

HEATSTRIP TT-MTM Operation, Installation & Maintenance Instructions
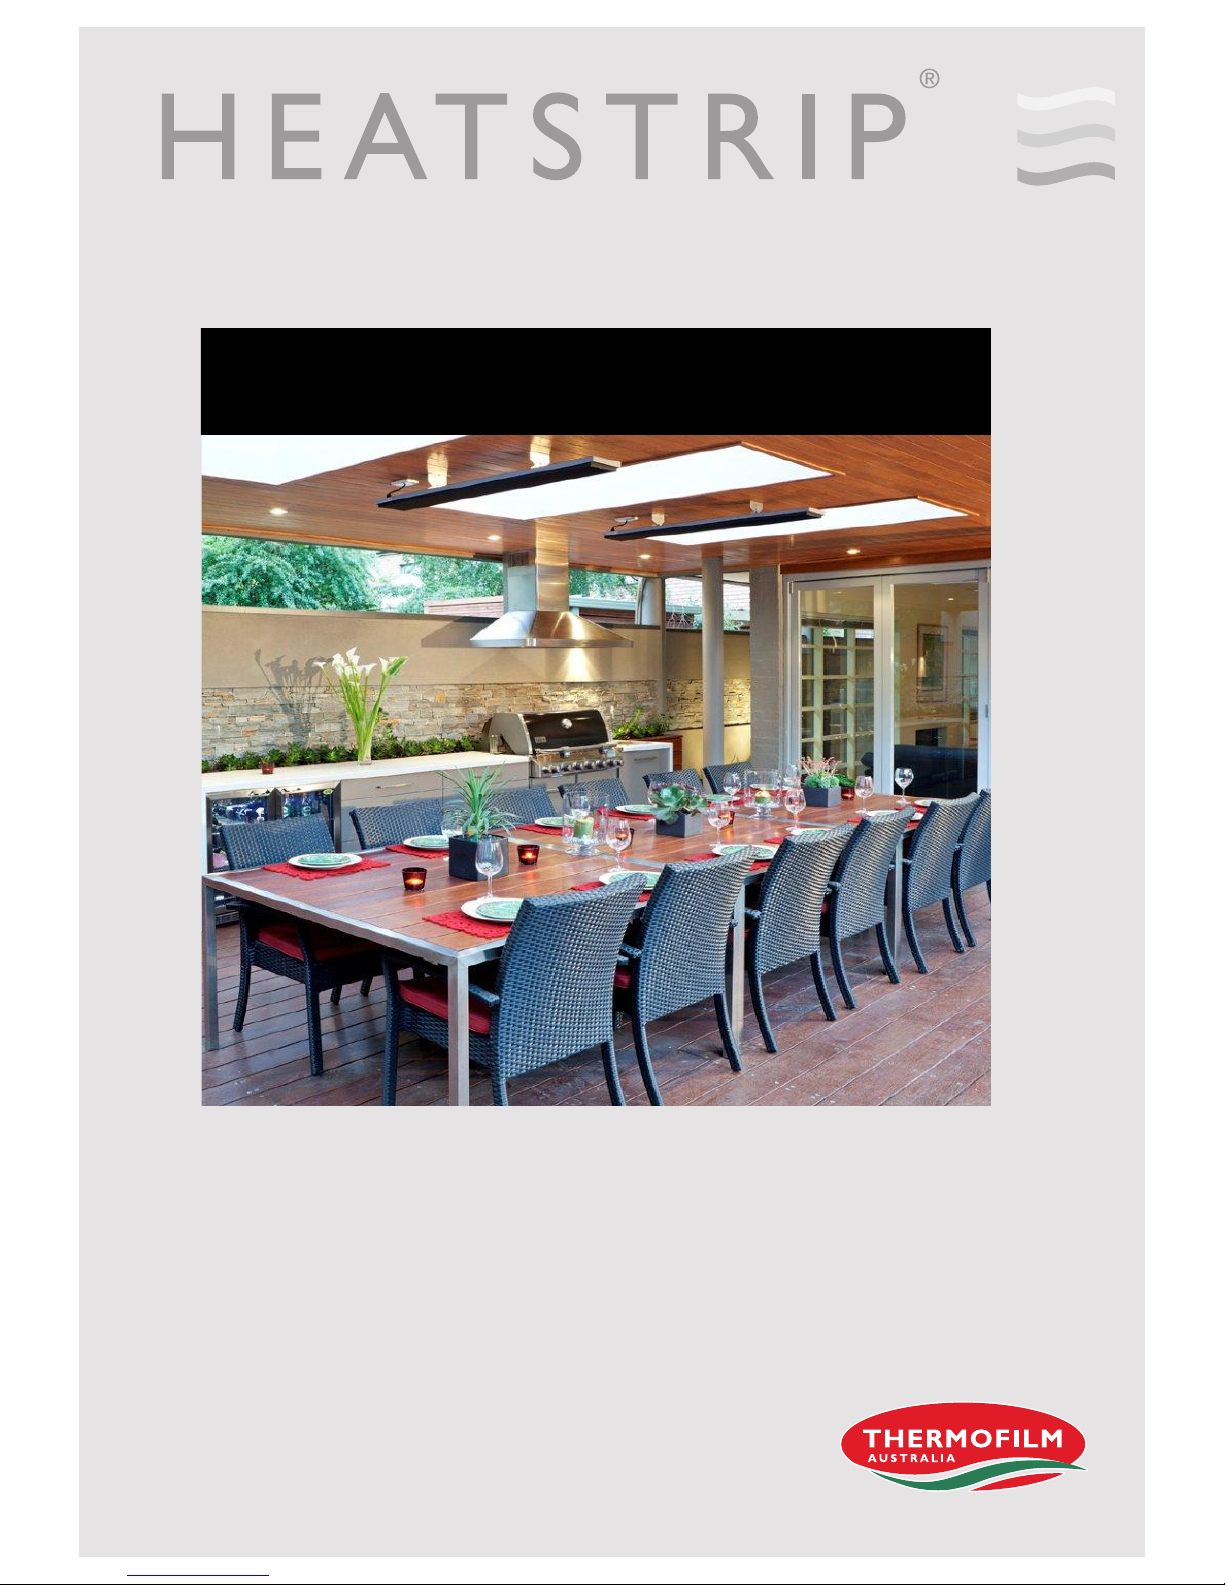
R A D I A N T O U T D O O R H E A T E R S
OPERATION, INSTALLATION AND MAINTENANCE MANUAL
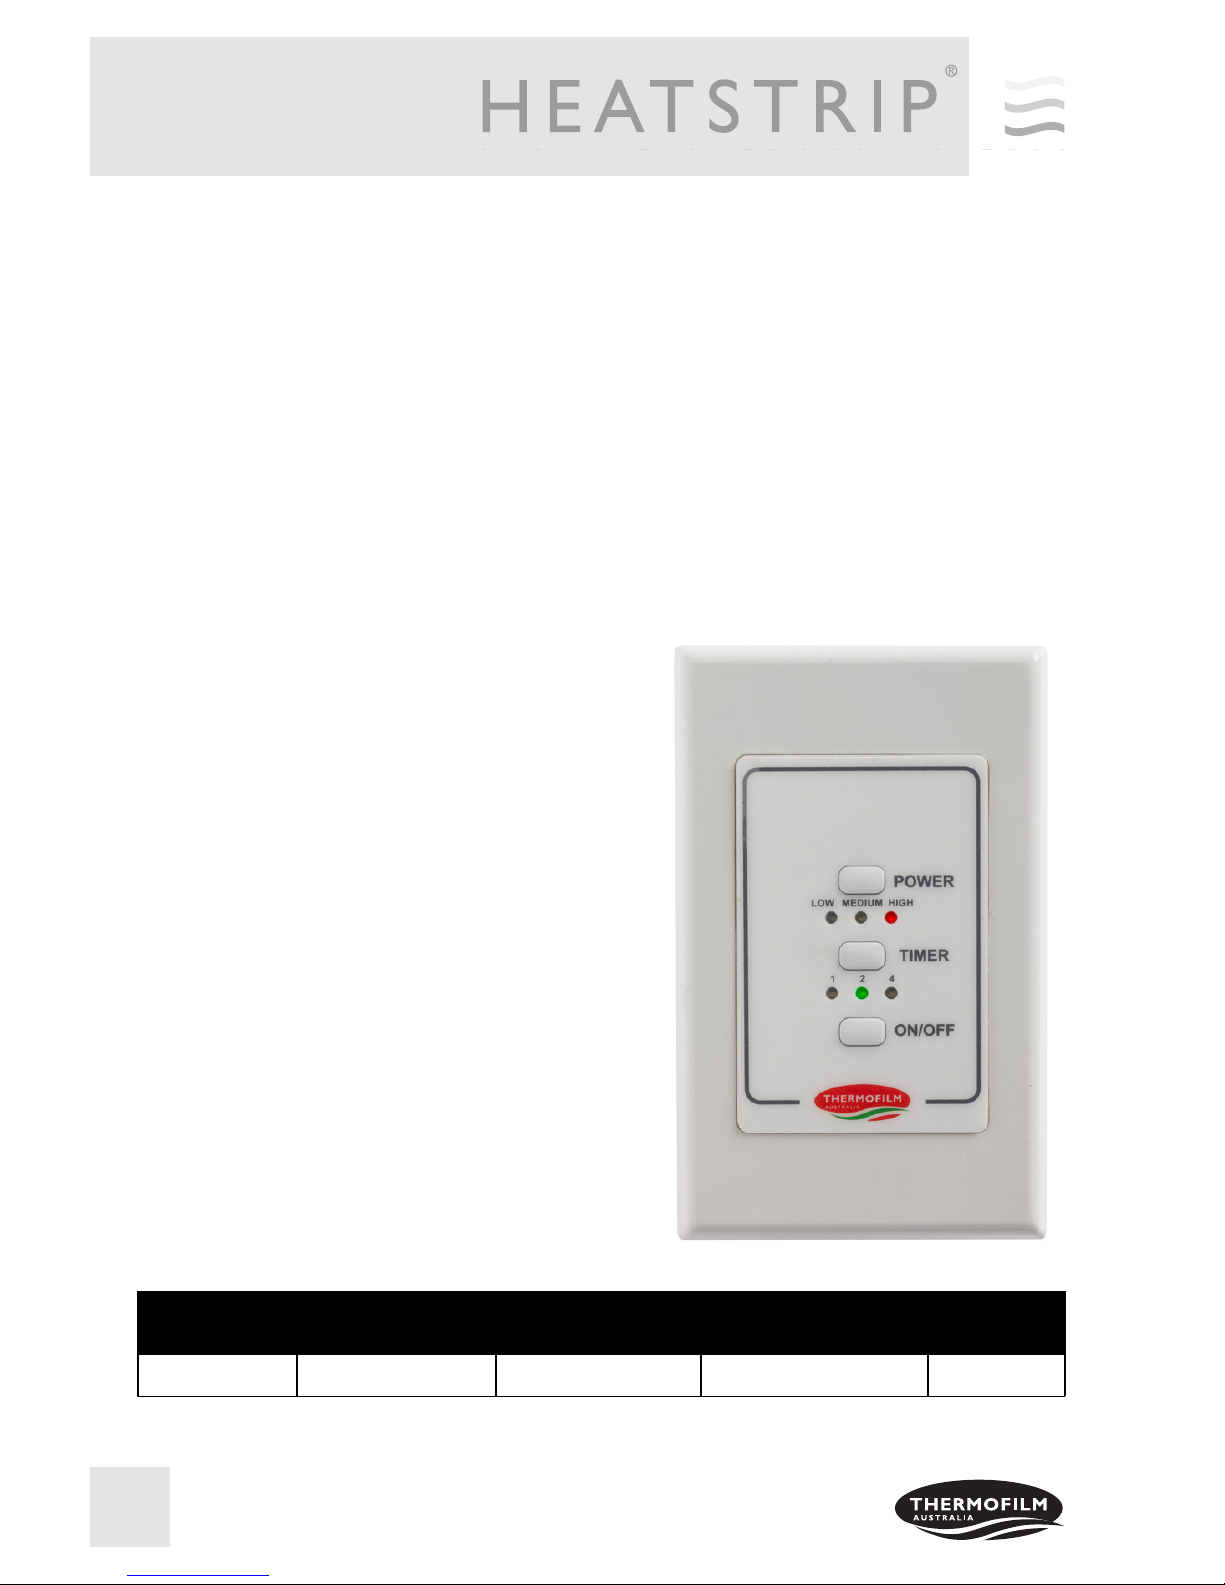
TT-MTM Wall Contr o ll er
2
TT-MTM Wall Controller
Rev E FEB14
TT-MTM wall controller
This controller is a custom designed and manufactured controller for HEATSTRIP® . It has been designed for ease of
use and low running costs of your heater. It provides both temperature control (allowing the user to turn the heat output
up or down depending on the ambient temperature and conditions) and a timer for automatic heater operation.
The count down timer function has four settings. It can be 1 hour, 2 hours or 4 hours or constantly on. This is ideal
when continuous heat is not required. For example a BBQ, alfresco areas, restaurant dining, assembly line production
etc. It is simple to use, just press the time button and it will switch on, press again and it will be 1 hour. After one hour
the heater will switch off.
Depending on the ambient temperature, there may be a requirement to control the operation of the heater (standard on
position is at full power and temperature). The controller has 3 settings, they are High, Medium and Low.
The controller allows a combination of the multiple timer (1/2/4 hour) and heat outputs (High/Medium/Low).
Controlling multiple units
It is possible to use one wall controller to control multiple heaters.
The wall controller is rated at 15 Amps and 240 volts. For larger
current draw, it is recommended that you talk to your electrician
who can use a time delay relay to connect more units.
The controller needs a minimum of 250W on the load before it
starts working. If connecting multiple units ensure one unit is
connected directly to the controller and the others are connected
using a contactor or relay.
The THX 3600 is not recommended to be directly connected
through the controller.
MODEL MAXIMUM
VOLTAGE (Volts)
MAXIMUM
CURRENT (Amps)
PACKAGED
DIMENSIONS (mm)
WEIGHT (kg)
TT-MTM 240 15 140 x 90 x 60 0.5
3
Operation
Press “ON/OFF” button to turns power on and off.
Press “POWER” button to select power rate to “HIGH” – “MEDIUM” – “LOW”. When power rate is at high, output
turns on continuously. When power rate is at “MEDIUM” output alternates on and off. When power rate is at
“LOW” output alternates on and off for longer.
Press “TIMER” button to set timer to 1, 2, 4 hours. Once timer is selected, timer will be started immediately.
When the timer has ended, power will turn off and all LED’s will be off as well.
Thermal Cutout Protection
This controller is protected by a thermal cutout switch. This switch is activated when the temperature of the controller is too high. The controller will cut all power until it has cooled down. Once it cools down to below the limit,
the unit will continue working as usual.
Warm Up Mode
The controller is programmed to operate continuously for the first 15 minutes of operation. This is to allow time
for the heater to warm up. After this time it will operate as intended.
Safety
The TT-MTM controller is to be mounted indoors. It needs to be away from wet conditions.
Ensure the connections are properly connected.
The controller needs to be installed according to your local wiring guidelines.
Do not allow any cables, furnishings, flammable materials or other items to obstruct the vents of the controller.
Never block the air vents of the controller.
Do not put anything in the vents of the controller.
If installed in wet areas, the controller must be located so that they cannot be touched by persons in the bath or
shower.
This appliance is not intended for use by persons (including children) with reduced physical, sensory or intellectual capabilities, or lack of experience and knowledge, unless they have been given supervision or instruction
concerning use of the appliance by a person responsible for their safety. Children should be supervised to ensure they do not play with the appliance.
Maintenance
The TT-MTM Controller is made from durable materials, however regular care and maintenance of your controller will help prolong the life of the product.
It is recommended that you dust the controller to keep the surface clean. The cleaning process at least every
three months will reduce the amount of build up and keep it looking as best it can.
Do not use any abrasive materials or products to clean the heater, this includes solvents, citrus based cleaners
or other harsh cleaning products. Do not use water or a damp cloth to clean the controller.
When handling the controller, ensure that your hands are clean or that you use clean gloves as grease or dirt
can mark the surface of the controller.
 Loading...