

Page 1
OPERATING INSTRUCTIONS AND OWNER’S MANUAL
READ INSTRUCTIONS CAREFULLY: Read and follow all instructions. Place
instructions in a safe place for future reference. Do not allow anyone who has
not read these instructions to assemble, light, adjust or operate the heater.
MODEL
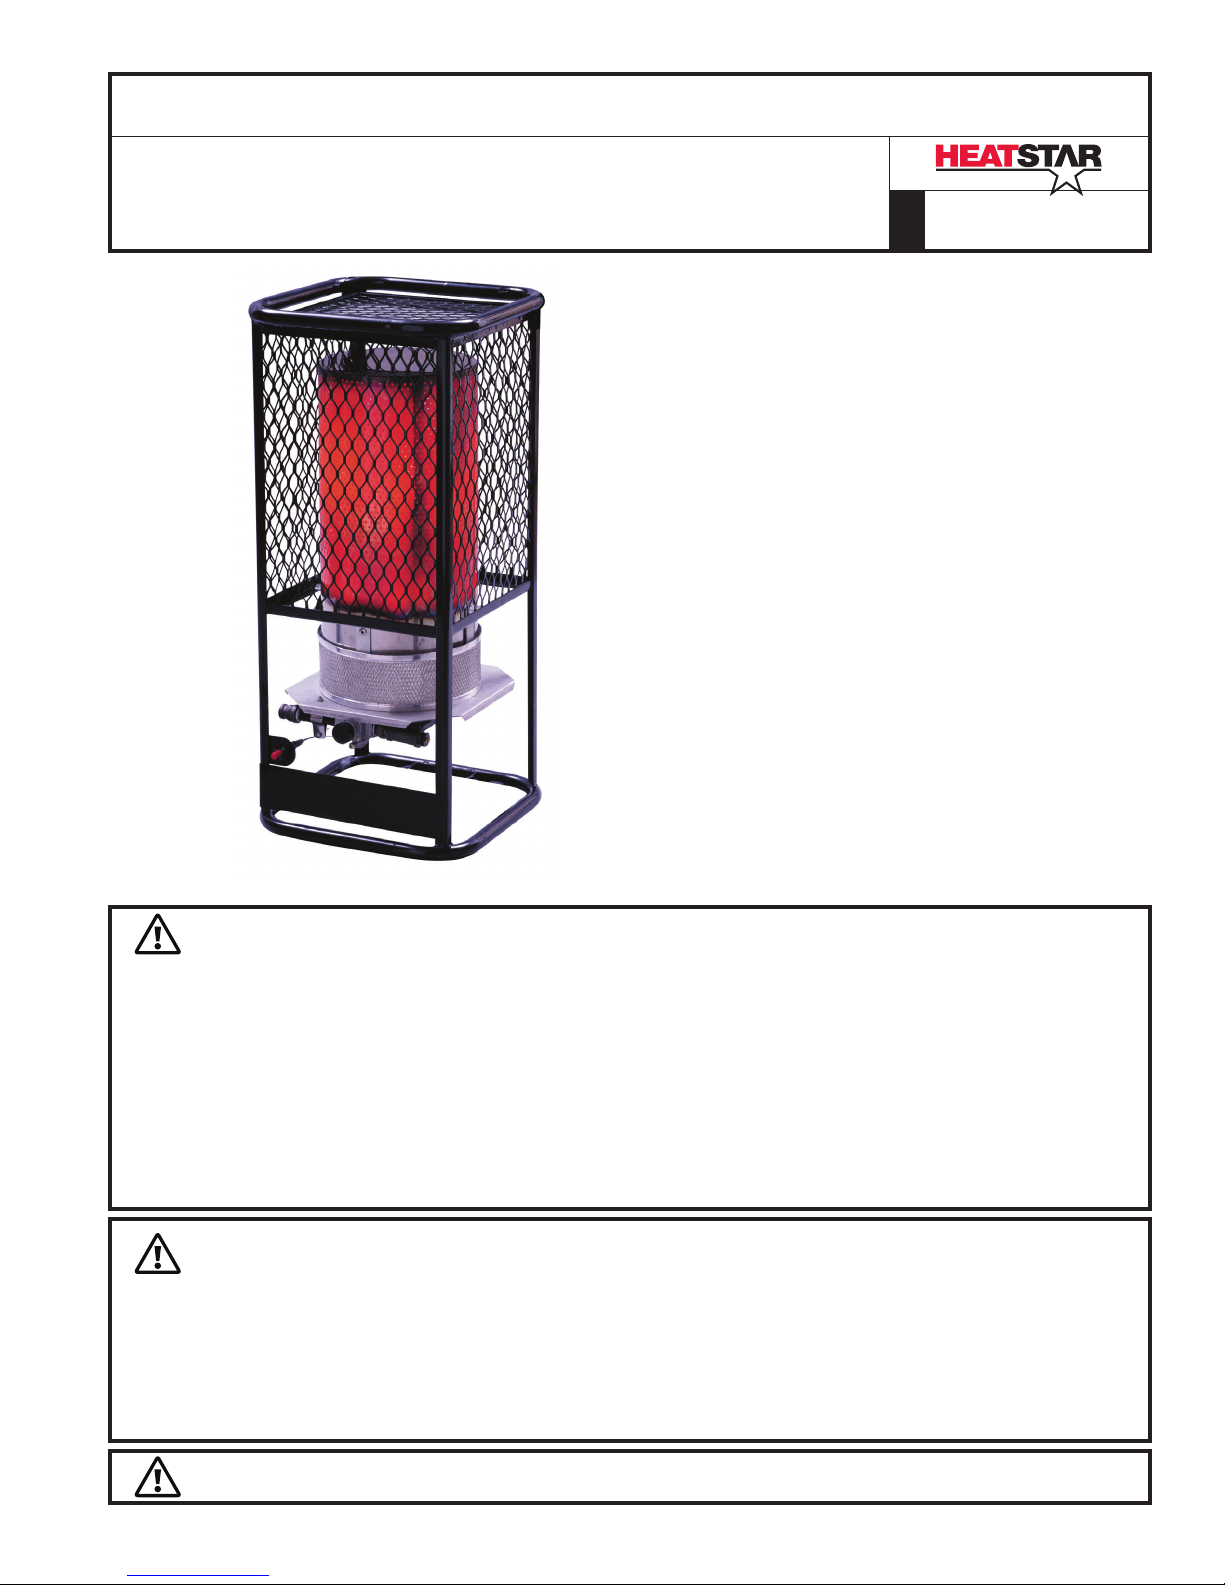
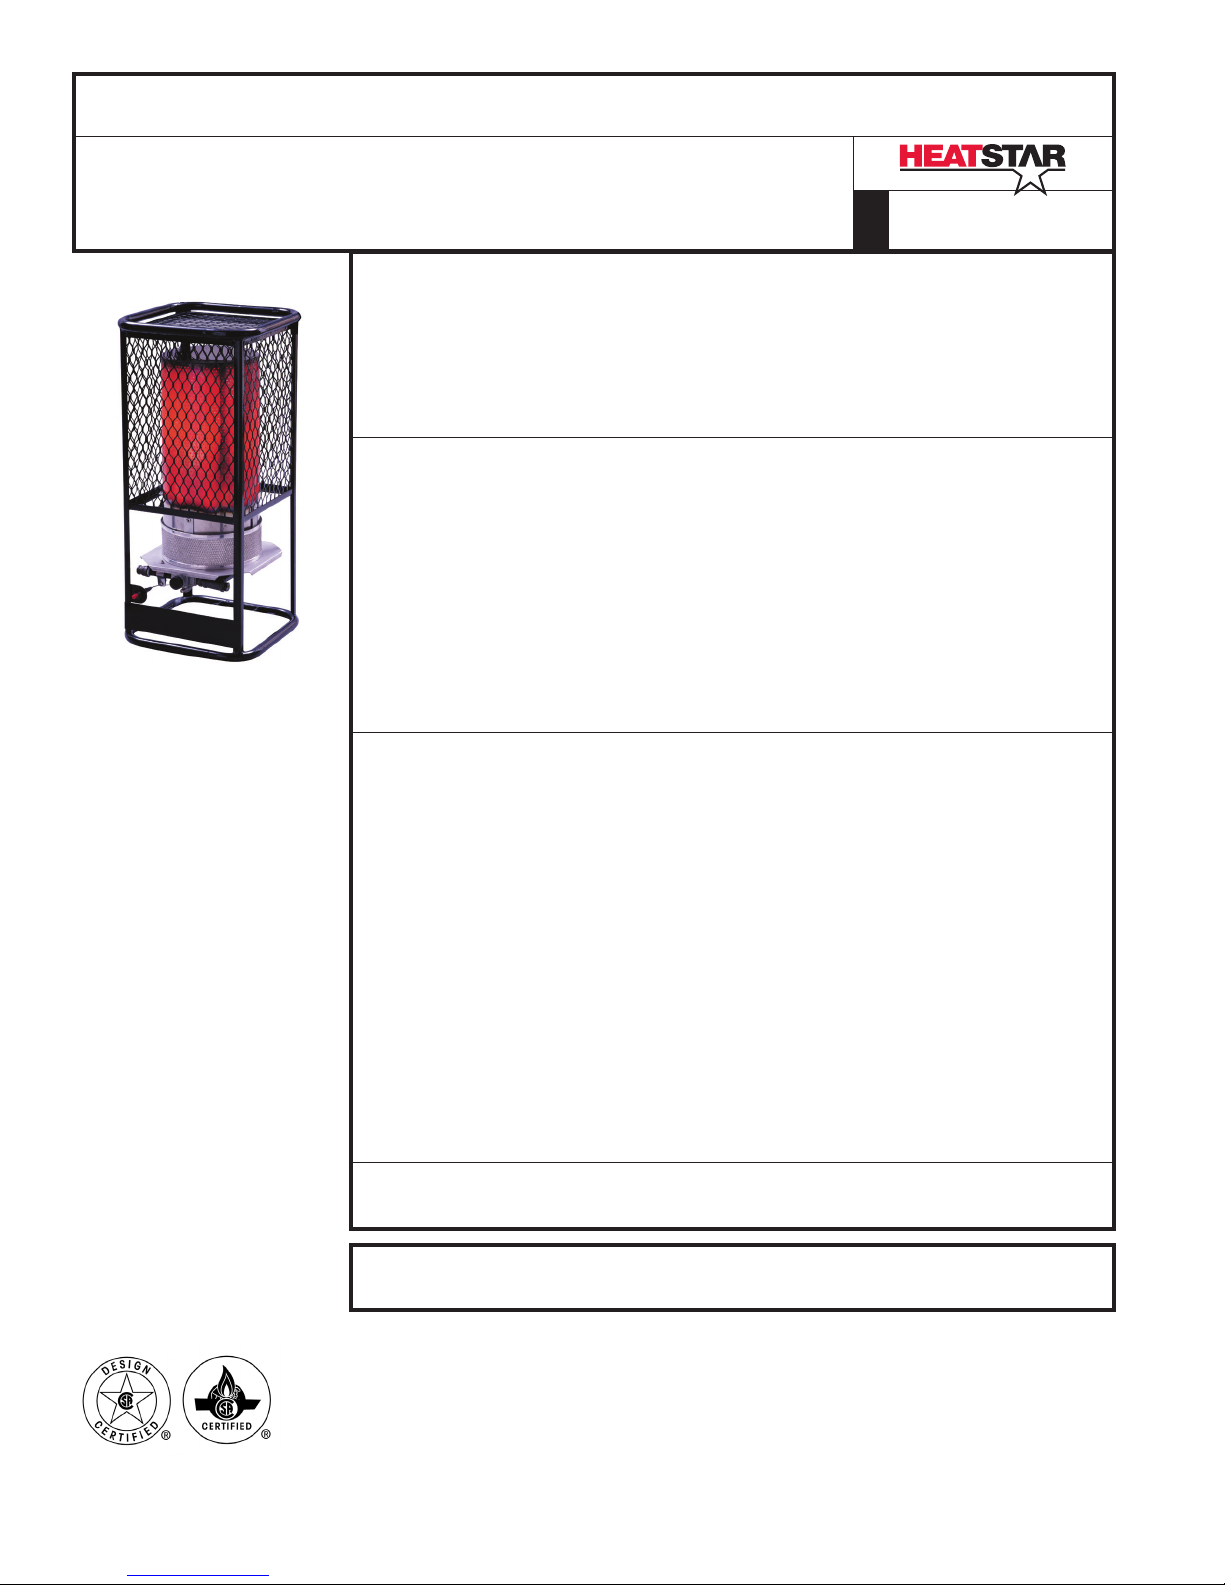
HS125NG, HS125LP
GAS-FIRED INFRA-RED
PORTABLE CONSTRUCTION HEATER
DO NOT LEAVE HEATER UNATTENDED OR IN OPERATION WHILE SLEEPING
GENERAL HAZARD WARNING:
FAILURE TO COMPLY WITH THE PRECAUTIONS AND INSTRUCTIONS PROVIDED WITH THIS HEATER
CAN RESULT IN DEATH, SERIOUS BODILY INJURY AND PROPERTY LOSS OR DAMAGE FROM
HAZARDS OF FIRE, EXPLOSION, BURN, ASPHYXIATION, CARBON MONOXIDE POISONING, AND/OR
ELECTRICAL SHOCK.
ONLY PERSONS WHO CAN UNDERSTAND AND FOLLOW THE INSTRUCTIONS SHOULD USE OR
SERVICE THIS HEATER.
IF YOU NEED ASSISTANCE OR HEATER INFORMATION SUCH AS INSTRUCTION MANUALS, LABELS,
ETC., CONTACT THE MANUFACTURER.
WARNING:
FIRE, BURN, INHALATION AND EXPLOSION HAZARD. KEEP SOLID COMBUSTIBLES SUCH AS
BUILDING MATERIALS, PAPER OR CARDBOARD A SAFE DISTANCE AWAY FROM THE HEATER AS
RECOMMENDED BY THE INSTRUCTIONS. NEVER USE THE HEATER IN SPACES WHICH DO OR MAY
CONTAIN VOLATILE OR AIRBORNE COMBUSTIBLES OR PRODUCTS SUCH AS GASOLINE, SOLVENTS,
PAINT THINNER, DUST PARTICLES OR UNKNOWN CHEMICALS.
WARNING: NOT FOR HOME OR RECREATIONAL VEHICLE USE
01/15 18666 2015 JMHEATSTAR by ENERCO, 4560 W. 160TH ST., CLEVELAND, OHIO 44135 • 866-447-2194
Page 2
SPECIFICATIONS
MODEL NO. .................................. HS125LP .......... HS125NG
GAS TYPE ........................................ LP-Gas ........ Natual Gas
MAX. INLET PRESSURE. ........... 14 IN. W.C. ....... 14 IN. W.C.
MIN. INLET PRESSURE .............. 14 IN. W.C. ....... 14 IN. W.C.
MANIFOLD PRESSURE .............. 12 IN. W.C. .......6.5 IN.W.C.
WARNING
DO NOT EXCEED ½ psi (14” w.c.) GAS
PRESSURE TO THE GAS CONTROL VALVE.
VENTILATION
WARNING
THIS APPLIANCE IS UNVENTED AND MUST BE
USED ONLY IN A WELL VENTILATED AREA.
The flow of combustion and ventilation air must not be
obstructed. DO NOT use in a tightly enclosed area.
Any combustion process requires and consumes oxygen, and may
produce carbon monoxide. This heater must be operated with
adequate ventilation. Two openings directly to the outdoors must
be provided, one low and one high, preferably on opposite sides
of the area to be heated. Each of these openings must provide
at least three square inches of combustion air-intake area and
exhaust outlet area for every 1000 BTUs per hour of heater input
rate in order to complete the combustion/ventilation process.
Provide additional ventilation for any additional fuel-burning
appliances and/or additional occupants.
CLEARANCE (Minimum clearances to combustible materials)
Do not exceed the gas supply pressures shown on rating plates. The maximum inlet gas supply pressures and minimum inlet supply pressures
(for purposes of input adjustment) for LP-Gas and Natural gas are shown as follows:
MODEL NO. BTU/HR RATING NORMAL OPERATING CLEARANCES TO
TYPE GAS POSTION COMBUSTIBLES
NATURAL LP-GAS TOP SIDES BACK
HS125LP 95 - 125,000* VERTICAL 48” 60” 60”
HS125NG 72 -2125,000 VERTICAL 48” 60” 60”
*Tank size and tank temperature can directly affect BTU output
CONTENTS
Installation Instructions ..................................................... 3
Location ............................................................................ 3
Piping ............................................................................... 3
Operating Instructions ...................................................... 4
Lighting and Shut Down ...................................................4
Maintenance Instructions ..................................................5
Replacement Parts List ...................................................... 6
Service and Parts Ordering Information .............................8
THE STATE OF CALIFORNIA REQUIRES THE FOLLOWING WARNINGS:
FOR YOUR SAFETY
Do not use this heater in a space where
gasoline or other liquids having flammable
vapors are stored or used.
The heater is designed and approved for use as a construction
heater under ANSI Z83.7 / CGA 2.14
We cannot anticipate every use which may be made of our
heaters. CHECK WITH YOUR LOCAL FIRE SAFETY AUTHORITY IF
YOU HAVE QUESTIONS ABOUT APPLICATIONS.
Other standards govern the use of fuel gases and heat producing
products in specific applications. Your local authority can advise
you about these.
This appliance is intended to be used for temporary heating of
buildings under construction, alteration or repair.
WARNING: Combustion by-products produced when using this product contain carbon monoxide, a chemical
known to the State of California to cause cancer and birth defects (or other reproductive harm).
WARNING: This product contains chemicals known to the State of California to cause cancer and birth defects or
other reproductive harm.
Operating Instructions and Owner’s ManualGas-Fired Infra-Red Portable Construction Heater
2
Page 3
INSTALLATION INSTRUCTIONS
GENERAL:
READ THESE INSTRUCTIONS CAREFULLY. Read and adhere
to these instructions. DO NOT allow anyone who has not
read these instructions to assemble, light, adjust or operate
this heater.
DO NOT attempt to operate the heater with any gas other
than that indicated on the heater nameplate.
For the U.S. and/or Canada, the installation of this appliance must
comply with local and/or Provincial codes or, in the absence of
these codes,
• With the (U.S.) National Fuel Gas Code, ANSI Z223.1 –
Latest Edition (for Natural and LP-Gas operation, Models
HS125NG and HS125LP), and with the (U.S) Standard
for the Storage and Handling of Liquefied Petroleum
Gases, ANSI/NFPA 58 (for LP Gas operation, Model
MH125LP, HS125LP), or
• with the current (Canadian) CAN/CGA B149.1 AND
B149.2 INSTALLATION CODES.
This heater (including hose and regulator assembly if applicable)
must be inspected before each use and at least annually by a
qualified service person. If the hose for Model HS125LP shows
evidence of excessive abrasion or wear, or if the hose is cut, it
must be replaced prior to the heater being put into operation.
The replacement hose assembly shall be that specified by the
manufacturer. See the parts list.
LOCATION
The heater (and LP-Gas supply cylinder if applicable) must be
located on a hard, flat, level surface to minimize the risk of
accidental tipping. If an LP Gas supply cylinder is used (i.e. with
Model HS125LP), the cylinder should be adequately restrained to
prevent accidental tipping. DO NOT operate this heater with
the supply cylinder in any other than the upright position.
This appliance must be installed only in locations where the
potential for physical damage to the appliance (i.e., due to
physical contact) is reduced to a minimum.
The installer must inform the owner/operator of this appliance
that precautions must be taken to protect the appliance from
physical damage.
This appliance produces radiant heat. Therefore, it must be located
at least six feet away from any LP-Gas container and must not be
directed toward any LP-Gas container within 20 feet.
The heater must be installed in a location such that it will not be
exposed directly to water spray, rain, and/or dripping water.
Use of this heater in a draft/windy area decreases its efficiency. If
possible, operate the unit in a draft free area.
PIPING
For Model HS125LP
(for use with LP-Gas)
This model may be connected to a self-contained LP-Gas
supply system using the hose and regulator assembly
supplied with the appliance, OR, it may be connected to a
permanently installed LP-Gas supply system.
If connected to a self-contained LP-Gas supply system, the
hose assembly must be inspected prior to each use of the
heater. If it is evident that there is excessive abrasion or wear,
or if the hose is cut, it must be replaced prior to the heater
being put into operation.
If connected to a self-contained LP-Gas supply system, the
cylinder must have no less than a minimum capacity of
40 pounds and no more than a maximum capacity of 100
pounds of LP-Gas. DO NOT connect this appliance to a
cylinder having less than a nominal 40 pounds capacity of
LP-Gas.
WARNING
NEVER USE A FORK LIFT TRUCK TYPE
CYLINDER.
The connection of Model HS125LP to an LP-Gas cylinder must
be made in a well ventilated area using the regulator and hose
assembly supplied with the appliance. DO NOT attempt to
adjust this regulator. It has been preset at the factory to provide
safe and proper operation of the appliance. Use a 7/8” open end
wrench to connect the POL fitting (supplied with the LP regulator)
to the LP-Gas cylinder. Turn the POL nut in a counter-clockwise
direction (left hand thread) until tight. DO NOT use pipe
compound on POL threads.
The heater must be located at least six feet away from any
LP-Gas cylinder and must not be directed toward any LP-Gas
cylinder within 20 feet. If more than one heater is used, they
and the supply cylinders must be separated by at least 20
feet. Check local codes.
The gas supply must be turned off at the LP-Gas supply
cylinder when the heater is not in use.
When the heater is to be stored indoors, the connection
between the LP-Gas supply cylinder and the heater must be
disconnected and the cylinder removed from the heater and
stored in accordance with Chapter 5 of the Standard for the
Storage and Handling of Liquefied Petroleum Gases. ANSI/
NFPA 58 (U.S.) OR CAN/CGA B149.2 (Canada).
If connected to a permanently installed LP-Gas supply system,
the system requires the use of a two-stage gas regulator
assembly which is normally provided by your LP Gas dealer
as part of the LP-Gas supply system. Consult with your local
LP Gas dealer for details concerning proper equipment and
installation.
For Model HS125NG (for use with natural gas)
Operating Instructions and Owner’s ManualGas-Fired Infra-Red Portable Construction Heater
3
Page 4
For Model HS125NG (for use with natural gas)
Piping must be clean and free from scale or burrs.
Install regulator supplied with heater. Connect with 1/2” NPT
nipple (not included) to Control Valve.
Connect the appliance to an appropriately designed and
installed fuel supply system. This system must include an
approved manual shut-off valve which is readily accessible and
is located within six (6) feet of the appliance. Additionally, a
sediment trap or drip leg must be located upstream of this
manual shut-off valve. Refer to the appropriate (natural gas)
installation code noted above. If a flexible connector is used,
it must be of an approved type.
Before attempting to ignite the appliance, all gas fittings and
connections must be thoroughly checked for gas leaks. Apply a
small amount of a mild soap and water solution to all fittings and
connections and observe for escaping bubbles. If any leaks are
detected, shut off the gas supply to the appliance immediately.
Wait a minimum of five minutes, repair the leak(s) and retest for
leakage. Dry all fittings and connections after leak testing.
WARNING
NEVER USE A FLAME FOR GAS LEAK TESTING.
OPERATING INSTRUC TIONS
ODOR FADE WARNING
WARNING
• Do not use in unventilated areas.
• The flow of combustion and ventilation air must
• Proper ventilation air must be provided to
• Refer to the specification section of the heater’s
• Lack of proper ventilation air will lead to
• Improper combustion can lead to carbon
DO NOT operate this heater if any part has been under
water. Call a qualified service technician to inspect the appliance
and to replace any part of the control system or gas control valve
which has been under water.
This appliance must be installed and operated only in locations
where the potential for physical damage to the appliance is
reduced to a minimum. The owner/operator of this appliance
must ensure that precautions are taken to protect the appliance
from physical damage.
WARNING
Asphyxiation Hazard
IF YOU DO NOT FOLLOW THESE INSTRUCTIONS
EXACTLY, A FIRE OR EXPLOSION MAY RESULT
not be obstructed.
CAUSING PROPERTY DAMAGE, PERSONAL
INJURY, OR LOSS OF LIFE.
support the combustion air requirements of the
heater being used.
CAUTION
manual, heater dataplate, or contact the factory
to determine combustion air ventilation
THIS APPLIANCE IS HOT DURING NORMAL
requirements of the heater.
OPERATION, AVOID PHYSICAL CONTACT.
improper combustion.
monoxide poisoning leading to serious injury or
CAUTION
death. Symptom of carbon monoxide poisoning
DO NOT PLACE CLOTHING OR OTHER
can include headaches, dizziness and difficulty
COMBUSTIBLE MATERIALS ON THIS APPLIANCE.
in breathing.
FUEL GAS ODOR
LP gas and natural gas have man-made odorants
added specifically for detection of fuel gas leaks.
If a gas leak occurs you should be able to smell the
fuel gas. Since Propane (LP) is heavier than air you
should smell for the gas odor low to the floor. ANY
GAS ODOR IS YOUR SIGNAL TO GO INTO IMMEDIATE
ACTION!
• Do not take any action that could ignite the fuel gas.
Do not operate any electrical switches. Do not pull
any power supply or extension cords. Do not light
matches or any other source of flame. Do not use your
telephone.
• Get everyone out of the building and away from the
area immediately.
• Close all propane (LP) gas tank or cylinder fuel supply
valves, or the main fuel supply valve located at the
meter if you use natural gas.
• Propane (LP) gas is heavier than air and may settle in
low areas. When you have reason to suspect a propane
leak, keep out of all low areas.
• Use your neighbor’s phone and call your fuel gas
supplier and your fire department. Do not re-enter the
building or area.
• Stay out of the building and away from the area until
declared safe by the firefighters and your fuel gas
supplier.
• FINALLY, let the fuel gas service person and the
firefighters check for escaped gas. Have them air out
the building and area before you return. Properly trained
service people must repair any leaks, check for further
leakages, and then relight the appliance for you.
ODOR FADING - NO ODOR DETECTED
• Some people cannot smell well. Some people cannot
smell the odor of the man-made chemical added to
propane (LP) or natural gas. You must determine if you
can smell the odorant in these fuel gases.
• Learn to recognize the odor of propane (LP) gas and
natural gas. Local propane (LP) gas dealers will be more
than happy to give you a scratch and sniff pamphlet.
Use it to become familiar with the fuel gas odor.
• Smoking can decrease your ability to smell. Being
around an odor for a period of time can affect your
sensitivity to that particular odor. Odors present in
animal confinement buildings can mask fuel gas odor.
• The odorant in propane (LP) gas and natural gas
is colorless and the intensity of its odor can fade
under some circumstances.
• If there is an underground leak, the movement of gas
through the soil can filter the odorant.
• Propane (LP) gas odor may differ in intensity at different
levels. Since Propane (LP) gas is heavier than air, there
may be more odor at lower levels.
• Always be sensitive to the slightest gas odor. If you
continue to detect any gas odor, no matter how small,
treat it as a serious leak. Immediately go into action as
discussed previously.
Operating Instructions and Owner’s ManualGas-Fired Infra-Red Portable Construction Heater
4
Page 5
Piping must be clean and free from scale or burrs.
ATTENTION - CRITICAL POINTS TO
Install regulator supplied with heater. Connect with 1/2” NPT
REMEMBER!
nipple (not included) to Control Valve.
• Propane (LP) gas has a distinctive odor. Learn to
Connect the appliance to an appropriately designed and
recognize these odors. (Reference Fuel Gas Odor and
installed fuel supply system. This system must include an
Odor Fading sections above.
approved manual shut-off valve which is readily accessible and
• Even If you are not property trained in the service and
is located within six (6) feet of the appliance. Additionally, a
repair of the heater, ALWAYS be consciously aware of
sediment trap or drip leg must be located upstream of this
the odors of propane (LP) gas and natural gas.
manual shut-off valve. Refer to the appropriate (natural gas)
• If you have not been properly trained in repair and
installation code noted above. If a flexible connector is used,
service of propane (LP) gas then do not attempt to
it must be of an approved type.
light heater, perform service or repairs, or make any
Before attempting to ignite the appliance, all gas fittings and
adjustments to the heater on the propane (LP) gas fuel
connections must be thoroughly checked for gas leaks. Apply a
system.
small amount of a mild soap and water solution to all fittings and
connections and observe for escaping bubbles. If any leaks are
detected, shut off the gas supply to the appliance immediately.
Wait a minimum of five minutes, repair the leak(s) and retest for
OPERATING INSTRUC TIONS
leakage. Dry all fittings and connections after leak testing.
WARNING
WARNING
IF YOU DO NOT FOLLOW THESE INSTRUCTIONS
NEVER USE A FLAME FOR GAS LEAK TESTING.
EXACTLY, A FIRE OR EXPLOSION MAY RESULT
CAUSING PROPERTY DAMAGE, PERSONAL
OPERATING INSTRUC TIONS
INJURY, OR LOSS OF LIFE.
WARNING
CAUTION
IF YOU DO NOT FOLLOW THESE INSTRUCTIONS
THIS APPLIANCE IS HOT DURING NORMAL
EXACTLY, A FIRE OR EXPLOSION MAY RESULT
OPERATION, AVOID PHYSICAL CONTACT.
CAUSING PROPERTY DAMAGE, PERSONAL
INJURY, OR LOSS OF LIFE.
CAUTION
DO NOT PLACE CLOTHING OR OTHER
CAUTION
COMBUSTIBLE MATERIALS ON THIS APPLIANCE.
THIS APPLIANCE IS HOT DURING NORMAL
OPERATION, AVOID PHYSICAL CONTACT.
DO NOT operate this heater if any part has been under
water. Call a qualified service technician to inspect the appliance
and to replace any part of the control system or gas control valve
which has been under water.
This appliance must be installed and operated only in locations
where the potential for physical damage to the appliance is
reduced to a minimum. The owner/operator of this appliance
must ensure that precautions are taken to protect the appliance
from physical damage.
CAUTION
DO NOT PLACE CLOTHING OR OTHER
COMBUSTIBLE MATERIALS ON THIS APPLIANCE.
LIGHTING AND SHUT DOWN
Lighting the Heater
1 Before attempting to light the heater, smell all around
the heater area for gas. Be sure to smell next to the floor
because LP Gas is heavier than air and will settle on the
floor. Turn on the gas supply to the appliance and check
all fittings and connections for gas leaks using a mild
soap and water solution. NEVER use a match to check
for gas leaks. Should a gas leak occur, shut off the gas
supply to the appliance immediately. Wait a minimum of
five minutes before repairing the leak.
2 Use only the fuel intended for this appliance. Check the
appliance rating plate for the correct fuel information.
3 Depress knob then turn the gas valve knob clockwise to
the “OFF” position. See Fig. 1 and Fig. 2 for location of
appliance parts.
4 Wait a sufficient length of time (at least five minutes)
to allow gas which may have accumulated in burner
compartment to escape.
5 Turn on the main gas supply.
6a Depress and turn Control Knob counterclockwise to
“Pilot” position and hold for 1-2 minutes. This may take
longer to purge air from the supply hose depending on
the length of the hose being used.
Depress red spark ignition button to light pilot flame
(repeat until pilot lights) and continue to hold Control
Knob at “Pilot” positionfor 30-60 seconds to enable Pilot
Light Safety System.
Fully turn Control Knob to “ON” position to light burner.
or...
6b To light the pilot, move the lighting hole cover aside
(see Fig. 1) and place a lighted match into the hole.
Depress the gas valve knob and hold while lighting
and observing the pilot burner. Ensure that the pilot
burner ignites from the match. Allow the pilot to burn
approximately 30 seconds before releasing the gas valve
knob. If pilot does not remain lighted, repeat the lighting
operation allowing a longer period of time before
releasing the gas valve knob.
NOTE: In cases where long runs of gas supply lines have been
installed ahead of the appliance, it may be necessary to bleed
trapped air out of the supply lines before lighting the pilot.
New installations generally require bleed of supply lines. Wait
a minimum of five minutes after bleeding the supply lines
before attempting to light the heater.
Adjust pilot if necessary as noted under “Pilot Burner
Adjustment.”
7. Turn the gas valve knob counter-clockwise to the “ON”
position (see Fig. 1). The burner will light. Turn knob
clockwise until stop for low fire position.
8. IMPORTANT: DO NOT attempt to adjust the main
burner input beyond stop, for this may cause the pilot
and thermocouple to shut down the burner (Fig. 2).
Operating Instructions and Owner’s ManualGas-Fired Infra-Red Portable Construction Heater
5
Page 6
OPERATING INSTRUCTIONS AND OWNER’S MANUAL
READ INSTRUCTIONS CAREFULLY: Read and follow all instructions. Place
instructions in a safe place for future reference. Do not allow anyone who has
not read these instructions to assemble, light, adjust or operate the heater.
WARNING:
USE ONLY MANUFACTURER’S REPLACEMENT PARTS. USE OF ANY OTHER PARTS
COULD CAUSE INJURY OR DEATH. REPLACEMENT PARTS ARE ONLY AVAILABLE
DIRECT FROM THE FACTORY AND MUST BE INSTALLED BY A QUALIFIED SERVICE
AGENCY.
PARTS ORDERING INFORMATION:
PURCHASING: Accessories may be purchased at any Mr. Heater or HeatStar local
dealer or direct from the factory
FOR INFORMATION REGARDING SERVICE
Please call Toll-Free 866-477-2194
www.enerco.com • www.heatstarbyenerco.com
Our office hours are 8:00 AM – 5:00 PM, EST, Monday through Friday.
Please include the model number, date of purchase, and description of problem in
all communication.
MODEL
HS125NG, HS125LP
WARRANTY
Gas Fired Infra Red Portable Construction Heater HS125NG & HS125LP
HEATSTAR by ENERCO warrants that Infra Red Heaters manufactured and sold will be free
from defects in material and workmanship.
Parts assemblies controls, etc. furnished by HEATSTAR by ENERCO will carry a one (1) year
warranty on the applicable warranties of the suppliers.
The sole responsibility of HEATSTAR by ENERCO under this warranty shall be to replace or
repair any part for which a written claim is made to HEATSTAR by ENERCO within the time
limit of this warranty which is returned upon request to HEATSTAR by ENERCO – F.O.B.
Cleveland Ohio – or F.O.B. an HEATSTAR by ENERCO authorized service facility and which is
proved to be defective upon inspection by HEATSTAR by ENERCO Technical Products.
This warranty shall not apply to any part or product which has been subjected to misuse or
neglect, damaged by accident, or rendered defective by reason of improper installation. THIS
WARRANTY IS IN LIEU OF ANY AND ALL OTHER WARRANTIES, EXPRESSED OR IMPLIED, and
of any other responsibility of HEATSTAR by ENERCO for parts or products sold by HEATSTAR
by ENERCO, including consequential or special damages.
HEATSTAR by ENERCO reserves the right to make changes at any time, without notice
or obligation, in colors, specifications, accessories, materials and models.
PRODUCT REGISTRATION: Thank you for your purchase.
Please log in to http://www.egiregistration.com to register your product.
HEATSTAR by ENERCO, 4560 W. 160TH ST., CLEVELAND, OHIO 44135 • 866-447-2194
Enerco and Mr. Heater are registered trademarks of Enerco Group, Inc.
© 2015, Enerco/Mr. Heater. All rights reserved
ANSI Z83.7b/CSA 2.14b - 2009
Page 7

GUIDE D’UTILISATION ET MANUEL DU PROPRIÉTAIRE
REMARQUE : lisez et suivez les instructions d’utilisation. Rangez le manuel de
l’utilisateur dans un endroit sûr aux fins de référence ultérieure. NE LAISSEZ
PERSONNE qui n’a pas lu le manuel de l’utilisateur tenter de monter, de
mettre en marche, de régler ou de faire fonctionner l’appareil de chauffage.
MODÈLES
HS125NG, HS125LP
APPAREIL DE CHAUFFAGE À AIR PULSÉ AU GAZ
PROPANE POUR CHANTIER DE CONSTRUCTION
NE LAISSEZ PAS L’APPAREIL DE CHAUFFAGE FONCTIONNER SANS SURVEILLANCE
MISE EN GARDE GÉNÉRALE CONTRE LES RISQUES :
LE NON-RESPECT DES PRÉCAUTIONS ET DES INSTRUCTIONS FOURNIES AVEC LE PRÉSENT APPAREIL DE
CHAUFFAGE RISQUE D’ENTRAÎNER DES BLESSURES CORPORELLES GRAVES, DES PERTES OU DOMMAGES
DE BIENS CAUSÉS PAR LE FEU, DES EXPLOSIONS, DES BRÛLURES, DES ÉLECTROCUTIONS, L’ASPHYXIE,
L’EMPOISONNEMENT AU MONOXYDE DE CARBONE OU LA MORT.
SEULES LES PERSONNES COMPRENNANT ET POUVANT SUIVRE LES INSTRUCTIONS DEVRAIENT
UTILISER LE PRÉSENT APPAREIL DE CHAUFFAGE.
SI VOUS DÉSIREZ OBTENIR DE L’AIDE OU DES INFORMATIONS SUR LE PRÉSENT APPAREIL, COMME
DES MODES D’EMPLOI, DES ÉTIQUETTES, ETC., VEUILLEZ COMMUNIQUER AVEC LE FABRICANT.
MISE EN GARDE :
RISQUE D’INCENDIE, DE BRÛLURE, D’INHALATION DE SUBSTANCES TOXIQUES ET D’EXPLOSION. TEL
QUE MENTIONNÉ DANS LE MANUEL DE L’UTILISATEUR, VEUILLEZ GARDER LES COMBUSTIBLES
SOLIDES TELS QUE LES MATÉRIAUX DE CONSTRUCTION, LE PAPIER OU LE CARTON À DISTANCE DE
L’APPAREIL DE CHAUFFAGE. N’UTILISEZ JAMAIS L’APPAREIL DE CHAUFFAGE DANS DES ENDROITS
OÙ IL Y A OU IL PEUT Y AVOIR DES COMBUSTIBLES VOLATILES OU DES PRODUITS TELS QUE DE
L’ESSENCE, DES SOLVENTS, DES DILUENTS, DES PARTICULES DE POUSSIÈRE OU DES PRODUITS
CHIMIQUES INCONNUS.
MISE EN GARDE : LE PRESENT APPAREIL N’EST PAS DESTINE A ETRE UTILISE DANS UN
DOMICILE OU UN VEHICULE RECREATIF.
01/15 18666 2015 JMHEATSTAR by ENERCO, 4560 W. 160TH ST., CLEVELAND, OHIO 44135 • 866-447-2194
Page 8

SPÉCIFICATIONS
NO DE MODÈLE. ............................ HS125LP .......... HS125NG
TYPE DE GAZ ............. Gaz propane liquéfié ....... Gaz naturel
PRESSION D’ADM. MAX... .... 14 PO D’EAU. .....14 PO D’EAU
PRESSION D’ADM. MIN. ........ 14 PO D’EAU .....14 PO D’EAU
PRESSION D’ADMISSION ....... 12 PO D’EAU ....6.5 PO D’EAU
MISE EN GARDE
N’EXCÉDEZ PAS ½ PSI (14 POUCES D’EAU) DE
PRESSION À LA VALVE D’ADMISSION DU GAZ.
VENTILATION
MISE EN GARDE
LE PRÉSENT APPAREIL N’EST PAS VENTILÉ ET
DOIT ÊTRE UTILISÉ SEULEMENT DANS UN
ENDROIT BIEN AÉRÉ.
La circulation d’air et le flux de combustion ne doivent pas être
ralentis. N’UTILISEZ PAS l’appareil dans un endroit fermé.
Tout processus de combustion requiert de l’oxygène et peut
produire du monoxyde de carbone. L’appareil de chauffage doit
être utilisé en présence d’une aération adéquate. L’endroit où
l’appareil est mis en marche doit comporter deux ouvertures
qui donnent directement vers l’extérieur, soit une basse et une
haute, de préférence sur des côtés opposés de la pièce. Chacune
de ces ouvertures doit permettre au moins 3 pouces carrés de
prise et de sortie d’air pour chaque 1 000 BTU/heure consommé
par l’appareil de chauffage afin de compléter le processus de
combustion/ventilation. Veuillez assurer une meilleure ventilation si
des appareils à combustible ou des personnes supplémentaires
se trouvent dans la même pièce que l’appareil de chauffage.
DÉGAGEMENT (Distances de dégagement autour de matériaux combustibles)
N’excédez pas les pressions d’admission de gaz indiquées sur les plaques signalétiques. Les pressions d’admission maximale et minimale
(pour le réglage de l’admission) pour le gaz propane liquéfié et le gaz naturel sont les suivantes :
NO DE TAUX BTU/HEURE POSITION NORMALE DISTANCES DE DÉGAGEMENT
MODÈLE TYPE DE GAZ DE FONCTIONNEMENT AUTOUR DES COMBUSTIBLES
NATUREL GAZ PROPANE HAUT CÔTÉS ARRIÈRE
HS125LP 95 - 125 000* VERTICALE 48 po 60 po 60 po
HS125NG 72 - 125 000 VERTICALE 48 po 60 po 60 po
*La capacité et la température du réservoir peuvent influer directement sur la production de BTU
CONTENU
Instructions d’installation ..................................................3
MESURES DE SÉCURITÉ
N’utilisez pas l’appareil de chauffage dans
un endroit où de l’essence ou autres liquides
Emplacement .................................................................... 3
Tuyauterie ......................................................................... 3
Instructions d’utilisation .................................................... 4
Allumage et arrêt ..............................................................4
Entretien ........................................................................... 5
Liste des pièces de remplacement ..................................... 6
Service à la clientèle et commande de pièces .................... 8
L’ÉTAT DE CALIFORNIE EXIGE QUE L’AVERTISSEMENT SUIVANT SOIT FOURNI :
qui dégagent des vapeurs inflammables sont
entreposés ou utilisés.
Cet appareil de chauffage est destiné à être utilisé sur les chantiers de
construction, conformément à la norme ANSI Z83.7 / CGA 2.14
Nous ne pouvons pas prévoir toutes les possibilités d’utilisation
de nos appareils de chauffage. SI VOUS AVEZ DES QUESTIONS
QUANT AUX DIFFÉRENTES UTILISATIONS POSSIBLES, VEUILLEZ
COMMUNIQUER AVEC VOTRE SERVICE DES INCENDIES LOCAL.
Pour certaines applications, d’autres normes régissent l’utilisation
de gaz combustibles et d’appareils de chauffage. Demandez à votre
commission locale pour obtenir de plus amples informations à ce sujet.
Le présent appareil de chauffage est principalement destiné à
chauffer les structures en construction ou en réparation.
MISE EN GARDE : Les sous-produits de combustion émis lors de l’utilisation de cet appareil contiennent du
monoxyde de carbone, un produit chimique reconnu par l’état de Californie comme pouvant causer le cancer et des malformations congénitales (ou autres dommages au système reproducteur).
MISE EN GARDE : Cet appareil contient des produits chimiques reconnus par l’état de Californie comme
pouvant causer le cancer et des malformations congénitales ou autres dommages au système reproducteur.
Operating Instructions and Owner’s ManualGas-Fired Infra-Red Portable Construction Heater
2
Page 9

INSTRUCTIONS D’INSTALLATION
GÉNÉRAL :
VEUILLEZ LIRE ATTENTIVEMENT LES INSTRUCTIONS
SUIVANTES ET LES APPLIQUER NE LAISSEZ PERSONNE
qui n’a pas lu le manuel de l’utilisateur tenter de monter,
de mettre en marche, de régler ou de faire fonctionner
l’appareil de chauffage.
N’ESSAYEZ JAMAIS de faire fonctionner l’appareil de chauffage
avec un type de gaz autre que celui indiqué sur la plaque
signalétique.
Pour les É.-U. et le Canada, l’installation du présent appareil
doit être conforme aux codes locaux et/ou provinciaux ou,
dans l’absence de tels codes,
• au code national (É.-U.) de gaz inflammables (National
Fuel Gas Code), ANSI Z223.1 - dernière édition (pour la
manipulation du gaz naturel et du gaz propane liquéfiés,
modèles HS125NG et HS125LP), et à la norme sur
l’entreposage et la manipulation de gaz liquéfiés
(Standard for the Storage and Handling of Liquefied
Petroleum Gases), ANSI/NFPA 58 (pour la manipulation
du gaz propane liquéfié, modèle HS125LP), ou
• aux CODES D’INSTALLATION (Canada) CAN/CGA B149.1 ET
B149.2
L’appareil de chauffage (y compris le tuyau et l’ensemble de
régulation, le cas échéant) doit être inspecté avant chaque utilisation
et au moins une fois par année par une personne qualifiée. Si le
tuyau du modèle HS125LP montre des signes d’usure excessive, ou
s’il est coupé, remplacez-le avant de mettre l’appareil de chauffage
en marche. La tuyauterie de remplacement doit avoir été approuvée
par le fabricant. Voir la liste des pièces de remplacement.
EMPLACEMENT
L’appareil de chauffage (et la bonbonne de gaz propane, le cas
échéant) doit être placé sur une surface dure, plane et au niveau
afin de réduire les risques de basculement. Si une bonbonne de
gaz propane est utilisée (avec le modèle HS125LP), celle-ci doit être
installée de façon sécuritaire afin d’empêcher qu’elle ne tombe.
N’UTILISEZ PAS l’appareil de chauf fage avec la bonbonne
de gaz en une position autre que verticale.
Le présent appareil de chauffage doit être installé seulement dans
des endroits où le potentiel de dommages physiques à l’appareil
(p. ex. causés par un contact physique) est réduit au minimum.
L’installateur doit informer le propriétaire/l’utilisateur de l’appareil
des précautions à prendre pour protéger l’appareil contre
d’éventuels dommages physiques.
Le présent appareil de chauffage produit de la chaleur rayonnante.
Il doit donc être placé à au moins 2 mètres d’une bonbonne de
gaz et ne doit pas faire face à une bonbonne de gaz à moins de
6 mètres.
L’appareil ne doit pas être exposé directement à l’eau pulvérisée
ou à la pluie.
L’efficacité de l’appareil sera réduite si vous l’utilisez dans un
endroit venteux. Dans la mesure du possible, installez l’appareil
dans un endroit sans courant d’air.
TUYAUTERIE
Modèle HS125LP
(pour utilisation avec du gaz propane
liquéfié)
Ce modèle peut être branché à un système d’alimentation
autonome de gaz propane liquéfié à l’aide du tuyau et de
l’ensemble de régulation fournis avec l’appareil OU peut être
branché à un système d’alimentation de gaz propane liquéfié
installé de façon permanente.
Si branchée à un système d’alimentation autonome de gaz
propane liquéfié, la tuyauterie doit être examinée avant
chaque utilisation. Si le tuyau montre des signes d’usure
excessive, ou s’il est coupé, remplacez-le avant de mettre
l’appareil de chauffage en marche.
Si branchée à un système d’alimentation autonome de
gaz propane liquéfié, la bonbonne doit avoir une capacité
de gaz propane liquéfié minimale et maximale de 18 et
45 kg respectivement. NE BRANCHEZ PAS l’appareil à une
bonbonne ayant une capacité de gaz propane liquéfié
nominale de 18 kg. NE BRANCHEZ PAS l’appareil à plus d’une
bonbonne ayant une capacité de 45 kg.
MISE EN GARDE
N’UTILISEZ JAMAIS UNE BONBONNE DE
TYPE CHARIOT ÉLÉVATEUR À FOURCHE.
Le branchement du modèle HS125LP à une bonbonne de gaz
propane liquéfié doit être effectué dans un endroit bien aéré à
l’aide de la tuyauterie et de l’ensemble de régulation fournis avec
l’appareil. N’ESSAYEZ PAS de régler ce régulateur. Celui-ci a
été réglé en usine afin d’assurer un fonctionnement adéquat et
sécuritaire de l’appareil. Utilisez une clé à fourche 7/8 po pour
brancher la pièce de fixation de gauche (fournie avec le régulateur
à gaz) à la bonbonne de gaz. Vissez l’écrou de gauche en sens
anti-horaire (filetage à gauche). N’UTILISEZ PAS de mastic
pour joints de tuyaux sur le filetage de gauche.
L’appareil de chauffage doit être placé à au moins six pieds
d’une bonbonne de gaz et ne doit pas faire face à une
bonbonne de gaz à moins de 6 mètres. Si plusieurs appareils
de chauffage sont utilisés, ces derniers ainsi que les bonbonnes
doivent être séparés par une distance d’au moins 6 mètres.
Lorsque l’appareil de chauffage n’est pas utilisé, l’alimentation
en gaz doit être coupée à la source, c’est-à-dire à la bonbonne
de gaz.
Si l’appareil de chauffage est entreposé à l’intérieur, le tuyau
entre la bonbonne de gaz et l’appareil doit être débranché,
et la bonbonne enlevée de l’appareil de chauffage et
entreposée de la façon indiquée au chapitre 5 de la norme
d’entreposage et de manipulation des gaz liquéfiés (Standard
for the Storage and Handling of Liquefied Petroleum Gases)
ANSI/NFPA 58 (É.-U.) OU CAN/CGA B149.2 (Canada).
Si branché à un système d’alimentation de gaz installé de
façon permanente, le système requiert l’utilisation d’un
ensemble de régulation à deux phases habituellement fourni
par votre fournisseur de gaz avec le système d’alimentation
de gaz. Pour obtenir de plus amples informations sur les
instructions d’installation et l’équipement appropriés, veuillez
vous renseigner auprès de votre fournisseur de gaz local.
Operating Instructions and Owner’s ManualGas-Fired Infra-Red Portable Construction Heater
3
Page 10

Modèle HS125NG (au gaz naturel)
La tuyauterie doit être rester propre et ne doit pas être salie
de bavure de mortier ou présenter des dépôts calcaires.
Installez le régulateur fourni avec l’appareil de chauffage.
Branchez-le à la valve de contrôle à l’aide d’un raccord fileté
NPT de 1/2 po (non fourni).
Branchez l’appareil à un système d’alimentation en gaz
conçu et installé de façon adéquate. Ce système doit inclure
une valve d’arrêt manuelle approuvée, laquelle doit être
accessible et située à un maximum de 6 pieds de l’appareil.
De plus, un réservoir de décantation ou un collecteur de
condensats doit être installé en amont de la valve d’arrêt
manuelle. Veuillez vous référer au code d’installation
approprié (gaz naturel) susmentionné. Veuillez n’utiliser
qu’un connecteur flexible approuvé.
Avant d’allumer l’appareil, veuillez vous assurer que les pièces
de fixation et les joints sont bien installés afin de prévenir des
fuites éventuelles. Pour détecter des fuites, appliquez une
petite quantité d’eau savonneuse sur tous les joints; des bulles
se formeront en présence de fuite. Dans un tel cas, couper
immédiatement l’alimentation en gaz. Attendez au moins 5
minutes, réparez la fuite et faites une autre vérification. Faites
sécher les joints après la vérification.
MISE EN GARDE
N’UTILISEZ JAMAIS UNE FLAMME NUE POUR
PROCÉDER À LA VÉRIFICATION D’UNE FUITE
COLMATÉE.
MISE EN GARDE LIÉE AUX
SUBSTANCES ODORANTES
ODEUR DU GAZ DE COMBUSTION
Le GPL et le gaz naturel contiennent des substances
odorantes artificielles ajoutées spécifiquement pour la
détection de fuites de gaz de combustion. Si une fuite
de gaz survient, vous devriez pouvoir sentir le gaz de
combustion. Du fait que le propane (liquéfié) est plus lourd
que l’air, vous devriez sentir l’odeur de gaz près du sol.
N’IMPORTE QUELLE ODEUR DE GAZ EST LE SIGNAL POUR
PRENDRE DES MESURES IMMEDIATES !
• Ne pas entreprendre une action qui pourrait enflammer
le gaz de combustion. Ne pas basculer des interrupteurs
électriques. Ne pas tirer une alimentation ou des rallonges
électriques. Ne pas allumer des allumettes ni aucune autre
source de flamme. Ne pas utiliser votre téléphone.
• Faire sortir tout le monde du bâtiment et s’éloigner de la
zone tout de suite.
• Fermer tous les réservoirs de gaz propane (liquéfié) ou les
vannes d’alimentation des cylindres de carburant ou la vanne
d’alimentation principale de carburant située au compteur si
vous utilisez du gaz naturel.
• Le gaz propane (liquéfié) est plus lourd que l’air et peut
séjourner dans les zones basses. Quand vous avez toutes les
raisons pour soupçonner une fuite de propane, empêchez
l’accès à toutes les zones basses.
• Utiliser le téléphone de votre voisin et appeler votre
fournisseur de gaz de combustion et les pompiers de votre
secteur. Ne pas rentrer à nouveau dans le bâtiment ou dans
la zone.
• Vous tenir hors du bâtiment et loin de la zone jusqu’à
ce qu’elle soit déclarée sûre par les pompiers et par le
fournisseur de votre gaz de combustion.
• ENFIN, laisser le personnel d’entretien du gaz de combustion
et les pompiers vérifier si du gaz s’est échappé. Leur
faire aérer le bâtiment et la zone avant d’y retourner. Les
personnels d’entretien correctement formés doivent réparer
toutes les fuites, vérifier qu’il n’y ait pas d’autres fuites
possibles et ensuite rallumer l’appareil pour vous.
MISE EN GARDE
Risque d’asphyxie
• N’utilisez pas l’appareil dans des endroits sans
ventilation.
• Le débit de combustion et l’air de ventilation ne doivent
pas être obstrués.
• Un air de ventilation adéquat doit être fourni pour
supporter les exigences de l’air de combustion de
l’appareil de chauffage utilisé.
• Référez-vous à la section des spécifications du manuel
de l’appareil de chauffage, à la plaque de données
de l’appareil ou communiquez avec le fabricant pour
obtenir les renseignements relatifs aux exigences en
apport d’air de ventilation de l’appareil.
• Un air de ventilation inapproprié occasionnera une
combustion inadéquate.
• Une combustion inadéquate peut provoquer une
asphyxie par le monoxyde de carbone causant de
sérieuses blessures ou la mort. Les symptômes
d’empoisonnement par le monoxyde de carbone
peuvent inclure des maux de tête, des étourdissements
et des difficultés respiratoires.
DISSIPATION D’ODEUR -
PAS D’ODEUR DETECTÉE
• Certaines personnes ne peuvent pas bien sentir les odeurs.
Certaines personnes ne peuvent pas sentir l’odeur artificielle
du produit chimique ajouté au propane (liquéfié) ou au
gaz naturel. Vous devez déterminer si vous pouvez sentir la
substance odorante dans ces gaz de combustion.
• Apprenez à reconnaître l’odeur du gaz propane (liquéfié)
et du gaz naturel. Les revendeurs locaux de gaz propane
(liquéfié) seront plus qu’heureux de vous donner une
brochure que vous grattez et sentez. Utilisez-la pour vous
familiariser avec l’odeur du gaz de combustion.
• Fumer peut diminuer votre capacité à sentir les odeurs. Se
trouver alentour d’une odeur pour une certaine période de
temps peut affecter votre sensibilité à cette odeur particulière.
Les odeurs présentes dans les bâtiments où sont enfermés des
animaux peuvent masquer l’odeur de gaz de carburant.
• La substance odorante dans le gaz propane (liquéfié) et
dans le gaz naturel n’a pas de couleur et l’intensité de
son odeur peut se dissiper dans certaines circonstances.
• S’il y a une fuite souterraine, le passage du gaz à travers le
sol peut filtrer la substance odorante.
• L’odeur de gaz propane (liquéfié) peut différer dans son
intensité à différents niveaux. Du fait que le gaz propane
(liquéfié) est plus lourd que l’air, il peut y avoir plus d’odeurs
à des niveaux inférieurs.
• Soyez toujours en alerte pour l’odeur de gaz la plus
insignifiante. Si vous continuez à détecter n’importe quelle
odeur de gaz, aussi faible soit-elle, traitez-la comme une fuite
sérieuse. Mettez-vous tout de suite en action comme il a été
discuté précédemment.
Operating Instructions and Owner’s ManualGas-Fired Infra-Red Portable Construction Heater
4
Page 11

ATTENTION - POINTS CRITIQUES
À MÉMORISER !
• Le gaz propane (liquéfié) a une odeur reconnaissable. Apprenez
à reconnaître ces odeurs. (Se référer aux sections Odeur de gaz
de combustion et Dissipation d’odeur ci-dessus.
• Même si vous n’êtes pas correctement formé dans l’entretien
et la réparation de l’appareil de chauffage, il faut TOUJOURS
être consciemment averti des odeurs du gaz propane (liquéfié)
et du gaz naturel.
• Si vous n’avez pas été correctement formé dans la réparation
et l’entretien du gaz propane (liquéfié), alors ne tenter pas
d’allumer l’appareil de chauffage, de faire l’entretien ou les
réparations ou de faire des réglages du système de combustion
de gaz propane (liquéfié) de l’appareil de chauffage.
INSTRUCTIONS D’UTILISATION
MISE EN GARDE
SI VOUS NE RESPECTEZ PAS LES
INSTRUCTIONS À LA LETTRE, UN INCENDIE
OU UNE EXPLOSION PEUT S’ENSUIVRE ET
CAUSER DES DOMMAGES DE BIENS, DES
BLESSURES CORPORELLES OU LA MORT.
AVERTISSEMENT
LE PRÉSENT APPAREIL DEVIENT TRÈS CHAUD
EN COURS D’UTILISATION. ÉVITEZ TOUT
CONTACT PHYSIQUE.
AVERTISSEMENT
NE DÉPOSEZ PAS DE VÊTEMENT OU AUTRE
MATÉRIAU COMBUSTIBLE SUR L’APPAREIL
DE CHAUFFAGE.
N’UTILISEZ PAS l’appareil si l’un de ses composants a été en
contact avec de l’eau. Faites appel à un technicien qualifié pour
procéder à une vérification de l’appareil et remplacer toute pièce
du système de contrôle ou de la valve ayant été en contact avec
de l’eau.
Le présent appareil de chauffage doit être installé seulement dans
des endroits où le potentiel de dommages physiques à l’appareil
est réduit au minimum. Le propriétaire/utilisateur doit s’assurer
que les précautions nécessaires sont prises afin de protéger
l’appareil contre d’éventuels dommages physiques.
ALLUMAGE ET ARRÊT
Allumage de l’appareil
1 Avant d’allumer l’appareil, assurez-vous qu’il n’y a pas
d’odeur de gaz. Étant donné que le gaz propane liquéfié
est plus lourd que l’air, il est important de sentir au
niveau du sol. Alimentez l’appareil en gaz et inspectez
les joints pour détecter toute fuite de gaz à l’aide
d’eau savonneuse. N’UTILISEZ JAMAIS une flamme
nue pour détecter une fuite. En cas de fuite, couper
immédiatement l’alimentation en gaz à l’appareil.
Attendez au moins 5 minutes avant de colmater la fuite.
2 Utilisez seulement le type de combustible prévu pour
le présent appareil de chauffage. Consultez la plaque
signalétique pour obtenir des informations sur le type de
combustible à utiliser.
3 Appuyer sur le bouton. Faites tourner le bouton de la
valve de gaz en sens horaire jusqu’à la position « OFF ».
Voir les figures 1
et 2 pour connaître l’emplacement des pièces de l’appareil.
4 Attendez au moins 5 minutes pour laisser s’échapper
le gaz qui s’est peut-être accumulé dans la chambre du
brûleur.
5 Ouvrez l’alimentation de gaz principale.
6a Appuyez sur le bouton de contrôle et faites-le tourner
en sens anti-horaire jusqu’à la position « Pilot ».
Maintenez-le enfoncé pendant 1 ou 2 minutes. Le
processus d’évacuation d’air peut prendre plus de temps
si vous utilisez un long boyau d’alimentation.
Appuyez sur le bouton d’allumage rouge pour allumer
la flamme de la veilleuse (répétez jusqu’à ce que la
veilleuse s’allume) et continuez de maintenir le bouton
de contrôle enfoncé en position« Pilot » pendant encore
30-60 secondes afin d’activer le système de sécurité de
la veilleuse.
Faites tourner le bouton de contrôle jusqu’à la position
« ON » pour allumer le brûleur. ou...
6b Pour allumer la veilleuse, déplacez le couvercle du trou
d’allumage (voir figure 1) et placez une allumette allumée
dans le trou. Appuyez sur le bouton de la valve de gaz
et maintenez-le enfoncé pendant l’allumage tout en
observant le bouton de la veilleuse. Assurez-vous que
l’allumette allume le brûleur. Laissez la veilleuse brûler
pendant environ 30 secondes avant de relâcher le bouton
de la valve de gaz. Si la veilleuse ne reste pas allumée,
répétez la démarche d’allumage et attendez un peu plus
longtemps avant de relâcher le bouton de la valve de gaz.
REMARQUE : si de longues conduites d’alimentation en gaz
ont été installées en avant de l’appareil de chauffage, vous
devrez peut-être enlever l’air de ces conduites avant d’allumer la
veilleuse. C’est souvent le cas pour les conduites d’alimentation
des nouvelles installations. Après voir enlevé l’air des conduites
d’alimentation, attendez au moins 5 minutes avant d’essayer
d’allumer le brûleur.
Réglez la veilleuse au besoin, tel que décrit sous « Réglage de
la veilleuse ».
7. Faites tourner le bouton de la valve de gaz en sens
anti-horaire jusqu’à la position « ON » (voir figure 1).
Le brûleur s’allumera. Le boton de tour dans le sens des
aiguilles d’une montre jusqu’a l’arret pour la position de
Operating Instructions and Owner’s ManualGas-Fired Infra-Red Portable Construction Heater
5
Page 12

GUIDE D’UTILISATION ET MANUEL DU PROPRIÉTAIRE
REMARQUE : lisez et suivez les instructions d’utilisation. Rangez le manuel de
l’utilisateur dans un endroit sûr aux fins de référence ultérieure. NE LAISSEZ
PERSONNE qui n’a pas lu le manuel de l’utilisateur tenter de monter, de
mettre en marche, de régler ou de faire fonctionner l’appareil de chauffage.
MISE EN GARDE :
UTILISEZ SEULEMENT LES PIÈCES DE REMPLACEMENT DU FABRICANT. L’UTILISATION
D’AUTRES PIÈCES PEUT CAUSER DES BLESSURES OU LA MORT. LES PIÈCES DE
REMPLACEMENT SONT UNIQUEMENT DISPONIBLES AUPRÈS DE L’USINE ET DOIVENT
ÊTRE INSTALLÉES PAR UN TECHNICIEN QUALIFIÉ.
COMMANDE DE PIÈCES :
ACHAT : des accessoires peuvent être achetés auprès de votre détaillant local Mr. Heater
ou HeatStar, ou directement de l’usine.
INFORMATION SUR LE SERVICE
Veuillez appeler sans frais le 866-477-2194
www.enerco.com • www.heatstarbyenerco.com
Nos heures de bureau sont de 8:00 h à 17:00 h, fuseau horaire de l’est, du lundi au
vendredi Veuillez inclure le numéro du modèle, la date d’achat et la description du
problème dans toute communication.
MODÈLES
HS125NG, HS125LP
GARANTIE
Appareil de chauffage portatif à infrarouge et au gaz HS125NG et HS125LP
HEATSTAR by ENERCO garantit que les appareils de chauffage infrarouges fabriqués et vendus sont
exempts de défaut de matériel et de fabrication.
Les pièces détachées des ensembles, les contrôles, etc. fournis par HEATSTAR by ENERCO
comporteront la garantie d’un (1) an sur les garanties applicables des fournisseurs.
La seule responsabilité de HEATSTAR par ENERCO sous cette garantie sera de remplacer ou de
réparer n’importe quelle pièce pour laquelle une réclamation écrite est faite à HEATSTAR by
ENERCO dans la limite de validité de cette garantie, qui est retournée sur demande à HEATSTAR by
ENERCO – FOB Cleveland, Ohio - ou FOB à un centre de service autorisé HEATSTAR by ENERCO et
qui s’est révélée défectueuse lors de l’inspection par HEATSTAR par HEATSTAR by ENERCO Technical
Products.
Cette garantie ne s’appliquera pas à toute pièce ou produit qui a été soumis à une mauvaise
utilisation ou à de la négligence, endommagé par accident ou rendu défectueux en raison en raison
d’une mauvaise installation. CETTE GARANTIE VAUT EN LIEU ET PLACE DE N’IMPORTE QUELLE ET
DE TOUTES AUTRES GARANTIES, EXPRIMEES OU IMPLICITES, et d’aucune autre responsabilité de
HEATSTAR par ENERCO pour les parties ou les produits vendus par HEATSTAR by ENERCO, y compris
les dommages conséquents ou spéciaux.
HEATSTAR by ENERCO se réserve le droit de modifier en tout temps, sans préavis ni obligation,
les couleurs, spécifications, accessoires, matériaux et modèles.
ENREGISTREMENT DU PRODUIT : Nous vous remercions de votre achat.
Veuillez vous connectez-à http://www.egiregistration.com pour enregistrer votre produit.
HEATSTAR by ENERCO, 4560 W. 160TH ST., CLEVELAND, OHIO 44135 • 866-447-2194
Enerco et Mr. Heater sont des marques déposées d’Enerco Group, Inc.
© 2015, Enerco Group, Inc. Tous droits réservés
ANSI Z83.7b/CSA 2.14b - 2009
Page 13

INSTRUCCIONES DE USO Y MANUAL DEL USUARIO
LEA CUIDADOSAMENTE LAS INSTRUCCIONES: Rlea y siga todas las
instrucciones. Consérvelas en un lugar seguro para futura referencia.
No permita que nadie que no haya leído estas instrucciones arme, encienda,
ajuste o use el calentador.
CALEFACTOR PORTÁTIL PARA
MODELO
HS125NG, HS125LP
CONSTRUCCIÓN INFRARROJO A GAS
NO DEJE EL CALENTADOR DESATENDIDO Y NO LO DEJE FUNCIONANDO
MIENTRAS DUERME.
ADVERTENCIA GENERAL DE PELIGRO:
EL NO CUMPLIR CON LAS PRECAUCIONES E INSTRUCCIONES QUE VIENEN CON ESTE CALENTADOR
PUEDE CAUSAR LA MUERTE, LESIONES GRAVES Y PÉRDIDAS Y DAÑOS MATERIALES DERIVADOS
DEL PELIGRO DE INCENDIO, EXPLOSIÓN, QUEMADURAS, ASFIXIA, ENVENENAMIENTO CON
MONÓXIDO DE CARBONO Y/O DESCARGAS ELÉCTRICAS.
SOLO LAS PERSONAS QUE ENTIENDAN Y PUEDAN SEGUIR LAS INSTRUCCIONES DEBEN USAR
O MANTENER ESTE CALENTADOR.
SI NECESITA AYUDA O INFORMACIÓN ACERCA DEL CALENTADOR, COMO MANUALES DE
INSTRUCCIONES, ETIQUETAS, ETC., PÓNGASE EN CONTACTO CON EL FABRICANTE.
ADVERTENCIA:
PELIGRO DE INCENDIO, QUEMADURAS, INHALACIÓN Y EXPLOSIÓN. MANTENGA LOS
COMBUSTIBLES SÓLIDOS COMO MATERIALES DE CONSTRUCCIÓN, PAPEL O CARTÓN A UNA
DISTANCIA SEGURA DEL CALENTADOR TAL COMO LO RECOMIENDAN LAS INSTRUCCIONES. NUNCA
USE EL CALENTADOR EN ESPACIOS QUE CONTIENEN O PODRÍAN CONTENER COMBUSTIBLES
VOLÁTILES O PRODUCTOS COMO GASOLINA, SOLVENTES, DILUYENTE DE PINTURA, PARTÍCULAS DE
POLVO O PRODUCTOS QUÍMICOS DESCONOCIDOS.
ADVERTENCIA: NO APTO PARA USAR EN EL HOGAR NI EN CASAS RODANTES
01/15 18666 2015HEATSTAR by ENERCO, 4560 W. 160TH ST., CLEVELAND, OHIO 44135 • 866-447-2194
Page 14

ESPECIFICACIONES
N.° DE MODELO. .......................HS125LP .................. HS125NG
TIPO DE GAS ............................... Gas LP ............... Gas natural
PRESIÓN DE ENTRADA
MÁXIMA...................... 14 PULGADAS W.C. .... 14 PULGADAS W.C.
PRESIÓN DE ENTRADA
MÍNIMA .....................14 PULGADAS W.C. ... 14 PULGADAS W.C.
PRESIÓN DEL
COLECTOR ................. 12 PULGADAS W.C. . 6.5 PULGADAS W.C.
ADVERTENCIA
NO EXCEDA EL ½ psi (14” w.c.) DE PRESIÓN DE
GAS EN LA VÁLVULA DE CONTROL DE GAS.
VENTILACIÓN
ADVERTENCIA
ESTE ARTEFACTO NO TIENE VENTILACIÓN
Y DEBE USARSE ÚNICAMENTE EN UN ÁREA
BIEN VENTILADA.
No obstruya el flujo de aire necesario para la combustión y la
ventilación. NO lo use en un lugar muy cerrado.
Todo proceso de combustión requiere y consume oxígeno, y puede
producir monóxido de carbono. Este calentador debe usarse con
la ventilación adecuada. Debe haber dos aberturas directamente
hacia el exterior, una baja y otra alta, preferentemente en los lados
opuestos del área que se desea calefaccionar. Cada una de estas
aberturas debe tener por lo menos tres pulgadas cuadradas de
área de entrada de aire de combustión y área de salida de escape
por cada 1000 BTU por hora de la tasa de entrada del calentador
para completar el proceso de combustión/ventilación. Proporcione
ventilación adicional por cada artefacto a combustible y ocupantes
adicionales.
SEPARACIÓN (distancias mínimas a materiales combustibles)
No exceda las presiones del suministro de gas indicadas en las placas de especificación. La presión máxima y la presión mínima de entrada
del suministro de gas (para ajustar la entrada) para gas LP y gas natural son las siguientes:
MODELO N.°: BTU/HR ESPECIFICACIONES POSICIÓN NORMAL DISTANCIA A
DEL TIPO DE GAS DE FUNCIONAMIENTO COMBUSTIBLES
GAS NATURAL GAS LP SUPERIOR COSTADOS INFERIOR
HS125LP 95 -125,000* VERTICAL 48” 60” 60”
HS125NG 72 - 125,000 VERTICAL 48” 60” 60”
*El tamaño y la temperatura del tanque pueden afectar directamente la salida de BTU.
CONTENIDOS
Instrucciones de instalación............................................ S-3
POR SU SEGURIDAD
No use este calentador en un lugar donde
se almacene o se use gasolina u otros
Ubicación ....................................................................... S-3
Tuberías ......................................................................... S-3
Instrucciones de uso ...................................................... S-4
Encendido y apagado .................................................... S-4
Instrucciones de mantenimiento .................................... S-5
Lista de repuestos .......................................................... S-6
Información del servicio técnico y para ordenar piezas ....... S-8
EL ESTADO DE CALIFORNIA EXIGE LAS SIGUIENTES ADVERTENCIAS:
líquidos con vapores inflamables.
El calentador está diseñado y aprobado para usarse como calentador
para construcción bajo las normas ANSI Z83.7 / CGA 2.14.
No podemos anticipar todos los usos que se le pueden dar a
nuestros calentadores. CONSULTE CON LA AUTORIDAD DE
SEGURIDAD ANTIINCENDIOS SI TIENE ALGUNA PREGUNTA SOBRE
SUS APLICACIONES.
Hay otros estándares que rigen el uso de gases combustibles y
productos que producen calor en aplicaciones específicas.
Su autoridad local podrá asesorarlo al respecto.
Este aplicacion es querida para la calefaccion temporal de edificios
bajo construccion, modificascion o reparacion..
ADVERTENCIA: Uno de los elementos generados por la combustión al usar este equipo es monóxido de
carbono, un producto químico que de acuerdo con el estado de California produce cáncer y defectos de nacimiento
(u otros daños reproductivos).
ADVERTENCIA: Este producto contiene sustancias químicas que de acuerdo con el estado de California
producen cáncer y defectos de nacimiento u otros daños reproductivos.
Operating Instructions and Owner’s ManualGas-Fired Infra-Red Portable Construction Heater
2
Page 15

INSTRUCCIONES DE INSTALACIÓN
GENERAL:
LEA CUIDADOSAMENTE ESTAS INSTRUCCIONES. Lea y siga
las siguientes instrucciones. NO permita que nadie que no
las haya leído arme, encienda, ajuste o use este calentador.
NO intente usar el calentador con cualquier otro gas que no
sea el que se indica en la placa del calentador.
Para los EE. UU. y/o Canadá, la instalación de este artefacto debe
cumplir con las normas locales o provinciales o, en ausencia de
dichas normas,
• con el Reglamento nacional de combustible gaseoso
(EE. UU.) ANSI Z223.1 - última edición (para el
funcionamiento con gas natural y gas LP, modelos
HS125NG y HS125LP), y con las Normas para el
almacenamiento y manejo de gases licuados del petróleo
(EE. UU.) ANSI/NFPA 58 (para el funcionamiento con
gas LP, modelos MH125LP, HS125LP), o bien
• con las NORMAS actuales DE INSTALACIÓN CAN/CGA
B149.1 Y B149.2 (Canadá).
Hay que inspeccionar este calentador (incluso la manguera y el
regulador, si corresponde) antes de cada uso y hacerlo revisar
por una persona calificada una vez por año por lo menos. Si la
manguera del modelo HS125LP muestra signos de abrasión o
desgaste excesivo, o si tiene cortes, debe ser reemplazada antes
de hacer funcionar el calentador. La manguera de reemplazo debe
ser la indicada por el fabricante. Consulte la lista de piezas.
UBICACIÓN
El calentador (y el cilindro de suministro de gas LP, si corresponde)
deben colocarse sobre una superficie dura, plana y nivelada para
reducir al mínimo el riesgo de una caída accidental. Si se utiliza
un cilindro de suministro de gas LP (por ejemplo, en el modelo
HS125LP), el cilindro debe sujetarse bien para evitar que se
caiga accidentalmente. NO use este calentador con el cilindro
de suministro en ninguna posición que no sea la vertical.
Este artefacto debe instalarse únicamente en lugares donde el
riesgo de daños físicos al artefacto (originados por contacto físico,
por ejemplo) se reduzcan al mínimo.
El instalador debe informarle al dueño o usuario de este artefacto
que se deben tomar las precauciones necesarias para proteger al
artefacto contra daños físicos.
Este artefacto produce calor radiante. Por lo tanto, debe ubicarse
por lo menos a 2 metros de distancia de cualquier contenedor de
gas LP y no debe apuntar hacia ningún contenedor de gas LP a
menos de 6 metros.
El calentador debe instalarse en un lugar en el que no quede expuesto
directamente a las salpicaduras de agua, lluvia o goteo de agua.
El usar este calentador en un área ventosa/con corrientes de aire
disminuye su eficiencia. De ser posible, use la unidad en un área
sin corrientes de aire.
TUBERÍAS
Para el modelo HS125LP
(para usar con gas LP)
Este modelo puede conectarse a un sistema de suministro
autónomo de gas LP con la manguera y el conjunto del regulador
suministrado con el artefacto, O BIEN, puede conectarse a un
sistema de suministro de gas LP permanentemente.
Si se conecta a un sistema de suministro de gas LP autónomo,
el conjunto de la manguera debe inspeccionarse antes de cada
uso del calentador. Si es evidente que hay abrasión o desgaste
excesivos, o si la manguera está cortada, debe reemplazarse
antes de poner en funcionamiento el calentador.
Si se conecta a un sistema de suministro de gas LP
autónomo, el cilindro debe tener una capacidad de gas LP
mínima de 18 kilogramos y máxima de 45 kilogramos. NO
conecte este artefacto a un cilindro que tenga una capacidad
nominal de gas LP menor a los 18 kilogramos.
ADVERTENCIA
NUNCA USE UN CILINDRO DEL TIPO USADO
EN MONTACARGAS.
La conexión del modelo HS125LP a un cilindro de gas LP debe
hacerse en un área bien ventilada, usando el regulador y la
manguera que vienen con el artefacto. NO intente ajustar
este regulador. Ha sido ajustado en la fábrica para brindar
un funcionamiento seguro y adecuado del artefacto. Use una
llave de extremo abierto de 7/8” para conectar el acople del
POL (suministrado con el regulador de LP) al cilindro de gas LP.
Enrosque la tuerca POL hacia la izquierda (es una rosca izquierda)
hasta que quede fija. NO utilice compuestos para tuberías en
las roscas POL.
El calentador debe ubicarse por lo menos a 2 metros de
cualquier cilindro de gas LP y no debe apuntar hacia ningún
cilindro de gas LP a menos de 6 metros. Si se usa más de un
calentador, deberán separarse de los cilindros de suministro
por más de 6 metros. Verifique las normas locales.
El suministro de gas debe cerrarse en el cilindro de suministro
de gas LP cuando el calentador no se use.
Cuando deba guardar el calentador en un lugar cerrado,
deberá desconectar la conexión entre el cilindro de suministro
de gas LP y el calentador, y deberá retirar el cilindro del
calentador y guardarlo como se especifica en el Capítulo 5
de las Normas para el almacenamiento y manejo de gases
licuados del petróleo. (EE. UU.) ANSI/ NFPA 58, O CAN/CGA
B149.2 (Canadá).
Si se conecta a un sistema de suministro de gas LP
permanentemente, el sistema requiere el uso de un regulador
de gas de dos etapas, generalmente suministrado por el
distribuidor de gas LP como parte del sistema de suministro
de gas LP. Comuníquese con el distribuidor de gas LP local
para obtener información detallada sobre el equipo y la
instalación adecuados.
Operating Instructions and Owner’s ManualGas-Fired Infra-Red Portable Construction Heater
3
Page 16

Para el modelo HS125NG
(para usar con gas natural)
La tubería debe estar limpia y sin sarro o rebabas.
Instale el regulador incluido con el calentador. Conéctelo con
la unión de 1/2” NPT (no incluida) a la válvula de control.
Conecte el artefacto a un sistema de suministro de combustible
diseñado e instalado adecuadamente. Este sistema debe incluir
una válvula de cierre manual aprobada que esté a mano y que
se encuentre a 1,82 m del artefacto. Además, se debe colocar
un separador de sedimentos o una pierna colectora arriba
de esta válvula de cierre manual. Consulte el reglamento de
instalación adecuado (gas natural) mencionado anteriormente.
Si utiliza un conector flexible, debe ser de un tipo aprobado.
Antes de intentar encender el artefacto, deberá verificar bien que
no haya ninguna fuga de gas por los acoples o las conexiones.
Coloque una pequeña cantidad de solución de agua y jabón en
todos los acoples y conexiones y observe si aparecen burbujas.
Si detecta alguna fuga, cierre la entrada de gas al artefacto
inmediatamente. Espere cinco minutos como mínimo, repare
las fugas y vuelva a verificar que no haya fugas. Seque todos los
acoples y conexiones después de la prueba de fugas.
ADVERTENCIA
NUNCA USE UNA LLAMA PARA VERIFICAR
LAS FUGAS.
ADVERTENCIA DE DISIPACIÓN DEL OLOR
OLOR A GAS COMBUSTIBLE
Los gases LP y el gas natural contienen sustancias
aromáticas artificiales añadidas específicamente para
facilitar la detección de fugas de gas. Si se produjera una
fuga de gas, usted debe poder oler el gas combustible. Dado
que el propano (LP) es más pesado que el aire, debe tratar
de detectar el olor lo más cerca del piso posible. CUALQUIER
OLOR A GAS SERÁ LA SEÑAL PARA TOMAR MEDIDAS
INMEDIATAMENTE.
• No haga nada que pudiera inflamar el gas combustible. No
active ningún interruptor eléctrico. No desconecte ninguna
toma de corriente ni cables de extensión. No encienda fósforos
ni ninguna otra fuente de llamas. No utilice el teléfono.
• Saque a todas las personas del edificio y aléjelas del área
inmediatamente.
• Cierre todas las válvulas de suministro de combustible de
los cilindros o del tanque de gas propano (LP), o la válvula
principal de suministro de combustible que se encuentra en el
medidor si emplea gas natural.
• El gas propano (LP) es más pesado que el aire y puede
asentarse en áreas bajas. Cuando sospeche que puede haber
una fuga de propano, manténgase alejado de las áreas bajas.
• Utilice el teléfono de su vecino y llame al proveedor de gas y
al departamento de bomberos. No vuelva a entrar al edificio
ni se acerque al área.
• Manténgase alejado del edificio y del área hasta que los
bomberos y el proveedor de gas hayan declarado que no
hay peligro.
• POR ÚLTIMO, permita que la persona del servicio de gas y los
bomberos revisen si hay fugas de gas. Haga que ventilen el
edificio y el área antes de su regreso. Un agente de servicios
calificado debe reparar cualquier fuga, revisar si hay otras
fugas y volver a encender el artefacto por usted.
ADVERTENCIA
Peligro de asfixia
• No utilice el artefacto en áreas sin ventilación.
• No obstruya el flujo de aire necesario para la combustión
y la ventilación.
• Deberá suministrar la ventilación adecuada para
garantizar que el calentador disponga del aire que
necesita para la combustión.
• Consulte la sección de especificaciones del manual del
calentador, la placa del calentador o póngase en contacto
con el fabricante para conocer los requerimientos de
ventilación del calentador.
• Si la ventilación no es la adecuada, la combustión no se
llevará a cabo correctamente.
• Una combustión inadecuada puede producir
envenenamiento con monóxido de carbono con graves
daños para la salud, o causar la muerte. Los síntomas
de envenenamiento con monóxido de carbono incluyen
dolores de cabeza, mareos y dificultad para respirar.
DISIPACIÓN DEL OLOR:
NO SE DETECTA NINGÚN OLOR
• Algunas personas tienen problemas de olfato. Algunos no
pueden detectar el olor del químico artificial añadido al propano
(LP) o al gas natural. Debe determinar si es capaz de oler la
sustancia aromática que contienen estos gases combustibles.
• Aprenda a reconocer el olor del gas propano (LP) y del gas
natural. Los distribuidores locales de propano (LP) le darán
con gusto un panfleto con muestras de olores. Utilícelo para
familiarizarse con el olor del gas combustible.
• El hábito de fumar puede disminuir el sentido del olfato.
Exponerse a un olor durante un período puede afectar su
sensibilidad a ese olor específico. Los olores presentes en
instalaciones donde se crían animales pueden enmascarar el
olor del gas combustible.
• La sustancia aromática presente en el gas propano (LP)
y en el gas natural es incolora y la intensidad de su olor
puede desvanecerse en algunas circunstancias.
• Si hay una fuga subterránea, el recorrido del gas a través del
suelo puede filtrar esta sustancia aromática.
• El aroma del gas propano (LP) puede variar en intensidad
a diferentes niveles. Dado que el gas propano (LP) es más
pesado que el aire, el olor puede ser más intenso en los
niveles más bajos.
• Manténgase siempre alerta al más mínimo olor a gas.
Si continúa percibiendo el olor a gas, no importa cuán poco
sea, proceda como si fuera una fuga grave. Tome medidas
de inmediato como se explicó anteriormente.
Operating Instructions and Owner’s ManualGas-Fired Infra-Red Portable Construction Heater
4
Page 17

ATENCIÓN: PUNTOS IMPORTANTES
PARA RECORDAR
• El gas propano (LP) tiene un olor característico. Aprenda a
reconocer estos olores. (Consulte las secciones anteriores
“Olor a gas combustible” y “Disipación del olor”).
• Aunque usted no esté capacitado para dar mantenimiento
y reparar el calentador, SIEMPRE esté atento a los olores del
gas propano (LP) y del gas natural.
• Si no ha recibido capacitación para reparar y dar
mantenimiento a equipos que emplean gas propano (LP),
no intente encender el calentador, darle mantenimiento o
repararlo, ni hacer ningún ajuste al calentador en el sistema
de combustible de gas propano (LP).
INSTRUCCIONES DE USO
ADVERTENCIA
SI NO SE SIGUEN AL PIE DE LA LETRA ESTAS
INSTRUCCIONES, PODRÍA PRODUCIRSE
UN INCENDIO O UNA EXPLOSIÓN QUE
PROVOCARÍA DAÑOS MATERIALES, LESIONES
PERSONALES O MUERTES.
CUIDADO
ESTE ARTEFACTO SE CALIENTA DURANTE SU
FUNCIONAMIENTO NORMAL. EVITE TODO
CONTACTO FÍSICO.
CUIDADO
NO COLOQUE ROPA U OTRO MATERIAL
COMBUSTIBLE SOBRE ESTE ARTEFACTO.
NO use este calentador si alguna de las piezas ha estado
bajo el agua. Contáctese de inmediato con un técnico de
mantenimiento calificado para que inspeccione el calentador y
reemplace cualquier pieza del sistema de control o válvula de
control de gas que haya estado bajo el agua.
Este artefacto debe instalarse y usarse únicamente en lugares
donde el riesgo de daños físicos al artefacto se reduzcan al
mínimo. El dueño/usuario de este artefacto debe asegurar que
se tomen las precauciones necesarias para proteger el artefacto
contra daños físicos.
ENCENDIDO Y APAGADO
Encendido del calentador
1 Antes de encender el calentador, huela alrededor del área del
calentador para verificar que no haya olor a gas. Asegúrese
de oler cerca del piso ya que el gas LP es más pesado que
el aire y se acumula en el piso. Abra el suministro de gas
del artefacto y verifique todos los acoples y conexiones
para corroborar que no haya fugas de gas con una solución
de agua jabonosa. NUNCA use un fósforo para buscar
fugas. En caso de que se produzca una fuga de gas, cierre
el suministro de gas del artefacto de inmediato. Aguarde un
mínimo de cinco minutos antes de reparar la fuga.
2 Use únicamente el combustible especificado para este
artefacto. Consulte la placa de especificaciones del artefacto
para obtener información actual acerca del combustible.
3 Pulsar la perilla. Gire la perilla de la válvula de gas hacia
la derecha a la posición “OFF” (APAGADO). Consulte la
fig. 1 y la fig. 2 para ver la ubicación de las piezas del
artefacto.
4 Aguarde el tiempo suficiente (al menos cinco minutos)
para permitir que salga el gas que se pudo haber
acumulado en el compartimiento del quemador.
5 Abra el suministro principal de gas.
6a Presione y gire la perilla de control hacia la izquierda
hasta la posición “Pilot” (Piloto) y manténgala presionada
entre 1 y 2 minutos. Purgar aire desde la manguera de
suministro puede llevar más tiempo, según la longitud
de la manguera que se use.
Oprima el botón de encendido de color rojo para encender
la llama del piloto (repita este paso hasta que se encienda
el piloto) y continúe presionando la perilla de control en
la posición “Pilot” (Piloto) entre 30 y 60 segundos para
habilitar el sistema de seguridad de encendido del piloto.
Gire por completo la perilla de control a la posición “ON”
(ENCENDIDO) para encender el quemador. o bien...
6b Para encender el piloto, retire la tapa del orificio de
encendido (consulte la fig. 1) y coloque un fósforo
encendido en el orificio. Oprima la perilla de la válvula
de gas y manténgala presionada al encenderla y observe
el quemador del piloto. Asegúrese de que el quemador
del piloto se encienda con el fósforo. Permita que el
piloto permanezca encendido durante aproximadamente
30 segundos antes de soltar la perilla de la válvula
de gas. Si el piloto no permanece encendido, repita
la operación de encendido y mantenga presionada la
perilla de la válvula de gas por más tiempo.
NOTA: En caso de que se instalen circuitos largos de líneas de
suministro de gas antes que el artefacto, podría ser necesario
purgar el aire atrapado en ellas antes de encender el piloto.
Generalmente, las instalaciones nuevas requieren del purgado
de las líneas de suministro. Aguarde durante un mínimo
de cinco minutos luego de haber purgado las líneas de
suministro antes de intentar encender el calentador.
Ajuste el piloto si es necesario, según se indica en la sección
“Ajuste del quemador del piloto”.
7. Gire la perilla de la válvula de gas hacia la izquierda a
la posición “ON” (ENCENDIDO) (consulte la fig. 1). El
quemador se encenderá. Perilla de vuelta dextrosum
para parase para posicion de fuego baja.
8. IMPORTANTE: NO intente ajustar la entrada del
quemador principal usando la válvula general del
suministro de gas, ya que esto podría provocar que el
piloto y la termocupla apaguen el quemador (fig. 2).
Operating Instructions and Owner’s ManualGas-Fired Infra-Red Portable Construction Heater
5
Page 18

INSTRUCCIONES DE USO Y MANUAL DEL USUARIO
LEA CUIDADOSAMENTE LAS INSTRUCCIONES: lea y siga todas las
instrucciones. Consérvelas en un lugar seguro para futura referencia. No
permita que nadie que no haya leído estas instrucciones arme, encienda,
ajuste o use el calentador.
ADVERTENCIA:
USE SOLAMENTE REPUESTOS DEL FABRICANTE. EL USO DE CUALQUIER OTRA PIEZA
PODRÍA CAUSAR HERIDAS O LA MUERTE. LOS REPUESTOS ESTÁN DISPONIBLES
ÚNICAMENTE EN LA FÁBRICA Y DEBEN SER INSTALADOS POR UNA AGENCIA DE
SERVICIO CALIFICADA.
INFORMACIÓN PARA ORDENAR REPUESTOS:
COMPRAS: Los accesorios se pueden comprar en cualquier distribuidor local de Mr.
Heater o HeatStar o directamente en la fábrica.
SI DESEA OBTENER INFORMACIÓN ACERCA DE REPARACIONES
Llame sin cargo al 866-477-2194.
www.enerco.com • www.heatstarbyenerco.com
Nuestro horario de trabajo es de 8:00 a. m. a 5:00 p. m., hora del este, de lunes a viernes.
Incluya el número de modelo, la fecha de compra y la descripción del problema en
todas sus comunicaciones.
MODELO
HS125NG, HS125LP
GARANTÍA
Calentador portátil para construcción infrarrojo a gas modelos HS125NG Y HS125LP
HEATSTAR by ENERCO garantiza que los calentadores infrarrojos fabricados y vendidos estarán
libres de defectos de materiales y de mano de obra.
Las piezas, los controles, etc. suministrados por HEATSTAR by ENERCO tendrán un (1) año de
garantía sobre las garantías correspondientes de los proveedores.
La única responsabilidad de HEATSTAR by ENERCO en virtud de esta garantía será la de
reemplazar o reparar toda pieza que sea reclamada por escrito ante HEATSTAR by ENERCO
en el plazo de esta garantía, la cual se envíe a solicitud a HEATSTAR by ENERCO - F.O.B.
Cleveland, Ohio – o F.O.B. a un centro de reparaciones autorizado de HEATSTAR by ENERCO
y que se compruebe que está defectuosa luego de ser inspeccionada por HEATSTAR by
ENERCO Technical Products.
Esta garantía no cubre ninguna pieza o producto que haya sido usado incorrectamente
o con negligencia, dañado por accidente o que se haya arruinado por una instalación
inadecuada. ESTA GARANTÍA REEMPLAZA A TODAS Y CADA UNA DE LAS GARANTÍAS QUE
EXISTAN, EXPRESAS O IMPLÍCITAS, y cualquier otra responsabilidad de HEATSTAR by ENERCO
sobre las piezas o los productos vendidos por HEATSTAR by ENERCO, lo que incluye daños
consecuentes o especiales.
HEATSTAR by ENERCO se reserva el derecho a hacer cambios en cualquier momento, sin
previo aviso, en los colores, las especificaciones, los accesorios, los materiales y los modelos.
REGISTRO DEL PRODUCTO: Gracias por su compra.
Inicie sesión en http://www.egiregistration.com para registrar su producto.
HEATSTAR by ENERCO, 4560 W. 160TH ST., CLEVELAND, OHIO 44135 • 866-447-2194
Enerco y Mr. Heater son marcas comerciales registradas de Enerco Group, Inc.
© 2015, Enerco/Mr. Heater. Todos los derechos reservados.
ANSI Z83.7b/CSA 2.14b - 2009
 Loading...