

Page 1
OPERATING & SERVICE PARTS MANUAL
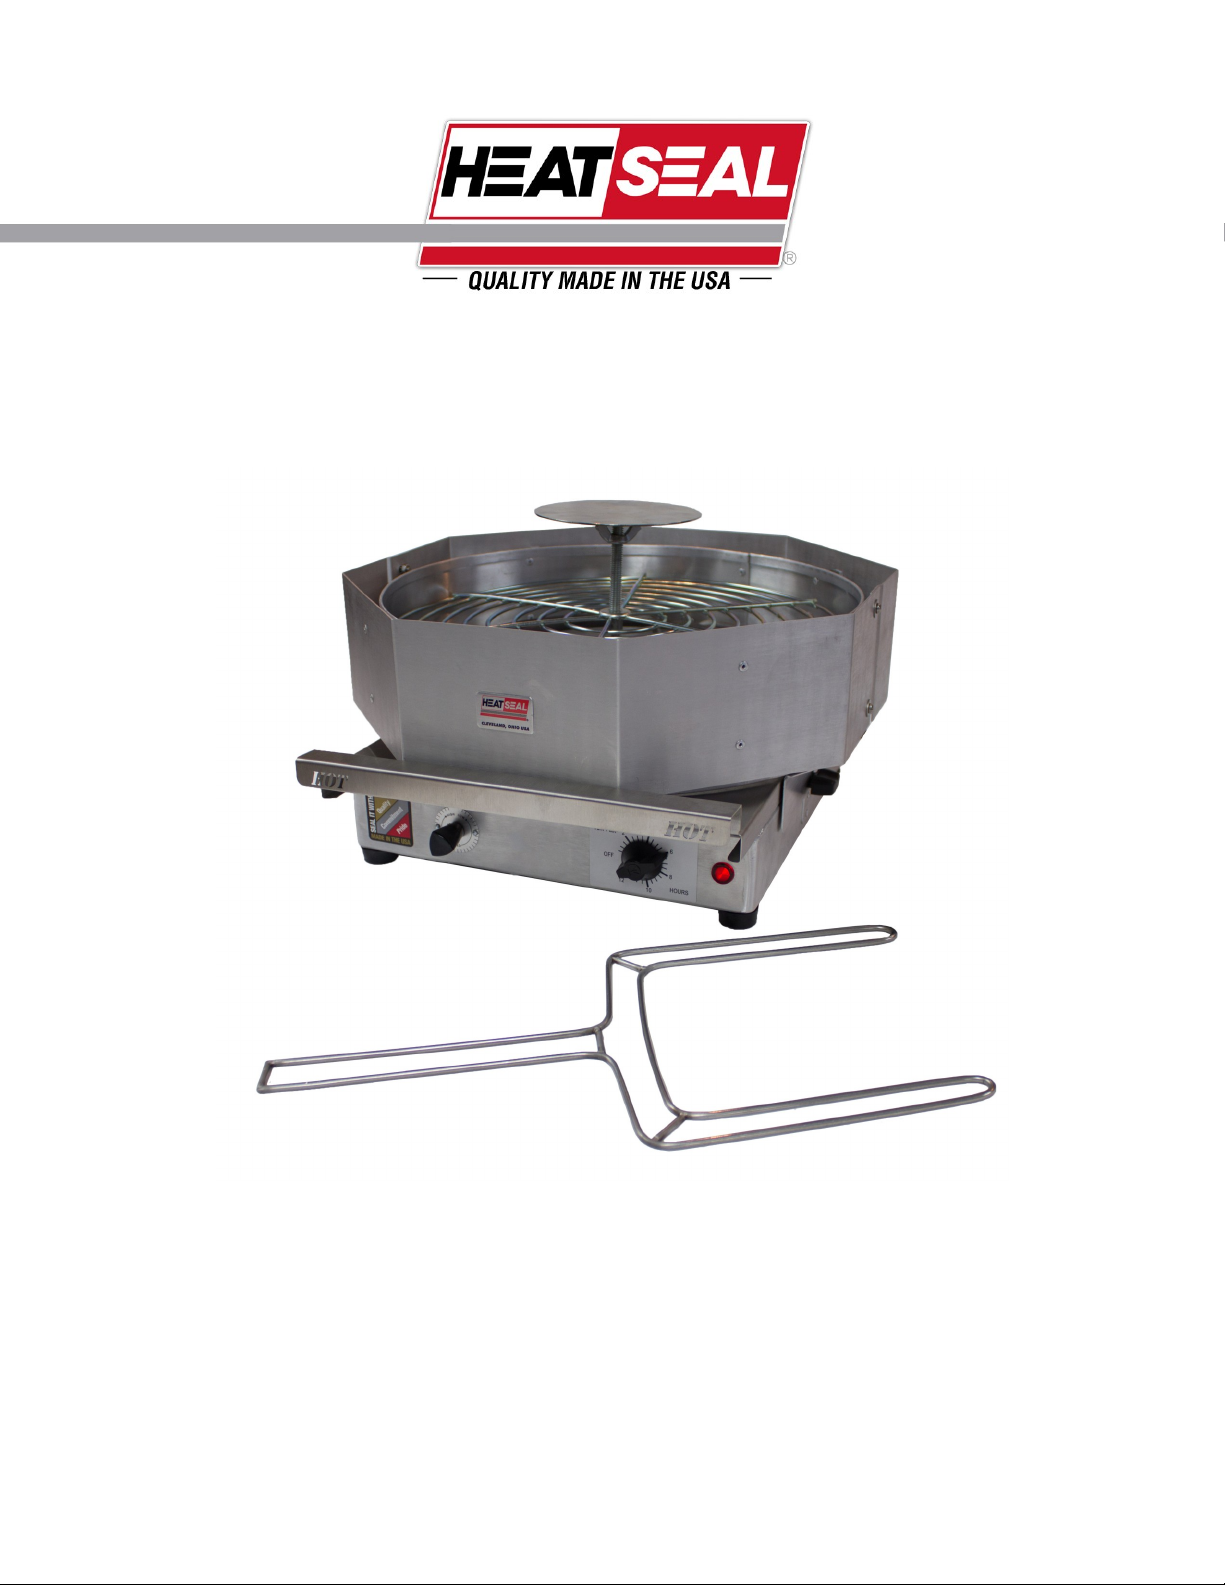
PIZZA CAPPER PC-1318
READ ALL INSTRUCTIONS CAREFULLY BEFORE OPERATING EQUIPMENT
Revised 2013
Page 2
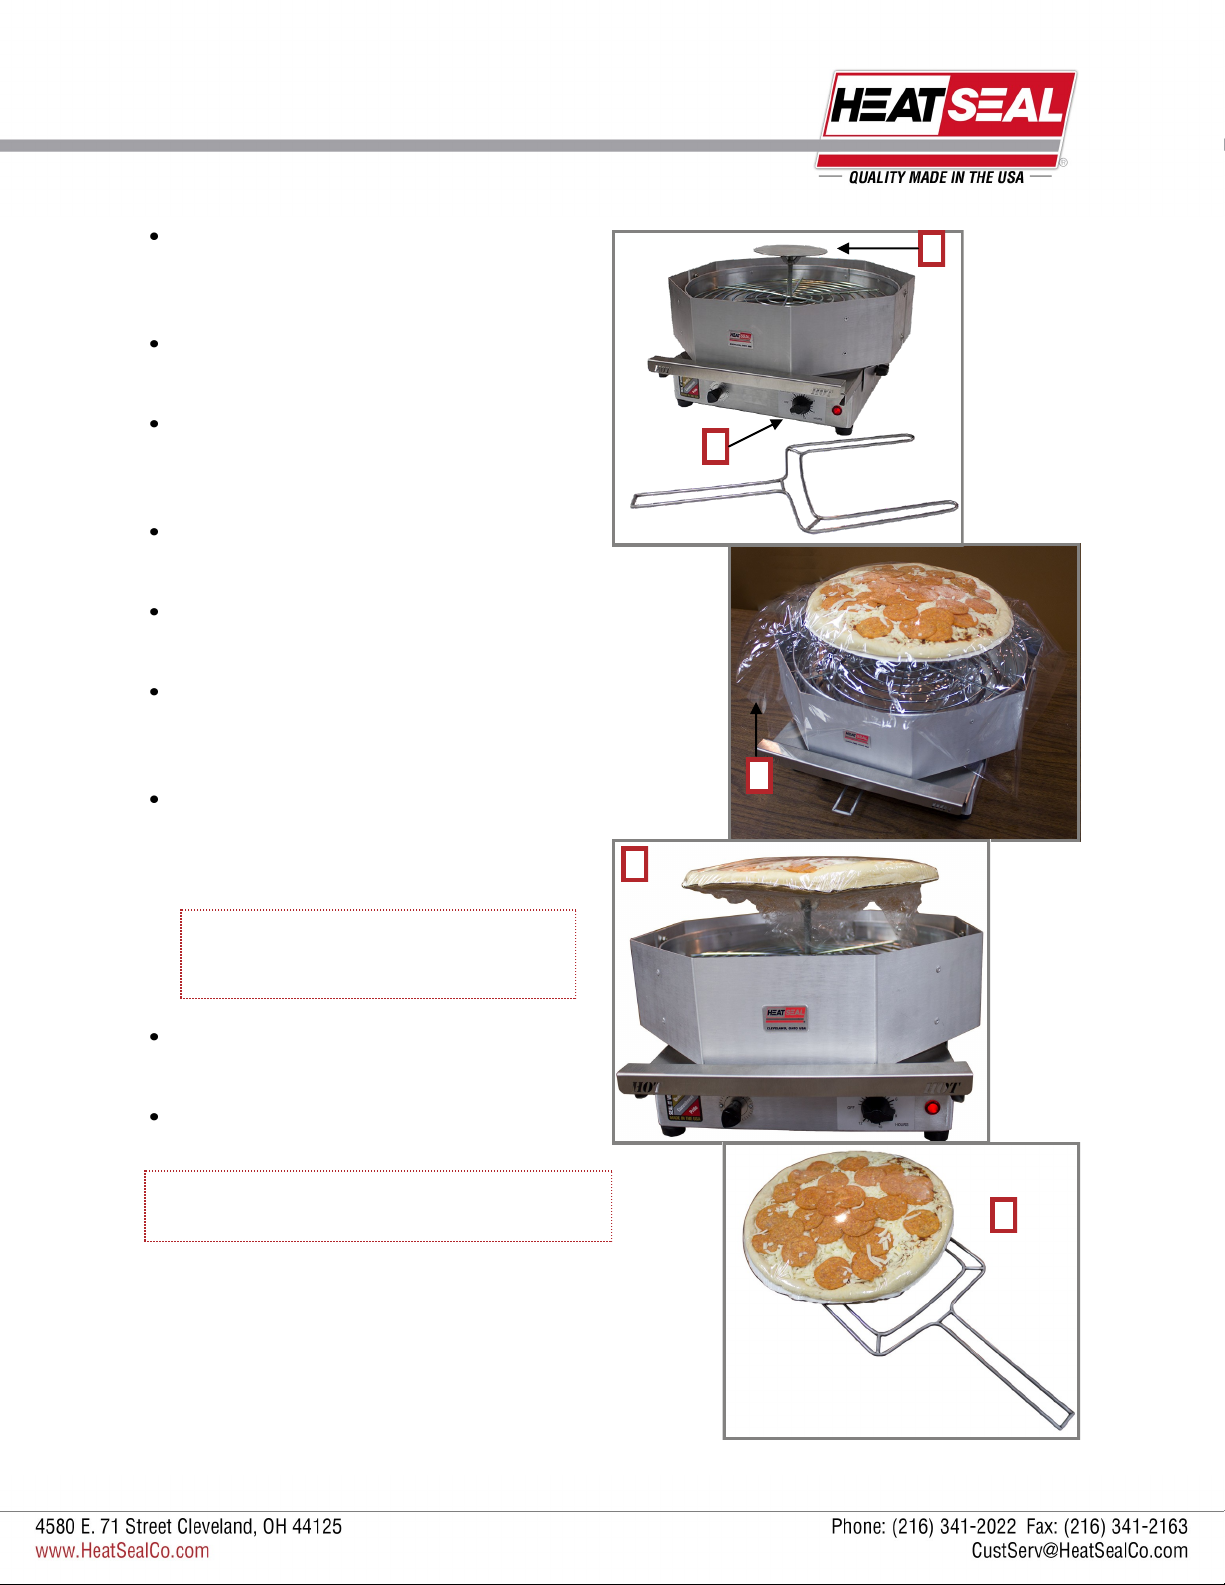
CAPPING THE PIZZA
Install the appropriate platform for the size of pizza being
wrapped, the 5” disk is for pizzas up to 13” and the 11” disk
is for pizzas up to 18”.
Plug the electrical cord into a standard 110 volt grounded
outlet.
Turn the 12 Hour Timer (2) light will indicate that the power
is on. To set the timer, turn the dial past 2 and then to the
setting you want to leave the wrapper on (1 to 12 hours).
Allow approximately ten minutes for pizza wrapper to heat
to sealing temperature.
Place pizza on a cardboard disc, then place pizza centered
on the platform (1).
Cover pizza with shrink film (3) The pizza film should be
about double the size of the pizza diameter for sufficient
coverage.
Gently tuck the film edges under the cardboard (4) with
your fingers or a tool. Allow the film to shrink for up to thirty
seconds (this time varies depending on the thickness of the
film being used and the temperature set on the thermostat).
1
2
3
4
BE CAREFUL WHEN TUCKING EDGES
OR REMOVING PIZZA FROM PLATFORM,
THE WRAPPER AND FILM CAN BE HOT.
Remove the wrapped pizza from the platform with the pizza
fork (5).
Allow wrapper to completely cool before handling or cleaning.
DO NOT HANDLE OR TOUCH SURFACES UNTIL
THE UNIT HAS HAD ENOUGH TIME TO COOL.
5
Revised 2013
2
Page 3

CLEANING & MAINTENANCE
TO CLEAN THE PIZZA CAPPER
When cleaning or maintaining the PC-1318, make sure to let the machine cool completely and remove power from the unit.
DO NOT submerge or wash down the unit.
The PC-1318 comes with a removable stainless steel crumb tray (1). When the Pizza Capper has cooled down, pull out the
crumb tray and wash or wipe down.
The stainless steel Pizza Capper fork (2) can be washed or wiped down.
The platform and round grate (3) can be removed and washed or wiped down.
The outer and inner rings can also be removed by loosening the three thumb knobs (4) on the sides and the back of the
Pizza Capper.
3
4
1
2
3
Revised 2013
Page 4

4
Revised 2013
 Loading...