

Page 1
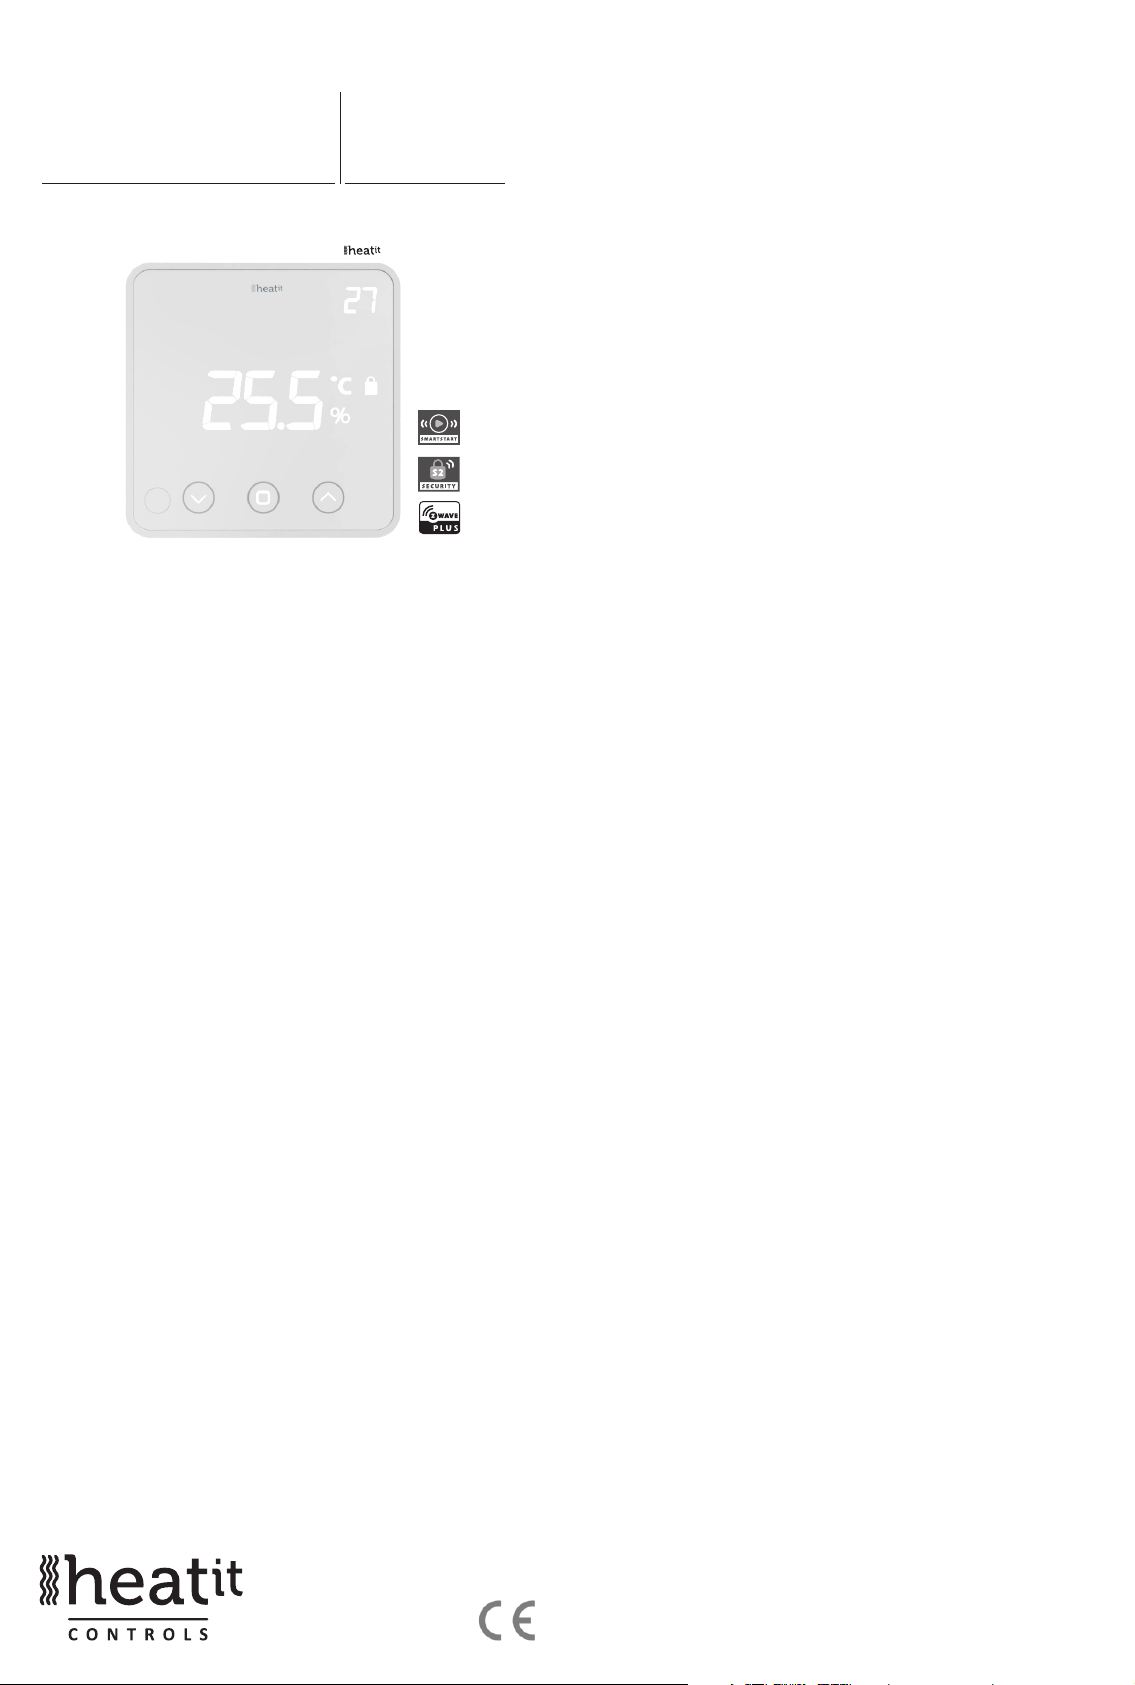
HEATIT
Z-TEMP2
01.03.2020
Ver 2020-B
Installers manual
TABLE OF CONTENTS
1 Introduction
2 Statement regarding products from multiple manufacturers
3 Behavior within the Z-Wave™ network
4. Quick Start
5. Installation
6. Add/Remove
6.1 Method 1 Standard (manual)
6.2 Method 2 SmartStart (automatic)
7 Factory Reset
8 Compability/ Principles for regulation
9 Information shown in display
10 Hysteresis (DIF)
11 Childlock - Lock
12 Standby and main screen
13 Z-Wave QR-Code / DSK
14 Security
15 Node Information Frame
16 Associations
17 Conguration parameters
18 Operating the device
19 Supported Command Classes
Product information
Firmware 1.1
1. INTRODUCTION
Heatit Z-Temp2 is a battery-operated thermostat designed for use
with water based heating systems. Used in combination with the
Heatit Z-Water regulator you can control your heating system with a
Z-Wave primary controller/gateway with the use of Heatit Z-Water in
combination with one or several Heatit Z-Temp2.
2. STATEMENT REGARDING PRODUCT
FROM MULTIPLE MANUFACTURERS
Please read this before installation
This device may be used with all devices certied with the Z-Wave
Plus™ certicate and should be compatible with such devices
produced by other manufacturers. Every primary controller is dierent
depending on the manufacturer, their target audience and intended
use/application. Please review the functionalities implemented by
the primary controller you intend to use with our Z-Wave Plus
certied device to ensure that it provides the necessary controls
to take full advantage of our product’s capabilities.
3. BEHAVIOR WITHIN THE Z-WAVE NETWORK
This product can be operated in any Z-Wave network with other
Z-Wave certied devices from other manufacturers. All non-battery-
operated nodes within the network will act as repeaters regardless
of manufacturer to increase reliability of the network. On delivery,
the device does not belong to any Z-Wave network. The device
needs to be added to an existing network to communicate with
the devices of this network. Devices can also be removed from
a network. Both adding and removing process are initiated by the
primary controller of the Z-Wave network.
This controller will enter a mode for adding or removing devices.
Please refer to your primary controller/gateway manual on how to
turn your controller into add or remove mode. The device can only
be added or removed from the network if the primary controller is in
add/remove mode. When the device is removed from the network,
the device will revert to factory default settings.
4. QUICK START
1. Install the batteries (as stated in the technical specication).
2. Install the device on a at vertical surface
using screws or double-sided tape
3. Set the controller/gateway in add mode (security/non-security).
4. Press the link button 3 times in a rapid sequence.
5. The thermostat will display “INC” when the thermostat is
successfully included.
NB! If adding/removing fails, Err (error) will appear.
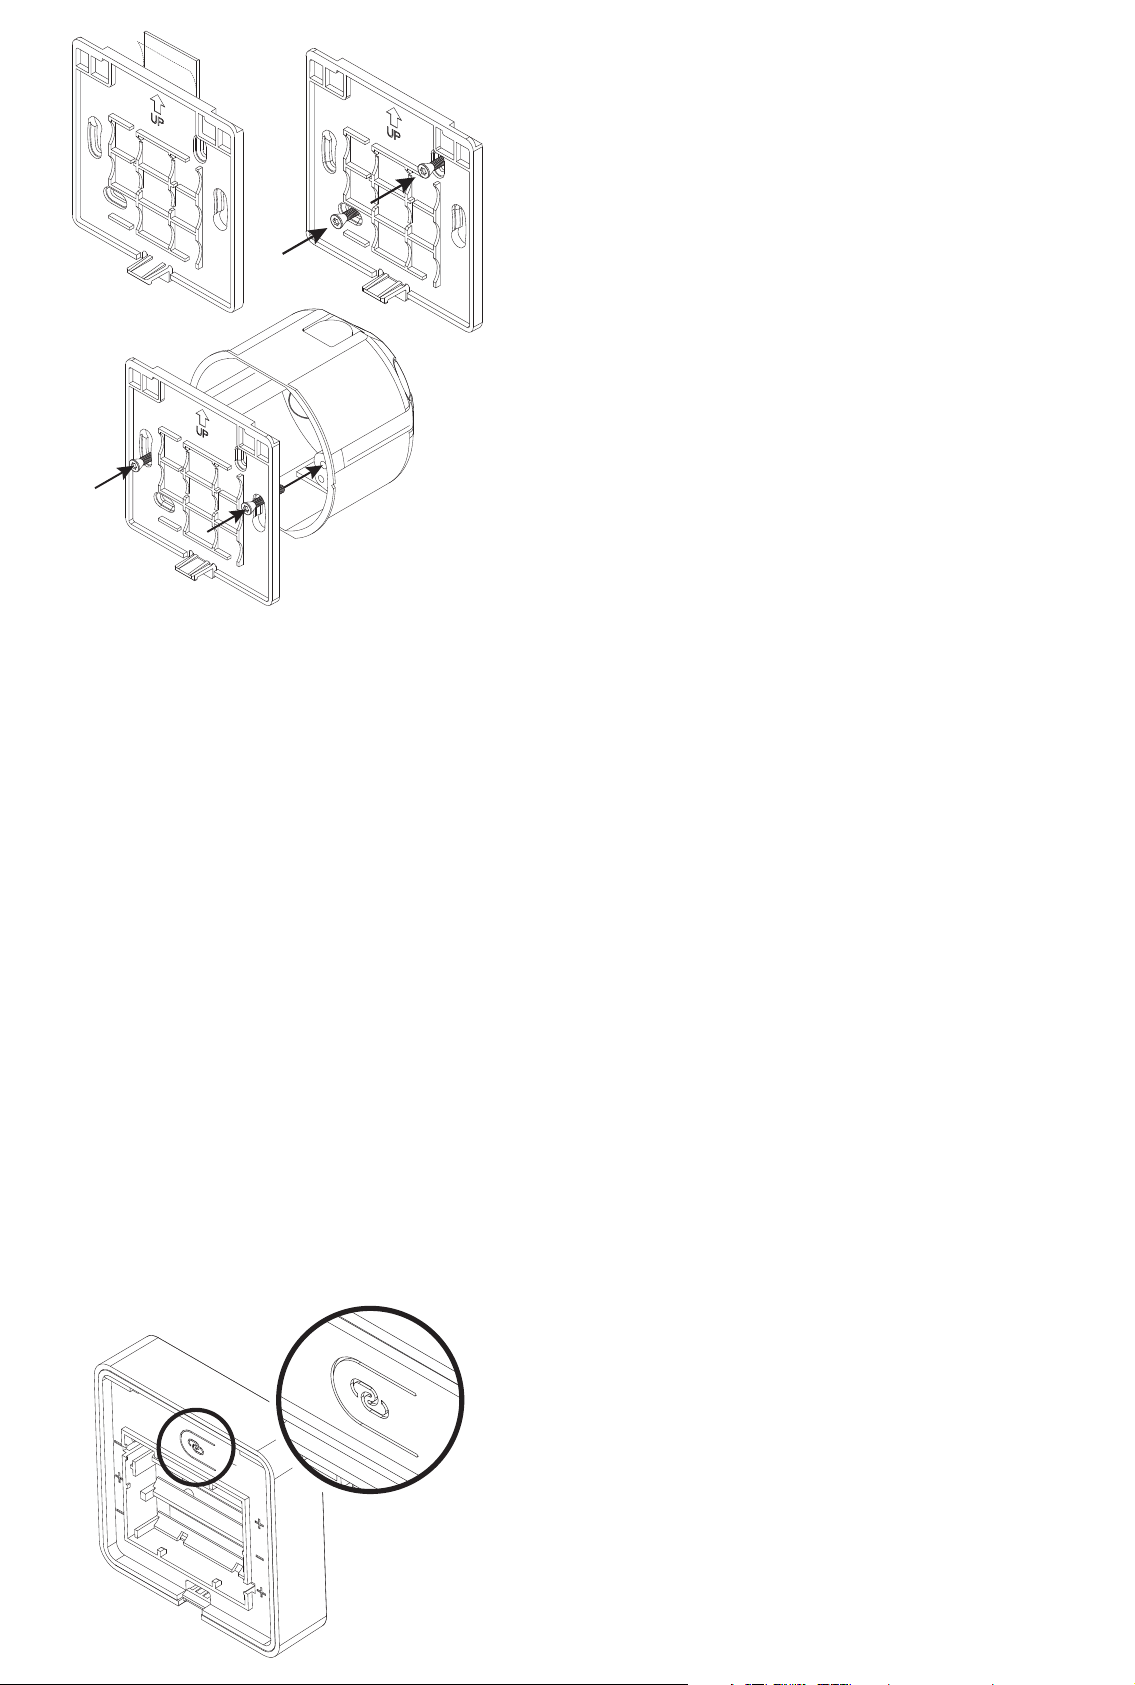
5. INSTALLATION
Use a large athead screwdriver to remove the back cover.
Fix the unit to the wall by double-sided tape, screws or installed
on top of a Euro wall box.
Make sure the mounting surface is clean and dry.
Then install 3x AA batteries (alkaline) in the device’s battery-holder.
NB! Be careful to when installing batteries, ensuring the polarity of
the batteries is in accordance with the printing in plastic.
Page 2
7. FACTORY RESET
By pressing and holding the link button for 20 seconds, the
thermostat will perform a complete factory reset. rES will be displayed.
NB! Please use this procedure only when the primary controller/
gateway is missing or otherwise inoperable.
8. COMPABILITY / PRINCIPLES FOR REGULATION8. COMPABILITY / PRINCIPLES FOR REGULATION
Water based heating
The thermostat uses temperature readings retrieved from the internal
sensor. Heatit Z-Temp2 is designed to work together with water based
heating solutions. Heatit recommends using Heatit Z-Temp2 together
with Heatit Z-Water. These two products allow for an advanced water
based heating solution by using a Z-Wave enabled controller. This
is a “wire-free” solution which save both time and money. All the
communication between Heatit Z-Temp2 and the controlled device
is wireless. The range can be extended using Heatit Z-Repeater or
any other device that supports routing. This makes our water based
solutions a good addition to your existing or new home automation
system.
6. ADD/REMOVE
There are two ways to add your devices in a Z-Wave network.
6.1 METHOD 1: STANDARD (MANUAL)
Please refer to your primary controller/gateway manual on how to
enter add/remove mode. The device can only be added or removed
from the network if the primary controller is in add/remove mode.
When the primary controller/gateway is set to add/remove mode
press the link button on the thermostat 3 times in a rapid sequence.
6. 2 METHOD 2: SMARTSTART (AUTOMATIC)
Please refer to your primary controller/gateway to see if SmartStart is
supported by the controller. SmartStart enabled products can be added
into a Z-Wave network by scanning the Z-Wave QR-Code present on the
product with a controller providing SmartStart inclusion. No further action
is required and the SmartStart product will be added automatically within
10 minutes of being switched on in the network vicinity.
Enter SmartStart modus from your primary controller.
With the batteries for the devices taken out of the device. Scan the
QR-code on back of the device, then follow the gateway instructions.
If the device already belongs to a network, follow the removing
process before adding it in your network. Otherwise, the adding of
this device will fail. When the device is removed from the network,
the device will revert to factory settings.
Electrical heating
Heatit Z-Temp2 could also be used in situations where a traditional
electrical thermostat is not suited. The battery-operated thermostat
can be used together with Heatit Z-Relay or any other relay device
installed in a remote location. Rehabilitation could be done using this
solution to avoid unnecessary wiring.
9. INFORMATION SHOWN IN DISPLAY
The thermostat benets from two screens.
The main screen
The main screen displays measured temperature readout or relative
humidity. You can switch between the humidity and measured
temperature by pressing the center button while display is active.
The temperature and humidity can be calibrated using parameter
4 and 5 respectively. When childlock is active, there will displayed
a lock icon adjacent to the Celsius icon.
Secondary screen
This screen displays the setpoint temperature when the thermostat
is in heating mode. When the thermostat mode is turned OFF, the
thermostat will not use this display. To turn ON or OFF the thermostat
you need to hold center button for 10 seconds, or use Z-Wave
command Basic or Thermostat mode.
Connecting to an external relay
After the device is added to your Z-Wave gateway you will need to link
the thermostat to the device that is going to control the heating. This
is done by using association groups from the thermostat’s root device
(EP0) with Group 3 (ON/OFF Control) towards your actuator device (using
Multichannel or Single channel, based on the controlled device type.
*To set associations in your primary controller/gateway, please refer to
your primary controller/Z-Wave gateway for more information.
Page 3

10. HYSTERESIS (DIF)
You can make changes to the hysteresis in the thermostat via the
parameter. This means that you can changes the hysteresis from
0,3°C up to max 3,0°C. Default is 0,5°C.
SETTING AND REMOVING ASSOCIATIONS
Associations may be assigned and removed via Z-Wave commands.
Please refer to your primary controller/Z-Wave gateway for more
information.
11. CHILD LOCK - LOC
By pressing Left and Right (down and up buttons for 10 seconds,
the thermostat will display LOC. Child lock is now activated, and the
lock icon will be lit up when the display is active. Trying to make
changes from the display is not possible within this modus. Changes
with the Z-Wave controller is still possible. Refer to your primary
controller/gateways user manual on how to change the setpoint.
Child lock is deactivated by pressing Left and Right (down and up)
buttons for 10 seconds, the thermostat will display oPn. The lock
symbol is no longer lit when the display is active, and now you can
make changes using buttons.
12. STANDBY AND MAIN SCREEN
When the thermostat remains untouched for a while, it will
automatically go to standby screen. Due to power saving settings,
while in standby, the display will be turned o. The proximity sensor
will activate the thermostat when proximity is sensed. You can also
activate the thermostat manually by pressing any button.
13. Z-WAVE QR-CODE / DSK
The QR Code is needed when including using S2-Security or
SmartStart. The Z-Wave DSK can be found in the QR-Code and is
located;
1. On the back of wall mount (above the battery compartment).
2. Inside the packaging attached on the note.
3. On the product packaging.
14. SECURITY
The S2 security enhances Z-Wave Plus with an additional layer of AES
128-bit encryption of the wireless Z-Wave communication to prevent
hacking and man-in-middle attacks on the home network. The Heatit
Z-Temp2 supports S2 and has a Z-Wave DSK QR-Code label that may
be used when the module is added to the Z-Wave home network.
The primary controller will ask for a 5-digit Code, which can be found
underneath the QR-Code. The primary controller will then ask you to
conrm the rest of the code that is contained in the QR-Code.
15. NODE INFORMATION FRAME
The node information frame is the business card of a Z-Wave device.
It contains information about the device type and its technical
features. The add and remove procedure of the device is conrmed
by sending out a node information frame. Besides this, it may
be necessary for certain network operations to send out a node
information frame.
16. ASSOCIATIONS
Z-Wave devices interact with other Z-Wave devices. The relationship
between one device controlling another device is called an
association. In order to control a subordinate device, the controlling
device needs to maintain a list of devices that will receive controlling
commands. These lists are called ”Association Groups”. They are always
related to the specic event triggered (e.g., sensor reports). In case
the event is triggered, all devices stored in the respective association
group will receive a joint wireless command.
ASSOCIATION GROUPS
ROOT DEVICE THE MAIN THERMOSTAT DEVICE
Group 1
Lifeline
Group 2
Temperature Report
Group 3
ON/OFF Control
Lifeline. (Normally used by the Z-Wave
Controller) Sends:
- Battery Report (sent when battery runs low).
- Notication Report (sent rst time power on).
- Device Reset Locally Notication (sent if device
is reset).
- Indicator Report
- Thermostat Mode Report (sent when mode
changed from panel).
- Thermostat Setpoint Report (sent when
setpoint changed from panel).
- Thermostat Operating State Report (sent when
heating should be active).
- Sensor Multilevel Report (periodical reports).
- Protection Report (childlock activated/
deactived from panel).
Max. nodes in group: 5
Multilevel Sensor Report (internal measured
temperate and measured relative humidity).
Max. nodes in group: 5
Binary Switch Set (normally used to control
external relays).
Sends:
0x00 = OFF
0xFF = ON
Max. nodes in group: 5
17. CONFIGURATION PARAMETERS
Z-Wave products are supposed to work out of the box after inclusion.
Some conguration of a device can alter the functionality to better
serve the user’s needs or unlock further enhanced features.
Parameter 1, Parameter Size 2. Temperature/ Humidity report interval
Used to adjust the time between report interval for Temperature and humidity reports.
VALUE READ-
ONLY
30 to 32 767 0 0 0 30 to 32 767 seconds
Parameter 2, Parameter Size 2. Temperature delta value
VALUE READ-
ONLY
0
5 to 50 0.5 to 5°C
Parameter 3, Parameter Size 2. Humidity delta value
VALUE READ-
ONLY
0
5 to 50 5 to 50%
Parameter 4, Parameter Size 2. Temperature oset settings
Calibrate the internal sensor. NB! To set negative values; 65 535 – desired value + 1.
VALUE READ-
ONLY
-100 to 100 0 0 0 -100 to 100°C
ADVANCED ALTERING
CAPABILITIES
ADVANCED ALTERING
CAPABILITIES
0 0 0
ADVANCED ALTERING
CAPABILITIES
0 0 0
ADVANCED ALTERING
CAPABILITIES
DESCRIPTION
(Default 900)
DESCRIPTION
Reporting temperature based on
change is disabled
(Default 10, 1.0°C)
DESCRIPTION
Reporting temperature based on
change is disabled
(Default 10, 10%)
DESCRIPTION
(Default 0, 0°C)
Page 4

Parameter 5, Parameter Size 2. Humidity oset settings
Osets the measured relative humidity. NB! To set negative values; 65 535 – desired value + 1.
VALUE READ-
ONLY
-100 to 100 0 0 0 -10 to 10%
Parameter 6, Parameter Size 2. Proximity sensor retrigger interval
VALUE READ-
ONLY
2 to 270 0 0 0 2 to 270 seconds
Parameter 7, Parameter Size 2. Proximity sensor Enable / Disable
Choose if proximity sensor is used or not.
VALUE READ-
ONLY
0
1 Enable (Default)
Parameter 8, Parameter Size 2. LED maximum brightness
Adjust the backlight of LCD display.
VALUE READ-
ONLY
0 to 99 0 0 0 0 to 99%
Parameter 9, Parameter Size 2. LED turned on before timeout
Adjust the time from proximity sensor / display touched until display goes to sleep.
VALUE READ-
ONLY
3 to 300 0 0 0 3 to 300 seconds
Parameter 10, Parameter Size 2. Temperature Control Hysteresis
Adjust the delta values for the thermostat to turn on o heating.
VALUE READ-
ONLY
3 to 30 0 0 0 0.3 to 3°C
Parameter 11, Parameter Size 2. Minimum Temperature Limit
Set the mimum temperature limit.
VALUE READ-
ONLY
50 to 400 0 0 0 5 to 40°C
Parameter 12, Parameter Size 2. Maximum Temperature Limit
Set the maximum temperature limit.
VALUE READ-
ONLY
50 to 400 0 0 0 5 to 40°C
Parameter 13, Parameter Size 2. External Relay & Operating State update interval
Set time on how often the devices sends Binary Switch Set and thermostat mode to gateway.
VALUE READ-
ONLY
0
1 to 240 1 to 240 minutes +
ADVANCED ALTERING
CAPABILITIES
ADVANCED ALTERING
CAPABILITIES
ADVANCED ALTERING
CAPABILITIES
0 0 0
ADVANCED ALTERING
CAPABILITIES
ADVANCED ALTERING
CAPABILITIES
ADVANCED ALTERING
CAPABILITIES
ADVANCED ALTERING
CAPABILITIES
ADVANCED ALTERING
CAPABILITIES
ADVANCED ALTERING
CAPABILITIES
0 0 0
DESCRIPTION
(Default 0, 0%)
DESCRIPTION
(Default 10, 10 seconds)
DESCRIPTION
Disable
DESCRIPTION
(Default 50, 50%)
DESCRIPTION
(Default 3, 3 seconds)
DESCRIPTION
(Default 5, 0,5°C)
DESCRIPTION
(Default 50, 5°C)
DESCRIPTION
(Default 400, 40°C)
DESCRIPTION
Sends only when
changed (Default)
When changed
Parameter 14, Parameter Size 2. Report when presence is detected
Decides if the thermostat sends temperature when presence is detected.
VALUE READ-
ONLY
0
1 Send temperature
ADVANCED ALTERING
CAPABILITIES
0 0 0
DESCRIPTION
Do not report to
gateway when
presence is detected,
only at interval.
(Default)
report to gateway
when presence is
detected.
18. OPERATING THE DEVICE
No Multi Channel support/ Multichannel support:
Besides the mandatory command classes, Heatit Z-Temp2 has
support for following command classes:
Thermostat Mode
It is possible to change the operating mode of the thermostat by sending
a Thermostat Mode Set command.
Uses the following values;
0x00 = OFF (Thermostat regulation is deactivated)
0x01 = Heating Mode (Thermostat regulation is active)
Thermostat Setpoint Command Class
When a Thermostat Setpoint Set command is received by the root device,
it sets the actual setpoint for heating mode.
Basic Command Class
A Basic Set to the root endpoint will change the thermostat mode.
Uses the following values;
0x00 = OFF (Thermostat regulation is deactivated)
0x01 = Heating Mode (Thermostat regulation is active)
Multilevel Sensor Report
The device sends Multilevel Sensor Reports to indicate measured
temperature and relative humidity. The device will send a humidity and
temperature report when powered on after a powerloss.
USE CASE SENSOR TYPE SIZE SCALE PRECISION
Sends temperature report
from internal
sensor
Sends relative
humidity
report from
internal sensor
Temperature(version 1)
= 0x01
Relative humidity (version 2)
= 0x05
2Byte = 0x02 Celsius (°C)
= 0x00
2Byte = 0x02 Percentage
value (%)
=0x00
1 decimal
= 0x01
1 decimal
= 0x01
Notication Command Class
When the device is turned back on after a power outage (insearted
fresh batteries), the device sends a notication command to indicate
that the device is back in idle state. The Device will also send a
humidity report and temperature report when powered back on.
EVENT TYPE EVENT LENGTH
Power On (OxFF) Power maneg-
ment (0x08)
Power has been
applied (0x01)
0x00
Page 5

19. SUPPORTED COMMAND CLASSES
The following table lists all Command Classes supported by the Z-Wave
Device. The device supports both S0, S2 Authenticated security and S2
Unauthenticated security.
INSECURE
INCLUSION
COMMAND_CLASS_ZWAVEPLUS_INFO_V2 Yes Yes Yes
COMMAND_CLASS_ASSOCIATION_V2 Yes Yes
COMMAND_CLASS_MULTI_CHANNEL_
ASSOCIATION_V2
COMMAND_CLASS_ASSOCIATION_GRP_
INFO_V3
COMMAND_CLASS_TRANSPORT_
SERVICE_V2
COMMAND_CLASS_VERSION_V3 Yes Yes
COMMAND_CLASS_MANUFACTURER_
SPECIFIC_V2
COMMAND_CLASS_DEVICE_RESET_
LOCALLY_V1
COMMAND_CLASS_INDICATOR_V3 Yes Yes
COMMAND_CLASS_POWERLEVEL_V1 Yes Yes
COMMAND_CLASS_BATTERY_V1
COMMAND_CLASS_SECURITY_V1 Ye s Yes
COMMAND_CLASS_SECURITY_2_V1 Yes Ye s
COMMAND_CLASS_NOTIFICATION_V8 Yes Yes
COMMAND_CLASS_SUPERVISION_V1
COMMAND_CLASS_FIRMWARE_
UPDATE_MD_V5
COMMAND_CLASS_THERMOSTAT_
MODE_V3
COMMAND_CLASS_THERMOSTAT_SETPOINT_V3
COMMAND_CLASS_THERMOSTAT_
OPERATING_STATE_V1
COMMAND_CLASS_PROTECTION_V1 Yes Yes
COMMAND_CLASS_CONFIGURATION_V4 Yes Yes
COMMAND_CLASS_SENSOR_
MULTILEVEL_V5
COMMAND_CLASS_APPLICATION_
STATUS_V1
Yes
Yes Yes
Yes Yes
Yes
Yes Yes
Yes
Yes
Yes Yes
Yes Yes
Yes Yes
Yes
Yes Yes
Yes
INSECURE
ON SECURE
INCLUSION
Yes
Yes Yes
SECURE
ON
SECURE
INCLUSION
Yes
Yes
Yes
Yes
PRODUCT INFO
26 PRODUCT INFORMATION
Heatit Z-Temp2
FE ATURES
•
Z-Wave thermostat for controlling external relays
•
Internal room sensor
•
Humidity sensor
•
Proximity sensor to turn on the display
•
SmartStart
•
Automatic brightness control
•
Firmware updates (OTA)
•
Weekly program/setback via gateway
•
5 associations
•
Lock mode/child lock
•
Supports encryption modes S0, S2 Authenticated Class,
S2 Unauthenticated Class
This product is a security-enabled Z-Wave Plus product with
encryption. The product must be used with a security-enabled
Z-Wave Controller in order to fully utilize the product.
TECHNICAL DATA
Protocol Z-Wave
Chip Z-Wave 700 chip
Rated voltage 3 x AA batteries (1,5V)
Ambient temperature 0°C to 60°C
Humidity Max. 85% RH
Range RF Min. 40 meters
Hysteresis 0,3°C to 3,0°C (default 0,5°C)
IP Code IP 21
Approvals Z-Wave Plus V2
CE, RED 2014/53/EU, ETSI EN 301 489-1 V2.2.3 (2019-11),
ETSI EN 301 489-3 V2.1.1 (2019-03), ETSI EN 300 220-1
V3.1.1 (2017-02), ETSI EN 300 220-2 V3.2.1 (2018-06),
EN 62479:2010, EN 62368-1:2014+A11:2017, RoHS 2011/65/EU
MAINTENANCE
The device is maintenance-free, but must never be covered.
ART. NO. PRODUCT COLOR Z-WAVE
FREQUENCY
45 126 66 Heatit Z-Temp2 thermostat - battery
99 306 67 Heatit Z-Temp2 thermostat - battery White RAL 9003 RU 869,0MHz
99 306 68 Heatit Z-Temp2 thermostat - battery White RAL 9003 AUS 921,4MHz
White RAL 9003 EU 868,4MHz
Heatit Controls AB can
not be held liable for
typographical errors, other
errors or omittances in
our information.
Product specifications
may change without
further notice.
All electrical installations
must be carried out by a
licensed electrician.
The product must be installed
in accordance with national
building codes and our
installers manual.
Heatit Controls AB l Läkarvägen 4, 454 31 BRASTAD, SWEDEN
Phone: +47 61 18 77 77 l post@heatit.com – www.heatit.com
 Loading...