

Heatilator LOGS-ADI60, ADI60 Log Placement Instructions

Log Assembly: LOGS-ADI60
Model: ADI60
Carefully remove the logs from the packaging. CAUTION: Logs are fragile!
LOG PLACEMENT
INSTRUCTIONS
4
2
6
1
1
5
3
7
PILOT
1
BURNER
BASE PAN
LOG #1 (SRV340-701): Place log #1 in the back on the insert. Locate the legs of the log outside the 3/8"
tabs to either side of the burner. Pull the log forward until the log is stopped by the back edge of the burner. The log
should be centered.
2
2
LOG #2 (SRV340-702): Position log #2 by locating its slot over the tab on the front left of the burner. The
slot in the left end of the log slides into the vertical metal edge in front of the square cut out on the base pan.
1
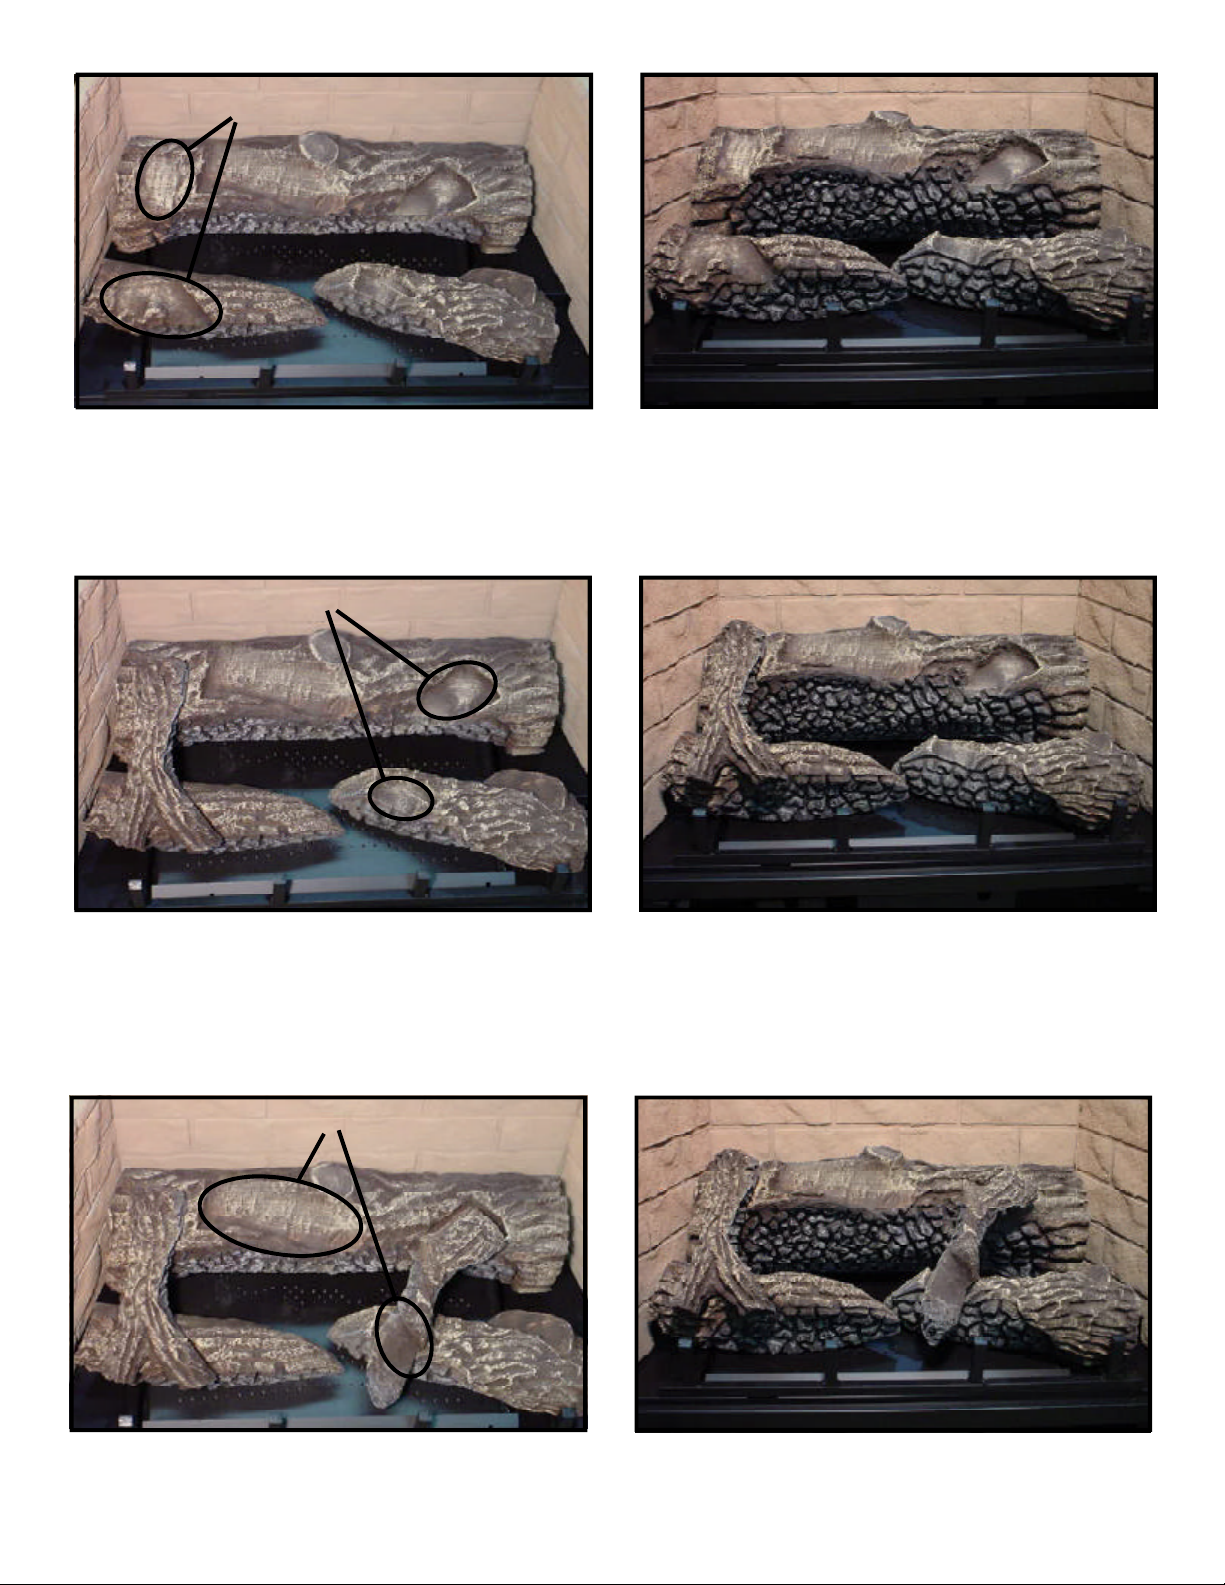
AREAS FOR LOG #4 PLACEMENT
3
3
LOG #3 (SRV340-703): Position log #3 by locating its slot over the tab on the front right of the burner.
Push the right side forward against the right grate tine.
AREAS FOR LOG #5 PLACEMENT
4
LOG #4 (SRV340-704): Place log #4 across log #1 and log #2 in the grooved out areas as shown.
AREAS FOR LOG #6 PLACEMENT
4
5 5
LOG #5 (SRV340-706): Place log #5 across log #1 and log # 3. The notch in the bottom of the log sets
on the carved out edge on top of log #3. The back of the log sits in the grooved out area in log #1.
2
 Loading...