

Heatilator LOGS-4236, LOGS-4842 Instructions Manual
Log Set Assembly: LOGS-4236, LOGS-4842
LOG PLACEMENT INSTRUCTIONS
Models: CNXT4236IT-C/D, CNXT4842IT-C/D, CNXT4236IH-C/D, CNXT4842IH-C/D,
CNXT4236IFTT/H, CNXT4842IFTT/H, CD4236IR-C/D, CD4842IR-C/D
CD4236IFTR, CD4236IFTLR, CD4842IFTR, CD4842IFTLR
CAUTION: Logs are fragile, handle with care.
Log A: SRV2208-702
Log B: SRV2208-703
Log C: SRV2208-704
Log D: SRV2208-073 (4236 models)
SRV2211-073 (4842 models)
Log E: SRV2208-705
Log F: SRV2208-706
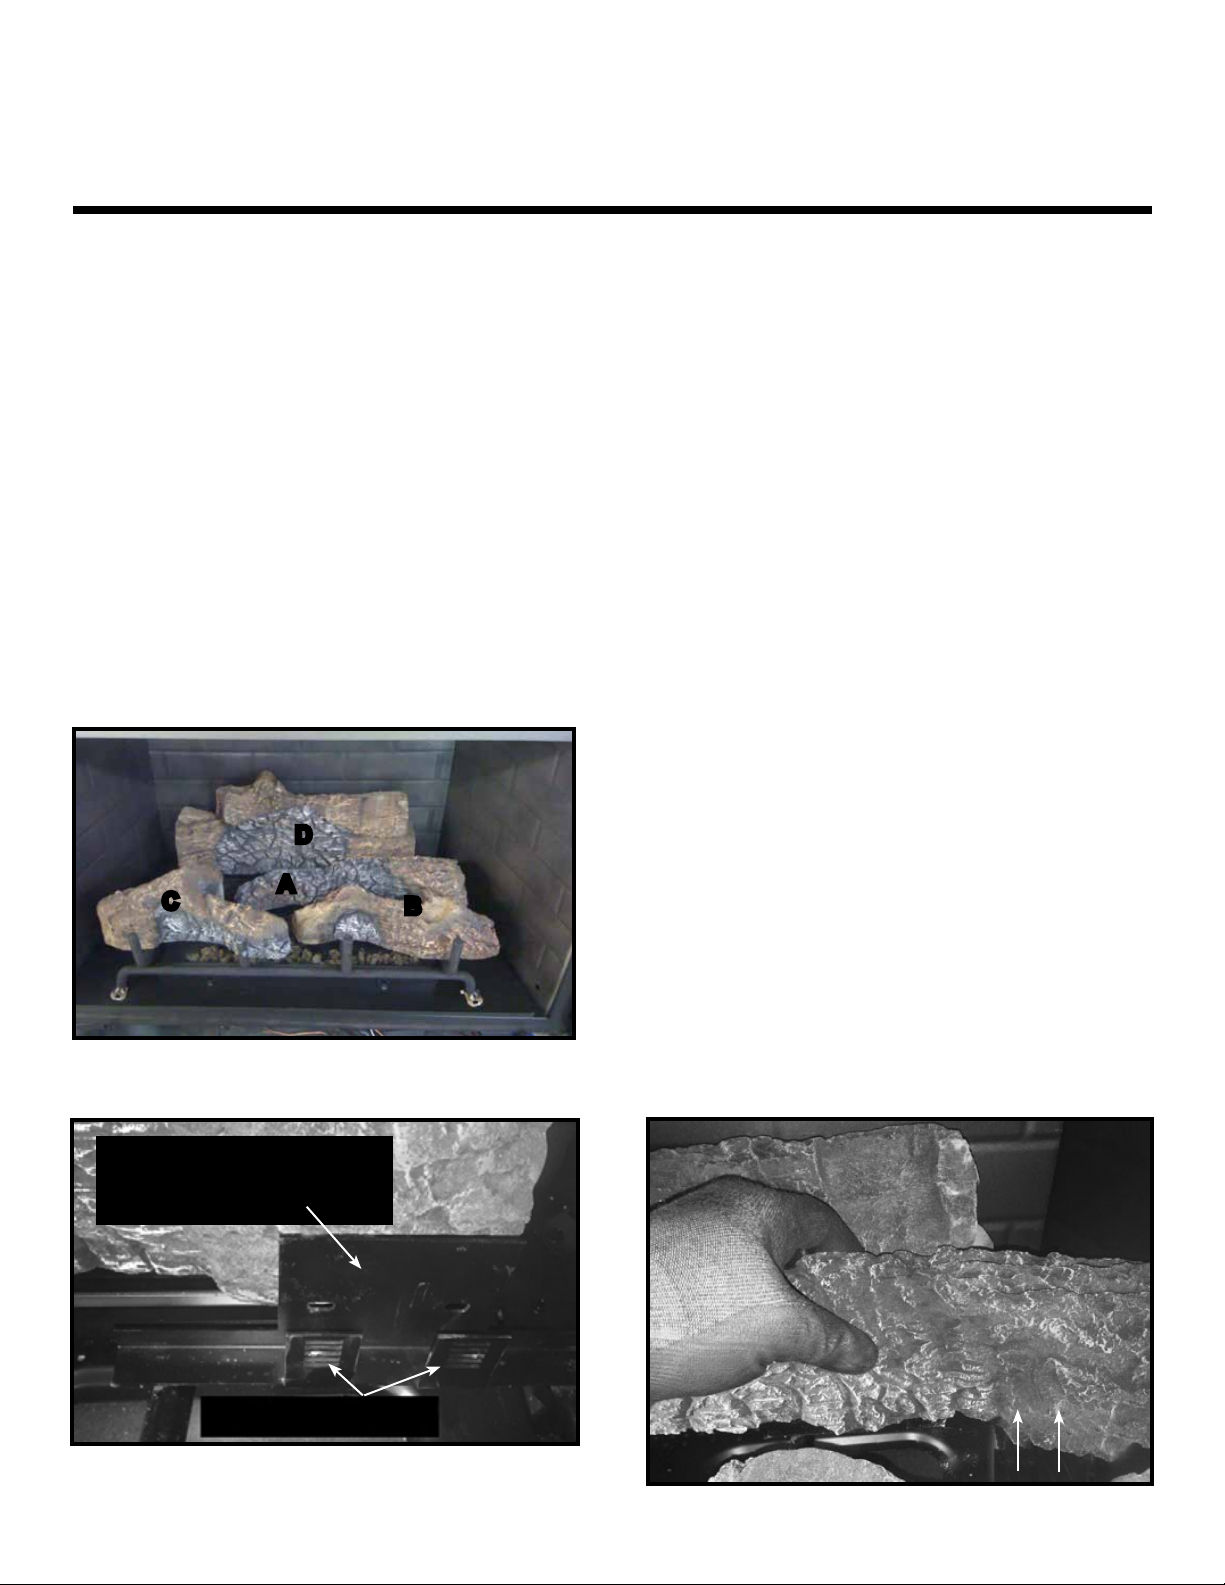
1. Base logs B, C and D have been permanently mounted on the grate assembly. Do not attempt to remove or relocate the
logs.
2. Log A placement (SRV2208-702): Install Log A as shown in Figure 2 and Figure 3. Locate log placement bracket
and placement tabs shown in Figure 2. Align holes in bottom of log with alignment tabs. Place log down on log
placement bracket and push back toward the rear of the rebox. See Figure 3.
D
A
C
Figure 1. Base Logs
LOG PLACEMENT BRACKET
FOR LOG A (SRV2208-702)
ALIGNMENT TABS
B
Figure 2.
Figure 3.
Heatilator • LOGS-4236, LOGS-4842 • 2208-935 Rev. E • 3/18
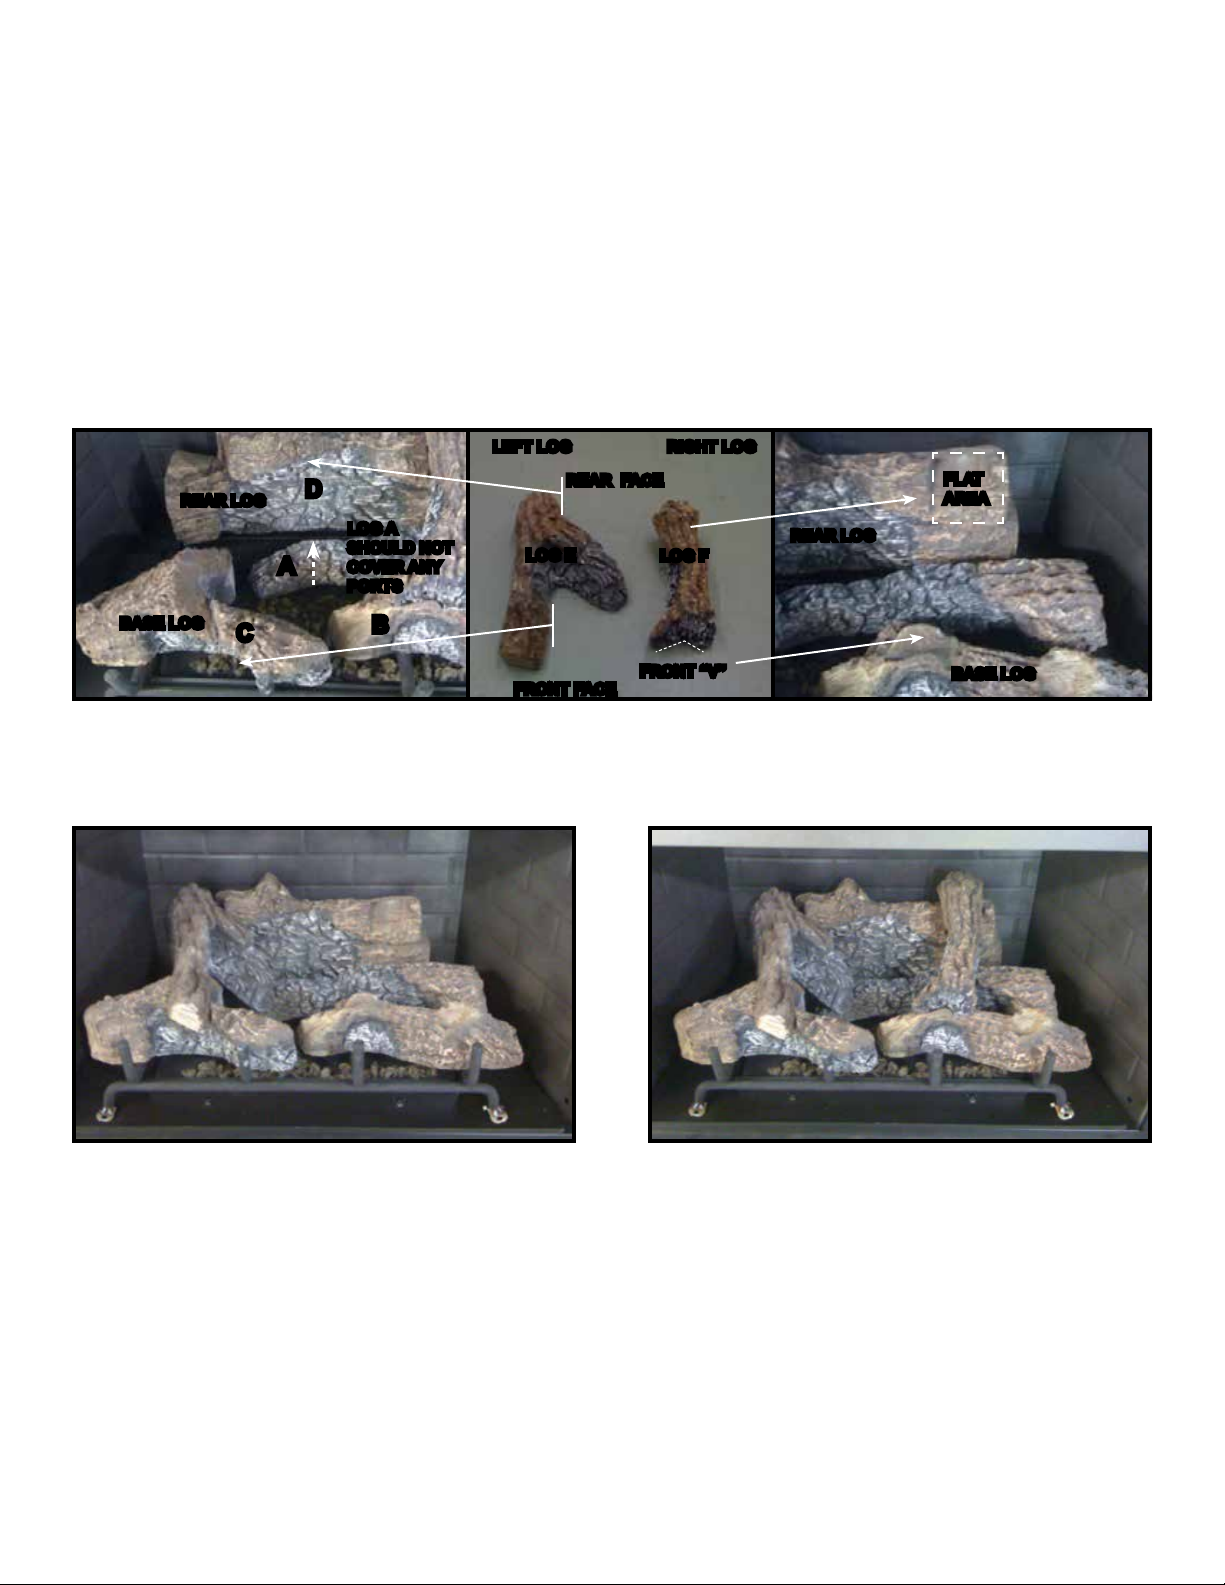
3. Left log placement (SRV2208-705) : Mate rear and front
faces of left log with indentations on rear and base logs
as shown in Figure 4 and Figure 5. Slide the left log
back.
4. Right log placement (SRV2208-706) : Place the right log
by positioning the front “V” of the log on the indentation
on the base log and resting the rear of the log on the
at area of the rear log. See Figure 4 and Figure 6.
5. Figure 6 shows the left and right logs properly placed.
Both left and right logs should sit securely on the rear
and corresponding base logs.
A
D
LOG A
SHOULD NOT
COVER ANY
PORTS
LOG E
REAR LOG
REAR FACE
RIGHT LOGLEFT LOG
FLAT
AREA
REAR LOG
LOG F
BASE LOG
Figure 4. Left Log and Right Log Reference Points
Figure 5. Left Log in Proper Position Figure 6. Left and Right Log in Proper Position
C
B
FRONT FACE
FRONT “V”
BASE LOG
Heatilator • LOGS-4236, LOGS-4842 • 2208-935 Rev. E • 3/18
 Loading...