

Page 1
HOM rev. new Heathkit Maintenance #1 - Slide Switch Repair
Heathkit of the Month - Extra #1:
by Bob Eckweiler, AF6C
This introduces a new a new feature of the
Heathkit of the month. Occasionally I may
find a repair technique or such to help get a
kit back into working order when parts are
not easily obtainable. These won’t appear
often but will be added when I find they
might be useful to those working on the kits.
MAINTENANCE
Slide Switch Repair
Featuring the HM-102
HF Power Meter
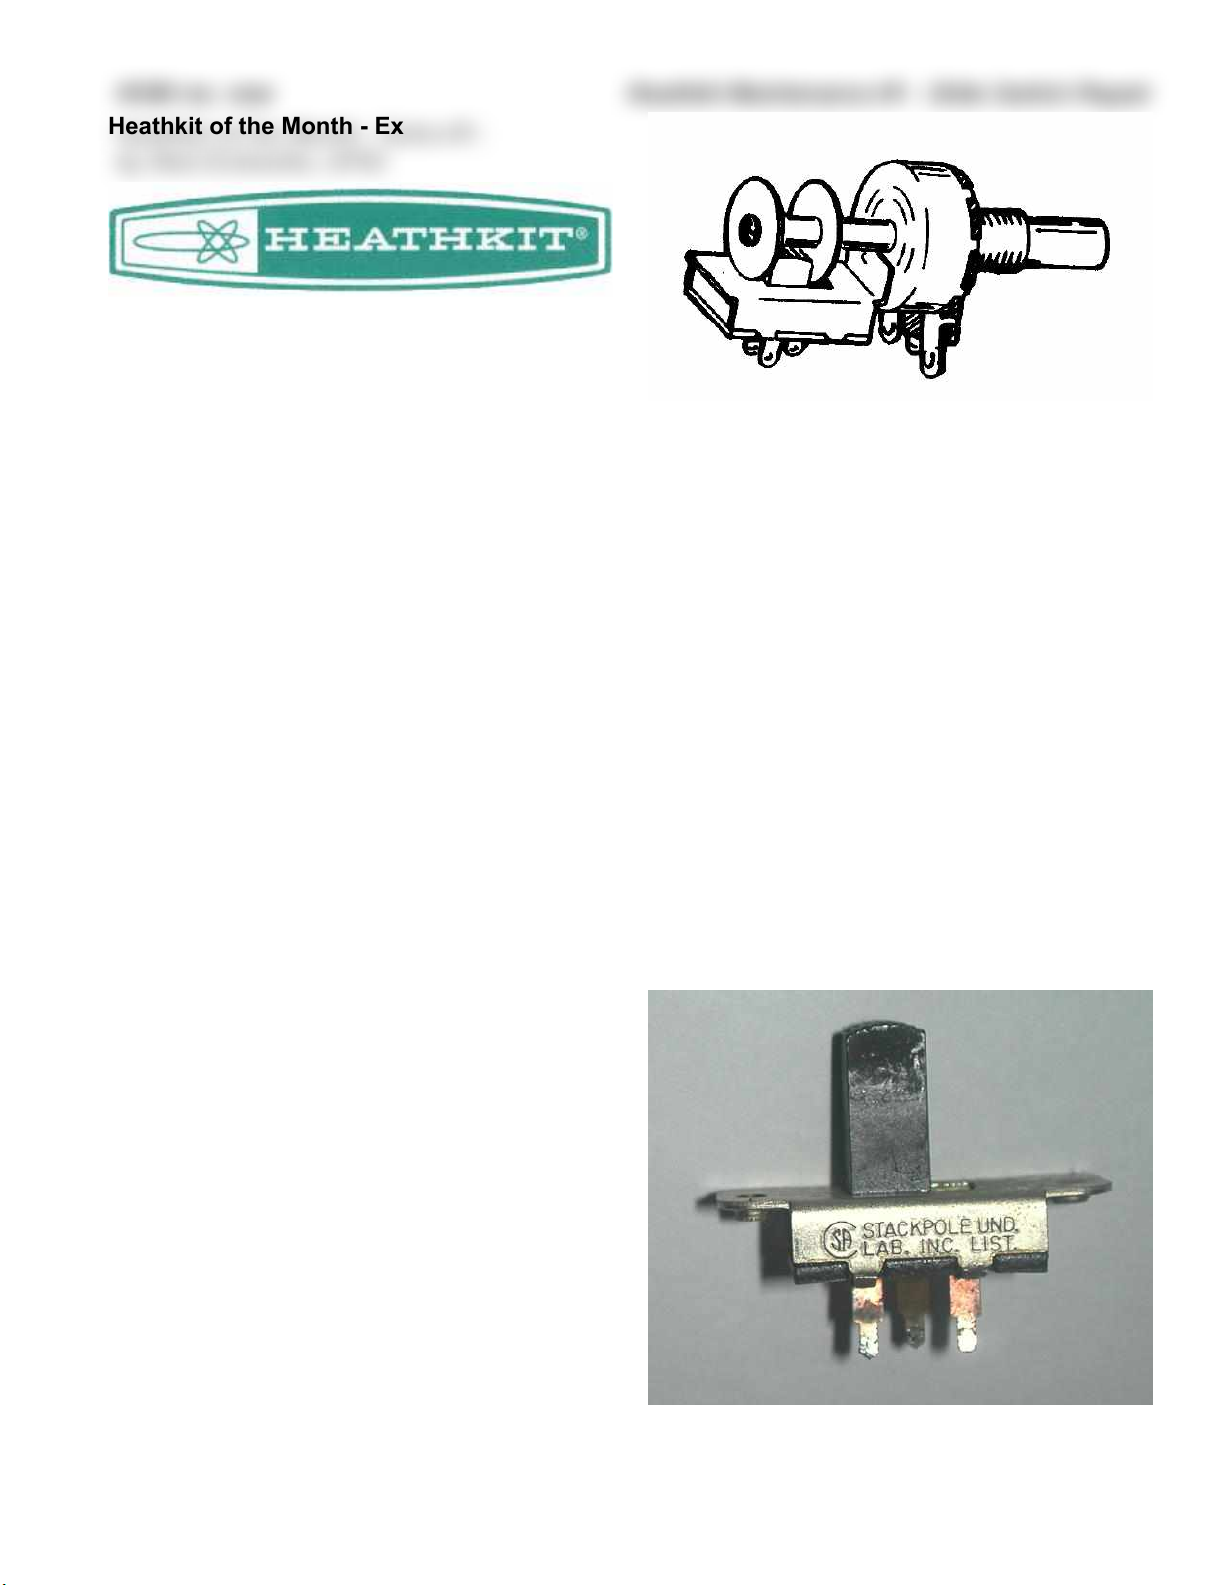
Figure 1: Pot with Integral Slide Switch
Finding a replacement for this pot - switch assembly (Fig. 1) would not be easy. The alternative was to take it apart and see what ailed it.
The switch assembly does not come separate
from the pot, but the fiber switch back plate
can be removed by lifting the four metal tabs
that hold it in place. This is not easy to do.
Introduction:
After servicing a friend’s Heathkit HM-102 that
he picked up at a local swap meet, and that initially looked like a basket case, I was surprised
how well it worked. It calibrated easily and
held the calibration. I thought back to the HM102 that I had acquired recently and was currently using. It was constructed well and appeared to be in a lot better physical condition,
but was not nearly as solid in its performance.
It was time I did something about that.
My HM-102 was disassembled and examined
carefully. The soldering was not in question
though I reheated a few joints, more to make
me feel I was doing something than thinking I
was fixing a problem. After cleaning the pots
and switches with a small and careful application of De-Ox-ID cleaner I check the pots, rotary switch and slide switches with an ohmmeter. The pots seemed fine as did the rotary
switch. But the first slide switch, which was located on the SWR sensitivity pot, and activated
by pulling the knob out, showed erratic resistance. Sometimes it was near zero, sometimes
it was high and sometimes it was beyond the
scale my digital ohmmeter was set on. The
switch had a problem.
With some trepidation I was able to bend the
tabs up carefully and totally disassemble the
switch. Once the tabs were lifted it was obvious
there was at least one spring underneath so extra care was taken not to have pieces shoot everywhere. The switch was then cleaned, lubricated and reassembled. The contact surfaces on
this switch were badly tarnished and almost
black, but they cleaned up to shiny silver with a
cotton swab and some 91% alcohol. When I was
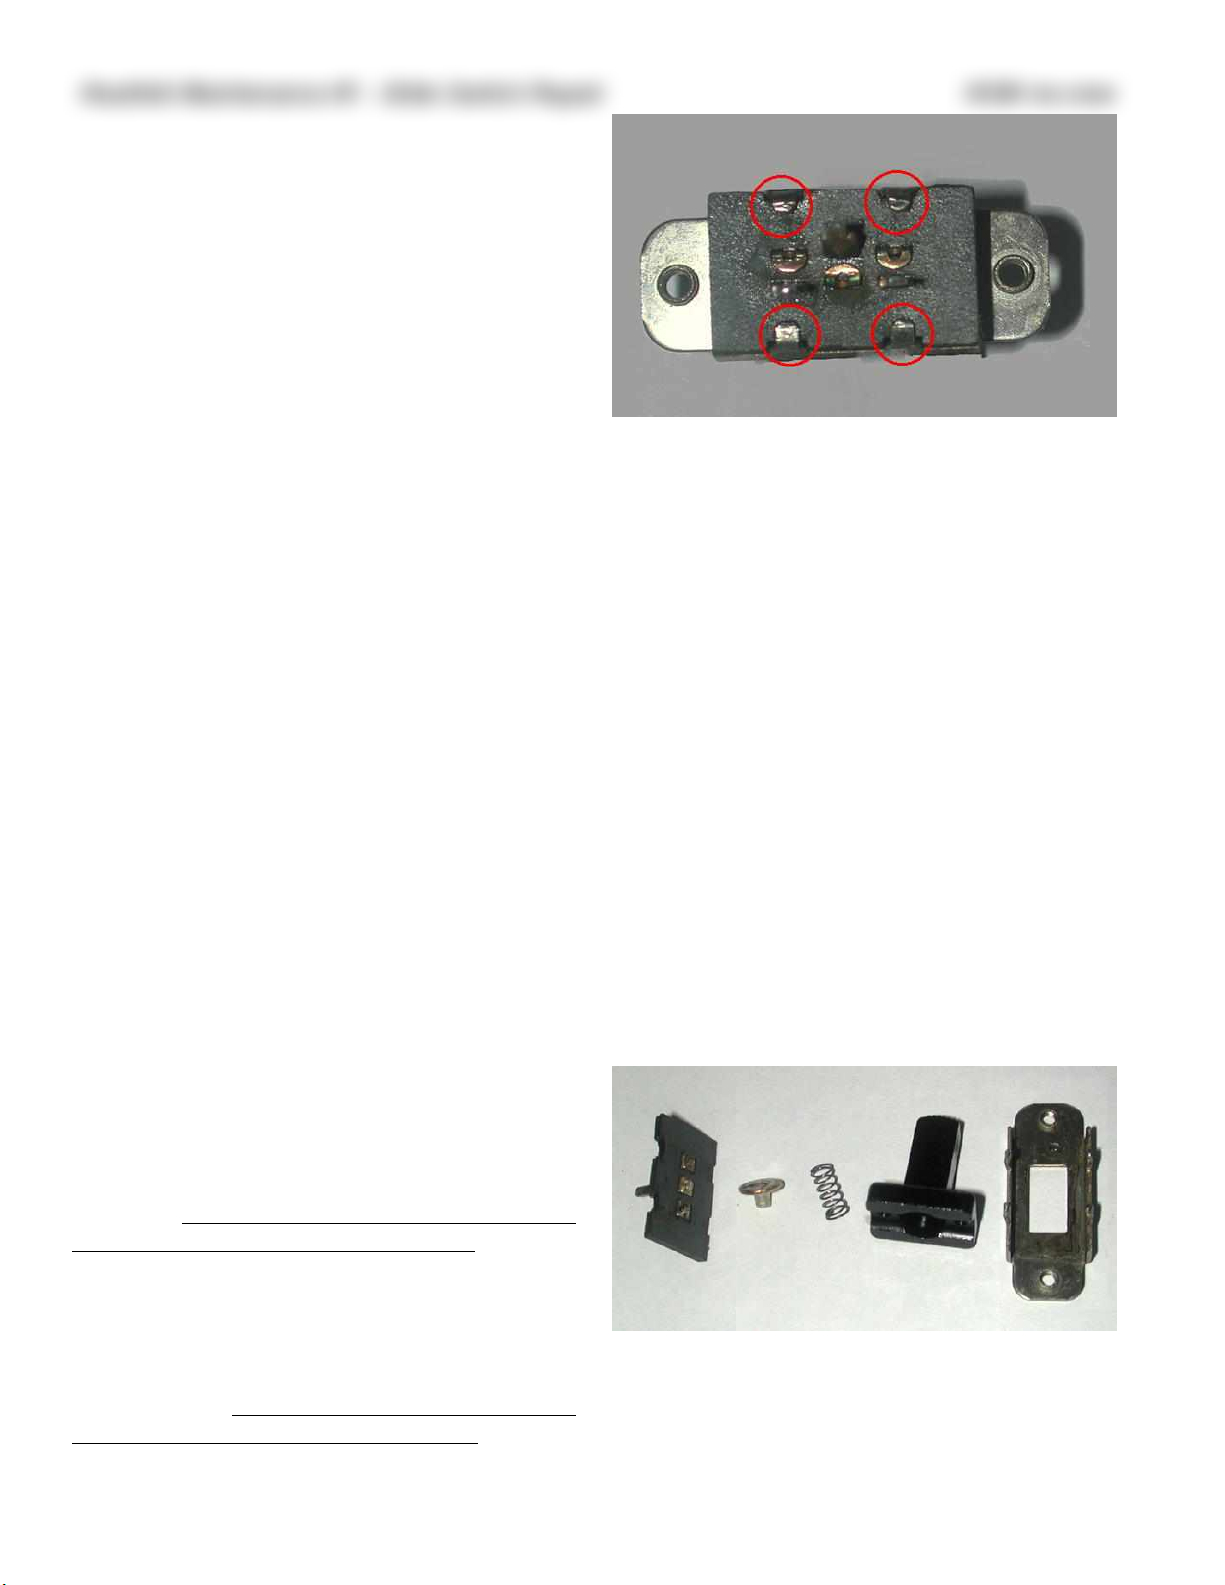
Figure 2: Slide Switch from Circuit Board
Copyright 2014, R. Eckweiler & OCARC, Inc. Page 1 of 4
Page 2
Heathkit Maintenance #1 - Slide Switch Repair HOM rev.new
all done I cussed myself because I should have
documented the process with some pictures.
After reassembly, I tested the HM-102 performance and the SWR section worked as solid
as I could ever wish for. Unfortunately, though,
the Power calibration still remained erratic.
That circuit used a second slide switch. This
one was a different style designed for circuit
board mounting and included a vertically extended slider; however the guts of the switch
appeared identical (Figure 2).
Figure 3: Slide Switch Showing the Tabs
Here are step by step instructions for disassembling, cleaning and reassembling the
switch:
Items You Will Need:
• Needle nose pliers
• Medium weight wire cutters, Preferably an
old pair
• A 7/8” or 19 mm socket (or something similar) to hold the switch during assembly.
• Cotton Swabs
• Palmolive, Dawn or other dish detergent.
• 91% isopropyl alcohol or other solvent.
• White lithium grease (GC 19-2302)
• De-Ox-Id contact cleaner and lubricant.
Disassembly:
It is assumed you have removed the slide
switch to be repaired. However if the switch is
easily accessible when mounted you may leave
it mounted. When the initial switch was serviced the pot assembly remained mounted. This
can make the switch more stable while disassembling. Be sure to note the orientation of the
switch terminals prior to disassembly.
damaging the metal frame or fiber plate you
will need to get something under the tab and
lift it slightly. I’ve never had luck using needle
nose pliers, but an old pair of wire cutters can
be used to get under the tab. You don’t want to
mar the metal frame so it is wise to protect the
other cutter blade; I used a thin piece of brass
shim stock. Again just bend the tab up far
enough so you can use needle nose pliers to
complete the bending. Keep pressure on the
fiber plate so it doesn’t come off and allow the
spring and contact to fly off.
Now gently remove the fiber plate, contact and
spring. Also remove the plastic slider. When
you are done you should have five parts as
listed in figure 4.
Cleaning:
Clean the disc contact (figure 5) with the alcohol. It should clean easily to a silver shine - this
If you examine the slide switch you will see
four tabs that are bent over holding the fiber
plate with the terminals to the metal switch
bracket (See Figure 3). These need to be carefully bent up. Caution, excessive bending will
cause the tabs to fatigue and break. Without
Page 2 of 4 Copyright 2014, R. Eckweiler & OCARC, Inc.
Figure 4: Disassembled Slide Switch parts.
Left to right: Fiber plate with terminals
and fixed contacts, disc contact, spring,
plastic slider and metal switch frame.
Page 3

HOM rev. new Heathkit Maintenance #1 - Slide Switch Repair
tergent and water at the sink, and everything
was set aside to dry (Figure 6)
Lubrication and Reassembly:
Use something that will hold the metal frame
above the table; I used a 19 mm socket wrench.
Place the metal frame atop the socket with the
tabs pointed up. Apply a small film of lithium
grease to the frame’s channel where the plastic
slide moves back and forth using a cotton swab.
Place the plastic slide in the frame (it can go
either way) and slide it back and forth a few
times to disperse the grease; then gently wipe
away any excess grease. (figure 7).
Figure 5: The silver disc contact prior to
cleaning. The earlier switch contact was
much dirtier to the point of being covered
with black tarnish. However this had
enough dirt to cause switch failure.
part is silver plated so don’t use anything abrasive. If your disc shows signs of burning, polish
it gently; the HM-102 puts minimal current
through the slide switches so this is not a problem. That may not be true for switches in other
Heathkits. Similarly, clean the contacts on the
fiber board. These too should clean up to a silvery shine.
The spring in both the switches was clean; I left
them alone. However, I did clean all the lubricant off the metal switch frame, again with the
alcohol. The plastic slider was washed with de-
Figure 7: Frame with slide inserted
Insert the spring into the well in the plastic
slider (figure 8) and gently place the contact
Figure 6: Cleaned Parts:
Ready for lubrication and assembly.
Copyright 2014, R. Eckweiler & OCARC, Inc. Page 3 of 4
Figure 8: Slide with spring inserted
Page 4

This article originally appeared in the
September 2014 issue of RF, the newsletter of
the Orange County Amateur Radio Club - W6ZE.
Remember, if you are getting rid of any old
Heathkit Manuals or Catalogs, please pass
them along to me for my research.
Thanks - AF6C
Heathkit Maintenance #1 - Slide Switch Repair HOM rev.new
tance scale and check between each terminal
and the frame. They should all read infinity.
Then check from the center terminal to each of
the end contacts, one at a time, with the ohmmeter on a low-resistance scale. In one position
the resistance should be close to zero and in the
other infinity. The resistances should hold
steady. Figure 10 shows the repaired switch reassembled and ready to be reinstalled.
Summary:
Figure 9: Slide with spring and disc
contact inserted
disk onto the end of the spring (figure 9). Try
not to touch the contact surface, and clean with
some alcohol and a cotton swap if you do.
Now, place a tiny drop of De-Ox-Id or other
quality contact lubricant* on the contact disk.
Spread the contact cleaner evenly on the surface; I used a thin strip of plain white paper. Rotate the disc contact so that the previous wear, if
noticeable, is off from the axis of slide motion.
This can be seen in figure 9 with the previous
wear marks now almost vertical.
Finally, the fiber plate is installed. Depending on
the switch, make sure the solder contacts are
oriented as they were prior to the switch being
taken apart. Bend each of the four tabs back
down to the 45° position. This should hold the
fiber plate in place, though it might be loose.
Continue bending each of the tabs down further
to about 30° to horizontal. This should be close
to where the tabs were prior to disassembly. Do
not be tempted to bent the tabs to horizontal.
As Heathkits get older, finding replacement
parts is going to become harder and repairing
the kits are going to take more ingenuity.
While this repair is not “rocket science”, perhaps
it will encourage others to attempt the repair instead of living with an annoying problem. My
HM-102 has worked flawlessly since the
switches were disassembled, cleaned and lubricated. Regular contact cleaner, such as De-Ox-Id
didn’t, by itself, return the switch to the solid
operational condition one would want.
From time to time I may add to the Extra series
of Heathkit articles as I find solutions to problems encountered restoring or fixing a kit or
particular part.
73, from AF6C
Checking the Finished Switch
The first thing you want to do is to be sure the
switch slides freely. It should unless you bent
the metal switch frame or pressed the tabs down
too far.
Now it is time to check the switch electrically,
Use leads with an alligator clip on each end so
you don’t get false readings from poor probe
contact. First use an ohmmeter on a high resis-
Page 4 of 4 Copyright 2014, R. Eckweiler & OCARC, Inc.
 Loading...