

Page 1
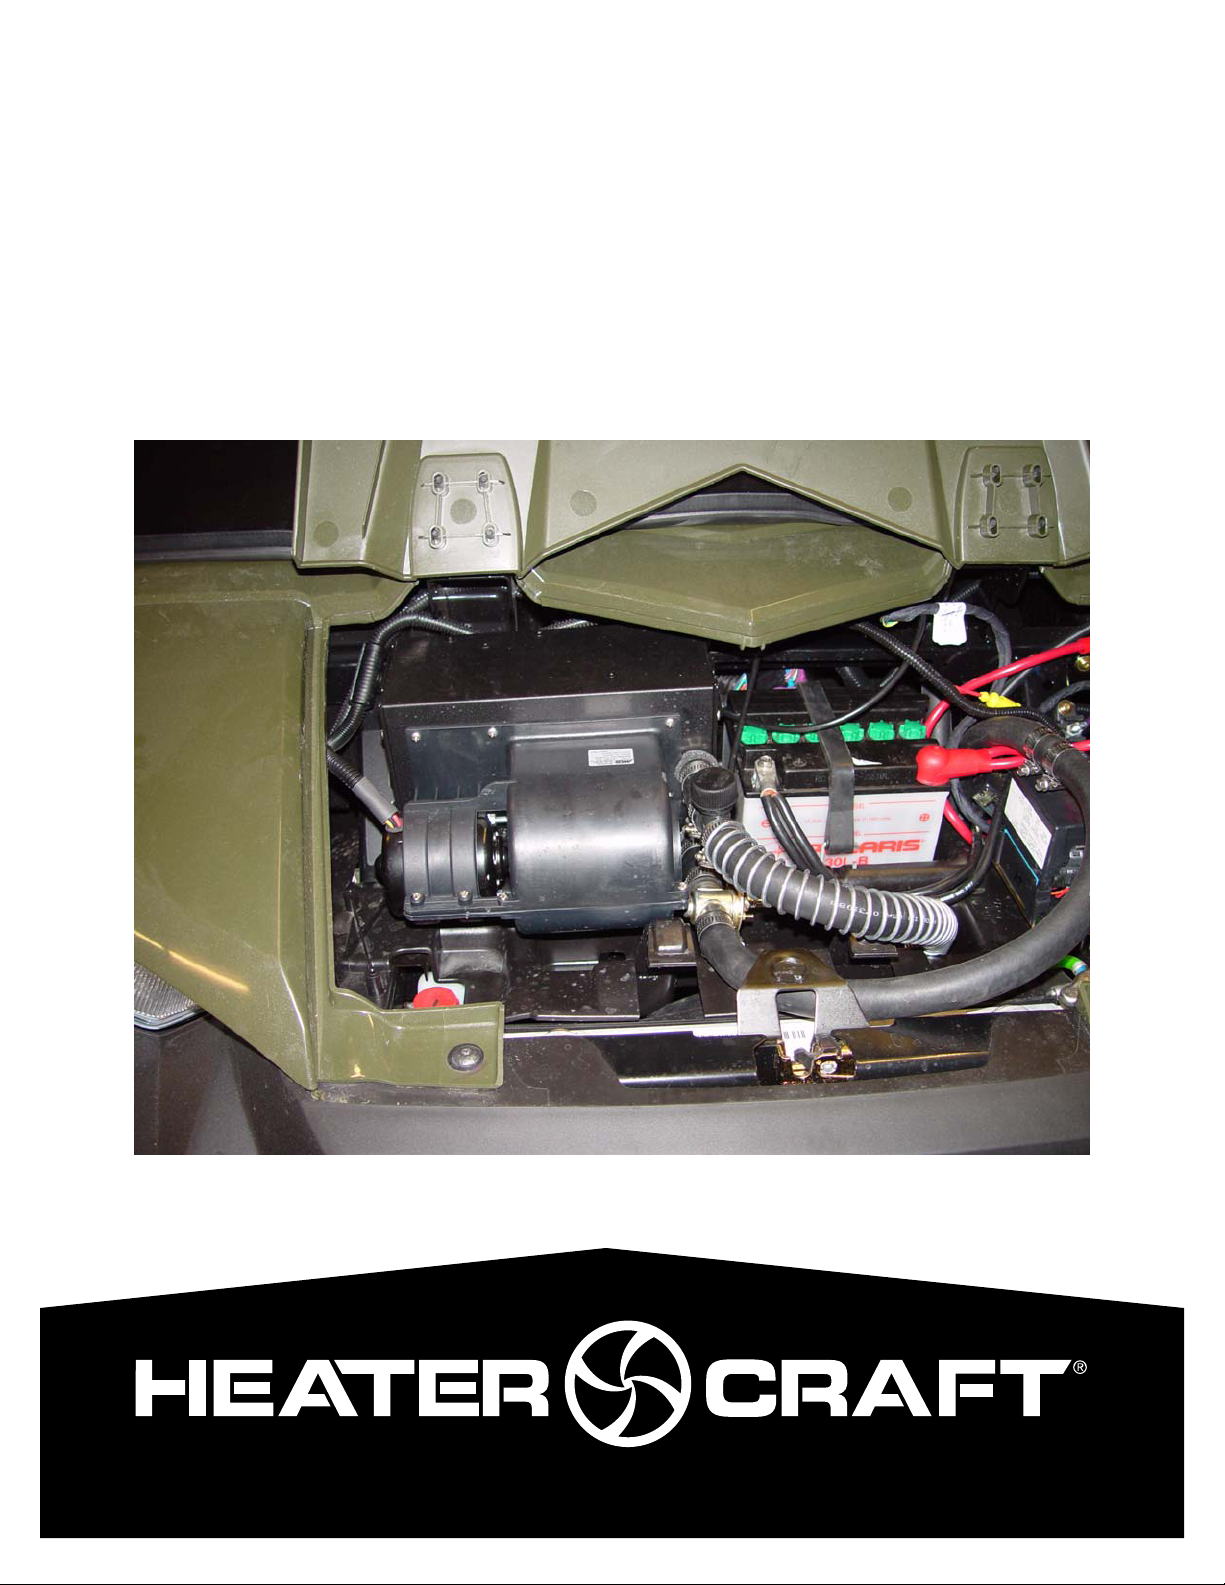
Installation Instructions
Ranger 700/800 Heater System
( Part # 2878137/2878364 )
6672 Boekel Road, Rathdrum | (208) 687-4400 | w ww.heatercraft.com
Page 2

Order of installation for a Complete Enclosure
Always install the Heater System first if possible
NOTE: If installing the Heater System with a windshield that has the Wiper System
mounted on bottom of Windshield there in an optional vent kit available. (The
defrost vent mounts in the center of the dash and the wiper motor could block the
air flow.)
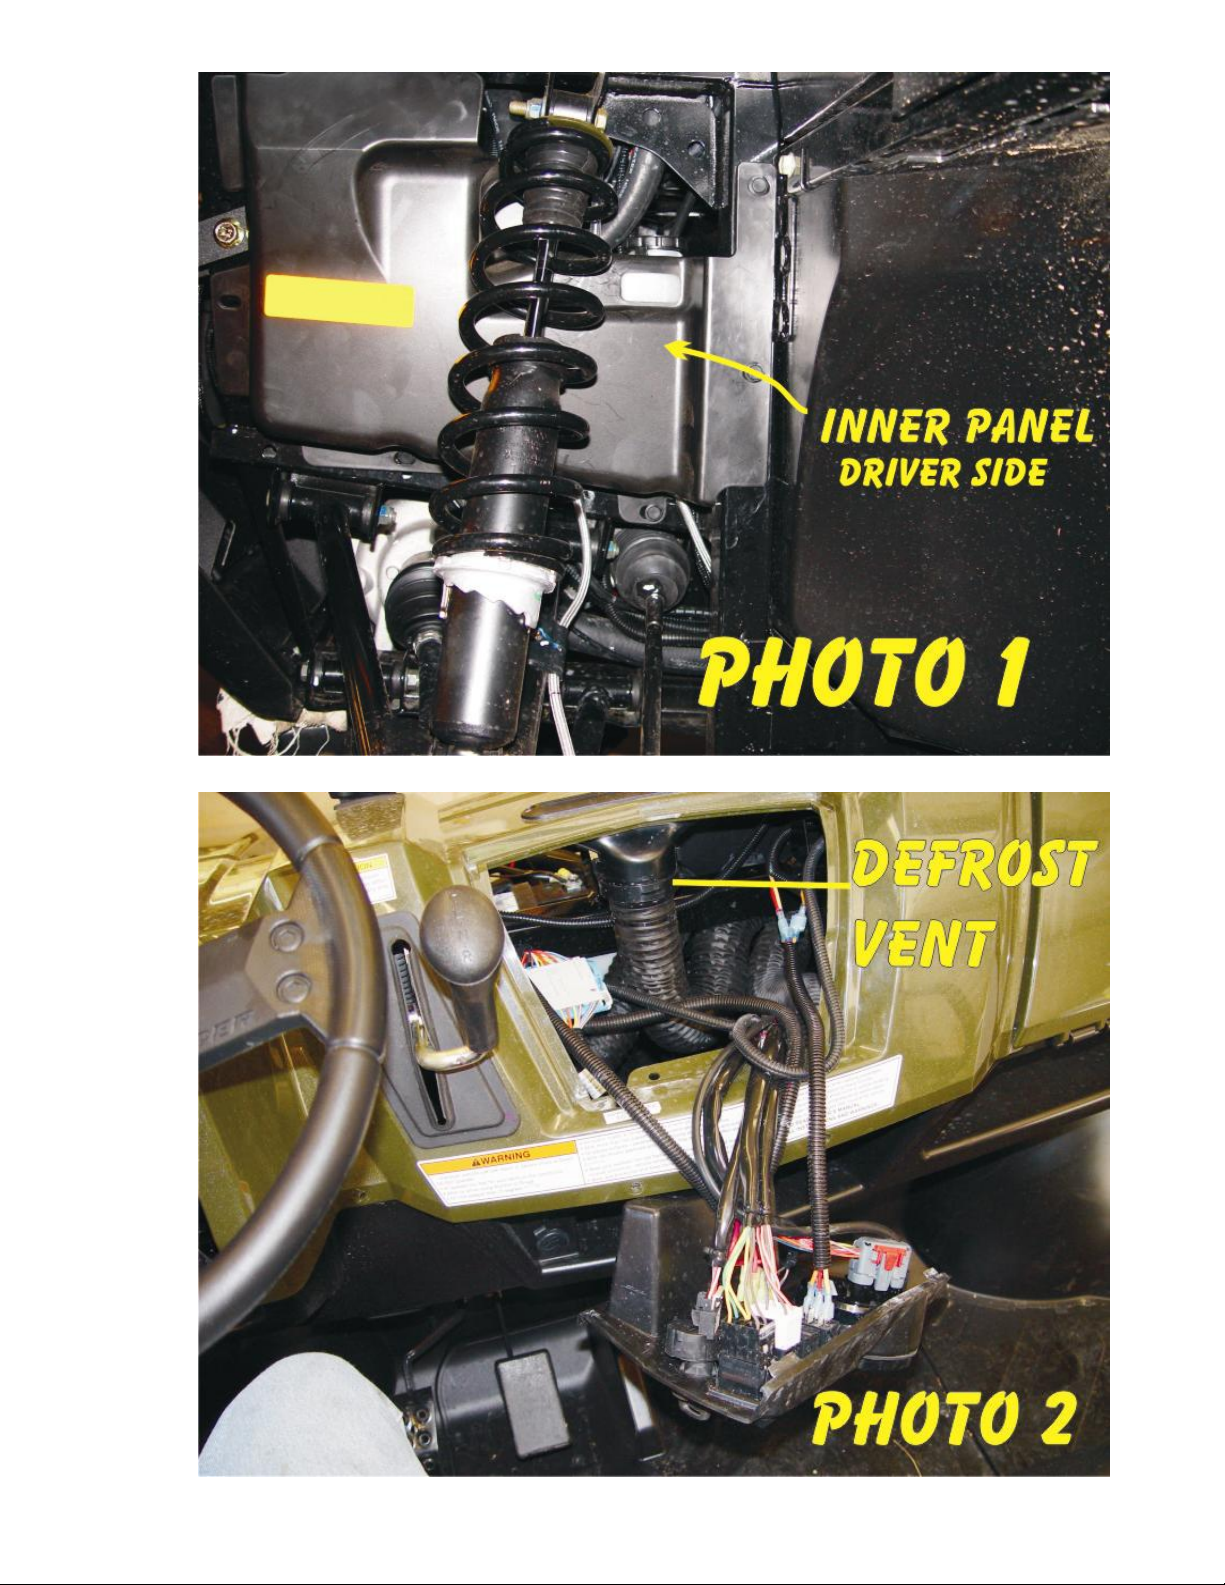
1. Lift and block the vehicle front and remove the driver side front wheel.
Remove the driver side inner wheel well panel. (Photo 1)
2. Remove the center floor pan and seat.
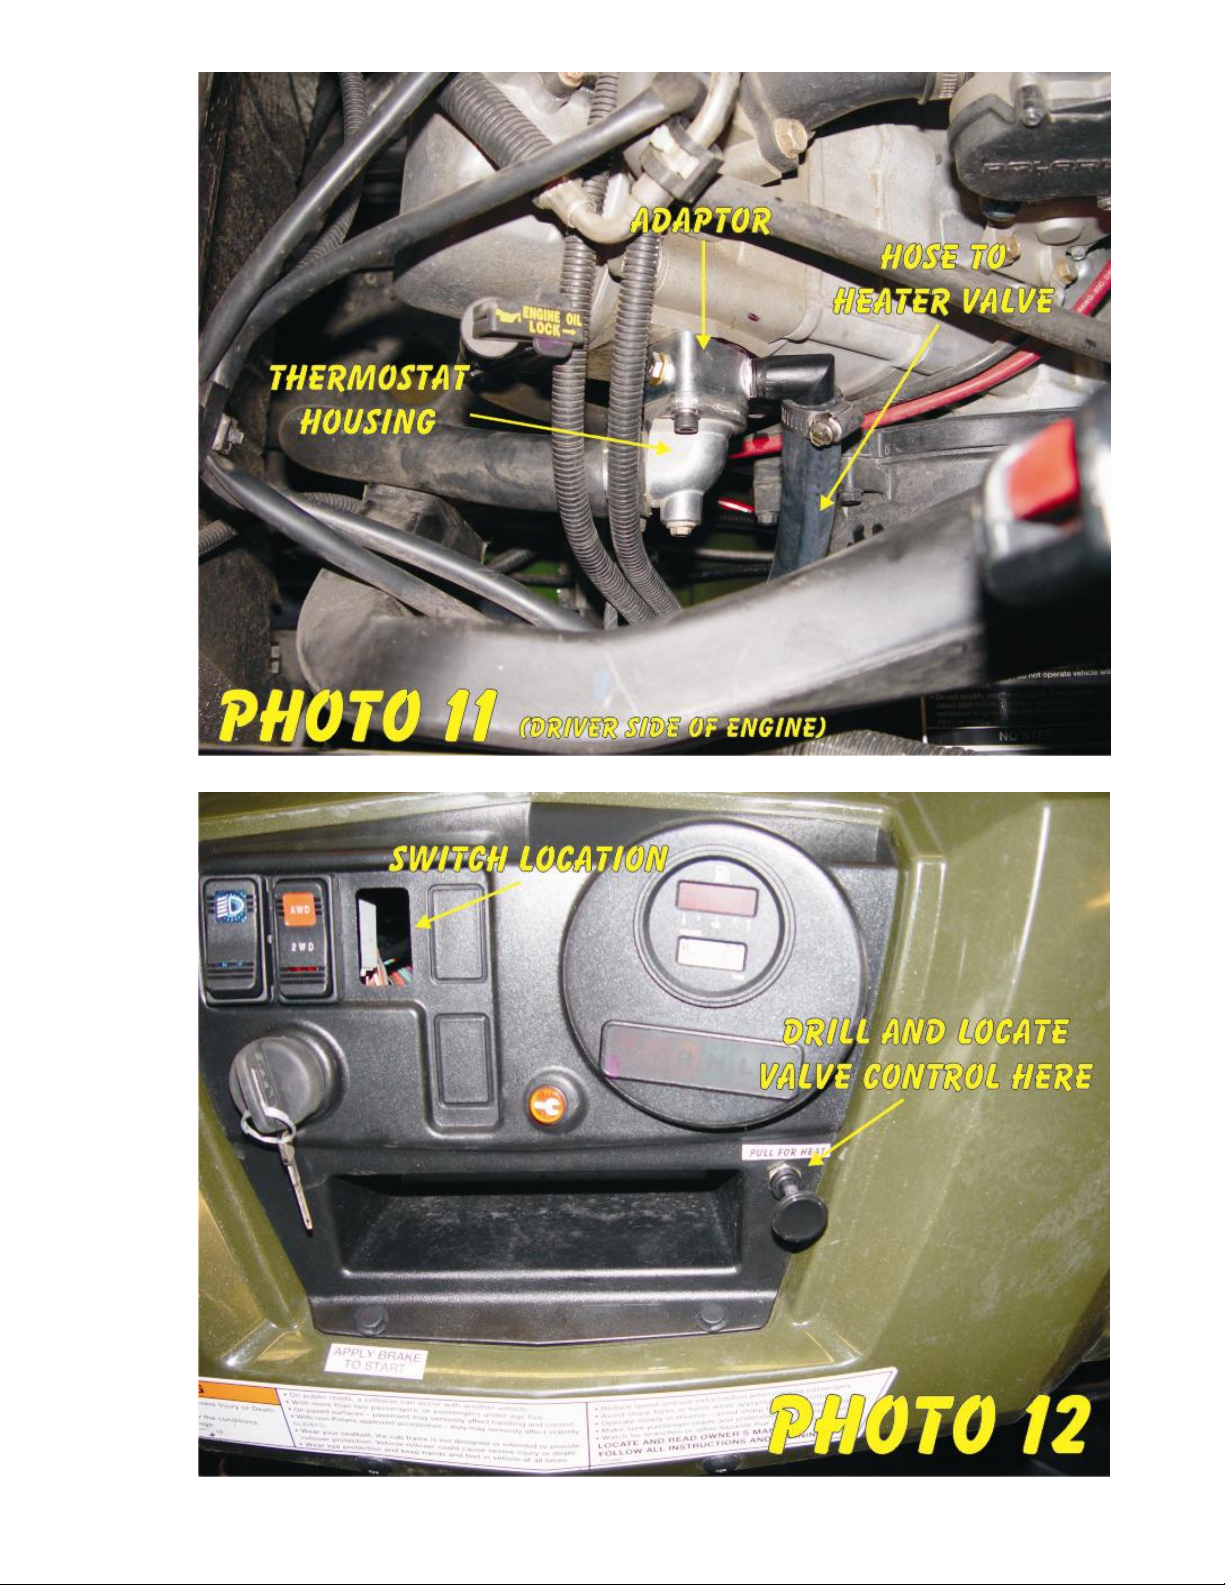
3. Remove the switch blank from the instrument panel and drill a 3/8” hole
for the control cable. (Photo 12) Remove the plastic rivets from the
instrument panel and allow it to hang as shown. (Photo 2)
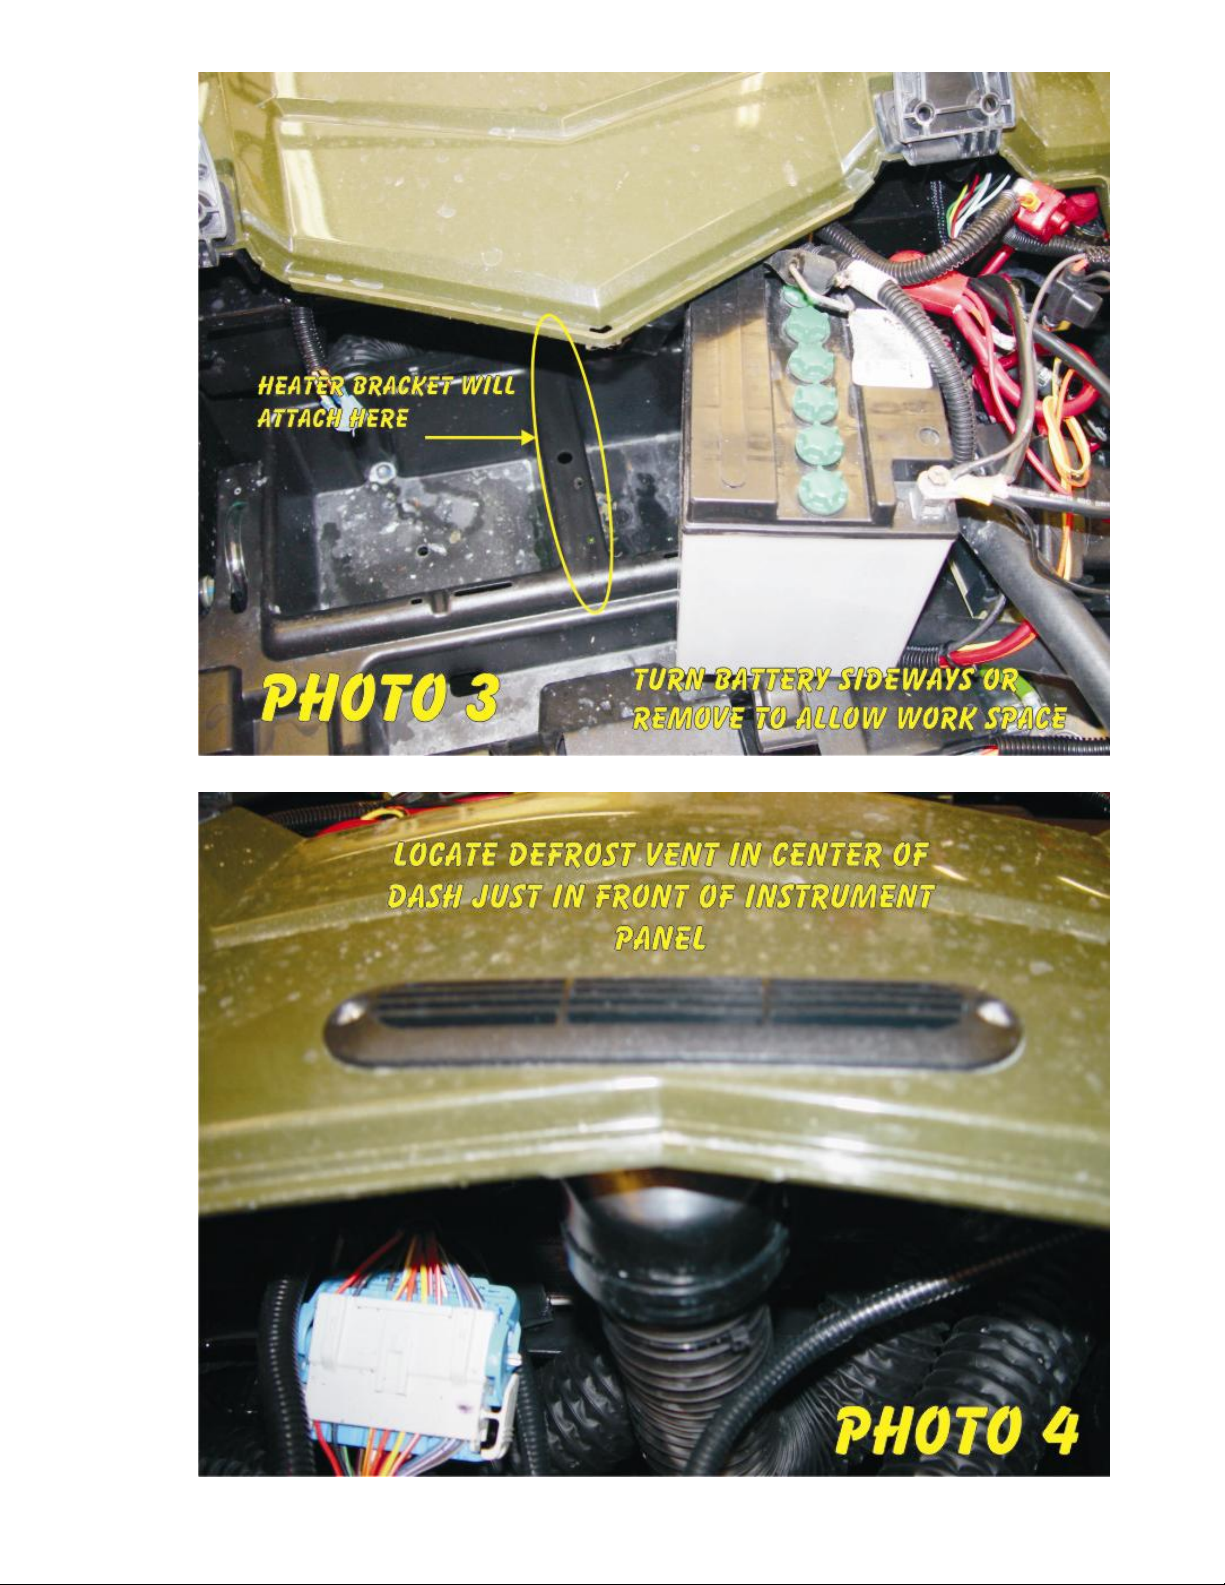
4. Loosen Battery and turn sideways or remove completely to allow extra
work space. (Photo 3)
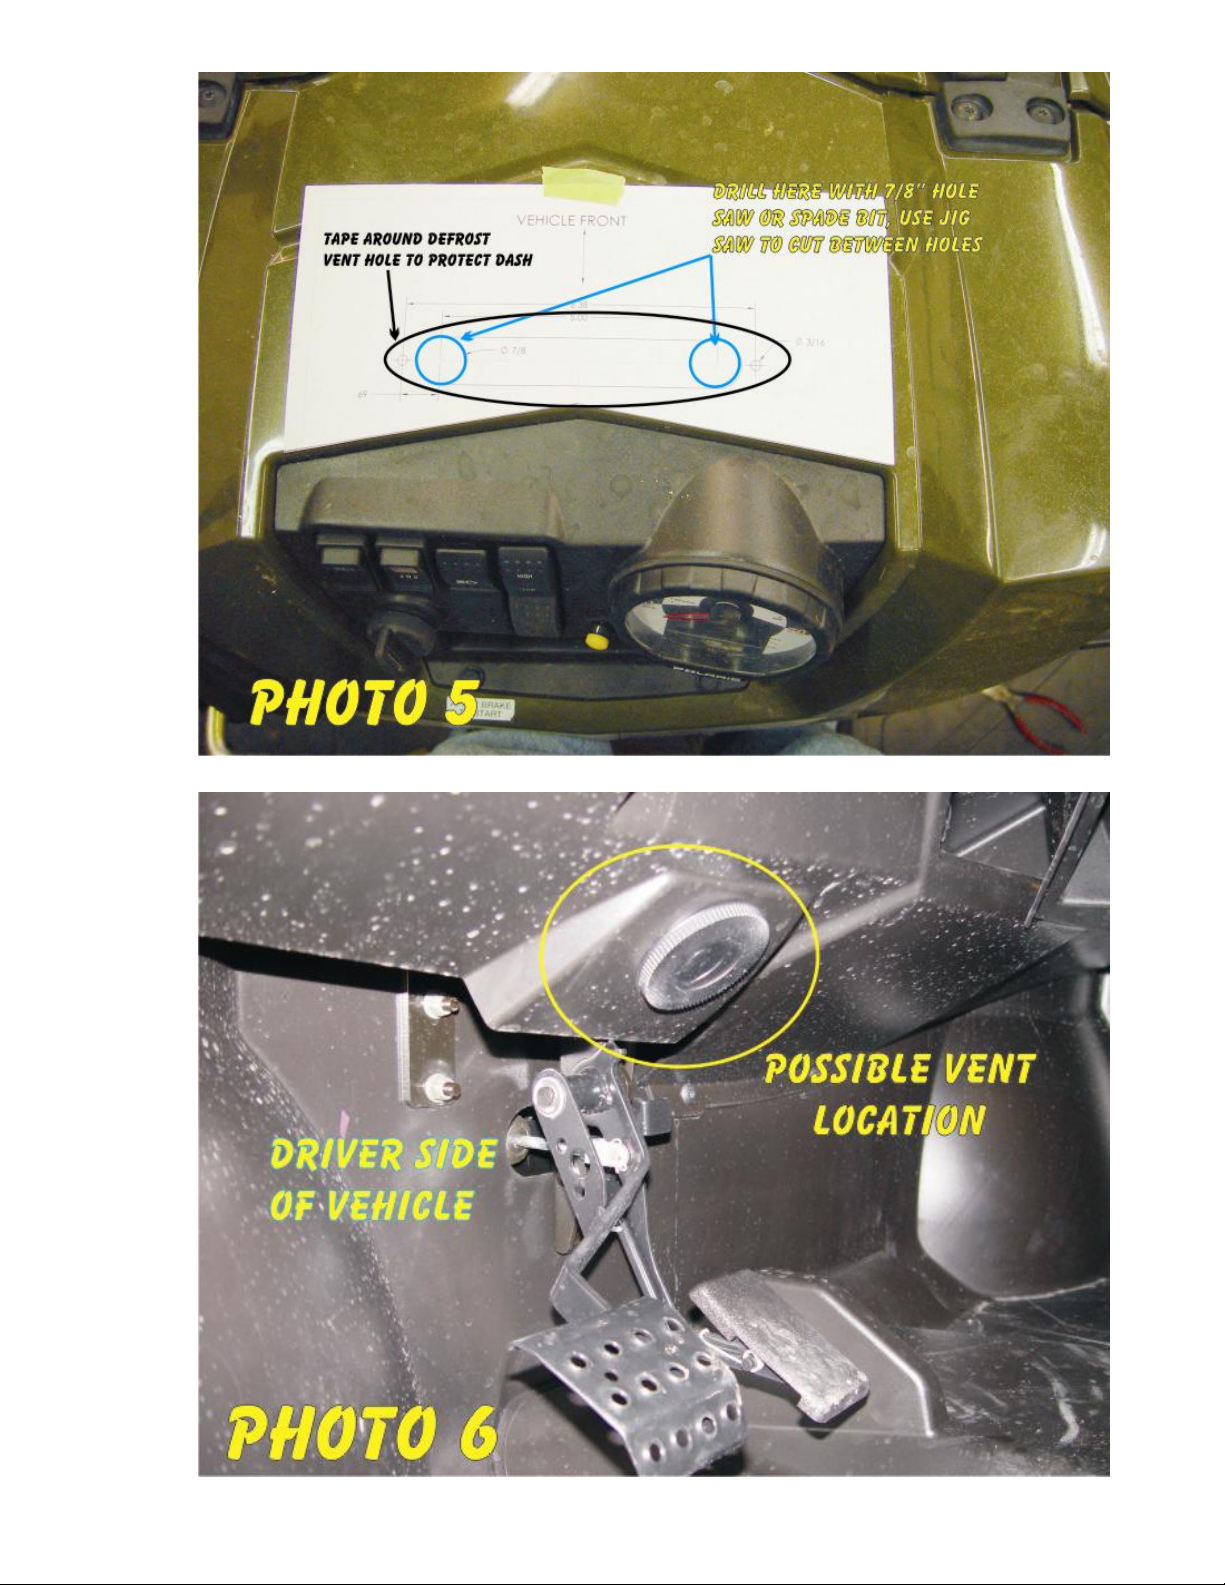
5. Use the template to cut out the dash and install the defrost vent. Tape the
dash area to prevent scuff marks. (Photos 4 & 5) If you are going to
need the accessory vent kit do not install this defrost vent.
6. Use a 2 1/16” or 2 1/8” hole saw to install the (2) 360degree vents where
desired. Photos 6 & 7 show the suggested locations. Wherever you
install them make sure there is adequate room for the vents and duct
hose. Be careful not to damage any wiring under the dash. (Photos 6 &
7)
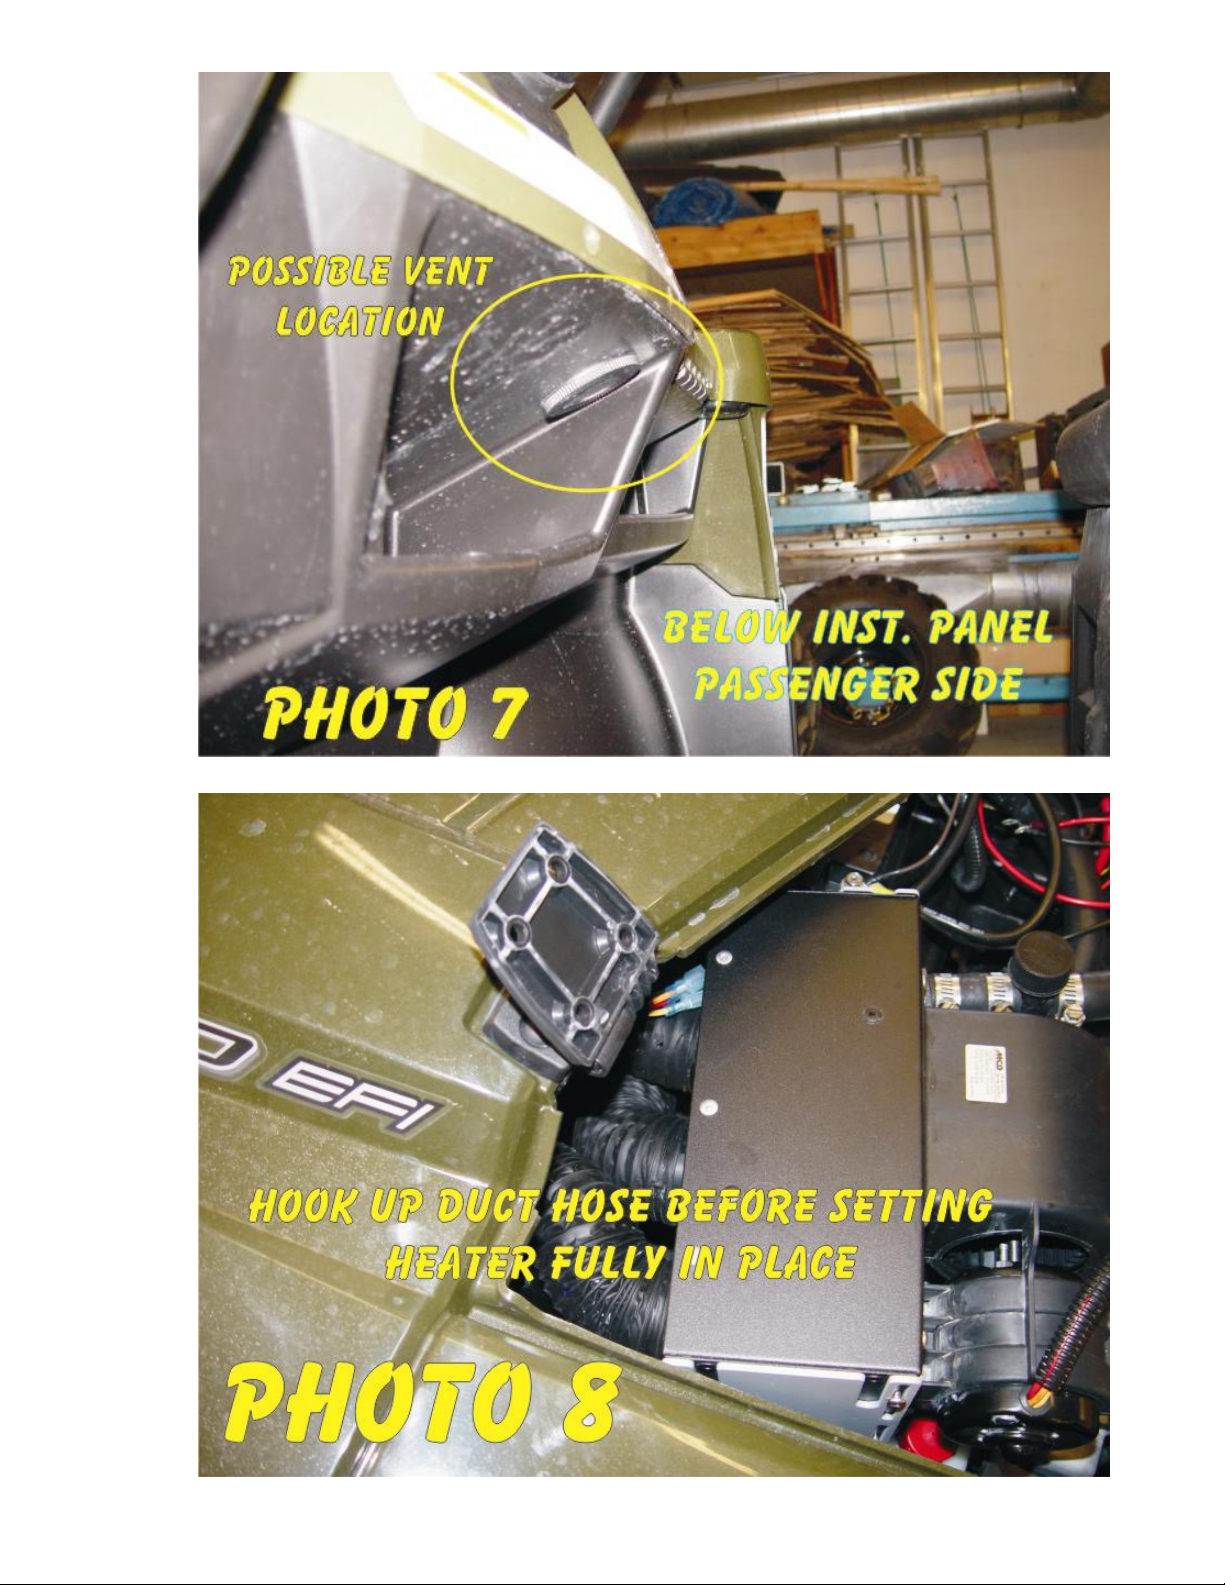
7. NOTE: To position heater, align the passenger side bracket with the
steel dash support and the driver side bracket with the top center of the
battery tray.
Open the hood and set the heater as close as possible to its final
mounting position. Connect the duct hoses to the heater plenum (center
outlet is for defrost) and route to the vents. Keep the hoses as short as
possible. Secure the hoses with wire ties. (Photos 3 & 8)
8. Position the heater and fasten the passenger side bracket to the dash
support using a #10 self tapping hex head screw. Fasten the driver side
bracket to the center of the Battery tray using the Black Phillips head klath screws.
Page 3

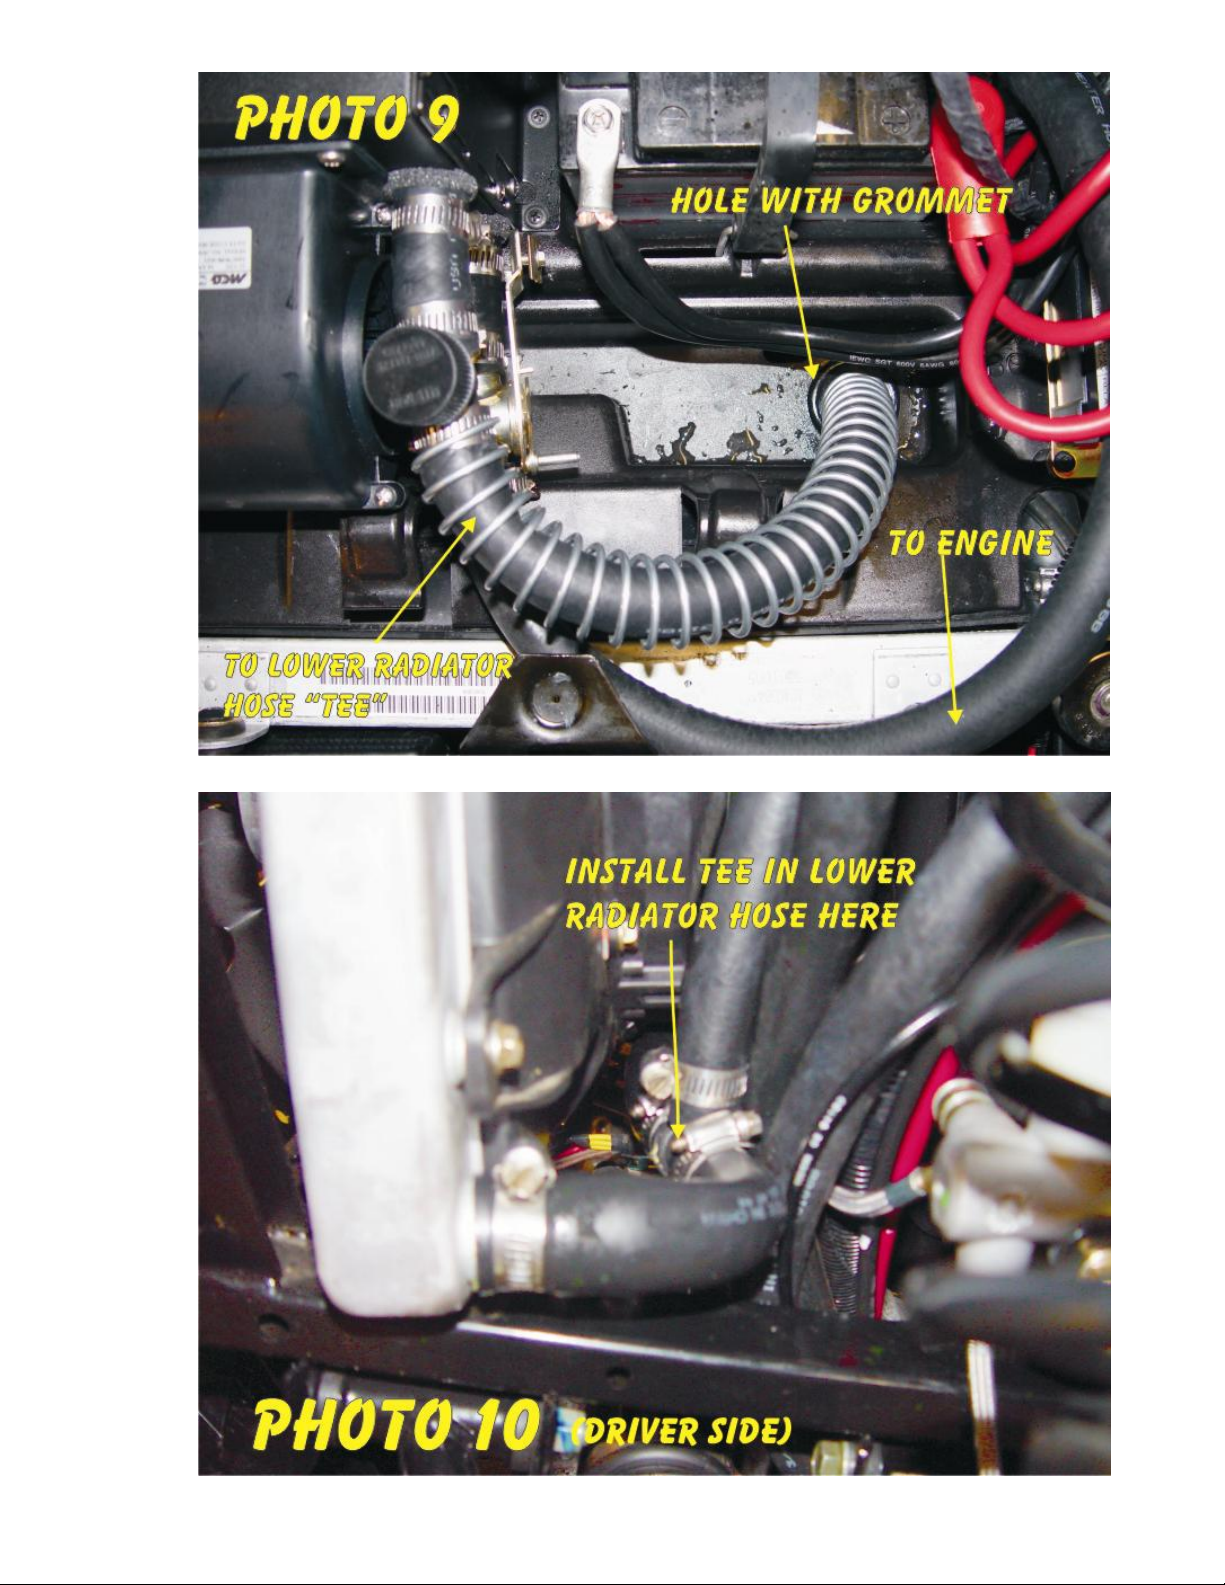
9. Use a 1 3/8” or 1 ½” hole saw to drill a hole in the plastic tray in front of
the battery and install the grommet. (Photo 9)
10. Remove the lower radiator hose at the radiator (driver side) and drain the
coolant. Cut the hose 2”from the bend and install the tee. Route a piece
of hose from the tee up thru the grommet (lube the grommet) to the filler
on the upper heater core outlet. Use a piece of the spring to prevent
kinking. Refasten the radiator hose and secure all connections with hose
clamps. (Photos 9 & 10)
11. Note: Retain all parts for reinstallation. Remove the thermostat
housing from the engine block. Install the adaptor, gaskets, thermostat
and housing as shown in diagram “A” using the longer bolts supplied.
(Photo 11)
12. Route a piece of hose from the adaptor down under the floor following
the coolant hose on the driver side and up thru opening between the
battery and terminal block to the valve on the lower portion of the heater
core outlet. Secure the hose away from all moving parts with wire ties
and tighten the hose clamps. (Photos 9 & 11)
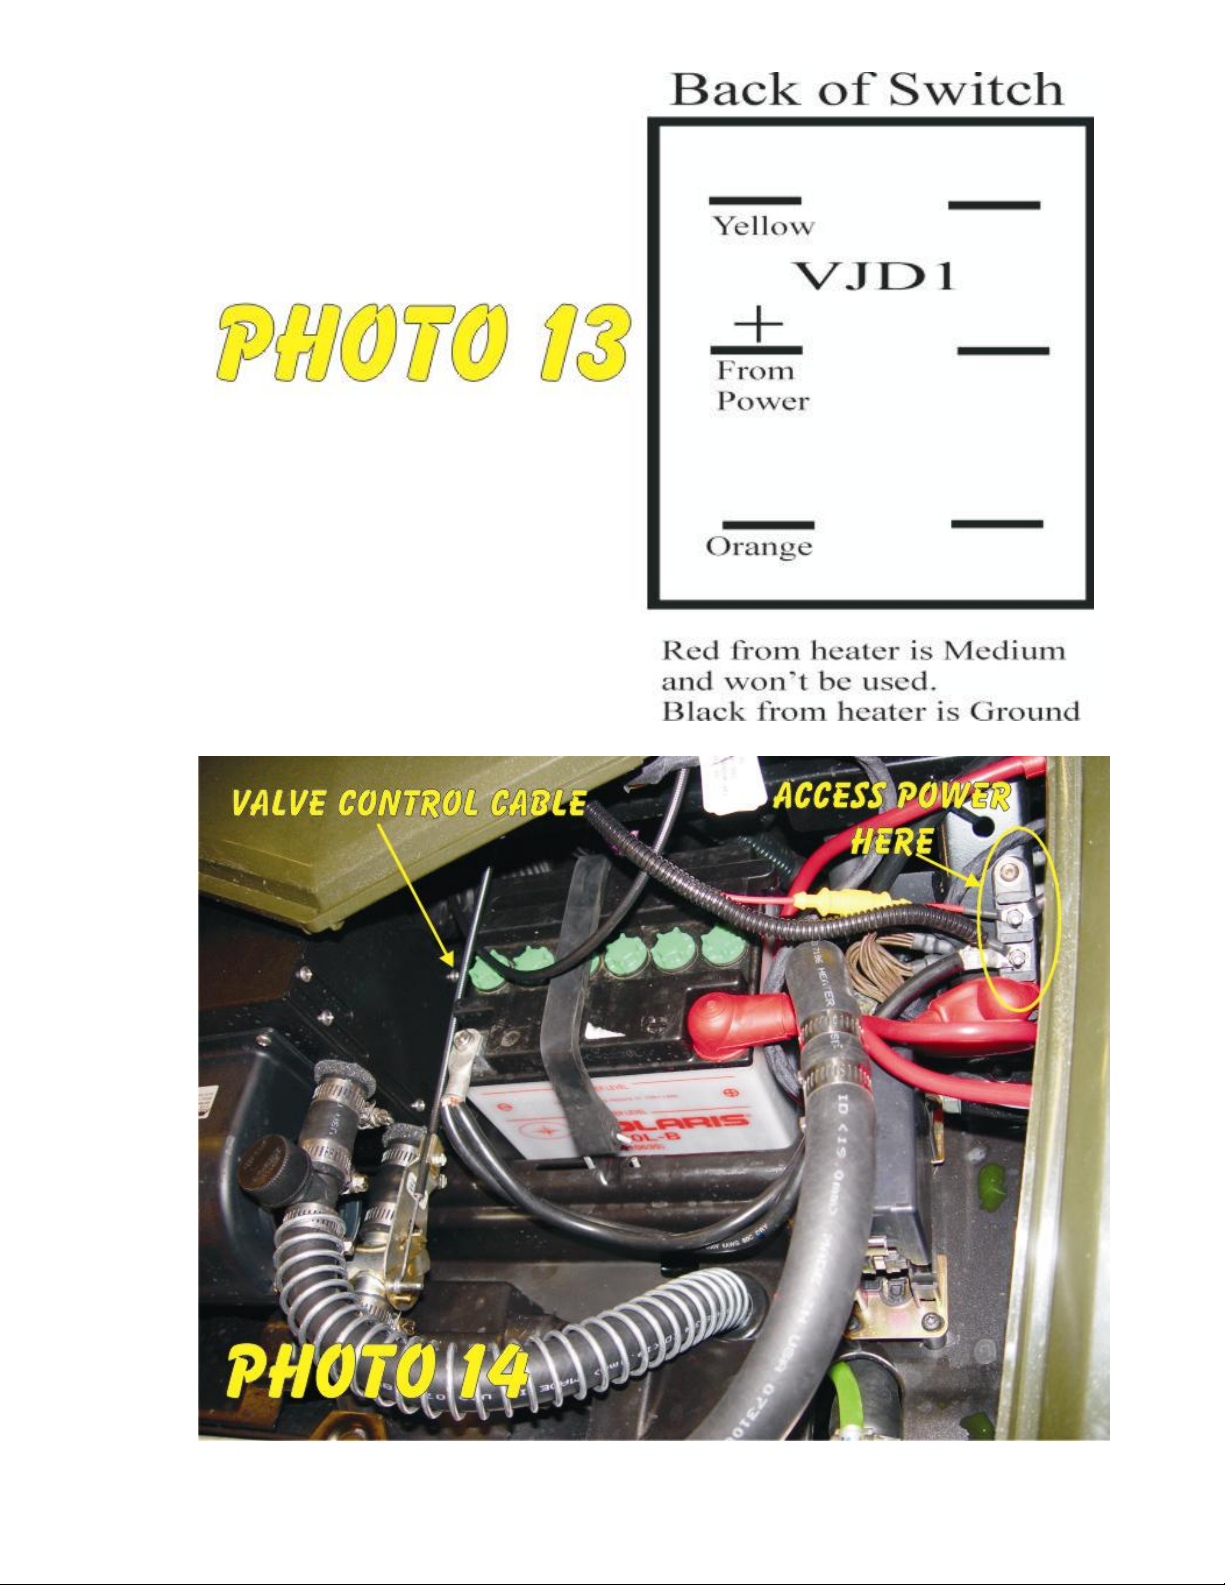
13. Connect the negative (black) and the positive (red) wires to the terminal
strip beside the battery (the top lug supplies key on power). Route the
switch wires to thru the cutout and connect to the switch (Photo 13, back
of switch) press the switch in place. (Photo 14)
14. Install the control cable thru the instrument panel and secure the nut.
Route the cable under the dash support cross member and between the
battery and heater. Make a loop in the control cable (allows the
instrument panel to be removed). With the valve in the “off” position
and the control knob pushed “in” place the control cable clamp on the
valve and tighten the clamp. (Photos 12 & 14)
15. Reinstall the instrument panel.
16. With all the hose clamps tight and the heater valve “open” remove the
radiator cap and the filler/bleeder cap. Fill the radiator with coolant and
replace the cap. Slowly fill the system thru the filler / bleeder to allow
air to exit. Replace the filler cap. CAUTION!!!! Coolant level is now
above the radiator cap. Never open the radiator cap. Fill the system
only thru the filler / bleeder and over flow reservoir. This information
must be passed on to the customer and or vehicle owner.
17. Start and run the vehicle for 2 minutes. With the engine off open the
filler / bleeder and add coolant as needed. Repeat until coolant level
remains full. CHECK FOR LEAKS
Page 4
18. Start and run the vehicle. Operate the blower, warm air should blow
from the vents within 2 minutes. The upper radiator hose should begin
to warm within a few minutes (allow enough time for the engine
thermostat to open). If you do not have heat at the vents or upper
radiator hose allow the engine to cool and check the coolant level. (Step
17)
19. Reassemble the vehicle.
For service, parts, and technical questions call
James Hook - (208) 687-4400 ext - 213
6672 Boekel Road, Rathdrum | (208) 687-4400 | www.heatercraft.com
Page 5
Page 6
Page 7
Page 8
Page 9
Page 10
Page 11
Page 12
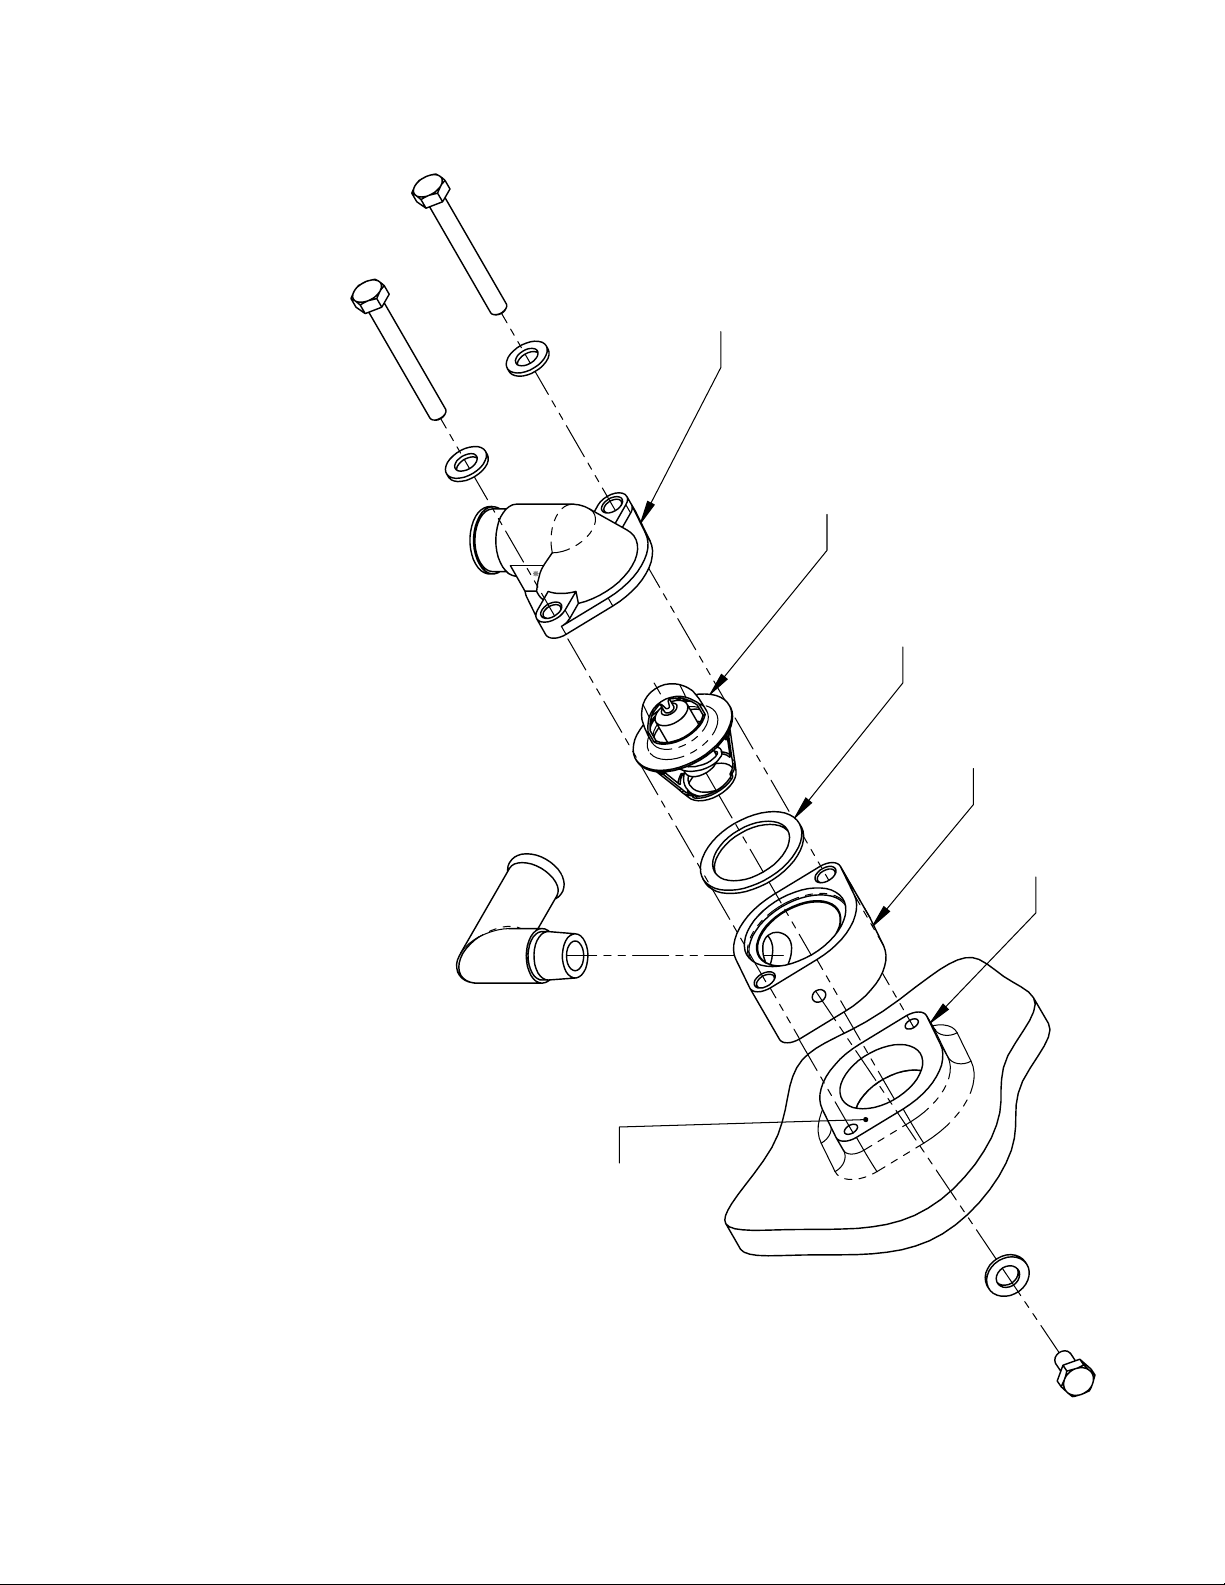
THERMOSTAT
HOUSING
THERMOSTAT
GASKET
ADAPTOR
ENGINE
GASKET MATERIAL
Page 13
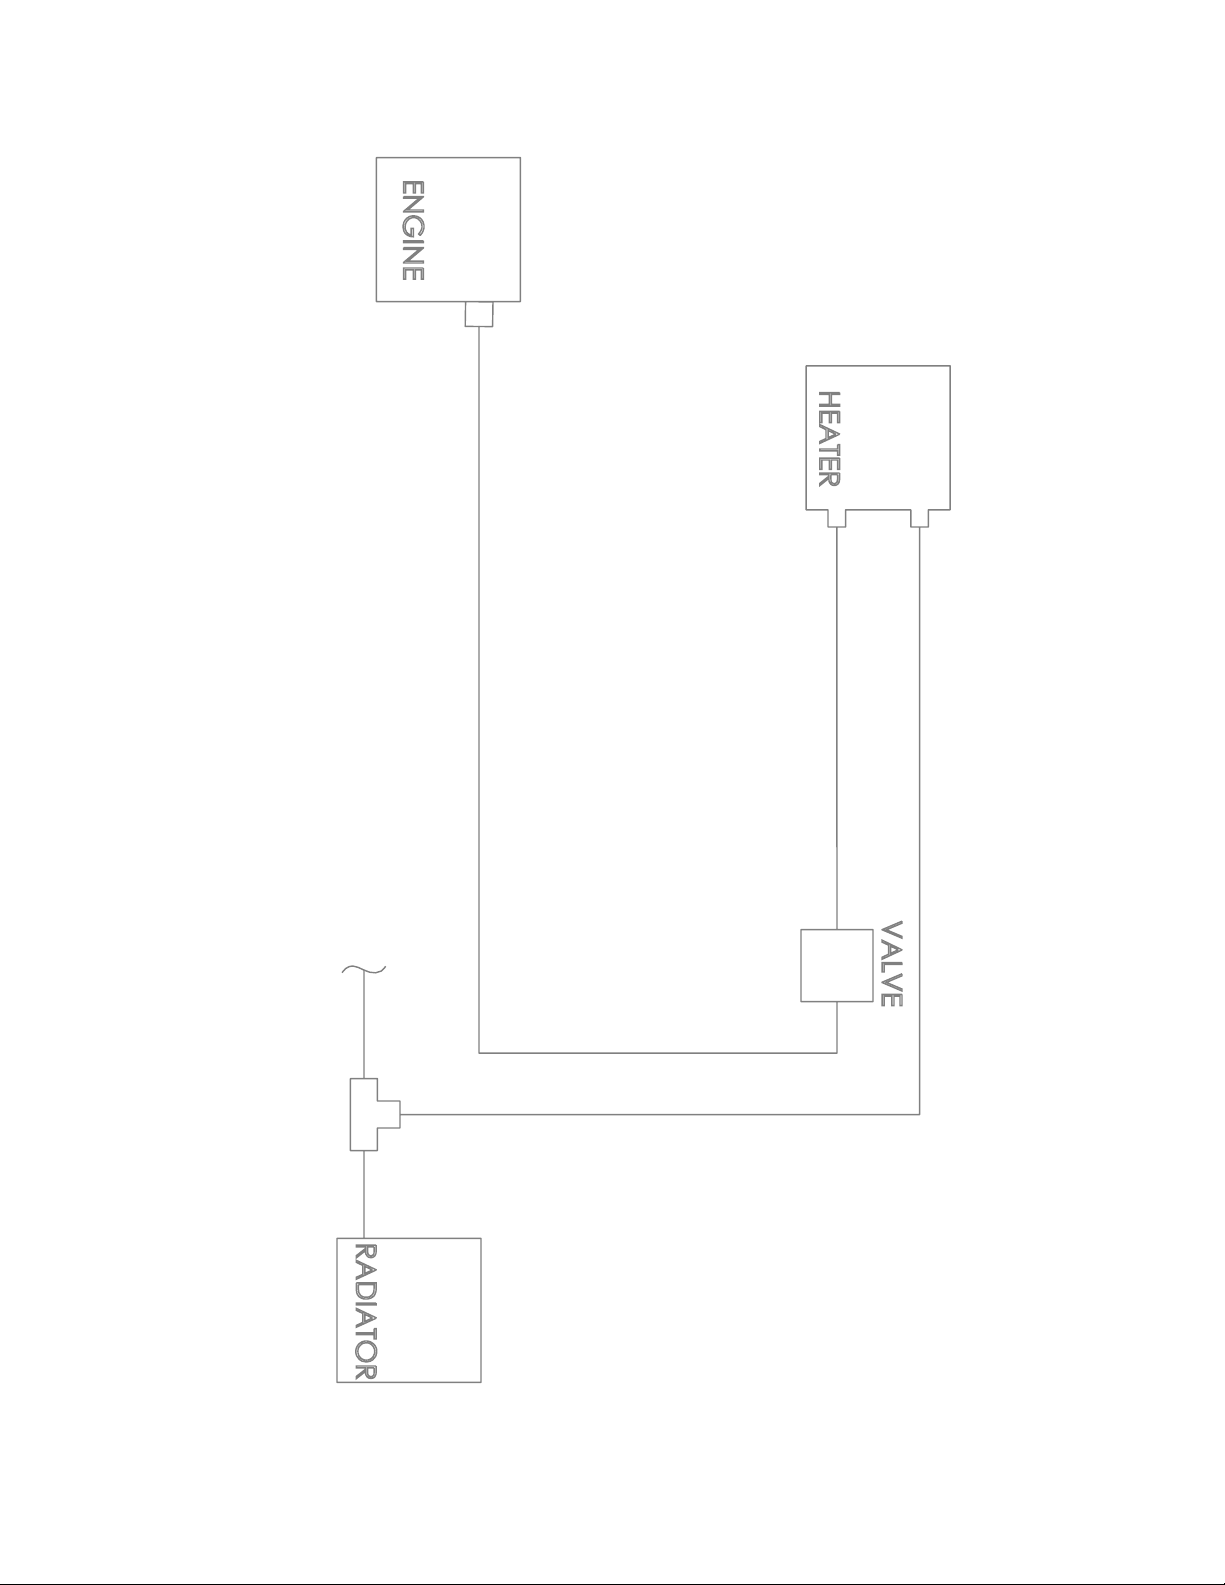
09 RANGER 500 & 700 HEATER HOSE ROUTING SCHEMATIC
1"X1"X3/4"
Page 14
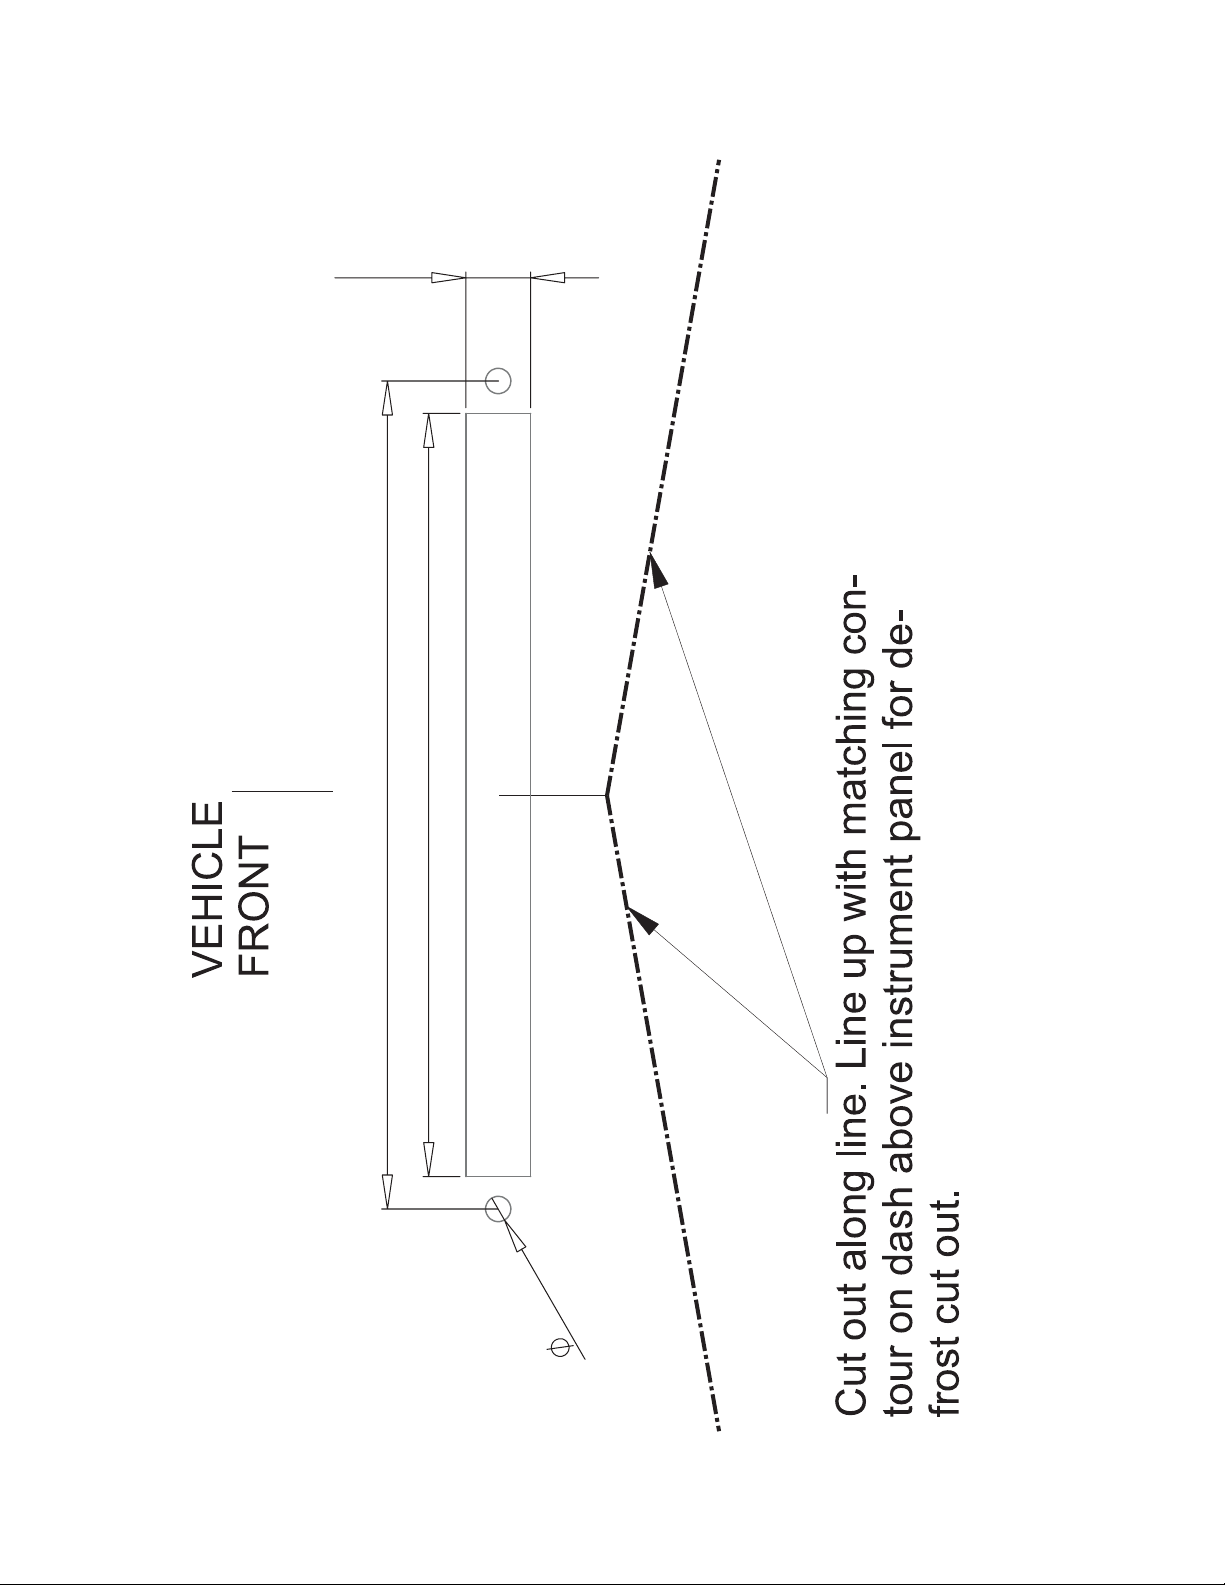
0.450
5.300
5.750
0.175
 Loading...