

Heatcraft intelliGen Integration Card iIC, intelliGen Webserver Card iWC Installation & Operation Manual

Installation & Operation Manual
intelliGen 00049DFS
intelliGen™ Webserver Card (iWC) and
Integration Card (iIC)
iWC
OCTOBER 2018
PART NO. 25010401
iIC
Legend
Long Name Abbrev. Name
intelliGen Webserver Card iWC
intelliGen Integration Card iIC
intelliGen Refrigeration Controller iRC
intelliGen Refrigeration Controller User Interface iRCUI
Dynamic Host Conguration Protocol DHCP
Building Automation System BAS
Master Slave Token Passing MS/TP
Remote Terminal Unit RTU
Media Access Control MAC
TABLE OF CONTENTS
iWC- intelliGen Webserver Card ......................2
Installation ...................................................2
Configuration and Initial Setup .....................2
Local Access ...........................................2-5
Remote Access ...........................................6
Web Navigation ...........................................7
Troubleshooting ..........................................8
iIC- intelliGen Integration Card ........................9
Installation ...................................................9
Configuration and Initial Setup .....................9
Integration Guide ...................................... 10
BACnet Mapping ..................................11-13
Modbus Register Mapping ...................14-16
System Alarms Tables .............................. 17
Unit Alarms Tables ................................... 18

iWC- intelliGen WEBSERVER CARD
Installation
• While system is powered down, align and insert iWC's pins into intelliGen Refrigeration Controller
(iRC) board’s plug
• Secure with mounting screws. For proper mounting, the #6-32x1 inch screws should be torqued
to 64 oz.-inch.
• Connect CAT5 Ethernet cable to iWC
• Connect other end of Ethernet cable to a network router
Configuration and Initial Setup
Local Access
IF SYSTEM HAS NOT BEEN PREVIOUSLY CONFIGURED
• Follow steps in intelliGen Quick Start Guide to configure system via iRCUI on an evaporator OR
following the next steps
• Connect iWC to a network point/router before beginning webserver configuration
• Follow steps to obtain IP address:
STEP 1
Enter Expert PIN
STEP 1.
Enter Expert PIN
ENTER EXPERT PIN
X X X X X X
First digit in PIN automatically ashes
for edit. Turn dial to change rst PIN
digit 0-9. Push Enter to choose digit.
Repeat with all digits.
The Default Expert PIN is 999999
2
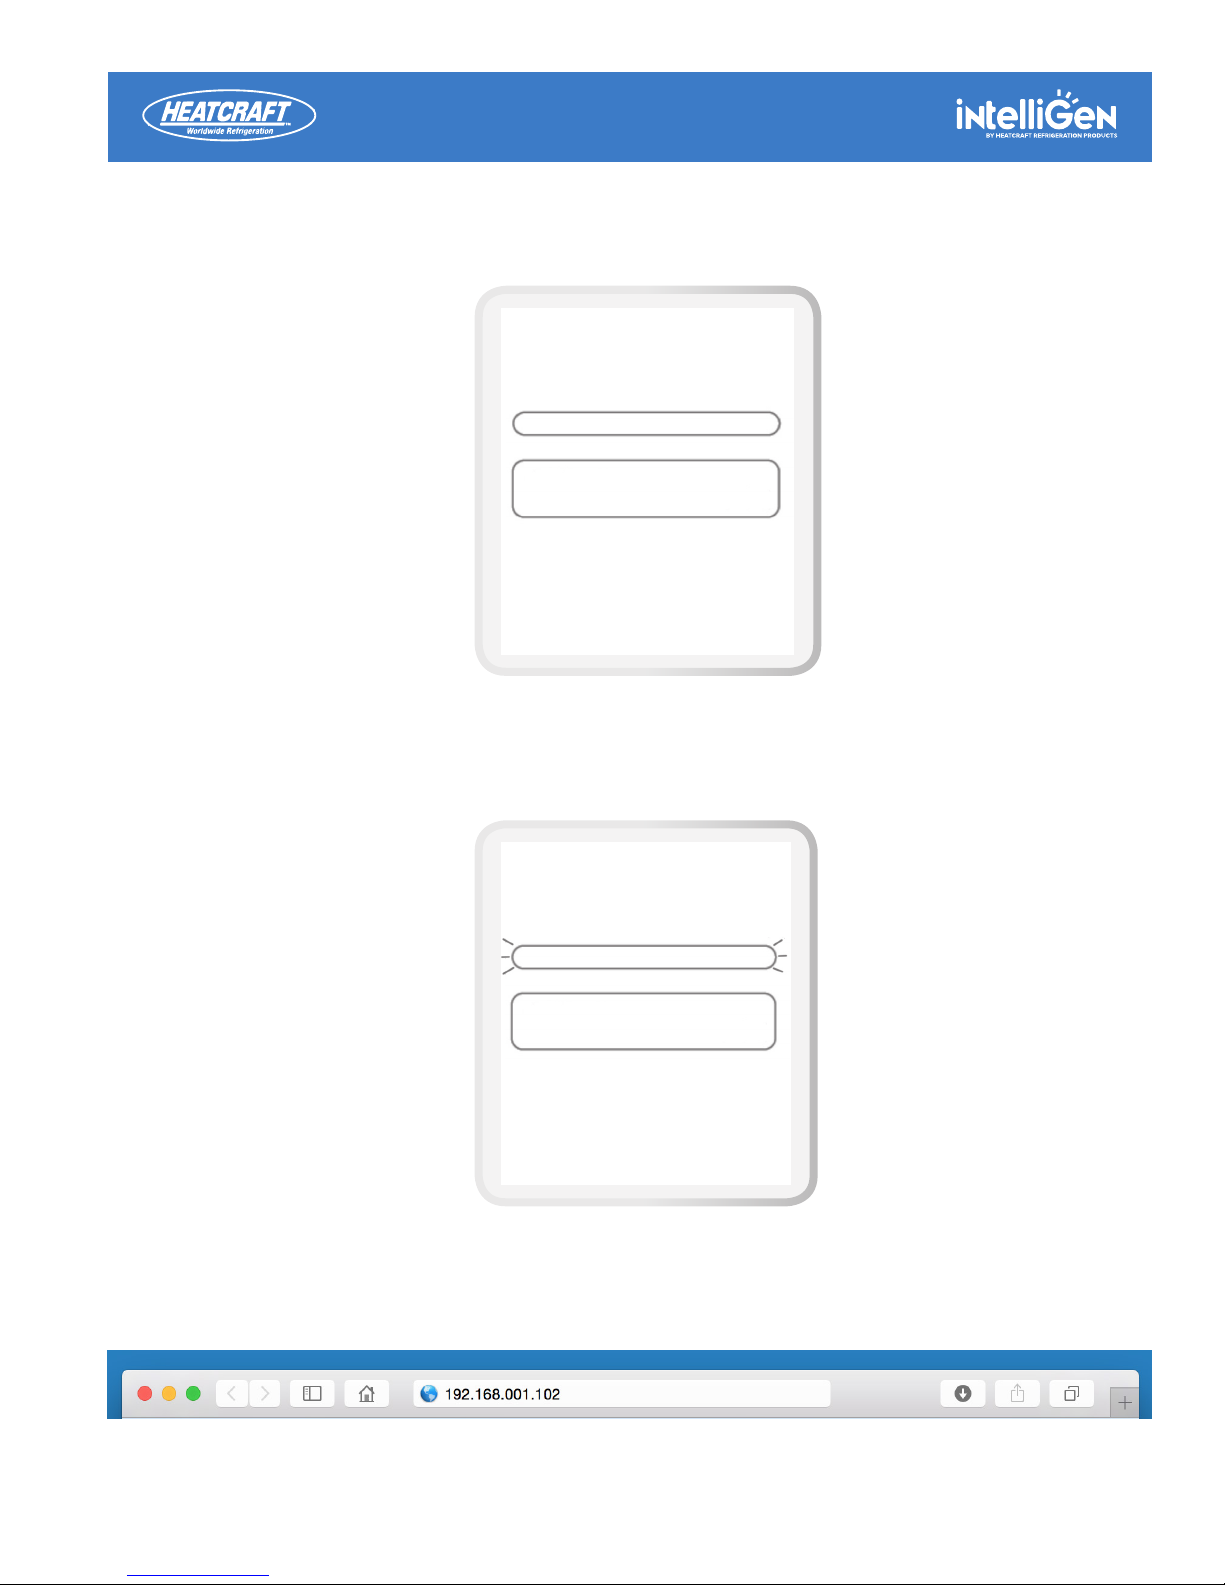
STEP 2
Select Conguration Mode
STEP 3
IP Address Generation
STEP 2.
Select Conguration Mode
CONFIG FROM?
Web - Local Wired
Select the Web- Local Wired option
to obtain the IP address for local web
conguration
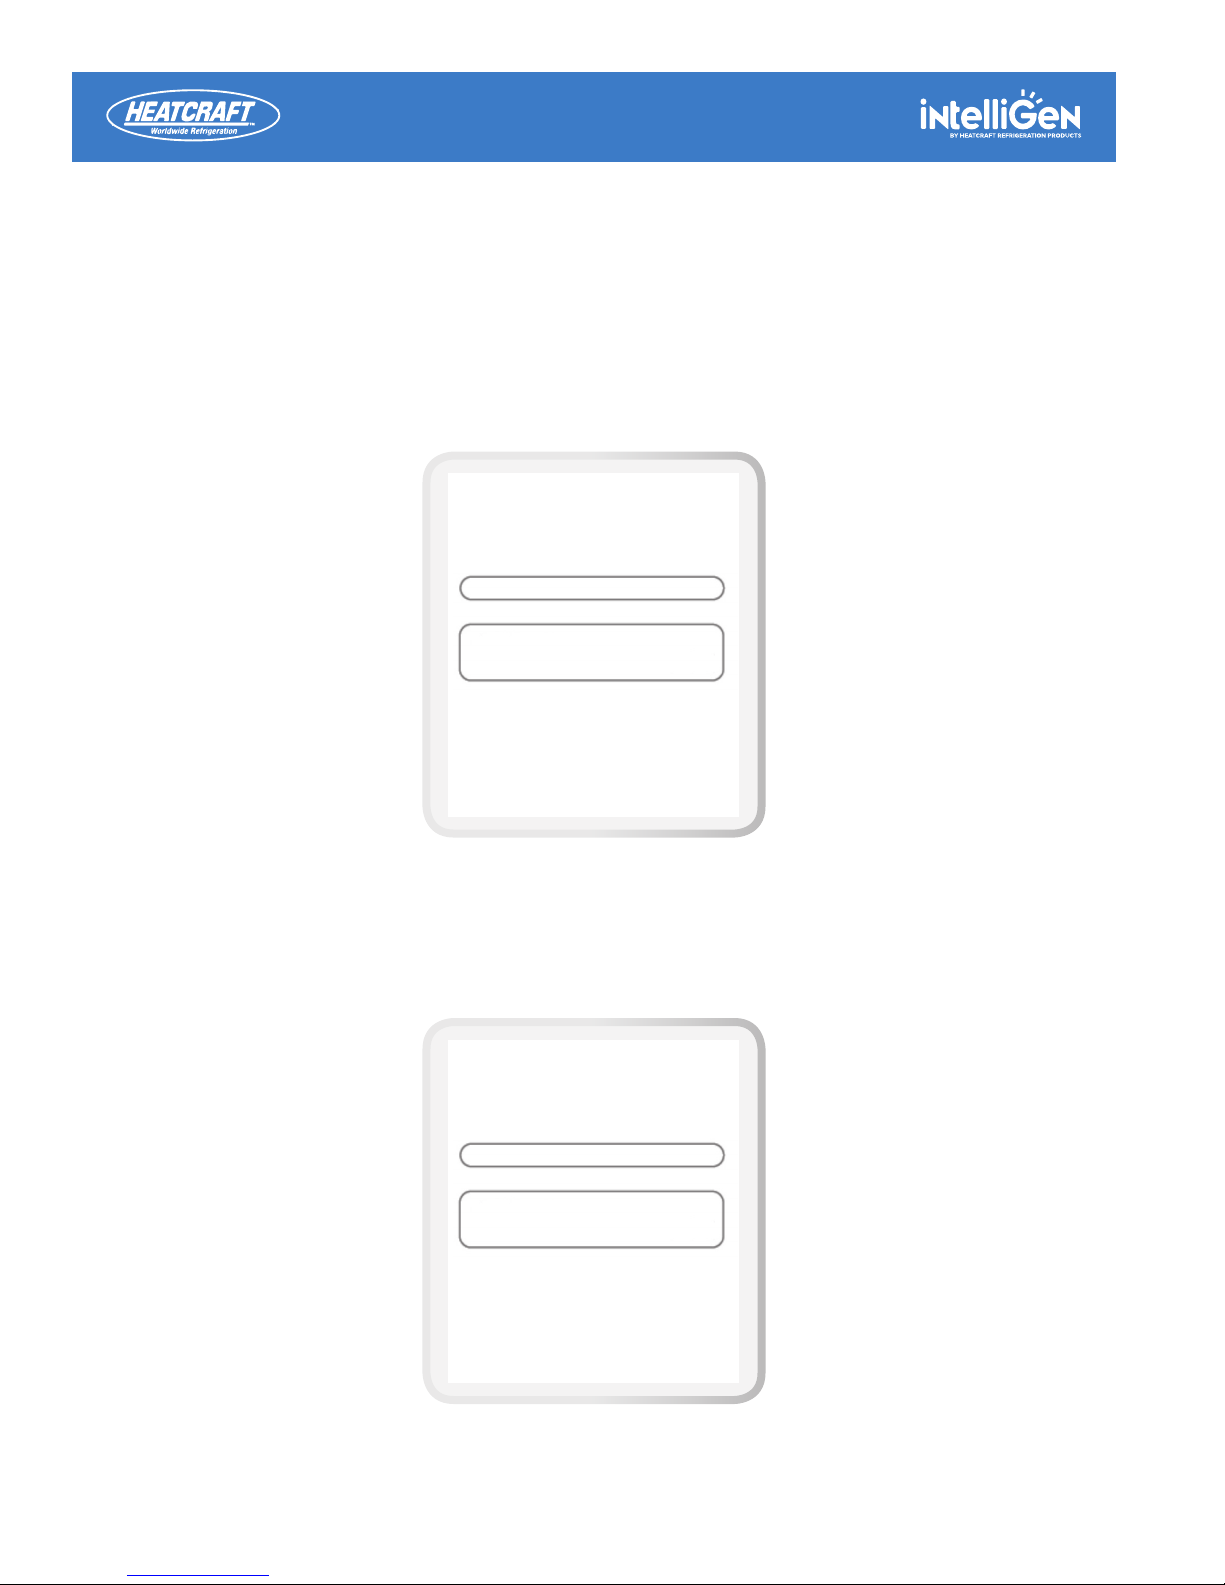
STEP 4
Type IP Address into Browser
STEP 3
IP Address Generation
IP-192.168.001.102
Re-choose
Enter IP into web browser to begin
local web conguration. Click enter to
re-choose if there is a network conict
with current IP address. IP address
may take several minutes to populate
Type IP address into web browser and follow the prompts to complete system configuration
3
IF SYSTEM HAS BEEN PREVIOUSLY CONFIGURED
• Connect iWC to a network point/router before commencing webserver configuration
• Follow steps to obtain IP address:
STEP 1
Go To General Setting Menu
STEP 1.
General Settings
GENERAL SETTINGS
Press the Home button and turn knob
to nd General Settings, press knob
and access the menu.
STEP 2
Select IP Address and Submask
4
STEP 2.
Select IP & Submask
IP ADDRESS & SUBMASK
Under general settings, nd and select
IP Address and Submask to congure
IPv4 information.
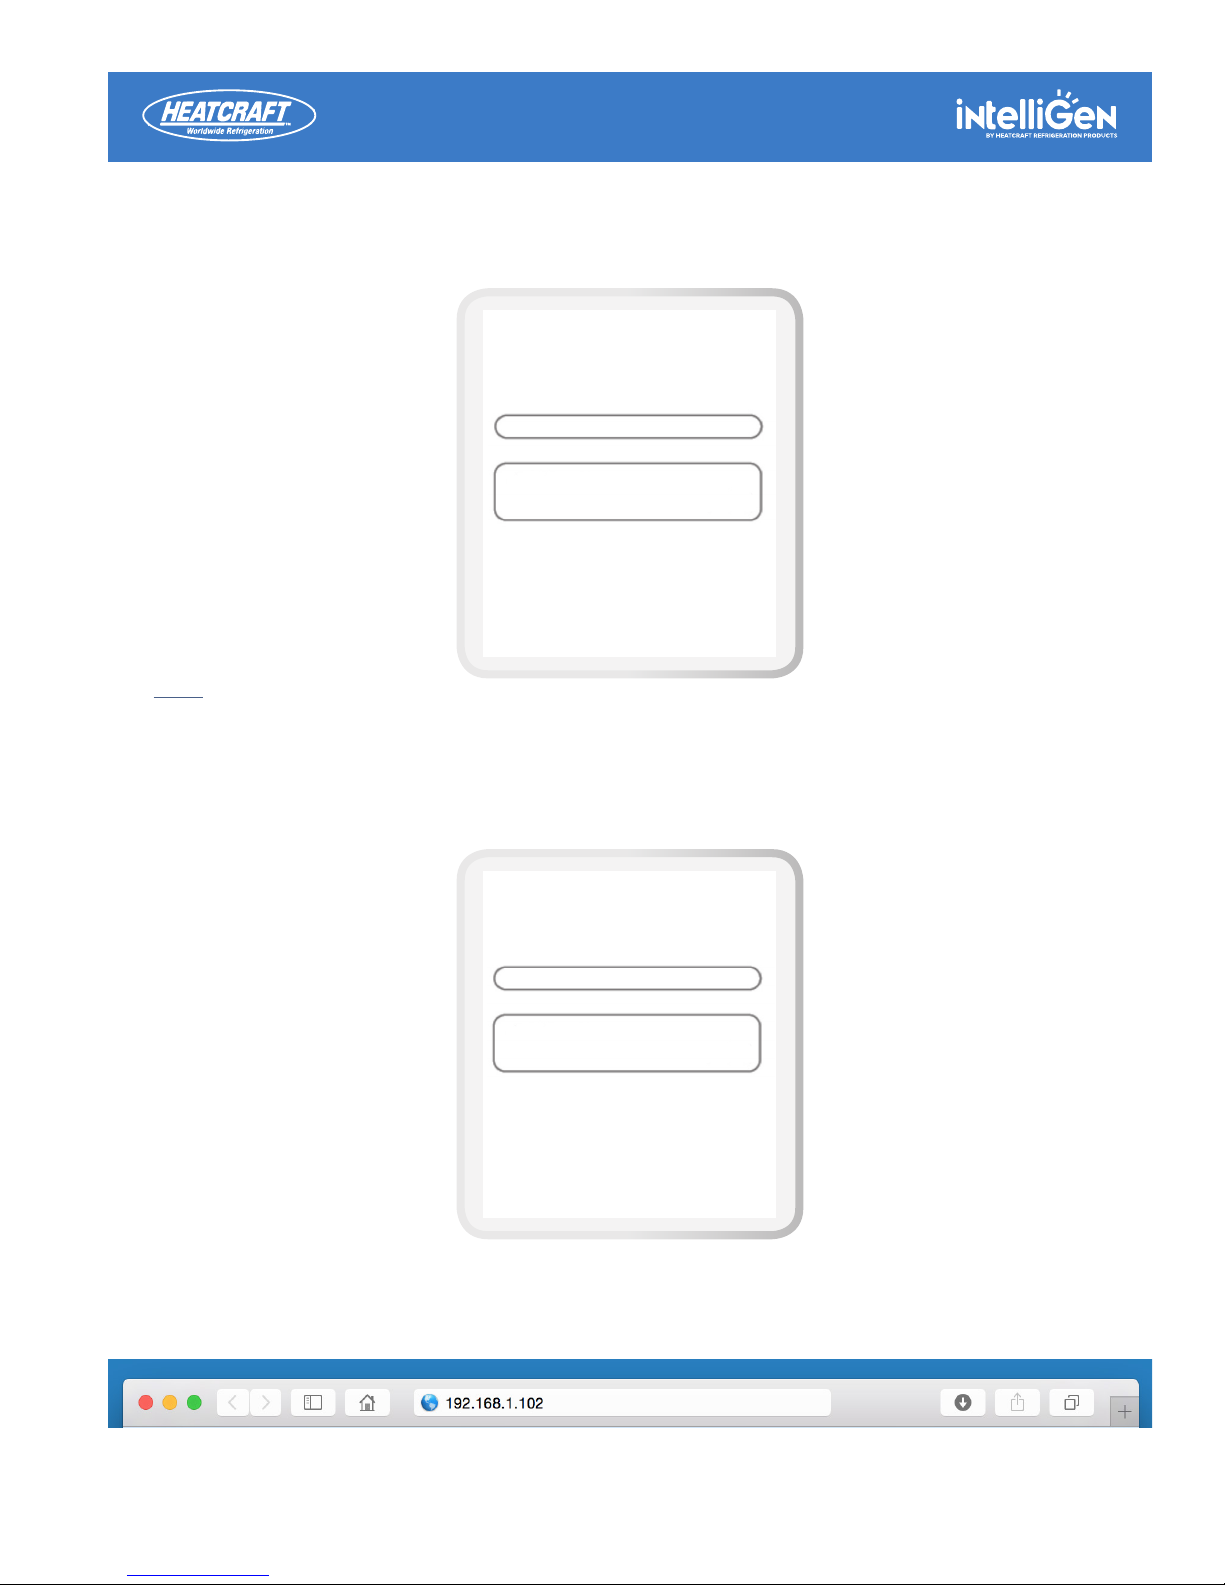
STEP 3
Congure IP address information
STEP 3.
Conguration IP Address Info
CONFIGURE IPv4
DHCP
IPv4 is defaulted to DHCP, if a static
IP is needed, press knob and scroll to
select static ip address assignment.
NOTE:
IPv4 Defaults to DHCP, this setting will work with most networks. Highly secured networks may require a static IP address.
Contact your IT department for additional support.
STEP 4
Obtain IPv4 address
STEP 5
Enter IPv4 address in Browser
STEP 4.
Obtain IPv4 Address
IPv4 ADDRESS
192.168.1.102
If DHCP is selected scroll to obtain
automatically generated IPv4 Address.
If Static is selected, values for IPv4
address, subnet mask, default gateway,
and dns server must all be entered
manually.
Type IPv4 address into web browser on a device that is connected to the local network to access system
information through the web.
5
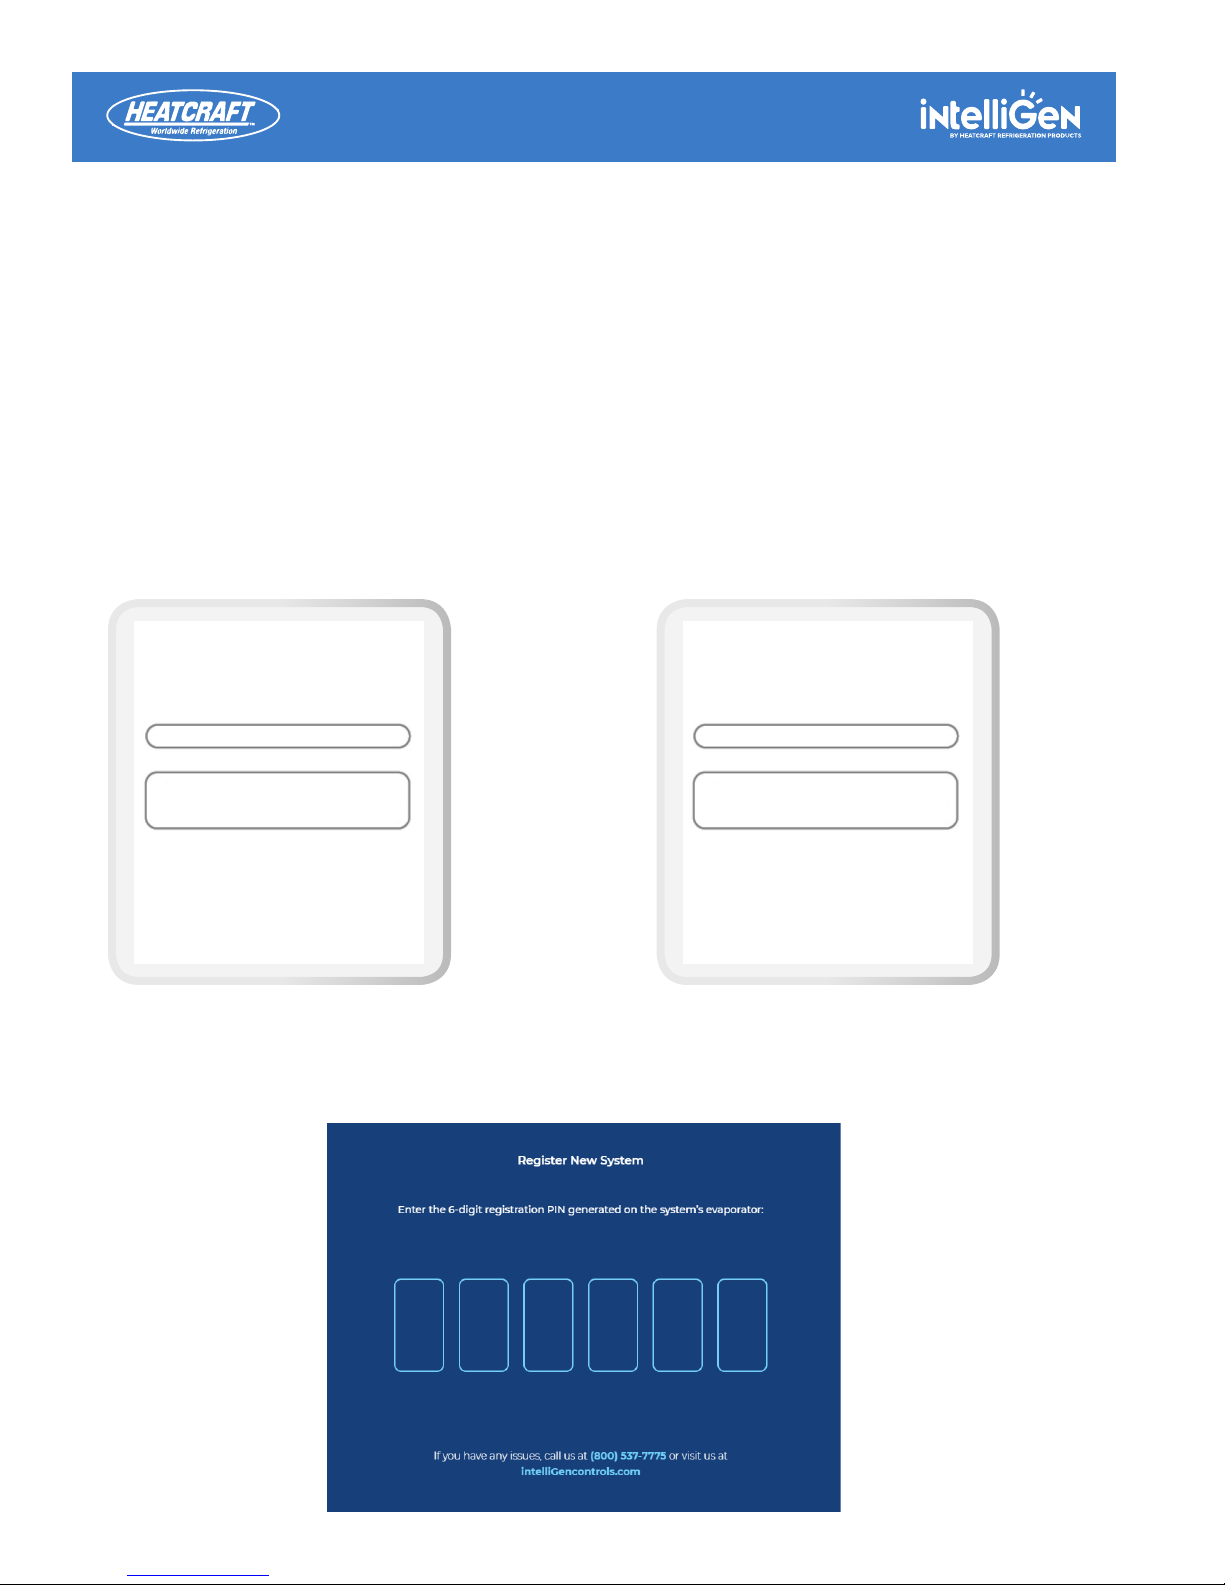
Remote Access
USER SETUP : Log-in information including passwords and 6 digit pin
• iWC must be configured per Local Access instructions
• Create an account by visiting: https://intelligen.online
• Log in and select ‘REGISTER NEW SYSTEM’. A prompt for a 6 digit PIN will appear
• To obtain PIN follow these steps
STEP 1
Go To General Setting Menu
STEP 1.
General Settings
GENERAL SETTINGS
Press the Home button and turn knob
to nd General Settings, press knob
and access the menu.
STEP 2
Remote Web Set-Up
STEP 2.
Remote Web Set-Up
REMOTE WEB SETUP
Generate Code
Under General Setting access the
remote web setup to generate a 6
digit code. If the system is already
registered, display will read Done-Sys
ID XXXXXX
When registering a new system, enter 6 digit code that was generated on the iRCUI into the web browser
6
 Loading...