

Page 1
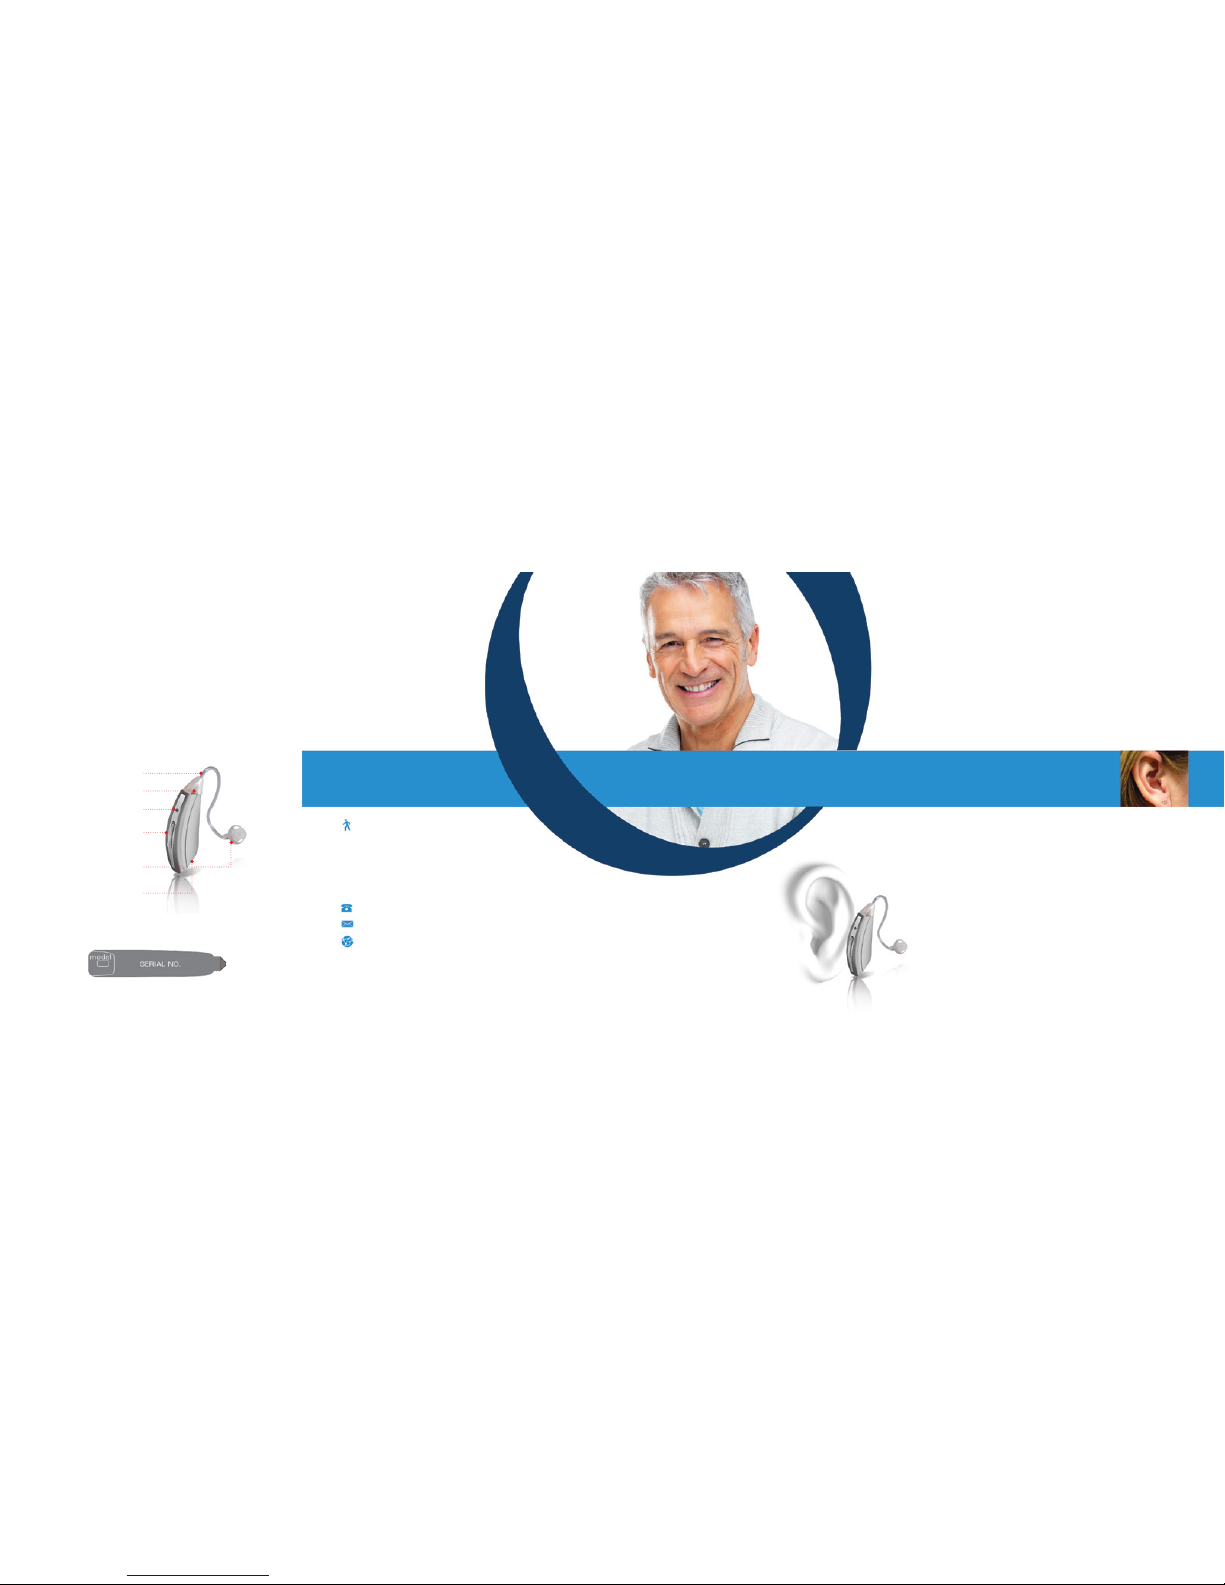
Rocker Switch
(Volume & Memory)
Ear Dome
Battery Door
Microphone
2nd Microphone
Tubing
Welcome back to the world of sound!
™
A belief that in order to succeed, you must have a
certain passion and desire to give your every en-
deavor your very best. We forge this very commit-
ment to excellence into every hearing instrument in
our portfolio.
A rare combination of state of the art technology and
custom craftsmanship brings you the best instru-
ments available today. Currently, our products are
distributed all over the world. We thank you for allow-
ing us to assist with your hearing needs.
These instructions along with the guidance from
HearingDirect.com will help you attain maximum
benet from your hearing instrument(s).
HD360
HearingDirect.com
UG / HD360 / USA / 8 © 16
Welcome to a whole new world of hearing
™
Features
Identifying Your Device
HD360
The serial number is on the bottom of the case while the
model is on the battery door.
• 100% Digital
• Volume Control
• Multi-Memory Push Button
• Adaptive Noise Reduction
• Directional Microphones
• Adjustable Power On Delay
• Low Battery Indicator
• Memory Tone Indicator
• Replaceable Thin-Tube
• Adaptive Feedback
Reduction
• Dynamic Speech
Enhancement
* Not all features may apply to your instrument.
1-800-216-2331
HearingDirect Ltd
Unit 4 Nine Mile Water
Nether Wallop
SO20 8DR
United Kingdom
World Headquarters
Page 2
Cleaning & Changing Tubes
Batteries - Uses a 312 battery
TO TURN ON - With your nger, gently open the door. Insert
battery and close the door. Your device is equipped with a
power on delay, you will be given several seconds to seat the
device comfortably in your ear before it turns on.
When placing the battery in your device, position the battery
with the positive (+) side (or totally at side) up and insert it
into the battery compartment section of the battery door. If the
battery is inserted incorrectly or upside down, the door will not
close. Do not force the door closed.
CAUTION: Batteries are dangerous if swallowed! Keep batteries
out of the reach of children. Never put batteries in your mouth for
any reason they are easily swallowed. In the event a battery has
been swallowed, seek immediate medical attention. For more
information call the National Battery Hotline at 202-625-3333.
Inserting Your Device
Powering Your Device
Fig. A
Fig. B
Fig. C
Fig. 2
Fig. 3
Fig. 1
Use a soft cloth to wipe the OTE after use to remove any
particles or moisture. The Cleaning Tool is used to remove
debris / wax from the sound tubing and earbud.
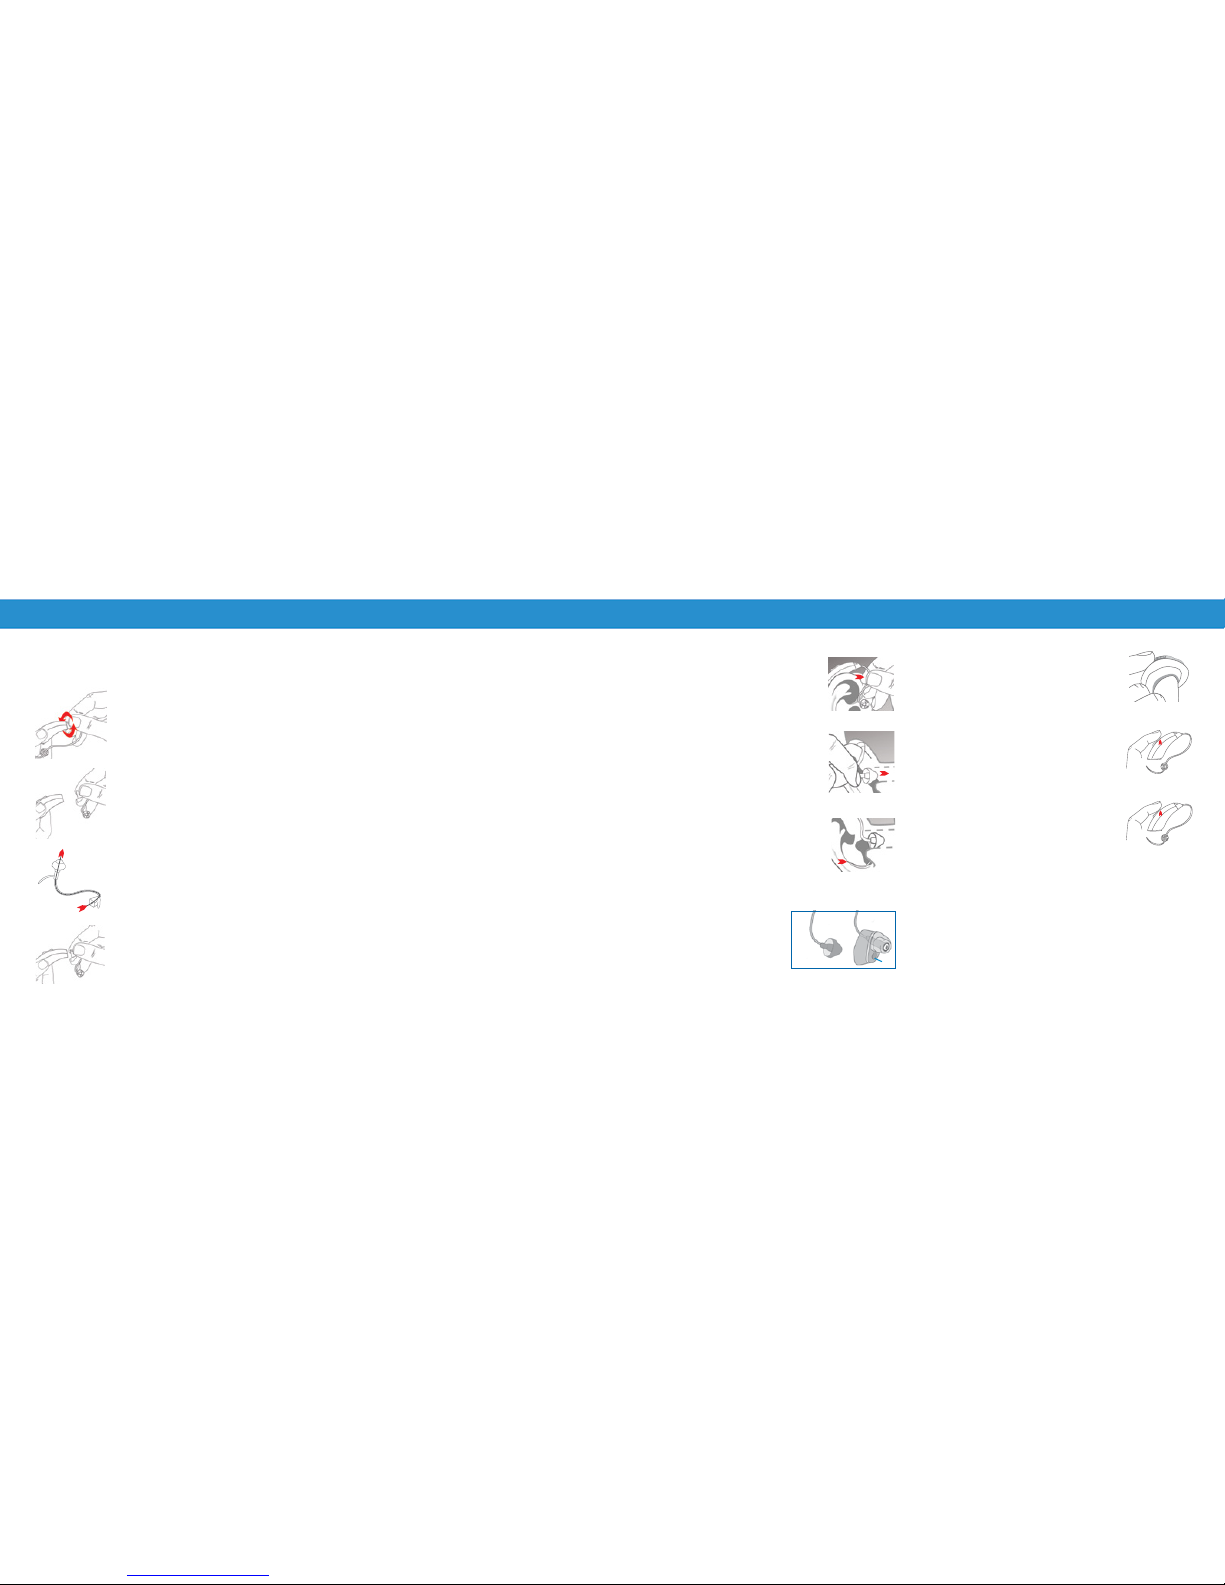
1. To remove tubes gently rotate the
sound tubing holding the instru
ment rmly.
3. To clean, insert the cleaning tool
through the nose cone end.
Thread all the way through the
tubing & earbud.
2. Pull sound tubing from the
hearing instrument.
4. To reassemble or change sound
tubing simply line up and push
tubing until it snaps into place.
Volume Adjustment
TO TURN OFF - To remove the device simply grasp the tubing
close to the earbud or earmold and remove from ear canal.
Then remove instrument from the top of the ear. To turn your
device o, simply open the battery door completely. Store in a
safe dry place.
NOTE: Some irritation may occur due to becoming accustomed
to wearing a new hearing instrument. If swelling or redness
occurs, discontinue use and visit your Doctor.
The rocker switch is both a volume
control and multiple memory mode
control.
For all adjustments place thumb into
the helix portion of your ear. Next,
take your index nger and place it on
the rocker switch. (Fig. 1)
Briey push/release the top half of
the switch to increase volume (Fig. 2)
and bottom half of switch to decrease
the volume (Fig. 3). Each short press
changes the volume slightly. Even
after you power cycle your instrument
(o/on), the volume control setting
last used will be restored.
Hold down the top half of the rocker switch for 3 seconds
(Fig. 2). The number of beeps correspond to the memory
that you have selected. The programs will cycle up in
sequence 1,2,3,1,2,3 etc.... Hold down the lower half of
the rocker switch for 3 seconds (g. 3) to cycle down in
sequence 3,2,1,3,2,1 etc....
Memory Adjustment
Before insertion, please clean your ear
and make sure the battery door is closed
properly.
• Hold the tubing with your thumb and
index nger close to the ear dome
(Fig. A).
• Place the instrument over the top of the
ear. (Fig. A)
• Gently insert the ear dome into your ear
canal. (Fig. B)
• Move the retention lock into position by
lifting and placing it into the bowl of your
ear. (Fig. C)
Earbuds / Tips
D. Tube with earbud
E. Tube with ZipTip -
Keep the small vent hole (F)
to the bottom of the ear
farther from the device
D E
F
 Loading...