


Instructions for Use
Healthmark Inspection Scope Camera FIS-001
FIS-001 Page 1 of 33

TABLE OF CONTENTS
1.0 Introduction ...................................................................................................................................... 3
2.0 Purpose ............................................................................................................................................. 3
3.0 General Description ......................................................................................................................... 3
4.0 Software Installation ........................................................................................................................ 5
5.0 Mitigating Residual Device Risks .................................................................................................. 15
6.0 Troubleshooting ............................................................................................................................. 16
7.0 Mounting The Handle on a Tripod ................................................................................................. 22
8.0 Preparation & Power-Up ................................................................................................................ 22
9.0 Graphical User Interface (GUI) ...................................................................................................... 24
10.0 Accessories ..................................................................................................................................... 33
11.0 Maintenance ................................................................................................................................... 33
12.0 User Notices ................................................................................................................................... 33
FIS-001 Page 2 of 33

1.0 INTRODUCTION
The Healthmark Inspection Camera is intended for inspection of medical and surgical
instrumentation after cleaning, and prior to sterilization, or post sterilization. It may be used on
the outside or inside surfaces of instruments including devices such as arthroscopy routers,
shavers, reamers, and Yankauer etc….
2.0 PURPOSE
This Instructions For Use (IFU) manual describes how the camera device is to be used. Software
installation instructions are also included.
This IFU contains essential information on using this device safely and effectively. Before use,
thoroughly review and be familiar with this manual and the manuals of all equipment that will be
used during the inspection procedure. Use the devices as instructed. Keep this and all related
instruction manuals in a safe, accessible location. If you have any question or comment about
any information in this IFU, please contact Healthmark at (800) 521-6624 x6657 or e-mail at
hmitdesk@hmark.com.
3.0 GENERAL DESCRIPTION
The Healthmark Inspection Camera has an extrusion with a light source and camera lens at the
distal tip. The outer diameter of the extrusion and camera head is 3.1mm max. The device
should never be inserted into a lumen or working space smaller than 3.2mm in diameter. Any
smaller lumen may cause the device to become stuck, rendering the inspected equipment
unusable, and possibly damaging the camera device.
Use this device only in spaces 3.2mm or larger in diameter.
The camera extrusion is 50cm from the distal tip to the control handle. Using the camera device
in lumens longer than this may lead to inadequate inspection because the target areas to be
inspected may be beyond the effective focal length of the device.
Ensure that all areas of equipment to be inspected are accessible by the inspection
camera; failure to do so may lead to inadequate inspection.
FIS-001 Page 3 of 33

Proximal End
Distal Tip
Camera
Handle
Healthmark Inspection Camera
FIS-001 Page 4 of 33

4.0 SOFTWARE INSTALLATION
4.1 System Requirements:
The computer in which the software will be installed must meet the following
requirements:
- Platform: Windows XP or Windows 7 (32-bit or 64-bit)
- RAM: 4GB minimum
- One USB 2.0 port
4.2 Procedures:
The Healthmark Inspection Camera software installation consists of two (2) steps:
1) Device Driver Installation, and
2) Application Software Installation.
4.3 Device Driver Installation
4.3.1 Turn on the Target Computer.
4.3.2 Proceed to log into the Windows desktop environment.
4.3.3 Do not connect any Healthmark camera device to the computer during the
installation process unless instructed to do so.
4.3.4 Obtain the Installation software on the USB flash drive provided and insert it into
the USB port of the computer. Then open “My Computer” and look for the
external device drive.
4.3.5 Double click on the Healthmark drive to open the software folder.
FIS-001 Page 5 of 33

4.3.6 Determine System Architecture of target computer:
Determine whether your computer is running a 32-bit version or 64-bit version of
the Windows operating system. If you need more information regarding how to
check, you may refer to http://support.microsoft.com/kb/827218 for more details.
4.3.7 Locate the proper device driver installer:
Open the Healthmark folder. Depending on 32-bit or 64-bit system architecture,
double click and open the “32bit_driver” or “64bit_driver” folder accordingly.
4.3.8 Initiating the driver installer - double click and run the following file:
4.3.8.1 For 32-bit system: Cy2510Installation.msi
4.3.8.2 For 64-bit system: Cy2510Installation_x64.msi
4.3.8.3 Then proceed as guided by a series of pop-up dialog boxes from the
InstallShield Wizard. Click the “Next” Button to continue.
4.3.8.4 Review and accept the License Agreement. Click the “Next” Button to
continue.
FIS-001 Page 6 of 33

4.3.8.5 On the “Customer Information” page, enter the desired information.
Then click the “Next” button.
4.3.8.6 On the “Setup Type” page, choose “Complete” option to install all
necessary components. Then click the “Next” Button.
4.3.8.7 Click the “Install” Button on the next dialog box screen.
FIS-001 Page 7 of 33

4.3.8.8 After clicking “Install” on the “Ready to Install the Program” screen, a
Windows dialog box with the title “User Account Control,” may pop
up and display a question similar to:
“Do you want to allow the following program from an unknown
publisher to make changes to this computer?”
“Program name:…Cy2510Installation_x...msi”
In case this Windows dialog box pops up, click the “Yes” Button to
continue.
4.3.8.9 Another Windows Security pop-up dialog box (shown below) may
appear and display a question:
“Windows can’t verify the publisher of this driver software.”
Choose the option, “Install this driver software anyway.”
4.3.8.10 Review the next pop-up dialog box. Then click the “OK” Button to
FIS-001 Page 8 of 33
proceed.

4.3.8.11 At the InstallShield Wizard Completed screen, click the “Finish”
Button to proceed.
4.3.9 Connect a Healthmark Inspection Camera to USB2.0 port of the computer using
the provided USB cable.
4.3.10 A Windows balloon message may pop up at the lower right-hand corner and
display a message: “Installing device driver software”.
4.3.11 When the Windows finishes installing the device driver, another balloon message
may pop up at the lower right-hand corner and display a message:
“Sanovas zvCy2510 winUSB” and “Device driver software installed
successfully.”
FIS-001 Page 9 of 33

4.4 Application Software Installation
If the Healthmark Application Software has been installed on the computer before,
continue to install the new application software to obtain the latest software update.
4.5 Locate the application software installer on software CD:
Open the HealthMark_Install_Package folder, and locate the file “setup.exe”.
4.6 Double click and run the file “setup.exe” from the “HealthMark_Install_Package” folder.
4.7 Install .NET Microsoft Framework 4.0 if prompted.
If the computer has not previously been installed with Microsoft .NET framework 4.0 or
above, a pop-up dialog box will appear to install the required .NET framework files.
Click on the “Install” Button to install .NET Microsoft framework 4.0.
The installing process for Microsoft .NET Framework 4.0 may take a few minutes.
FIS-001 Page 10 of 33

4.8 Proceed with installation wizard until finished.
If Microsoft .NET Framework 4.0 or above are installed successfully, proceed by
clicking the “Next” Button.
4.9 Review and accept the License Agreement. Click the “Next” Button to continue.
4.10 On the “Customer Information” page, enter the desired information. Then click the
“Next” button.
FIS-001 Page 11 of 33

4.11 On the “Setup Type” page, choose “Complete” option to install all necessary
components. Then click the “Next” Button.
4.12 Click the “Install” Button on the next dialog box screen, “Ready to Install the Program.”
4.13 A Windows “User Account Control” pop-up dialog box may appear and display a
question:
“Do you want to allow the following program from an unknown publisher to make
changes to this computer?”
“Program name: …HealthmarkInstallation.msi”.
If this dialog box appears, click “Yes” to continue.
FIS-001 Page 12 of 33

4.14 When the InstallShield Wizard is completed, click the “Finish” Button to end the
installation.
4.15 Connect a Healthmark Inspection Camera device to the computer.
4.16 Starting the Program
Double click the “HealthMark1.0.6.14.exe” shortcut from the Desktop to run the
program.
If the shortcut is not available, navigate to the folder C:\Sanovas\Healthmark1.0.6.14, and
locate the “HealthMark.exe” program. Double click and run the program.
4.17 An “Imaging Software” dialog box will then appear. Click the “OK” Button to proceed.
FIS-001 Page 13 of 33

4.18 The Main window of the camera software will now appear:
If any of the above pop-up dialog box does not come up, please refer to troubleshooting
or contact Sanovas for support.
FIS-001 Page 14 of 33

5.0 MITIGATING RESIDUAL DEVICE RISKS
5.1 Do NOT immerse / submerge the camera device in liquid as a residual risk of user shock
remains in this scenario.
5.2 Do NOT make rapid hand motion with the device as the flexible shaft section may whip
and cause eye-injury or abrasion on impact with body parts.
5.3 Do NOT use the device to poke or attempt to pierce any object as it may cause serious
eye-injury or abrasion on impact with body parts in addition to device damage.
5.4 Do NOT subject the device to excessively high temperatures above 120 ºF as the
materials of construction are not designed to operate under these conditions.
5.5 Do NOT allow the device to be subject to any liquid splash as a residual risk of user
shock remains in this scenario.
5.6 Do NOT grasp and handle the device from the camera head as a residual risk of fatigue
damage to the distal tip of the device remains in this scenario.
5.7 Do NOT use the device handle to strike or hit any object. Serious harm to body and/or
device may result.
5.8 Do NOT over bend the flexible device shaft to a point of kinking. It may cause damages
to electronic components and render the camera un-operational.
5.9 Do NOT plug the USB cable into any port other than a USB2.0 (or later version) port on
a computer.
5.10 Use only the USB cable provided with the device. Using other cables may lead to
interference with surrounding electronic devices and potential performance deterioration.
5.11 Do NOT attempt to disassemble or repair the device yourself. Doing so voids the limited
warranty and could cause harm to the user and/or the device.
5.12 Do NOT use the device, when activated, near RF-emitting sources (Wi-Fi, cellphone,
radio transmitters, etc.), as intermittent auto-recoverable, frame-rate loss may occur.
6.0 USE OF THE DEVICE NEAR RF-TRANSMITTING / EMITTING SOURCES
6.1 Radio Frequency (RF) emitters (Wi-Fi antennae, Radio Transmitters, power transformers,
etc.) emit radio waves that at very close proximity to the device can occasionally cause
the device to experience temporary frame-rate stall in video rendering (areas in the video
image freeze). This is generally an auto-recoverable condition and the user is not
required to take any action, as the device will automatically return to normal video
rendering when the radio field is removed (or the device is moved outside the radio field).
6.2 Normal background radio transmission is generally insufficient to cause these behaviors
to manifest. In the instance where strong RF emitters or fields (>5V/m) are known to
exist the user is cautioned from using the device as more serious video rendering issues
may be triggered.
FIS-001 Page 15 of 33

7.0 TROUBLESHOOTING
Please read through the following guide and verify your installation. If you encounter problems
running the software, contact Sanovas for support.
7.1 Software Updates
Please make sure you have the latest version of software and firmware on the camera.
7.2 Compatibility
Software, Firmware and Hardware components all have version requirements in order to
function as described. Refer to Software Release Notes for any known compatibility
requirements and/or issues.
7.3 Administration Privileges
Administration privileges are necessary in order to install Healthmark software on a
computer. Please contact your IT administrator for support.
7.4 Device driver installation verification
After you install the device driver and connect the Healthmark Inspection Camera, locate
the Device Notification icon at the lower right-hand corner.
Click on the Device Notification icon. If the device driver installation was successful and
the provided Healthmark device is valid, the option “Eject Cyp-ver1.7” should be
available.
Otherwise, uninstall the device driver “Cy2510Installation_x64” or
“Cy2510Installation_x32,” under the Windows Control Panel and reinstall the device
driver again.
FIS-001 Page 16 of 33

7.5 Install Device Driver on Windows 8 or higher
The Healthmark software requires a platform of either Windows XP or Windows 7.
However, if it is necessary to install it on a Windows 8 system, the driver signature
verification will need to be disabled in order to install unsigned drivers. Follow the
procedures below:
7.5.1 Press the Win + C keyboard combination to bring up the Charms Bar, and click
on the Settings Charm.
FIS-001 Page 17 of 33

7.5.2 Go to Control Panel by clicking on the Change PC settings link.
7.5.3 When the Control Panel opens, click and switch to the “Update & recovery”
section.
7.5.4 Click on the “Recovery” option on the left hand side.
7.5.5 Once selected, you will see an advanced startup section appear on the right hand
side. Click on the “Restart now” button.
FIS-001 Page 18 of 33

7.5.6 Once the computer has been rebooted, choose the “Troubleshoot” option.
7.5.7 Click on “Advance options”.
FIS-001 Page 19 of 33

7.5.8 Click “Startup” Settings.
7.5.9 Click “Restart”.
FIS-001 Page 20 of 33

7.5.10 A list of startup settings will be shown. Press F7 to choose “Disable driver
signature enforcement”.
7.5.11 The computer will then reboot and the unsigned drivers should be able to install
without any Windows error message.
7.5.12 Reinstall the device driver per IFU procedures.
FIS-001 Page 21 of 33

8.0 MOUNTING THE HANDLE ON A TRIPOD
There is a screw hole for mounting the handle on a tripod or a hanger that can be utilized.
A metric M6 x 1 Screw can be used to mount the handle.
9.0 PREPARATION & POWER-UP
9.1 Turn ON the PC the Software is installed on.
9.2 Plug the Type Mini-B side of the provided USB 2.0 Cable to the camera handle.
The Mini-B connector looks like:
9.3 Plug the Type A side of the provided USB 2.0 Cable to the computer where the
Healthmark software is installed.
The Type A connector looks like:
FIS-001 Page 22 of 33
9.4 Starting the GUI
To run the Healthmark software, locate and double-clicking on the Healthmark program
icon on the Windows desktop.
If the shortcut is not available, the application file should be in a folder named
C:\Sanovas\
It can also be executed from this folder.
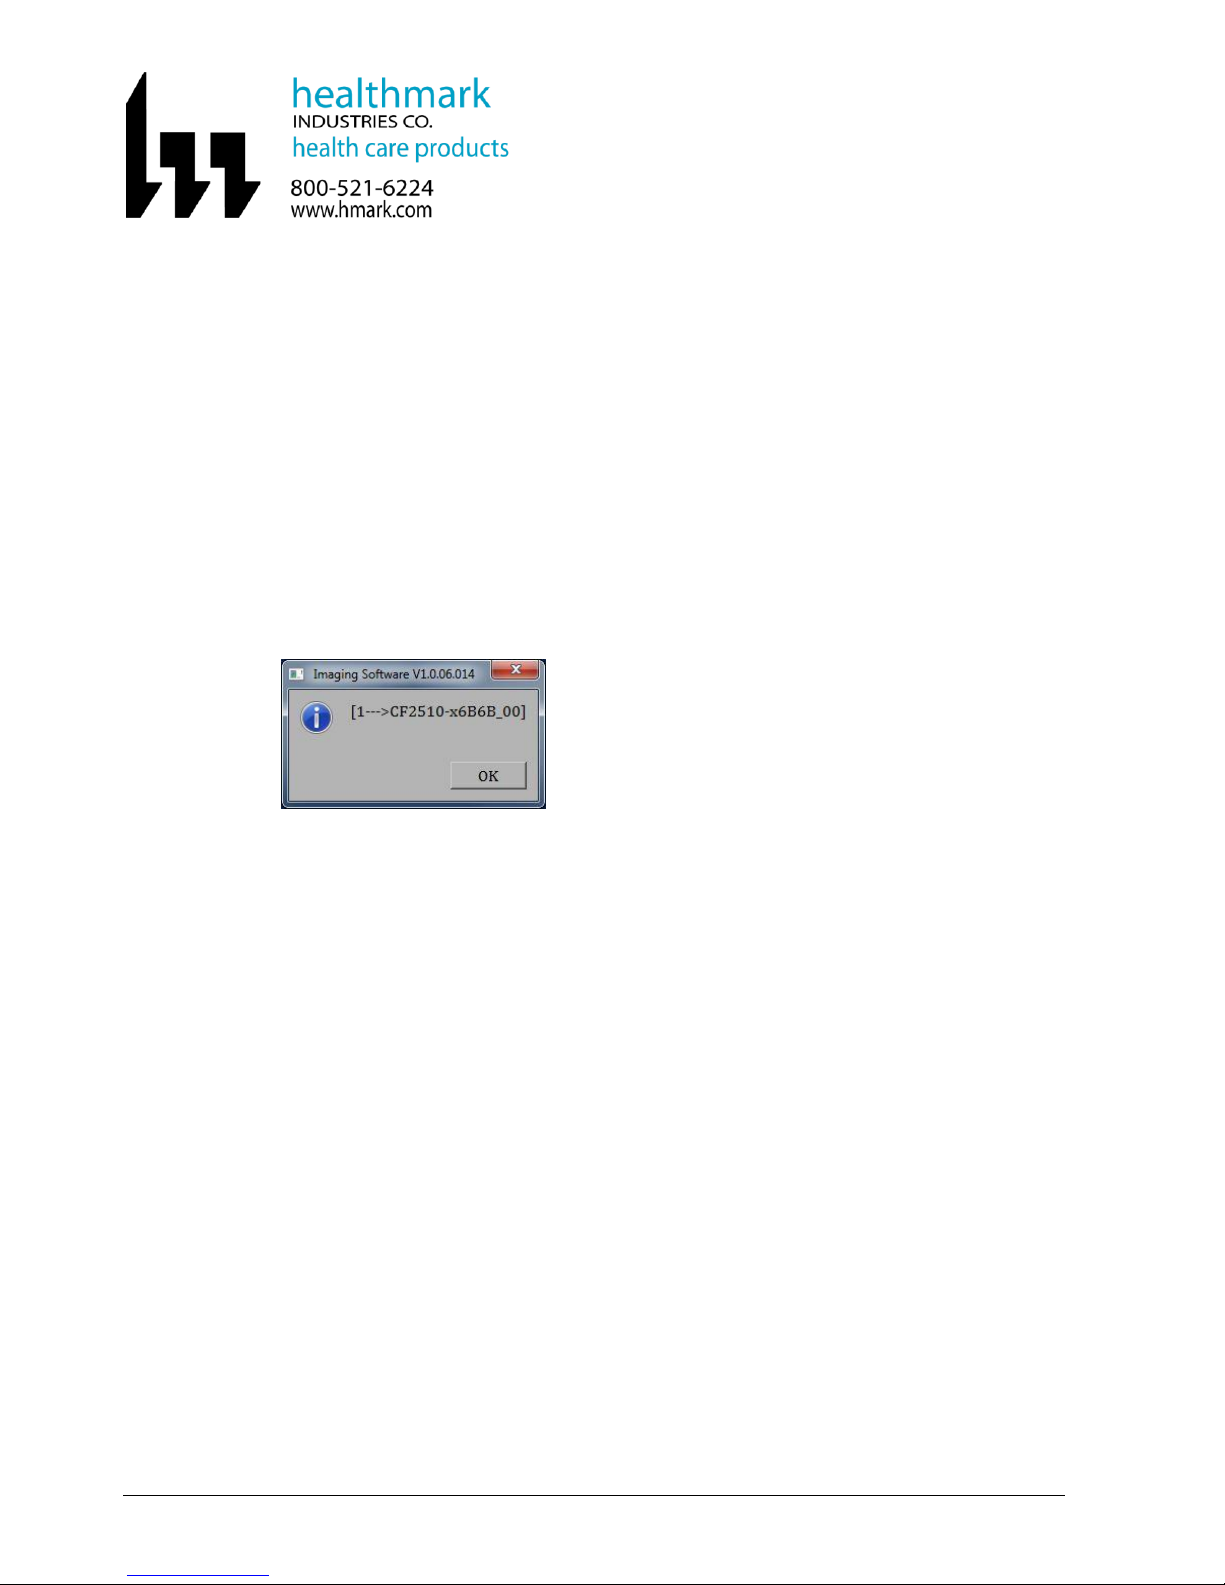
The information pop up window will appear with the following information:
If the Information Popup Box does not come up, try restarting the application or
reinstalling the software.
If the popup still does not come up, the Hardware (Device) may be damaged and/or not
plugged in properly.
When the Information Popup Box comes up, continue by selecting the “OK” button.
The User Graphical User Interface (GUI) will display on the screen.
FIS-001 Page 23 of 33

10.0 GRAPHICAL USER INTERFACE (GUI)
If the Software and Hardware are both operational and compatible the following program window
will appear on the screen (video will be live).
Date & Time are reported on the top right corner.
10.1 Changing Instrument Name
The Instrument information can be changed so that each video and image taken can be
stored in a user defined location. To do this, click on the box that says <Enter Surgical
Instrument Information>. A key-board will popup enabling the user to change the
name of the test/procedure.
With either the keyboard on screen or an externally attached keyboard type the name of
the test/procedure followed by the “Enter” key.
All images & videos captured will now be stored under the folder.
ImageData\Date_<Surgical Instrument Information Entered>
For example:
FIS-001 Page 24 of 33

2013-11-18_SuctionTube
There is no limit to the number of characters that can be entered in this field.
Once the inspection procedure is completed, the name can be modified and the next
inspection image data will be stored under the new label.
10.2 Taking Photo(s) Using GUI
To take a still image snapshot, click the “PHOTO” button once.
Each time a photo is captured the capture count will be incremented under the button
If the “Capture Photo as Reference” radio button is NOT selected, the images will be
stored in the folder defined by the Procedure Window.
Files can be retrieved from :
ImageData\Date_< Surgical Instrument Information Entered >
If the “Capture Photo as Reference” radio button is selected, the images will be stored
in the “reference” folder under ImageData.
FIS-001 Page 25 of 33

Files can be retrieved from:
ImageData\reference.
The images will be stored in the ImgTimeStamp.png format.
For example:
Img20131118113255000, where
2013 is the year 2013
11 is the 11th month of the year
18 is the day of the month
113255000 is the time of day the image is taken.
10.3 Taking Photo(s) using the button on the device handle
To capture a still image using the Control Handle, press the “PHOTO” button
This will be equivalent to using the GUI and the results will be the same.
Photo Button on handle is as follows:
User will observe the image capture behavior in the GUI as previously explained.
FIS-001 Page 26 of 33

10.4 Recording Video(s) Using GUI
To record video, click the “RECORD” button once.
Each time a video is recorded, the time of the video stored will be provided under the
button; this will be for the last video that is being recorded. When recording video, the
button color will change to red.
The videos will be stored in the VidTimeStamp.avi format.
For example:
Vid20140321101505000 , where
2014 part is the year 2014
03 part is the 3rd month of the year
21 part is the day of the month
101505000 part is the time of day video recording began.
FIS-001 Page 27 of 33

10.5 Stop Recording Video(s)
To stop recording video, the “RECORD” button will be clicked once again.
Once the “Record” Button is pressed a second time, the button color will change back to
black.
10.6 Recording Video(s) Using Button on Handle
To record video using the Control Handle, press the “REC” button once. This will be
equivalent to using the GUI, and the results will be the same.
Record Button on handle is as follows:
User will observe the behavior in the GUI as previously explained.
10.7 Stop Recording Video(s) Using Button on Handle
To stop recording video using the Control Handle, press the “REC” button once again.
This will be equivalent to using the GUI, and the results will be the same.
Record Button on handle is as follows:
User will observe the behavior in the GUI as previously explained.
10.8 Increasing the Illumination Level Using GUI
The “Up Arrow” next to “Illumination” button can be clicked to increase the brightness
of the camera light (LEDs).
FIS-001 Page 28 of 33

[100%] would indicate highest level possible.
[000%] would indicate lowest level possible. (LEDs Turned OFF)
The LED brightness is increased by 10% every time the button is pressed.
The GUI will have a different representation of each level selected.
Once 100% is reached if the increase button is pressed again, the LEDs will be turned
OFF.
10.9 Increasing the Illumination Level Using Button on Device Handle
To increase the brightness of the camera LEDs, press the “Up Arrow” on the Control
Handle. This will be equivalent to using the GUI, and the Illumination change results will
be the same.
Up/Down Button on handle is as follows:
The user will observe the Illumination change behavior in the GUI as previously
explained.
[100%] would indicate highest level possible.
[000%] would indicate lowest level possible. (LEDs Turned OFF)
The LED brightness is increased by 10% every time the button is pressed.
The GUI will have a different representation of each level selected.
Once 100% is reached if the increase button is pressed again, the LEDs will be turned
OFF.
FIS-001 Page 29 of 33

10.10 Decreasing the Illumination Level Using GUI
The “Down Arrow” next to “Illumination” button can be clicked to decrease the
brightness of the camera light (LEDs).
[000%] would indicate lowest level possible. (LEDs Turned OFF)
The LED brightness is decreased by 10% every time the button is pressed.
The GUI will have a different representation of each level selected.
Once 0% is reached if the decrease button is pressed again, the LEDs will be turned ON
at 100%.
10.11 Decreasing the Illumination Level Using Button on Device Handle
The “Down Arrow” next to “Illumination” button can be clicked to decrease the
brightness of the camera LEDs.
The results will be the same.
Up/Down Button on handle is as follows:
The user will observe the Illumination change behavior in the GUI as previously
explained.
[000%] would indicate lowest level possible. (LEDs Turned OFF)
The LED brightness is decreased by 10% every time the button is pressed.
The GUI will have a different representation of each level selected.
Once 0% is reached if the decrease button is pressed again, the LEDs will be turned ON
at 100%.
FIS-001 Page 30 of 33

10.12 Reviewing Stored Images/Video
To review previously stored images or recorded video select the “MENU” button with a
single click.
A single click on the “MENU” button will take user to “Tools” Box.
Under the “Tools” Box, select “REVIEW” button with a single click.
A new window with all working folders will be displayed.
Select the folder to be opened.
Click on “OPEN” button to select the folder for review.
FIS-001 Page 31 of 33

A file managing/selecting window will popup, enabling user to select an image or video
to replay.
Select the file to be reviewed by double-clicking on it.
The image/video will be displayed in a new window.
To quit, select the “x” button in the Setup Box and “EXIT” button in the Tools Box.
This will take user to the startup interface.
FIS-001 Page 32 of 33

11.0 ACCESSORIES
USB 2.0 Cable:
A standard, RoHS Compliant, USB2.0 Cable, with Type A to Mini B connections, is the only
device accessory. Standard cable length is 6ft (2m).
12.0 MAINTENANCE
12.1 Cleaning
The device handle can be cleaned with a damped cloth or wipe with alcohol.
It should not be soaked or dunked into any liquid solution.
The electronics are NOT designed to be soaked.
The Unit will STOP working if submerged under any liquid.
12.2 Storage
The device can be stored in -20°C to +55°C.
Keep away from liquids, dust and magnetic fields while storing.
13.0 USER NOTICES
13.1 THIS DEVICE IS NOT INTENDED FOR USE ON HUMANS
13.2 The device does NOT have Field-Wiring Terminal Boxes.
13.3 The device does NOT produce Ionizing Radiation.
13.4 The device is RoHS Compliant.
13.5 The device handle may get warm to the touch. This is normal.
13.6 The device has NOT been tested with MAC OS, older Windows operating systems, or
any Virtual Machine and the results are not guaranteed in terms of functionality and
performance.
13.7 There would be NO risk in plugging the device to a USB2.0 compliant port on a PC or
tablet running an unsupported OS.
13.8 Plugging the device to a non-compliant USB port (i.e. USB 1.0 or USB 1.1 capable only)
will not damage the device; however it will NOT function as intended.
13.9 Training is required for end users to use this device.
13.10 The device can and will be packaged in single or bulk quantities.
13.11 The device will be packaged in a way that the flexible shaft is not kinked during the
shipment.
FIS-001 Page 33 of 33
 Loading...