

Page 1
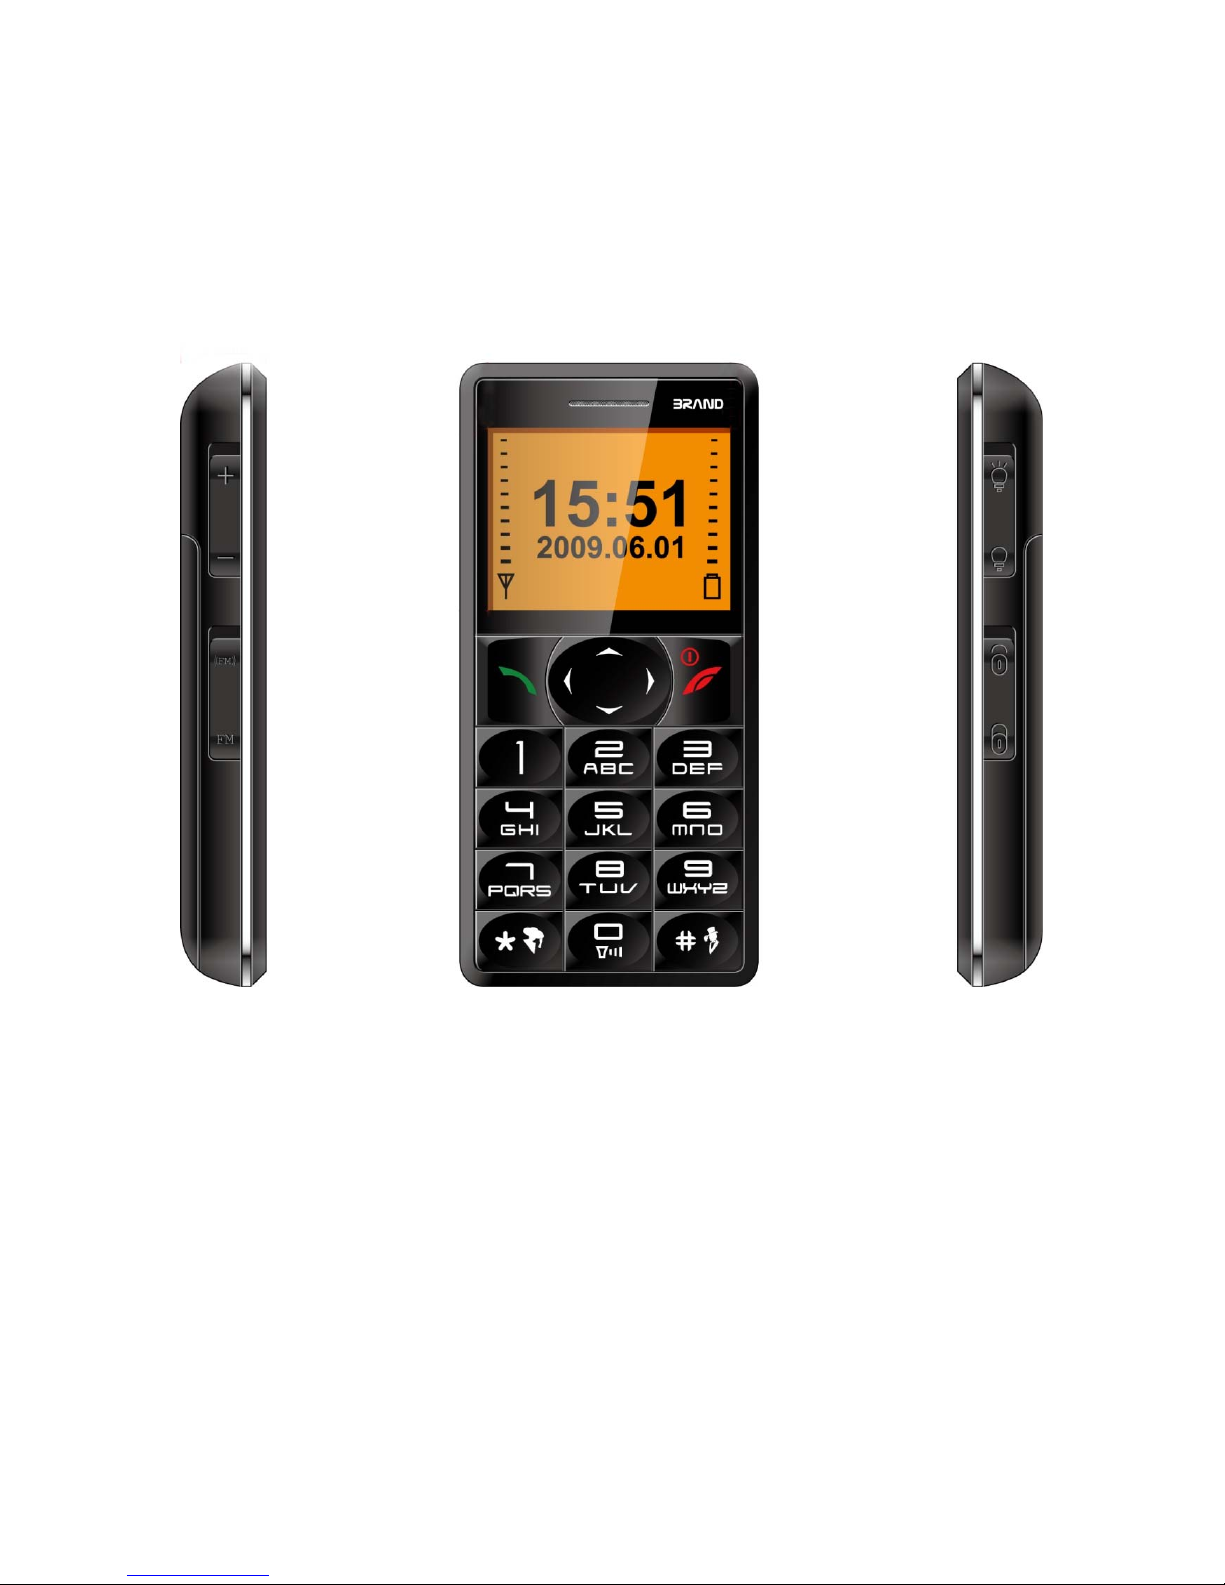
GPS Safety Mobile Phone Manual
Welcome to use our mobile phone!
Thank you for choosing our GPS safety monitoring mobile phone. This mobile phone represents the
perfect combination of GSM and GPS technologies. It is characterized by streamline fashionable
profile design, simplicity and elegance; it fully shows the fashionable personality. With large-capacity
phonebook, SMS, alarm clock, call center, phone settings, FM radio, GPS, hang-up state emergency
alarm, etc, it can help you enjoy a rich and colorful life.
● Before use, be sure to read this manual carefully.
1
Page 2

● The new battery cannot have optimal performance until it has 2-3 complete charges and
discharges (at least12hs). It is recommended to charge the battery until the battery is empty and
the mobile phone switches off automatically
The content of this manual may be different from the real object, so the latter shall prevail. Should any
update on this phone and its accessories, we will not make further notice.
Table of contents
1. Precautions and notices ....................................................................................................................... 3
1.1 Safety Prevention Measures .............................................................................................. 3
1.2 Notices on using the phone ............................................................................................... 4
1.3 Notices on using the battery .............................................................................................. 4
1.4 Notices on using the charger ............................................................................................. 5
1.5 Related Requirements ....................................................................................................... 6
2. Use Notices ......................................................................................................................................... 8
2.1. Check the Phone and Accessories .................................................................................... 8
2.2. Mobile Phone Specifications ............................................................................................ 8
2.2.1 Accessory Specifications ................................................................................................ 8
2.2.2 Technical Specifications ................................................................................................. 8
2.3. Appearance ....................................................................................................................... 9
2.4 How to Insert the SIM Card ...................................................................................... 10
2.5 Battery ....................................................................................................................... 10
2.5.1 Install the Battery ......................................................................................................... 10
2.5.2 Charge the Battery ........................................................................................................ 10
3. Basic Operation ................................................................................................................................. 12
3. Basic Operation ................................................................................................................................. 12
3.1 Switch-on/off................................................................................................................... 12
3.2 Standby Shortcut ............................................................................................................. 12
3.3. Keypad Lock .................................................................................................................. 12
3.4. Adjust Receiver Volume ................................................................................................. 12
3.5. Word Input ..................................................................................................................... 12
4. Functional Description ...................................................................................................................... 13
4.1. Phonebook ...................................................................................................................... 13
4.1.1 Search ........................................................................................................................... 13
4.1.2 Add Contacts ................................................................................................................ 13
4.1.3 Copy ............................................................................................................................. 13
4.1.4 Settings ......................................................................................................................... 13
4.2 SMS ................................................................................................................................. 13
4.2.1 Create SMS .................................................................................................................. 14
4.2.2 Inbox ............................................................................................................................ 14
4.2.3 Outbox .......................................................................................................................... 14
4.2.4 SMS Settings ................................................................................................................ 14
4.3 Call Center ...................................................................................................................... 14
4.4 Phone Settings ................................................................................................................. 14
4.5 Kit ................................................................................................................................... 14
5. Phone Maintenance ........................................................................................................................... 15
6. Troubleshooting ................................................................................................................................ 16
7. About GPS ........................................................................................................................................ 17
2
Page 3
7.1 Introduction to GPS-related Functions ............................................................................ 17
7.2 Commands Corresponding to and Operation Method of Basic Functions ...................... 17
7.2.1 Location Inquiry ........................................................................................................... 17
(1) SMS Inquiry .................................................................................................................... 17
(2) Platform Inquiry .............................................................................................................. 17
7.2.2 Setup of Center Number ............................................................................................... 17
7.2.3 Alarm number setting function ..................................................................................... 18
7.2.4 SOS Function ............................................................................................................... 18
7.2.5 Regular Upload Interval Setup ..................................................................................... 18
7.2.6 Function of Changing Password .................................................................................. 19
7.2.7 Low-Voltage Alarming Function .................................................................................. 19
7.2.8 Set APN Command ...................................................................................................... 19
7.2.9 Electronic Fence Function ............................................................................................ 19
(1)GPS Fence Function ......................................................................................................... 19
(2) Fence Reading Function .................................................................................................. 19
(3) Server center address command ...................................................................................... 20
(4) Function of Canceling Fence ........................................................................................... 20
7.2.10 Auxiliary Functions .................................................................................................... 20
7.2.11 Server setting command ............................................................................................. 20
8. After-sale Service .............................................................................................................................. 21
1. Precautions and notices
1.1 Safety Prevention Measures
Before use, please read “Safety Warnings and Notices” carefully in order to ensure your correct use.
The safety warnings and notices are used to prevent any damages on people and properties.
The following signs indicate the danger and damage level possible in case of incompliance with the
safety protection rules.
DANGER, indicating that incorrect operation will result in severe accidents or
faults.
WARNING, indicating that incorrect operation may likely result in severe
accidents or faults.
CAUTION, indicating that incorrect operation may possibly result in accidents or
faults.
The following signs indicate the rules we must abide by:
Indicates forbidden operations.
Indicates forbidden disassemblies.
Indicates that the power plug must be pulled out of the socket.
Indicates compulsory operations.
3
Page 4
1.2 Notices on using the phone
Do not use the phone while driving a car in order to avoid traffic accidents. When
you must use the phone during driving, be sure to stop the car in a safe place.
Please switch off your mobile when it is not permitted to use, such as in plane,
hospital, etc. The phone will affect the normal operation of electronic devices and
medical instrument. So, please abide by relative regulations when using your
mobile.
Please do not use the phone where the signal is weak or expose to high-precision
electronic device. The wireless electronic wave may interfere the operation of the
electronic device. Please avoid using your mobile near the following devices:
hearing aid, pacemaker, other medical electronic devices, fire detector, auto door,
and other auto control devices.
If you must use the phone near medical devices, you should consult their
manufacturers and distributors to avoid interference.
Under very rare circumstances, when using the phone in some types of cars, the
electronic devices in the car might be affected. At that time, for safety consideration,
please do not use the phone.
Do not place your mobile near magnetic cards since the radiation wave may clash the
information on cards, such as floppy disk, credit card, etc.
Do not keep such articles as pin, etc close to the receiver of the phone, because of the
magnetism of the receiver may attract such articles, thus causing damages to human
body.
1.3 Notices on using the battery
Please do not discard the battery into fire, otherwise it might cause fire or crack on
the battery.
When installing the battery, please do not force it in, otherwise leakage, overheating,
crack, and fire might occur.
Please do not use hardware, such as electrical wire, needle, etc, to short circuit, or
place the battery with hardware, such as necklace, etc. Otherwise, it might lead to
leakage of liquid, overheating, cracking, and even fire.
If the liquid of the battery enter into the eyes, it might cause ablepsia. At this time,
please do not knead the eyes with fingers, just flush eyes with clean water, and then
see a doctor immediately.
Please do not place or use the battery near the fire, heater, or other places of high
temperature. Otherwise, it might lead to the leakage of liquid, overheating, cracking,
and fire.
4
Page 5
Please do not disassemble or refit the battery, otherwise it might lead to the leakage
of battery liquid, overheating, cracking, and even fire.
If the liquid of the battery spills onto your skin or clothes, it might burn your skin.
Please flush the liquid with water immediately. If necessary, please see a doctor.
When the battery has leakage or special odor, be sure to keep it away from open fire
immediately to avoid fire or explosion.
Be sure to install the battery correctly to prevent the phone being damaged due to
wrong polarity.
Please do not use or place the battery at places where the sunlight can reach directly.
It might lead to the leakage of the battery liquid and overheating, reduce the
performance, and shorten the service life of the battery.
1.4 Notices on using the charger
Please use 220V of alternating current. Other voltage might cause leakage of power,
fire, and damage to the phone and the charger.
Please do not short connect the charger, otherwise you might get an electric shock,
and smoking and damage to the charger might occur, too.
Do not hold the power cord of the charger and pull it fro and back; otherwise, the
charger may be damaged or others may be injured.
Please do not contact the charger, power line, and AC outlet with wet hand.
Otherwise, it might lead to electronic shock.
Do not pull the lead wire of the charger with too much force; do not place any
weights on the power cord; do not replace the power cord; otherwise electric shock
or fire may be caused.
When the battery is fully charged, please unplug the charger from the power socket.
During charging, when the battery has smoke or special odor, please immediately
unplug it from the power socket. In such case, the continuous use of the charger may
cause fire or electric shock. Self-repair is very dangerous, please immediately
consult your distributor.
5
Page 6
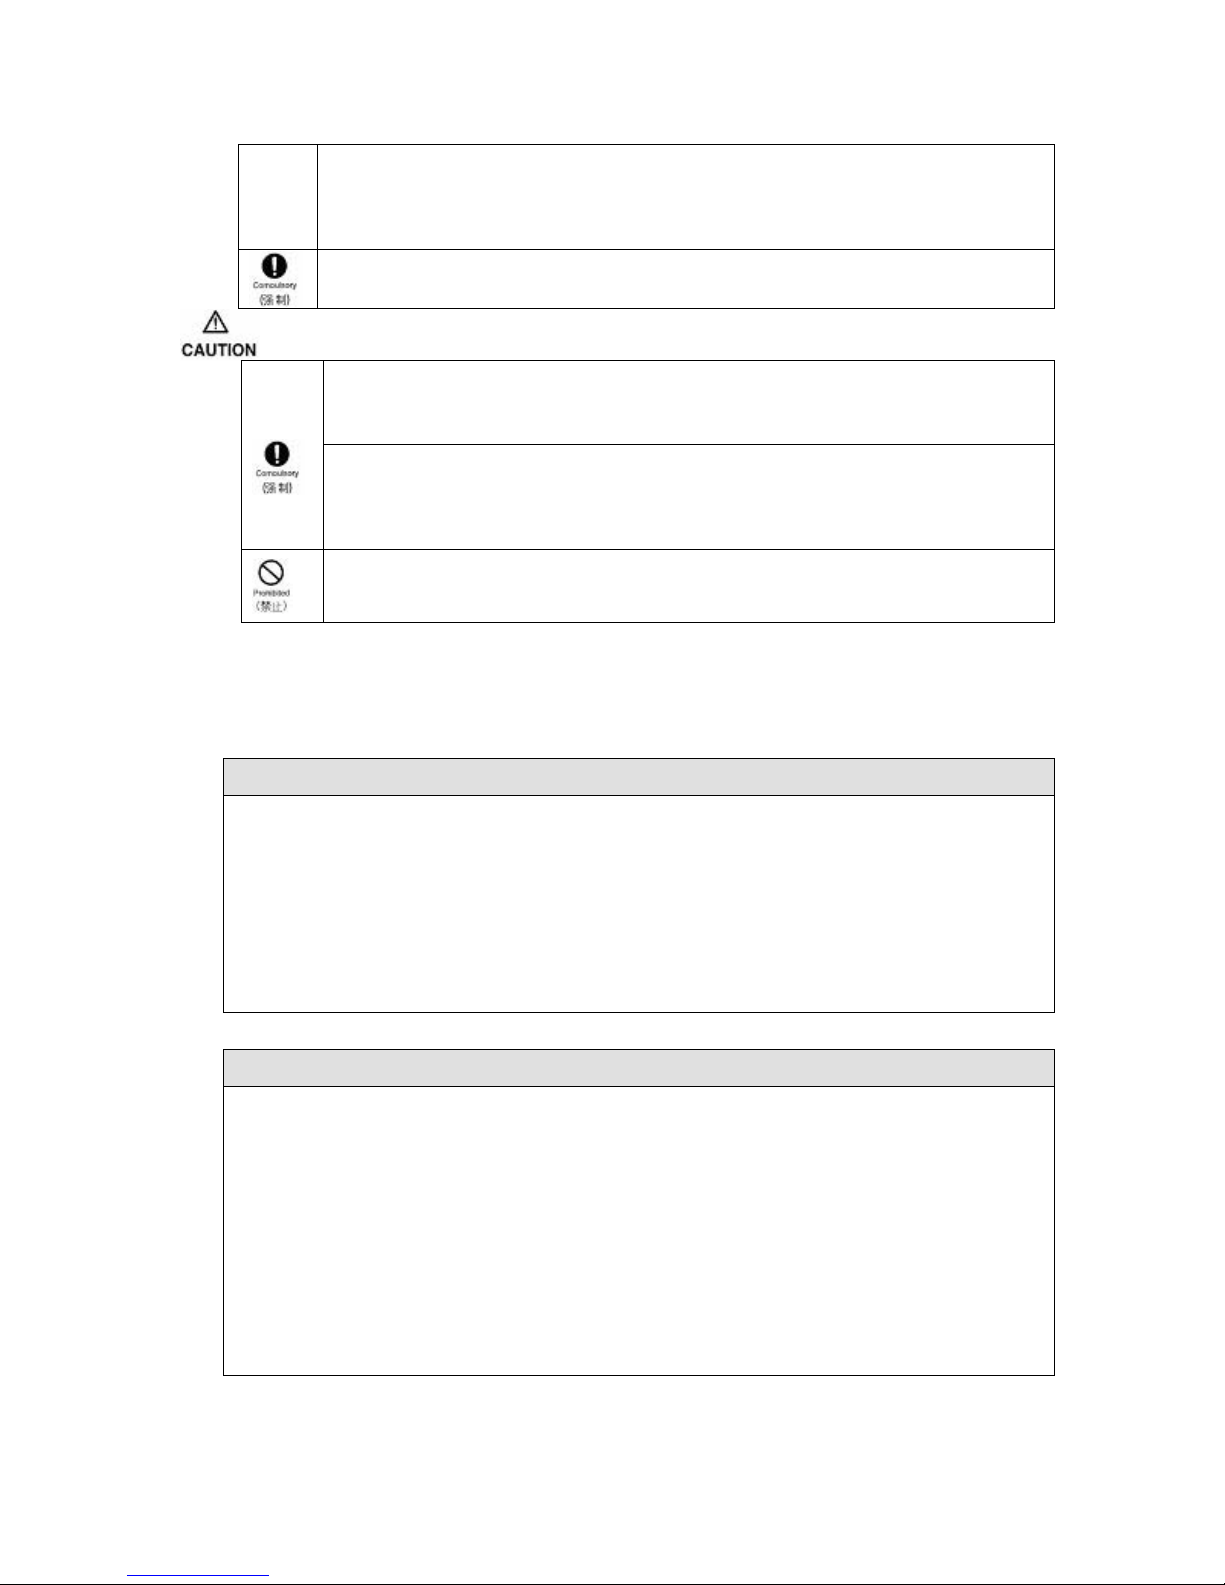
If there is water or other liquid on the charger, please get the charger out of the AC
outlet right away, to prevent overheating, fire, electric shock, and charger
malfunction.
Always use the original charger because the use of other chargers may damage the
phone.
Before maintenance or cleaning, please pull the charger out of the socket to avoid
electric shock.
When pulling out the charger, be sure to hold its main body, because of the pull of
the power cord of the charger may result in the damage of the power cord, and
possible cause fire or electric shock.
Please do not use the charger at High humidity places, such as bathroom, etc.
Otherwise, it might lead to electronic shock, fire, and damage to the charger.
1.5 Related Requirements
Related requirements for the use of the phone
Never use the phone at too high and too low temperature.
In order to ensure call quality, try to avoid using the phone too close to common phone,
TV set, radio, office automation, etc.
In order to keep accurate positioning, be sure to use the GPS function of this phone in an
open place.
Related requirements for the use of the battery
The battery shall be placed in the cool, well-ventilated and direct sunshine-free place. If
the battery is used up for long, it will be unable to be charged. If the phone is idle for long,
please regularly charge it.
The battery is consumable. All the batteries have certain service life. When the battery is
charged repeatedly but cannot improve its performance, it will indicate that the battery has
been damaged and should be replaced.
Never throw the waste battery together with rubbish. When dealing with the waste
battery, always abide by the regulations of the local competent authority.
6
Page 7

Charging requirements
Please do not charge your phone at such places: the sunshine can reach directly; the outer
temperature is below 5℃ or higher than 40 ; Humid and dusty places or vibrating places ℃
(might cause malfunction); near television, radio, or other electrical devices (might affect
the image and sound of these devices).
7
Page 8
2. Use Notices
2.1. Check the Phone and Accessories
Unpack the mobile phone package and check if the phone and its accessories are complete. In case of
any incompletion, please consult the local distributor.
• 1X mobile phone;
• 1 x battery;
• 1x charger
• 1x user manual;
• 1x headset(optional);
• 1x certificate of conformity.
2.2. Mobile Phone Specifications
2.2.1 Accessory Specifications
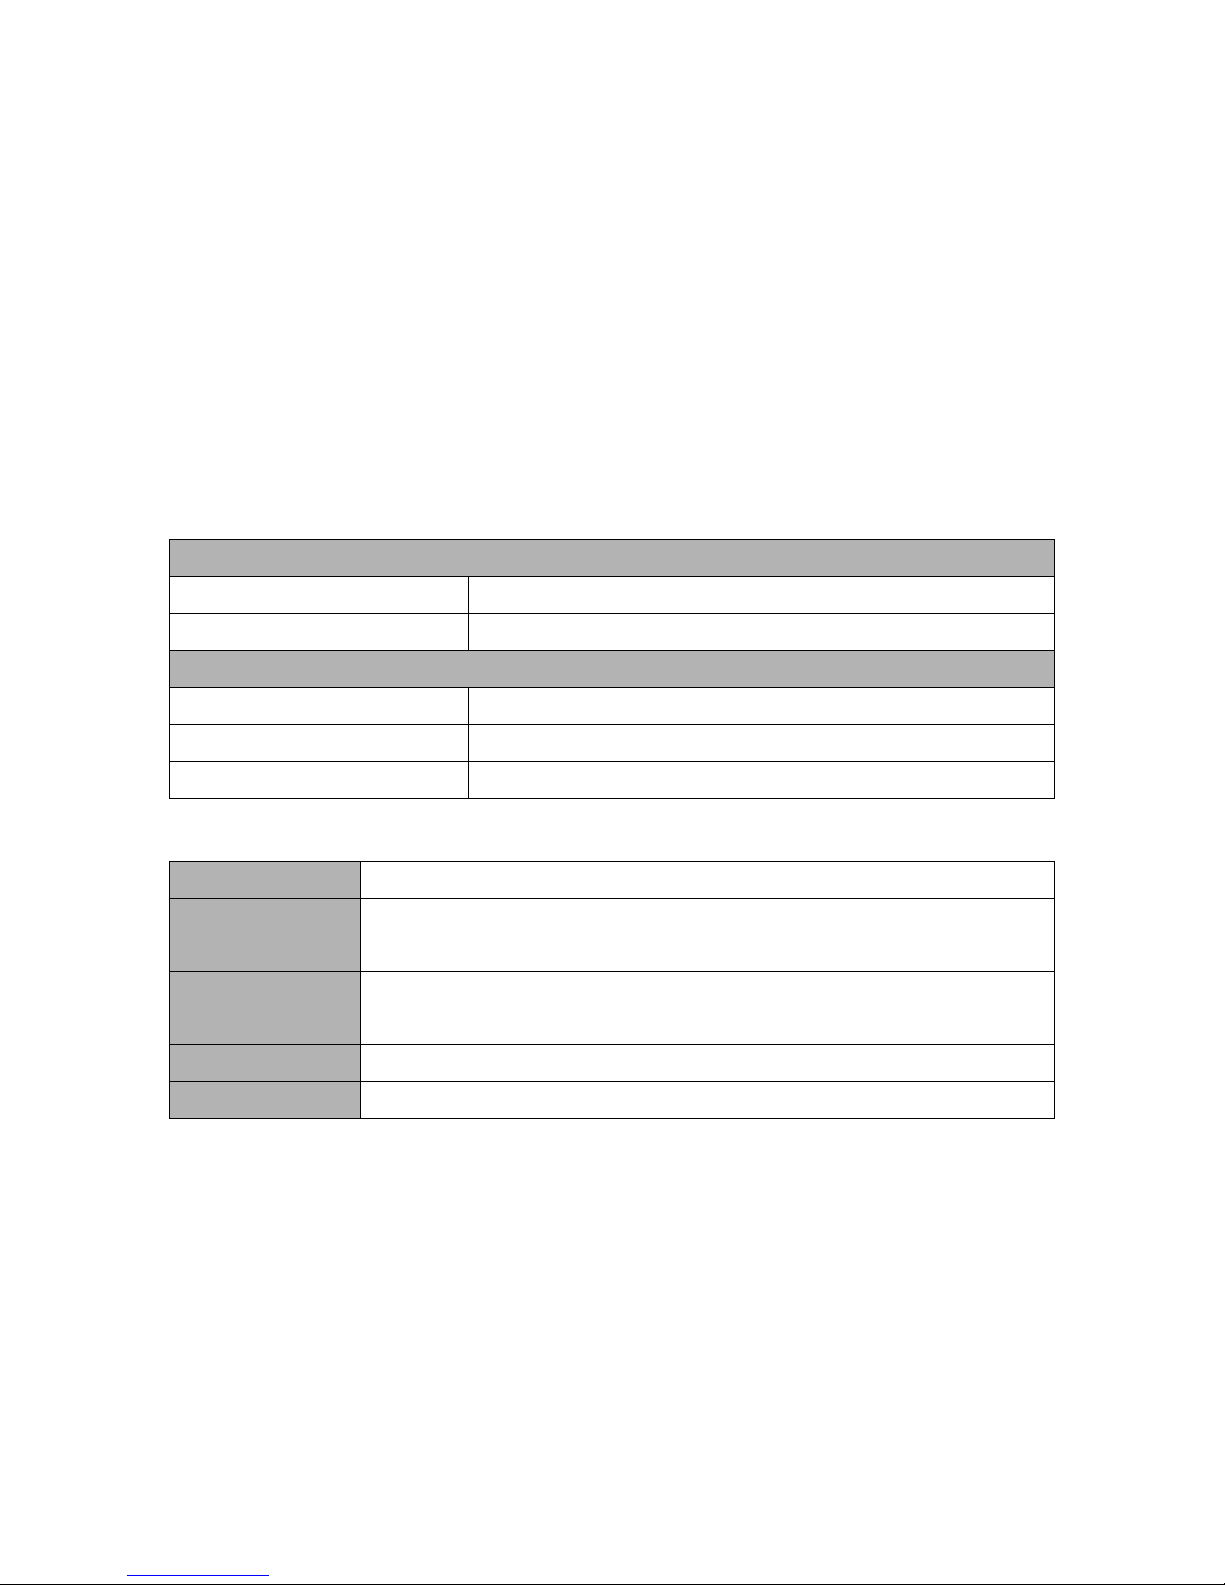
Lithium battery
Normal voltage 3.7V 1300MAH
Charging voltage 4.2V
Charger
Input AC220V(+/- 20%) 50Hz 50mA
Output DC5.0V 500mA
Charging time 12h for the first three times and 3-6h thereafter.
2.2.2 Technical Specifications
Work frequency 850/900/1800/1900MHZ
Continuous call
duration
Continuous standby
duration
Dimensions 118mm*63mm*27mm
Weight 110g ( including battery)
* The standby duration and call duration depend on the local network and GPS application.
About 5h
7 days (GSM standby)
8
Page 9
2.3. Appearance
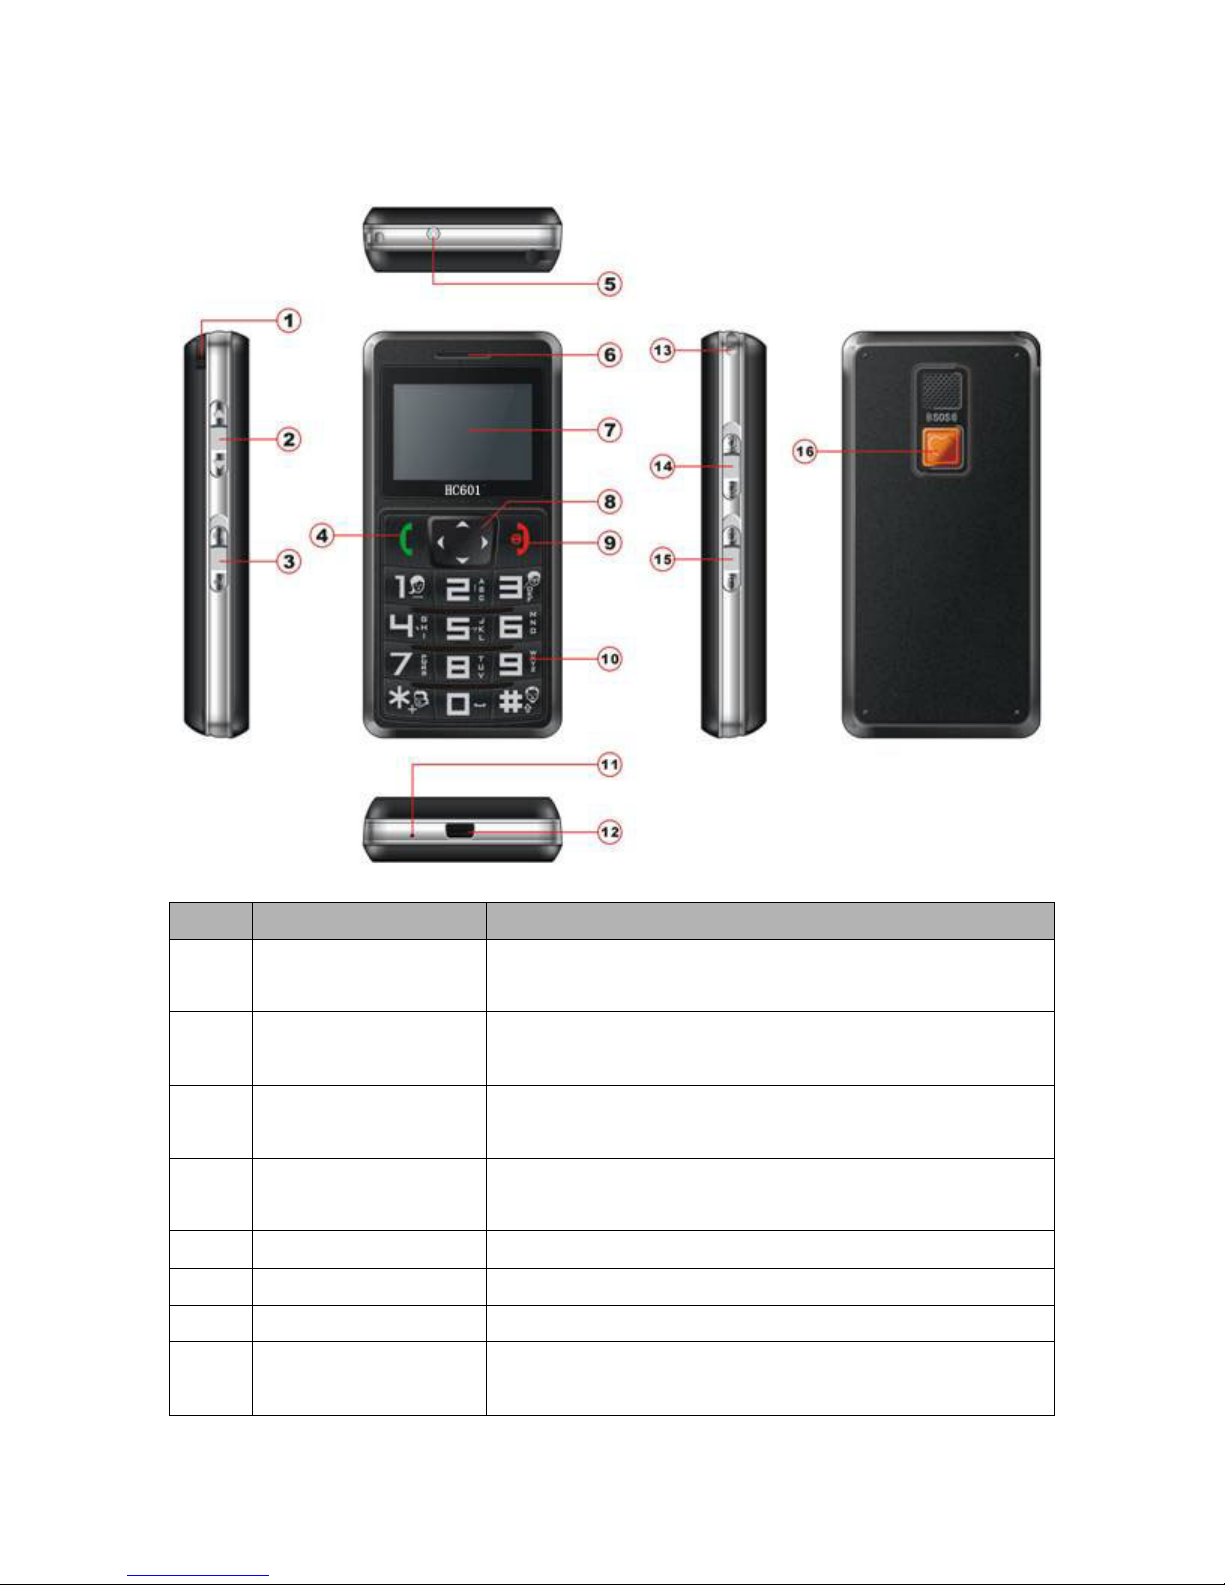
SN Name Functional Description
1 FM antenna When listening to FM radio, you need to pull out the FM
antenna.
2 Volume key During call, listening to FM radio, etc, to adjust volume, just
press this key.
3 FM shortcut key Push the key upward to open FM radio and downward to close
it.
4 Answer and dial key Dial a call or receive a call; in standby, press this key to enter
the latest call log.
5 Flashlight Push the key upward to open the flashlight.
6 Receiver Voice, ring tone and FM output
7 Screen
8 Direction key
Adjust menus; the left and right direction keys are for Enter and
Back.
9
Page 10
9 End key End or refuse a call;
In operation, back to the previous level, i.e. Cancel or Back;
On the switch-off state, press this key long to switch on
the phone;
On the standby interface, press this key long to switch
off the phone;
On the non-standby interface, press this key long to back
to the standby interface in shortcut way.
10 Keypad On the Edit interface, press * key to input special symbols and
press the # key to switch input modes.
11 MIC
12 I/O port For charging and headset.
13 Lanyard port For lanyard
14 Flashlight switch Upward to switch on the flashlight, downward to switch off the
flashlight.
15 Keypad lock switch Upward to unlock, downward to lock the keypad (except SOS
key)
16 SOS key In switch-on/off state, press this button for 3 for SOS (refer to
7.2.2,7.2.3 for details)
2.4 How to Insert the SIM Card
Please insert the SIM card along its SIM card slot direction (align the cut corner of the SIM card with
the cut corner of the slot) and make sure that the SIM card has been inserted into its proper position.
2.5 Battery
2.5.1 Install the Battery
Open the battery cover, insert the SIM card properly, install the battery and then restore the battery
cover.
2.5.2 Charge the Battery
About charging:
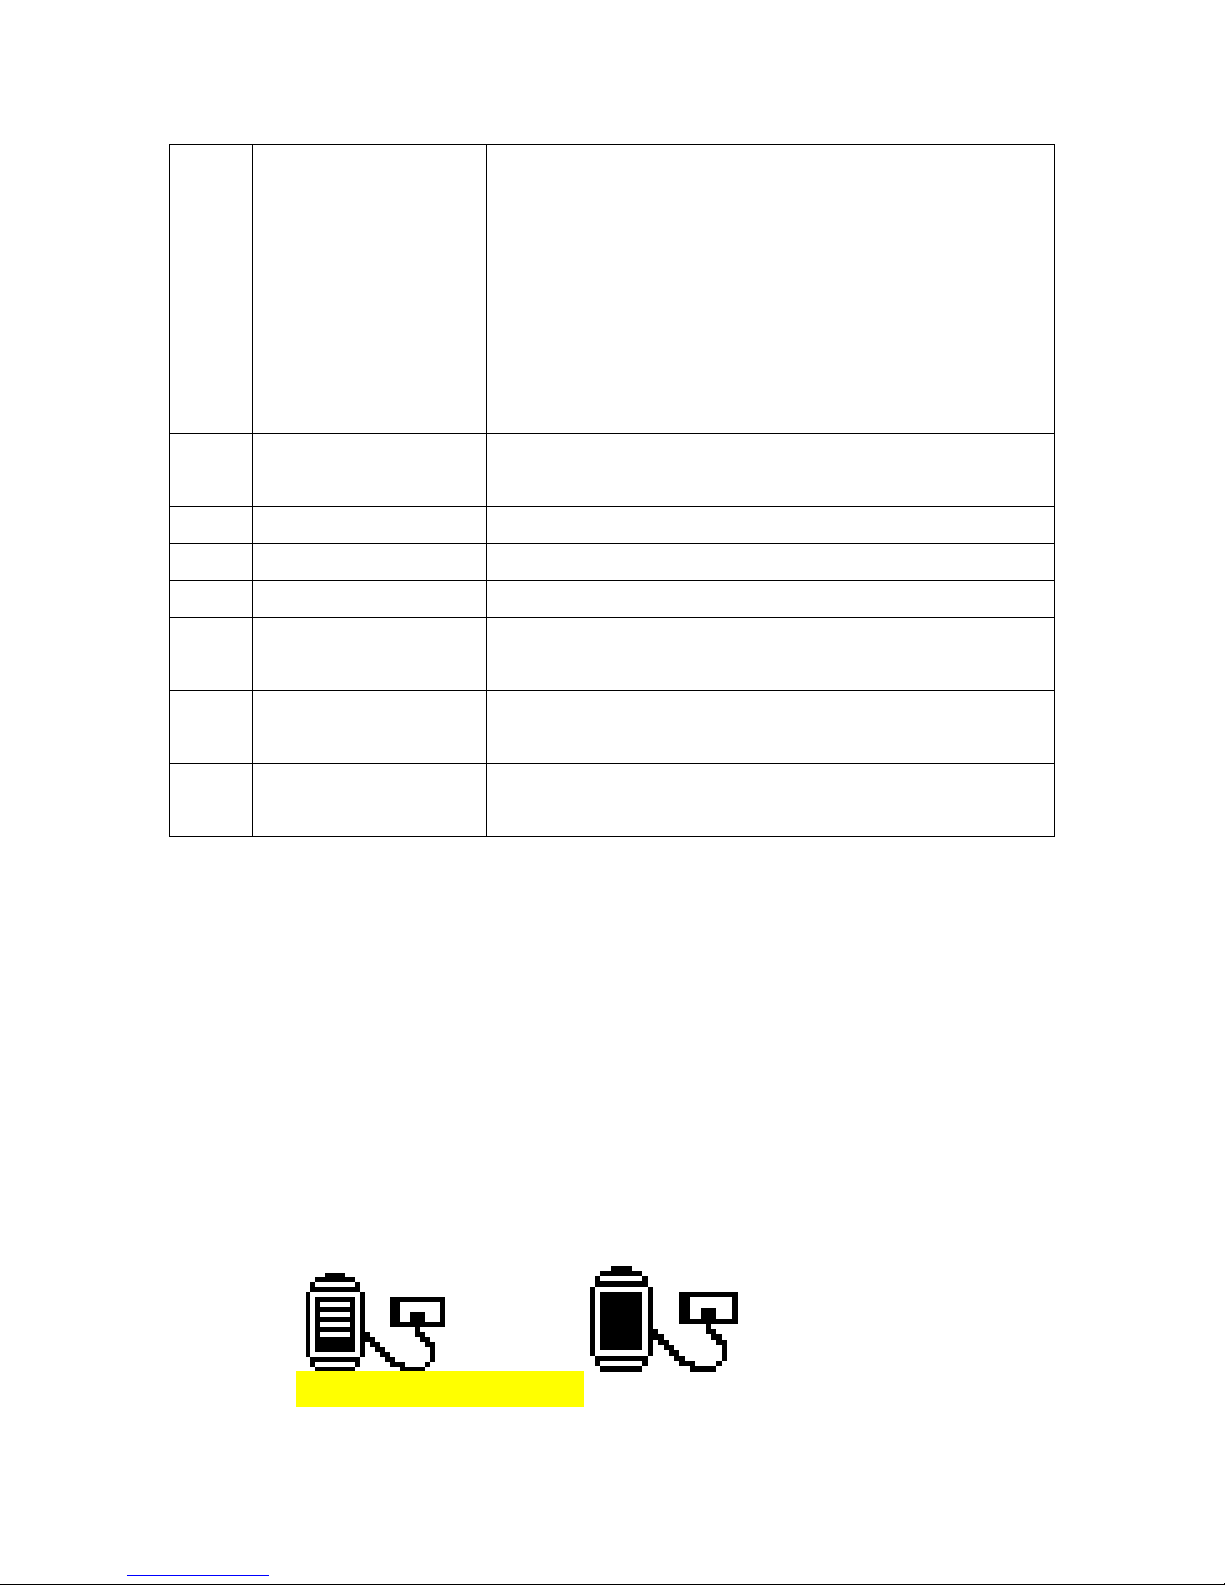
1) Insert the charging plug of the charger into the charging port of the phone and the other end of
the charger into the 220V power socket. In such case, the phone backlight will be lit up, the battery
icon will flicker and “charging” will be displayed.
Charging Charged
10
Page 11

2) When the battery icon of the phone stops flickering, it will indicate that the charging is over and
the screen will display “Charged”.
Charge with the phone on:
1) Insert the charging plug of the charger into the charging port of the phone and the other end of
the charger into the 220V power socket. In such case, the phone backlight will be lit up, the battery
icon will flicker and the battery icon on the right of the screen will start flickering.
● Tips:
For the battery of the newly bought mobile phone or the new replacing battery, do not charge it
until it is completely used up. It is recommended to charge the battery for above 12h for the first
three times in order to ensure the service life of the battery.
The charging with the phone on will not affect the normal call dial and reception, but consume
more power than usual and thus it will take more time to charge the battery.
11
Page 12

3. Basic Operation
3.1 Switch-on/off
Switch-on
Press the [Switch-on Key] to switch on the phone and enter the standby interface.
Tips:
1. If the SIM protection is activated, you need to input SIM password, press the [Left Function Key] to
confirm and enter the standby interface.
2. If the phone protection is activated, you need to input the phone password, press [Left Function Key]
to confirm and enter the standby interface.
Switch off
On the standby interface, press the [Switch-off Key] to switch off the phone.
3.2 Standby Shortcut
Tips:
On every edit and function interface, press the [Switch-on Key] to directly back to the standby
interface.
On the standby interface, press the [Left Function Key] to enter the main menu. On the main menu,
press the [Up/Down Direction Key] to move and select the corresponding menus and then press the
[Left Function Key] to enter the corresponding module.
On the standby interface, press the [Dial Key] to enter the list of the latest received/dialed calls.
On the standby interface, press the [Up Direction Key] to enter the interface of creating SMS.
On the standby interface, press the [Down Direction Key] to enter the alarm clock menu.
3.3. Keypad Lock
In order to avoid touching the keypad carelessly and thus causing wrong operation, you may lock the
keypad of the phone.
In switch-on state, push the keypad lock switch downward to lock the keypad.
In the locked keypad state, push the keypad lock switch upward to unlock the keypad.
3.4. Adjust Receiver V olume
Press the left volume adjustment key to adjust the receiver volume. 3s after the volume is adjusted, the
screen will automatically back to the call duration page.
3.5. Word Input
GPS safety monitoring mobile phone provides such input modes for you as intelligent Pinyin input,
letter input, English input, number input and symbol input. The defaulted input mode is the intelligent
Pinyin input mode. You may set input mode on the phone. Press the [# Key] to switch input modes
and the input state will be displayed on the right upper corner of the screen.
The keypad definitions in the input mode are as follows:
[Enter Key]: Confirms the selected Pinyin, Chinese characters or symbols.
12
Page 13

[Back Key]: Exits from the current input state.
[Up Direction Key], [Down Direction Key]: Moves the cursor up and down.
[* Key]: Inputs punctuations.
[# Key: Switches input modes.
[0 Key]~[9 Key]: Input digits.
4. Functional Description
4.1. Phonebook
The phonebook is used to store your phone numbers and it includes phone phonebook and SIM
phonebook.
The phone phonebook can hold 200 entries while the SIM phonebook capacity depends on the actual
SIM card.
Via Main Menu →Phonebook, or on the standby interface, press the [Left Direction Key] to enter the
phonebook in a shortcut manner.
1) Search Contacts You may search phone numbers according to names. You need not to input all
of the name but part to search the phone number.
2) Add Contacts You may add new contacts into the phonebook.
3) Copy All You may copy the phone numbers on the SIM card to the phone or vice versa.
4)Delete You may delete the phone phonebook or the SIM phonebook.
5)Phonebook Settings You may set the preferred storage location or phone list.
4.1.1 Search
Search the contacts in the phonebook according to names.
Fast search: In the phonebook list, you may localize the contact according to the first Pinyin letter of
the name or the first letter of the English name. For example, in phonebook list, to search Li Si, press
the [5 Key] (JKL) three times to localize the contacts beginning with L.
4.1.2 Add Contacts
1. Enter the phonebook and choose “Add” to add new contacts into the phonebook.
2. The storage location includes phone phonebook and SIM phonebook. If phone phonebook, on the
editing page of adding contacts, in turn input name and phone number.
3. Press the [Left Function Key] to save the contacts.
4.1.3 Copy
Copy: You may copy all numbers on the SIM card to the phone or vice versa.
4.1.4 Settings
Settings: You may set the preferred location of the phonebook and the content displayed on the list.
4.2 SMS
This phone supports the delivery of SMS to many parties; totally you can send SMS to 10 recipients at
a time. Every SMS may contain at most 58 Chinese characters or 116 English words, digits and
13
Page 14

symbols.
4.2.1 Create SMS
1. Create: Via Main Menu→ SMS →Create, enter the SMS editing interface (for SMS editing, refer to
the input mode)
2. Choose Number: After the content of the SMS is input completely, press the [Left Function Key] to
select “Send” to input the phone number.
Or press the [Left Function Key] options to choose phonebook: enter the page of selecting phone
number on the phonebook, press the [Enter Key]/[Left Function Key] to introduce the number of such
contact.
3. Select and Save: You may save the edited SMS into the draftbox.
4. Send: After the recipient number is input, press the [Left Function Key] to send the SMS.
4.2.2 Inbox
1. Via Main Menu→ SMS →Inbox, display the list of the received SMS.
2. Choose the SMS item and then press the [Left Function Key] to choose the operation item and carry
out it.
4.2.3 Outbox
Via Main Menu→ SMS →Outbox, display the SMS having been sent successfully.
4.2.4 SMS Settings
Via Main Menu→ SMS →SMS Settings, you may have such options as mode settings, status settings
preferred location, preferred connection.
4.3 Call Center
Call log includes missed calls, received calls and dialed calls. You may enter the call center via Main
Menu-> Call Log.
4.4 Phone Settings
Via Call Settings, you may set the normal functions of the phone.
Via Main Menu→ Settings, you may have the following settings:
1) Time & date Set the time and date for the phone.
2) Timed switch-on/off Switch on/off the phone within the set time by the user.
3) Language Chinese and English
4) Network settings Network selection, etc
5) Security settings SIM lock, phone lock, keypad lock, fixed dialing, forbidden
dialing and password revision.
6) Restore factory settings Input the password to restore the factory settings
4.5 Kit
Via Main Menu →Kit, display Alarm Clock.
At most, this phone may set 5 alarm clocks at the same time.
14
Page 15

Via the alarm clock settings on the tool bar of the main menu, display the list of alarm clocks, choose
one alarm clock, press the [Enter Key] to enter alarm clock settings.
5. Phone Maintenance
Wipe off the common dirt with dry and soft cloth. If too much dirt, twist the soft towel with neutral
detergent dry and gently wipe off dirt and then wipe the phone with dry soft cloth.
Do not use hard cloth and benzene, thinner, etc to wipe the phone, otherwise, phone surface scratch,
fade or color change may occur.
15
Page 16

6. Troubleshooting
During operation, when feeling abnormal, please restore factory settings and refer to the following
solutions. If the problem cannot be solved, please contact the distributor or the service provider.
Failures Possible Causes Solutions
The battery is used up. Charge the battery.
Unable to switch on.
Unable to dial a call
Call cut off or noise
interference in call
The [Switch-on Key] is not
pressed long enough.
The battery is not installed
Press the [Switch-on Key] for more than
2s.
Install the battery correctly.
properly.
Out of the service area. Move to the place with signals.
Wrong phone number. Check the phone number.
Move to the place with strong signals.
Too weak signals
There are buildings around
Change to another place for call.
preventing the transmission of
signals.
In fast movement. The signal may have momentary
interruption during base station
switching. Please slow down and do not
move violently during call.
The plug of the charger is not
Insert the plug again.
Unable to charge the
inserted properly.
battery
The power cord of the charger is
disconnected.
The battery is aged. Replace it.
16
Check the connection.
Page 17

7. About GPS
7.1 Introduction to GPS-related Functions
GPS individual positioning
z High-sensitivity, new workmanship and the most advanced GPS chip;
z Can work effectively in limited space such as the remote and narrow places in a city;
z Low energy consumption;
z Fast signal capturing;
z Supports single positioning and continuous tracking;
z Supports alarming and remote monitoring;
z Supports fast dial button;
z Supports the location information inquiry by SMS and Internet
z May monitor without disturbing the tracked person and realizes real-time tracking;
z Can position the holder by call or mobile phone SMS;
z In emergency, press the SOS button to have an accurate positioning.
z Supports SOS key alarm in switch-off state.
7.2 Commands Corresponding to and Operation Method of Basic Functions
7.2.1 Location Inquiry
(1) SMS Inquiry
Create 988 + password command (defaulted password as 0000) via mobile phone and send it to the
terminal mobile phone number; after successful sending, the guardian’s mobile phone will receive a
piece of word message.
Send command to the terminal The terminal will return confirmation message to the mobile phone
By the same means, send the command 987 + password to the terminal, then the terminal will return
one piece of website message. The guardian may inquire the location information of the ward attached
with local map through this website message.
In the same way, send the command 666 encrypted password to the terminal; then the terminal will
return a piece of latitude and longitude message and a piece of detailed address message.
(2) Platform Inquiry
Step 1: Log onto the platform:www.theywhere.com
Step 2: Click the terminal of the ward, then the map will display the location of the ward.
7.2.2 Setup of Center Number
Set the center number by means of SMS through mobile phone. After the setup is successful, then the
17
Page 18

mobile phone sending the SMS will receive the “config OK” response message from the terminal.
Command format: #710# center number # user password ##
For example: #710#134xxxxxxxx#0000##
Note: All alarming information thereafter including SOS, low power, electronic fence, etc will be
returned to such number.
7.2.3 Alarm number setting function
Send the command in form of SMS through mobile phone to the terminal. After the setup is successful,
after sending the SMS, the mobile phone will receive the config OK response message returned from
the terminal.
Setup format: #711# Call 1# Call 2 # Call 3 # 0000##
Send command to the terminal The terminal will return confirmation message to the mobile phone
Description: After the setting is successful, press the SOS key, then the terminal will circularly dial
the set phone until it is connected.
7.2.4 SOS Function
If the monitoring number (i.e. the phone in Item 3) is set, when the ward is in emergency, press the
SOS key for 3s, then terminal will firstly play a piece of alert tone and then send a piece of alarm
message to every pre-saved number, then circularly dial the three pre-saved numbers until getting
connected. At the same time, the terminal activates the GPS function; after succeeding, the terminal
will report the current location to the center.
Format of sending alarm message:
#356823031017473##0#0000#SOS#2#26280E4E#11354.6567,E,2232.7841,N,005.82,119#180310#0
61616##
7.2.5 Regular Upload Interval Setup
The defaulted factory upload interval of this device is 2 minutes for getting the point and 4 minutes for
uploading one piece of positioning information. The user may change such parameter according to
actual demand.
Command format: # command number 730# Sampling interval # Pieces of uploads # User password
##
For example: 730#20#4#0000##
Note: The parameter “20” indicates getting one point every 20s; after getting points accumulatively
for 4 times, upload one piece of positioning information with the upload interval as 20*4=80s. The
user may change this parameter as the case may be.
18
Page 19

7.2.6 Function of Changing Password
Send the SMS “#770# User new password # User old password ##” by mobile phone to the terminal
number, after successful sending, the mobile phone with such setup will receive one piece of config ok
response information。
Send command to the terminal The terminal will return confirmation message to the mobile phone
7.2.7 Low-Voltage Alarming Function
If the terminal of the ward has a very low power and needs to be powered off, the terminal of the ward
will automatically upload one piece of low-voltage alarming command to the monitoring center
number.
SMS format:
#356823031017473##038888#LPD#1#26280E4E#11354.6567,E,2232.7841,N,005.82,119#180310#0
61616##
7.2.8 Set APN Command
Create the SMS “802#APN letters or digits, 4-20 bits # Log user name letters or digits 4-20 bits in #
Log password letter or digits 4-20 bits in # terminal password 4 bits ##” and send it to the terminal;
after executing this command, the terminal will automatically restart and connect to GPRS with APN
set.
Command example 1: #802#cmnet###0000###
Command example 2: #802#CCDLEN#QIUXIA.21#RX0000#0000##
After this command is executed, APN will be CCDLEN; the login user name is QIUXIA.21 and login
password is RX0000.
Note: The default APN of this product is CMNET.
7.2.9 Electronic Fence Function
(1)GPS Fence Function
Set fence format: # command number (751) # fence radius # sampling interval # longitude # latitude #
user password ##.
For example: #751#500#5#22.5442N#113.91E#0000##
After the setup is successful, the setting mobile phone will receive a piece of config ok command.
Then, when the ward leaves this area, the terminal will send the alarming information of being out of
the fence to the center number.
(2) Fence Reading Function
Send commands to the terminal: # command number (752) # user password 4 digits ##; after the
19
Page 20

command is set successfully, the terminal will read the data of the module fence working status and
return message to the sending mobile phone, or PASSWORD ER if the password is wrong.
For example: #752#0000##
Return: #open:1#lat:11456.209400#lng:2233.470100#distance:500#time:5#status:2
Where, open: 1 indicates fence open; Open: 0 indicates fence closed;
lat:11456.209400, latitude;
lng: 2233.470100; longitude;
distance: 500; fence radius;
time: 5 sampling interval;
status: 2 , terminal has obtained valid satellite data, fence works normally;
status: 1; fence open, but there are no valid satellite data have been received;
status: 0, no electronic fence is set.
(3) Server center address command
Command name:#803#server address # port# password##
Example:#803#www.theywhere.com#7003#0000##
(4) Function of Canceling Fence
Command name: # command number (760) # user password 4-digits ##
Example: #760#0000##
After the terminal receiving this command, all fence settings will be cancelled.
Advice: Do not set GSM fence and GPS fence at the same time.
7.2.10 Auxiliary Functions
(1)#901## Command of reading user parameters;
(2)#902## Command of reading GPRS parameters
(3)#904## GPRS connection command
(4)#905## GPRS disconnection command
7.2.11 Server setting command
Format:#803#IP adress # port # user password ##
Example: #803#WWW.THEYWHERE#7003#0000##
20
Page 21

8. After-sale Service
For more information about after-sale service, please refer to the attached After-sale Service Manual.
Notices:
z This device is of non-waterproof design.
z This device must work with the cooperation of GSM/GPRS network.
z Make sure that the SIM card has sufficient balance in order to avoid inconvenience in use.
z This device will not be able to work in case of power-off and out of the service area, even if you
are a registered user.
z This device supports the dual positioning mode of GPS and GSM/GPRS.
z Please use this device in a legal area, any illegal consequence will be borne by the user.
21
 Loading...