

Page 1
Art.nr 95809
Senast ändrad: 2011-09-27
Rev. B
Bendelare, HD Balance
Art nr: 69620 (fäste), 69605-2, 69606-2, 69615-2, 69616-2
Ingående delar:
1 x 1 x 3 x
Montering
Bruksanvisning /
Monteringsanvisning
Sida 1 (1)
Översikt:
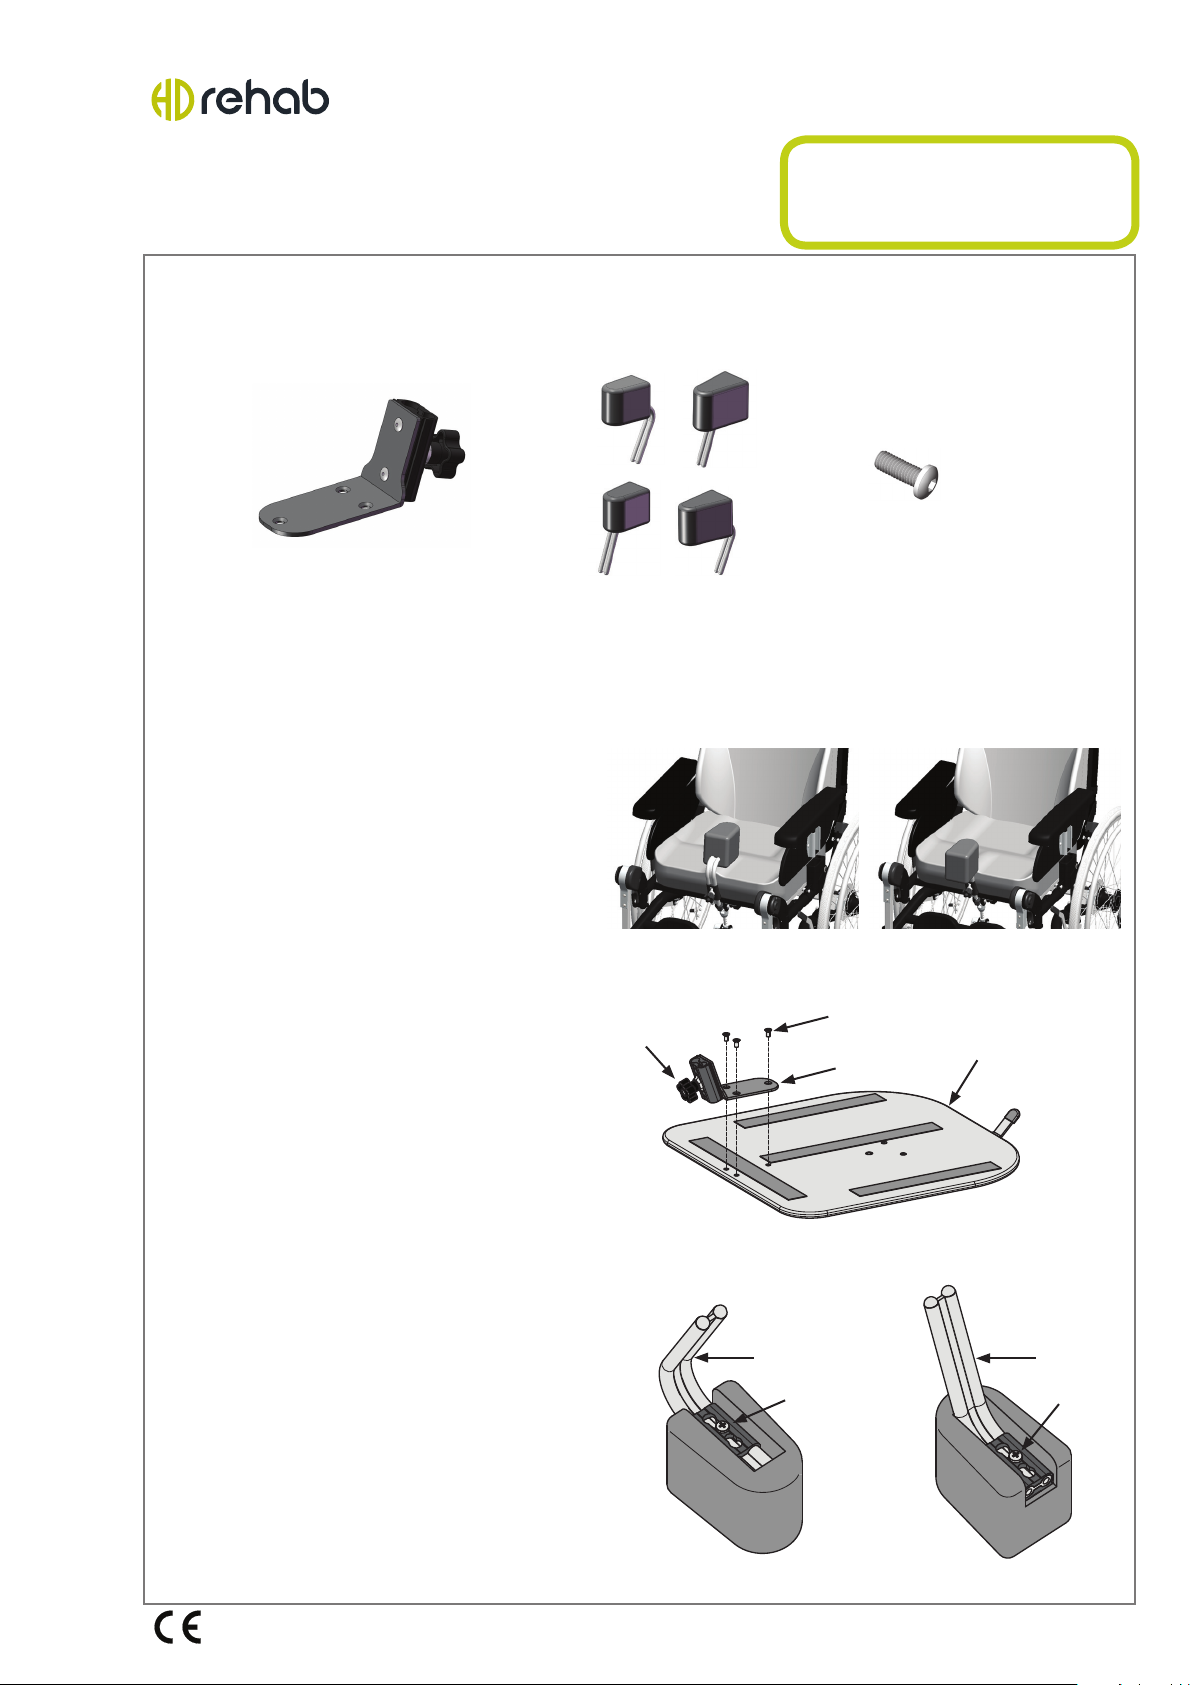
- Bendelaren nns i två storlekar och två
utföranden: Standardutförande (gur 1)
samt framyttat utförande (gur 2).
- Bendelaren består av en bendelarkudde
med bygel (6) samt ett bendelarfäste (1).
- För att bendelaren ska kunna användas
måste fästet först monteras på rullstolens
sitsplatta.
Montering av fäste:
(För montering krävs insexnyckel.) Fästet
(1) monteras i sitsplattans (A) framkant på
ovansidan, med skruvarna (2). Sitsplattan
är förberedd med 3 st muttrar. Drag fast
skruvarna ordentligt.
Användning:
Bendelaren stoppas ned i fästet, enligt bild
1 alt. 2, och kan låsas i höjdled genom att
dra åt ratten (4). Bendelaren kan regleras
i djupled genom att öppna klädseln på
undersidan, se gur 4 alt. 5. Skruven (5)
kan då lossas något och bygeln (6) ställas i
önskat läge.
Figur 1. Standardutförande.
4
Figur 3. Montering av fäste.
6
5
Figur 2. Framyttad
bendelare.
2
A
1
6
5
Figur 4. Standardutförande. Figur 5. Framyttad.
TILLVERKARE: Hantverksdesign & Rehabiliteringsprodukter AB
Tryffelslingan 4, SE-181 57 Lidingö
tel. 08-767 04 80 fax. 08-767 50 00
www.hdrehab.se [email protected]
Page 2
Art.no. 95809-1
Latest revision: 2011-09-27
Rev. B
Pommel, HD Balance
Art. no.: 69620 (mount), 69605-2, 69606-2, 69615-2, 69616-2
Parts included:
1 x 1 x 3 x
Assembling
Overview:
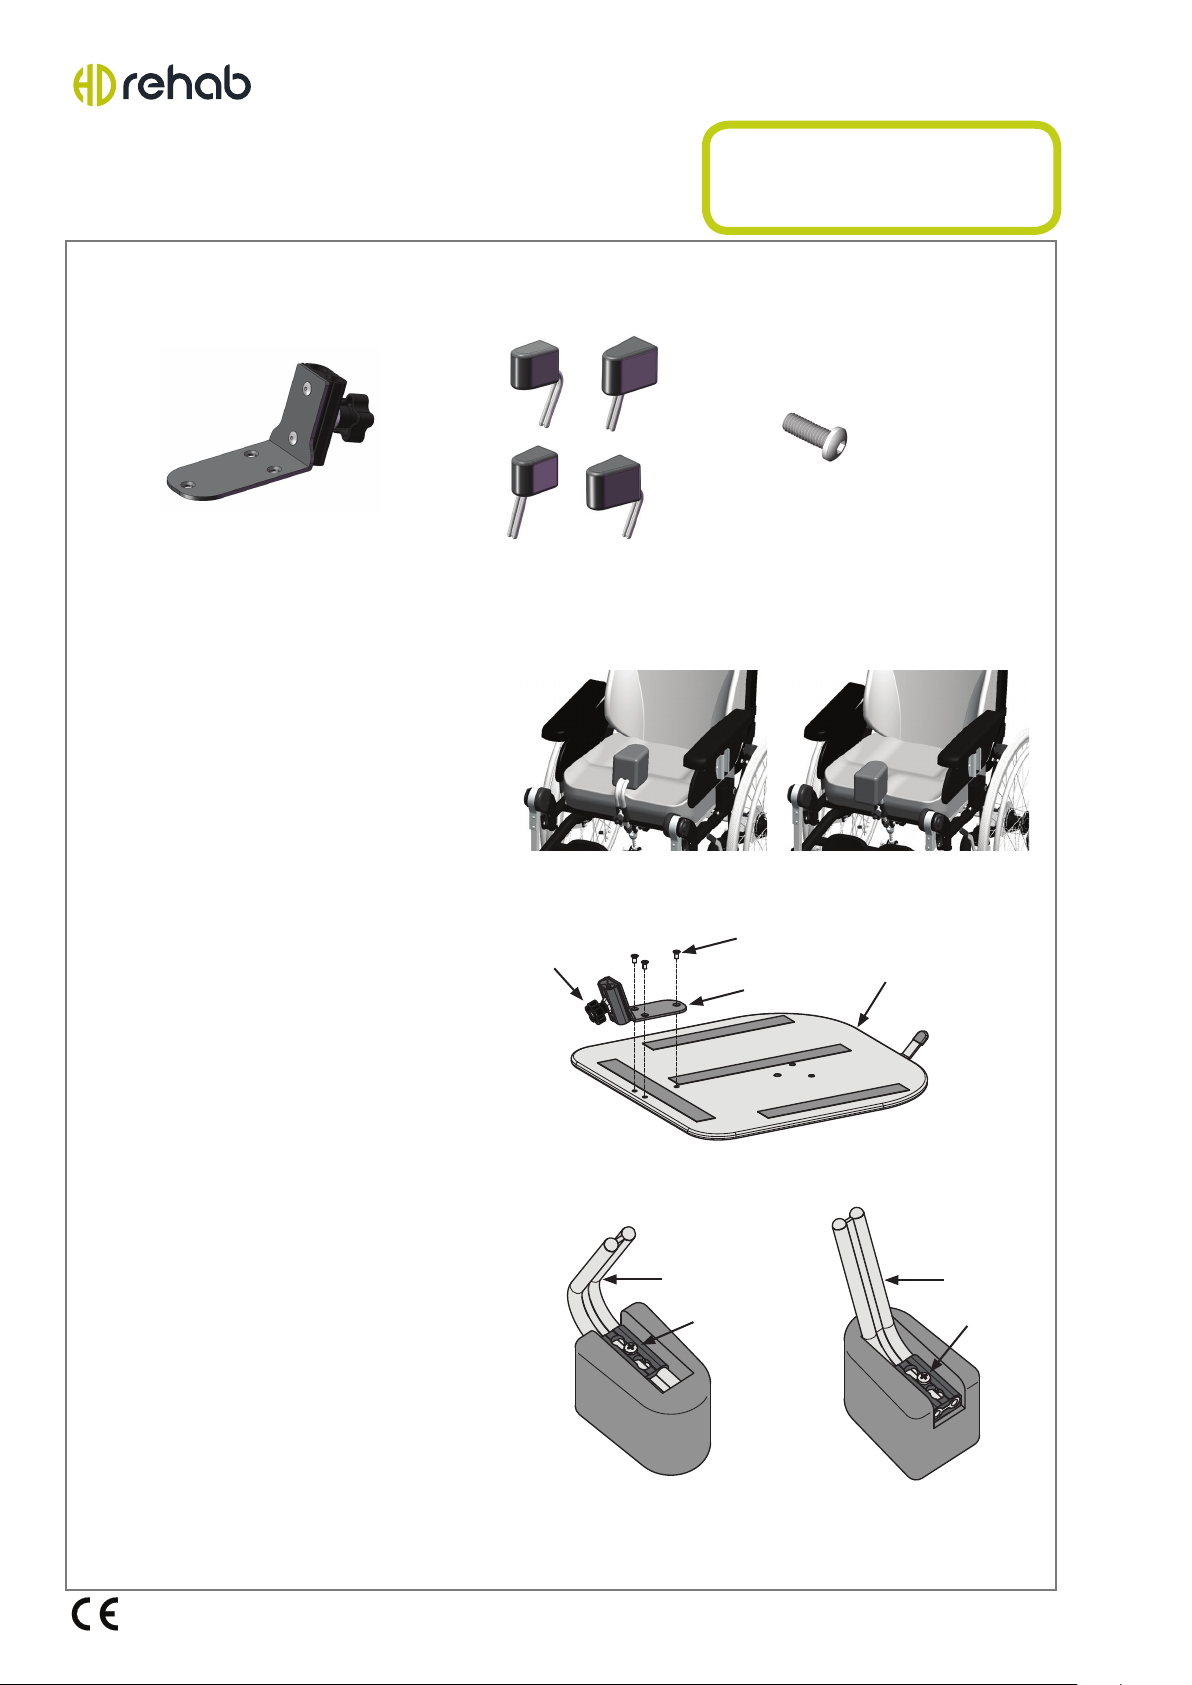
- The pommel comes in two sizes and two
versions: Standard version (diagram 1) and
front positioned version (diagram 2).
- The pommel consists of a pommel
cushion with a bracket (6) and a pommel
fastening (1).
- To use the pommel, the fastening must
rst be tted onto the seat plate of the
wheelchair.
Diagram 1. Standard pommel.
User manual /
Assembly instructions
Page 1 (1)
Diagram 2. Front
positioned pommel.
Assembly, fastening: (Diagram 3)
(You will need an Allen key.)
Fit the fastening (1) onto the front, top
edge of the seat plate (A), using the screws
(2). The seat plate comes adapted for use
with the fastening and includes three nuts.
Tighten the screws securely.
Instructions for use:
Push the pommel down into the fastening,
as shown in diagram 1 alt. 2. The position
can be locked by tightening the knob (4).
The depth of the pommel can be adjusted
by opening the underside of the cover; se
diagram 4 alt. 5. This enables you to loosen
the screw (5) slightly and set the bracket (6)
in the desired position.
2
4
A
1
Diagram 3. Fastening of the mount.
6
5
Diagram 4. Standard pommel. Diagram 5. Front positioned
pommel.
6
5
MANUFACTURER: Hantverksdesign & Rehabiliteringsprodukter AB
Tryffelslingan 4, SE-181 57 Lidingö, Sweden
tel. +46 8 767 04 80 fax. +46 8 767 50 00
www.hdrehab.se [email protected]
 Loading...