

HDM Z1 Auto Getting Started Manual
LCD Display Overview
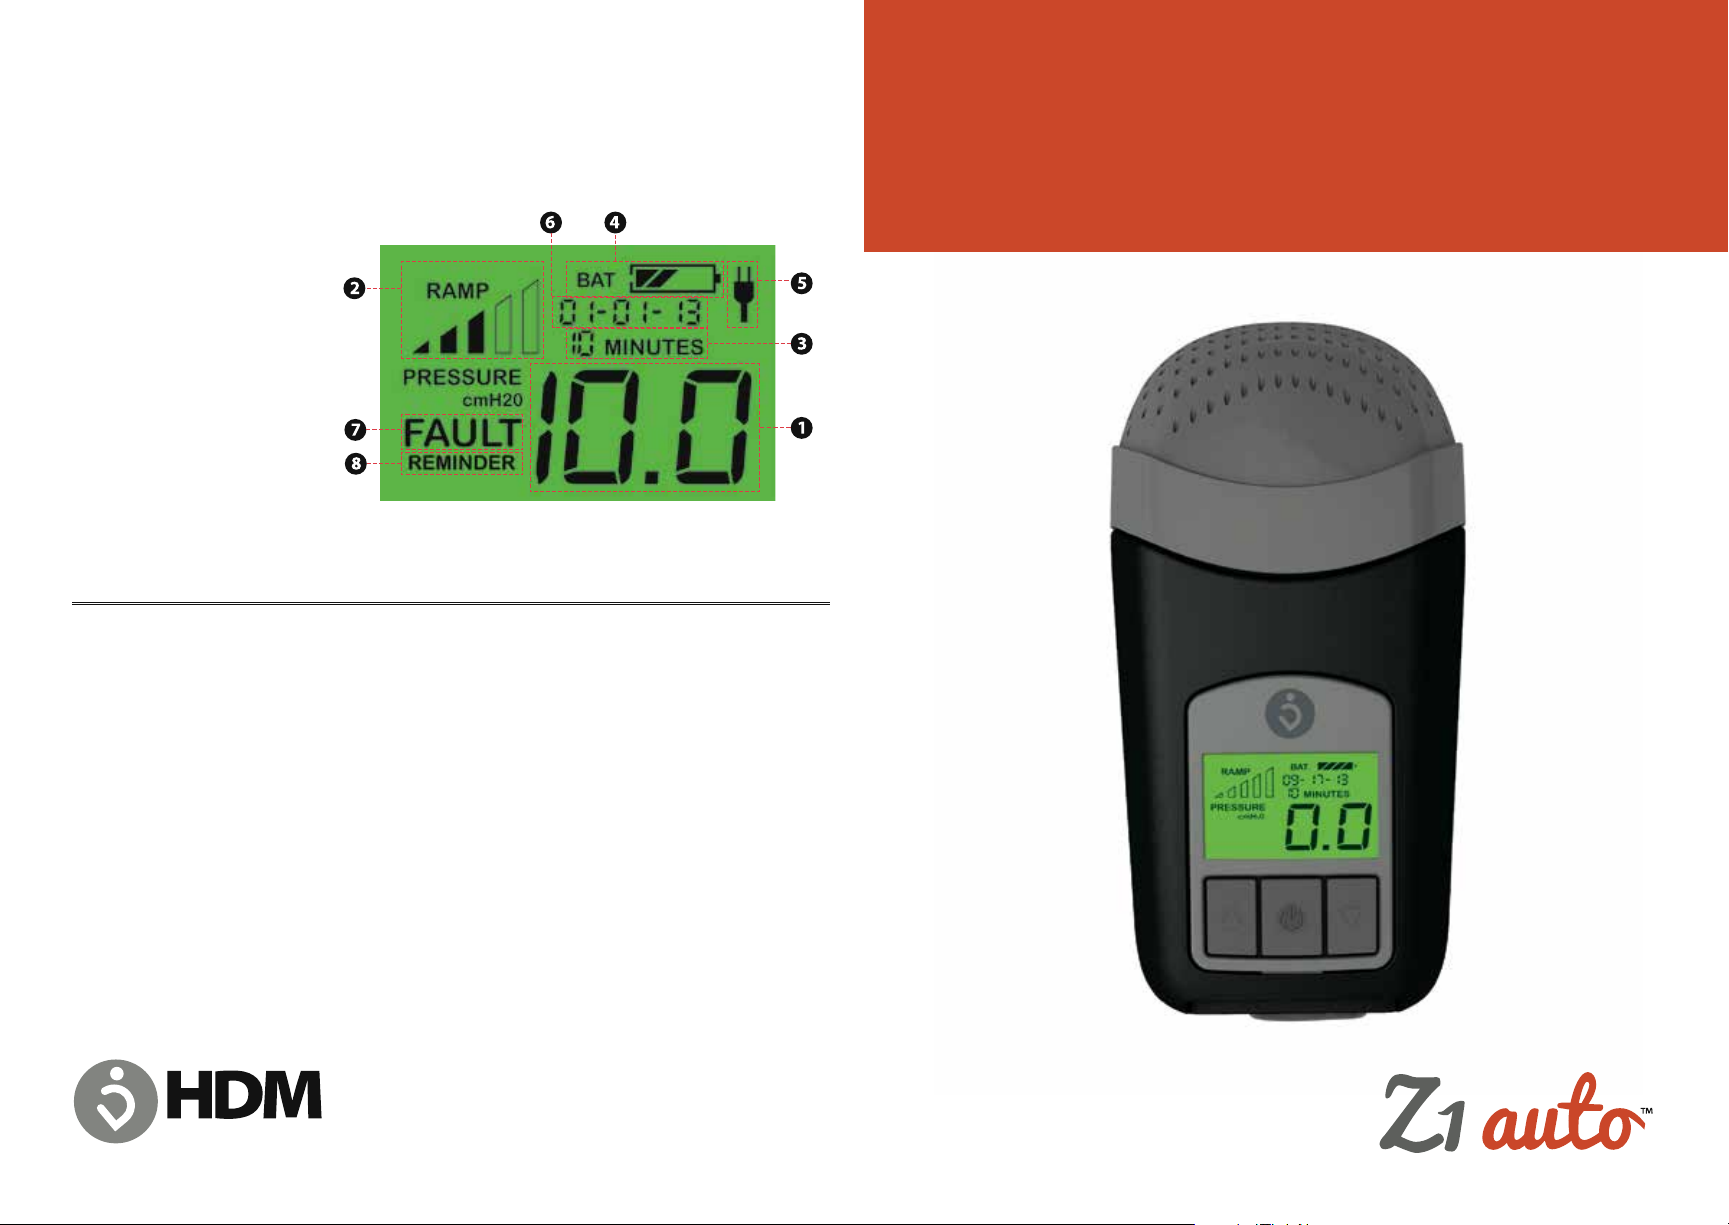
The Z1 Auto display offers useful information on device settings. Below is a brief
overview of the information available using the built-in LCD. For more information,
please refer to the Z1 Auto User Guide.
1. Treatment pressure display
2. Ramp progress indicator (if ramp set)
3. Ramp time remaining (if ramp set)
4. Battery status (if present)
5. AC Power indicator (if connected)
6. General status display
7. Fault indicator (if fault occurs)
8. Reminder indicator (if excessive air
leakage occurs)
If you encounter problems consult the Z1 Auto User Guide or contact
the Support Center toll-free at 1-855-436-8729 (855-HDM-USA9).
Z1 Auto™ Getting Started Guide
To register your device, visit http://www.hdmusa.com/register or fill
out and return the included Warranty Registration Form.
Designed in the United States of America.
Human Design Medical, LLC, Charlottesville, VA 22902
The HDM logo and Z1 are registered trademarks of Human Design Medical, LLC. Z1 Auto is a trademark of
Human Design Medical, LLC.
Patent Pending. © Copyright 2014, Human Design Medical, LLC. All rights reserved.
AN AFFILIATE OF BREAS MEDICAL AB
Z1 Auto Getting Started Guide v1, 111014
# 40-0029 Rev. A
Welcome!
Congratulations on choosing the world’s smallest, lightest, most portable Auto CPAP machine!
™
Your new Z1 Auto
To begin using your Z1, follow the steps outlined below. Please read the entire Z1 Auto
has been programmed with your prescribed setting and is almost ready for use.
™
User Guide.
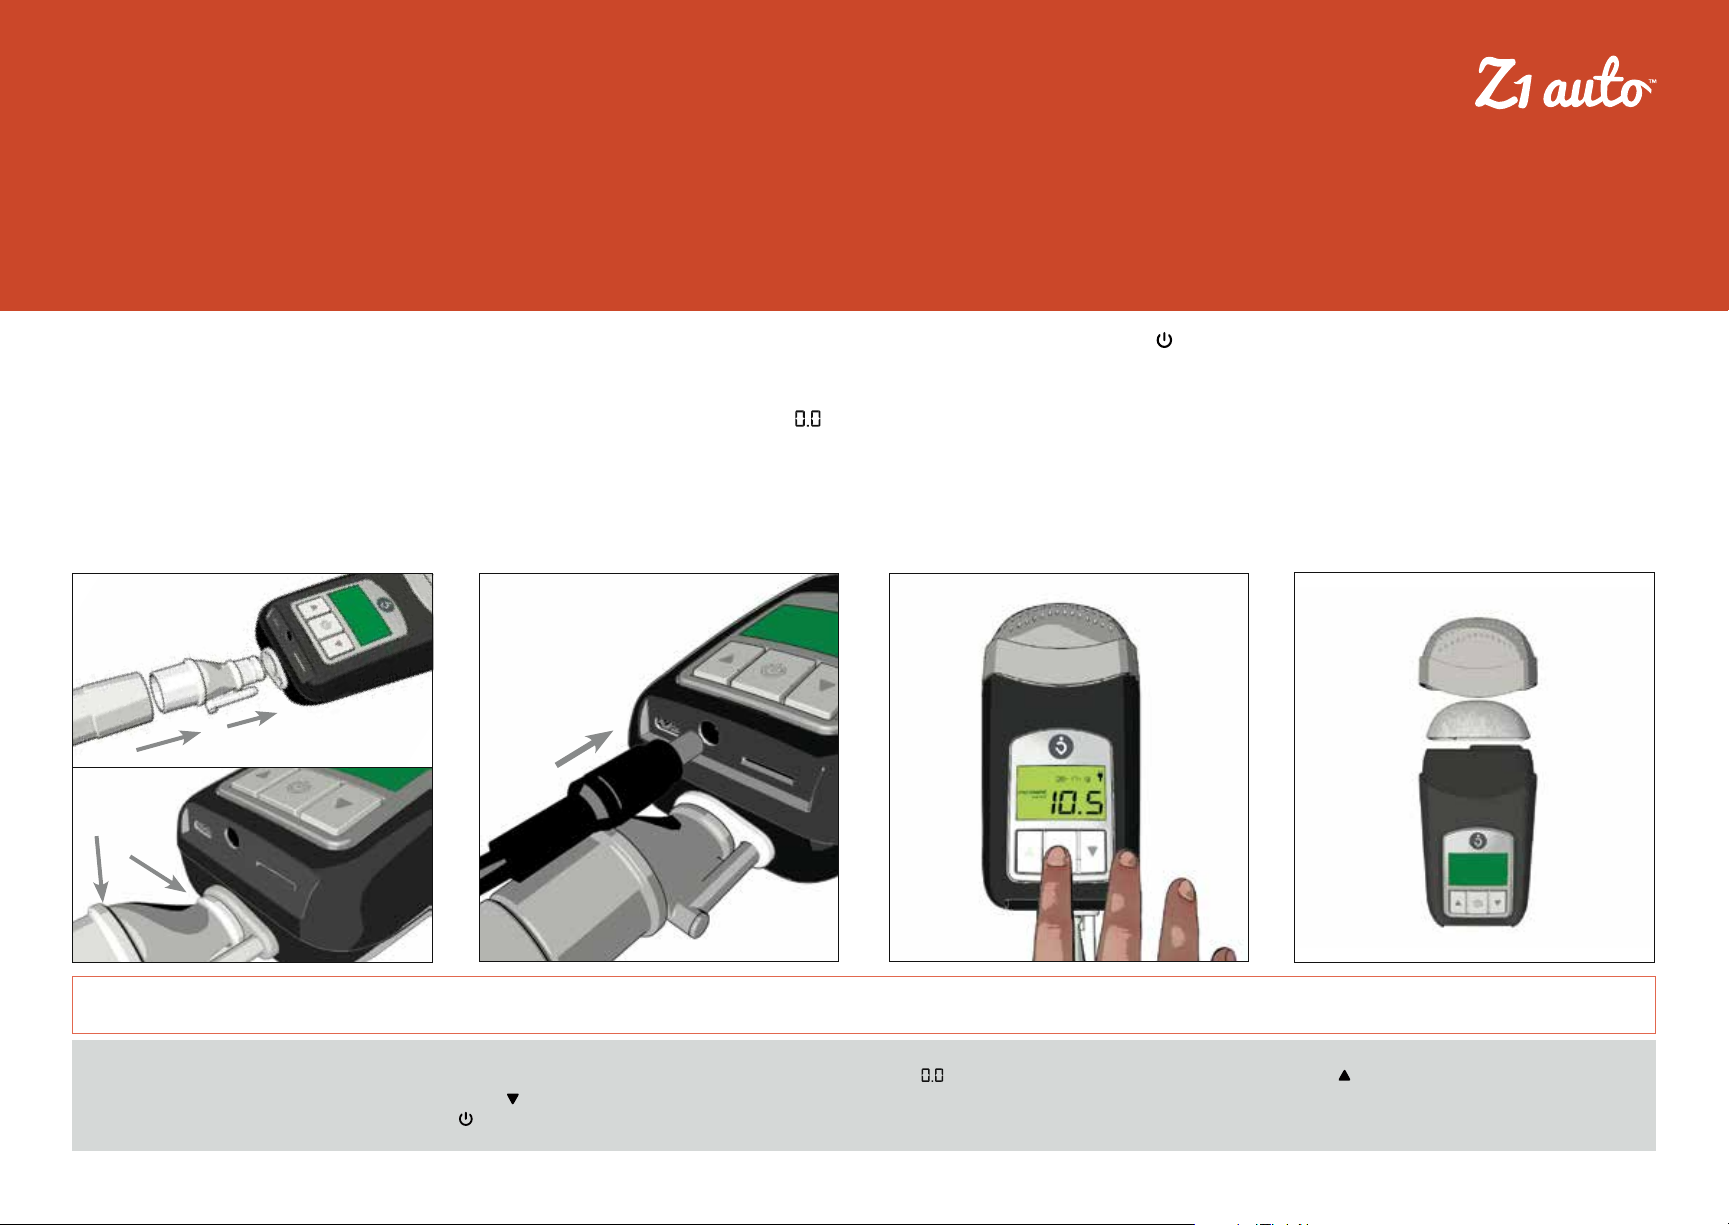
1. Connect one end of the CPAP tube to
the round end of the tube adapter. Insert
the other end of the tube adapter into
the outlet of the Z1 as shown. Connect
the other end of the CPAP tube to the
mask. Ensure all connections are tight to
avoid air leaks.
2. Plug the power supply (AC to DC power
adapter) into the Z1 as shown and into
a wall outlet. The Z1 will power up in
standby mode. The display will read .
The Z1 display will always be active
whenever the device is receiving power.
3. Push the start/stop button ( ) to initiate therapy using the pre-programmed
prescription setting. Push this button a
second time to stop therapy.
4. The Z1 Auto filter is preinstalled at
the factory. When it is time to replace it,
remove the end cap by squeezing the
sides and pulling down. Insert the new
filter into the end cap as shown, with
arched side of the filter aligned with the
top of the end cap. Ensure the filter covers all holes in the end cap. Press the end
cap onto the Z1.
IMPORTANT: The “REMINDER” indicator will display on the Z1 if an air leak is detected between the Z1 outlet and the mask. This may also display at times when the mask is not being worn properly. This common
condition should clear once all connections are secure, the mask is properly worn, and therapy has begun.
NOTE: Ramp time and initial ramp pressure can be adjusted while the Z1 Auto is in standby mode (screen displays ). To set the ramp time, press and hold the UP ARROW ( ) until the ramp time flashes. To set the
initial ramp pressure, press and hold the DOWN ARROW ( ) until the pressure display flashes. Repeatedly press the UP or DOWN ARROW until the desired setting is reached. (Set ramp time to “00” to disable the ramp
feature.) Press and hold the START/STOP BUTTON ( ) to save the new settings. For more information on adjusting settings see the Z1 Auto User Guide.
 Loading...