

HCL L-19 User Manual

Notational Conventions
Throughout this manual, the following conventions are used to distinguish elements of text.
Note:
identifies additional information that requires special attention.
Caution:
identifies important information that, if not followed,
may result in loss of data or damage to the computer.
Keyboard keys are shown in a bold typeset. For example:
Press Enter to complete.
When keys are joined by a plus sign (+), press the first key, and, while keeping the first key down, press the
remaining keys, finally release all the keys. When necessary, keys are also shown in graphics.
A title, command, setup item, or button that you can see on the screen is shown in boldface.
Overview
Managing Power
Chapter - 3
Operating Your Computer
Expanding Your Computer
Chapter - 4
Caring for the Computer
Chapter - 5
Troubleshooting
Chapter - 6
Chapter - 2
Getting Started
Chapter - 1
1-1
2-1
3-1
4-1
5-1
6-1
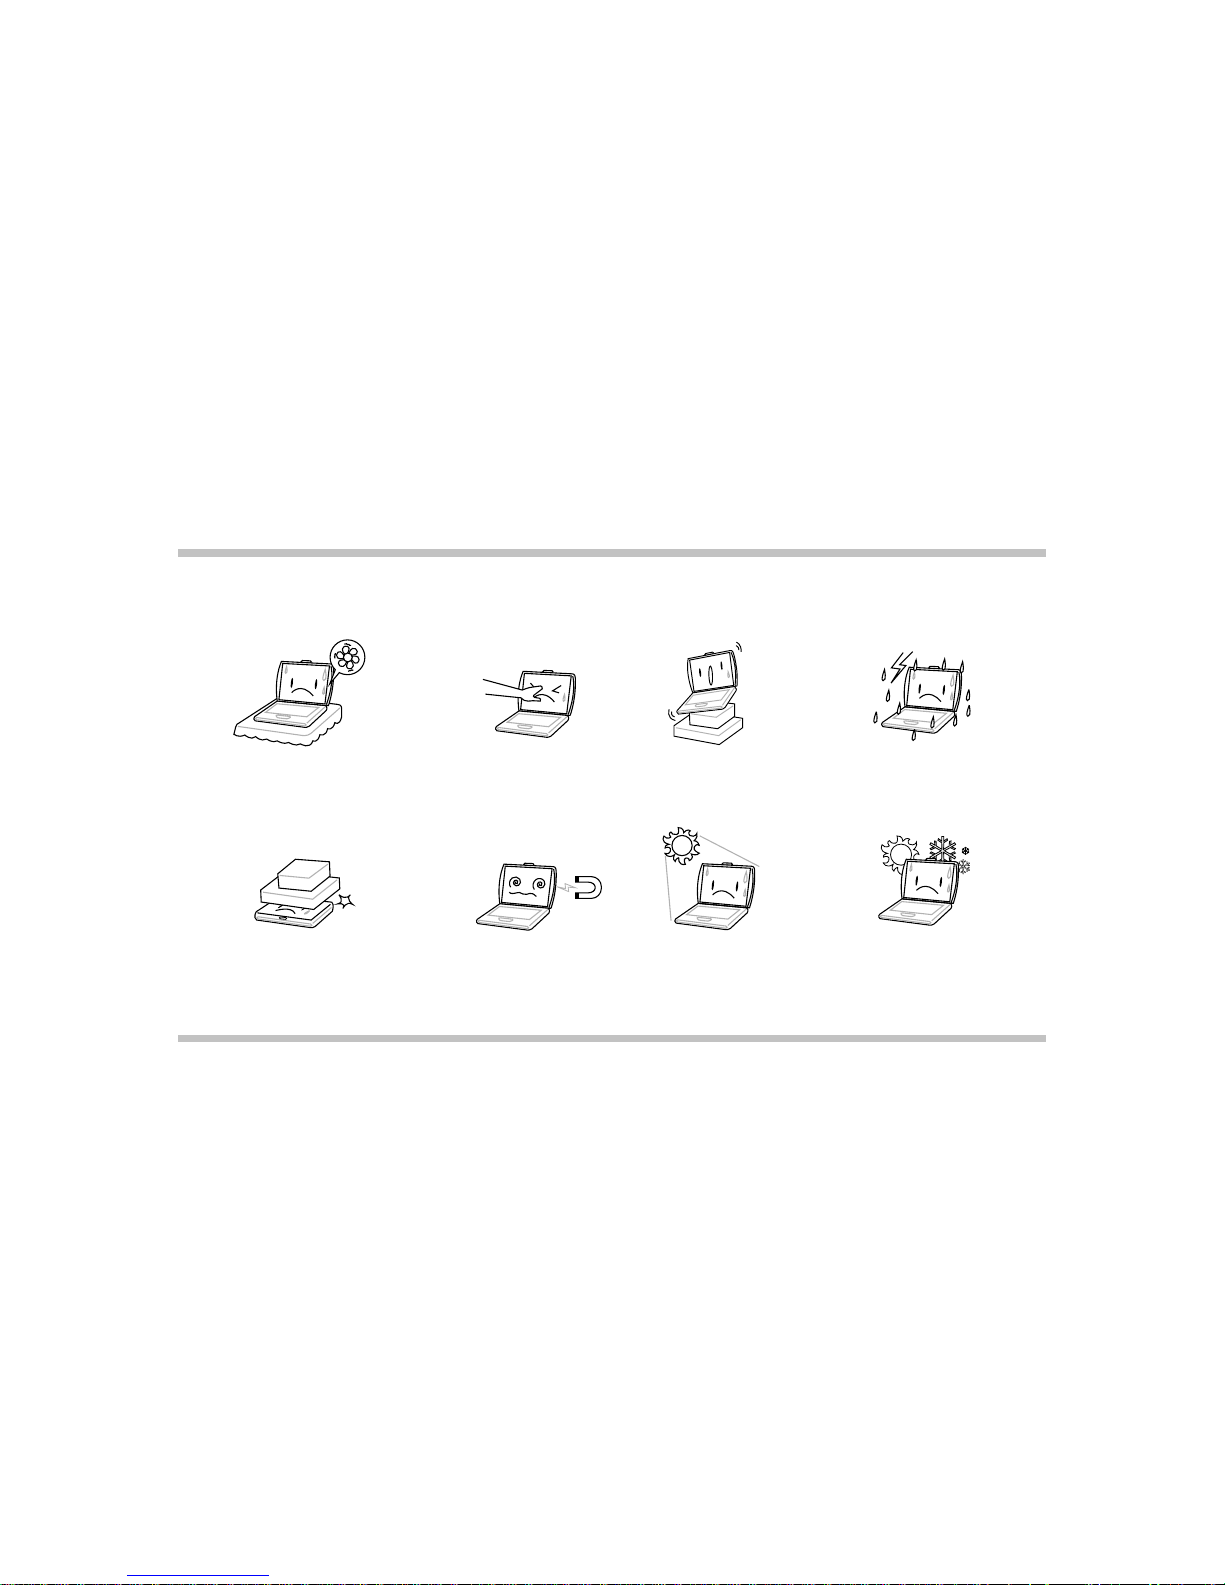
TAKING CARE OF YOUR NOTEBOOK PC
To prevent possible overheating of the computer's
processor, make sure you don't block the openings
provided for ventilation.
DO NOT press or touch the display panel.
DO NOT place on uneven or unstable work
surfaces.
DO NOT use your notebook computer under
harsh conditions.
DO NOT expose to direct sunlight.
DO NOT use or store in extreme
temperatures.
DO NOT subject the computer to magnetic
fields.
DO NOT place or drop objects on the computer
and DO NOT apply heavy pressure on it.

If you are traveling with your computer,
remember to carry it as hand luggage. Do not
check it in as baggage.
DO NOT spray water or any other cleaning fluids
directly on the display.
DO NOT slam your notebook shut and never
pick up or hold your notebook by the display.
DO NOT expose to dust and/or corrosive
chemicals.
DO NOT tamper with the batteries. Keep them
away from children.
DO NOT place near fire or other sources of heat.
DO NOT expose the computer to rain or
moisture.
Avoid sudden changes in temperature or humidity
by keeping it away fromA/C and heating vents.
User's Guide
Getting started
Getting Started
Chapter - 1
1-1

Getting the Computer Running
This section guides you through the procedures for getting the computer ready for operation.
Caution :
There are three main types of airport security devices : X-ray machines (used on items placed on conveyor belts), magnetic
detectors (used on people walking through security checks), and magnetic wands (hand-held devices used on people or
individual items). You can send your Notebook PC and diskettes through airport X-ray machines. However, it is
recommended that you do not send your Notebook PC or diskettes through airport magnetic detectors or expose them to
magnetic wands.
Unpacking
After unpacking the shipping carton, you should find these standard items:
! Notebook computer
! Accessories:
! AC adapter
! AC power cord
! Driver CD
Inspect all the items. If any item is damaged or missing, notify your dealer immediately.
Keep the shipping carton and packing materials in case you need to ship or store the computer in the future.
1-2
Getting started
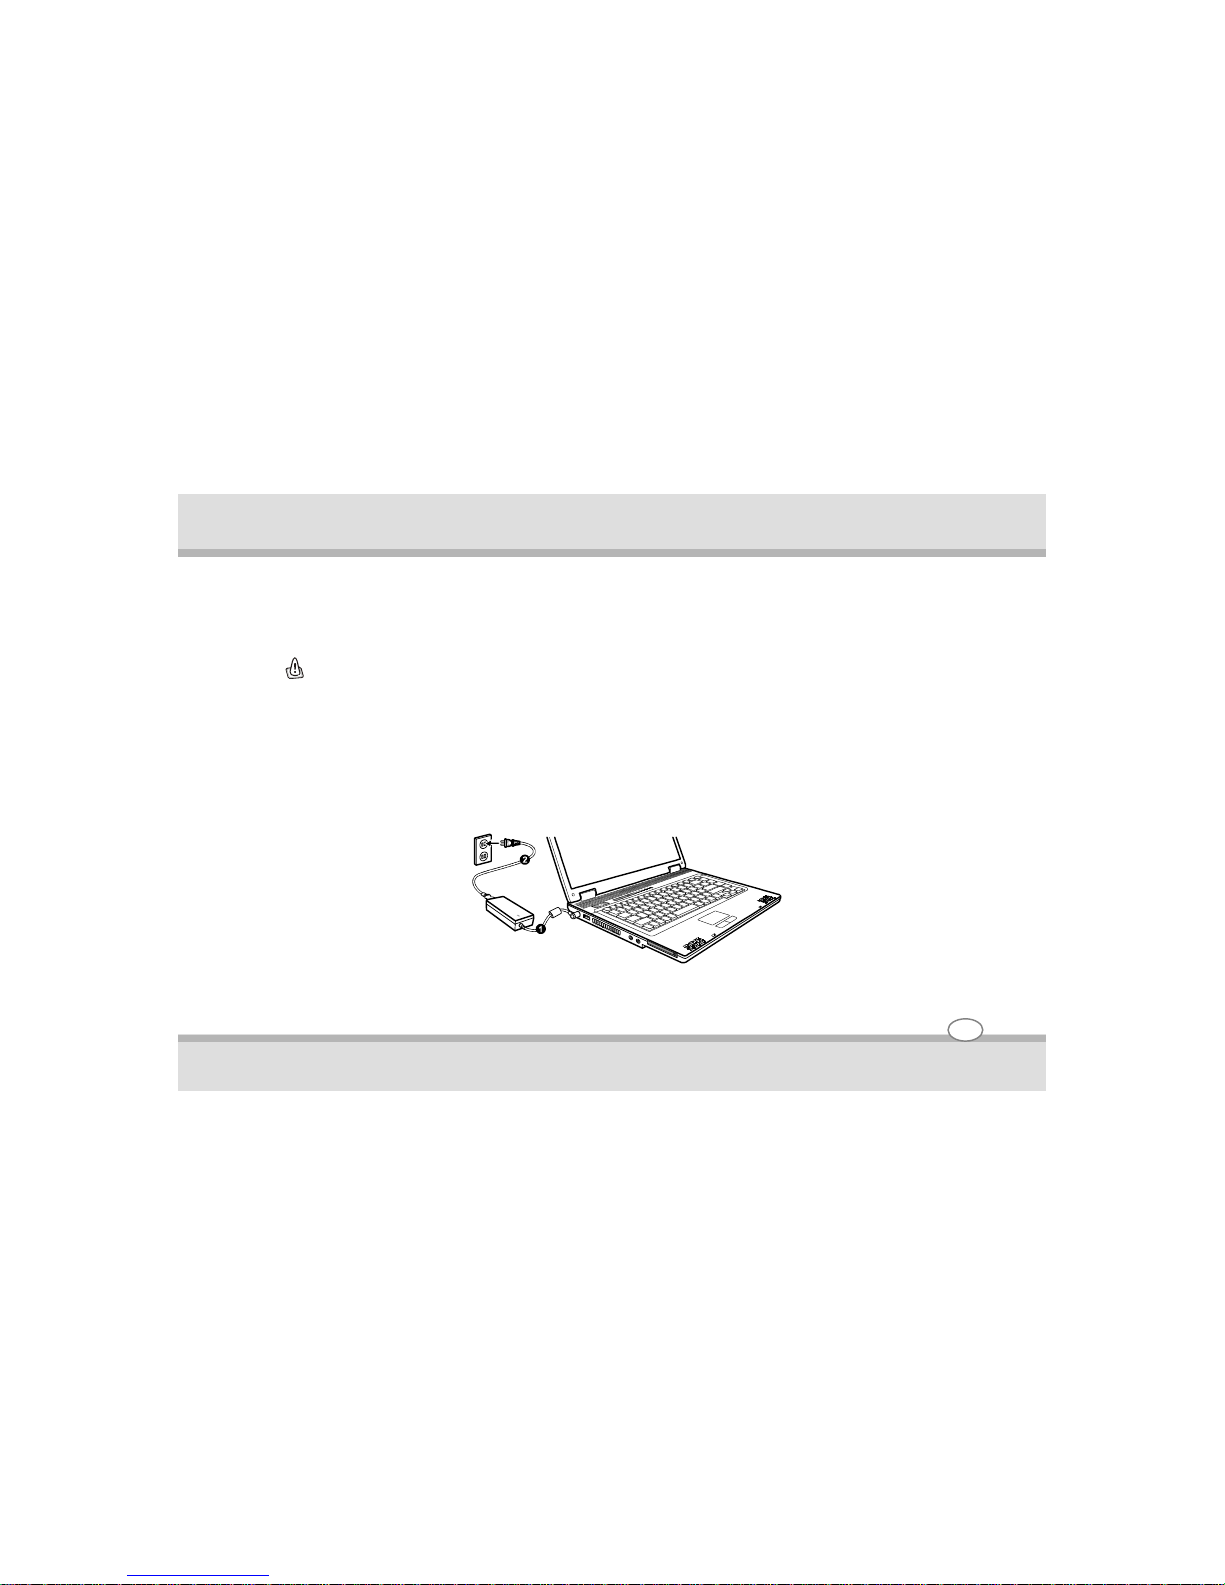
Connecting to AC Power
The computer operates either on the external AC power or internal battery power. It is suggested that you use
AC power when you start up the computer for the very first time.
Caution:
Use only the AC adapter included with your computer. Using other AC adapters may damage the computer.
1. Make sure that the computer is turned off.
2. Plug the DC cord of the AC adapter to the power connector of the computer (u ).
3. Plug the female end of the AC power cord to the AC adapter and the male end to an electrical outlet ( v).
1-3
Getting started
4. When the AC adapter is connected, power is being supplied from the electrical outlet to the AC adapter and
onto your computer. Now, you are ready to turn on the computer.
Caution:
! When you disconnect the AC adapter, disconnect from the electrical outlet first and then from the computer. A reverse procedure
may damage the AC adapter or the computer.
! When unplugging the connector, always hold the plug head. Never pull on the cord.
Note:
When the AC adapter is connected, it also charges the battery pack.
1-4
Getting started
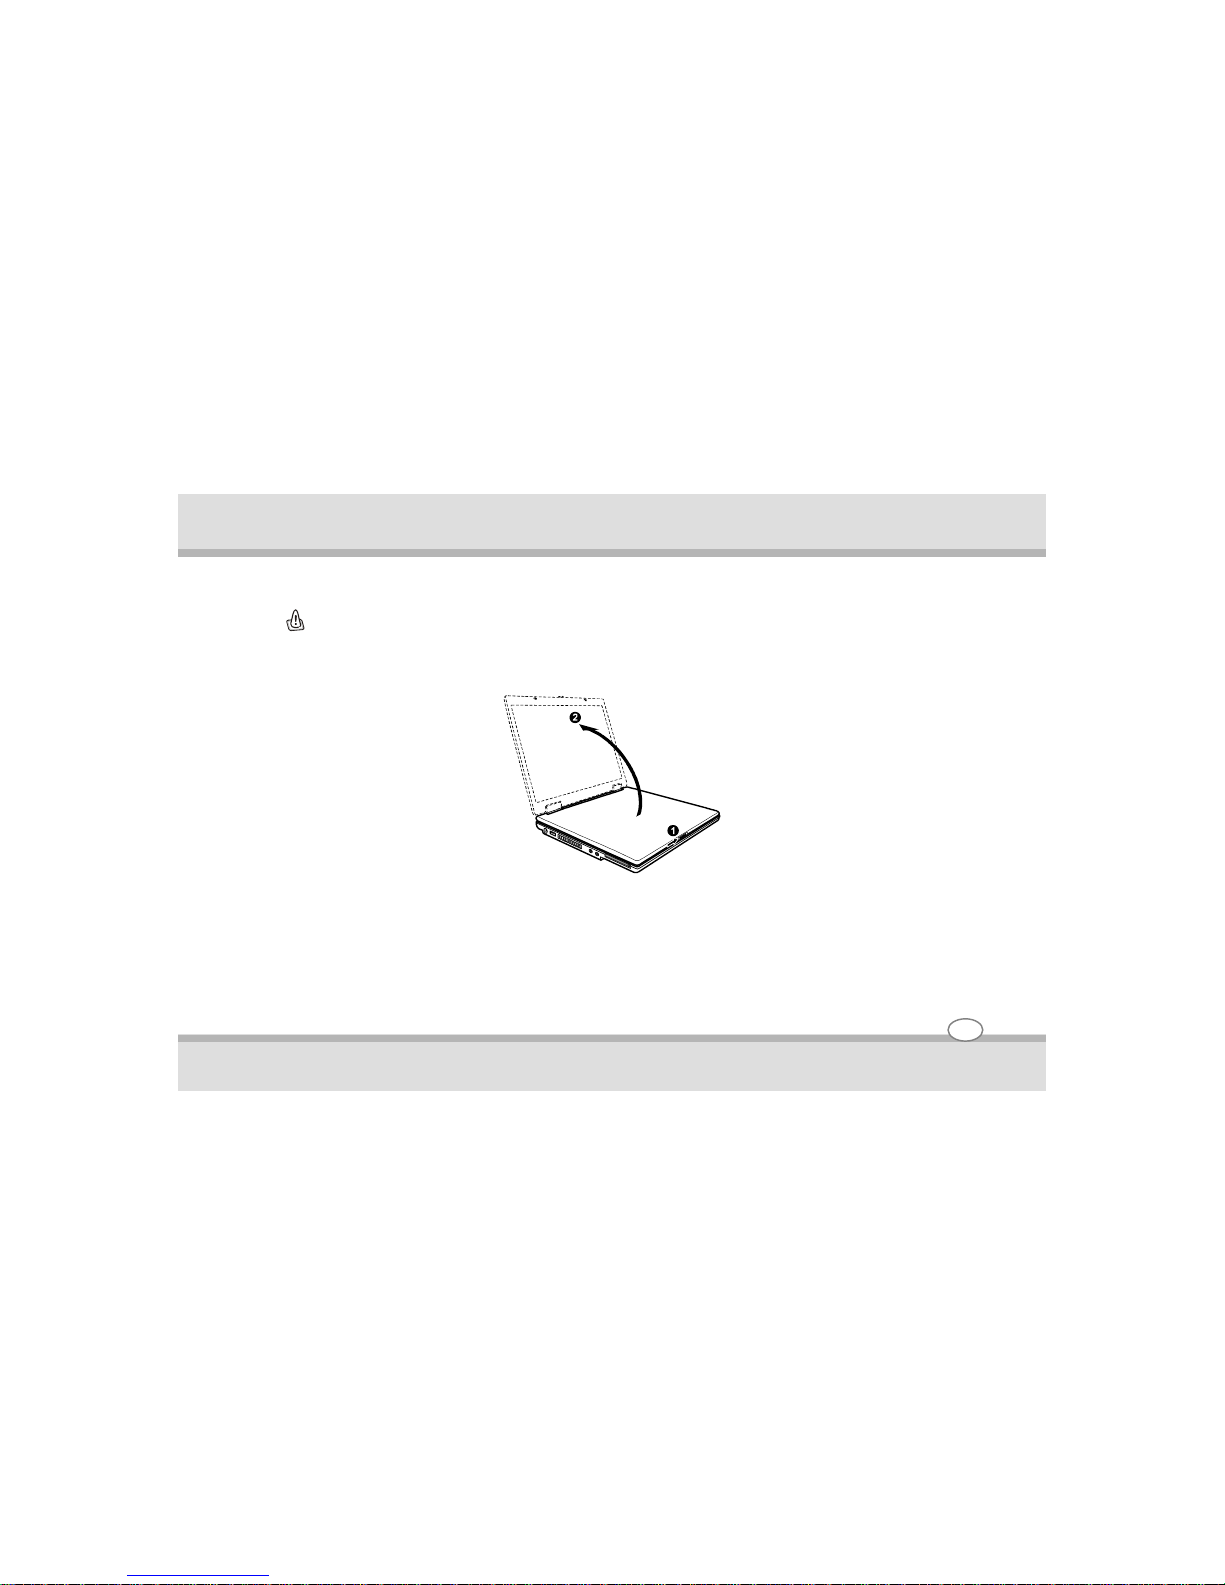
Opening the Cover
Caution:
Be gentle when opening and closing the cover. Opening it vigorously or slamming it shut could damage the computer.
Open the top cover by sliding the cover latch toward the right (u ) and lifting up the cover ( v). You can tilt the
cover forward or backward for optimal viewing clarity.
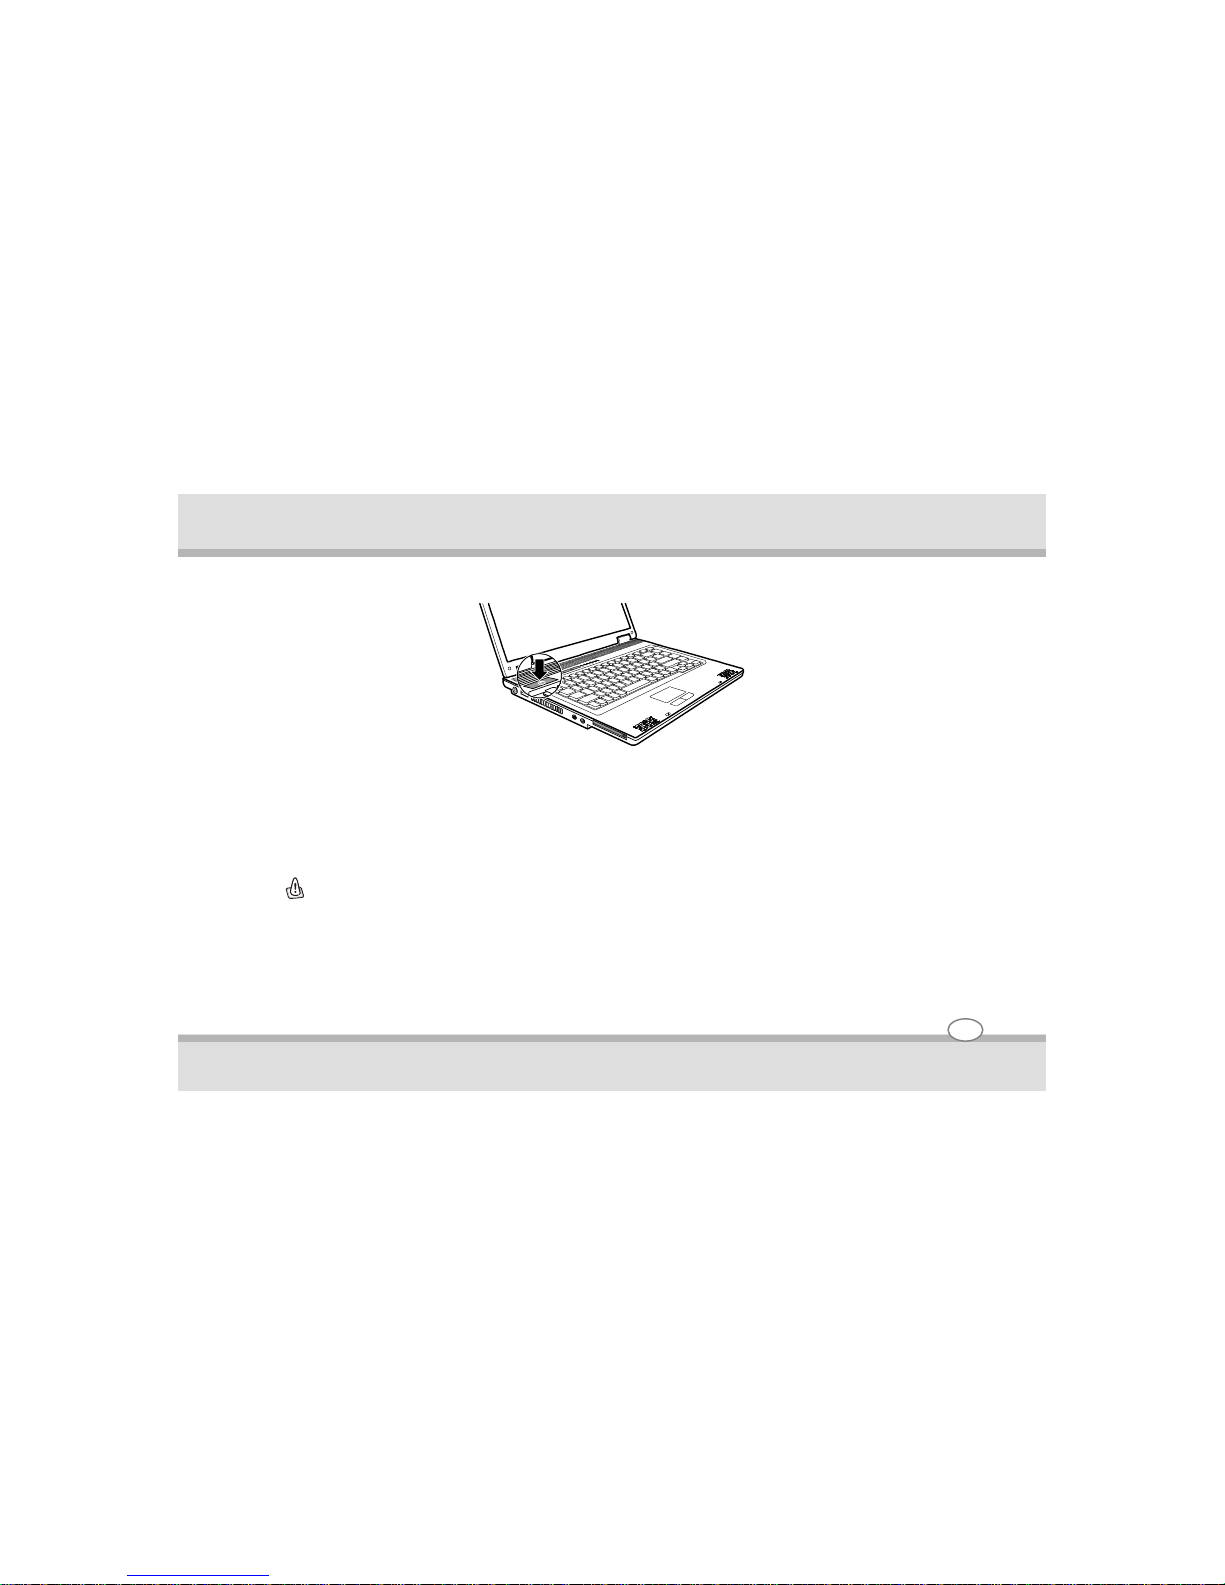
Turning On and Off the Computer
Turning On
1. Make sure that the computer is connected to AC power.
2. Press the power button.
1-5
Getting started
3. Each time the computer is turned on, it performs a Power-On Self Test (POST), and the operating system
such as Windows should start.
Turning Off
To turn off the computer power, use the “Shut Down” command of your operating system.
Caution:
If you have to turn the computer on again immediately after turning it off, wait for at least five seconds. Turning the computer off
and on rapidly can damage it.
2-3 1-6
Getting started
Taking a Look at the Computer
This section identifies the external components of the computer and briefly describes the function of each
component.
Note:
Depending on the model you purchased, the appearance of your computer may not be exactly the same as those shown in this
manual.
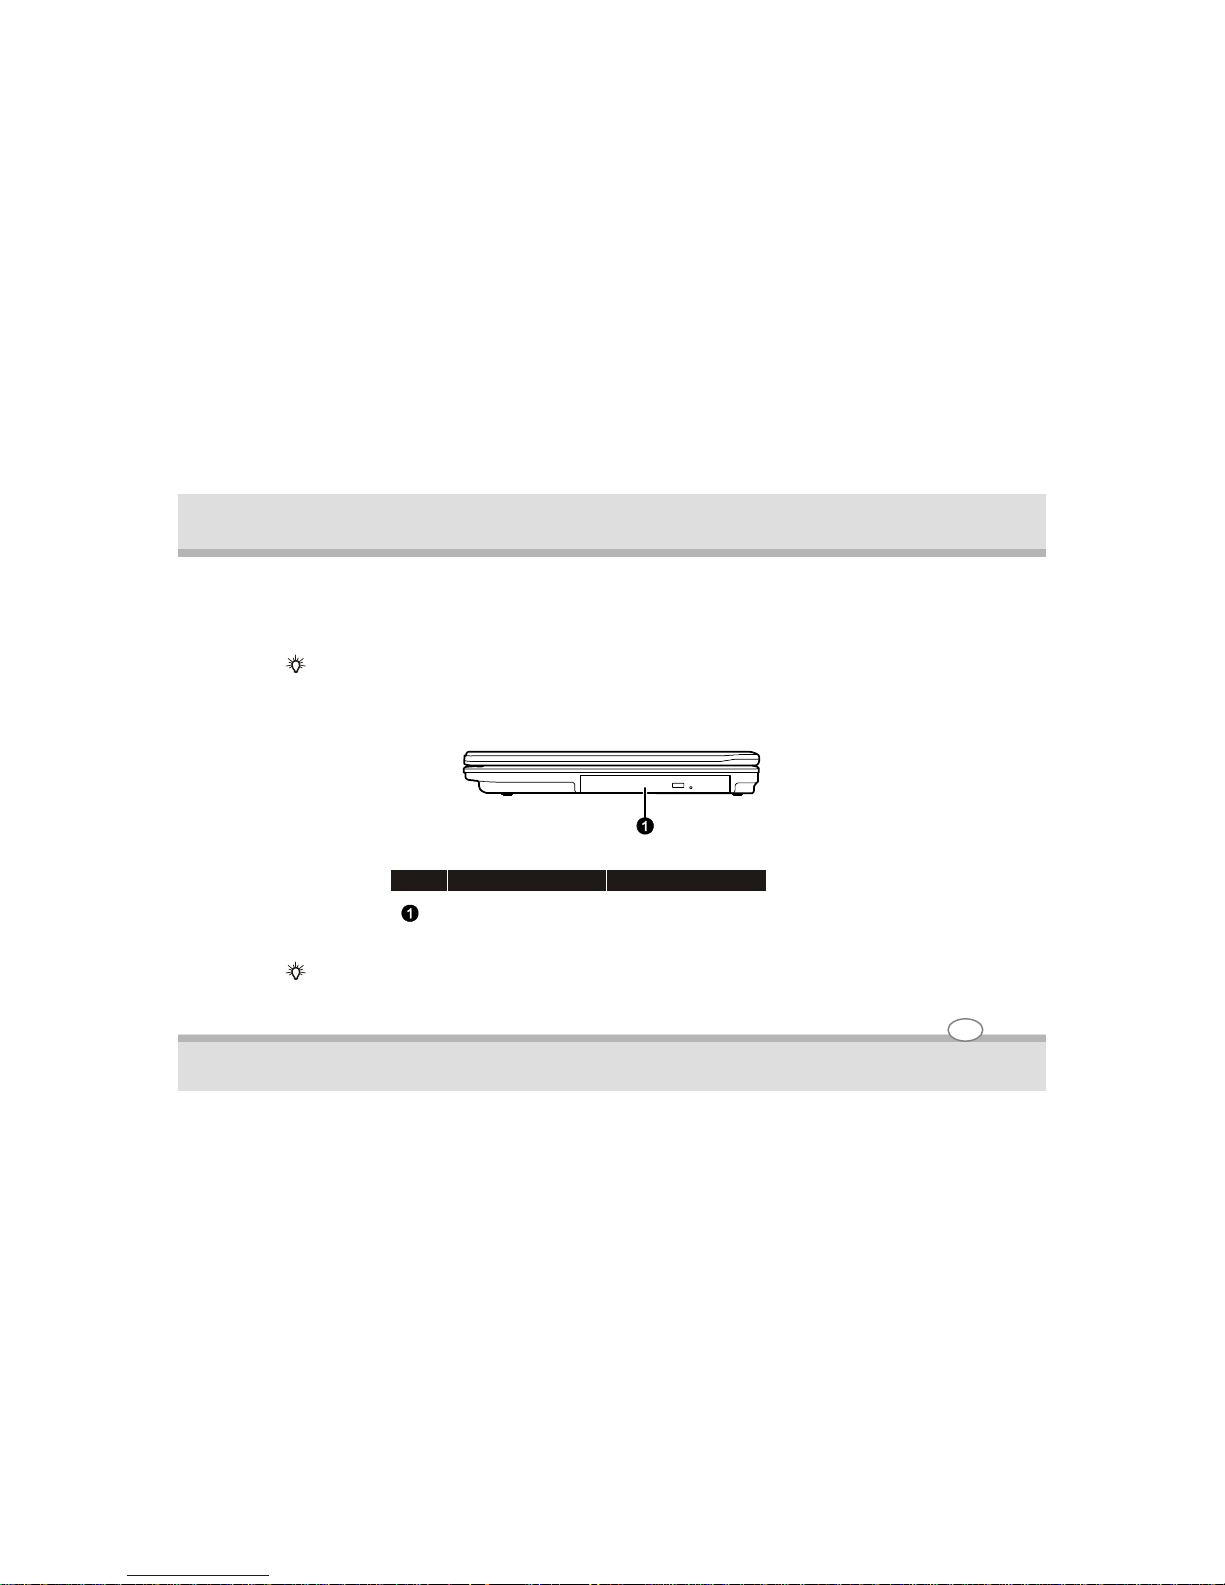
Right-Side Components
Note:
Depending upon the configuration the optical disk drive type may vary.
Ref Component Description
Combo Drive*
DVD Dual Drive*
Super Multi Drive*
Accepts a optical disc for installing or
loading software, accessing data, and playing
music/video.
1-7
Getting started

Left-Side Components
Ref Component Description
Power Connector Connects the AC adapter.
USB Port Connects a USB device, such as a USB disk,
printer, digital camera, joystick, and more.
Audio Output
Connector
Connects a set of headphones, external
speakers with amplifier, or an audio recording
device.
Microphone
Connector
Connects an external microphone.
ExpressCard
Slot
Accepts an ExpressCard for additional
functions.
1-8
Getting started
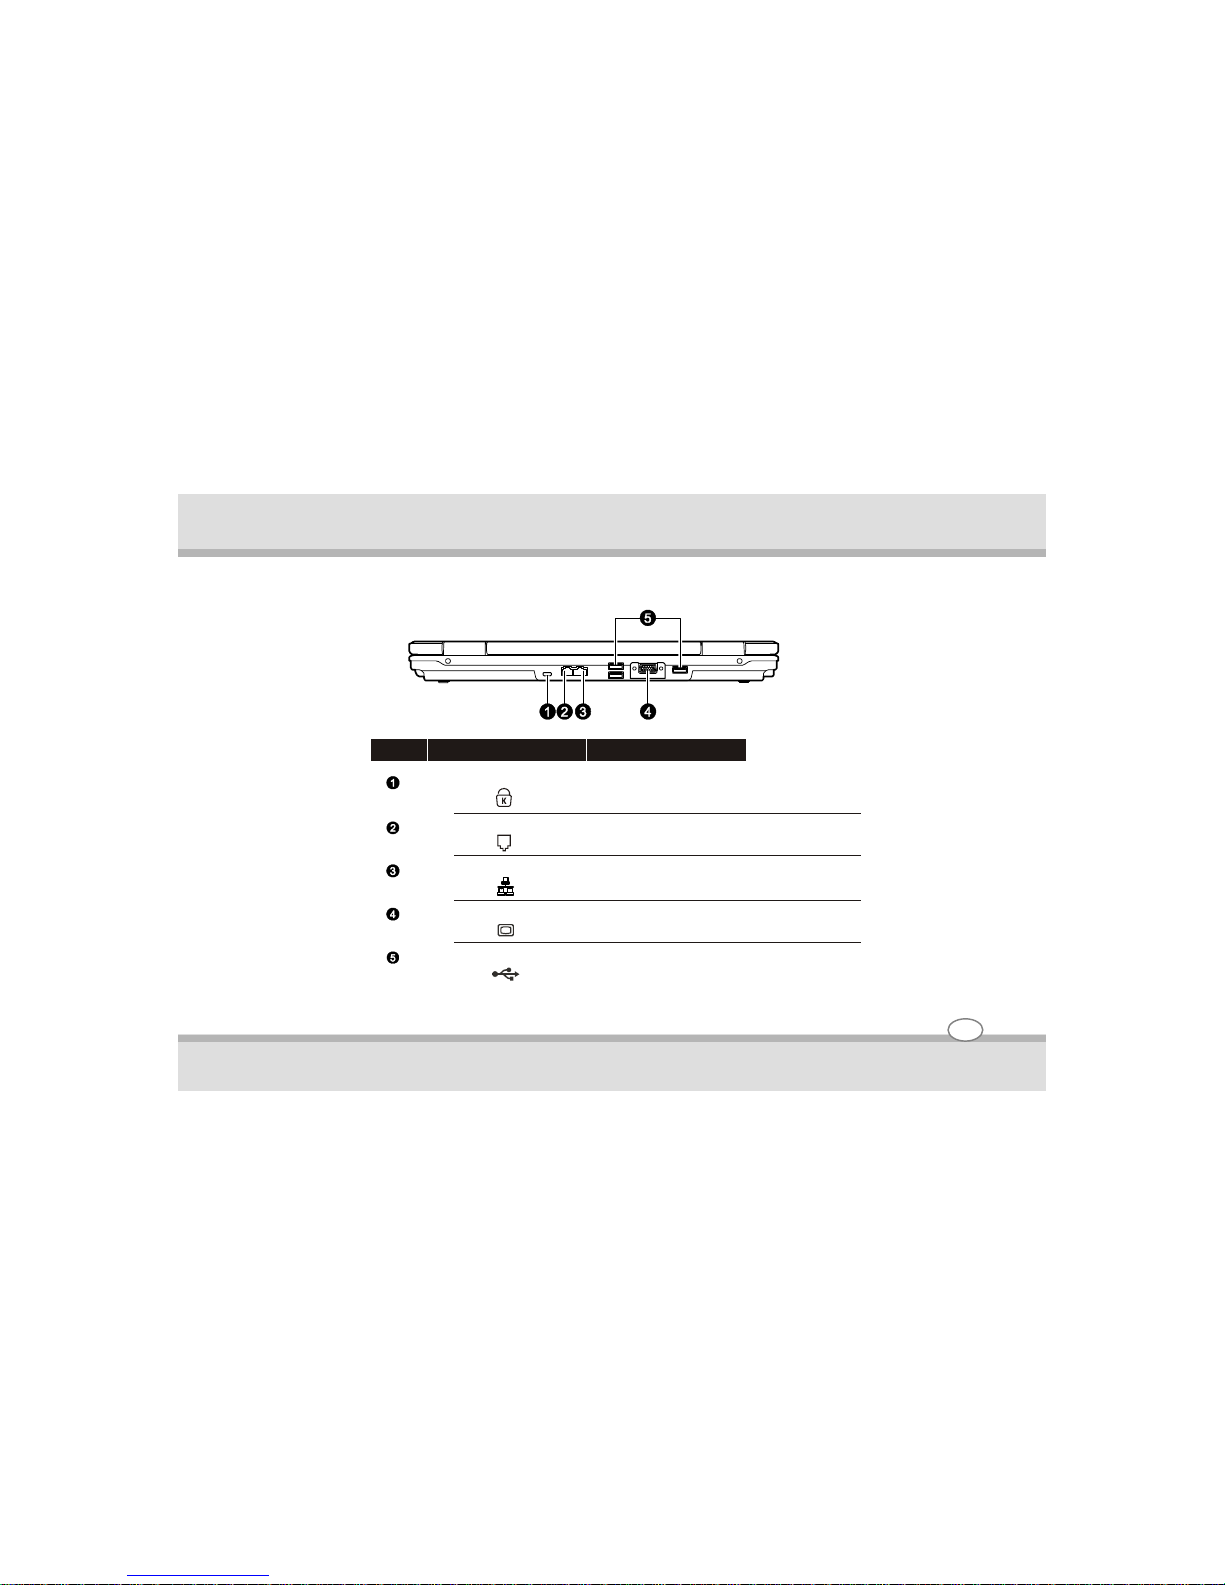
Rear Components
Ref Component Description
Kensington Lock Locks the computer to a stationery object for
security.
RJ-11 Connector Connects the telephone line.
RJ-45 Connector Connects the LAN cable.
VGA Port Connects an external monitor.
USB Ports Connect a USB device, such as a USB disk,
printer, digital camera, joystick, and more.
1-9
Getting started
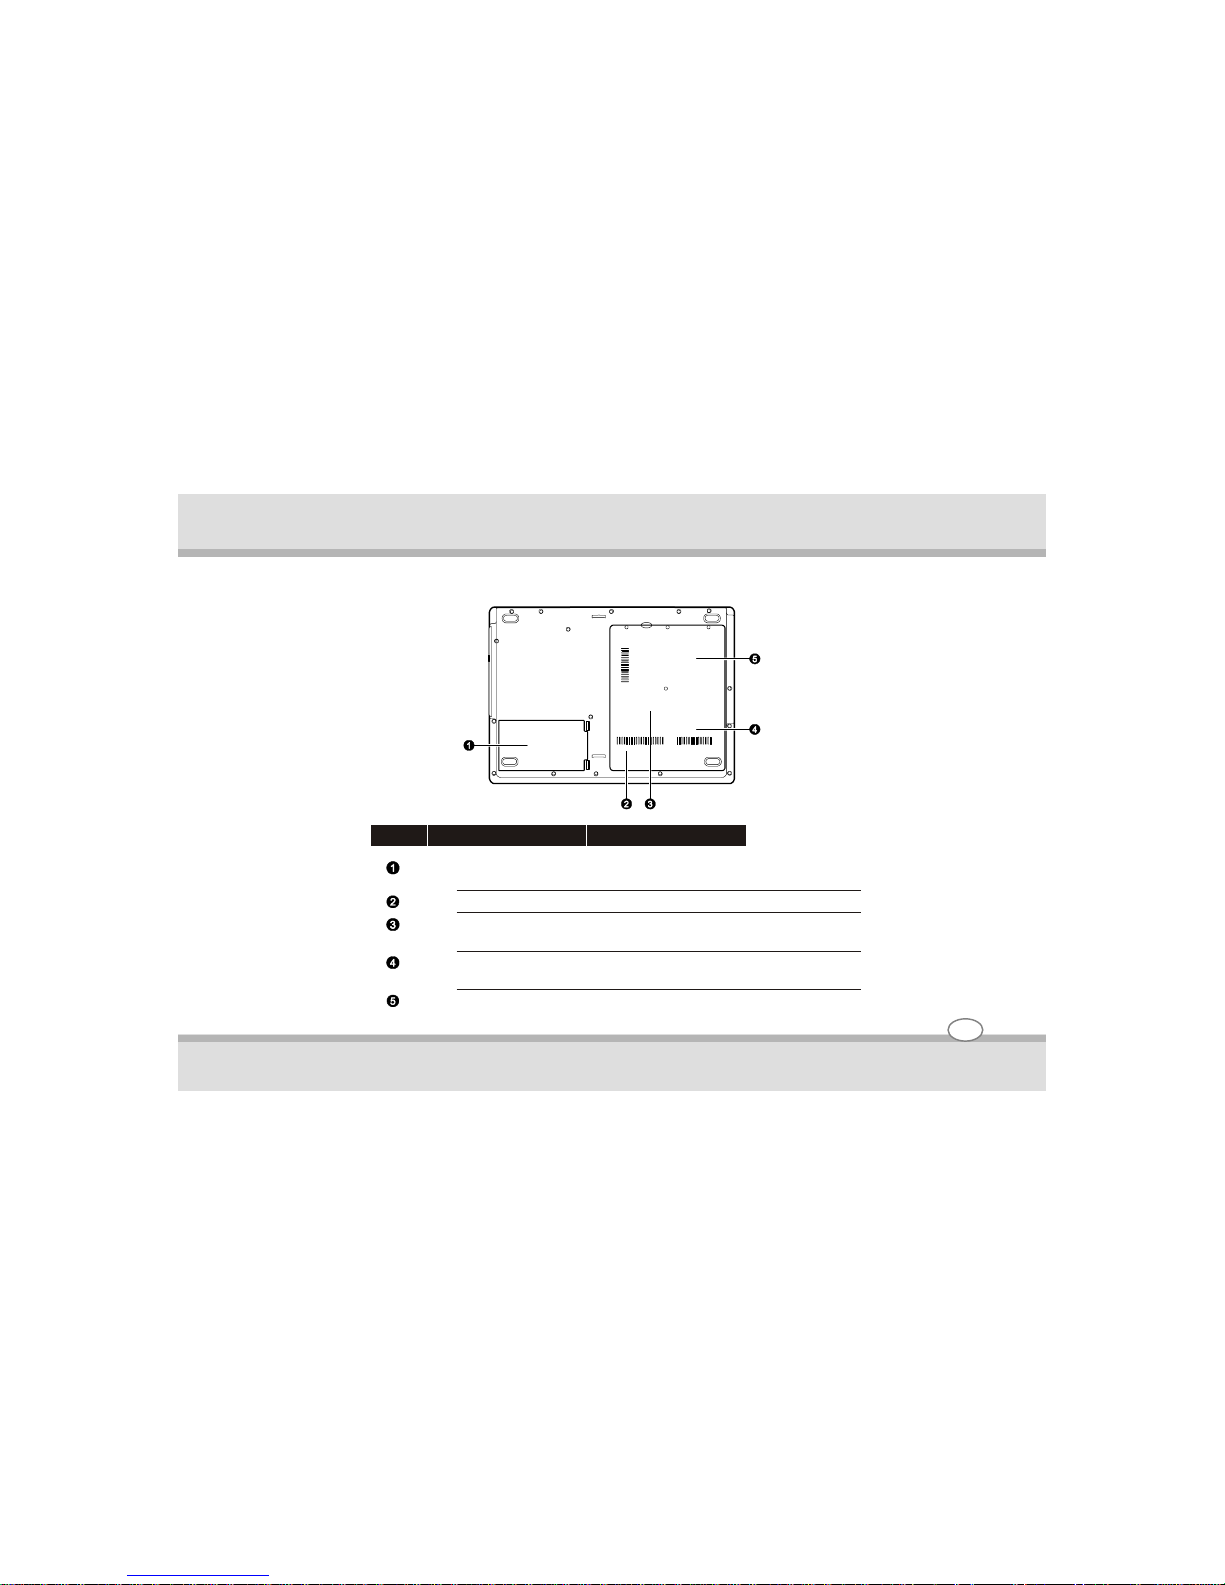
Bottom Components
Ref Component Description
Battery Pack Supplies power to your computer when
external power is not connected.
WLAN Card Slot Inside is the Mini PCI-E WLAN card.
Memory Slot Inside is the memory slot for expanding the
memory size.
Hard Disk Drive
Compartment
Inside is the hard disk drive.
CPU Socket Inside is the CPU.
1-10
Getting started
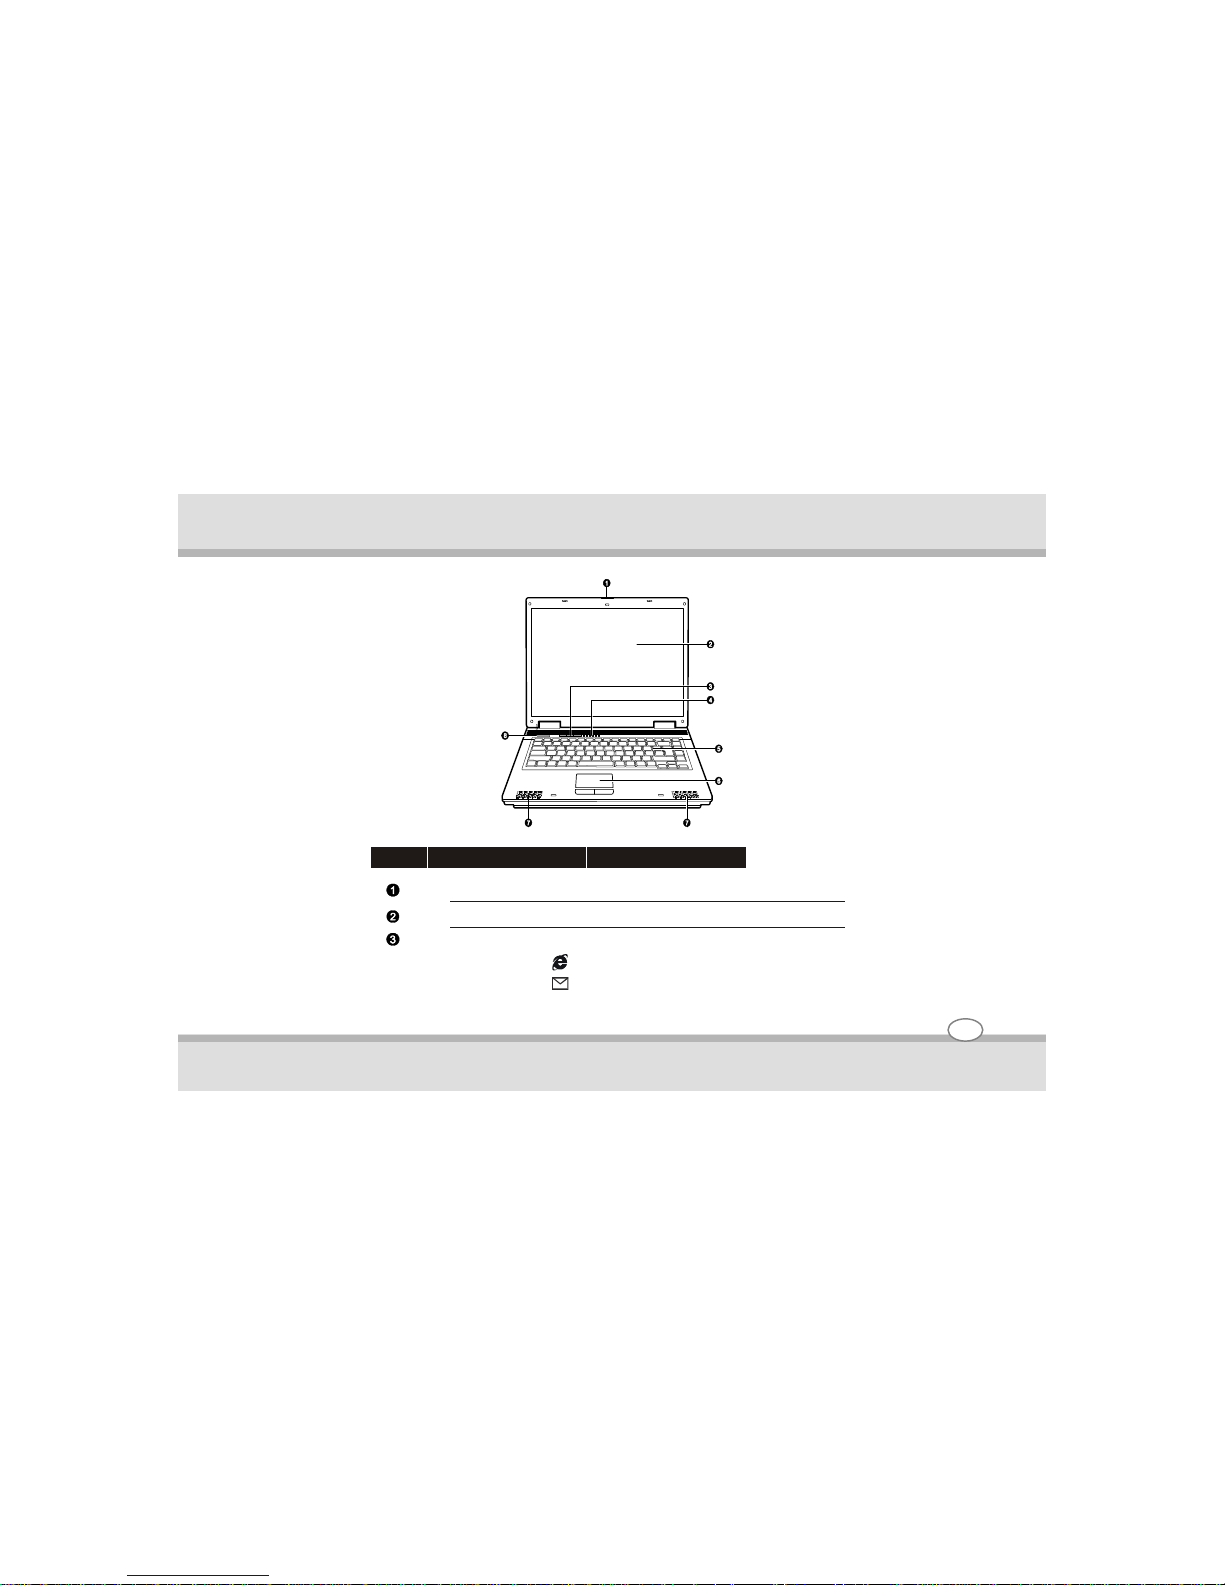
Ref Component Description
Top Cover Latch Locks the top cover.
LCD Screen Displays the output of the computer.
Easy Start Buttons Provide a quick way to launch programs.
Starts Internet Explorer.
Starts Microsoft® Outlook.
P1 (Program 1 – user customized) quick launch
key.
P1
1-11
Getting started
Top-open components
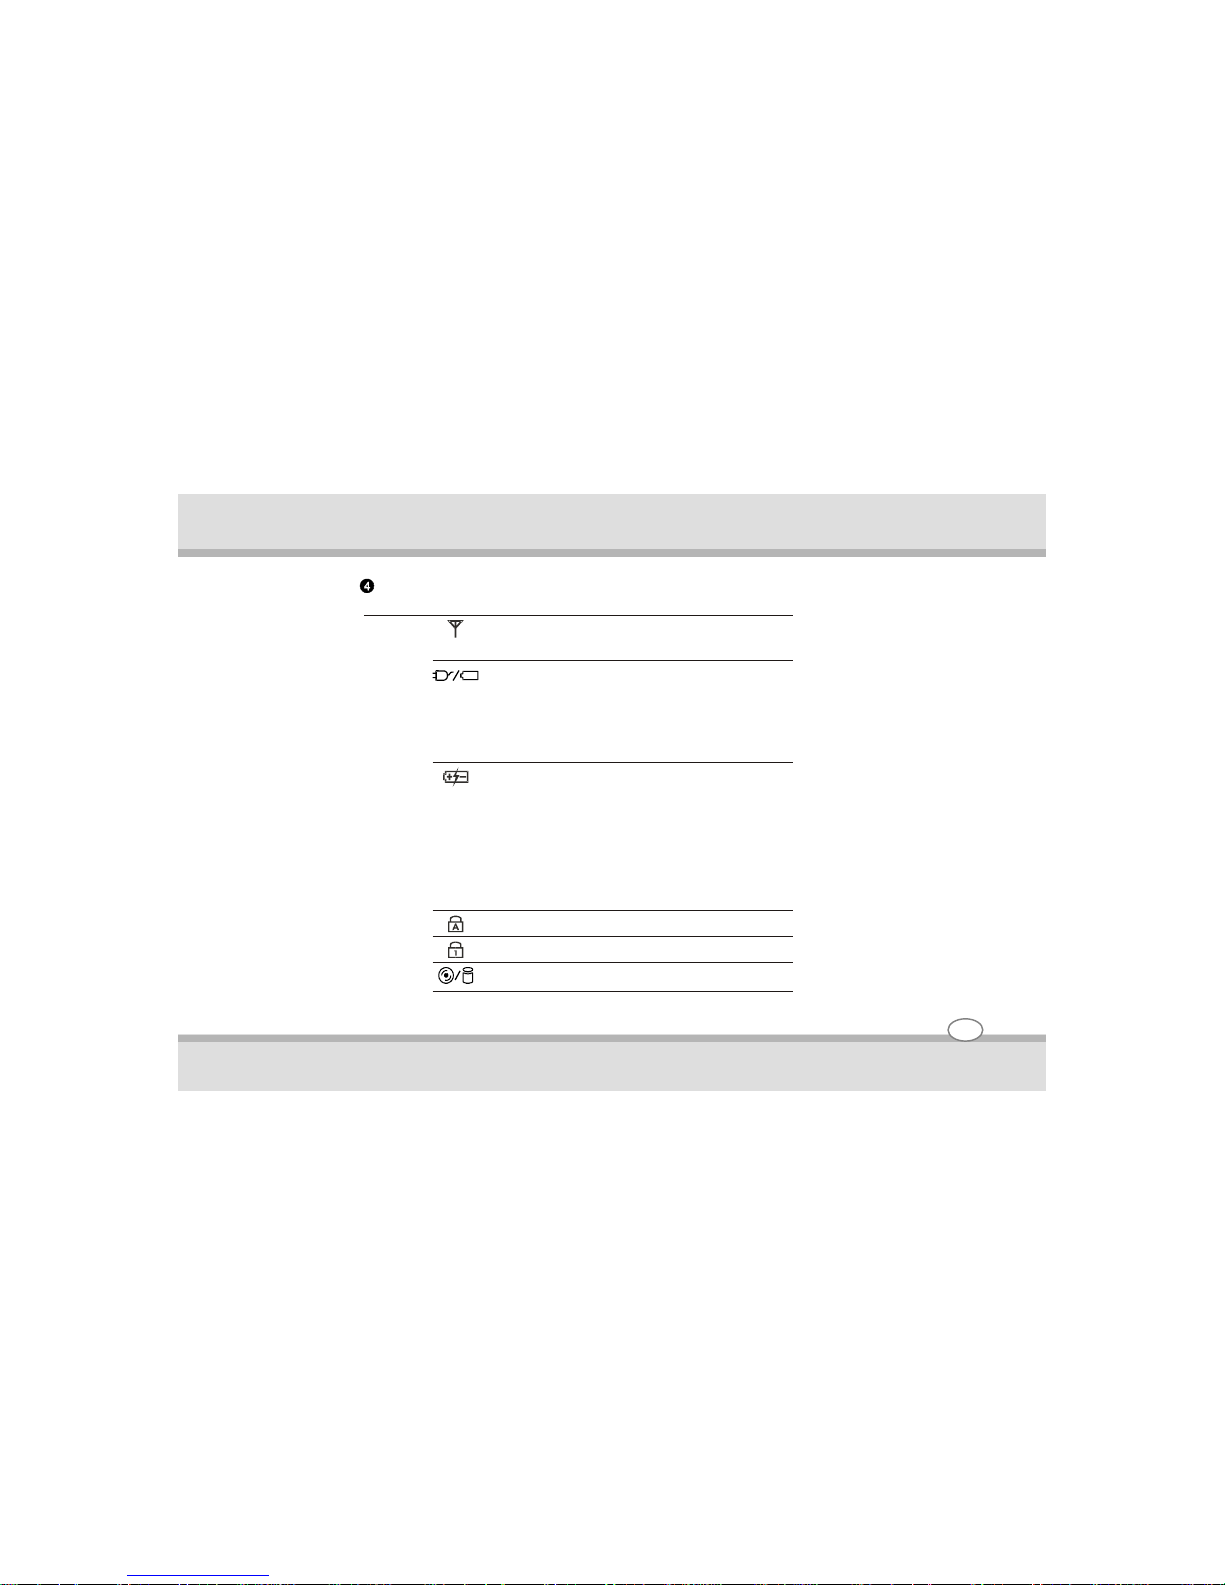
Indicators
Show the current status of the computer’s
devices.
WLAN
indicator
Glows in green when the
WLAN radio is on.
Glows in green when the
computer is turned on.
Power status
indicator
Glows in amber when the
computer is in the Standby
mode.
Glows in green when the
battery is fully charged and
connected to AC power.
Glows in amber when the
battery is being charged.
Battery Charge
indicato r
Bli nks red when the battery is
almost completely discharged.
Caps Lock indicator
Num Lock indicator
ODD drive / Hard disk drive in-use indicator
1-12
Getting started
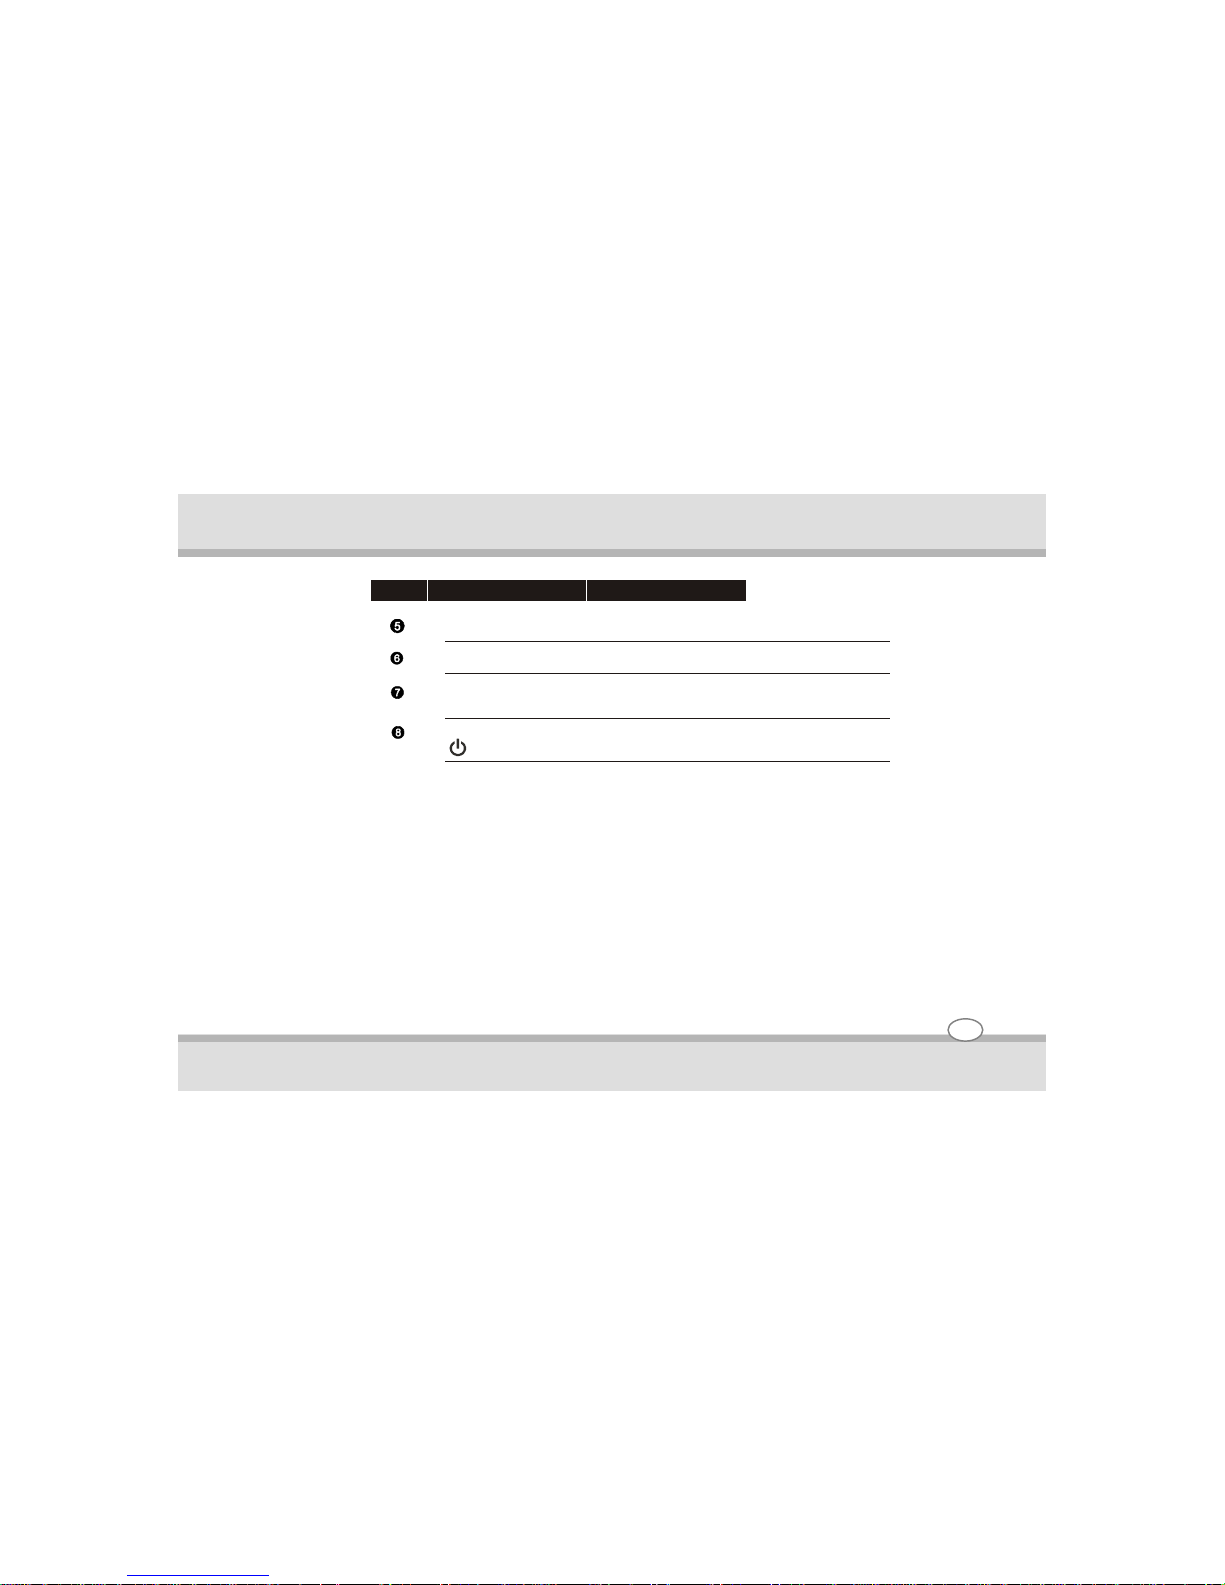
Keyboard
Serves as the data input device of the computer.
Touchpad
Serves as the pointing device of the computer.
Stereo
Speaker
Sends out sound and voice from the computer.
Power Button
Turns the computer power ON and OFF.
Ref Component Description
1-13
Getting started
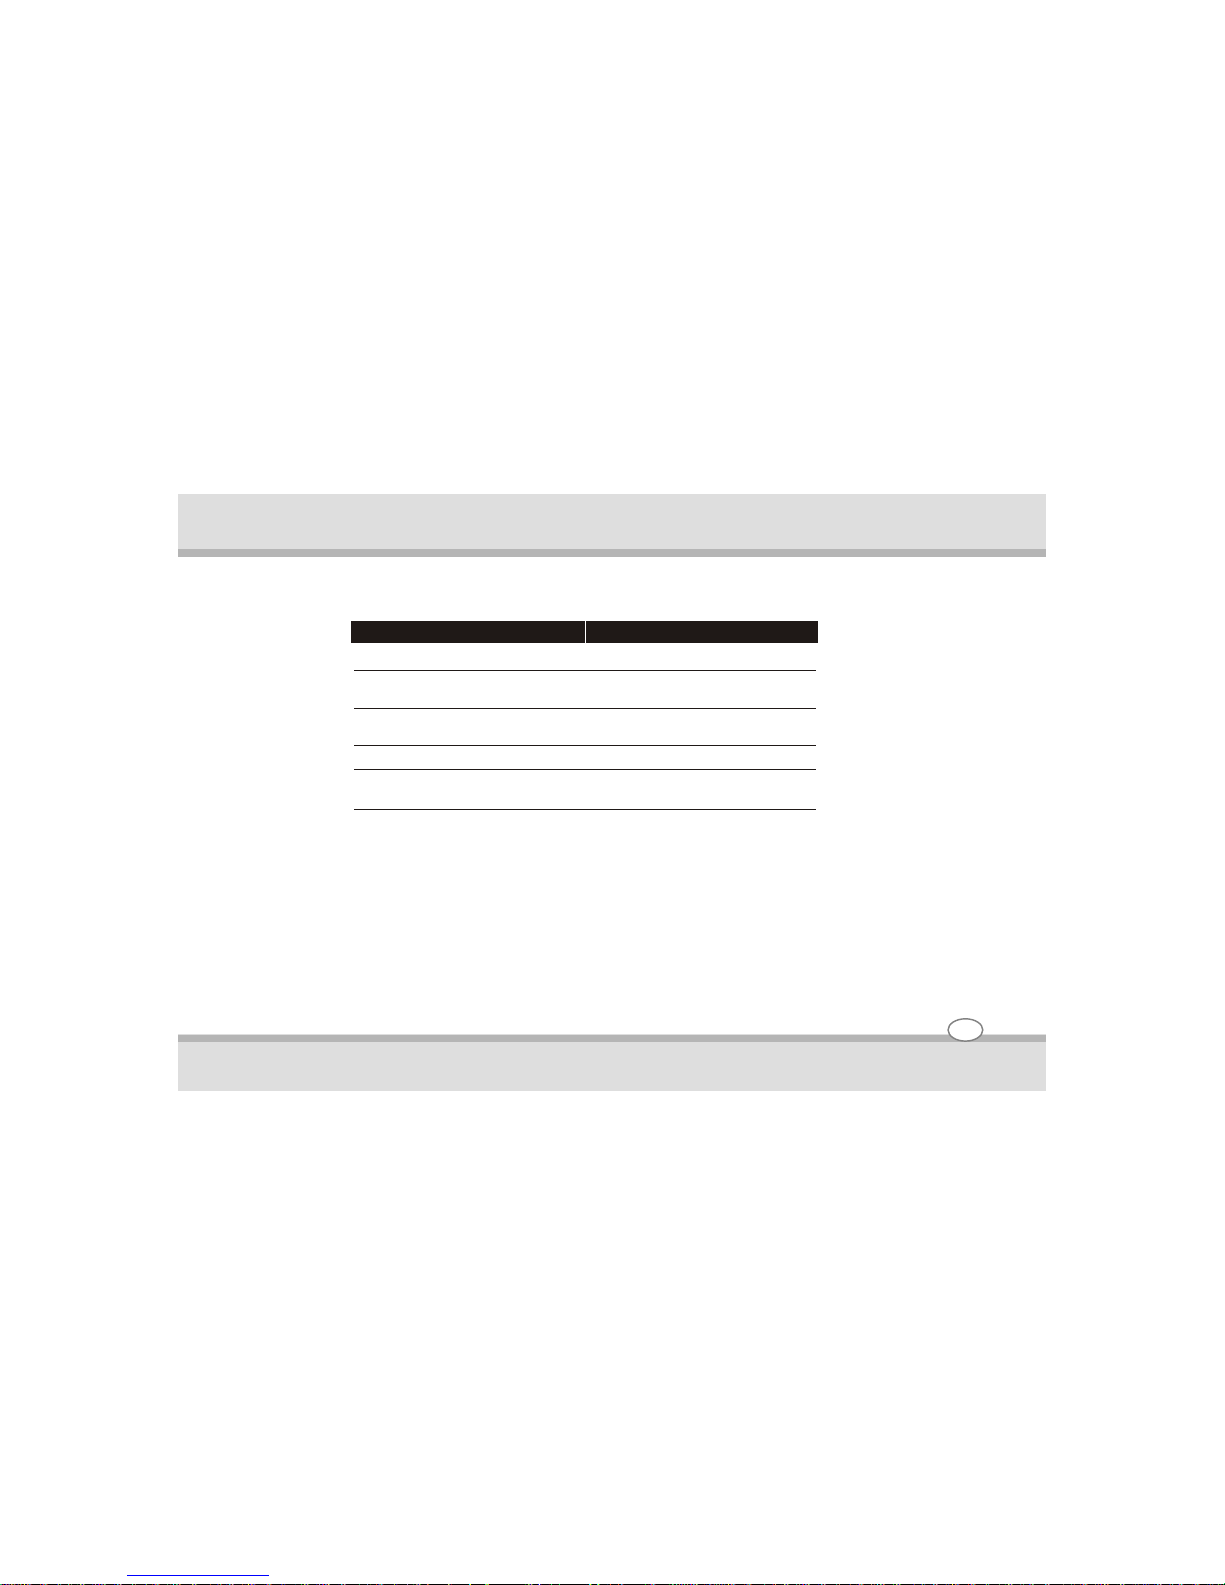
Where to Go from Here
For this purpose
To know more about the computer Go on to the next chapter.
To install the operating system if your See the operating system manual.
dealer has not already done so
To know more about the operating Read the operating system manual.
system
To set a power-on password See “ Security Menu” ” in Chapter
To charge the battery pack for the See “Charging the Battery Pack”
first time in Chapter.
Do this
1-14
Getting started

Congratulations on purchasing this computer.
This chapter provides information about the use of the computer.
If you are new to computers, reading this chapter will help you learn the operating basics. If you are already a
computer user but are new to notebook computers, you may choose to read only the parts containing
information unique to your computer.
Described in this chapter are the operating basics of these components:
! Keyboard
! Touchpad
! ODD drive
And these features:
! Starting and stopping the computer
! Video features
! Audio features
! Communication features
Operating your computer
Operating Your Computer
Chapter - 2
2-1

Starting and Stopping the Computer
There are a number of ways to start and stop the computer.
Starting the Computer
You always start the computer using the power button.
A computer starts up with an operating system (OS) existing on the storage device such as the hard disk and
CD disc. The computer will automatically load the OS after you turn it on. This process is called booting.
Note:
An operating system is the platform for all your software application programs to run on. The most widely used operating system
today is Microsoft Windows XP.
Stopping the Computer
When you finish a working session, you can stop the computer by turning off the power or leaving the computer
in Standby or Hibernation mode;
2-2
Operating your computer
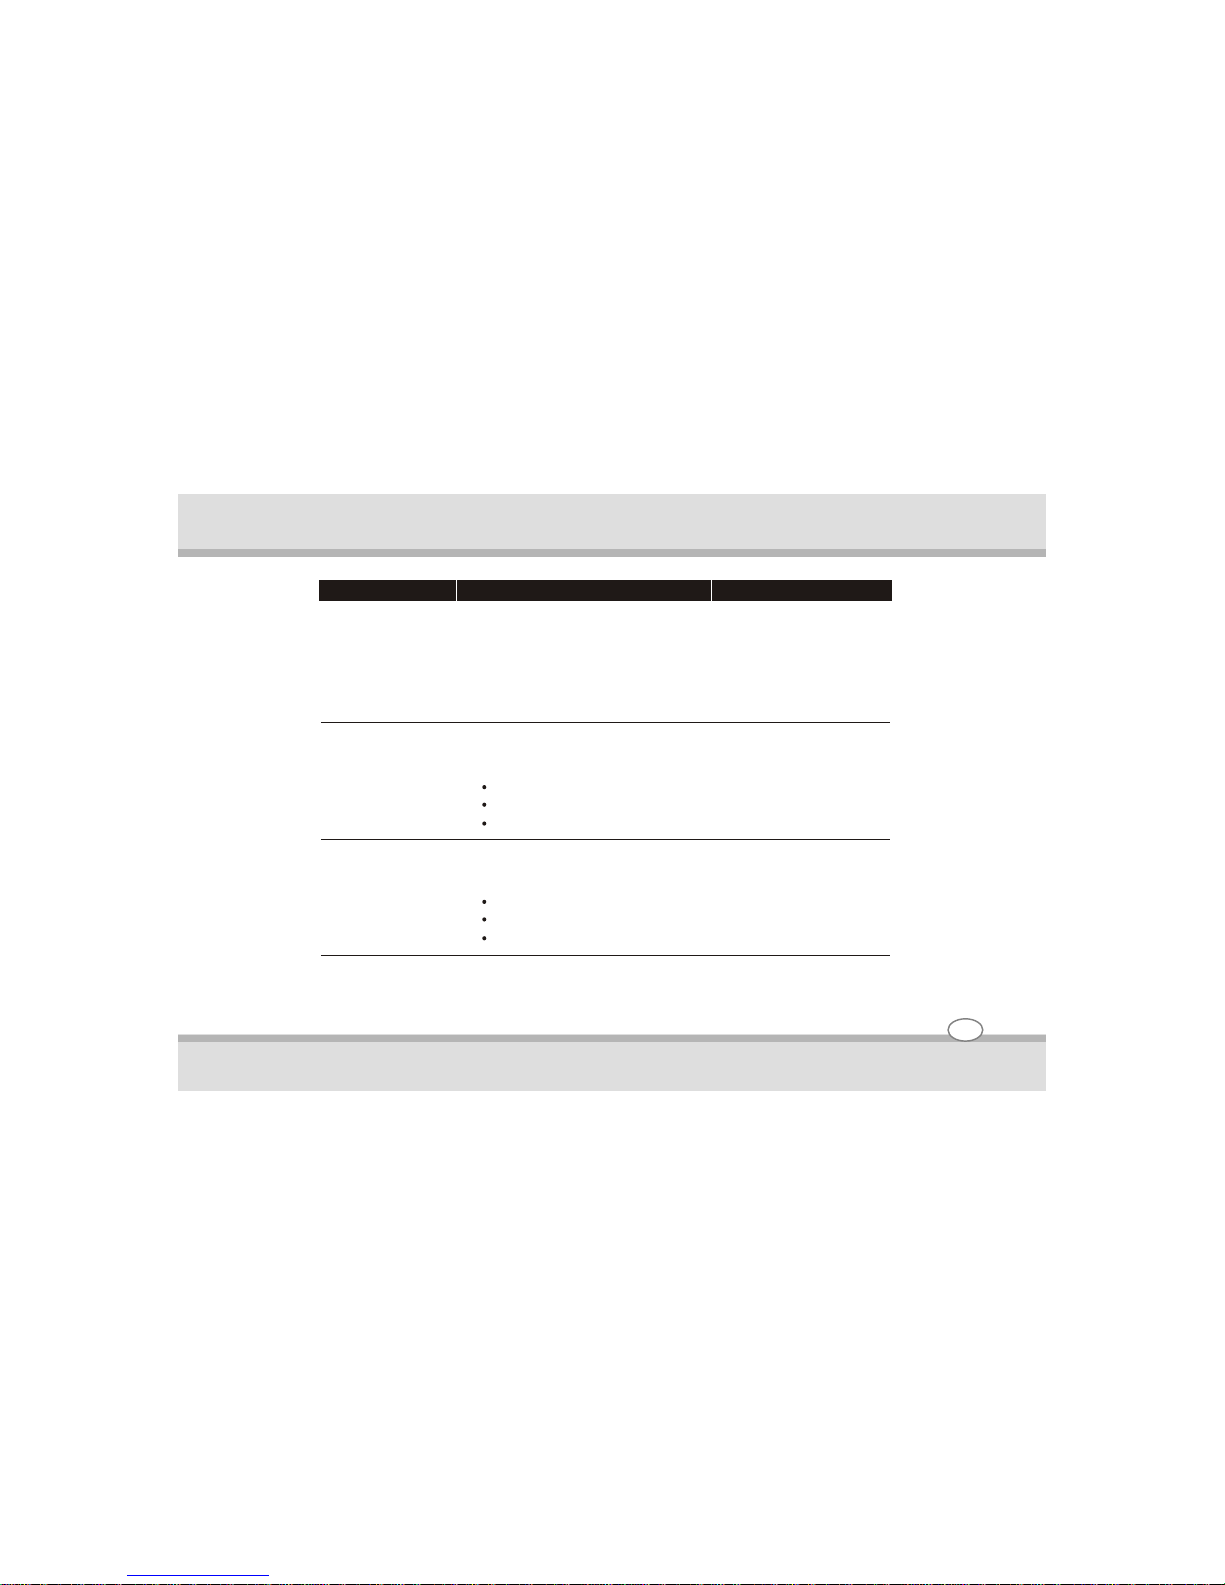
To stop in this mode
Do this To start up or resume again
Off Follow the shutdown procedure of your
operating system. This can prevent loss of
unsaved data or damage to your software
programs.
If the system is locked up because of
hardware or software problems, press the
power button to turn off the computer.
Standby
Press the power
button.
Depending on your settings in Windows,
you can place the computer in Standby
mode by:
Press any key.
Closing the display cover
Pressing the Fn+F12 hot key
Pressing the power button
Hibernation Depending on your settings in Windows,
you can place the computer in
Hibernation mode by:
Press the power
button.
Closing the display cover
Pressing the Fn+F12 hot key
Pressing the power button
If you choose to stop in Standby or Hibernation mode, you can return to where you left off the next time
you start up the computer.
2-3
Operating your computer
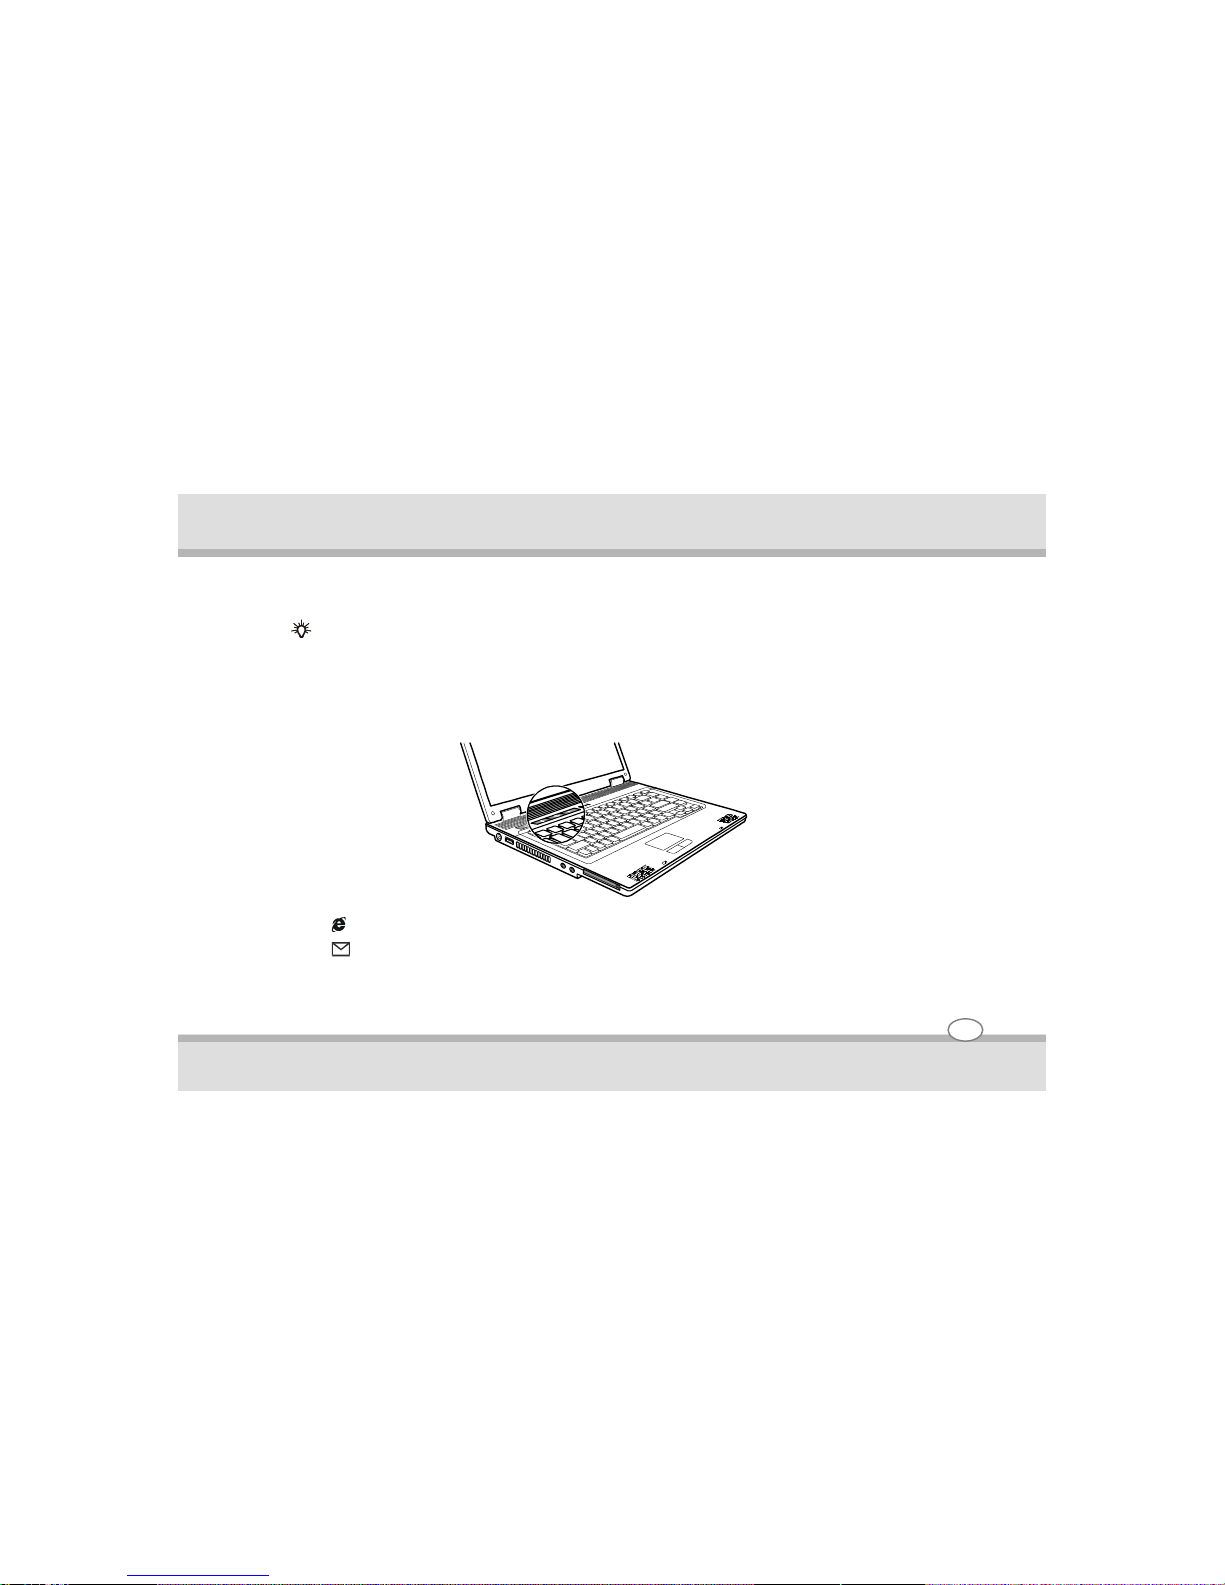
Using the Easy Start Buttons
Note: To take advantage of the Easy Start buttons feature, the ESB driver supplied with your computer must be installed.
The Easy Start buttons are three pre-defined buttons located on the left above the keyboard. The Easy Start
buttons allow you to start the frequently-used programs with one single press of a button (from left to right):
! Internet Explorer
! Microsoft® Outlook
! P1 (Program 1 – user customized) quick launch key (see the next section for details)
P1
2-4
Operating your computer

P1 Quick Launch Key Utility
The quick launch key utility allows you to define the P1 quick launch key.
To start the utility, double-click the HotKey icon on the taskbar. The ESB window appears as shown next.
Box
Cancel
Open
2-5
Operating your computer

Defining the buttons:
The box in the window represents the user-definable button.
To assign a program to a button, click the Open icon under the box to pop up the Select a File to Open dialog
box as shown next and select the desired program. Then, click Open to complete the process.
The appropriate icon will then appear in the box as shown next. To launch the program, press the P1 quick
launch key, or, if the ESB window is open, double-click the box containing the icon.
If you want to cancel the assignment of a program, click the Cancel icon under the box.
2-6
Operating your computer
 Loading...