

Page 1
©HBS Bolzenschweiss-Systeme GmbH & Co. KG
All rights reserved – Reprinting, in whole or in part, only with the approval of the manufacturer
Operating Manual
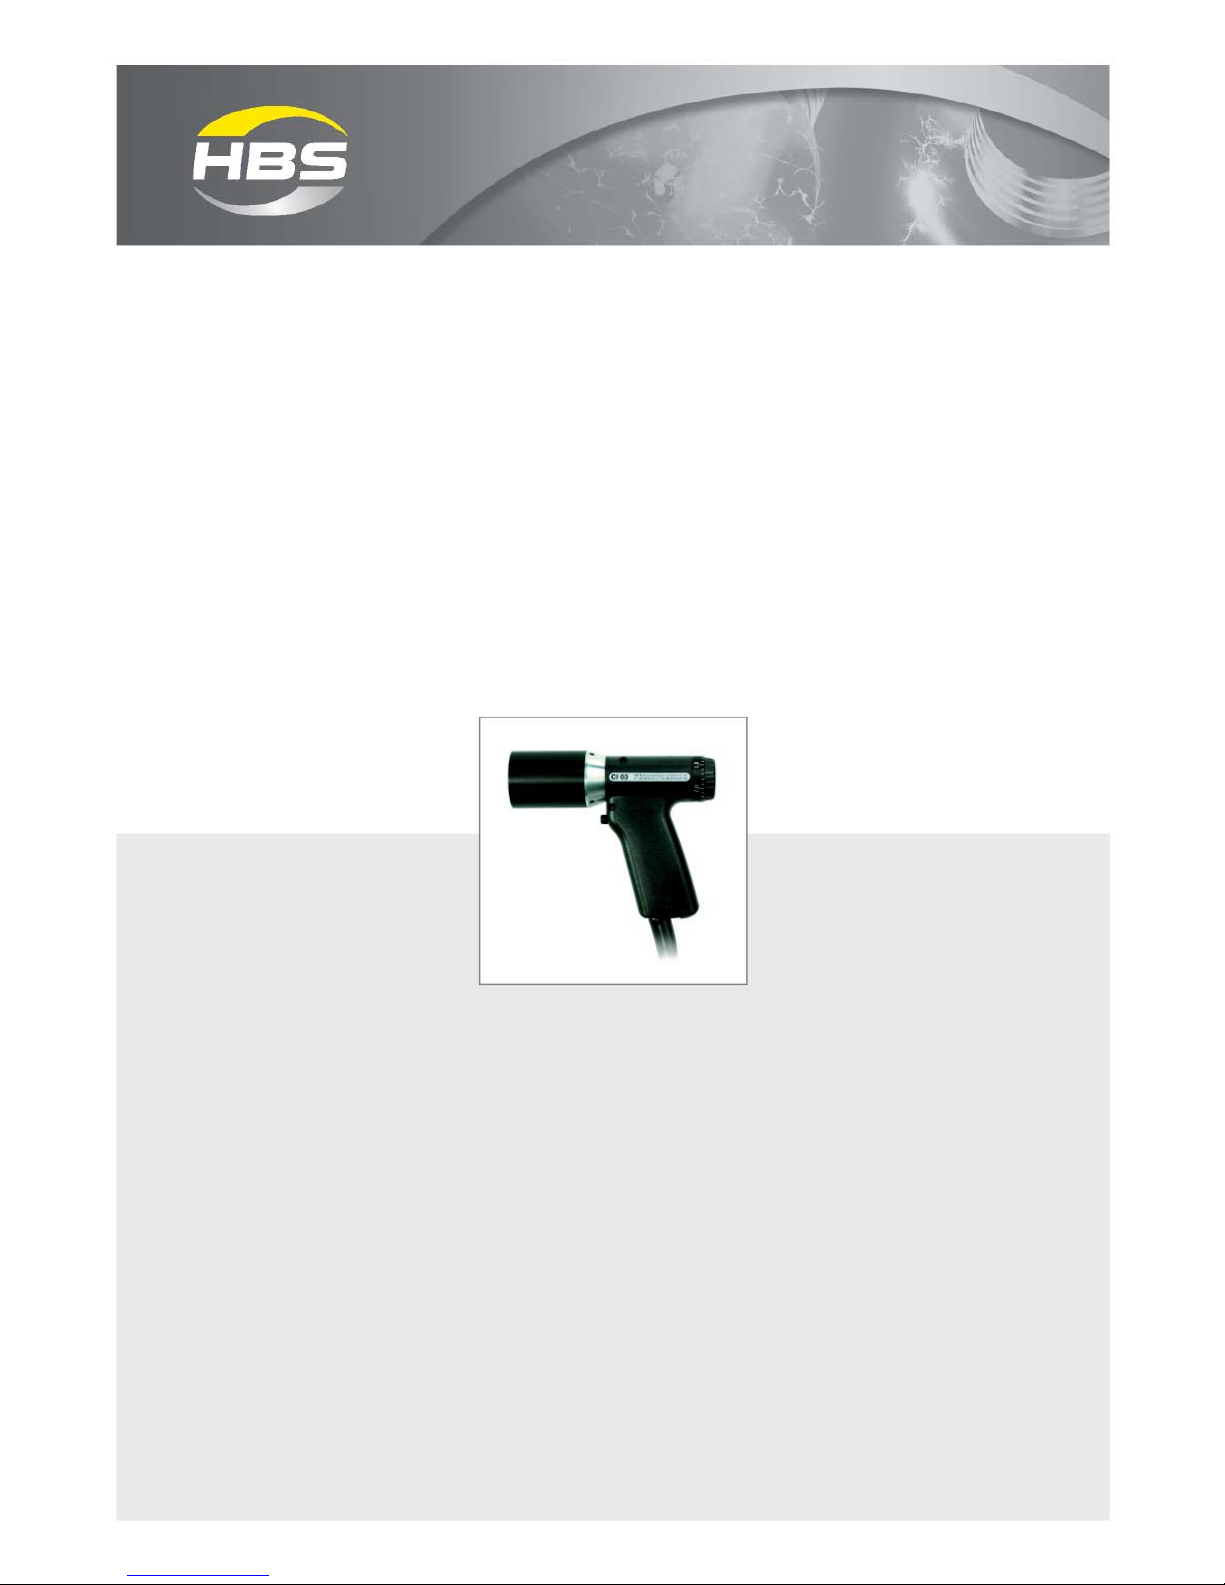
CI 03
Stud Welding Gun
92-20-254
2016
Page 2

2
After-sales service for Germany:
HBS Bolzenschweiss-Systeme GmbH & Co. KG
Felix-Wankel-Strasse 18
85221 DACHAU
GERMANY
CI 03 Operating Manual Issue 2016-05 Order No. E-BA 92-20-254
Translation of the Original Operating Manual
Please keep the manual in a safe place for future reference.
Transmission and duplication of this document, dissemination and notication
of the contents are not permitted unless expressly approved.
All rights, errors and technical amendments reserved.
© HBS Bolzenschweiss-Systeme GmbH & Co. KG
Page 3

3
©HBS Bolzenschweiss-Systeme GmbH & Co. KG
All rights reserved – Reprinting, in whole or in part, only with the approval of the manufacturer
Dear Customer,
Many thanks for buying a stud welding machine from HBS Bolzenschweiss-Systeme.
We at HBS wish you success at all times when working with this stud welding machine.
The high level of quality of our products is guaranteed by ongoing further development in the design, equipment and accessories. This may result in differences
between the present operating manual and your product. No claims can therefore be
derived from the data, illustrations and descriptions.
We have compiled the data and information in this reference work with the greatest
care, and have made every effort to ensure that the information contained in this
manual was correct and up-to-date at the time of delivery. We can nevertheless give
no guarantee for an absolutely error-free document.
Should you discover any errors or unclear points when reading this operating manual, please do not hesitate to contact us.
We would also be grateful for any feedback should you have any suggestions or
complaints to make about our product.
HBS Bolzenschweiss-Systeme GmbH & Co. KG
Felix-Wankel-Strasse 18
85221 Dachau
GERMANY
Page 4

©HBS Bolzenschweiss-Systeme GmbH & Co. KG
All rights reserved – Reprinting, in whole or in part, only with the approval of the manufacturer
4
Table of Contents
Table of Contents
1 Important Safety Precautions ................................................................... 6
2 Symbols and Terms Used ......................................................................... 9
3 Scope of Supply ....................................................................................... 12
4 Accessories .............................................................................................. 12
5 Technical Data .......................................................................................... 13
6 Intended Use ............................................................................................ 14
7 Warranty ................................................................................................... 15
8 Design and Function ............................................................................... 16
9 Welding Process ...................................................................................... 17
10 Preparing the Stud Welding Gun ........................................................... 18
10.1 Mounting the Chuck .............................................................................................. 18
10.2 Setting the Welding Parameters ........................................................................... 19
Adjusting Spring Force ....................................................................................................... 20
11 Welding ..................................................................................................... 21
12 Troubleshooting ....................................................................................... 22
13 Maintenance and Care ............................................................................. 24
13.1 Cleaning ............................................................................................................... 24
13.2 Inspection and Tests ............................................................................................. 25
Page 5

5
©HBS Bolzenschweiss-Systeme GmbH & Co. KG
All rights reserved – Reprinting, in whole or in part, only with the approval of the manufacturer
Table of Contents
14 Storage ..................................................................................................... 26
15 Disposal .................................................................................................... 26
Declaration of Incorporation of partly completed Machinery .......................... 27
Service & Support ................................................................................................ 28
Index ...................................................................................................................... 29
Page 6

©HBS Bolzenschweiss-Systeme GmbH & Co. KG
All rights reserved – Reprinting, in whole or in part, only with the approval of the manufacturer
6
1 Important Safety Precautions
1 Important Safety Precautions
The target group for this manual are qualied personnel who in view of their technical training, know-how and experience and knowledge of applicable regulations are
able to assess the work assigned to them and recognise potential hazards.
Danger from incorrect use
Use the stud welding machine only for the purpose described in this ma-
nual.
Otherwise you may endanger yourself or damage the stud welding machine.
You endanger yourself and others if you operate the stud welding machine
incorrectly or fail to observe the safety precautions and warnings. This can
lead to serious injury or extensive material damage.
Danger for unauthorised operating personnel
Work with the stud welding machine only when
– You are appropriately trained, instructed and authorised to do so, and
– You have read and completely understood this operating manual.
Never work with the stud welding machine when you are under the inu-
ence of
– Alcohol,
– Drugs or
– Medication.
Danger from unauthorised modications
Never modify the stud welding machine or parts thereof without obtaining
a clearance certicate from the manufacturer.
You will otherwise endanger yourself. This can lead to serious injury or extensive material damage.
Page 7

7
©HBS Bolzenschweiss-Systeme GmbH & Co. KG
All rights reserved – Reprinting, in whole or in part, only with the approval of the manufacturer
1 Important Safety Precautions
Life-threatening danger for wearers of active implanted cardiac
devices
Never operate the stud welding machine if you wear a heart pace-
maker or implanted debrillator.
In this case, never remain in the vicinity of the stud welding machine
during welding.
Never operate the stud welding machine if persons with heart pace-
makers or implanted debrillators are in the vicinity.
Strong electromagnetic elds are produced in the vicinity of the stud
welding machine during welding. These elds could impact the function of heart pacemakers or implanted debrillators.
Danger from fumes and airborne particulates
Switch on the welding fume extractor at the place of work.
Ensure that the room is well ventilated.
Never weld in rooms with a ceiling height of less than 3 m.
Observe furthermore your working instructions and the accident
prevention regulations.
This will help to avoid health damage due to fumes and airborne particulates.
Danger from glowing metal spatter (re hazard)
Glowing hot weld spatter and liquid splashes, ashes of light and a
loud
bang > 90 dB (A) must be anticipated during stud welding.
Inform colleagues working in the immediate vicinity accordingly
before starting work.
Ensure that an approved re extinguisher is available at the work-
place.
Page 8

©HBS Bolzenschweiss-Systeme GmbH & Co. KG
All rights reserved – Reprinting, in whole or in part, only with the approval of the manufacturer
8
1 Important Safety Precautions
Do not weld when wearing working clothes soiled with ammable
substances such as oil, grease, petroleum, etc.
Wear your proper protective clothing, such as:
– Protective gloves in accordance with the relevant standard,
– Non-ammable clothing,
– A protective apron over your clothing,
– Full-ear hearing protection in accordance with the relevant stan-
dard,
– A safety helmet when welding above your head,
– Safety shoes,
– Safety goggles with sight glass of protection level 2 in compli-
ance with the applicable standards and do not look directly into
the light arc.
Remove all ammable materials and liquids from the vicinity of the
work area before starting welding.
Weld at a safe distance from ammable materials or liquids.
Select a safety distance large enough to ensure that no danger can
arise from weld spatter.
Protection of the stud welding unit
Protect the stud welding machine against the ingress of foreign
matter and liquids caused by cutting or grinding work in the vicinity
of your work area.
This will help to prolong the service life of your stud welding machine.
Page 9
9
©HBS Bolzenschweiss-Systeme GmbH & Co. KG
All rights reserved – Reprinting, in whole or in part, only with the approval of the manufacturer
2 Symbols and Terms Used
2 Symbols and Terms Used
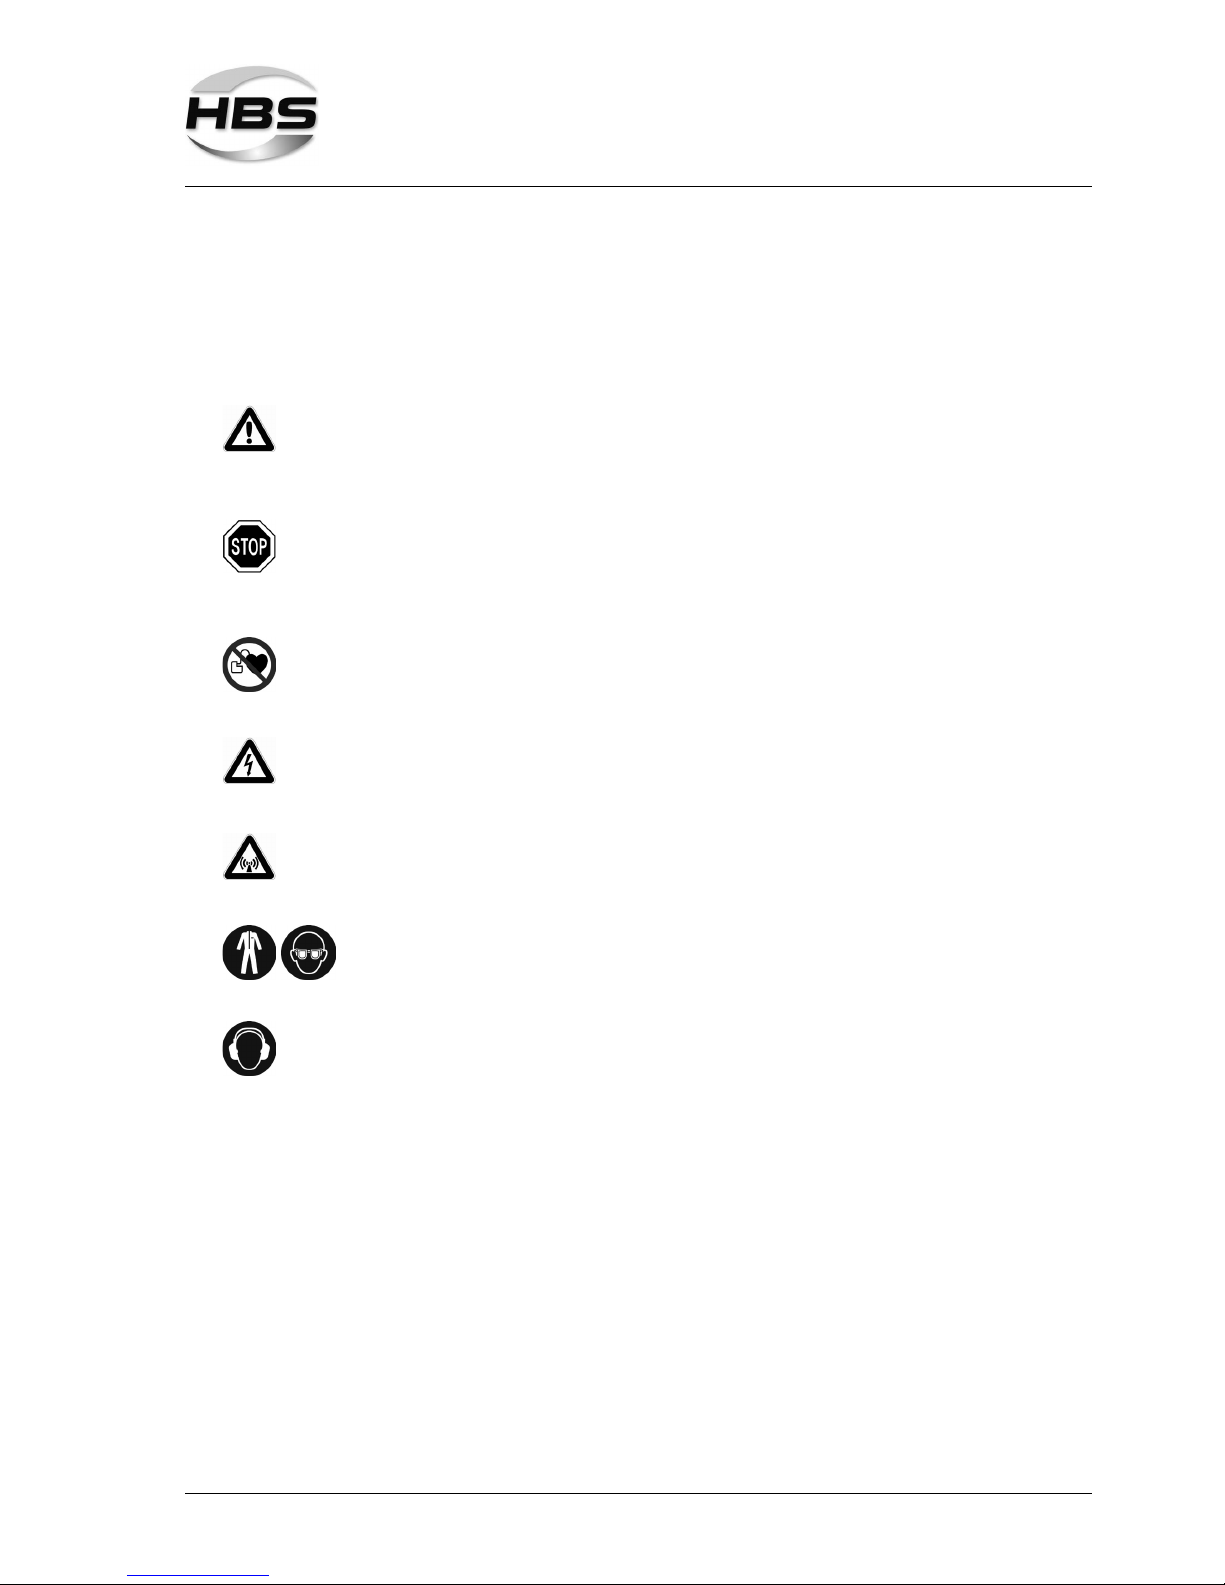
The symbols used in this operating manual have the following meanings:
Danger
Warns you of hazards that can lead to injury of persons or to
considerable material damage.
Caution
Problems with the operating procedures can occur if this information is
not observed.
No access for people with active implanted cardiac devices
Danger
Warns you of electrical hazards
Danger
Warns you of electromagnetic elds that can be generated during welding
These symbols prompt you to wear personal protective clothing when
working with the stud welding unit.
This symbol prompts you to wear ear protection. A loud bang > 90 dB (A)
can occur during the welding process.
Page 10

©HBS Bolzenschweiss-Systeme GmbH & Co. KG
All rights reserved – Reprinting, in whole or in part, only with the approval of the manufacturer
10
2 Symbols and Terms Used
Tip
Cross-reference to useful information on the use of the stud welding
machine
Cross-references in this operating manual are marked with this
symbol or are printed in italics
Fire hazard
Have a suitable re extinguisher for the working area ready before starting
work.
Work instruction
– List
Page 11

11
©HBS Bolzenschweiss-Systeme GmbH & Co. KG
All rights reserved – Reprinting, in whole or in part, only with the approval of the manufacturer
2 Symbols and Terms Used
Glossary
Automatic welding head: Device for welding of welding elements
Capacitor: Component for storage of electrical energy.
Light arc: Independent gas discharge between two electro-
des when the current is high enough. A whitish light
is emitted in the process. The light arc allows very
high temperatures to be generated.
Rectier: Electrical component that converts alternating vol-
tage into direct voltage
Stud feeder: Device for automatic feeding of welding elements
Stud welding gun: Device for welding of welding elements
Stud welding machine: Stud welding unit including stud welding gun
Stud welding unit: Device for provision of the electrical energy for
stud welding
Thyristor: Electronic component for contact-free switching of
high currents; switching takes place via the control
input
Welding element: Component such as stud or pin that is welded to
the workpiece
Welding parameters: Mechanical and electrical settings at the stud wel-
ding gun and at the stud welding unit (e.g. spring
force, charging voltage)
Workpiece: Components such as sheet metal or tubes to which
the welding elements are to be fastened
Page 12
©HBS Bolzenschweiss-Systeme GmbH & Co. KG
All rights reserved – Reprinting, in whole or in part, only with the approval of the manufacturer
12
3 Scope of Supply
3 Scope of Supply
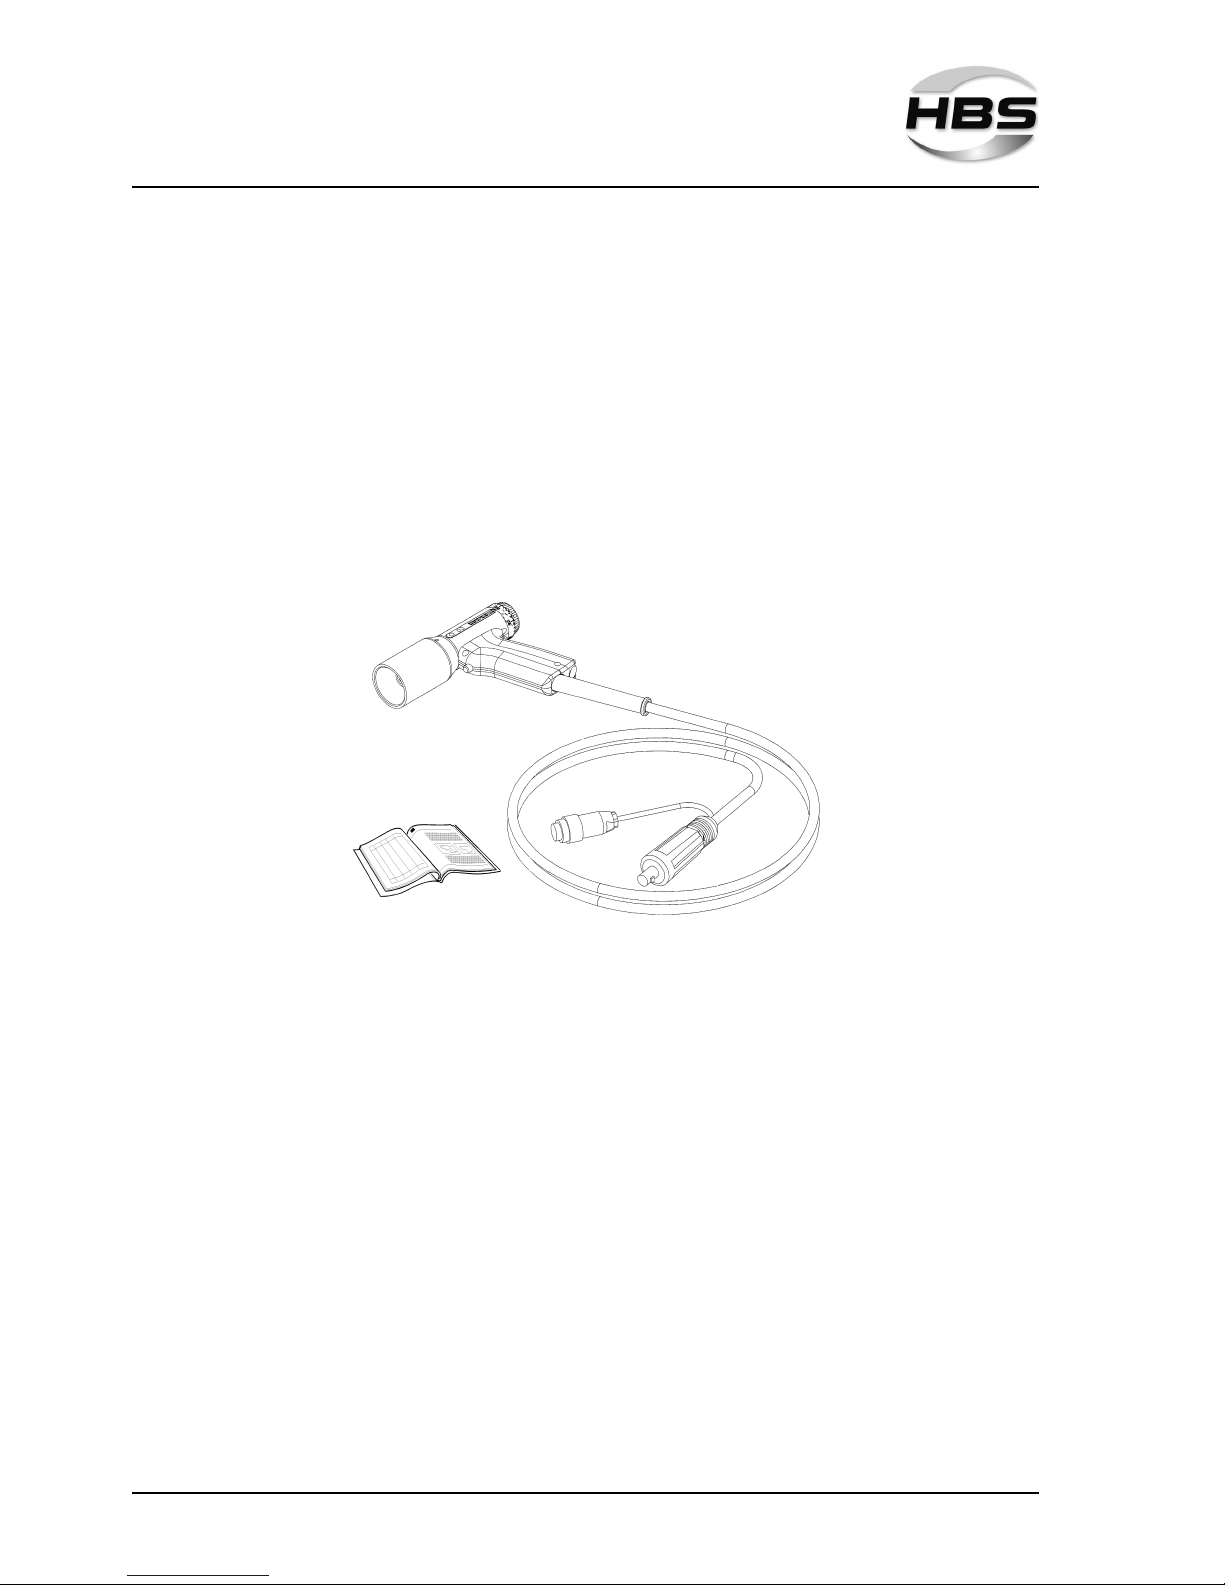
The basic conguration of your stud welding gun contains the following parts:
No. of
pieces
Part Type Order No.
1 Stud welding gun
cable length 10 m
CI 03 92-20-254
1 Operating manual
CI 03 E-BA 92-20-254
1 Double open-ended wrench AF 14/17 80-10-069
Inspect the shipment for visible damage and completeness immediately on re-
ceipt.
Report any transport damage or missing components immediately to the delive-
ring shipping agent or the dealer (address, see page 2).
4 Accessories
For example:
Accessories ISO TS
(Chuck ISO TS and double open-ended wrench)
dia. 30 mm 92-40-066A
Accessories ISO TS
(Chuck ISO TS and double open-ended wrench)
dia. 38 mm 92-40-063A
Additional accessories can be found in our extensive accessories catalogue.
Page 13

13
©HBS Bolzenschweiss-Systeme GmbH & Co. KG
All rights reserved – Reprinting, in whole or in part, only with the approval of the manufacturer
5 Technical Data
5 Technical Data
Stud welding gun Type CI 03 (for insulation)
for CD stud welding according to current standards
Welding range
Cupped head pins dia. 2/2.7 mm
Pin length 9.5 to 152.4 mm
Pin material Mild steel, stainless steel
Pin type Cupped head pins
Spring force Adjustable, arresting
Welding cable
10 m
IP-Code IP 20 (protect against humidity)
Workplace noise level > 90 dB (A) may occur during welding
Ambient temperature limits 0 °C to 40 °C
Dimension L x B x H 175 x 50 x 145 mm (without cable and tripod)
Weight 0.7 kg (without cable and tripod)
Page 14

©HBS Bolzenschweiss-Systeme GmbH & Co. KG
All rights reserved – Reprinting, in whole or in part, only with the approval of the manufacturer
14
6 Intended Use
6 Intended Use
The stud welding gun has been designed exclusively for use with standardised stud
welding elements. The use of any other elements will result in the desired strength
of the welded joint being diminished.
The stud welding gun must only be connected to HBS stud welding units.
Always check with the operating manual of your stud welding unit whether this
stud welding gun may be used.
Observation of the operating manual of the stud welding unit being used is also part
of the intended use.
Page 15

15
©HBS Bolzenschweiss-Systeme GmbH & Co. KG
All rights reserved – Reprinting, in whole or in part, only with the approval of the manufacturer
7 Warranty
7 Warranty
Please refer to the latest "General Terms and Conditions" for the scope of the
warranty.
The warranty does not cover faults caused by e.g.
– Normal wear,
– Improper handling,
– Failure to observe the operating manual,
– Failure to observe the safety precautions,
– Use for other than the intended purpose, or
– Transport damage.
Warranty entitlement shall no longer be valid if modications, changes or service
and repair work is carried out by unauthorised persons or without the knowledge of
the manufacturer. Invalidation of warranty entitlement shall also render the declaration of conformity invalid. The CE marking shall be declared invalid by the manufacturer.
We expressly point out that only spare parts and accessories or components approved by us may be used. The same applies likewise to installed units from our subsuppliers.
Page 16
©HBS Bolzenschweiss-Systeme GmbH & Co. KG
All rights reserved – full or partial reproduction subject to prior approval of the manufacturer
16
8 Design and Function
8 Design and Function
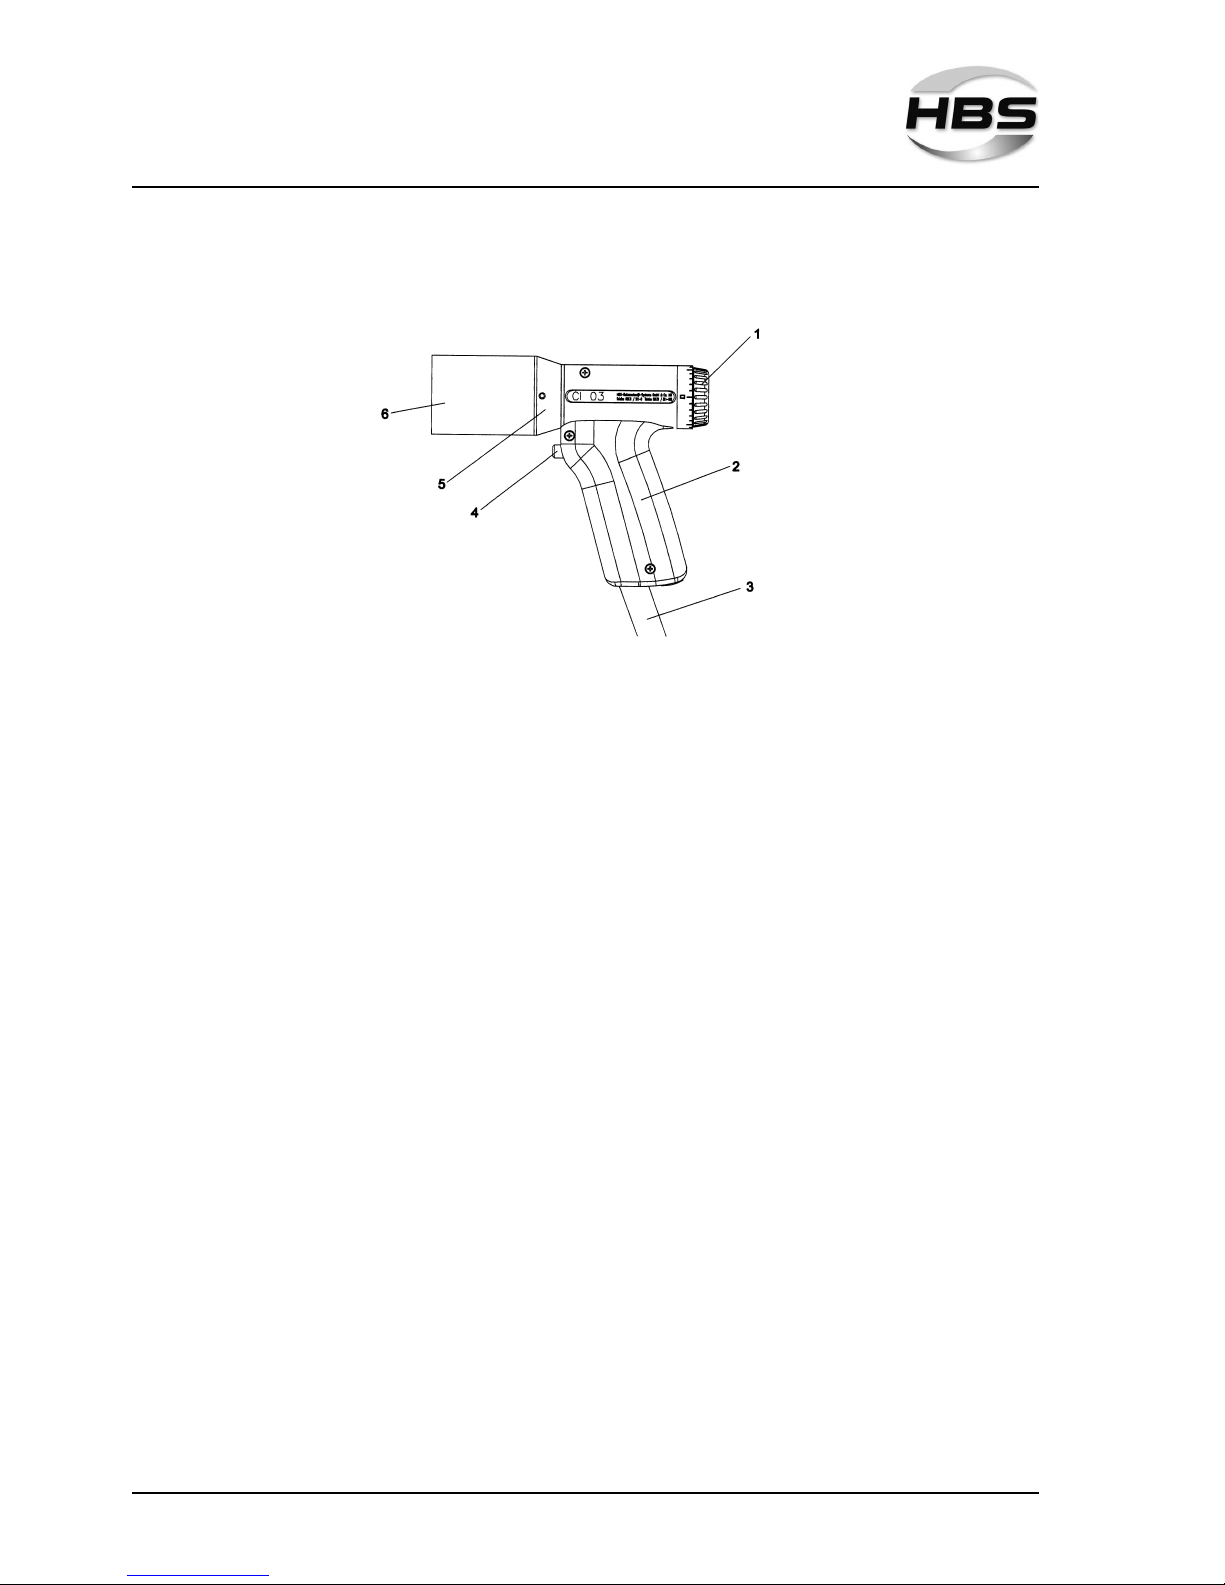
The body of the stud welding gun consists of a sturdy two-part plastic housing (2).
The
connecting line (3) (welding cable and control cable) is supplied through the
gun handle to the gun.
Positioned at the front of the stud welding gun are the welding piston and the retai-
ning nut used to x the manual chuck.
At the front of the stud welding gun, the
gun head (5) and the spacer (6) are ins-
talled.
At the rear, there is the mechanism for
spring force adjustment (1).
At the front of the stud welding gun handle, the
welding gun trigger (4) is installed.
It is used to trigger the welding process.
The serial number can be found on the welding gun handle.
Type plate
The type plate contains the following information:
– Manufacturer
– Type
The serial number is stamped.
Page 17

17
©HBS Bolzenschweiss-Systeme GmbH & Co. KG
All rights reserved – Reprinting, in whole or in part, only with the approval of the manufacturer
9 Welding Process
9 Welding Process
This stud welding gun may only be used for capacitor discharge stud welding with
tip ignition (contact welding).
Please refer to the original operating manual of the connected stud welding unit
for the welding procedure.
Page 18
©HBS Bolzenschweiss-Systeme GmbH & Co. KG
All rights reserved – Reprinting, in whole or in part, only with the approval of the manufacturer
18
10 Preparing the Stud Welding Gun
10 Preparing the Stud Welding Gun
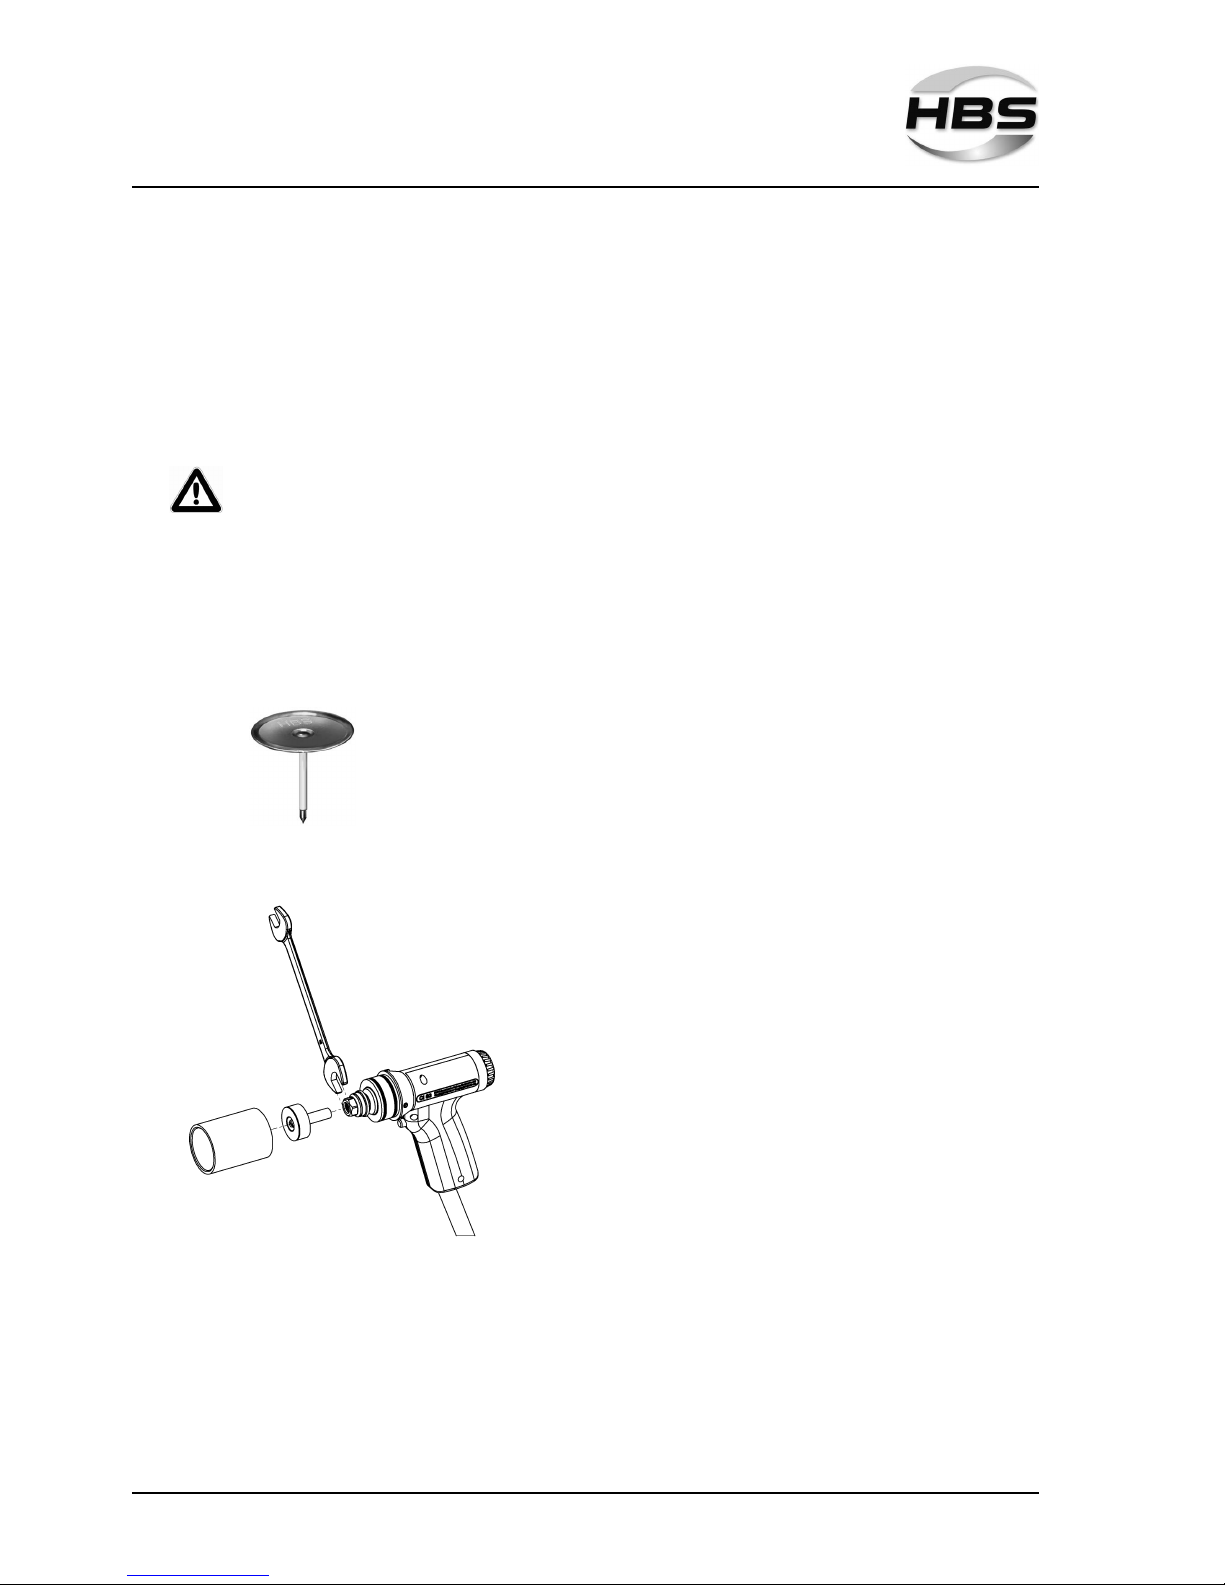
Prepare the stud welding gun by
– mounting the chuck
– adjusting the spring force.
Do not connect the stud welding gun to the stud welding unit until it
has been prepared.
In this way you can avoid any unintentional starting of the welding process.
10.1 Mounting the Chuck
Select a chuck suitable for your welding element.
Cupped head pin
Cupped head pin dimension Chuck (with solenoid)
Ø in mm
30 82-50-310B
28 82-50-308A
Loosen the retaining nut.
Put the chuck with loose retaining nut up to the
stop into the piston of the welding gun.
Tighten the retaining nut again with the double
open ended wrench AF 14/17.
Insert the spacer (tripod).
Page 19
19
©HBS Bolzenschweiss-Systeme GmbH & Co. KG
All rights reserved – Reprinting, in whole or in part, only with the approval of the manufacturer
10 Preparing the Stud Welding Gun
10.2 Setting the Welding Parameters
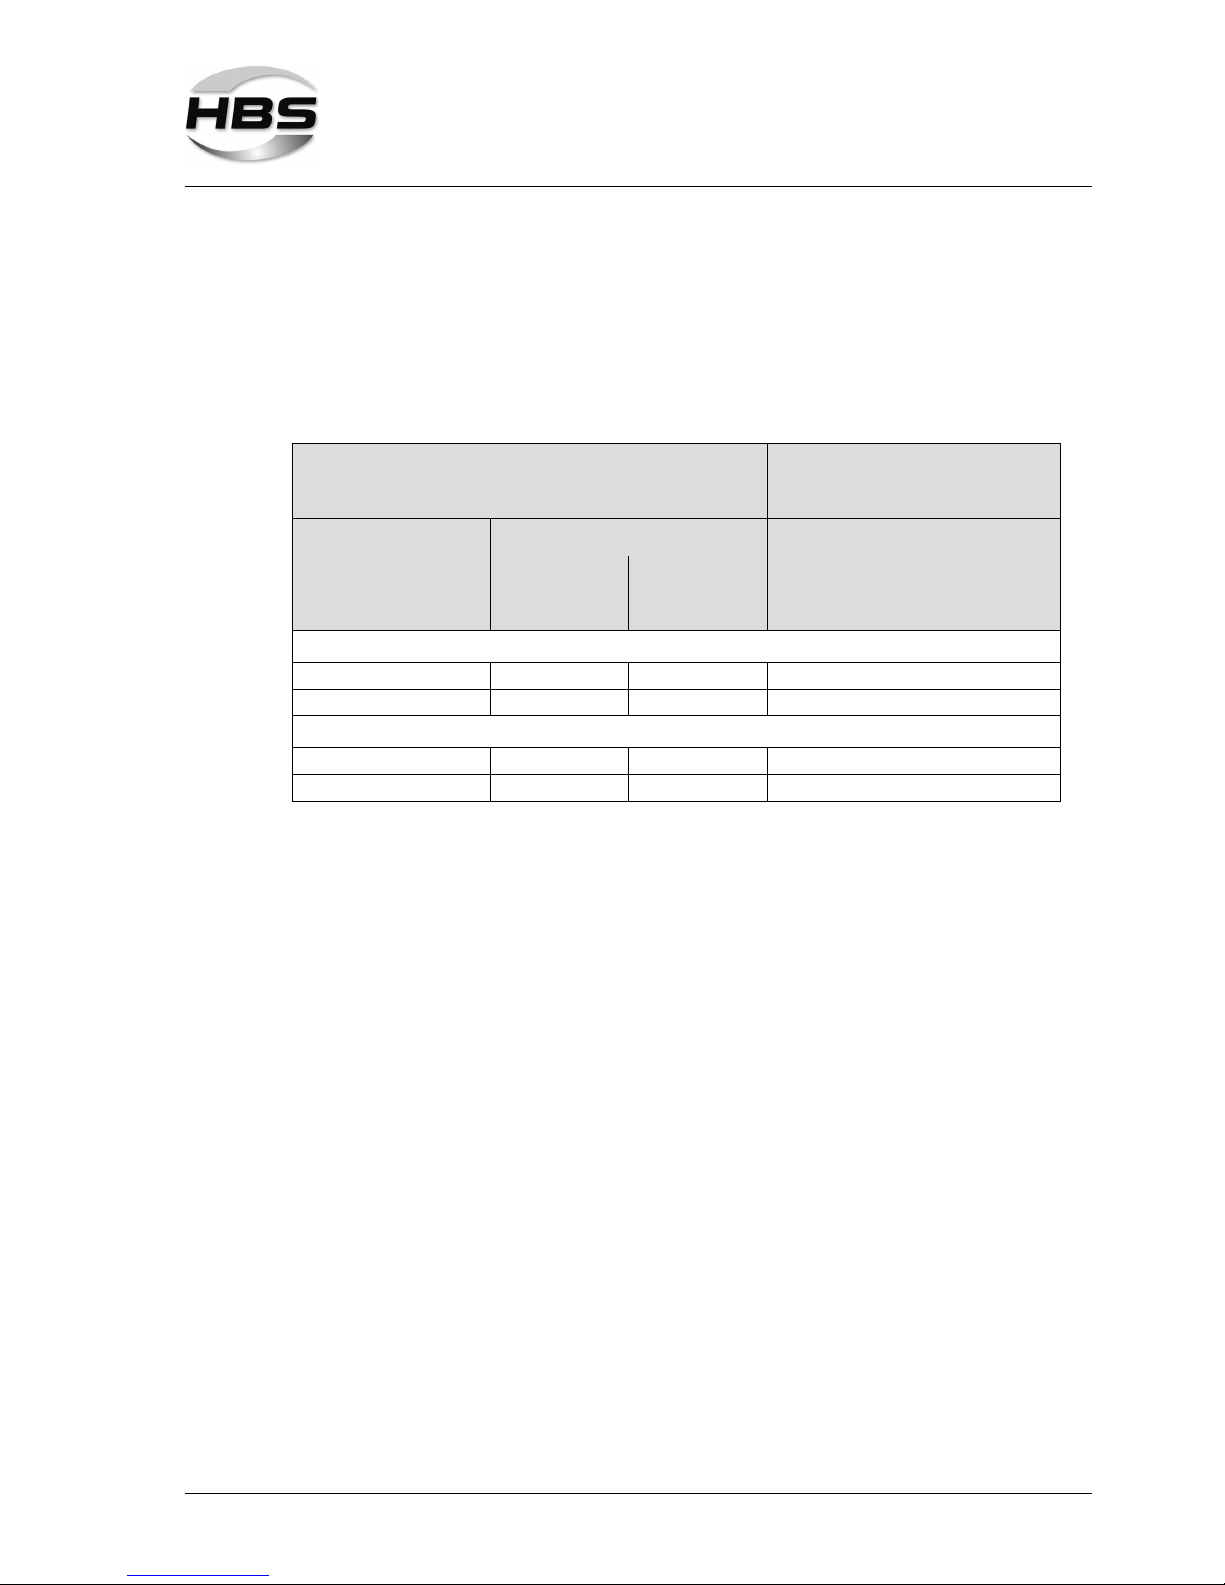
The spring force is, among others, dependent on the workpiece and welding elements used and their diameters.
The specications in the following table are guidelines.
Select the applicable parameters for spring force for your workpiece.
Stud welding units
CD 1501, CDi 1502
Pegasar 500 accu Insulation
Material of
welding elements
Diameter of welding elements Welding gun parameters
1)
metric imperial CI 03
D [mm] D Spring force (Scaling) *)
Material of workpiece: Mild steel (suitable for welding) / Galvanised steel (suitble for welding)
4.8 (suitable for welding)
2 14 ga 6
4.8 (suitable for welding)
2,7 12 ga 6
Material of workpiece: Alloyed steel (suitable for welding)
A2-50
2 14 ga 6
A2-50
2,7 12 ga 6
1)
to be checked by test welds
*) The spring force to be set complies with the thickness of the insulating mat as well as its density (hardness).
With thick and dense insulating mats, the spring force should be raised due to the increasing friction between
the cupped head pin and the insulating material.
Page 20
©HBS Bolzenschweiss-Systeme GmbH & Co. KG
All rights reserved – Reprinting, in whole or in part, only with the approval of the manufacturer
20
10 Preparing the Welding Gun
Adjusting Spring Force
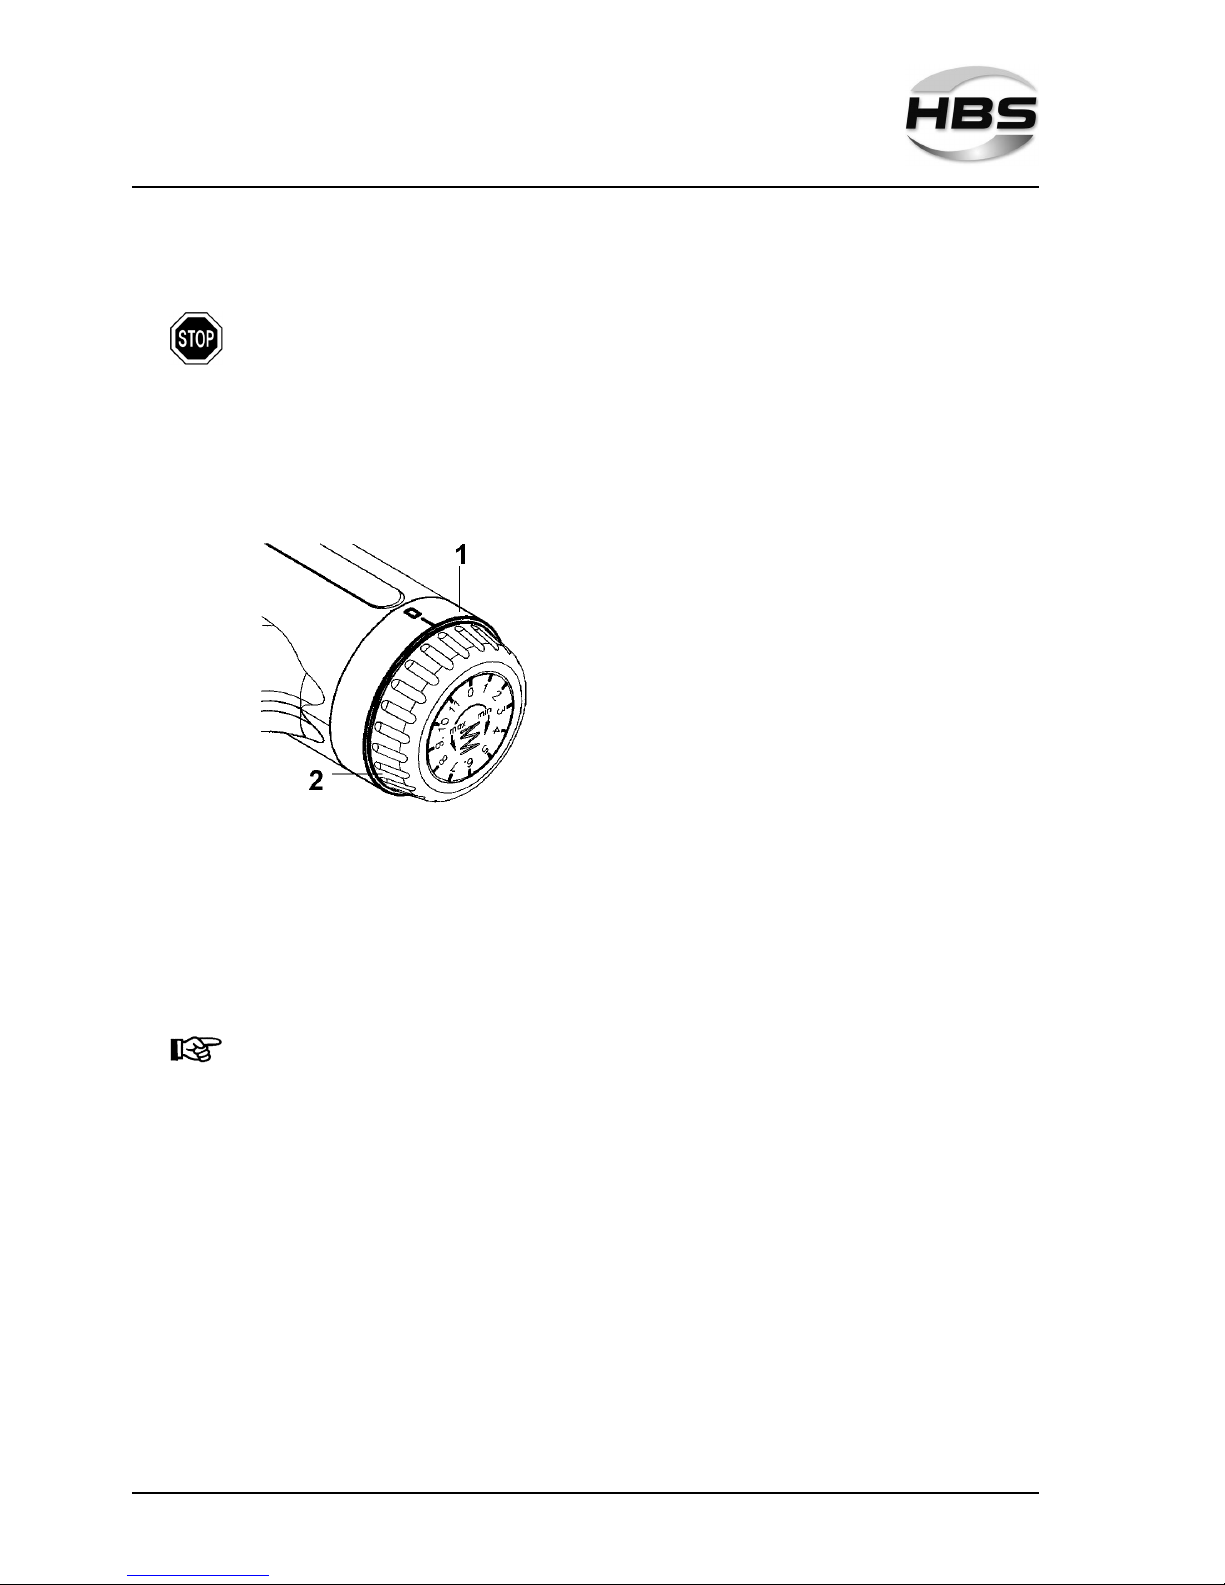
The adjustment piece for spring force must not be turned by more
than 360°.
Turn the adjustment piece for spring force only until you feel a noticeable resis-
tance.
Never turn the adjustment piece further with force.
Otherwise mechanical parts of the welding gun may be damaged.
1 - End ring
2 - Adjustment piece spring force
Turn the adjustment piece for spring force (2) up to the stop in „min“ direction.
Now turn the end ring of the welding gun until the „0“ position is aligned with the
„0“ position of the marking on the adjustment piece for spring force.
Now turn the adjustment piece for spring force to the selected value (see table
under point 10.2).
You thus determine the insertion rate.
The scale on the adjustment piece for spring force does not correspond to any particular dimensions.
You can reduce the insertion rate of the welding piston by turning the adjustment
piece for spring force clockwise.
You can increase the insertion rate of the welding piston by turning the adjust-
ment piece for spring force counter-clockwise.
Page 21

21
©HBS Bolzenschweiss-Systeme GmbH & Co. KG
All rights reserved – Reprinting, in whole or in part, only with the approval of the manufacturer
11 Welding
11 Welding
Work according to the original operating manual of the HBS stud
welding unit.
Danger if used other than for the intended purpose
Use the stud welding gun only for CD stud welding (contact welding) and
only in combination with stud welding units from manufacturer:
HBS Bolzenschweiss-Systeme GmbH & Co. KG
Felix-Wankel-Strasse 18
85221 Dachau
GERMANY
Always check with the operating manual of your stud welding unit whether
this stud welding gun may be used.
Page 22
©HBS Bolzenschweiss-Systeme GmbH & Co. KG
All rights reserved – Reprinting, in whole or in part, only with the approval of the manufacturer
22
12 Troubleshooting
12 Troubleshooting
Danger from insufciently qualied operating personnel
Carry out only the work described here on your stud welding unit or stud welding
gun.
Repairs may only be carried out by appropriately qualied personnel.
Inform your dealer or your maintenance department.
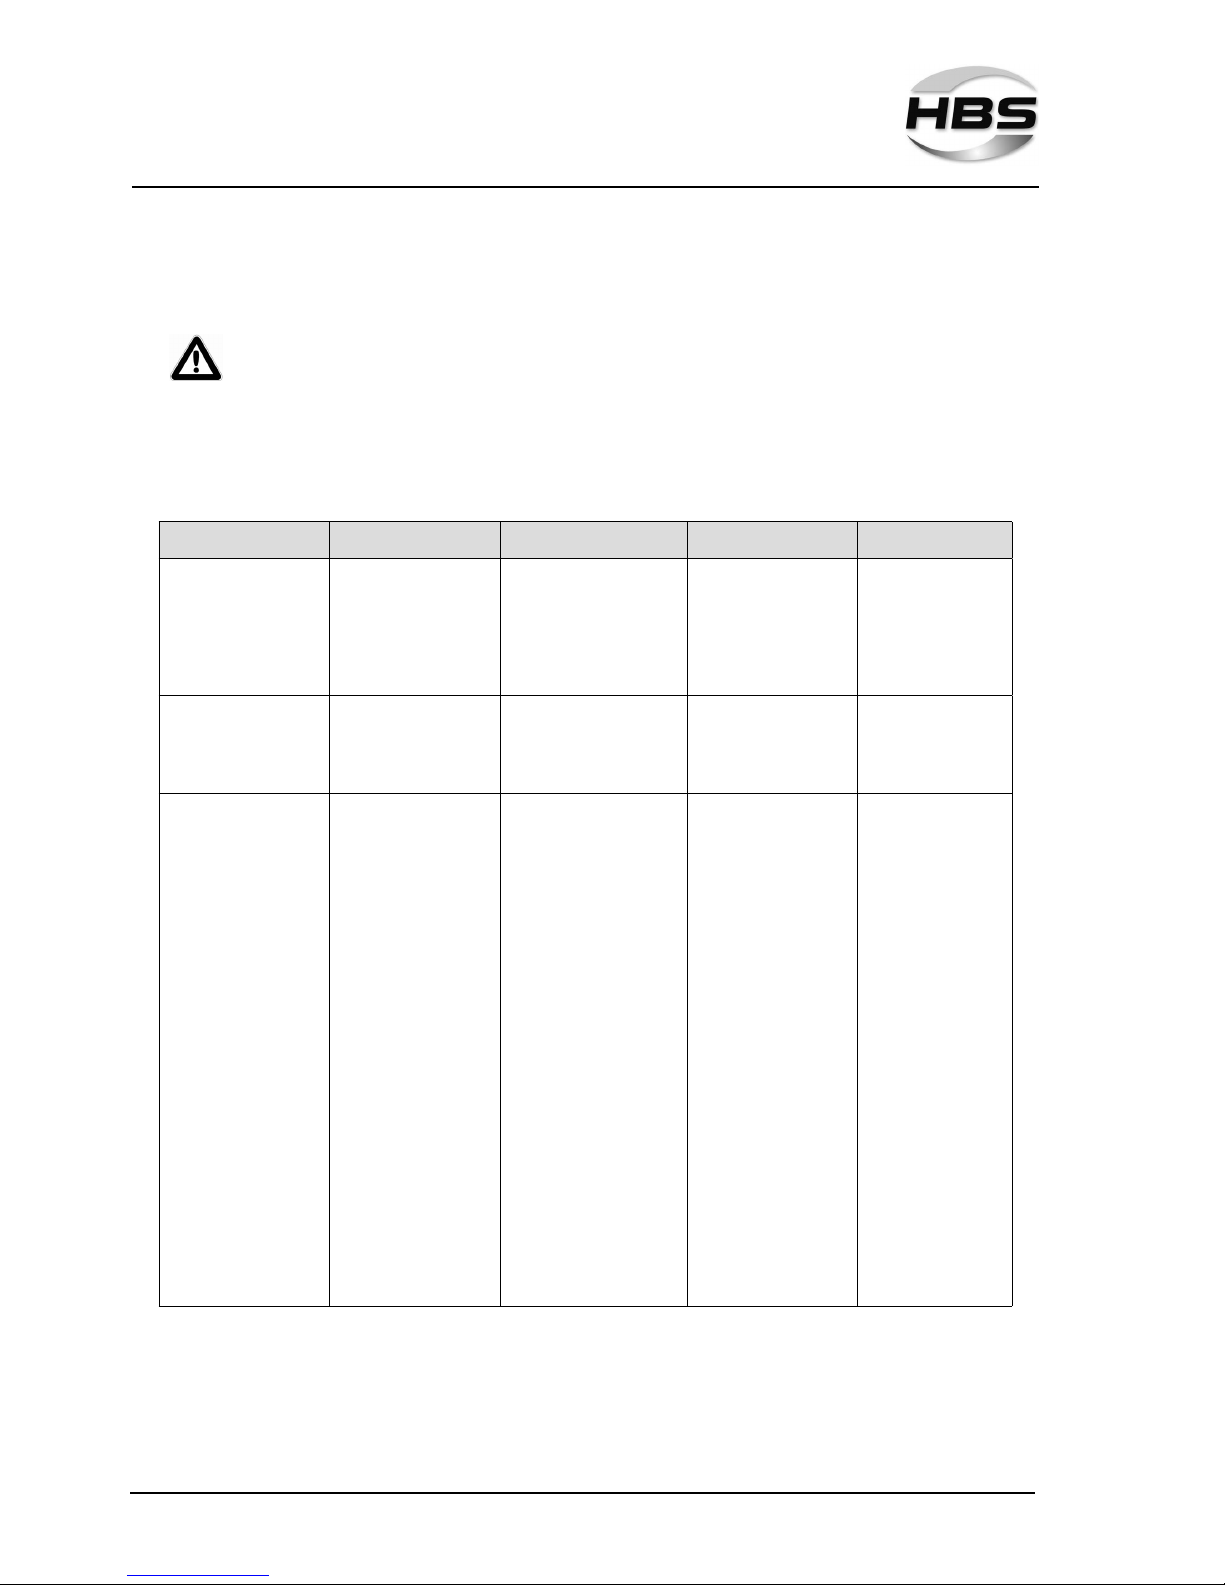
Fault Possible cause Fault localisation Fault remedy Performance
Welding elements not
rmly attached
Wrong welding parameters selected
Check adjusted parameters on stud welding unit
Change adjusted parameters
Trained personnel
Check spring force of stud
welding gun
Change adjusted parameters
Trained personnel
Insertion speed of welding element too low
Check welding piston and
linear bearing for ease of
movement *)
Clean or replace *) Qualied specialists
Burning marks at the
welding element
Chuck defective Check chuck for possible
defects
Replace chuck Trained personnel
Lamellas of chuck are
not pretensioned
O-rings existing?
Check o-rings for possible
defects
Replace o-rings Trained personnel
Stud welding gun does
not weld
Control cable defective
(with present contact
signal on stud welding
unit)
Check control cable for
electrical ow at control
cable sleeve (Pin 3 and 4)
with pressed welding gun
trigger *)
In case of no ow:
Replace control cable *)
Qualied specialists
Micro switch defective
(with present contact
signal on stud welding
unit)
Check micro switch
for electrical ow with
pressed welding gun
trigger *)
In case of no ow:
Replace micro switch *)
Qualied specialists
Welding current cable
defective (no contact
signal on stud welding
unit)
Check, whether welding
current cable is connected
to stud welding unit in a
technically correct way
Connect welding current cable
Trained personnel
Check welding current
cable for electrical ow *)
In case of no ow :
Replace welding
current cable and/or
connecting cable *)
Qualied specialists
Ground connection
defective (no contact
signal on stud welding
unit)
Check, whether ground
cable is connected to
workpiece in a technically
correct way
Connect ground cable Trained personnel
Check ground cable for
electrical ow *)
In case of no ow:
Replace ground
cable *)
Qualied specialists
Stud welding unit
defective
Follow the instructions
of the connected stud
welding unit
Repair required Factory service or
authorised agencies
Page 23

23
©HBS Bolzenschweiss-Systeme GmbH & Co. KG
All rights reserved – Reprinting, in whole or in part, only with the approval of the manufacturer
12 Troubleshooting
Work marked with *) may only be carried out by qualied electricians!
Please contact our Service department if none of the measures described
remedies the situation.
Please use the form „Service & Repair“ in the annex to send in the stud
welding unit or stud welding gun.
Page 24

©HBS Bolzenschweiss-Systeme GmbH & Co. KG
All rights reserved – Reprinting, in whole or in part, only with the approval of the manufacturer
24
13 Maintenance and Care
13 Maintenance and Care
Electric shock hazard
Never perform maintenance and service work on your stud welding gun
while it is connected to the stud welding unit
Prior to this disconnect the stud welding gun from the stud welding unit.
Danger from insufciently qualied operating personnel
Carry out only the work described here on your stud welding gun.
Repairs may only be carried out by appropriately qualied personnel.
Inform your dealer or your maintenance department.
13.1 Cleaning
Clean the casing of your stud welding gun with a slightly damp washcloth, when
necessary.
Do not use solvents for cleaning.
These may damage plastic components.
Page 25

25
©HBS Bolzenschweiss-Systeme GmbH & Co. KG
All rights reserved – Reprinting, in whole or in part, only with the approval of the manufacturer
13 Maintenance and Care
13.2 Inspection and Tests
Inspect the chuck before every use.
Replace the chuck if you discover signs of burning on the welding element and/or
on the chuck.
Work here in accordance with point 10.1 „Mounting the chuck“ in this manual.
Before every use, inspect the bellows on the front part of the stud welding gun for
proper seating and/or damage.
Never work with damaged or incorrectly seated bellows.
This will contribute to a long service life of your stud welding gun.
Inform your dealer or maintenance department if you discover any dama-
ge.
Before every use, check that the type designations and adjustment aids on the
stud welding gun are still legible.
Clean the type plates in the event of soiling.
Replace any type plates that are damaged or no longer legible.
Page 26

©HBS Bolzenschweiss-Systeme GmbH & Co. KG
All rights reserved – Reprinting, in whole or in part, only with the approval of the manufacturer
26
14 Storage
14 Storage
Store the stud welding gun in a safe and dust-free location when not in use.
Protect the stud welding gun from moisture and metallic contamination.
Store the stud welding gun only under the following ambient conditions.
Storage temperature:
-5 °C to +50 °C (23 °F to 122 °F)
Relative humidity:
0 % - 50 % at +40 °C (104 °F)
0 % - 90 % at +20 °C (68 °F)
15 Disposal
Dispose of the stud welding gun only via the manufacturer or a specia-
list disposal company.
Never dispose of the stud welding gun in the domestic refuse.
Page 27

27
©HBS Bolzenschweiss-Systeme GmbH & Co. KG
All rights reserved – Reprinting, in whole or in part, only with the approval of the manufacturer
Declaration of Incorporation of partly completed Machinery
Declaration of Incorporation of partly completed Machinery
to Directive 2006/42/EC, Annex II 1 B
(Original Declaration of Incorporation)
Herewith the manufacturer
HBS Bolzenschweiss-Systeme GmbH & Co. KG
Felix-Wankel-Strasse 18
P.O. Box 13 46
85221 Dachau
GERMANY
Phone +49 8131 511-0
Fax +49 8131 511-100
declares for the following product
Machine information: Welding gun
Type: CI 03
Order No: 92-20-254
Serial No: 92-20-254/162XXXX
Year of manufacture: 2016
that the following essential requirements of the above mentioned Directive – including changes to the Directive to be applied at the moment of this declaration – were applied and fullled:
Annex I, Article 1, 1.1.2, 1.1.3, 1.1.5, 1.1.6, 1.1.7, 1.2.1, 1.2.2, 1.2.3, 1.2.4.1, 1.2.6,
1.3.1, 1.3.2, 1.3.3, 1.3.4, 1.3.7, 1.3.8, 1.3.9, 1.4.1, 1.4.2.1, 1.5.1, 1.5.2, 1.5.4, 1.5.5,
1.5.6, 1.5.8, 1.5.10, 1.5.11, 1.5.15, 1.5.16, 1.6.1, 1.6.2, 1.6.3, 1.6.4, 1.7.1.1, 1.7.2,
1.7.3, 1.7.4,
that special technical documentation was compiled in accordance with Part B of Annex VII of
the above mentioned regulation and will be transmitted, in response to a reasoned request by
the national authorities as follows:
The above mentioned documents will be transmitted by e-mail as a data le in
German language.
that this partly completed machinery must not be put into service until the nal machinery
into which it is to be incorporated has been declared in conformity with the provisions of the
Directive, where appropriate.
that this incomplete machine complies with corresponding regulations of the following additional EU Directives, including any changes to be applied at the moment of this declaration:
„Electromagnetic compatibility“ 2014/30/EU
Protection targets of the low voltage regulation were kept to appendix I, no. 1.5.1 of the
machine regulation.
Persons who are based in the European community and who are authorised to compile the
technical documentation:
Name: Heike Otto Address: see manufacturer
Dachau, 02.01.2016 __________________________________
Place of issue, Date Erwin Promoli (General Manager HBS)
Page 28
©HBS Bolzenschweiss-Systeme GmbH & Co. KG
All rights reserved – full or partial reproduction subject to prior approval of the manufacturer
28
Service & Support
Service & Support
With the return please attach a copy of the lled out form together with the repair number given by HBS! Repairs without repair
number will not be processed.
Repair number
(given by HBS)
Company:
Name / Surname:
Street:
City, State and ZIP/Postcode:
Country:
Phone & Fax:
E-mail address:
Stud welding unit / stud welding gun
type of model:
Serial number:
Date of purchase:
Purchased at distributor:
Detailed descriptions of errors:
Service & Support may be done up to the value of EUR
without quotation:
Yes No
Could you nd any damage / burn marks
on the cables:
Yes No
on chucks:
Yes No
Are all plug and screw connections tightly fastened *:
Yes No
Are there any burn marks on plug or screw connections:
Yes No
Is there any other visual damage (e.g. cracks, dents):
Yes No
Have you checked the fuses:
Yes No
Default on the display of the stud welding unit:
ARC / IT CD / CDM / SC
**
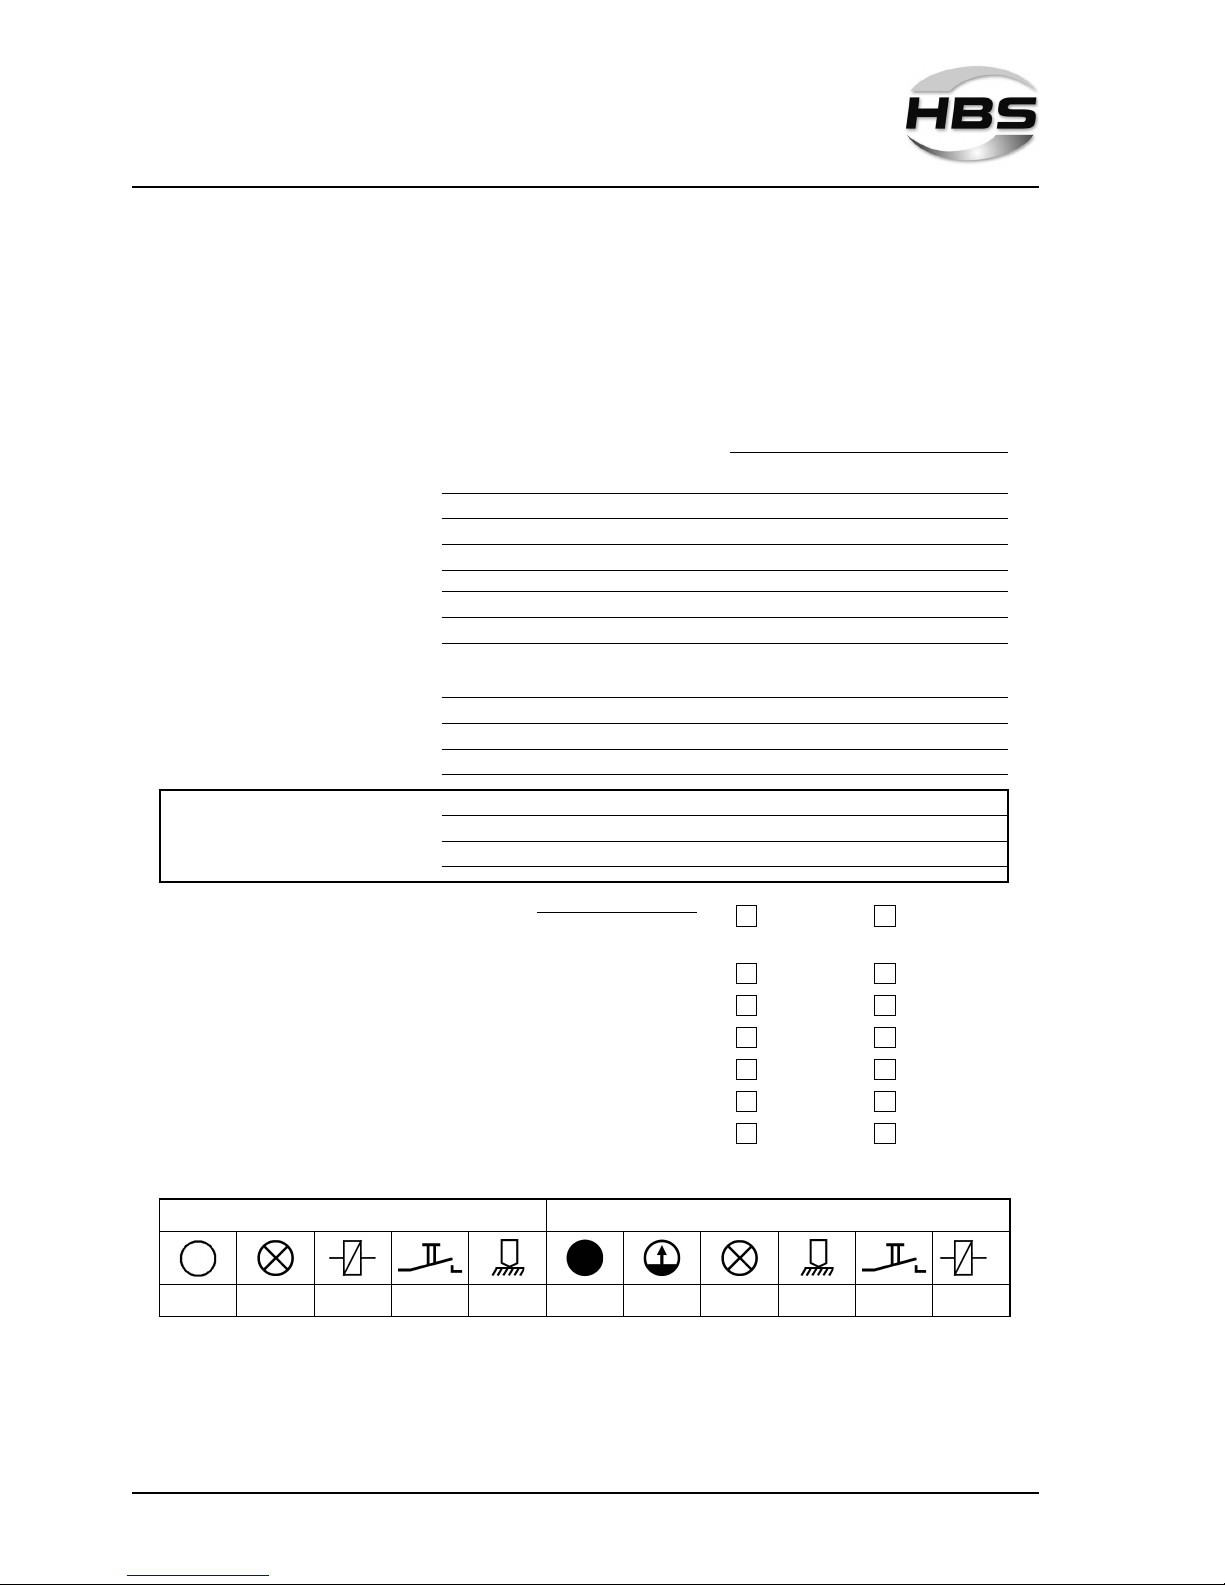
Which LED´s are illuminated (please mark with a cross)?
Please e-mail or fax this form to [email protected] or fax: +49 8131 511-100.
In case a repair is necessary a repair number will be given!
* See also operating manual chapter „Connection“
** Doesn´t light when using a contact welding gun
Page 29

29
©HBS Bolzenschweiss-Systeme GmbH & Co. KG
All rights reserved – Reprinting, in whole or in part, only with the approval of the manufacturer
Index
Index
A
accessories ....................... 12
adjustment piece spring force ......... 20
airborne particulates ................. 7
automatic welding head .............. 11
B
bang. . . . . . . . . . . . . . . . . . . . . . . . . . . . . . 7
basic conguration. . . . . . . . . . . . . . . . . . 12
C
capacitor ......................... 11
chuck, mounting
................... 18
cleaning .......................... 24
clothing, non-ammable .............. 8
control cable ...................... 16
D
danger from incorrect use ............. 6
Declaration of Incorporation .......... 27
disposal .......................... 26
E
ear protection. . . . . . . . . . . . . . . . . . . . . . . 9
electrical hazards. . . . . . . . . . . . . . . . . . . . 9
electromagnetic elds ................ 9
F
re extinguisher ..................... 7
re hazard ......................... 7
form „Service & Support“ .......... 23, 28
full-ear hearing protection ............. 8
fumes, harmful to health .............. 7
G
glossary .......................... 11
goggles with visor ................... 8
H
hazards for the machine .............. 9
hazards for the operator .............. 9
heart pacemaker .................. 7, 9
helmet ............................ 8
I
intended use ................... 14, 21
L
light arc .......................... 11
M
maintenance and care ............... 24
O
operating manual ................... 12
P
protective apron ..................... 8
protective equipment ................. 8
protective equipment, personal ......... 9
protective gloves .................... 8
R
rectier ........................... 11
S
safety goggles ...................... 9
safety goggles with sight glass ......... 8
safety precautions ................... 6
scope of supply .................... 12
serial number ...................... 16
spring force ....................... 19
spring force adjustment ........... 16, 20
storage. . . . . . . . . . . . . . . . . . . . . . . . . . . 26
storage temperature ................ 26
stud feeder. . . . . . . . . . . . . . . . . . . . . . . . 11
stud welding gun ................... 11
stud welding machine ............... 11
stud welding unit ................... 11
symbols used. . . . . . . . . . . . . . . . . . . . . . . 9
T
troubleshooting .................... 22
type plate ......................... 16
W
warranty entitlement ................ 15
welding cable ...................... 16
welding element. . . . . . . . . . . . . . . . . 11, 14
welding gun, design ................. 16
welding gun trigger ................. 16
welding parameter .................. 19
welding parameters ................. 11
workpiece ........................ 11
Page 30

©HBS Bolzenschweiss-Systeme GmbH & Co. KG
All rights reserved – full or partial reproduction subject to prior approval of the manufacturer
30
Page 31

Page 32

HBS Bolzenschweiss-Systeme GmbH & Co. KG
Felix-Wankel-Strasse 18 • 85221 DACHAU • GERMANY
Phone +49 8131 511-0 • Fax +49 8131 511-100 • E-mail [email protected]
www.hbs-info.com
 Loading...