

Hayward SWIMPURE, SWIMPURE N2SABG, SWIMPURE N2SIG Owner's Manual
SAFETY INSTRUCTIONS
The SwimPure™ Natural Pool Purifying System featuring
Nature
2 ®
can be used with every type of chemical treatment
available except bromine and bromide based chemicals1,
biguanide products2(e.g. Baquacil* or Softswim**), and copper
based algaecides3.
1. Bromine/Bromide will reduce the effectiveness of the purifying system.
2. Metals (e.g. silver) combine with biguanides to form cloudy water.
3. Copper based algaecides may cause staining of pool walls.
* A Trademark of Zeneca, Inc.
** A Trademark of Biolab, Inc.
Caution: Model N2SABG is rated for above-ground pools
from 5,000 gallons to 25,000 gallons. Model N2SIG is rated
for inground pools from 10,000 gallons to 35,000 gallons.
Using a SwimPure system on an undersized pool may
cause staining of the pool.
1. INSTALL THE SYSTEM
To install New Filter Factory-Equipped with SwimPure:
Follow the installation instructions packaged with your sand
filter to install the filter system. After filling the filter with sand
and removing the sand shield (step 3), proceed with the
following instructions:
Remove center pipe extension from the center pipe by
pulling the center pipe extension upward with a twisting
motion.
Properly place the purifying system onto the center pipe. The
side showing “SwimPure by HAYWARD” must face up as
shown in Installation (3).
Proceed with steps 4, 5, 6 and 7 in the sand filter installation
instructions.
To Install SwimPure Retrofit Kit to New Filter:
Follow the installation instructions packaged with your sand
filter to install the filter system. After filling the filter with sand
and removing the sand shield (step 3), proceed with the
following instructions:
Cut the center pipe, following these steps:
Note the filter control valve model number indicated on
the label on the top of the valve. Model number will be
either SP0714, SP071113, or SP0704.
OWNER’S GUIDE
ISN2S-00
SWIMPURE
™
NATURAL POOL PURIFYING SYSTEM
FOR SAND FILTERS
Your Hayward SwimPure™ Natural Pool Purifying System has established a new
horizon in swimming pool water purification. The system is designed to fit into all Hayward
top mount sand filters using SP0704, SP071113 or S0714T valve. It will release minerals
into the water to make your pool water clean and healthy.
A.
B.
C.
D.
A.
B.
1)
3)
C.
D.
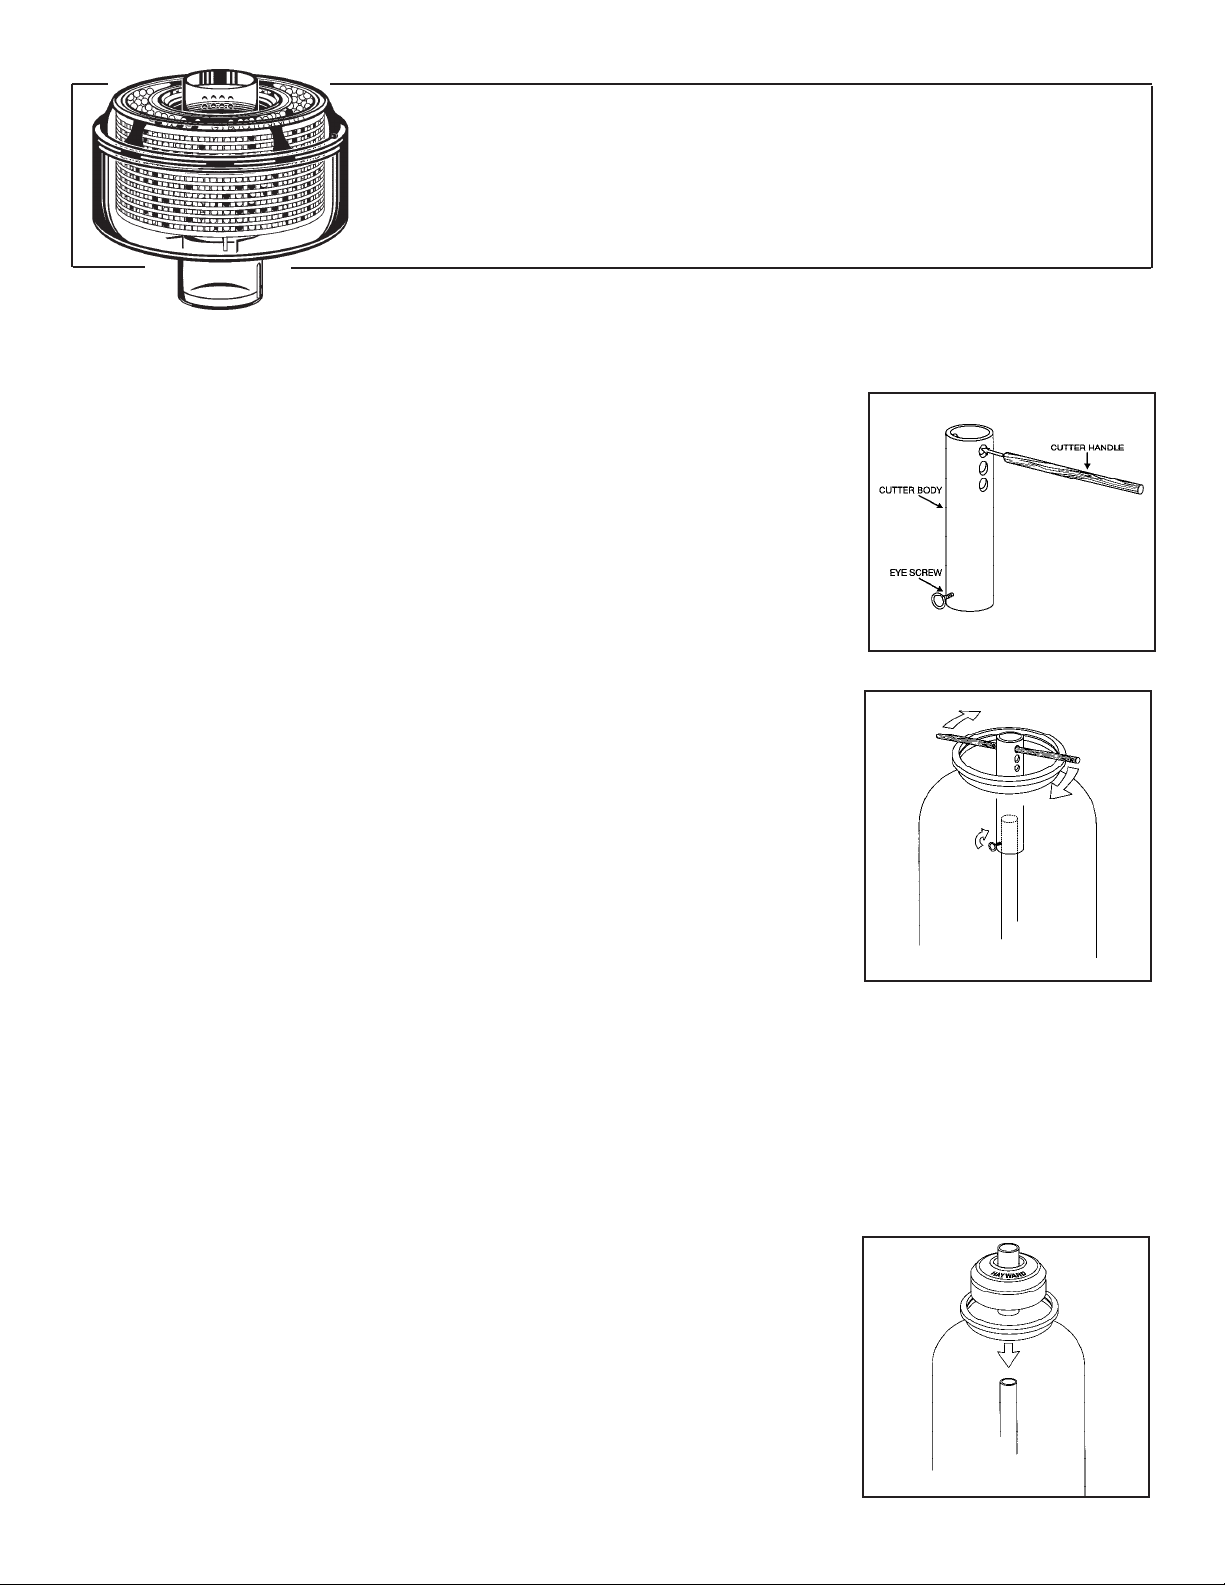
Place the cutter
handle through the
appropriate hole in
the cutter body, as
shown in Illustration
(1). For the SP0714T
valve, use the top
hole. For SP071113
valve or SP0704
valve, use the middle
hole.
Slip the cutter over
the center pipe until
the cutter handle
rests on the top of
the filter, as shown in
Illustration (2). Now
cut the center pipe
by:
Properly place the
purifying system onto
the center pipe. The
side showing “Swim
Pure by HAYWARD”
must face up, as
shown in Illustration
(3).
Proceed with steps 4,
5, 6 and 7 in the
sand filter installation
instructions.
Turning the eyescrew in a clockwise direction until the
screw point lightly contacts the center pipe.
Turning the cutter in a clockwise direction. Keep cutter
handle firmly rested on top of the filter during turning.
After every two revolutions of the cutter, turn the eyescrew an additional one-quarter turn in the clockwise
direction.
Repeat Step b) until the center pipe is cut.
Remove the cutter.
a)
b)
c)
d)
2)
Illustration 1
Illustration 2
Illustration 3
serial number indicated on the label on top of the valve.
SP0704 valves with serial numbers ending in numbers 29
or higher or G28, H28, J28, K28, L28, M28, use the
middle hole. For other SP0704 valves, use the bottom
hole.
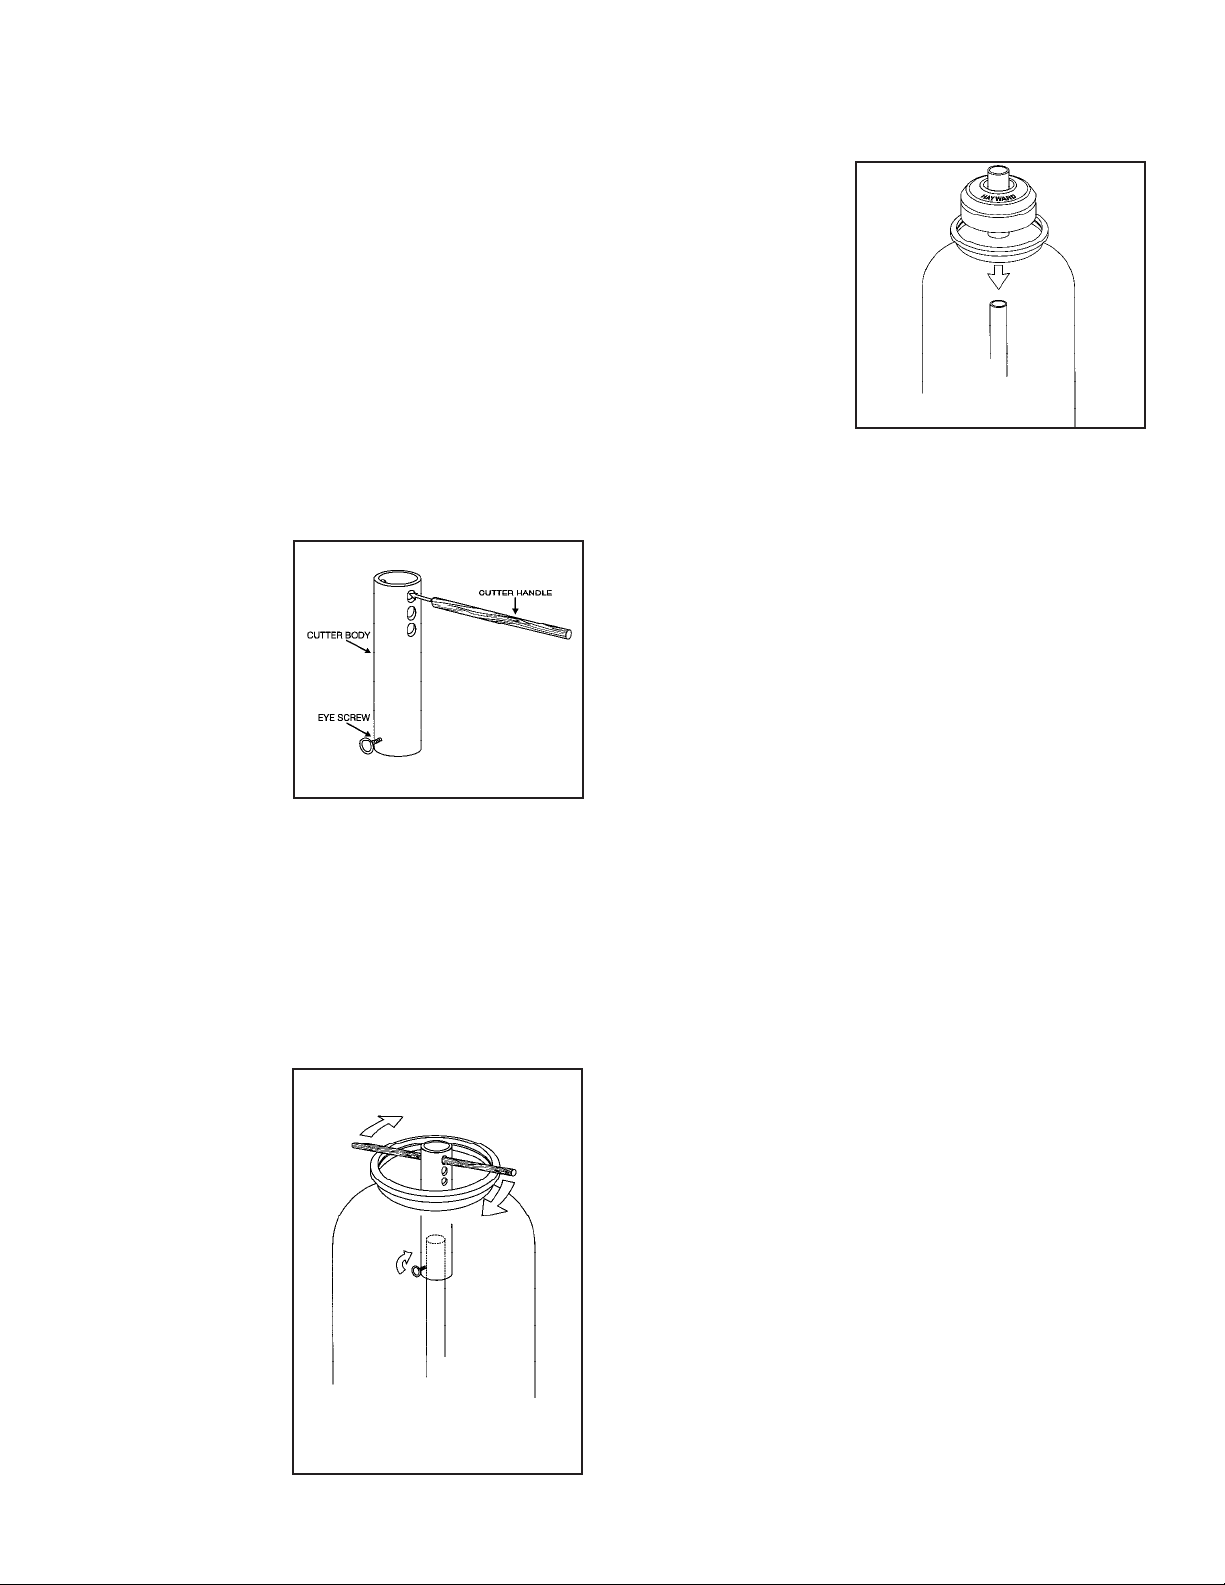
Slip the cutter over the center pipe until the cutter handle
rests on the top of the filter, as shown in Illustration (2).
Now, cut the center pipe by:
3)
Turning the
eyescrew in
a clockwise
direction until the
screw lightly
contacts the
center pipe.
Turning the cutter
in a clockwise
direction. Keep
the cutter handle
firmly rested on
top of the filter
during turning.
After every two
revolutions of the
cutter, turn the
eyescrew an
additional onequarter turn in
the clockwise
direction.
a)
b)
Repeat Step b) until the center pipe is cut.
Remove the cutter.
c)
d)
Properly place the
new purifying system
onto the center pipe
with the side showing
“SwimPure by
HAYWARD” facing
up, as shown in
Illustration (3).
Reinstall filter control valve clamp, following these steps:
G.
J.
Loosely pre-assemble both halves of the clamp with one
screw and one nut, turning the nut 2 or 3 turns.
Install clamp around tank and valve flange, and assemble
second screw and nut.
Tighten both sides of clamp alternately and evenly. Use a
proper-sized large screwdriver and tighten firmly to obtain
a good seal.
Be sure to place vinyl protector camps over ends of
screws.
1)
2)
3)
4)
To Install a Replacement SwimPure System:
Shut off the pump.
If the filter is located below the water level, close valves (or
block off suction and discharge lines) to prevent backflow of
water from the pool.
Unscrew and remove drain plug and allow water to drain
from the filter.
Remove filter control valve clamp.
Remove filter control valve. Note: Hoses can remain
attached to the valve.
Remove old purifying system by pulling upward on the
system. Aslight twisting motion may ease its removal.
Properly place new purifying system onto the center pipe
with the side showing “SwimPure by HAYWARD” facing up.
Wipe the filter flange clean.
Insert the filter control valve (with valve/tank O-ring) into the
tank neck, ensuring that the bottom port of the valve slips
over the top tube of the SwimPure system.
A.
B.
C.
D.
E.
F.
G.
H.
I.
Place the cutter
handle through the
appropriate hole in
the cutter body,
as shown in
Illustration (1). For
the SP0714T valve,
use the top hole.
For the SP071113
valve, use the
middle hole. For
SP0704 valve only,
note the last three
places of the
2)
To Install SwimPure Retrofit Kit to Existing Filter:
Shut off the pump.
If the filter is located below the water level, close valves (or
block off suction and discharge lines) to prevent backflow of
water from the pool.
Unscrew and remove drain plug and allow water to drain
from the filter.
Remove filter control valve clamp.
Remove filter control valve. Note: Hoses can remain
attached to the valve.
Cut the center pipe, following these steps:
A.
B.
C.
D.
E.
F.
Note the filter control valve model number indicated on
the label on the top of the valve. Model number will be
either SP0714T, SP071113, or SP0704.
1)
Wipe the filter flange clean.
Insert the filter control valve (with valve/tank O-ring) into the
tank neck, ensuring that the bottom port of the valve slips
over the top tube of the SwimPure system.
H.
I.
Illustration 1
Illustration 2
Illustration 3
 Loading...