

Hayward TriStar VS 900 Omni, Super Pump VS 700 Omni, HL32900VSP, HL2350020VSP, HL2670020VSP Operation Manual
...
\
USE ONLY HAYWARD GENUINE REPLACEMENT PARTS
Hayward Pool Products
620 Division Street, Elizabeth NJ 07207
Phone (908)-355-7995
www.hayward.com
Operation Manual
092693 RevC
Contents
Introduction............................................2
Favorites................................................17
Themes.................................................22
Cong...................................................24
Upgrade................................................27
Simple Mode........................................30
Web Enabled Control..............................33
Warranty................................................34
VS Omni
Pool Automation Control
HL32950VSP HL32900VSP
HL2350020VSP HL2670020VSP

USE ONLY HAYWARD GENUINE REPLACEMENT PARTS
1
IMPORTANT SAFETY INSTRUCTIONS
When using this electrical equipment, basic safety precautions should always be followed, including the following:
• READ AND FOLLOW ALL INSTRUCTIONS
• WARNING: Disconnect all AC power during installation.
• WARNING: Water in excess of 100 degrees Fahrenheit may be hazardous to your health.
• WARNING: To reduce the risk of injury, do not permit children to use this product unless they
are closely supervised at all times.
• WARNING: Do not use the VS Omni to control fire pits or related equipment.
• A green colored terminal marked “Grounding” is located inside the wiring compartment. To
reduce the risk of electric shock, this terminal must be connected to the grounding means
provided in the electric supply service panel with a continuous copper wire equivalent in size
to the circuit conductors supplying the equipment.
• One bonding lug for US models (two for Canadian models) is provided on the external
surface. To reduce the risk of electric shock, connect the local common bonding grid in the
area of the swimming pool, spa, or hot tub to these terminals with an insulated or bare copper
conductor not smaller than 8 AWG US / 6 AWG Canada.
• All field installed metal components such as rails, ladders, drains, or other similar hardware
within 3 meters of the pool, spa or hot tub shall be bonded to the equipment grounding bus
with copper conductors not smaller than 8 AWG US / 6 AWG Canada.
SAVE THESE INSTRUCTIONS
USE ONLY HAYWARD GENUINE REPLACEMENT PARTS
2
Introduction
This manual assumes that the VS Omni has been installed and configured according to the Installation Manual. The VS Omni can now be programmed with user desired settings such as schedules,
themes, and favorites. This manual will also explain how to manually turn pool equipment on/off,
program settings for specific equipment, view pool equipment status and conditions, and more.
Now that the initial configuration has been completed, the VS Omni will automatically go to the
Home Screen or Idle Screen. All settings and operation functions can be accessed from the Home
Screen. Note that if the VS Omni Control Pad is not touched for more than two minutes, the Idle
Screen will be displayed.
Using the Control Pad
The VS Omni uses the Control Pad touchscreen as the main interface with the device. Once
configured, the VS Omni can be controlled remotely by internet enabled devices such as computers, tablets, and phones. The Control Pad must be used to access the Configuration Wizard. The
Configuration Wizard is used for initial configuration (completed during the installation process) and
for any changes to existing configuration.
Idle Screen
The Control Pad will display the idle screen after two minutes of user inactivity. When the filter
pump is on, the Idle Screen will display the current temperature of the pool on the left side of the
screen. On the right side of the screen, the time will be displayed and the air temperature will
toggle with the date as well as other information.
º
F
82
9:13 PM
FRIDAY
jul 13
13
USE ONLY HAYWARD GENUINE REPLACEMENT PARTS
3
Home Screen
When the Idle Screen is touched, the VS Omni will display the Home Screen. This screen will give
the user access to all functions, settings, and configuration options.
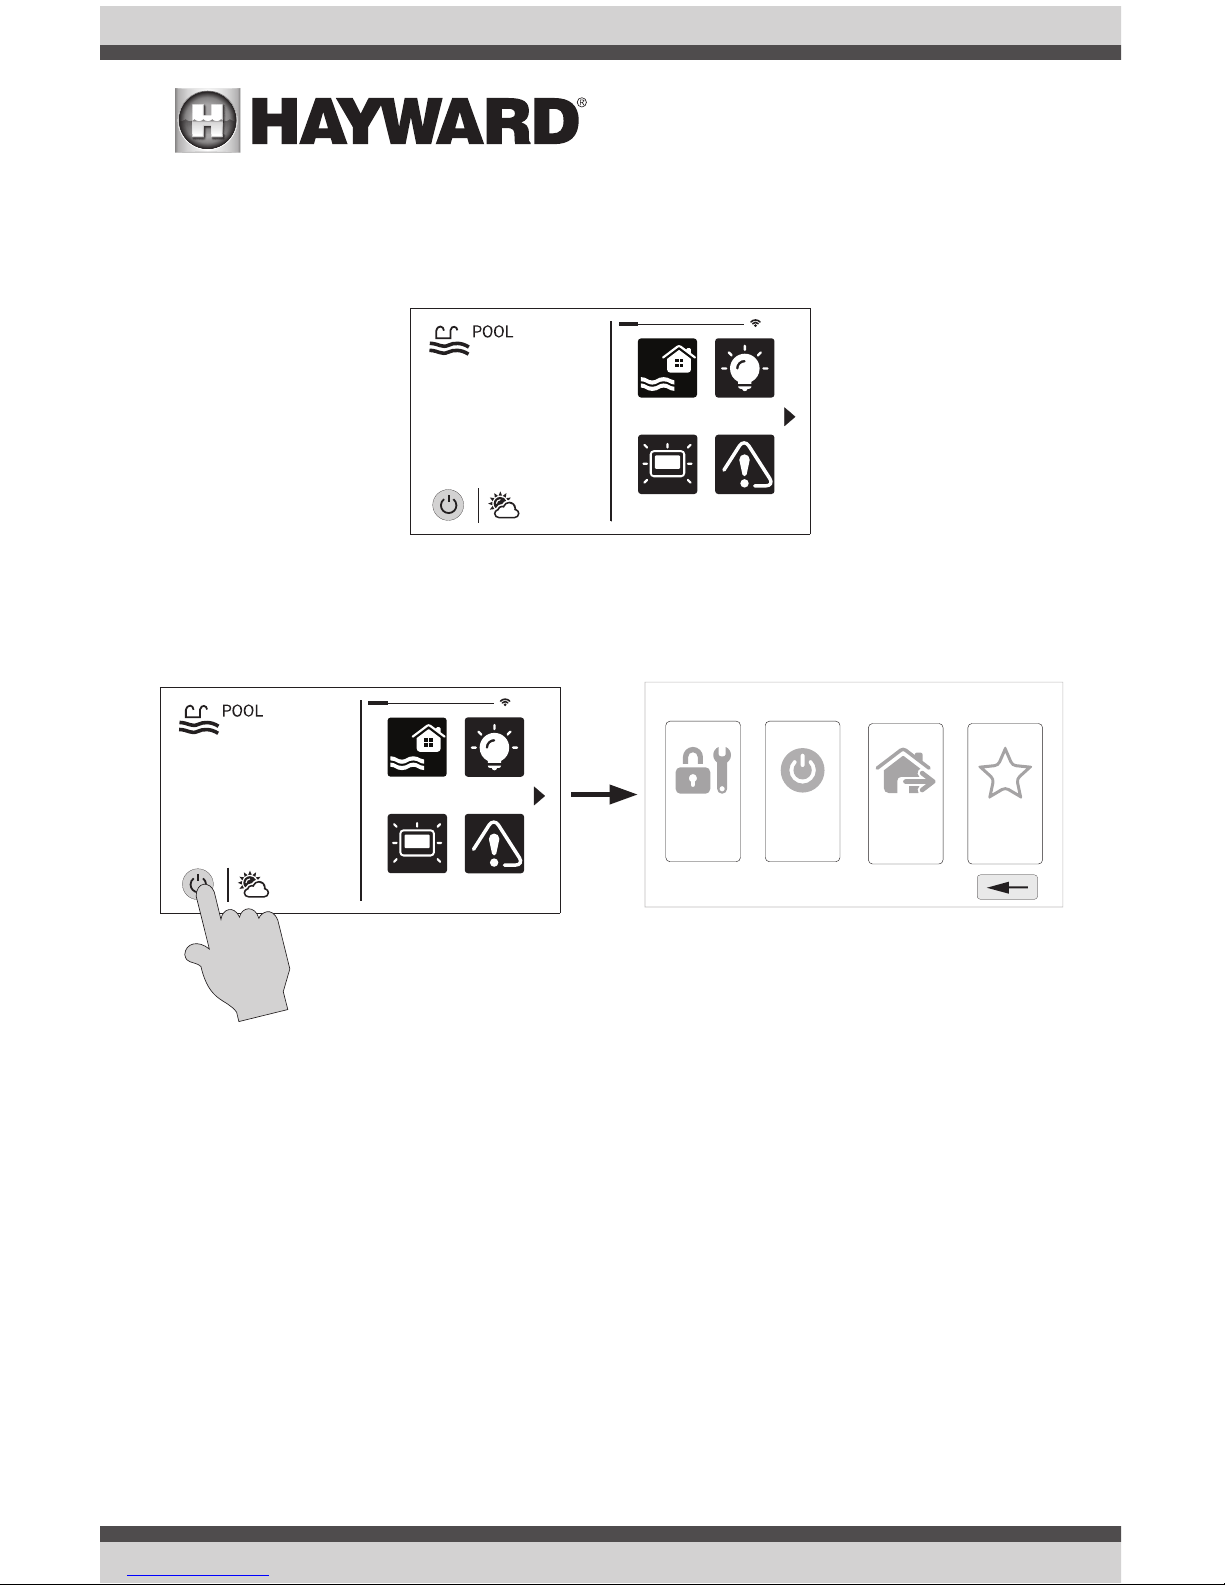
Power Button
The power button is displayed at all times when the VS Omni is not idle. When touched, it offers
the following 4 functions:
Shut Down - When Shut Down is selected, the VS Omni will turn off all pool equipment and report
when it is safe to remove power. When this message is displayed, you can either power off the unit
or restart the VS Omni by touching the large power button displayed on the left side of the screen.
Service Mode - Service Mode will turn off all pool equipment and disable all networked devices.
Service Mode is useful to prevent scheduled operation and disable remote operation while servicing the pool. After selecting Service Mode, there are two options:
Service Mode (Standard): The VS Omni will remain in Service Mode until you manually exit.
To exit Service Mode, touch the power button and select the Service Mode button again.
Service Mode Timed: Before entering Service Mode, you will select a Service Mode timeout.
This is the amount of time that the VS Omni will stay in Service Mode before automatically
exiting. The timeout can be set between 1-96 hours. There is no need to exit Service Mode
manually.
daylight
features
lights
º
F
air
71º F
82
alarm
daylight
features
lights
º
F
air
71º F
82
alarm
shut down
service
mode
simple
mode
features
o
USE ONLY HAYWARD GENUINE REPLACEMENT PARTS
4
Features Off - Features Off offers a quick way to turn off all equipment (except the filter pump and
ColorLogic lights if running because of a schedule) with a single touch of a button.
Simple Mode - Simple Mode is a customizable screen that can be set up for quick access to your
Favorites (page 17). You can set up only the Favorites that you want shown while in Simple Mode.
Because it’s customizable, Simple Mode can provide a convenient way to access the most common
functions for owners as well as a handy solution to limit access to other users. For information on
how to create and delete Simple Mode functions, refer to the “Favorites” section in this manual.
The MSP ID number (page 27) is needed when entering and exiting Simple Mode.
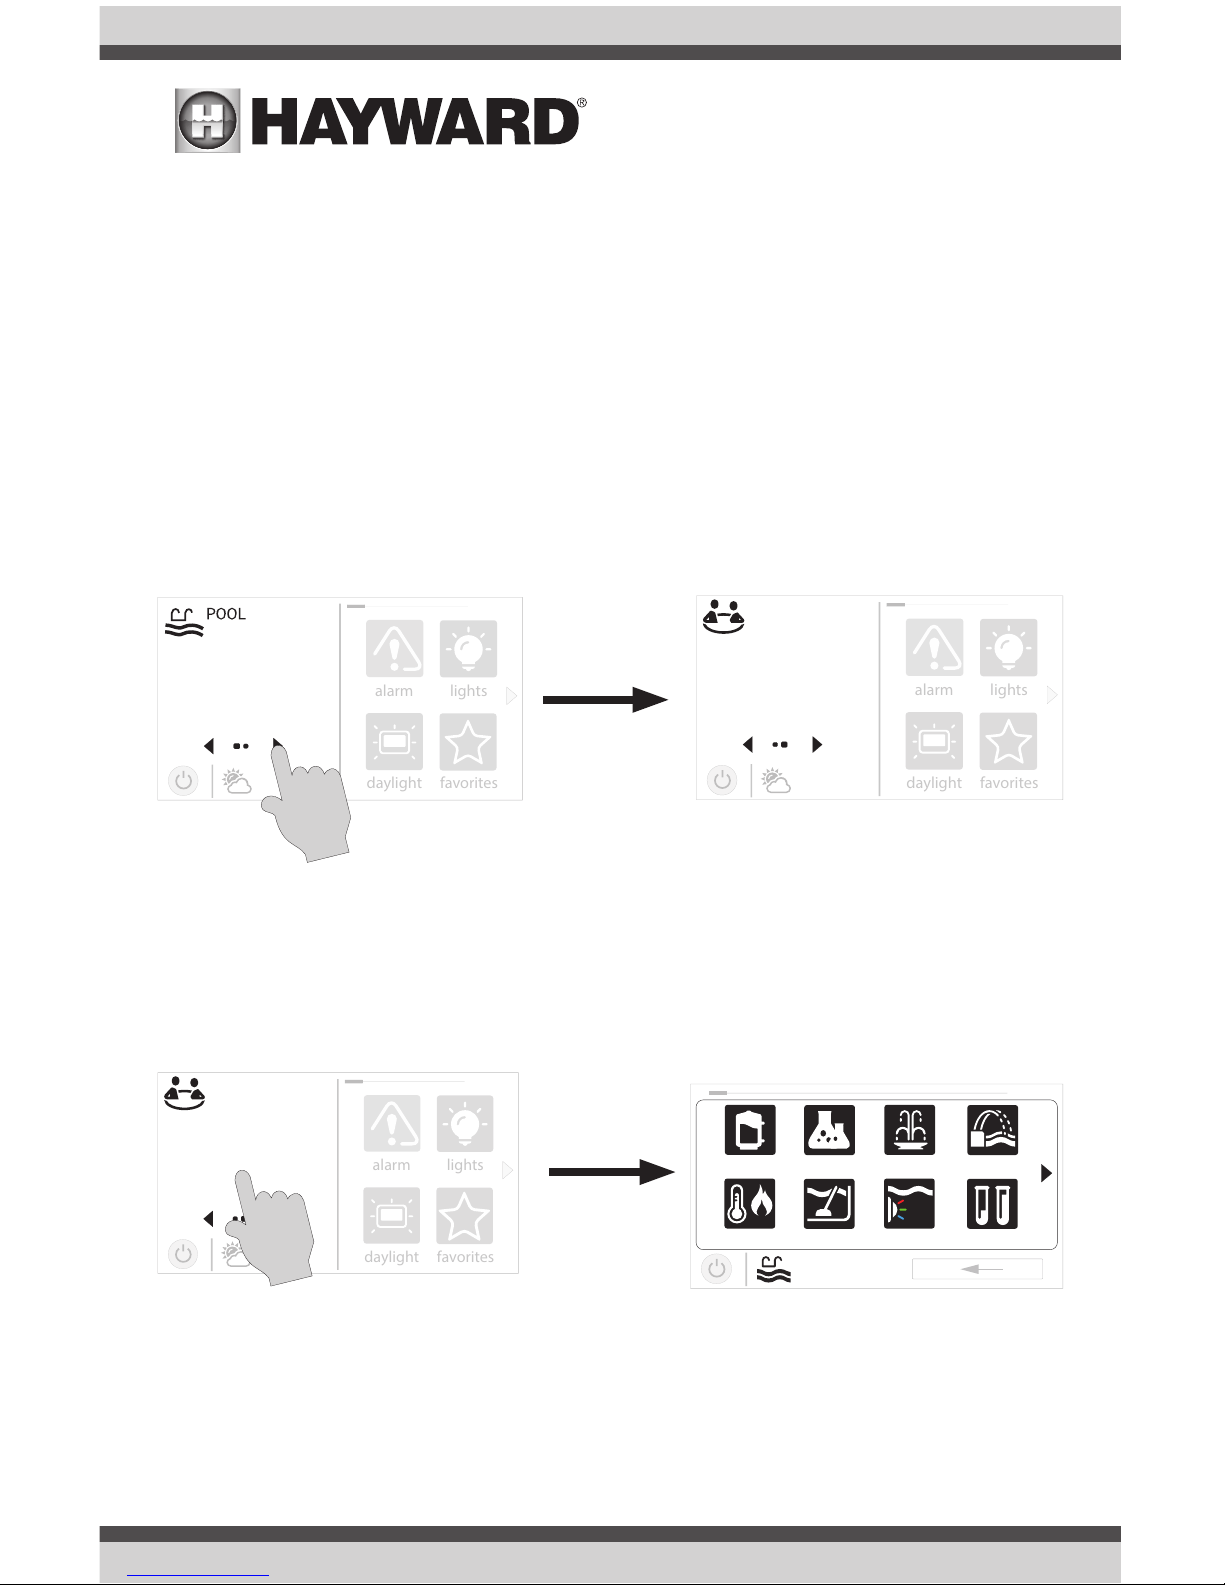
Selecting a Body of Water - Left Side of Home Screen
The left side of the Home Screen allows you to select and control a Body of Water. If more than one
Body of Water is used (typically a pool and a spa), pressing the left and right arrows shown below
toggle between the Bodies of Water. If just a pool is configured, there will be no arrows shown.
Controlling a Body of Water
When the desired Body of Water is displayed, touch the left side of the screen to advance to the Body
of Water Features Screens. The items shown on the Features Screen relate to that Body of Water
ONLY. To control a different Body of Water, select the desired Body of Water at the Home Screen first,
then go to the Features Screens.
daylight
favorites
alarm
lights
º
F
air
71º F
82
Use arrow buttons on left side of screen to change Body of Water.
daylight
favorites
alarm
lights
º
F
air
71º F
SPA
102
daylight
favorites
alarm
lights
º
F
air
71º F
SPA
102
uclights chlorinator
alarm light hung
1 / 2
vsp pH
heater cleaner
POOL
features
When the desired Body of Water is displayed, touch left side of screen
to enter Control Screens.
USE ONLY HAYWARD GENUINE REPLACEMENT PARTS
5
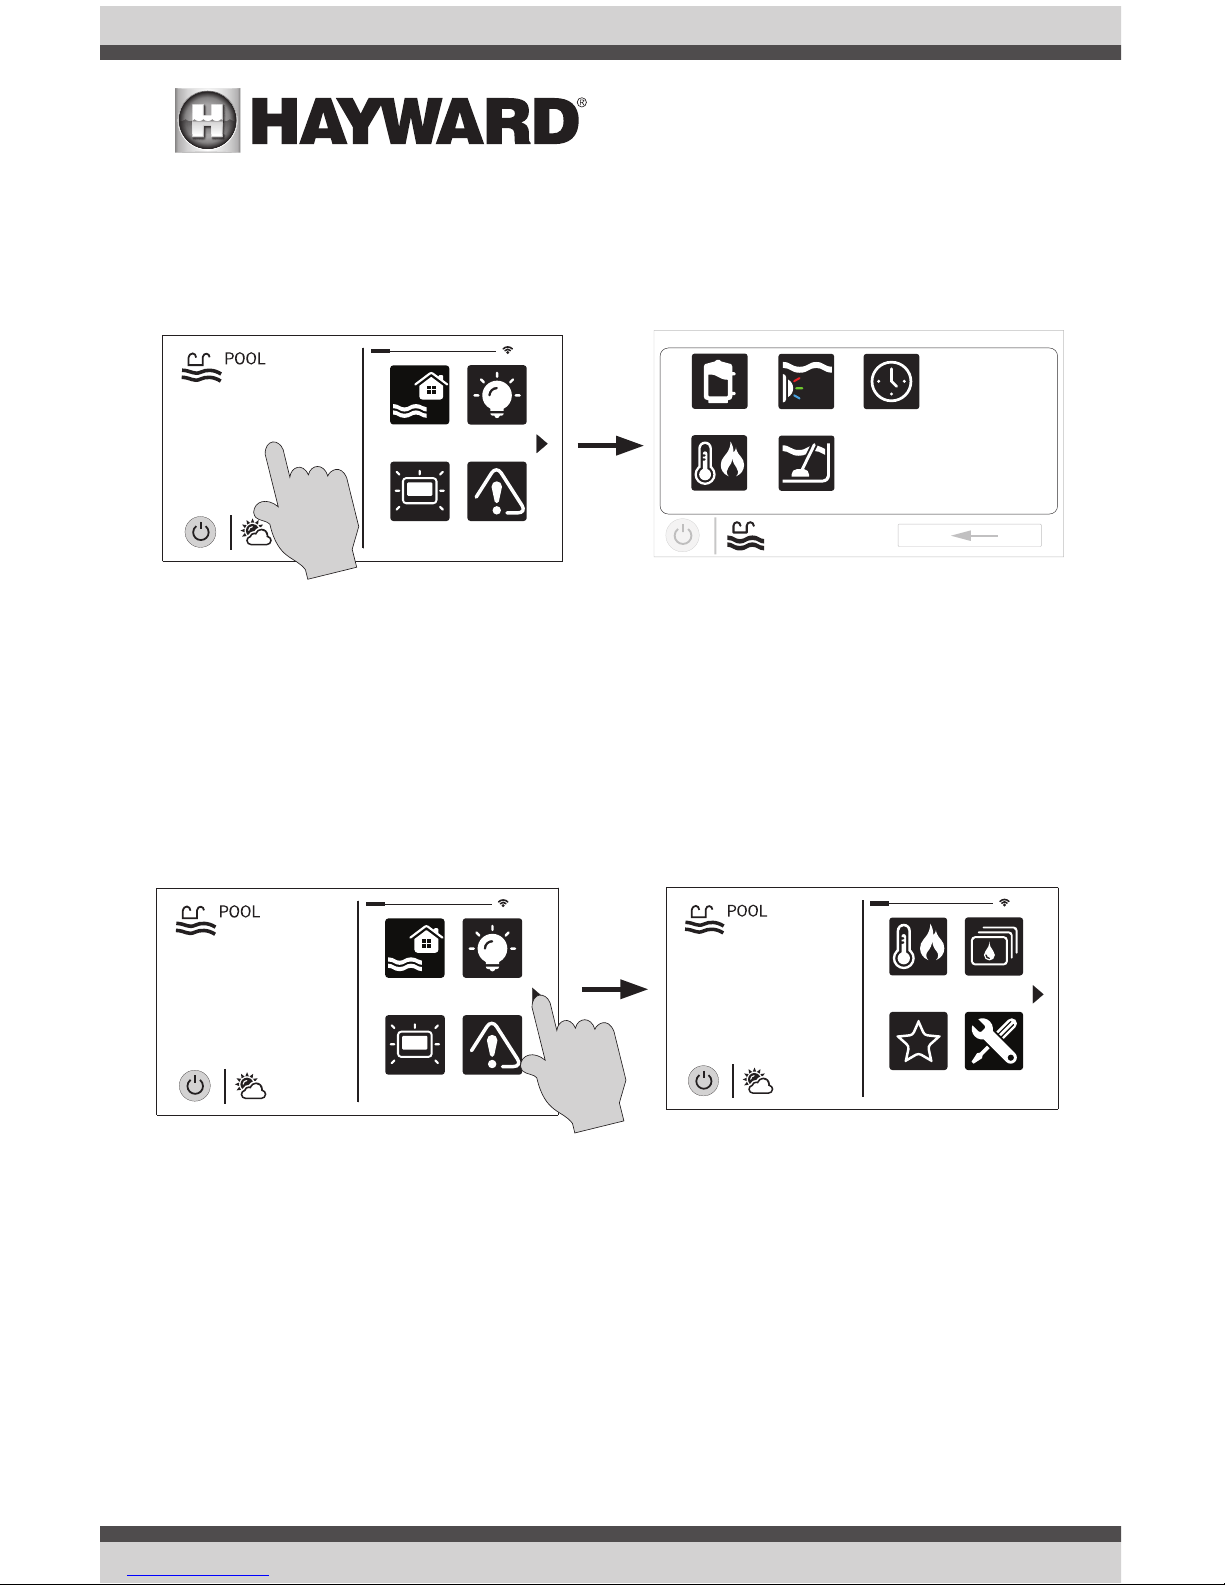
Features (left side of the Home Screen)
After selecting the desired Body of Water (if applicable), touch the left side of the screen to advance
to the Features Screen. The various buttons shown in the Features Screen are related to initial
configuration. For example, if you configured a heat pump to heat the pool, then the heater settings for the heat pump will be displayed.
Favorites - Right Side of Home Screen
The right side of the Home Screen is Favorites. These buttons offer universal control for all Bodies
of Water and Backyard equipment. Up to four Favorite buttons will be shown on the Home screen.
To access more Favorites, touch the arrows on the left or right of the Favorite buttons.
Note that some default buttons will appear on the Favorites Screen. These buttons are related
to your initial configuration settings and are automatically created. In addition, custom “Favorite”
buttons can also be added. The VS Omni supports up to 50 Favorites for quick, easy access to
commonly used functions.
Navigation
The VS Omni has been designed to be intuitive, allowing most users the ability to navigate with
little instruction. Following is a list of commonly used buttons. As you navigate through the various
screens, these buttons will likely be displayed. Some sections of this manual may refer to buttons
that are specific to certain types of pool equipment. You’ll find more information about those buttons under their corresponding section. If your installation does not include that particular equipment, those sections can be skipped.
daylight
features
lights
º
F
air
71º F
82
alarm
uclights
vsp
heater cleaner
POOL
features
schedule
daylight
features
lights
º
F
air
71º F
82
alarm
favorites
heating
themes
º
F
air
71º F
82
cong
USE ONLY HAYWARD GENUINE REPLACEMENT PARTS
6
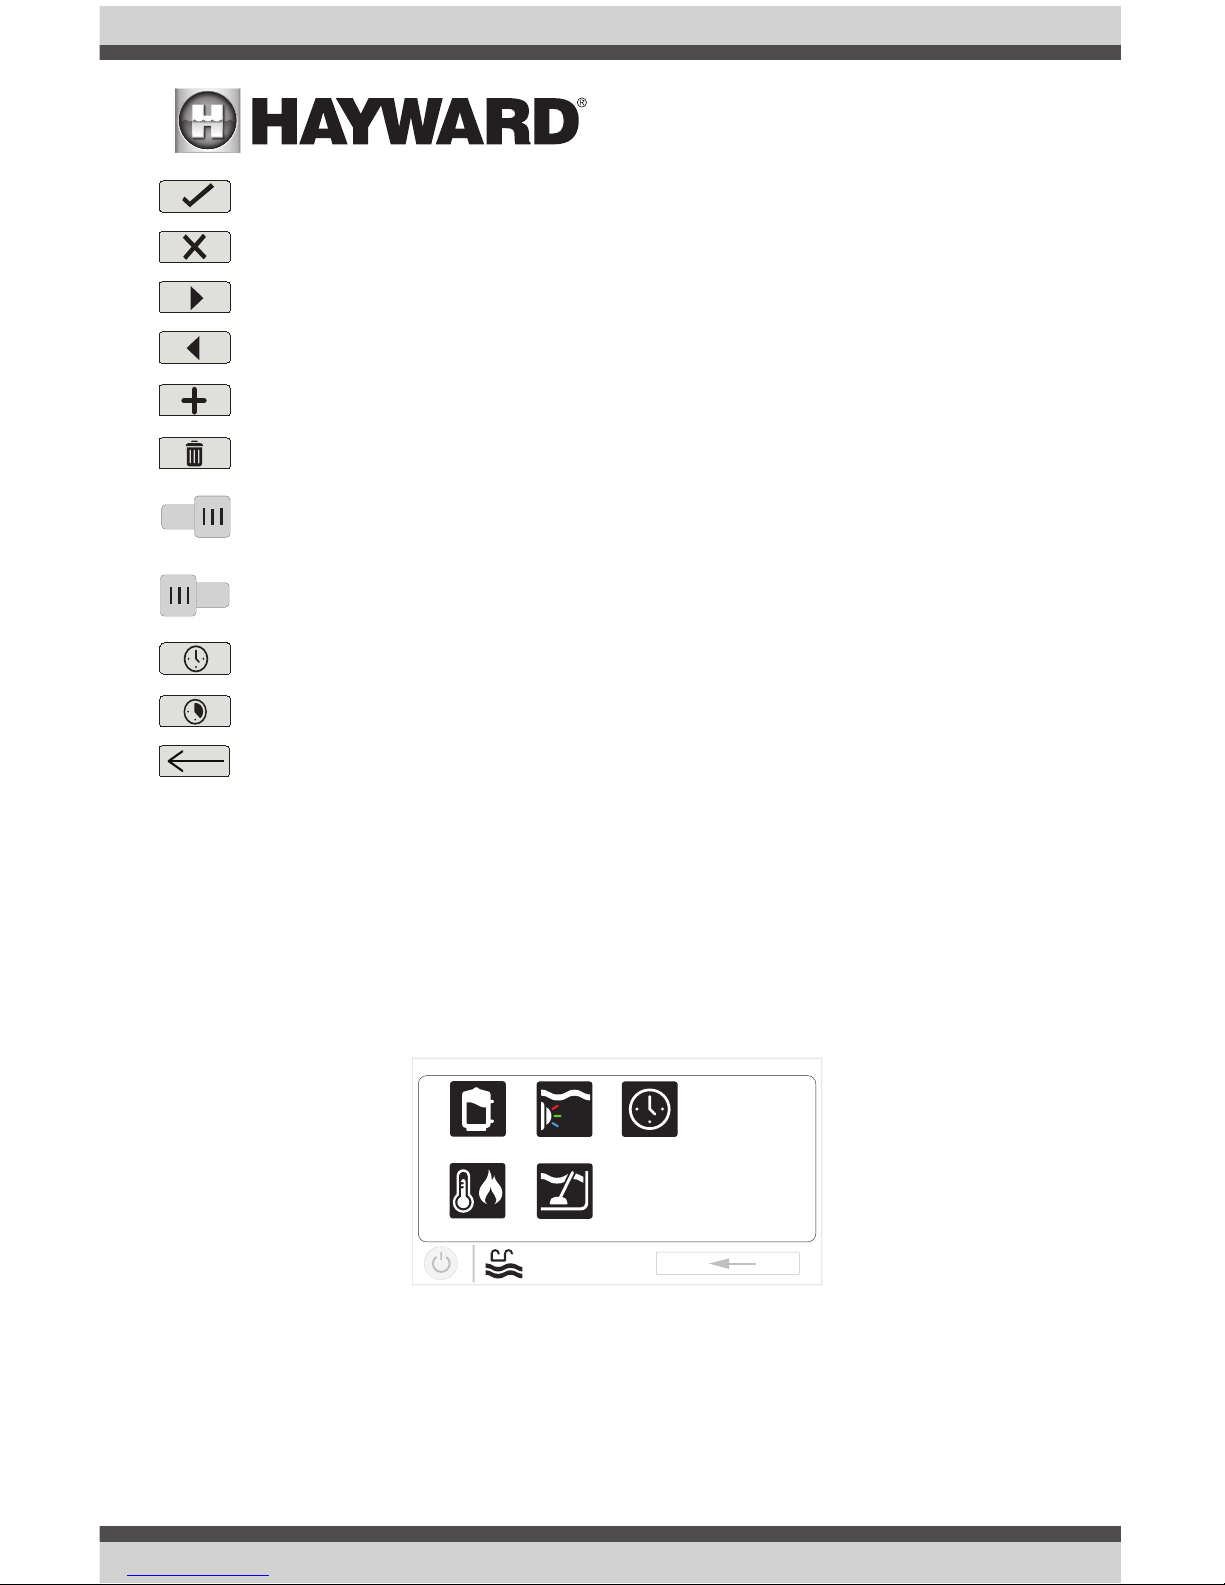
Save - Touch this button to save your selection.
Cancel - Touch this button to cancel your selection.
Advance - Touch this button to advance to the next screen.
Back - Touch this button to return to the previous screen.
Add - Touch this button to add an item.
Delete - Touch this button to delete a highlighted item.
Turn On or Enable - This button will either manually turn on pool equipment or enable a
function.
Turn Off or Disable - This button will either manually turn off pool equipment or disable
a function.
Schedule - Touch this button to schedule a function.
Countdown Timer - Touch this button to set a countdown timer.
Back - Touch this button to return to a previous screen.
Features and Control Screens
As previously stated, the Features Screen allows you to control functions and equipment. The
contents of the Features Screen is a result of how the VS Omni was configured using the Configuration Wizard. If equipment is missing or does not belong in the Features Screen, you may have to
go back to the Configuration Wizard and correct the configuration of that equipment.
An example of a Features Screen is shown below. In this example, we are looking at the Pool
(shown in the lower left of the screen) configured with a pump, a heater, a cleaner, and UCL lights.
Depending on the equipment in your system, your screens will likely be different. The purpose of
this section is to explain how Features and Control Screens work as well as show some common
equipment examples which will help familiarize you with the interface. Even though some of your
equipment may be different, you should see similarities in the following examples that will help you
create and change settings for all the equipment in your Features Screens.
ON
OFF
uclights
vsp
heater cleaner
POOL
features
schedule

USE ONLY HAYWARD GENUINE REPLACEMENT PARTS
7
Note that the following examples will be shown for the Pool only. All of the equipment shown in
the Features Screens will have been initially configured in the Configuration Wizard to operate with
a Pool body of water. You may have configured the VS Omni to share equipment with the Spa in
which case the equipment will be shown in the Features Screen for both the Pool and Spa.
Control Screens
After an item has been selected in the Features Screen, you’ll be brought to a control screen.
Control Screens are used to make changes to the pool’s equipment settings. To change a setting,
you’ll first touch the left side of the Home Screen to enter the Features Screen, then select the
equipment you’d like to set.
Filter Pump
In the example below, a variable speed pump which was named “vsp” has been configured to be
used with the Pool in the Configuration Wizard. Touching the “vsp” button in the Features Screen
will bring you to a pump Control Screen which will let you manually turn on/off the pump, view
the status, set a schedule, set a speed, start a countdown timer, or view the pump’s diagnostics.
Single speed and two speed pumps will have a similar Control Screen.
ON
POOL
vsp pump
ON
MED HIGH CUSTOMLOW
Change Speed - Manually
select the desired speed. This
will not be shown for single
speed pumps. Low, Med, and
High are fixed speeds. The
Custom button will bring you
to a screen that allows you to
select a speed based on percentage or RPM (determined
during configuration).
Turn On / Turn Off - Slide
this switch manually to turn
on/off the pump. This will
override any schedules or timer
settings.
Status of Equipment - This is an indicator
only. When lit up and in motion (shown below), the equipment is active. When grayed
out and stationary, the equipment is off.
Set Schedule - Touch
this button to add/delete a
schedule for the filter pump
or to enable/disable an
existing schedule.
Countdown Timer - Touch
this button to set a countdown timer for the filter
pump.
Diagnostics - Touch this
button to view the filter
pump’s diagnostics. This
option only appears for variable speed pumps.
uclights
vsp
heater cleaner
POOL
features
schedule
ON
POOL
vsp pump
ON
MED HIGH CUSTOMLOW
Pool Features Screen Pump Control Screen

USE ONLY HAYWARD GENUINE REPLACEMENT PARTS
8
Add a Schedule
If the “Set Schedule” button is touched, you’ll be brought to the pump schedule screen below.
Here you can add, delete, edit, enable, and disable schedules. Because there have been no schedules set up, the screen is blank. Touch the Add button (+) to add a schedule for the pool pump.
Set Schedule Time
Refer to the screen below to set the start and end times. When finished, touch “repeat”.
Set Schedule Frequency
Refer to the screen below to select how often you’d like the schedule to run. If “custom” is
selected, you’ll be asked which day(s) of the week you would like the pump to run. Touch “speed”
when finished.
POOL
vsp pump
Please press + button to add schedule items.
ON/OFF
end 7:00 pm
POOL
vsp pump
start 10:00 am
10
start / end
repeat
speed
am
pm
00
:
end 7:00 pm
POOL
vsp pump
start 10:00 am
10
start / end
repeat
speed
am
pm
00
:
Set Start Time - Select this
button to edit the start time.
The pump will start at the time
shown.
Edit Time - Select the Hours,
Minutes, or AM/PM fields to
change the desired time.
Set End Time - Select this button to edit the
end time. The pump cycle will end at the
time shown.
Set Schedule Frequency Select how often you’d like the
schedule to run (weekdays,
weekends, all week, custom).
Set Pump Speed - Select this
button to change the pump
speed for the schedule. This
option only appears for variable
speed and two speed pumps.
POOL
vsp pump
start / end
repeat
speed
weekdays all weekweekends
custom
USE ONLY HAYWARD GENUINE REPLACEMENT PARTS
9
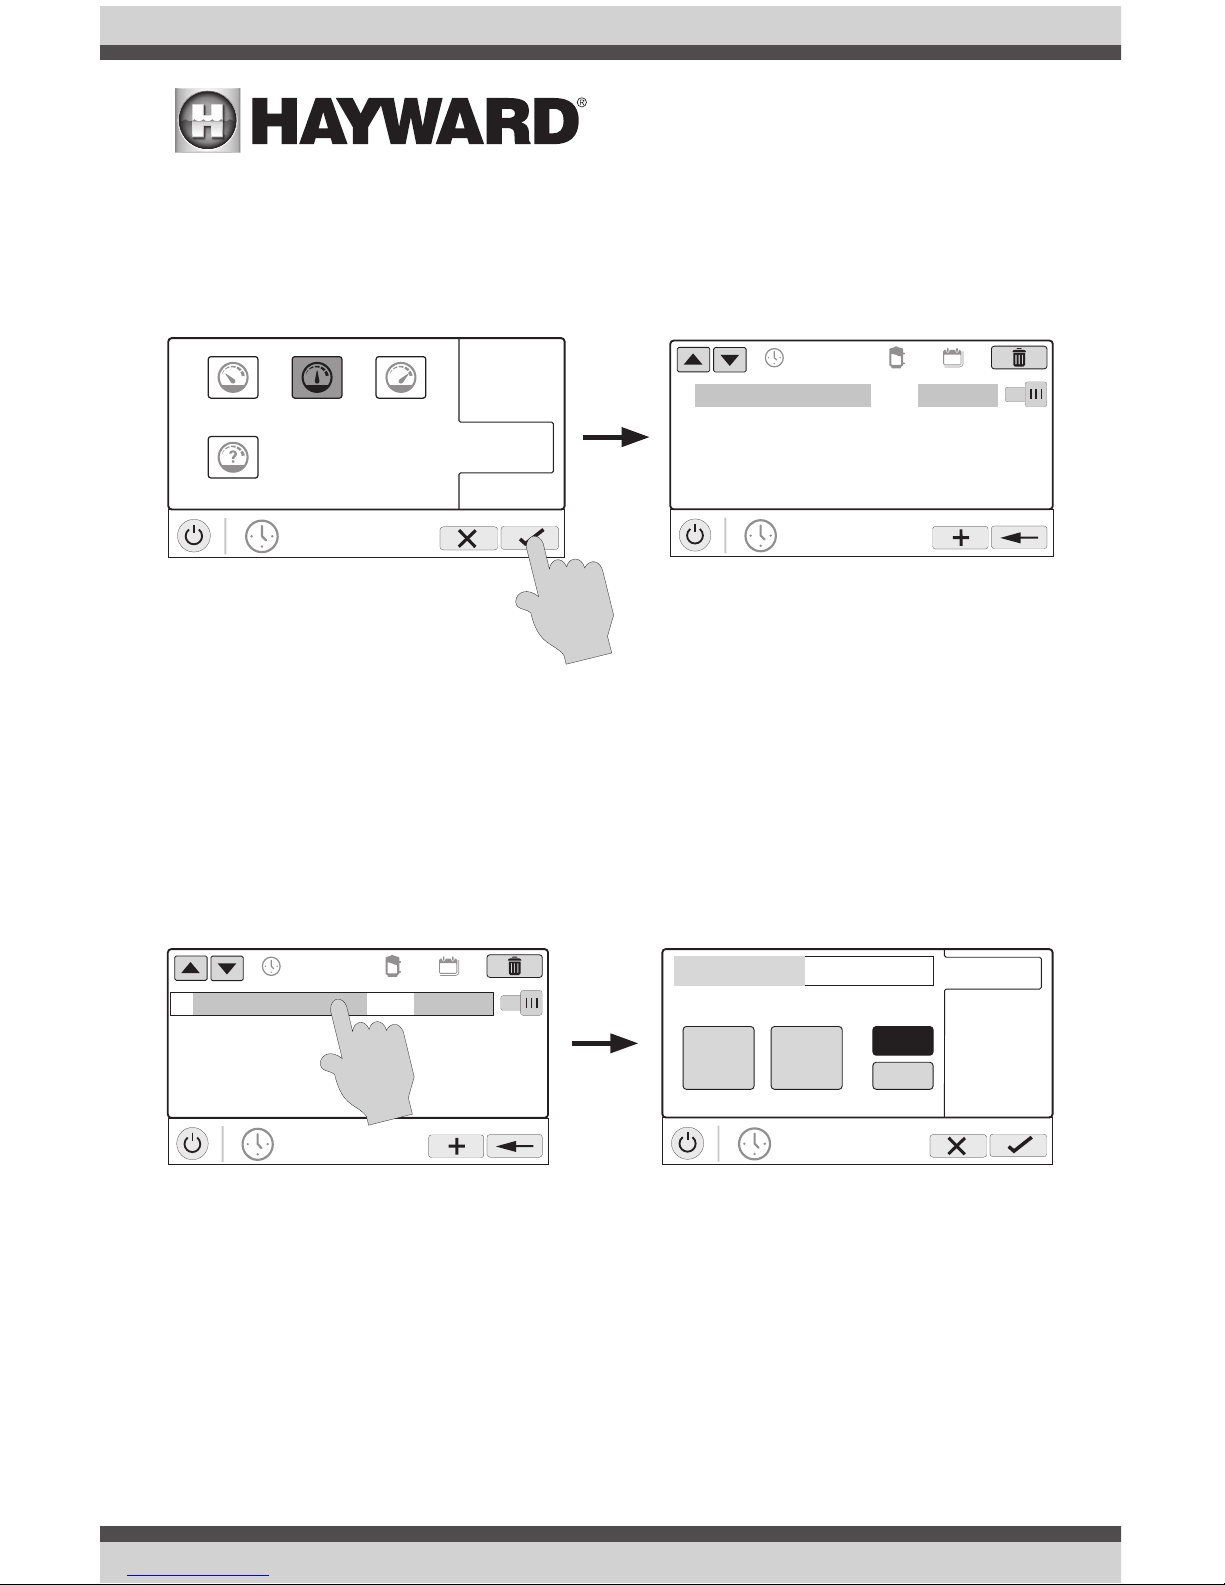
Set Pump Speed
Refer to the screen below to select the pump speed during the schedule. If custom is selected,
you’ll be asked to set the % pump speed or RPM depending on the setting. When finished, touch
the Save button to save the schedule. NOTE: the speed setting only appears if the pump is a variable speed or a two speed pump.
NOTE: if you intend to run the pump at different speeds throughout the day, create additional
schedules. You can start a new schedule on the same minute that the previous one ends. If
schedules overlap, the newest schedule’s start time will take priority by ending the previous schedule early. You can create up to 100 total schedules on the system.
Edit a Schedule
To edit a schedule, touch the schedule as shown below. You’ll be brought back to the screen which
will allow you to set times, speed and frequency.
POOL
vsp pump
start / end
repeat
speed
low highmed
custom
POOL
vsp pump
01
10:00 am / 7:00 pm
med
all week
ON
POOL
vsp pump
01
10:00 am / 7:00 pm
med
all week
ON
end 7:00 pm
POOL
vsp pump
start 10:00 am
10
start / end
repeat
speed
am
pm
00
:
USE ONLY HAYWARD GENUINE REPLACEMENT PARTS
10
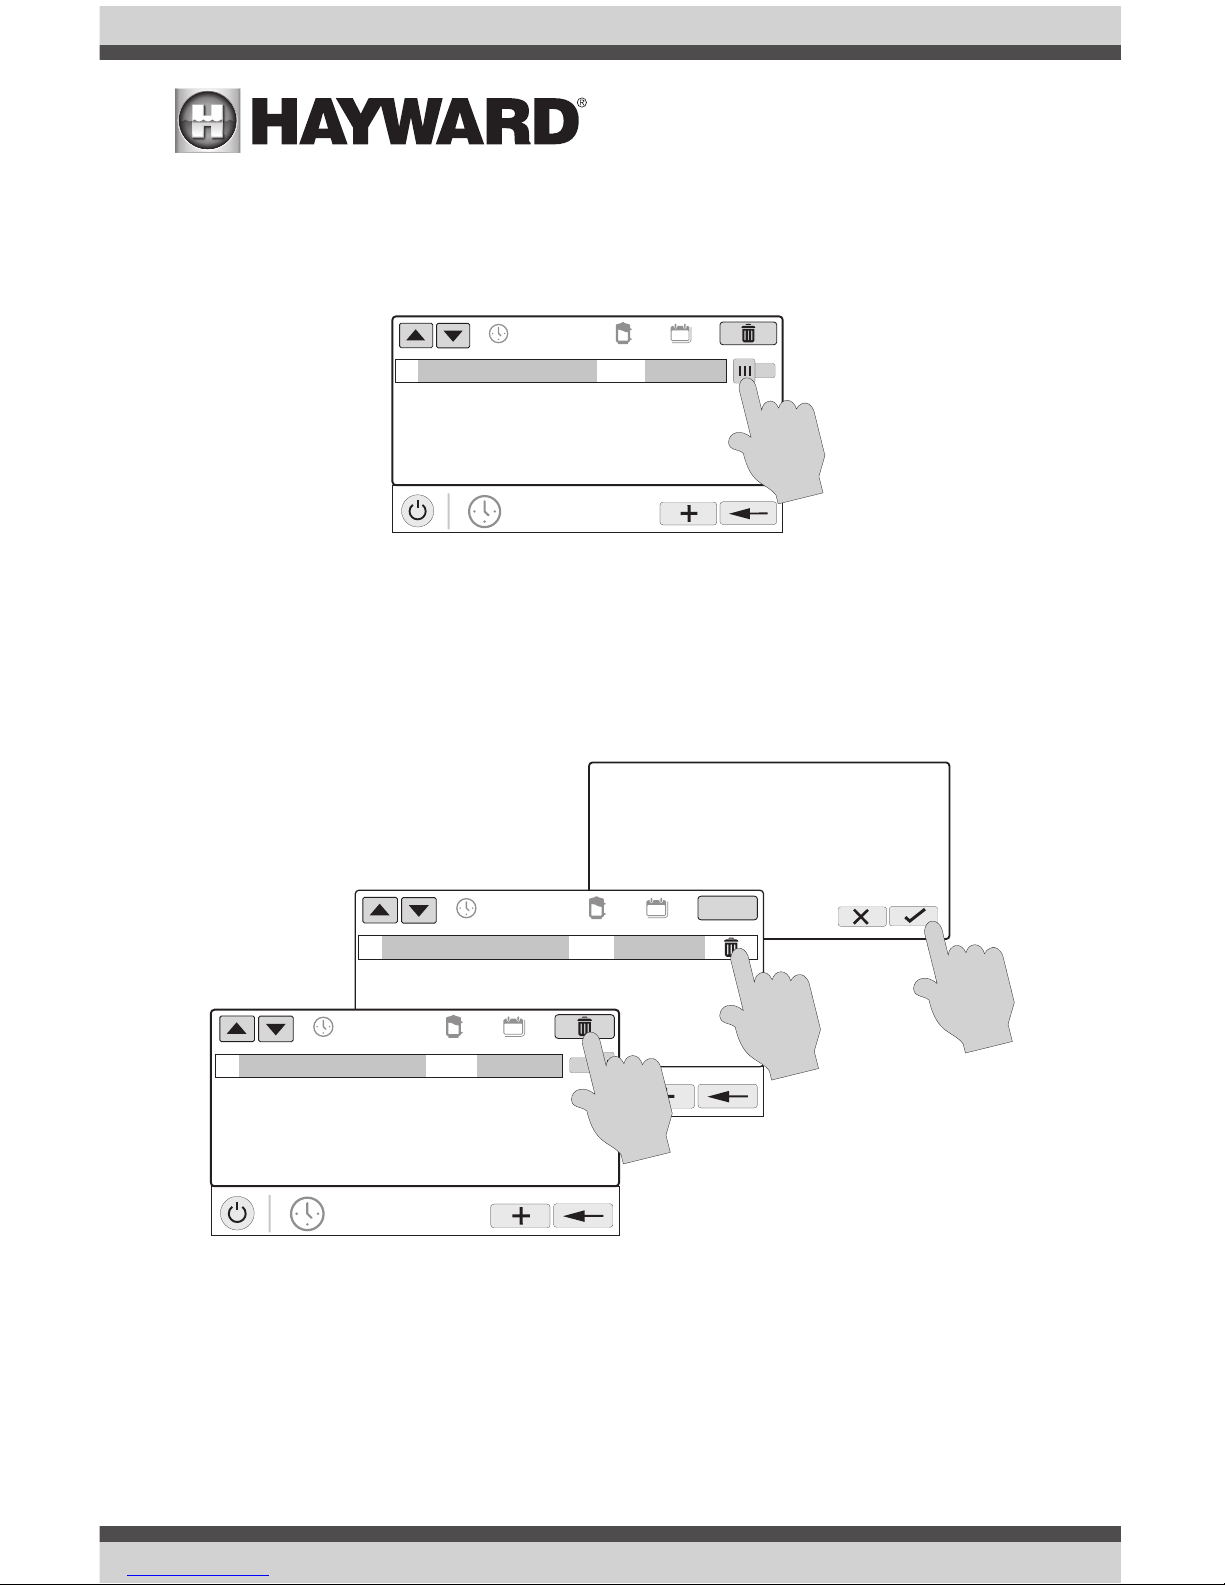
Turning a Schedule Off
There may be circumstances when you will want to turn off a schedule temporarily. To do this,
slide the On/Off button to “Off”. The schedule will remain off until you go back to this screen and
turn it off.
Deleting a Schedule
Schedules can be deleted when they are no longer necessary. To delete a schedule, select the
schedule and touch Delete as shown below. A Delete button should appear on the side of the
schedule. Touch this Delete button to remove the schedule.
POOL
vsp pump
01
10:00 am / 7:00 pm
med
all week
OFF
Are you sure you want to delete
the schedule?
POOL
vsp pump
ON/OFF
01
10:00 am / 7:00 pm
med
all week
POOL
vsp pump
01
10:00 am / 7:00 pm
med
all week
ON
 Loading...