

Hayter 610, 611 Operator's Manual

FormNo.3409-855RevB
46cmLawnMower
ModelNo.610—SerialNo.610A400000000andUp
ModelNo.611—SerialNo.611A400000000andUp
Registeratwww.hayter.co.uk.
OriginalInstructions(EN)
*3409-855*B
NetT orque:Thegrossornettorqueofthisenginewas
laboratoryratedbytheenginemanufacturerinaccordance
withtheSocietyofAutomotiveEngineers(SAE)J1940.
Asconguredtomeetsafety,emission,andoperating
requirements,theactualenginetorqueonthisclassofmower
willbesignicantlylower.Gotowww .hayter.co.uktoview
specicationsonyourmowermodel.
Introduction
Thisrotary-blade,walk-behindlawnmowerisintendedto
beusedbyresidentialhomeowners.Itisdesignedprimarily
forcuttinggrassonwell-maintainedlawnsonresidential
properties.Itisnotdesignedforcuttingbrushorfor
agriculturaluses.
Readthisinformationcarefullytolearnhowtooperateand
maintainyourproductproperlyandtoavoidinjuryand
productdamage.Youareresponsibleforoperatingthe
productproperlyandsafely .
YoumaycontactHayterdirectlyatwww.hayter.co.ukfor
productandaccessoryinformation,helpndingadealer,or
toregisteryourproduct.
Wheneveryouneedservice,genuineHayterparts,or
additionalinformation,contactanAuthorizedServiceDealer
orHayterCustomerServiceandhavethemodelandserial
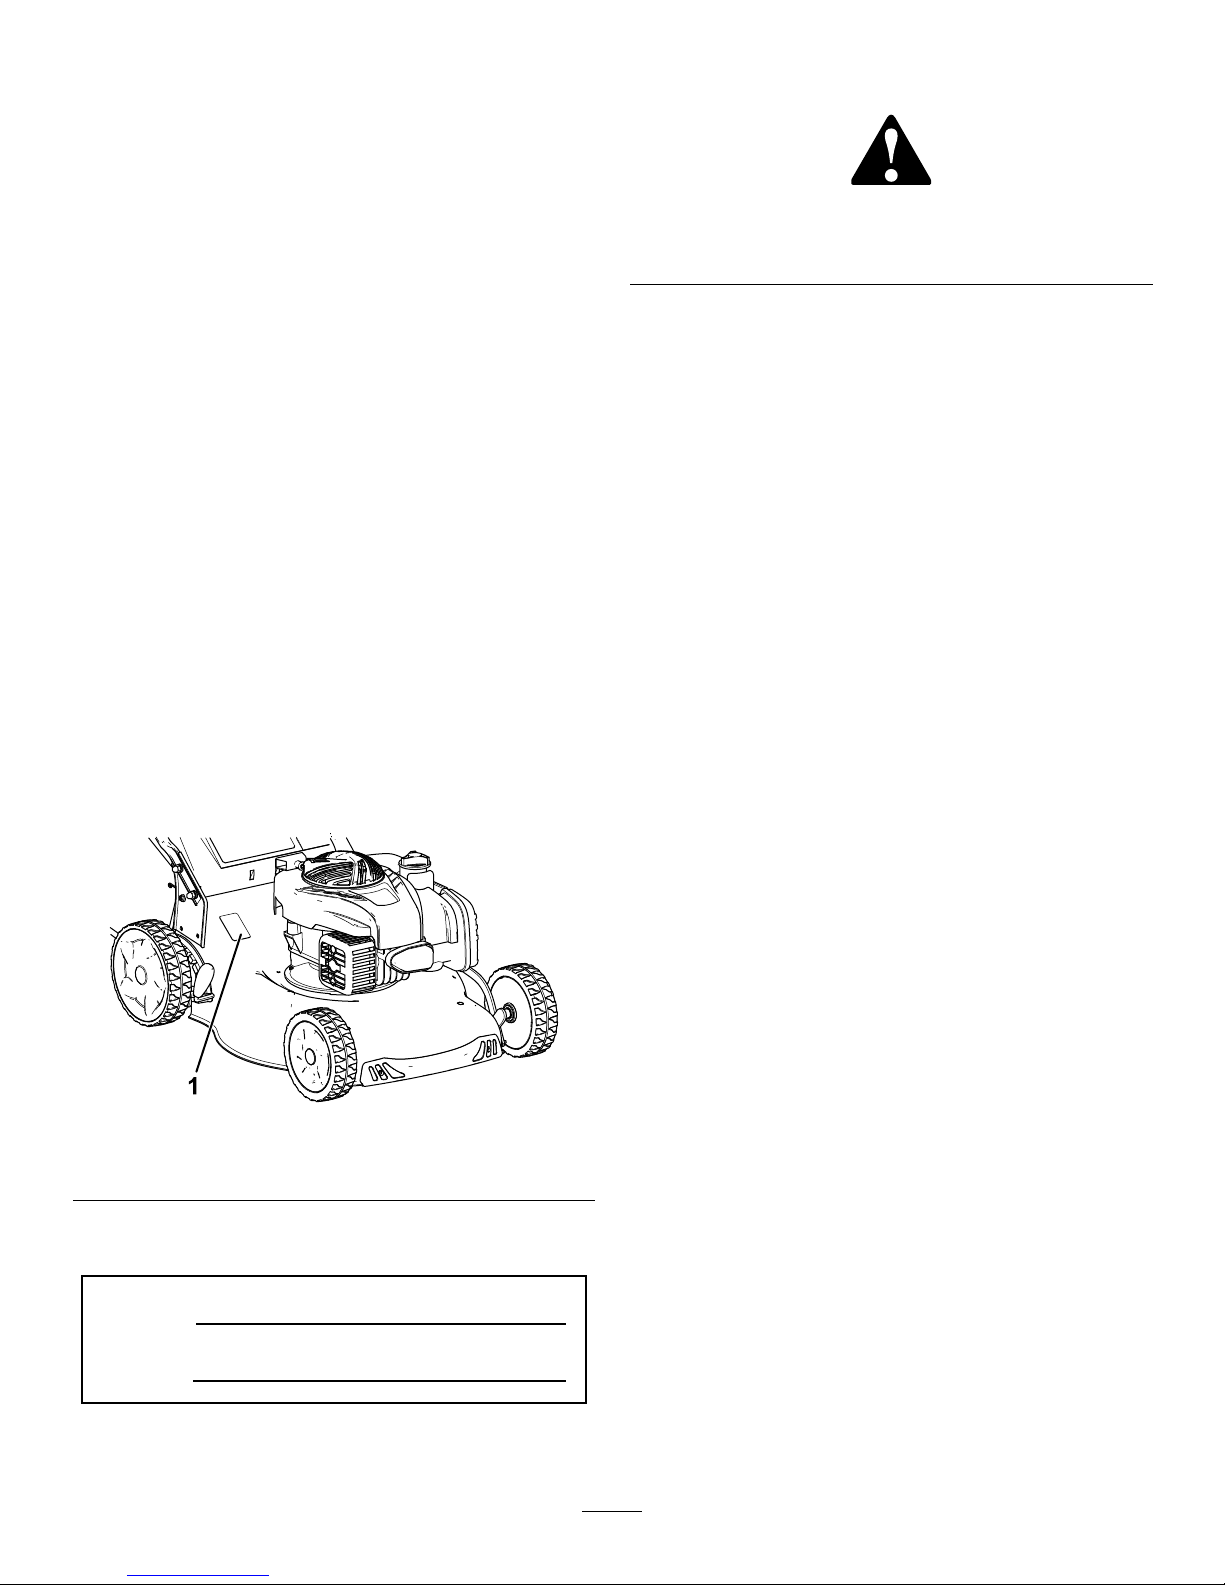
numbersofyourproductready .Figure1identiesthe
locationofthemodelandserialnumbersontheproduct.
g199776
Figure1
1.Modelandserialnumberplate
Writetheproductmodelandserialnumbersinthespace
below:
ModelNo.
SerialNo.
Thismanualidentiespotentialhazardsandhassafety
messagesidentiedbythesafety-alertsymbol(Figure2),
whichsignalsahazardthatmaycauseseriousinjuryordeath
ifyoudonotfollowtherecommendedprecautions.
g000502
Figure2
1.Safety-alertsymbol
Thismanualuses2wordstohighlightinformation.
Importantcallsattentiontospecialmechanicalinformation
andNoteemphasizesgeneralinformationworthyofspecial
attention.
Contents
Safety...........................................................................3
GeneralSafety.........................................................3
SafetyandInstructionalDecals.................................4
Setup............................................................................5
1AssemblingtheHandle..........................................5
2InstallingtheRecoil-StarterRopeintheRope
Guide.................................................................5
3FillingtheEnginewithOil......................................5
ProductOverview..........................................................7
Specications.........................................................7
BeforeOperation.......................................................7
BeforeOperationSafety...........................................7
FillingtheFuelTank................................................8
CheckingtheEngine-OilLevel..................................8
AdjustingtheCuttingHeight....................................9
DuringOperation......................................................9
DuringOperatingSafety...........................................9
StartingtheEngine.................................................10
UsingtheSelf-PropelDrive.....................................10
ShuttingOfftheEngine..........................................10
MulchingtheGrassClippings...................................10
BaggingtheGrassClippings....................................11
OperatingTips......................................................11
AfterOperation........................................................12
AfterOperatingSafety............................................12
CleaningundertheMachine.....................................12
FoldingtheHandle.................................................13
Maintenance.................................................................14
RecommendedMaintenanceSchedule(s)......................14
MaintenanceSafety.................................................14
PreparingforMaintenance.......................................14
ReplacingtheSparkPlug.........................................15
ServicingtheAirFilter............................................15
ChangingtheEngineOil.........................................15
ReplacingtheBlade................................................16
LubricatingtheWheels............................................17
Storage........................................................................18
PreparingtheMachineforStorage............................18
RemovingtheMachinefromStorage.........................18
©2016—HayterLtd
Spellbrook,Bishop’sStortford,Herts,CM234BU
2
Contactusat.
PrintedinChina
AllRightsReserved

Safety
ThismachinehasbeendesignedinaccordancewithENISO
5395:2013.
GeneralSafety
Thisproductiscapableofamputatinghandsandfeetand
ofthrowingobjects.Alwaysfollowallsafetyinstructionsto
avoidseriouspersonalinjury.
Usingthisproductforpurposesotherthanitsintendeduse
couldprovedangeroustoyouandbystanders.
•ReadandunderstandthecontentsofthisOperator’ sManual
beforestartingtheengine.
•Donotputyourhandsorfeetnearmovingcomponents
ofthemachine.
•Donotoperatethemachinewithoutallguardsandother
safetyprotectivedevicesinplaceandworkingonthe
machine.
•Keepclearofanydischargeopening.Keepbystandersa
safedistanceawayfromthemachine.
•Keepchildrenoutoftheoperatingarea.Neverallow
childrentooperatethemachine.
•Stopthemachineandshutofftheenginebeforeservicing,
fueling,oruncloggingthemachine.
Improperlyusingormaintainingthismachinecanresult
ininjury.Toreducethepotentialforinjury,complywith
thesesafetyinstructionsandalwayspayattentiontothe
safety-alertsymbol,whichmeansCaution,Warning,or
Danger—personalsafetyinstruction.Failuretocomplywith
theseinstructionsmayresultinpersonalinjuryordeath.
Youcanndadditionalitemsofsafetyinformationintheir
respectivesectionsthroughoutthismanual.
3
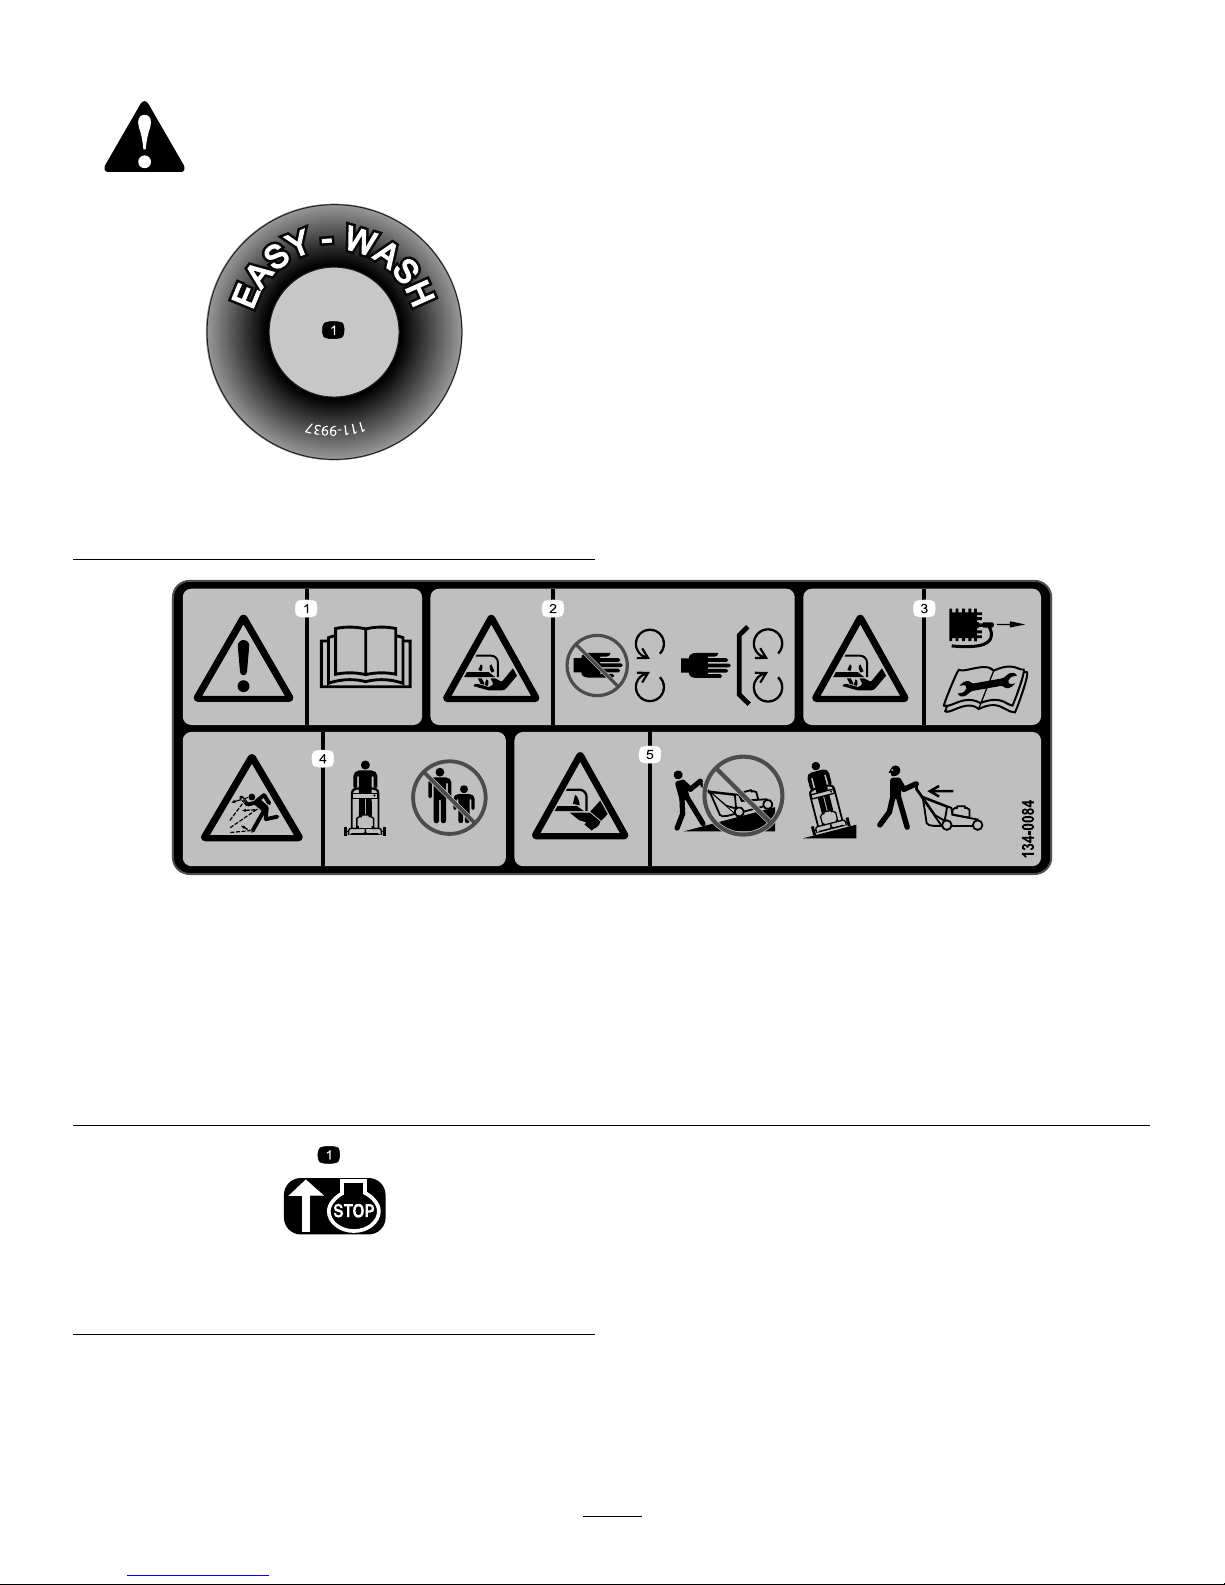
SafetyandInstructionalDecals
Safetydecalsandinstructionsareeasilyvisibletotheoperatorandarelocatednearanyareaofpotential
danger.Replaceanydecalthatisdamagedormissing.
decal111-9937
111-9937
1.Easy-washport
decal134-0084
134-0084
1.Warning—readtheOperator'sManual.4.Thrownobjecthazard—keepbystandersawayfromthe
machine.
2.Cuttinghazard—keepawayfrommovingparts;keepall
guardsandshieldsinplace.
5.Cuttinghazard—donotmowupaslope;alwaysmowfrom
sidetoside;ensurethatthebladeisstoppedandtheengine
isshutoffbeforepickingupnearbydebris;alwayslookbehind
youwhenbackingupwiththemachine.
3.Cuttinghazard—disconnectthesparkplugandreadthe
Operator'sManualbeforeperformingmaintenance.
decalh295159
H295159
1.Enginestop
4
Setup
1
AssemblingtheHandle
NoPartsRequired
Procedure
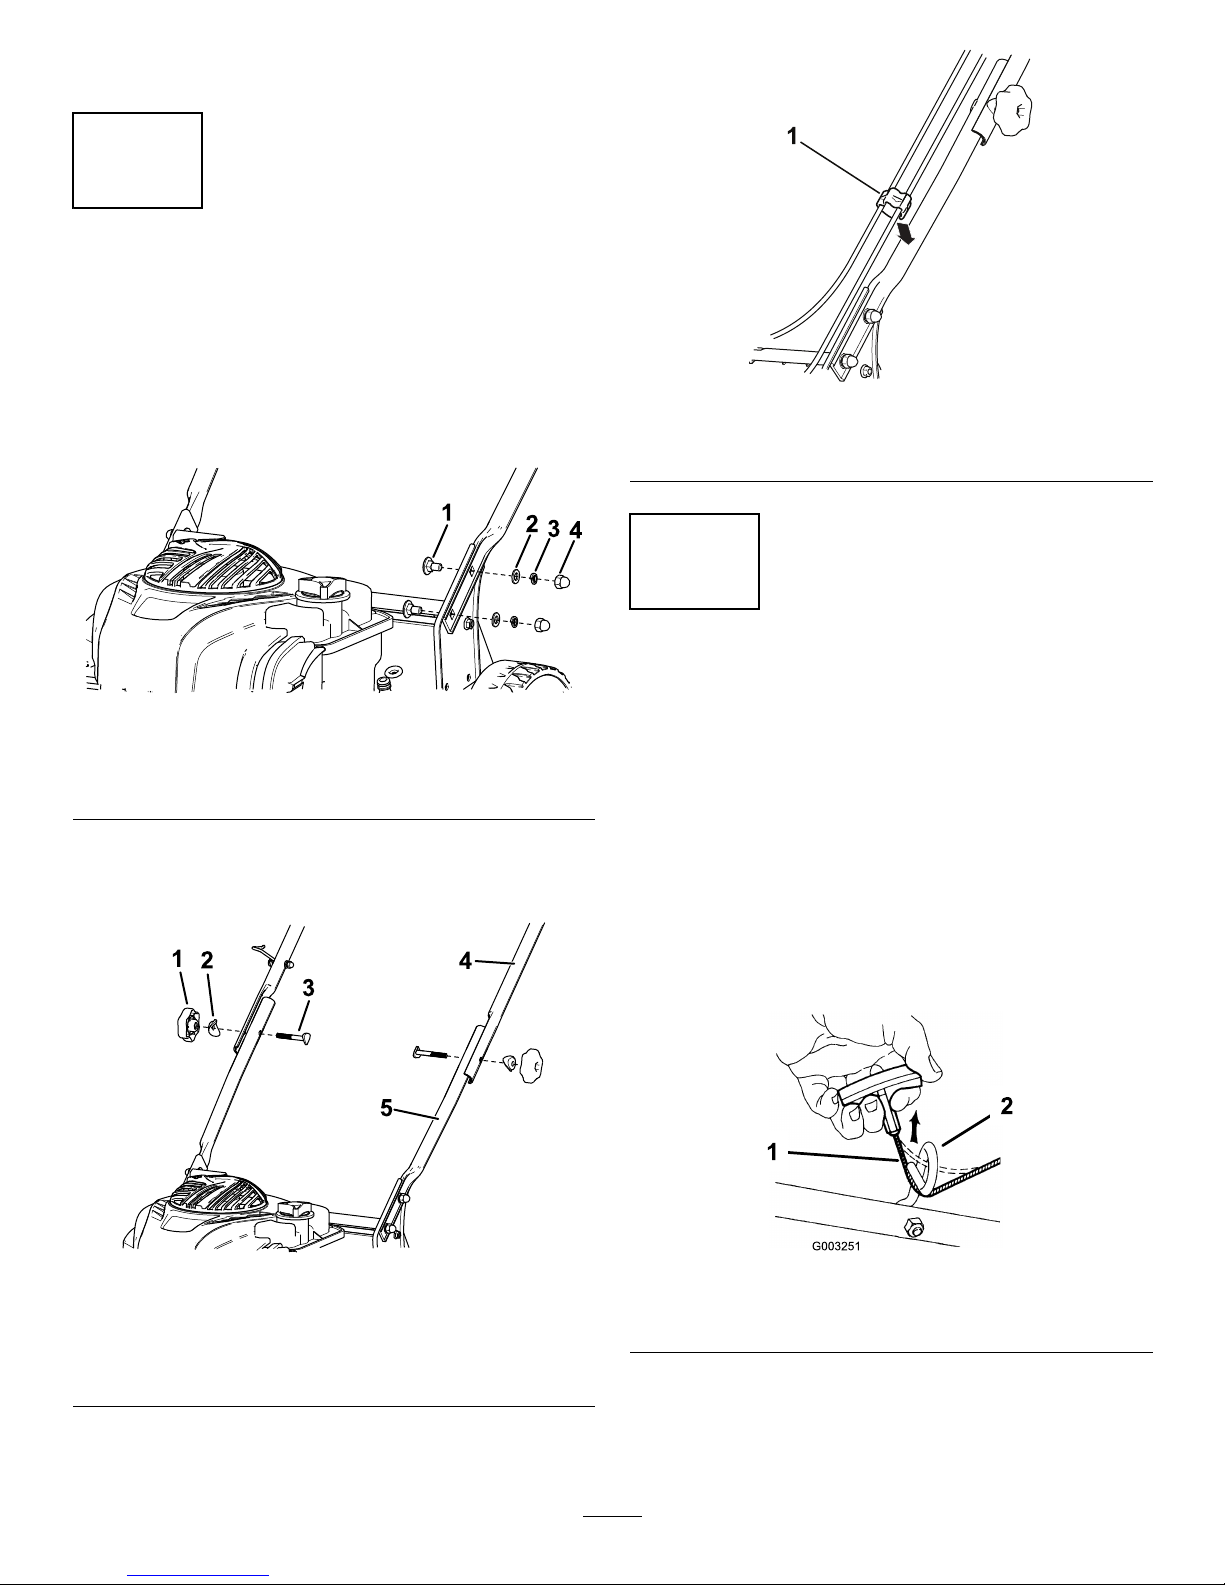
1.Attachthelowerhandletothemowerhousingwith4
bolts,4atwashers,4splitwashers,and4nuts(Figure
3).
g198623
Figure3
1.Bolt(4)3.Splitwasher(4)
2.Flatwasher(4)4.Nut(4)
2.Attachtheupperhandletothelowerhandleusing2
handleknobs,2curvedwashers,and2bolts.Tighten
thehandleknobssecurelybyhand(Figure4).
g198624
Figure4
1.Handleknob(2)
4.Upperhandle
2.Curvedwasher(2)
5.Lowerhandle
3.Bolt(2)
3.Insertthecablesintothecableclampandattachthe
cablecliptothehandleasshowninFigure5.
g189081
Figure5
1.Cableclip
2
InstallingtheRecoil-Starter
RopeintheRopeGuide
NoPartsRequired
Procedure
Important:Tostarttheenginesafelyandeasily
wheneveryouusethemachine,installtherecoil-starter
ropeintheropeguide.
Holdtheblade-controlbartotheupperhandle(Figure8)
andpulltherecoil-starterropethroughtheropeguideon
thehandle(Figure6).
g003251
Figure6
1.Recoil-starterrope2.Ropeguide
5
3
FillingtheEnginewithOil
NoPartsRequired
Procedure
Important:Yourmachinedoesnotcomewithoilin
theengine.Beforestartingtheengine,lltheengine
withoil.
Engineoilcapacity:0.47L
Oilviscosity:SAE30orSAE10W-30detergentoil
APIserviceclassication:SJorhigher
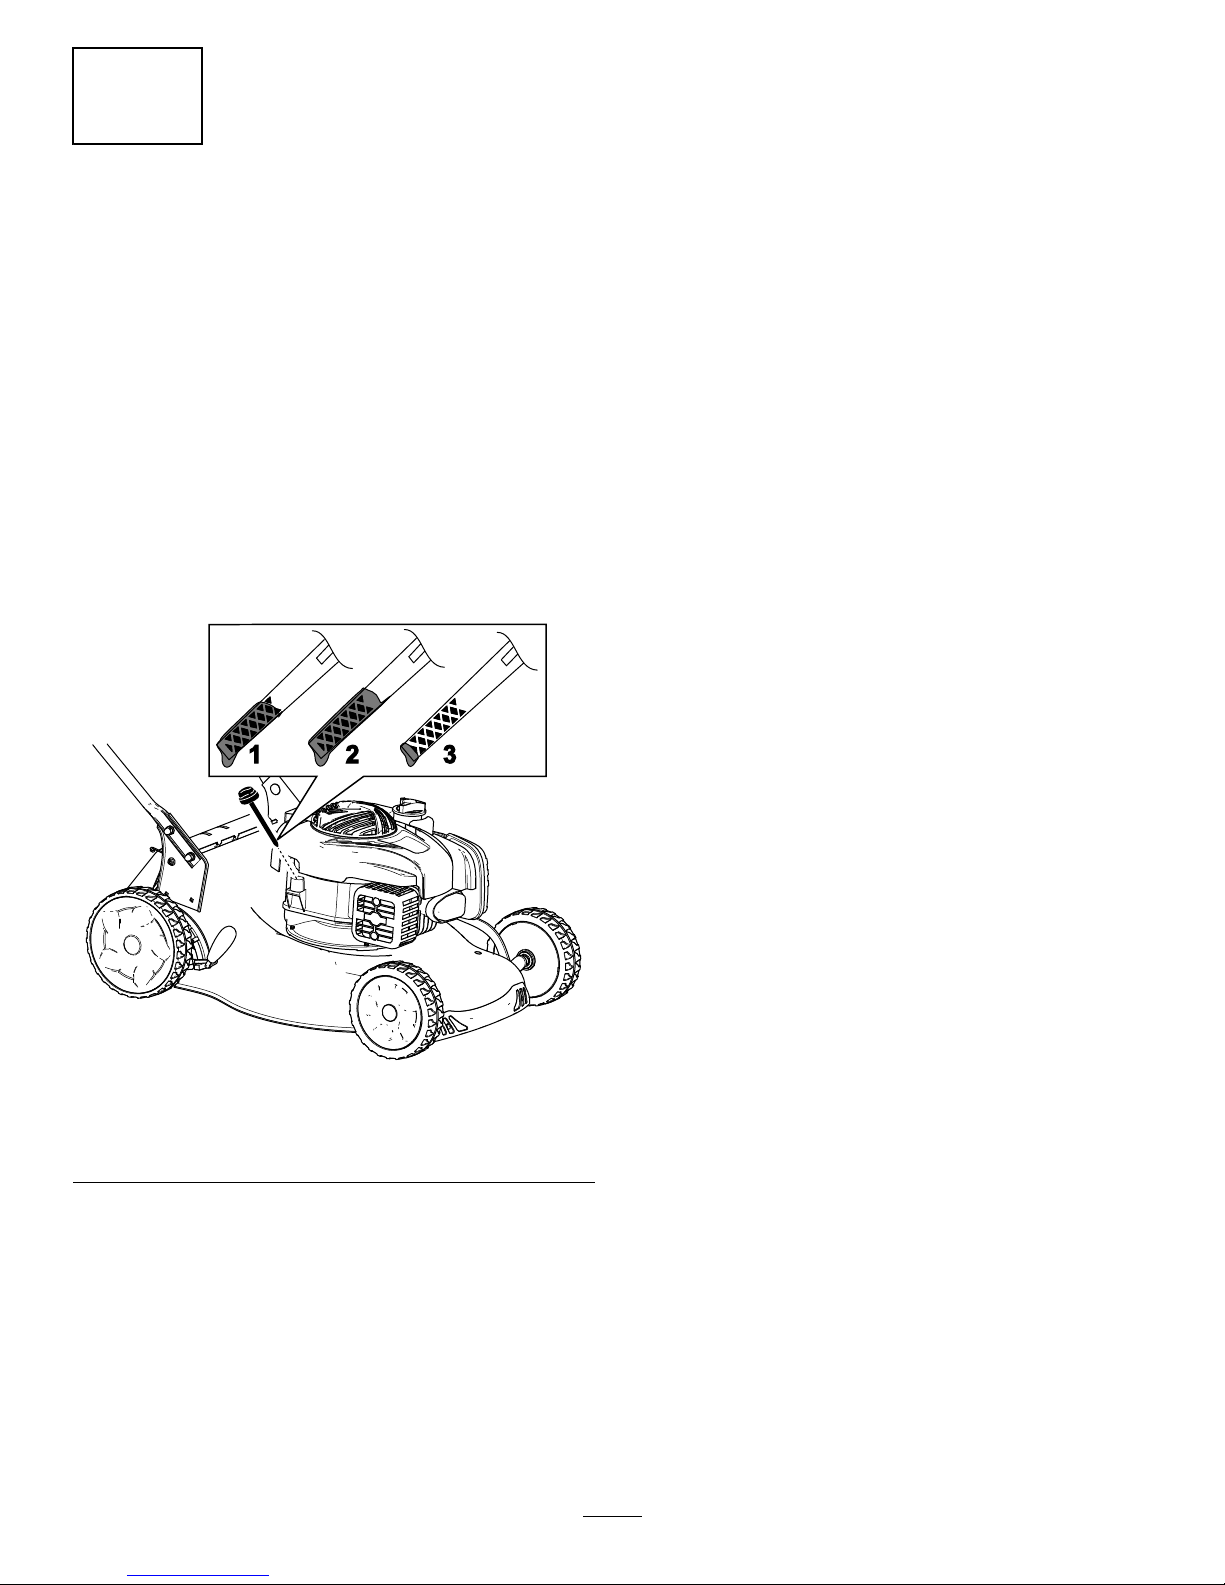
1.Movethemachinetoalevelsurface.
2.Removethedipstickbyrotatingthecap
counterclockwiseandpullingitout(Figure7).
g198625
Figure7
1.Full3.Low
2.High
3.Carefullypourabout3/4oftheenginecapacityofoil
intotheoil-lltube.
4.Waitabout3minutesfortheoiltosettleintheengine.
5.Wipethedipstickcleanwithacleancloth.
6.Insertthedipstickintotheoil-lltube,thenremove
thedipstick.
7.Readtheoillevelonthedipstick(Figure7).
•Iftheoillevelonthedipstickistoolow,carefully
pourasmallamountofoilintotheoil-lltube,
wait3minutes,andrepeatsteps3through5until
theoilonthedipstickisatthecorrectlevel.
•Iftheoillevelonthedipstickistoohigh,drain
theexcessoiluntiltheoilonthedipstickisatthe
correctlevel;refertoChangingtheEngineOil
(page15).
Important:Iftheoillevelintheengineistoo
lowortoohighandyouruntheengine,youmay
damagetheengine.
8.Installthedipsticksecurely.
6
 Loading...