

Page 1
Q
uick Installation Guide
Wireless-1200AC USB Network Adapter
HW12ACU
Package Contents
• Wireless-AC USB Network Adapter
• CD: User Manual and Drivers
Requirements
• Desktop or Laptop (an available CD-Rom Drive is
recommended*)
• Windows 7+
• Mac OS 10.6+
• An Available USB Port
• Wi-Fi Internet Access (i.e. Hotspot, Wireless Access
Point, Router)
* Software also available for download from our
website
Start Here
i
Do not connect the HW12ACU until you install the driver
from the CD and are instructed to do so. Otherwise, the adapter
may not operate properly.
This Quick Installation Guide includes a quick and easy way to set
up the HW12ACU Adapter for Windows 10 and Mac OS10.12+.
For older operating systems, please refer to the User Manual on
the CD. The software and guides can also be downloaded from
www.hawkingtech.com.
Note: If it does not appear,
please click on “File Explorer” in
your taskbar, on the left hand
column, choose “This PC” and
select your CD/DVD Drive.
- Page 1 -
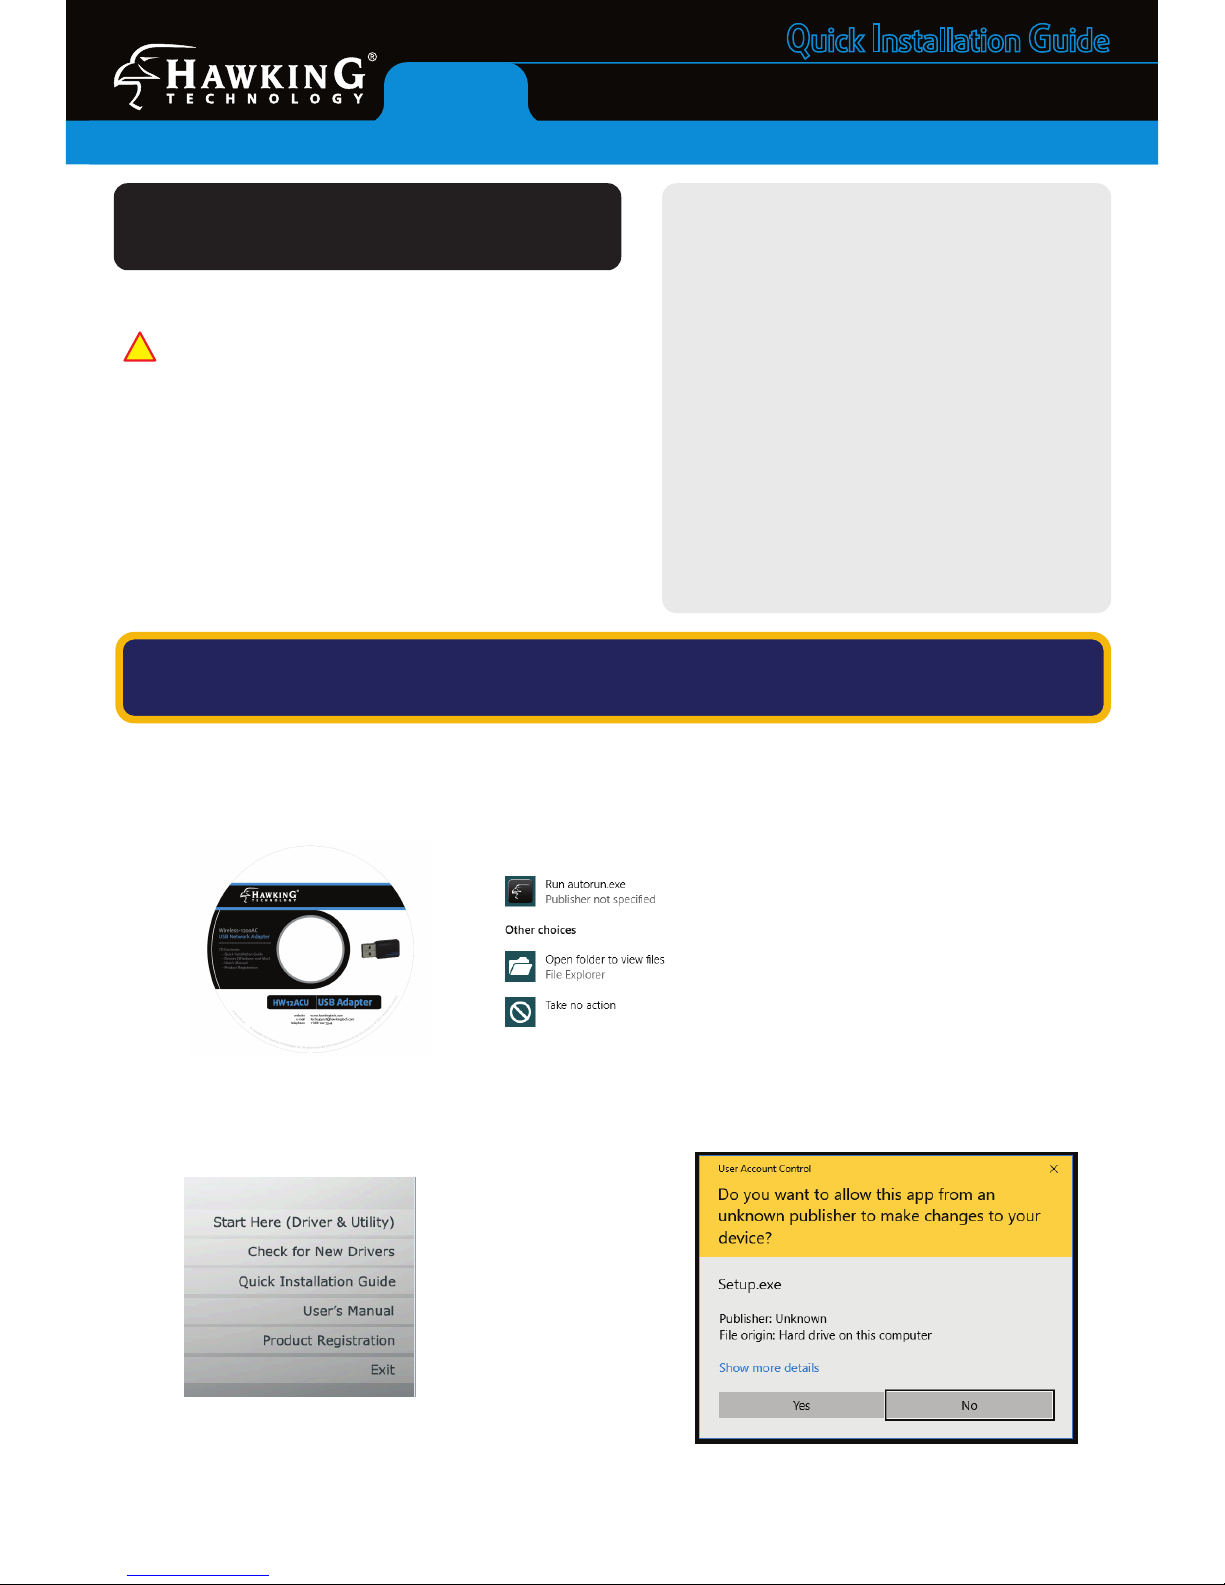
b. A menu page should now appear on your screen.
Click “Start Here (Driver & Utility)”
c. Windows may prompt you to allow the program to
make changes to this computer. Please click “Yes”.
WINDOWS 10
(For Apple OS instructions, please proceed to page 3)
1. Get Started
a. Insert Setup CD and Select “Run Autorun.exe”
Page 2
4. Access your Wireless Network
2. Run the Setup Program
Cont’d from Windows Instructions
3. Restart your Computer and Plug in the USB Adapter
- Page 2 -
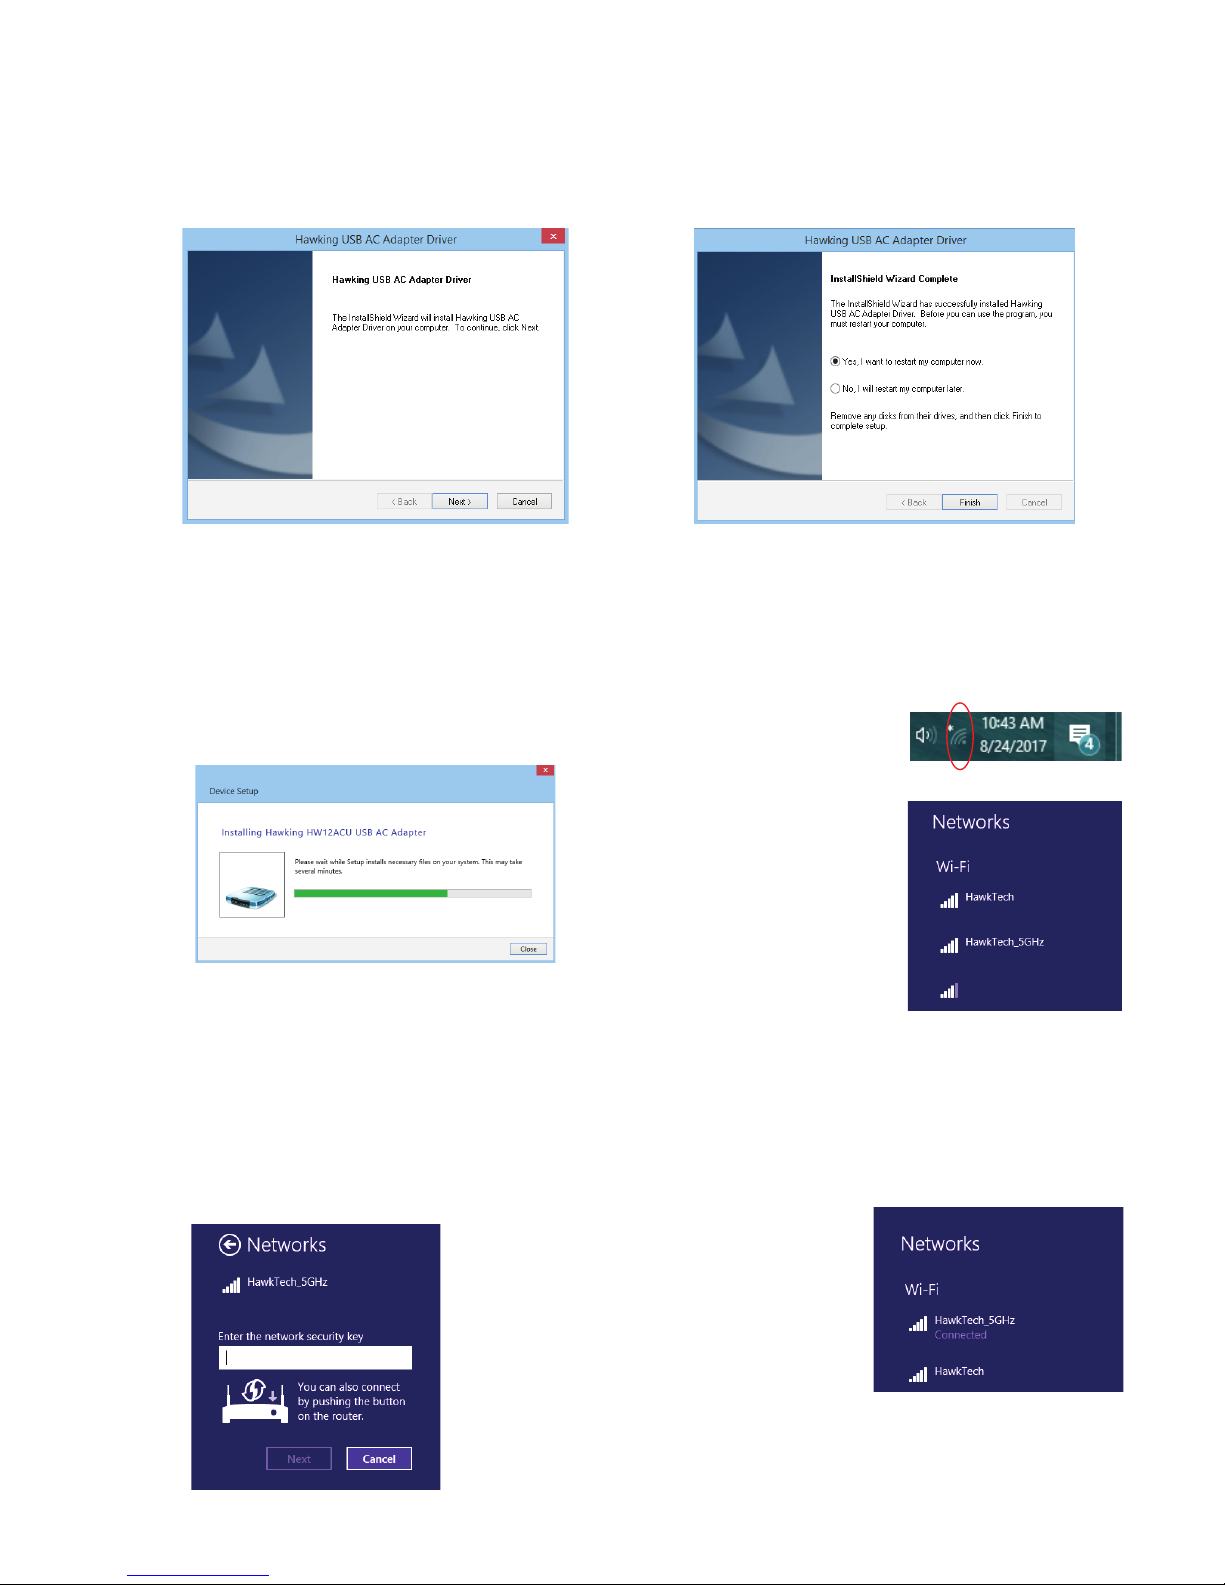
a. The setup program should now appear. Please click
“Next” for the installation to get started.
b. At the end of the installation, the computer will
prompt you to reboot. Please save and close any other
programs running and then click “Finish” to reboot the
computer.
a. After the computer has rebooted, please plug the
HW12ACU into an available USB port. Your system
will automatically search and nish up the driver
installation process.
b. After closing the “Device Setup” Screen, look on the
lower right corner of your taskbar. You will see a
wireless icon.
c. Click on the Wireless Icon
to view all available
wireless networks in
your immediate area.
Double click on the
network you wish to
connect to.
a. If your selected wireless network is password
protected, you will be prompted to enter in the
password. Please contact your network
administrator or wireless router manufacturer if you
do not know the key.
b. In a few seconds, you should see a “Connected”
message underneath your selected wireless network.
You can now go online!
Congratulations! You have completed the setup.
xyz network
Page 3

-Page 3-
a. Insert the CD in tray and wait a few seconds for the it
to auto play and appear on your desktop
1. Insert Setup CD & Wait for Icons to Show up
b. Double click on the CD icon and a folder should
appear showing you the les on the CD. Choose your
operating system. If you do not see the drivers, go to
hawkingtech.com and see if newer drivers have been
uploaded there.
2. Run the Driver Install Program
a. The install program should now appear. Click
“Continue” to begin the installation
b. During the installation, it will prompt you to
agree/disagree to the license agreements. Click
“Ag ree”
Apple OS X Instructions
(For Windows instructions, please proceed to page 1)
c. The installer will eventually prompt you to enter a
password to install the software. Please be sure to
use an admin username/password to complete
installation
d. At the end of the installation, the software will
prompt you to reboot. Please save and close any
other programs running and then click “Reboot” to
reboot the computer.
Page 4

Technical Support Tel: 1.888.202.3344 E-mail: techsupport@hawkingtech.com
© 2017 Hawking Technol ogies, Inc. All r ights reserve d. All trademar ks herin are the pro perty of their r espective owner s. Apple, Mac, iPa d, and iPhone are reg istered tradem arks of Apple Comp uter, Inc. No Affi liation implied o r expressed.
HW12ACU-QIG 10-10-2017
3. Connecting to a Wireless Network
Cont’d from Mac OS Instructions
b. Click on the Wireless Utility and you should see a list of
all the wireless networks in your area. Double Click to
select your network.
c. If you selected a wireless network that is password
protected, you will be prompted to enter in the
password. Please contact your network administrator
or wireless router manufacturer if you do not know
the key.
d. In a few seconds, you should see a green checkbox next
to your selected network, indicating that the
HW12ACU has connected.
Congratulations! You have completed the setup.
a. After the computer has rebooted, please plug the
HW12ACU into your computer. Mac OS should
automatically install the device. After a few seconds,
the wireless utility should appear in the dock.
 Loading...