

Page 1
Page 2

Table of Contents
Chapter 1 Introduction................................ ...................................................1
1.1 Package Contents...................................................................................2
1.2 Features................................................................................................. 2
1.3 Specifications......................................................................................... 2
1.4 Physical Description...............................................................................3
Chapter 2 Quick Installation................................ .........................................6
2.1 Hardware Installation ............................................................................. 6
2.2 Getting Started....................................................................................... 7
Chapter 3 Windows Setup Wizard................................ ...............................9
Chapter 4 Web Configuration.....................................................................20
4.1 Getting Started..................................................................................... 20
4.2 Configuring the Gaming Adapter.......................................................... 23
4.2.1 Status and Information ........................................................................................23
4.2.2 Wireless Setting..................................................................................................24
4.2.3 Advanced Setting ................................................................................................26
4.2.4 Encryption...........................................................................................................28
4.2.5 Wireless Site Survey...........................................................................................32
4.2.6 System Utility .....................................................................................................33
4.2.7 Configuration Tool..............................................................................................35
4.2.8 Firmware Upgrade ..............................................................................................37
4.2.9 Reset....................................................................................................................38
Chapter 5 Troubleshooting..........................................................................39
Page 3

Introduction
Chapter 1 Introduction
Congratulations on the purchase of the Hawking Technologies Wireless Gaming
Adapter. This unique product gives you the power to play “Head to Head” or online
“Internet Gaming” on your PlayStation 2, Xbox or PC without wires! Using state-ofthe-art wireless technology, the Wireless Gaming Adapter, boasts high speed, zero
lag gaming.
The HGA11 supports wireless security (WEP) to prevent intruders from hacking into
your wireless network. It functions on the popular IEEE 802.11b wireless
networking standard, making it compatible with both IEEE 802.11g and IEEE
802.11g Wireless networks!
The HGA11 is equipped with a removable dipole antenna that is easily replaced with
anyone of Hawking’s Hi-Gain Antennas. If you wish to increase the wireless
distance of your Gaming Adapter or wish to use it in a back house or office,
Hawking’s line of Hi -Gain Antennas is the perfect solution. The Hi-Gain 24 Series,
WiFi Antenna line can be viewed on the Hawking website at www.hawkingtech.com.
Installation and configuration of the Gaming Adapter is quick and simple. The Zero
Configuration feature automatically sets up the unit under your wireless network
settings.
1
Page 4

Introduction
1.1 Package Contents
T he Wireless Gaming Adapter package includes the following items:
Ÿ One Wireless Gaming Adapter
Ÿ One Power Adapter
Ÿ One CD-ROM
Ÿ One Quick Installation Guide
1.2 Features
Ÿ Wireless Head to Head or Internet Gaming.
Ÿ Supports X-Box, PlayStation 2, and any Ethernet ready device.
Ÿ Zero Configuration Feature – Simple installation.
Ÿ Complies with the IEEE 802.11b (DSSS) 2.4GHz wireless specifications.
Ÿ High data rate 11, 5.5, 2 and 1Mbps data transfer speeds.
Ÿ Auto rate fallback in case of obstacles or interferences.
Ÿ Provide 64/128-bit WEP Data Encryption function to protect the wireless
data transmissions.
Ÿ Provides Windows Utility and Web -based configuration.
1.3 Specifications
Ÿ Standards: IEEE 802.11b (Wireless), IEEE 802.3 (Wired)
Ÿ Data Rate: 11/5.5/2/1Mbps auto fallback
Ÿ Security: 64/128-bit WEP Data Encryption
Ÿ Frequency Band: 2.400~2.4835GHz (Industrial Scientific Medical Band)
Ÿ Modulation: CCK@11/5.5Mbps, DQPSK@2Mbps and DBPSK@1Mbps
Ÿ Radio Technology: Direct Sequence Spread Spectrum (DSSS)
Ÿ Antenna: External detachable dipole antenna (with RP -SMA connector)
Ÿ Connectors: 10/100Mbps RJ-45 x 1
Ÿ Button: Switch between “Head to Head mode (or Ad Hoc mode)” and
Internet Gaming Mode “Infrastructure mode”
Ÿ Power: 12VDC, 0.5A
Ÿ Transmit Power: 18dBm (Typical)
Ÿ LEDs: Power, LAN Link/Activity, Wireless Activity
2
Page 5

Introduction
required (static IP detected
Ad Hoc
Ÿ Dimension: 30(H) x 127(W) x 96(D) mm
Ÿ Temperature:
Operating: 32~131°F (0~55°C)
Storage: -4~158 °F(-20~70°C)
Ÿ Humidity: 10-90% (Noncondensing)
Ÿ Certification : FCC, CE
1.4 Physical Description
Front Panel
On the Wireless Gaming Adapter’s front panel there are LED lights that inform you
of the Wireless Gaming Adapter’s status. Below is an explanation of each LED and
its function.
LED Color Status Description
Power Green Lit Power is supplied.
Flashing System is bootin g
Off No Power.
Status Yellow Flashing No Access Point detected.
Yellow On PC configuration
or multiple access points detected).
Green On Ready to use.
Head 2 Head Green On Working in “Head to Head mode (or
mode)”.
Off Working in “Infrastructure mode”.
3
Page 6
Introduction
Console Green
On A valid link is established with the gaming
console.
Flash It is transmitting or receiving data.
Off No link is established.
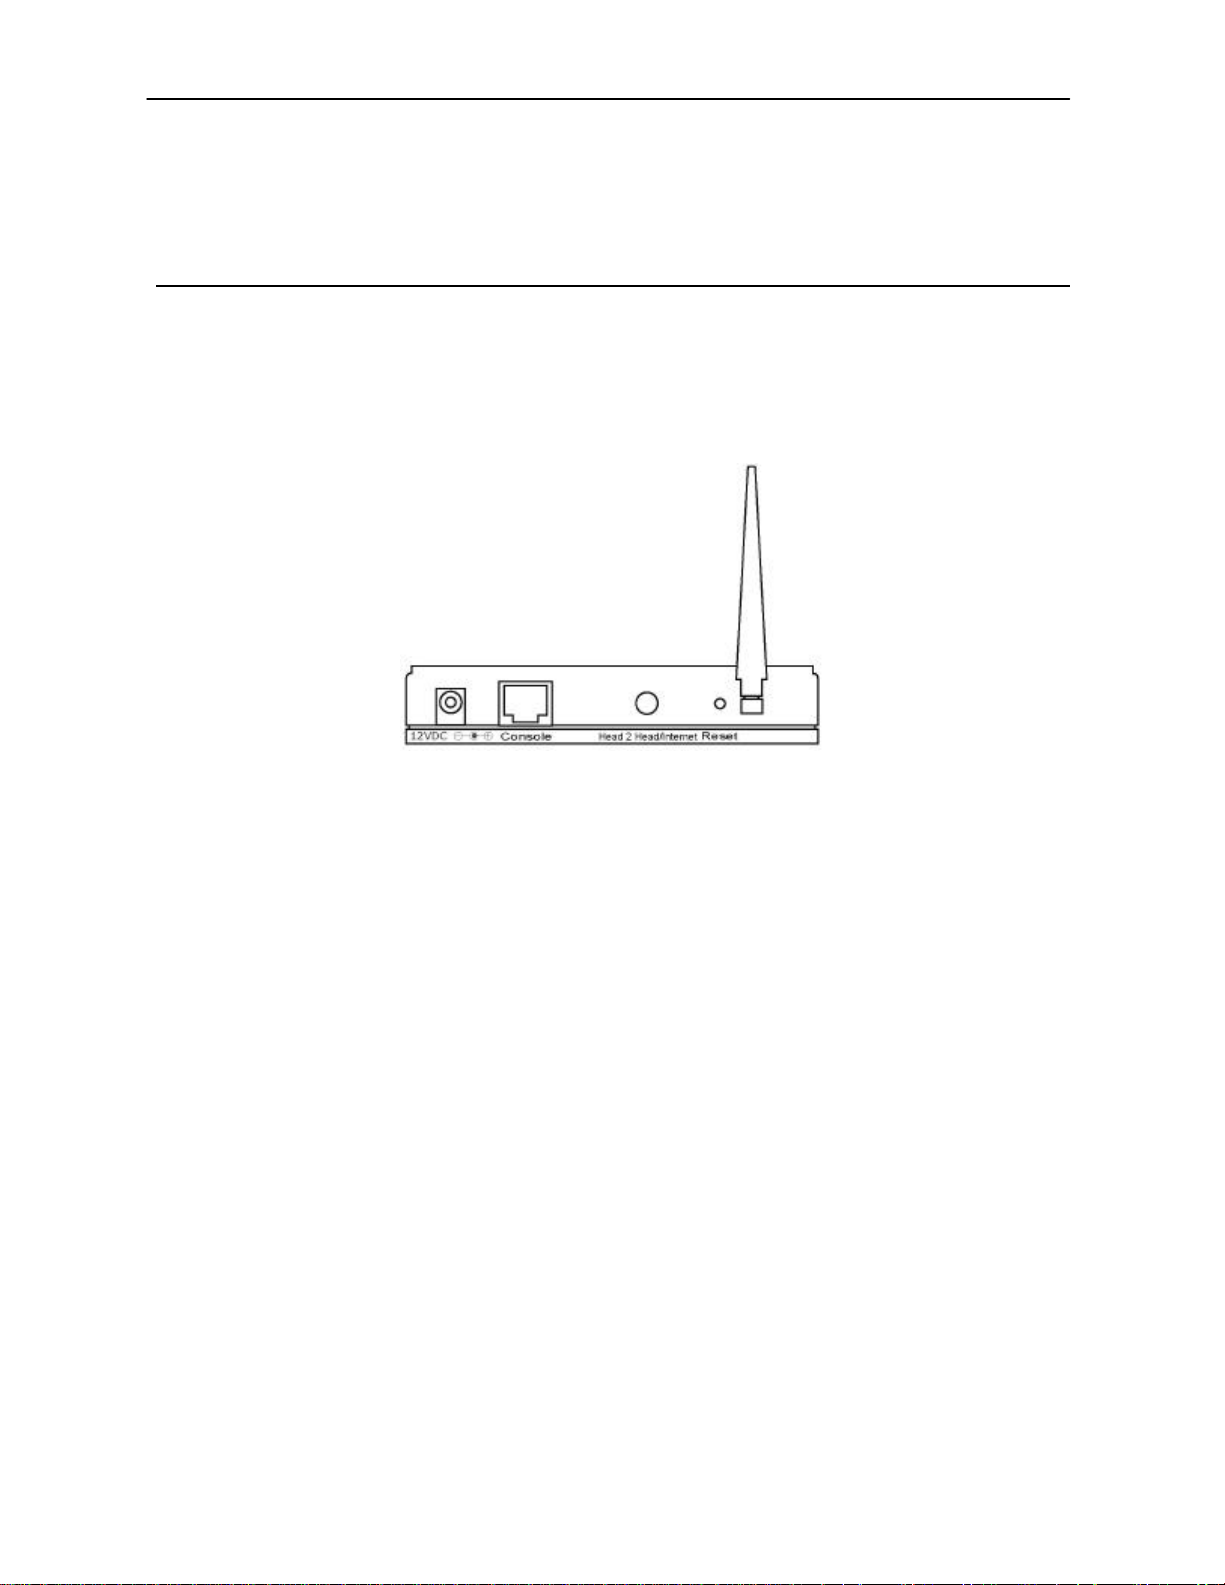
Back Panel
Wireless Gaming Adapter ’s connection ports are located on the back panel. Below is
the description of each connection port.
Ÿ Antenna Connector
The antenna connector is a RP-SMA antenna connector which is compatible with
all Hawking Technology range extending wir eless antennas.
Ÿ DC Adapter Port
Insert the power jack of the power adapter into this port.
Ÿ Console Port
The Wireless Gaming Adapter’s console port is used to connect your gaming
console to the Gaming Adapter. Your gaming console must have a
network/Ethe rnet adapter with a RJ-45 port. (You may connect any Ethernet
ready device to this port however the Gaming Adapter has been designed to work
optimally with gaming consoles)
Ÿ Head 2 Head / Infrastructure button
Press this button to switch between “Head to Head mode” and “Internet Gaming
Mode.
4
Page 7

Ÿ Reset
The Reset button allows you to do one of two things.
1) If problems occur with your Wireless Gaming Adapter, press the reset
button with a pencil tip (for less than 4 seconds) and the Wireless Gaming
Adapter will re-boot itself, keeping your original configurations.
2) If problems persist or you experience extreme problems or you forgot your
password, press the reset button for longer than 4 seconds and the Wireless
Gaming Adapter will reset itself to the factory default settings (warning:
your original configurations will be replaced with the factory default
settings) .
Introduction
5
Page 8
Wireless LAN Access Point Connection
Chapter 2 Quick Installation
2.1 Hardware Installation
1. Connect the Wireless Gaming Adapter to your game console.
Connect one end of standard Ethernet cable to the Wireless Gaming Adapter’s
Console Port and connect the other end of the cable to the network adapter on
your gaming console.
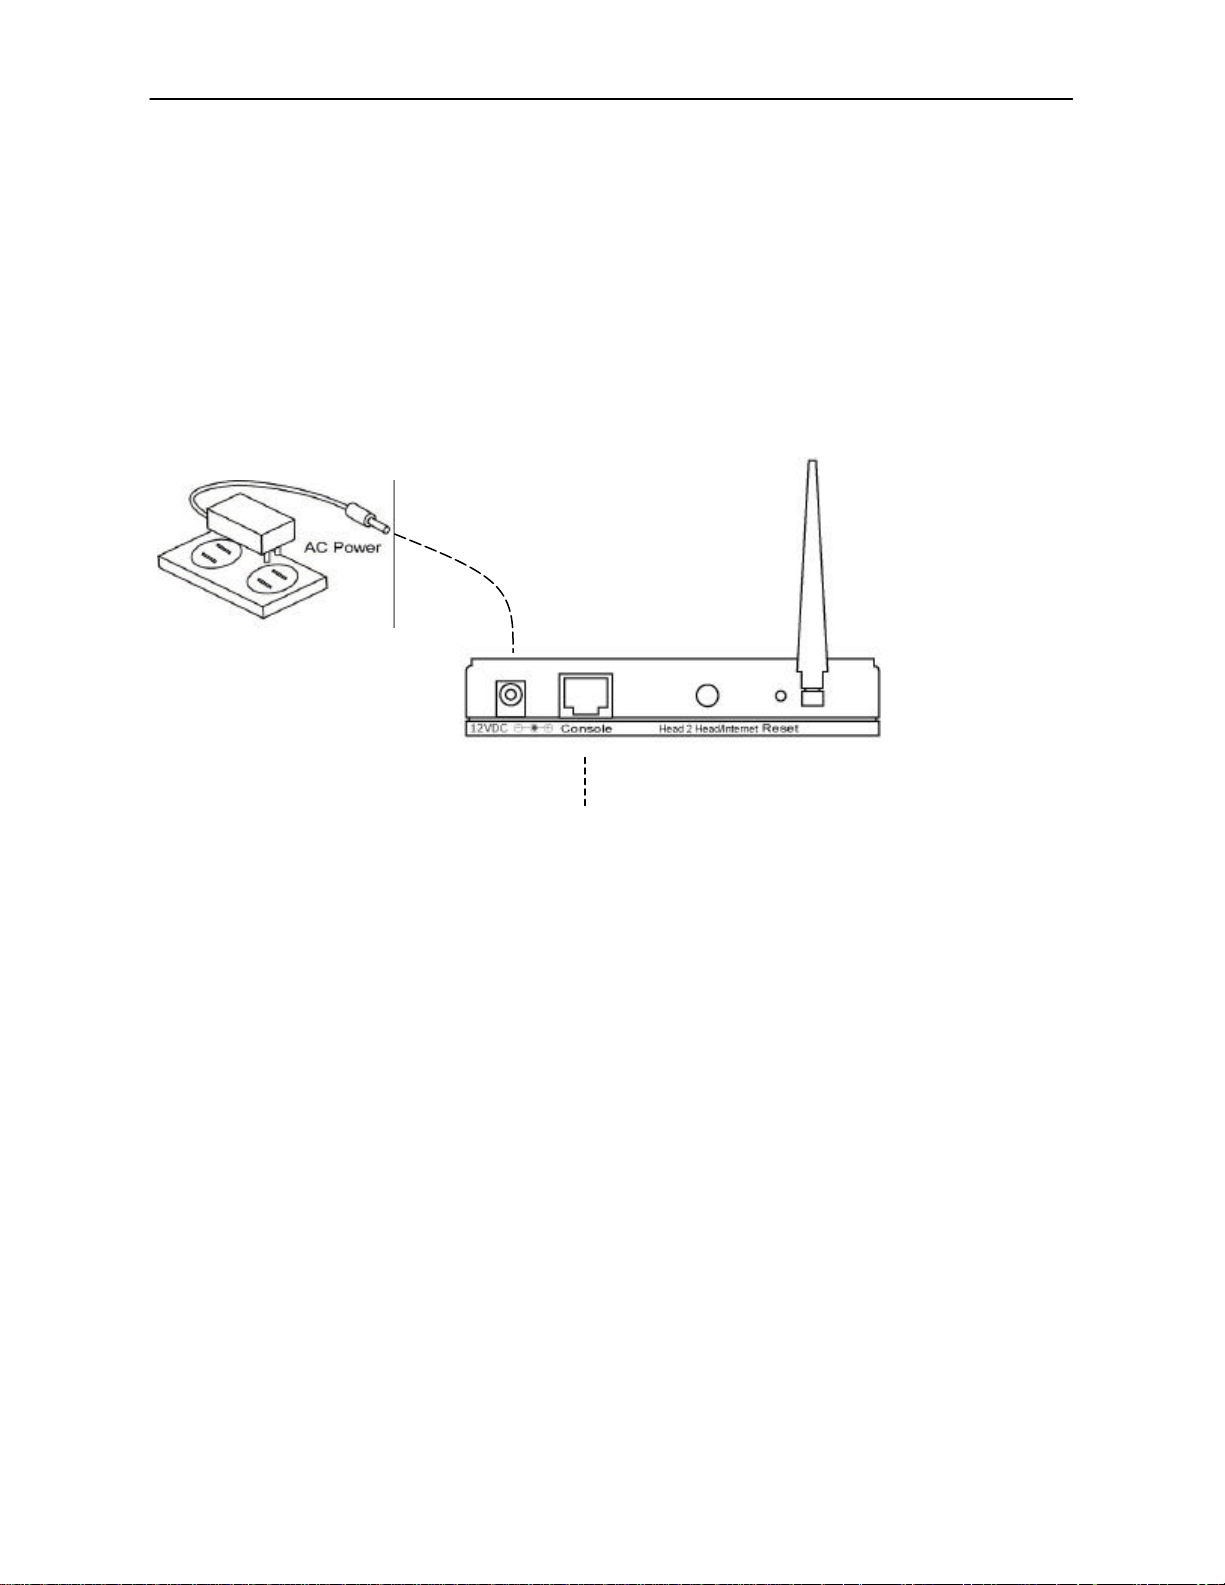
2. Connect the DC Power Adapter to the Wireless Gaming Adapter’s Power
Socket.
Only use the power adapter supplied with the Wireless Gaming Adapter. Using a
different adapter may damage the product.
Connect to a game console
3. Check the LED.
Power on both the Wireless Gaming Adapter and your gaming console. The
“PWR” and “CONSOLE” LEDs of the Wireless Gaming Adapter should be lit.
6
Page 9

Wireless LAN Access Point Connection
The Hardware Installation is complete.
2.2 Getting Started Using Zero Configuration
“Head to Head” Gaming Setup
1. If you have more than one game console and wish to connect these game
consoles together to play head to head games, you must switch the Wireless
Gaming Adapter to “Head to Head mode”. If the “Head 2 Head” LED is lit, then
the Wireless Gaming Adapter is already in “Head to Head mode.” If the “Head 2
Head” LED is not lit, press the “Head 2 Head/Infrastructure” button once and the
Wireless Gaming Adapter will switch to “Head to Head mode” automatically.
Once both units are in “Head to Head” gaming mode they should be able to
communicate with one another and a link can be established between multiple
gaming consoles with the Hawking Gaming Adapter. (Note: all gaming
consoles must be in wireless range of one another.)
2. When the Wireless Gaming Adapters are successfully connected, the “STATUS”
LED will be on and the led color should be green. If the STATUS led blinks
orange please skip to Chapter 3 in this manual for configuration via PC.
3. After all the Wireless Gaming Adapters are set to “Head to Head mode” and are
connected to your gaming consoles with a green Status led , you can start to enjoy
head to head games wirelessly.
Internet Gaming Mode Setup
1. Check to see if your gaming console’s network adapter is already configured for
internet gaming. (You can check this by connecting an Ethernet cable directly to
your console to connect it to your network. If you are able to play online games
then your network adapter is already configured) If your gaming console’s
network adapter is not configured for your network you must do so first before
continuing this installation procedure. Please read your manufacturers
instruction manual to configure your network adapter.
7
Page 10

Wireless LAN Access Point Connection
2. Connect your Wireless Gaming Adapter to your gaming console’s network
adapter port using a standard Ethernet cable.
3. Power On both the gaming console and your Gaming Adapter.
4. Check to see if the Head to Head LED on your gaming console is lit. If it is push
the Internet/Head to Head switch in the back of the Gaming Adapter to switch
the mode back to Internet Gaming Mode.
5. When the Wireless Gaming Adapter is successfully connected to your wireless
LAN, the “STATUS ” LED will have a green lit led. If it does not, or blinks
orange, please skip to Chapter 3 in this manual to configure your Gaming
Adapter for your wireless network using your PC.
6. After the Wireless Gaming Adapter been set to “Internet mode ” and is connected
to your gaming console, you may start to enjoy your favorite online games
wirelessly.
8
Page 11
Wireless LAN Access Point Configuration
Chapter 3 Windows Setup Wizard
The Wireless Gaming Adapter CD-Rom includes a setup wizard that will guide you
through the configuration process step by step in case are having problems with the
Zero Configuration feature. Please follow the instructions below to get started:
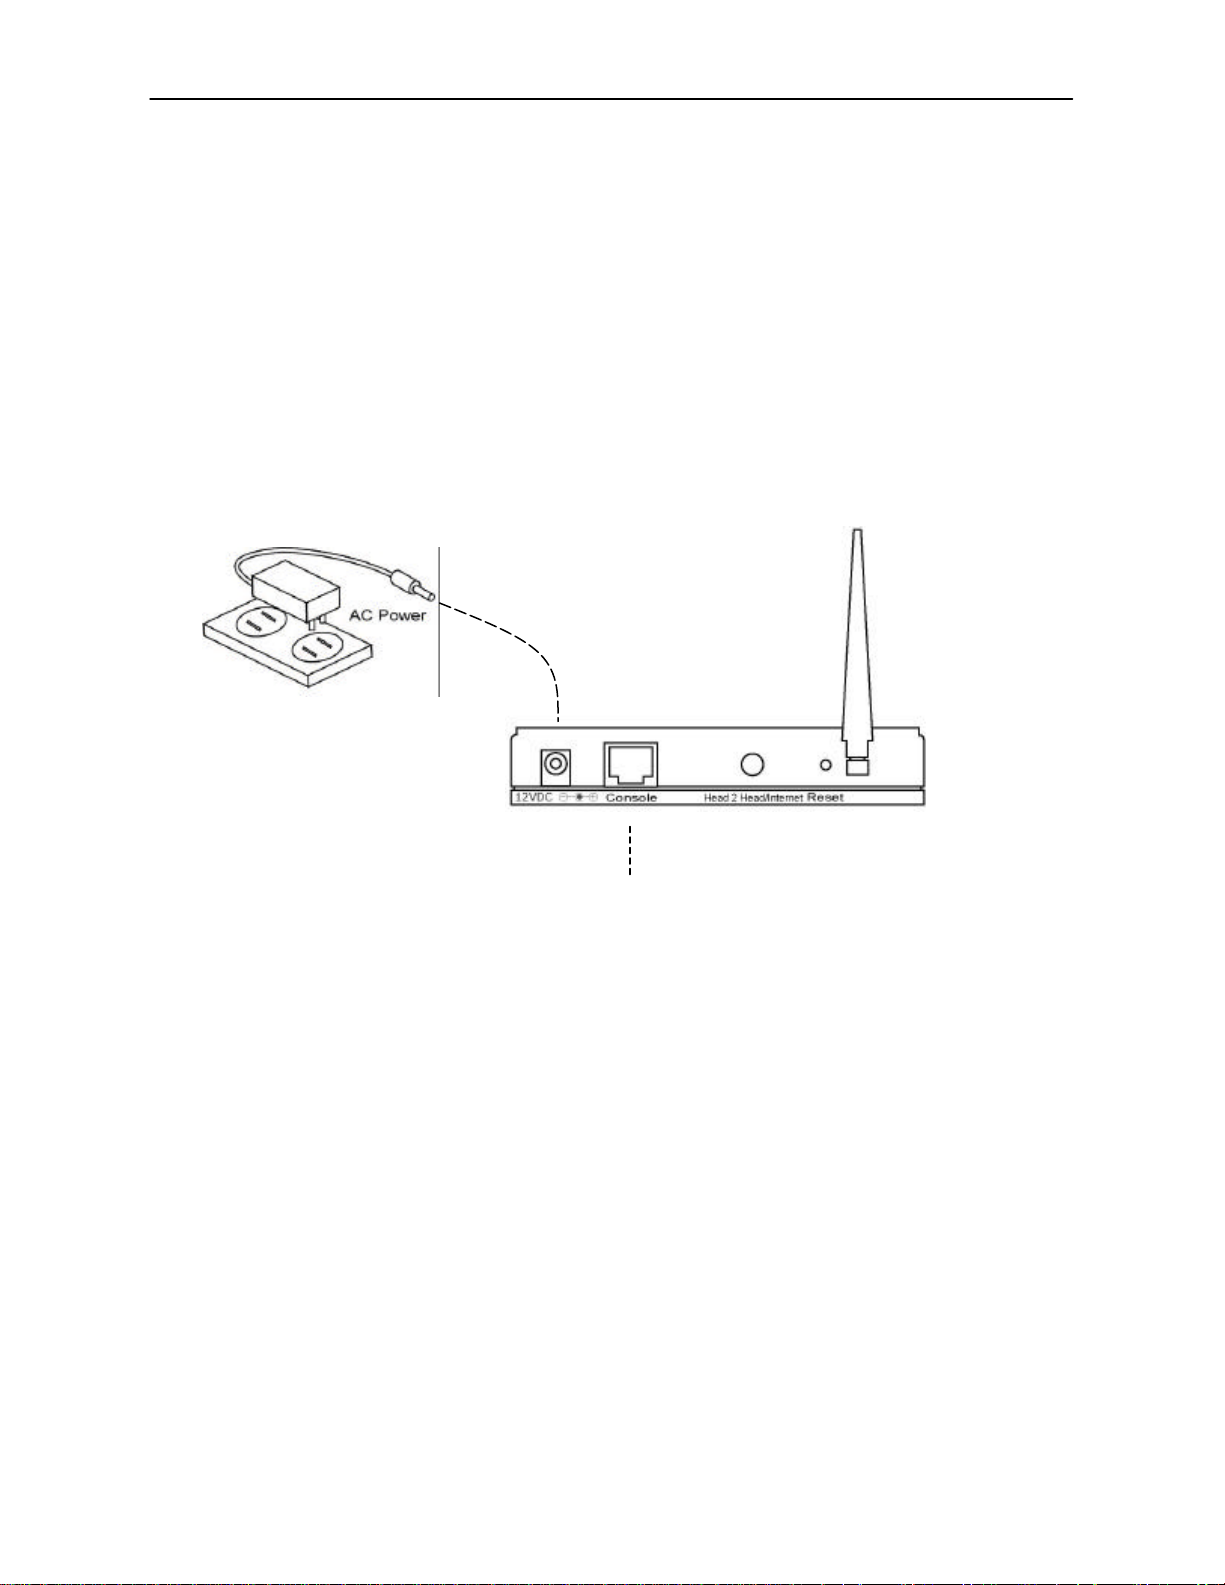
1. Follow the picture below to correctly connect the Wireless Gaming Adapter to
your PC.
Connect a Ethernet cable from the console port on the Gaming Adapter to the
network adapter port on your PC.
9
Page 12
Wireless LAN Access Point Configuration
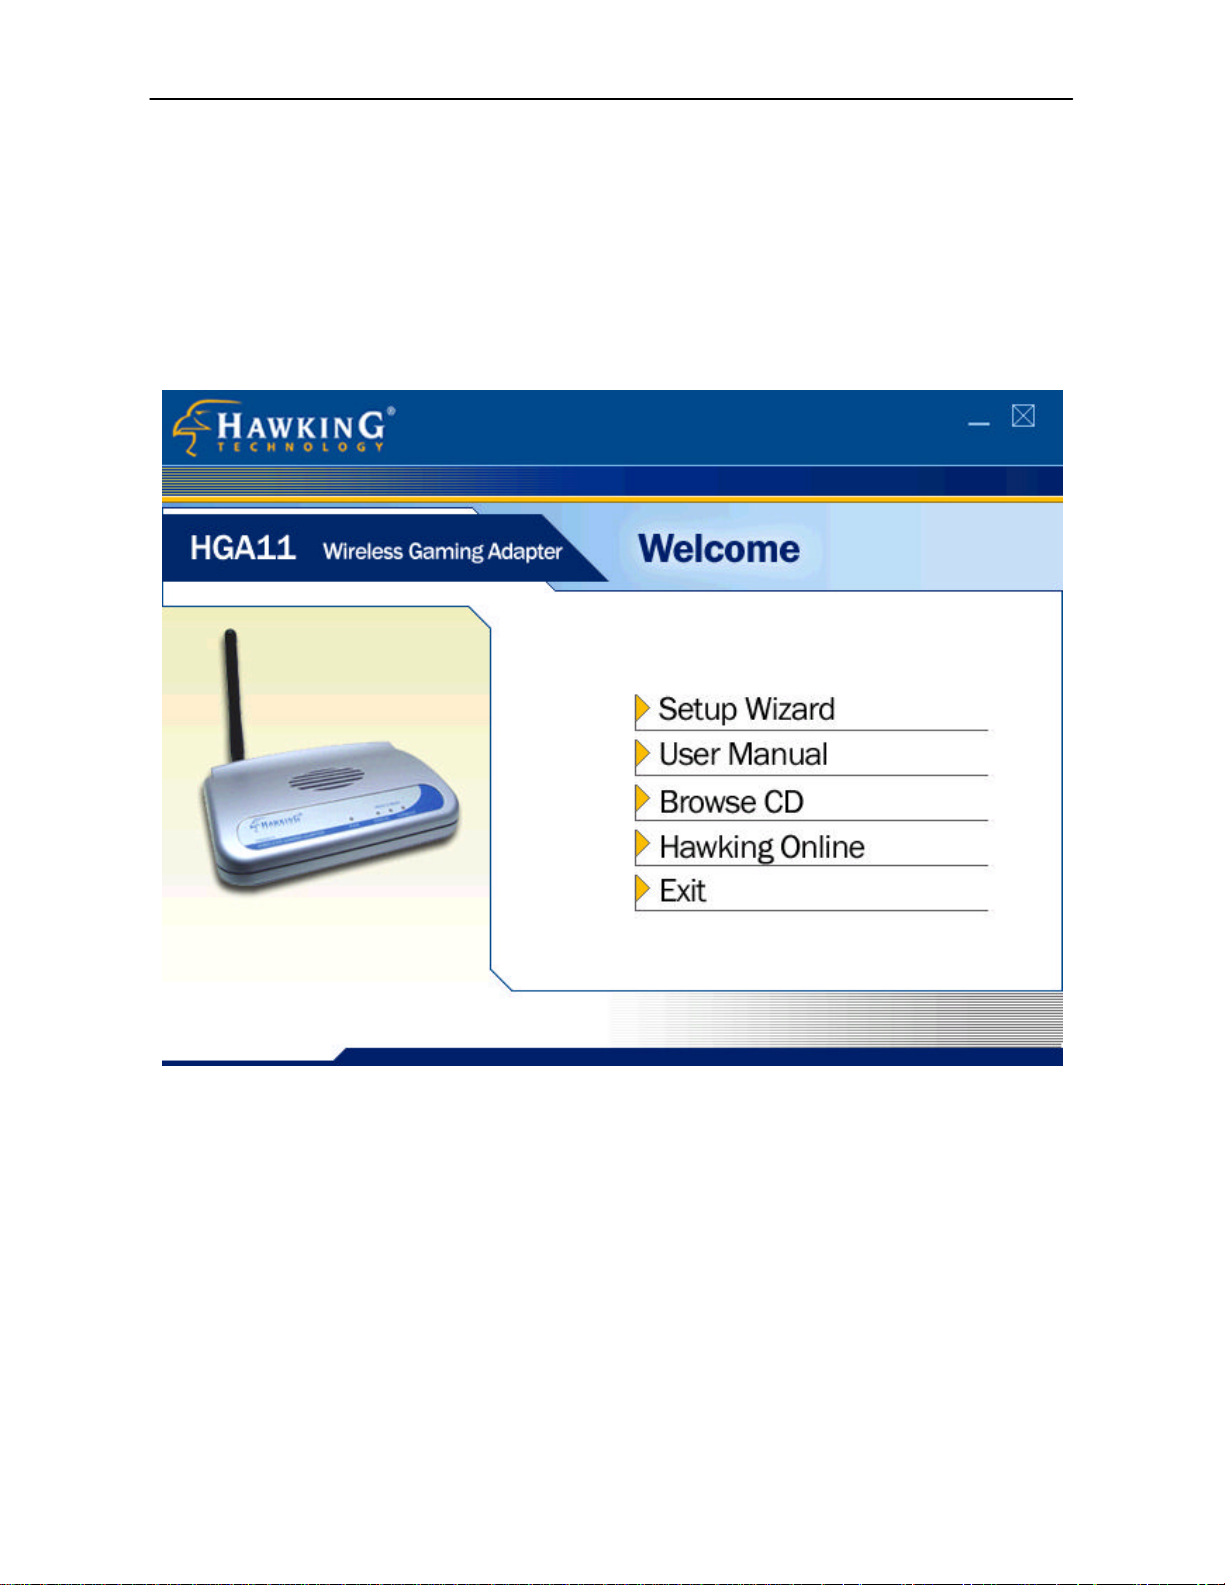
2. Insert the included Setup Wizard CD into the CD-Rom drive on your PC. The
installation program should automatically load and the window below should
appear. If the installation program is not executed automatically, please hit
START on your PC and then click on RUN. In the field please type:
D:\setup.exe (if D: is not the drive of your CD-Rom drive please replace it with
the correct letter)
3. Click “Setup Wizard” to start the setup process.
10
Page 13
Wireless LAN Access Point Configuration
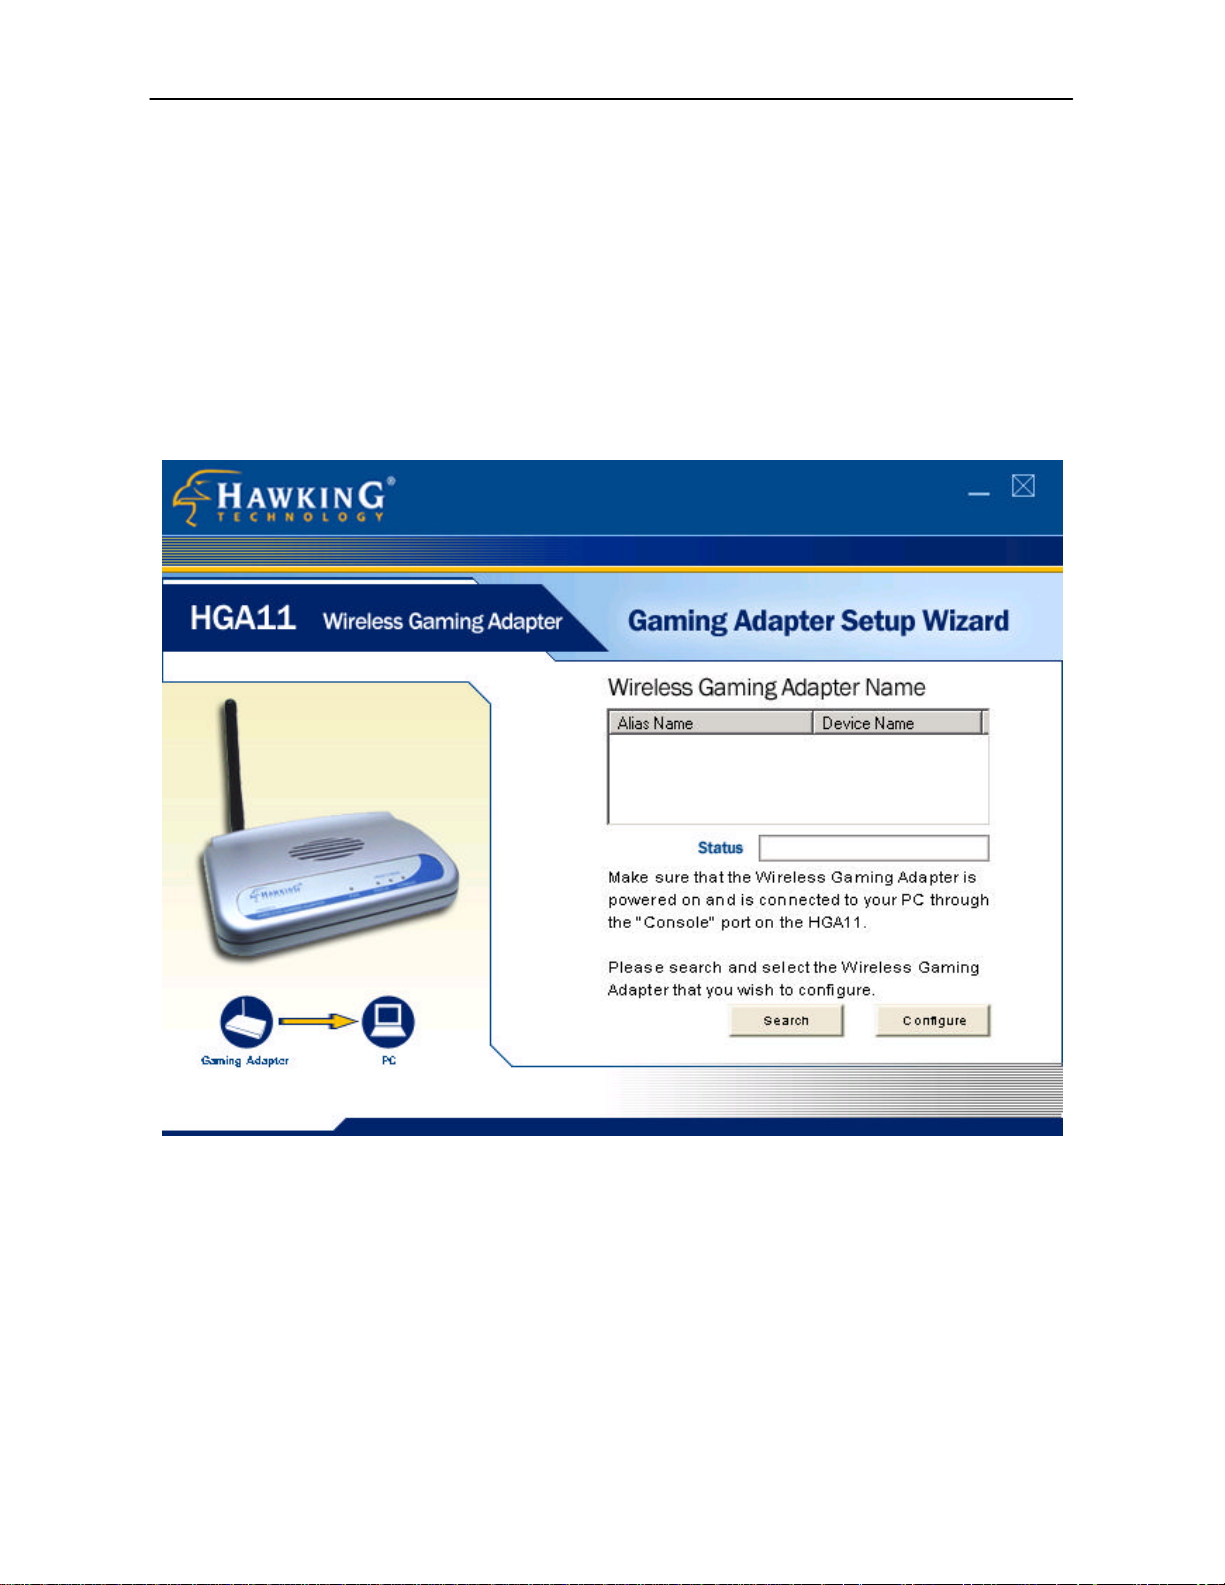
4. Click “Search” and the setup wizard will start to search for all accessible
Wireless Gaming Adapters. After a few seconds, you can see a list of all
Wireless Gaming Adapters attached to your PC or network. Select the one you
want to configure and click “Configure”. If the search cannot find your device
please check to see if the Wireless Gaming Adapter is setup correctly and then
click search again.
11
Page 14

Wireless LAN Access Point Configuration
5. Select the mode for the Wireless Gaming Adapter. If you wish to use the
Wireless Gaming Adapter for Internet/Online gaming, select the “Internet
Gaming Mode (Infrastructure)” and click “Next” and jump to step 6. This mode
allows the Wireless Gaming Adapter to connect to an access point, and through
this access point connect to the Internet. If you wish to use the Gaming Adapter
for head to head game, select the “Head to Head Gaming Mode (Ad Hoc) ” and
click “Next” and jump to step 8. This mode lets the Wireless Gaming Adapter
connect directly to other Wireless Gaming Adapters in the same wireless radius
for head to head gaming.
12
Page 15

Wireless LAN Access Point Configuration
6. In the “Internet Gaming Mode (Infrastructure)”, the Wireless Gaming Adapter
has to connect to an access point before going to the Internet. You can select
“Scan For Your Local Wireless Network” to let the Wireless Gaming Adapter
automatically scan for an available access point and go on to the next step or if
already know the SSID of the available access point, you also can select “Assign
Your Wireless Network Manually” and enter the SSID of the access point
manuallay and jump to step 10.
13
Page 16

Wireless LAN Access Point Configuration
7. The Wireless Gaming Adapter automatically scans for all available access points
and lists their SSID. If the Wireless Gaming Adapter does not find any access
points, check to see if your wireless network is setup correctly and then click
“Scan ” to let it search again. When an access point has been found, select and
highlight the access point and click “Next”. Jump to step 10.
14
Page 17

Wireless LAN Access Point Configuration
8. In “Head to Head Gaming Mode (Ad Hoc)”, the Wireless Gaming Adapter can
connect directly to another Wireless Gaming Adapter or other wireless devices
using Ad Hoc (“Head to Head”) mode. You may select “Scan For Your Local
Wireless Network” to let the Wireless Gaming Adapter scan for all wireless
devices that are available direct connection and jump to step 9, or you may
manually input the SSID of the wireless device you wish to connect to by
selecting “Assign Your Wireless Network Manually” You must then enter the
ID of your wireless network and select an operating channel that is the same for
all devices you are directly connecting to. You also can select “Automatically
Select Channel” to let the Wireless Gaming Adapter automatically scan and
select a suitable channel.
15
Page 18

Wireless LAN Access Point Configuration
9. The Wireless Gaming Adapter automatically scans for all available wireless
devices, including Wireless Gaming Adapters using Ad Hoc mode and lists their
SSIDs. If the Wireless Gaming Adapter does not find any wireless devices, click
“Scan ” to let it search again. You can select one wireless device you want to
connect to and click “Next”. If you wish to connect to multiple devices, they
must all have the same SSID’s.
16
Page 19

Wireless LAN Access Point Configuration
10. The IP Address of your Wireless Gaming Adapter is used to help your wireless
network determine where to send the data to and from. You may let the wizard
automatically assign an IP address (recommended) from your DHCP server or
you can manually set your IP address in the case that your network is using static
IP’s.
17
Page 20

Wireless LAN Access Point Configuration
11. WEP Encryption is used to secure the data communication of your wireless
network. If yo u do not wish to use WEP, select “OFF” and click “Next”. If you
wish to use the WEP to protect your wireless network, click “ON” and select
correct key length, 64 bit (less encryption) or 128 bit (more encryption), and
enter the WEP Key used in your Access Point and then click “Next”. If you are
unsure what the WEP Key is for your Access Point please ask your network
administrator or refer to the user’s manual of your wireless access point.
18
Page 21

Wireless LAN Access Point Configuration
12. This page provides you with a summary of the final settings on your Wireless
Gaming Adapter. Please double check to see that it is all correct. If so click
Finish to complete your installation.
13. You have finished the configuration for the Wireless Gaming Adapter.
19
Page 22

Wireless LAN Access Point Configuration
Chapter 4 Web Configuration
4.1 Getting Started
The HG A11 Wireless Gaming Adapter is capable of configuration via your web
browser. This feature is used for more advanced configurations and adjustments. We
recommend that you use a static IP on your Wireless Gaming Adapter if you plan to
configure your HGA11 via the web.
From Wired Station
1. Make sure your wired station is in the same subnet as the Gaming Adapter.
The default IP Address and Sub Mask of the Gaming Adapter is:
Default IP Address: 192.168.1.253
Default Subnet: 255.255.255.0
Configure your PC to be in the same subnet as the Access Point.
1a) Windows 95/98/Me
1. Click the Start button and select Settings, then click Control Panel. The Control Panel
window will appear.
Double-click Network icon. The Network window will appear.
2.
3. Check your list of Network Components. If TCP/IP is not installed, click the Add button to
install it now. If TCP/IP is installed, go to step 6.
4. In the Network Component Type dialog box, select Protocol and click Add button.
5. In the Select Network Protocol dialog box, select Microsoft and TCP/IP and then click the
OK button to start installing the TCP/IP protocol. You may need your Windows CD to
complete the installation.
6. After installing TCP/IP, go back to the Network dialog box. Select TCP/IP from the list of
Network Components and then click the Properties button.
7. Check each of the tabs and verify the following settings:
• Bindings: Check Client for Microsoft Networks and File and printer sharing for
Microsoft Networks.
• Gateway: All fields are blank.
• DNS Configuration: Select Disable DNS.
• WINS Configuration: Select Disable WINS Resolution.
20
Page 23

Wireless LAN Access Point Configuration
• IP Address : Select Specify an IP Address. Specify the IP Address and Subnet Mask
as following example.
ü IP Address: 192.168.1.3 (any IP address within 192.168.1.2~192.168.2.252 is
available , do not setup 192.168.1.253)
ü Subnet Mask: 255.255.255.0
8. Reboot the PC. Your PC will now have the IP Address you specified.
1b) Windows 2000
1. Click the Start button and select Settings, then click Control Panel. The Control Panel
window will appear.
2. Double-click Network and Dial-up Connections icon. In the Network and Dial-up
Connection window, double-click Local Area Connection icon. The Local Area Connection
window will appear.
3. In the Local Area Connection window, click the Properties button.
4. Check your list of Network Components. You should see Internet Protocol [TCP/IP] on
your list. Select it and click the Properties button.
5. In the Internet Protocol (TCP/IP) Properties window, select Use the following IP address
and specify the IP Address and Subnet mask as following.
ü IP Address: 192.168.1.3 (any IP address within 192.168.1.2~192.168.2.252 is
available, do not setup 192.168.1.253)
ü Subnet Mask: 255.255.255.0
6. Click OK to confirm the setting. Your PC will now have the IP Address you specified.
1c) Windows NT
Click the Start button and select Settings, then click Control Panel. The Control Panel
1.
window will appear.
2. Double-click Network icon. The Network window will appear. Select the Protocol tab from
the Network window.
3. Check if the TCP/IP Protocol is on your list of Network Protocols. If TCP/IP is not installed,
click the Add button to install it now. If TCP/IP is installed, go to step 5.
4. In the Select Network Protocol window, select the TCP/IP Protocol and click the Ok
button to start installing the TCP/IP protocol. You may need your Windows CD to
complete the installation.
5. After you install TCP/IP, go back to the Network window. Select TCP/IP from the list of
Network Protocols and then click the Properties button.
6. Check each of the tabs and verify the following settings:
21
Page 24

Wireless LAN Access Point Configuration
• IP Address: Select Specify an IP address. Specify the IP Address and Subnet Mask
as following example.
ü IP Address: 192.168.1.3 (any IP address within 192.168.1.2~192.168.1.253 is
available, do not setup 192.168.1.253)
ü Subnet Mask: 255.255.255.0
• DNS: Let all fields are blank.
• WINS: Let all fields are blank.
• Routing: Let all fields are blank.
7. Click OK to confirm the setting. Your PC will now have the IP Address you specified.
2. Enter 192.168.1.253 in the address bar of your Web Browser to get into the
Gaming Adapter’s web-configuration tool.
3. A screen will appear and request you to enter user name and password. The
default user name and password is as follows.
User Name: admin
Password: 1234
Enter the default user name and password, then press OK.
4. You may now use the web-configuration tool to configure you Wireless
Gaming Adapter.
22
Page 25

Wireless LAN Access Point Configuration
4.2 Configuring the Gaming Adapter
4.2.1 Status and Information
On this screen, you can see the general information of the Gaming Adapter including
Alias Name, Firmware Version, ESSID, Channel Number, Status, IP Address, MAC
Address, etc.
23
Page 26

Wireless LAN Access Point Configuration
4.2.2 Wireless Setting
This Gaming Adapter provides both “Ad Hoc mode” and “Infrastructure mode”.
“Ad-Hoc” Mode allows the Gaming Adapter to connect directly (Head to Head) to
other wireless devices (i.e. Bridges, Wireless PC Cards, PCI Cards, Gaming Adapters
etc..) that have the same Wireless ID (SSID). “Infrastructure mode” lets you connect
your wireless network through a wireless access point. This is normally used for
internet access and WLAN/LAN access or online gaming.
Parameter Description
Mode The operation mode of this Gaming Adapter. You can select “Ad Hoc ” if
you use peer-to-peer wireless LAN connection to play head to head
games. You can select “Infrastructure” if you are using a access point to
build up a wireless LAN.
24
Page 27

Wireless LAN Access Point Configuration
Alias Name The alias name of this Gaming Adapter.
ESSID The ESSID (up to 31 printable ASCII characters) is the unique name
identified in a WLAN. The ID prevents the unintentional merging of two
co-located WLANs. Please make sure that the ESSID of all stations in
the same WLAN network are the same. The default ESSID is “default”.
Channel Number Select the appropriate channel from the list provided to correspond with
your network settings. Channels differ from country to country.
Channel 1-11 (North America)
Channel 1-14 (Japan)
Channel 1-13 (Europe)
There are 14 channels available.
Click Apply button at the bottom of the screen to save the above configurations. You can now configur e
other advance sections or start using the Gaming Adapter.
25
Page 28

Wireless LAN Access Point Configuration
Adapter to associate with it without WEP encryption. When you select
4.2.3 Advanced Setting
You can configure the advanced settings of the Gaming Adapter in the “Advanced
Settings” page. The parameters include Authentication Type, Fragment Threshold,
RTS Threshold, Beacon Interval, Data Rate, Preamble Type, Broadcast ESSID. You
should not change these parameters unless you know what effect the changes will
have on this Gaming Adapter and your network.
Parameter Description
Authentication Type There are two authentication types: “Open System” and “Shared Key”.
When you select “Open System ”, your access point allows this Gaming
26
Page 29

Wireless LAN Access Point Configuration
“Shared Key ”, you should also setup your WEP key in the “Encryption”
page. This Gaming Adapter will use WEP encryption in the authentication
phase to associate with your access point. If you select “Both”, the
Gaming Adapter can associate with your access point or other wireless
devices by using any one of these two authentication types.
Fragment Threshold
“Fragment Threshold” specifies the maximum size of packet during the
fragmentation of data to be transmitted. If you set this value too low, it will
result in poor performance.
RTS Threshold When the packet size is smaller the RTS threshold, the Gaming Adapter
will not use the RTS/CTS mechanism to send this packet.
Beacon Interval The interval of time that this Gaming Adapter broadcast s a beacon.
Beacon is used to synchronize the wireless network.
Data Rate
The “Data Rate” is the rate this Gaming Adapter uses to transmit data
packets. The Gaming Adapter will use the highest possible selected
transmission rate to transmit the data packets.
Preamble Type Preamble type defines the length of CRC block in the frames during the
wireless communication. “Short Preamble” is suitable for high traffic
wireless network. “Long Preamble” can provide more reliable
communication.
Broadcast ESSID If you enable “Broadcast ESSID”, every wireless station located within
the coverage of this Gaming Adapter can discover this Gaming Adapter
easily. Disabling “Broadcast ESSID” can provide better security.
Click Apply button at the bottom of the screen to save the above configurations. You can now configure
other advance sections or start using the Gaming Adapter.
27
Page 30

Wireless LAN Access Point Configuration
4.2.4 Encryption
WEP is an authentication algorithm, which protects authorized Wireless LAN users
against eavesdropping. The Authentication type and WEP key of wireless stations
must be the same on all stations of your wireless network to permit successful
communication. This Gaming Adapter supports 64/128-bit WEP Encryption. With
this function, your data will be transmitted over the wireless network securely.
Parameter Description
WEP Mode You can select the 64 -bit or 128-bit to encrypt transmitted data. Larger
WEP key length will provide higher level of security, but the throughput
28
Page 31

Wireless LAN Access Point Configuration
will be lower. You also can select Disable to transmit data without
encryption.
29
Page 32

Wireless LAN Access Point Configuration
Parameter Description
Key Format You may select to select ASCII Characters/”Paraphrase” (alphanumeric
format) or Hexadecimal Digits (in the “A-F”, “a-f” and “0-9” range) to be
the WEP Key. For example:
ASCII Characters: guest
Hexadecimal Digits: 12345abcde
Key Length You may disable or enable the WEP function from the setting item. The
selections in the setting item are changed based on the key format.
Key 1 - Key 4
The WEP keys are used to encrypt data transmitted in the wireless
network. Fill the text box by following the rules belo w.
64-bit WEP: input 10-digit Hex values (in the “A -F”, “a-f” and “0-9” range)
or 5-digit ASCII character as the encryption keys.
30
Page 33

Wireless LAN Access Point Configuration
128-bit WEP: input 26-digit Hex values (in the “A-F”, “a-f” and “0-9”
range) or 10 -digit ASCII characters as the encryption keys .
Default Key Select one of the four keys to encrypt your data. Only the key you select
it in the “Default key” will take effect.
Click Apply button at the bottom of the screen to save the above configurations. You can now configure
other advance sections or start using the Gaming Adapter.
31
Page 34

Wireless LAN Access Point Configuration
4.2.5 Wireless Site Survey
“Wireless Site Survey” searches for all available access points near by. You can
select one access point listed in this table.
32
Page 35

Wireless LAN Access Point Configuration
4.2.6 System Utility
From here, you can define the Gaming Adapter’s IP Address and Login Password.
Parameter Description
Current Password
New Password Enter the password (up to 15-digit alphanumeric string) you want to login
Re-Enter Password Reconfirm the password (up to 15-digit alphanumeric string) you want to
33
Enter the current password (up to 15 -digit alphanumeric string) of the
Gaming Adapter. The default password for the Gaming Adapter is 1234.
Note that the password is case-sensitive.
to the Gaming Adapter. Note that the password is case-sensitive.
Page 36

Wireless LAN Access Point Configuration
login to the Gaming Adapter. Note that the password is case-sensitive.
Management IP You can select “Obtain an IP address automatically” to let this Gaming
Adapter get an IP from DHCP server. If you want to manual assign an IP
to this Gaming Adapter, select “Use the following IP address”.
IP Address Designate the Gaming Adapter’s IP Address. This IP Address should be
unique in your network. The default IP Address is 192.168.1.253.
Subnet Mask Specify a Subnet Mask for your LAN segment.
Click Apply button at the bottom of the screen to save the above configurations. You can now configure
other advance sections or start using the Gaming Adapter.
34
Page 37

Wireless LAN Access Point Configuration
4.2.7 Configuration Tool
The Configuration Tools screen allows you to save (Backup ) the Gaming Adapter ’s
current configuration setting. Saving the configuration settings provides an added
protection and convenience should problems occur with the Gaming Adapter and you
have to reset to factory default. When you save the configuration setting (Backup)
you can re-load the saved configuration into the Gaming Adapter through the
Restore selection. If extreme problems occur you can use the Restore to Factory
Default selection, this will set all configurations to its original default settings (e.g.
when you first purchased the Gaming Adapter ).
Parameter Description
Configuration Tools Use the " Backup" tool to save the Gaming Adapter’s current
configuration to a file named "config.bin" on your PC. You can then use
35
Page 38

Wireless LAN Access Point Configuration
the "Restore" tool to upload and restore the saved configuration to the
Gaming Adapter. Alternatively, you can use the "Restore to Factory
Default" tool to force the Gaming Adapter to perform a power reset and
restore the original factory settings.
36
Page 39

Wireless LAN Access Point Configuration
4.2.8 Firmware Upgrade
This page allows you to upgrade the Gaming Adapter’s firmware.
Parameter Description
Firmware Upgrade This tool allows you to upgrade the Gaming Adapter’s system firmware.
To upgrade the firmware of your Gaming Adapter, you need to download
the firmware file to your local hard disk, and enter that file name and path
in the appropriate field on this page. You can also use the Browse button
to find the firmware file on your PC. Please reset the Gaming Adapter
when the upgrade process is complete.
Once you’ve selected the new firmware file, click Apply button at the bottom of the screen to start the upgrade
process. (You may have to wait a few minutes for the upgrade to complete). Once the upgrade is c omplete you
can start using the Gaming Adapter.
37
Page 40

Wireless LAN Access Point Configuration
4.2.9 Reset
You can reset the Gaming Adapter’s system should any problem exist. The reset
function essentially Re-boots your Gaming Adapter’s system.
Parameter Description
Reset I n the event that the system stops responding correctly or in some way stops
functioning, you can perform a reset. Your settings will not be changed. To
perform the reset, click on the Apply button. You will be asked to confirm
your decision. Once the reset process is complete you may start using the
Gaming Adapter again.
38
Page 41

Troubleshooting
Chapter 5 Troubleshooting
This chapter provides solutions to problems usually encountered during the
installation and operation of the Gaming Adapter.
1. How to manually find your PC’s IP and MAC Address?
1) In Windows, open the Command Prompt program
2) Type Ipconfig /all and Enter
Ÿ
Your PC’s IP address is the one entitled IP address
Ÿ Your PC’s MAC Address is the one entitled Physical Address
2. What is Ad-hoc?
An Ad-hoc wireless LAN is a group of computers, each with a WLAN adapter,
connected as an independent wireless LAN. No wireless access points are
required.
3. What is Infrastructure?
An integrated wireless and wired LAN is called an Infrastructure configuration.
4. What is BSS ID?
A group of wireless stations and an Access Point compose a Basic Service Set
(BSS). Computers in a BSS must be configured with the same BSSID.
5. What is ESSID?
An Infrastructure configuration could also support roaming capability for mobile
workers. More than one BSS can be configured as an Extended Service Set (ESS).
Users within an ESS could roam freely between BSSs while maintaining a
continuous connection to the wireless network stations and the Wireless LAN
Access Points.
6. Can data be intercepted while transmitting through the air?
WLAN features two-fold protection in security. On the hardware side, as with
Direct Sequence Spread Spectrum technology, it has the inherent scrambling
39
Page 42

Troubleshooting
security feature. On the software side, the WLAN series offers the encryption
function (WEP) to enhance security and access control.
7. What is WEP?
WEP stands for Wired Equivalent Privacy, a data privacy mechanism based on a
64(40)-bit shared key algorithm.
8. What is a MAC Address?
The Media Access Control (MAC) address is a unique number assigned by the
manufacturer to any Ethernet networking device, such as a network adapter, that
allows the network to identify it at the hardware level. For all practical purposes,
this number is usually permanent. Unlike IP addresses, which can change every
time a computer logs on to the network, the MAC address of a device stays the
same, making it a valuable identifier for the network.
40
 Loading...