

Page 1
QUICK INSTALLATION GUIDE
Part No. HAWNR1 Hi-GainTM Wireless-150N Router with Range Amplifier
Start Here
1 Check Package Contents & Requirements
Package Contents
•1x Wireless-150N Router
with Range Amplifier
•1x Power Adapter
•1x Setup CD-ROM
•1x Quick Installation Guide (QIG)
•1x Ethernet Cable
•2x Dipole Antennas
2 Overview
Requirements
• Internet Access
• PC/Mac Computer
• Power Outlet
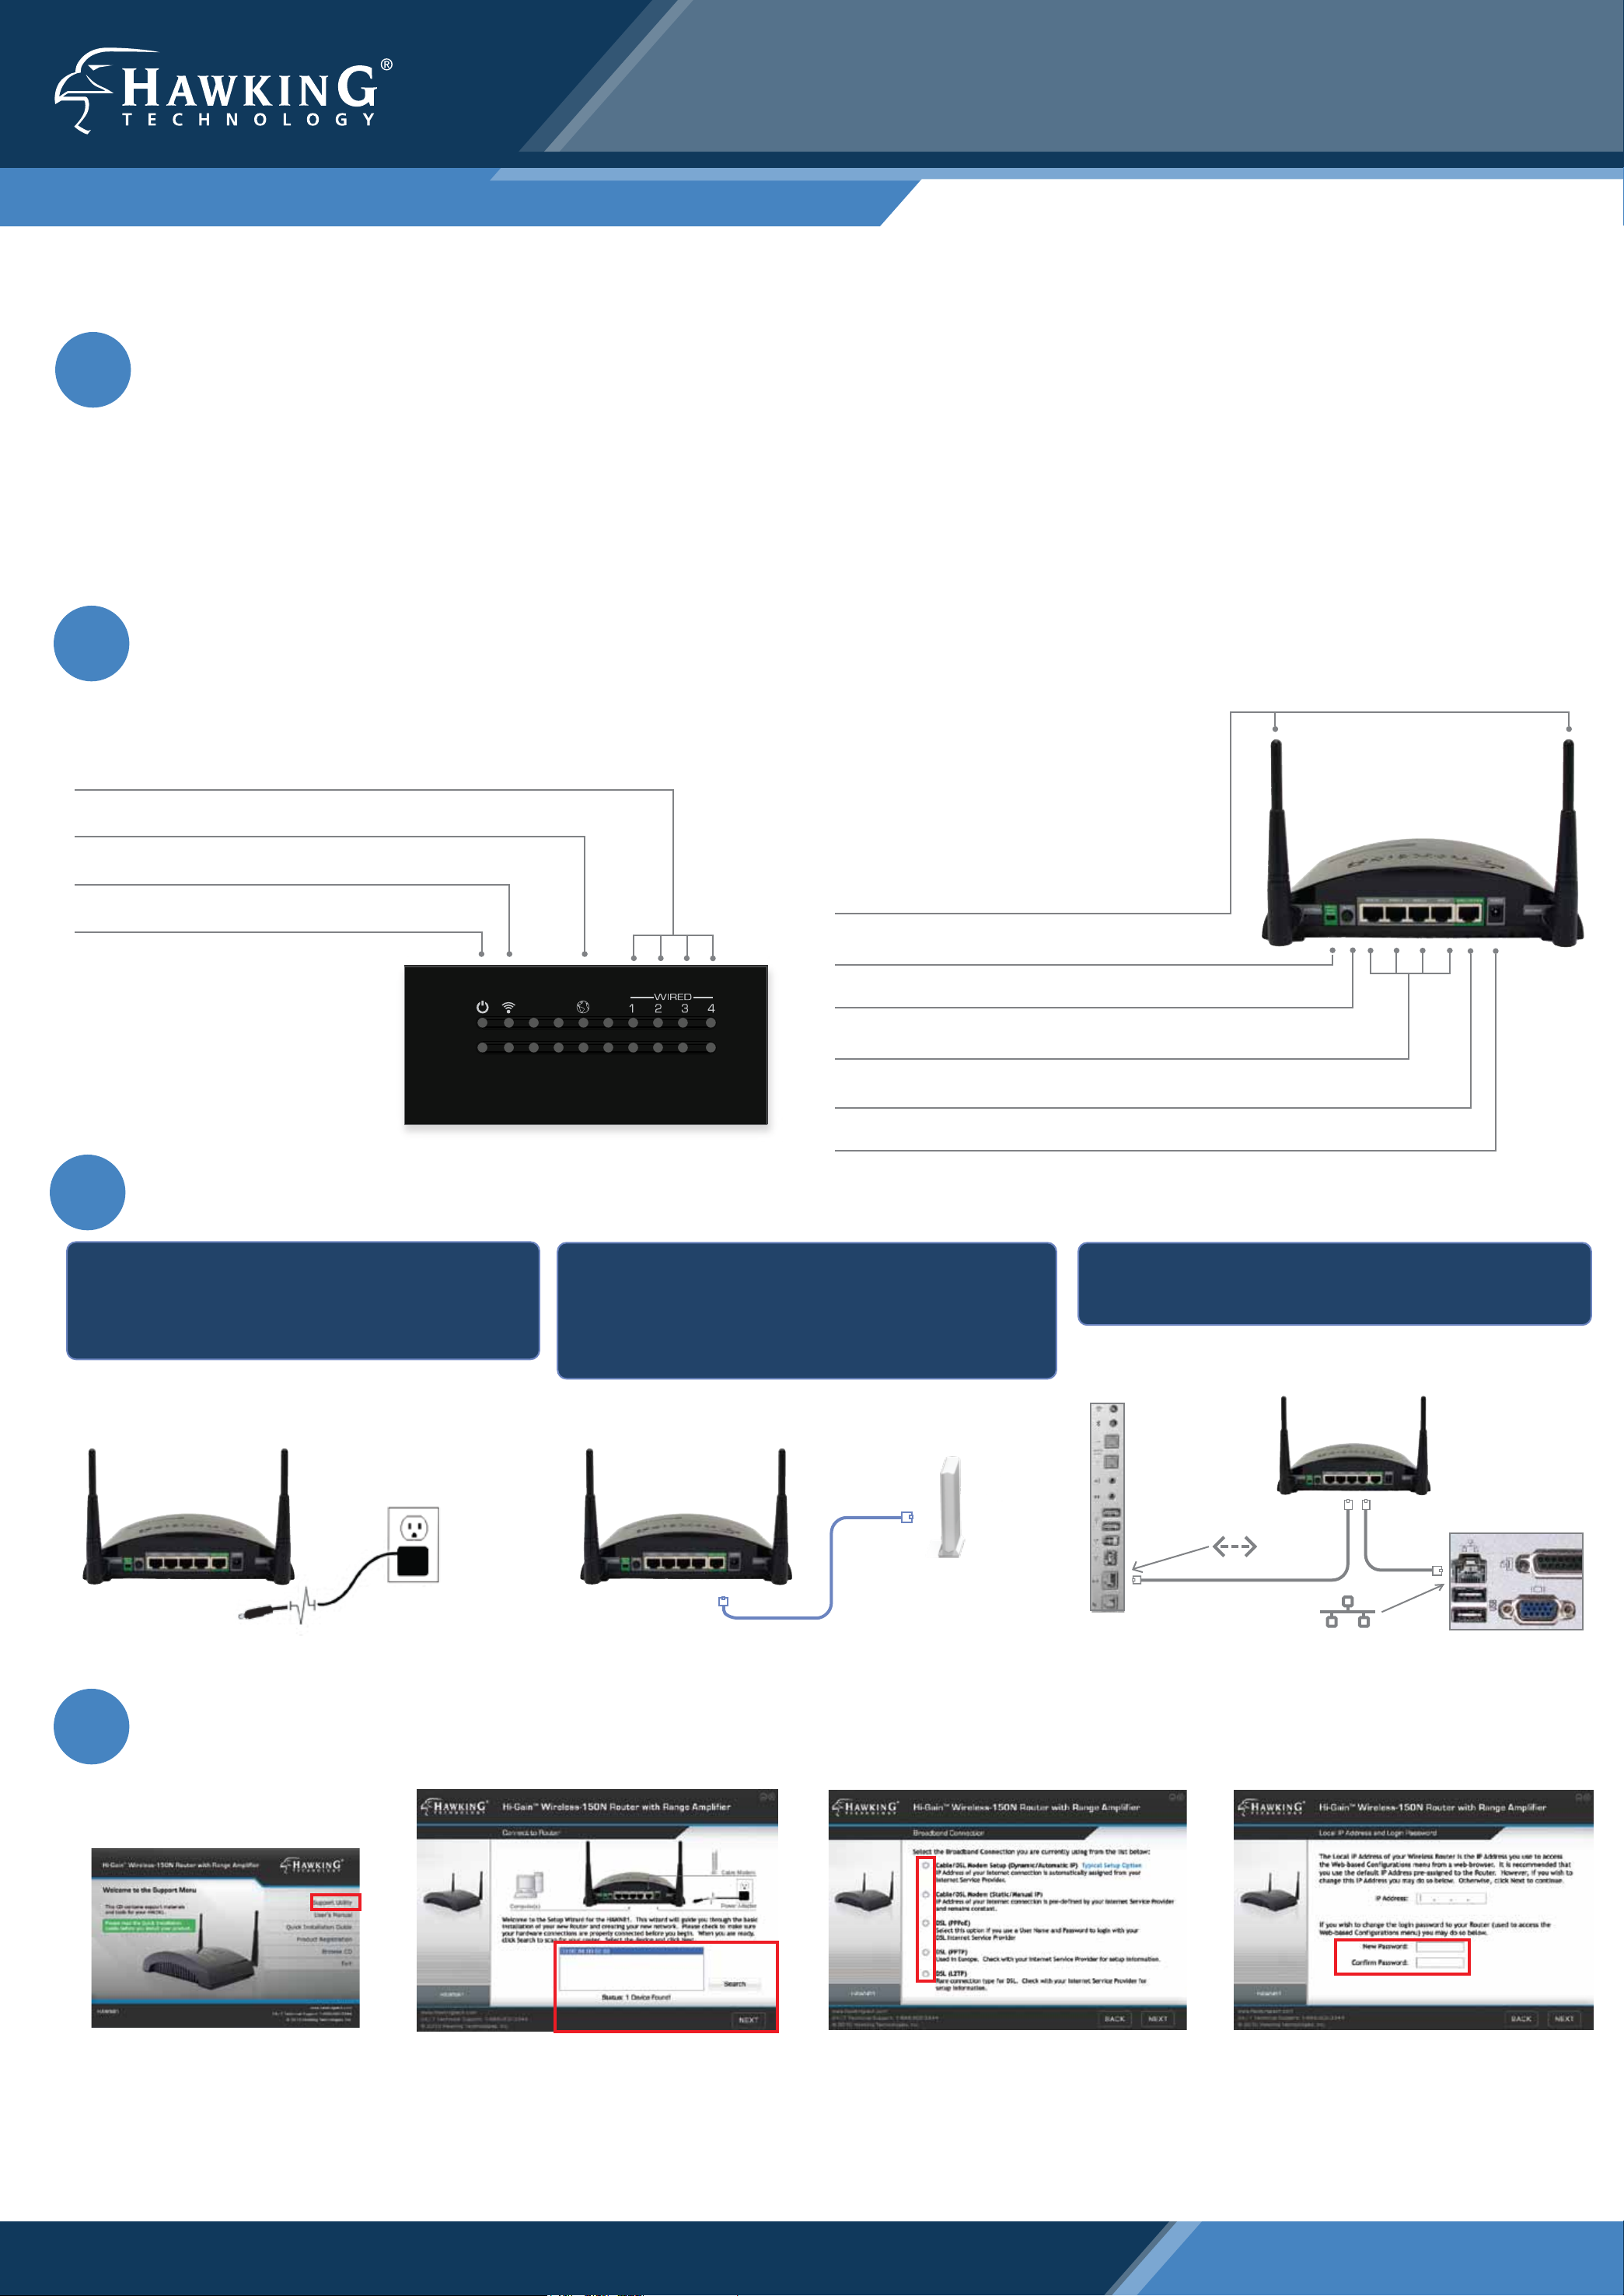
BACK PANEL DESCRIPTIONLED DESCRIPTION
LAN Ports (1-4)
LED is on, when a connection (with the specific port) between a PC and the router/network is detected.
Internet Connection
LED is on, when there is an established connection with a cable/DSL modem.
Wireless
LED is on, (blinking) when wireless data activity is detected.
Power
LED is on, when the power adapter is connected and plugged in to an outlet.
HAWNR1 Hi-Gain Wireless-150N Router
with Range Amplifier
3 Connecting the Router (to a Mac or PC)
Removable Antennas
Removable Omni-Directional Antennas
Wireless Radio On/Off Switch
Turns off the wireless functions
Reset Switch / WPS
Resets your router to its default settings / initiates WPS Setup
LAN Ports
Connects your wired network devices and computers to your network
Modem Port
For connecting directly to your Broadband Modem’s Ethernet port
Power
Power Adapter Plug
1.) Connect the A/C power adapter to
an electrical source, and then connect it
to the ‘Power’ socket of the router.
2.) Connect your Broadband Modem to the
Router’s “MODEM” port with an Ethernet
cable. Reset your modem by unplugging it
and plugging it back in.
Broadband ModemPower Adapter
3.) Connect your PC or Mac to any of the 4
LAN ports located on the back of the router.
Mac
Mac Symbol for Ethernet Port
Example
Mac Rear Ports
PC Symbol for Ethernet Port
Example
PC Rear Ports
PC
4a Configuring the Router with a PC (for configuring with a Mac, see Step 4b)
1.) Insert the Setup CD into the
CD-ROM drive.
2.) When the auto-load page
appears, click the Setup Wizard
option on the right and follow the
Setup directions.
3.) Scan for your router by clicking the
‘Search’ button. Once found, click the
device to highlight it and click ‘Next’.
4.) Select your Internet Service Provider
(ISP) from the list that appears. Then
click ‘Next’. Complete the information
requested for your Internet type in the
following pages.
5.) Here, you can adjust your LAN IP
settings. It is recommended, however,
that you DO NOT change your LAN IP.
You may also change your password
login (default:1234) settings here.
Technical Support: 1.888.202.3344 or techsupport@hawkingtech.com www.hawkingtech.com
Page 2
 Loading...