

Page 1
► Pipe Wrench
► 1/2” Wrench
► Cresent Wrench
► Thread Sealant
► Cable Cutter
This document contains the recommended procedures for installing a Hawkeye Industries Roadside Gauge Head.
Requirements
Ensure that the tank is prepared to accept a Roadside Gauge
Head (per Tank Preperation Instructions,) and has been fitted with
a float and float guide kit.
NOTE: Do not remove tape from the indicator spool until instructed
to do so.
Contents
Tools
Parts Required
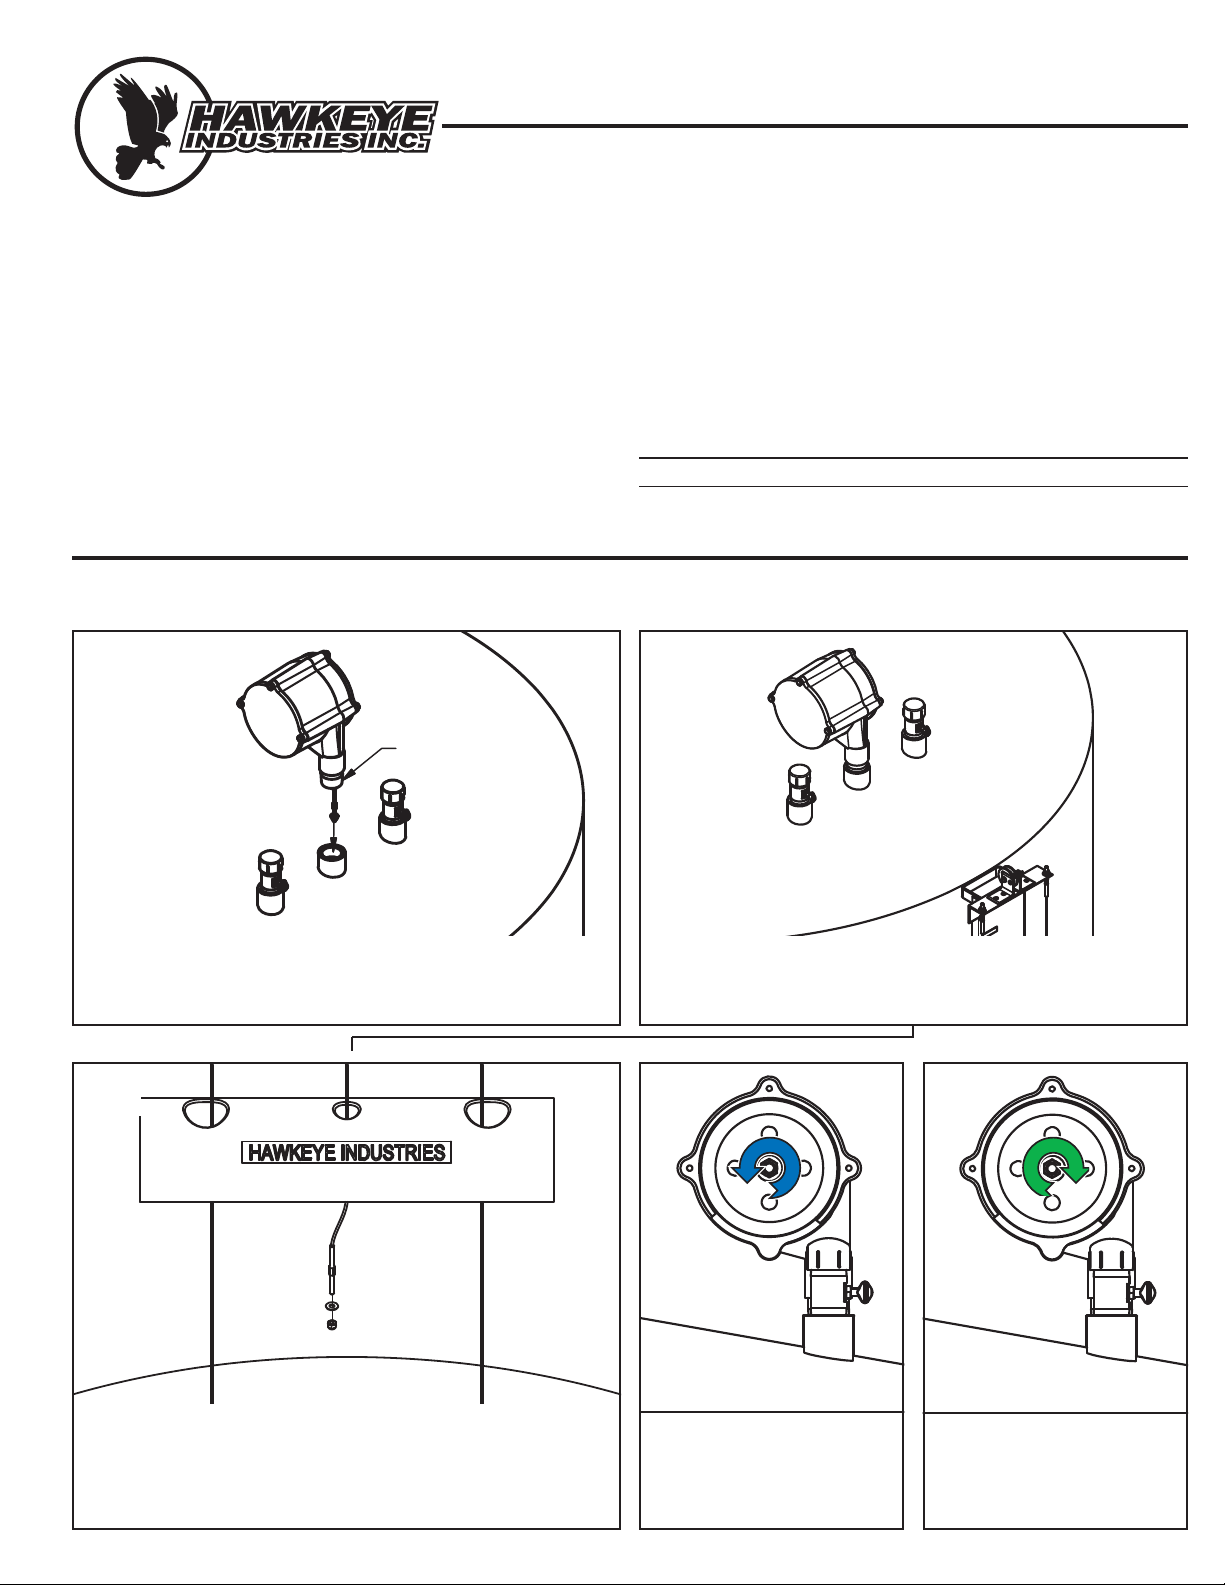
A.) Installing Roadside Gauge Head
A.) Installing Roadside Gauge Head
Pull float cable from the 1½” opening on the gauge head and feed it
through the 1½” coupling down into the tank. Place thread sealant on the
1½” NPT threads of the gauge head.
Unravel the rest of the float cable, if it has not already done so on its own,
into the tank and remove the nut and washer from the float cable stud.
Feed the stud and cable through the center hole of the float and replace
the nut and washer. Tighten the nut until there are three threads showing.
Thread the gauge into the coupling. Tighten the gauge with a pipe wrench
so that the open side of the gauge is aligned with the gauge board and
faces away from the board.
TANK PREPARATION | GAUGE BOARD KIT INSTALLATION | FLOAT GUIDE KIT INSTALLATION | GAUGE HEAD INSTALLATION | GOSHAWK INSTALLATION
Installation Instructions
Roadside Gauge Head
QTY Part
► 1 Roadside Gauge Head
APPLY THREAD
SEALANT
1.) 2.)
3.) 4.) 5.)
►►
►
Roadside Instructions, September 2013
1
►
Rotate the indicator spool counter
clockwise until you feel the float
barely lift off the floor of the tank.
Rotate the open reel 3 revolu-
tions clockwise.
x3
Page 2
Hawkeye Industries Inc.
2
6.)
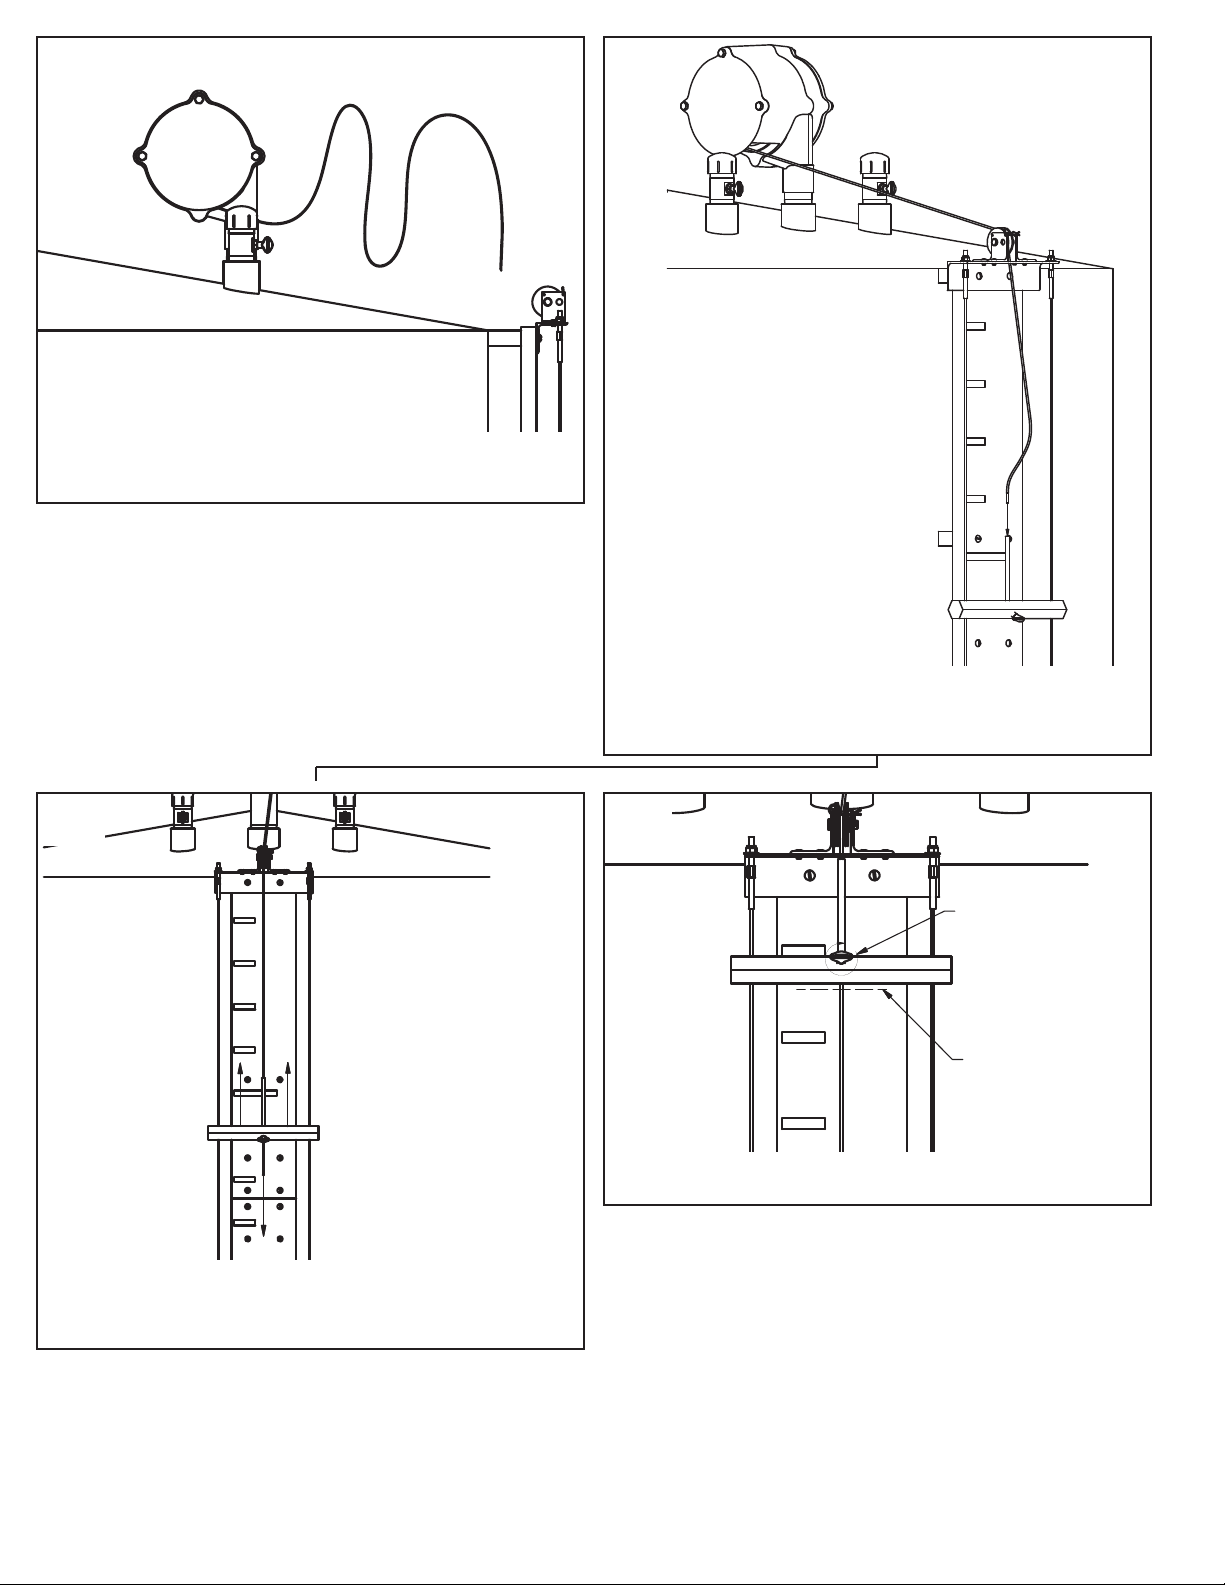
Remove the tape from the open reel and pull out the 3 revolutions of
loose cable (approximately 5ft)
PULL OUT THE 3 REVOLUTIONS
OF LOOSE CABLE
Pass the cable over the indicator cable pulley and through the hole in the
top bracket of the indicator guide assembly. Feed the cable through the
center hole of the indicator.
7.)
With slight tension on the cable to keep the float barely off the tank floor,
slide the indicator over the cable to the minimum level on the gauge
board.
SLIGHT TENSION TO KEEP FLOAT
BARELY ON TANK FLOOR
SLIDE INDICATOR TO THE MINIUMUM
LEVEL ON THE GAUGEBOARD
8.)
Tighten the indicator set screw. Cut off the excess cable.
CUT OFF EXCESS
TIGHTEN THUMB SCREW
9.)
►
►
Roadside Installaton Complete
Proceed to Goshawk Installation (if required)
►
 Loading...