

Hawaiian Wireless Gateway, 4111N Quick Start Manual
DSL Phon e
Wall
DFI /IW /09.13
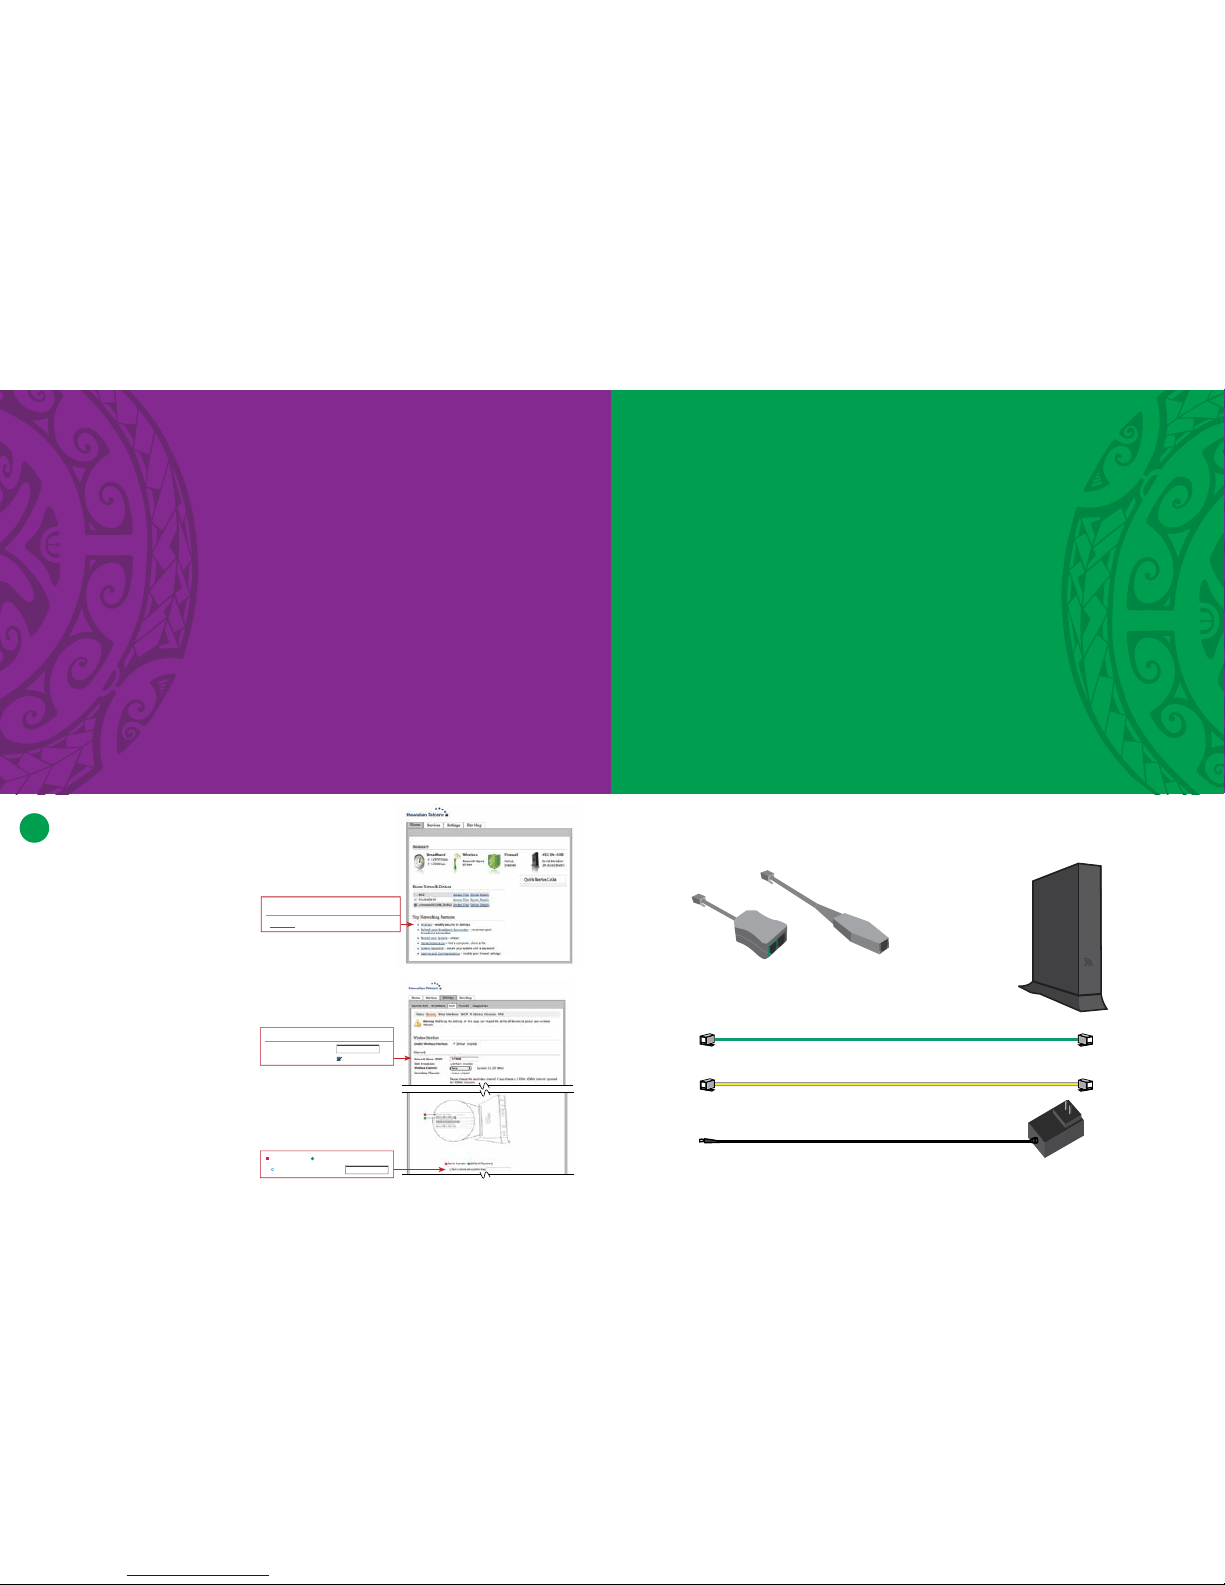
What’s included
Combo Splitter / Filter (1)
Phone / Fax Filter (3)
Green Data Cable (1)
Yellow Ethernet Cable (1)
AC Power Adapter (1)
Welcome
Thank you for choosing Hawaiian Telcom High-Speed Internet,
your connection to a whole new level of Internet enjoyment!
Your broadband service will be activated on the due date
you were given when you placed your order.
This guide will walk you through step-by-step
installation instructions. Getting started is easy
!
For more information
Visit hawaiiantel.com/internetsupport or
call our 24/7 Local Internet Support Team at 643-6111.
Looking for FREE WiFi access points? Hawaiian Telcom
offers the most in the state. Click on the WiFi Locations link at
hawaiiantel.com/wifi for a complete listing.
Hawaiian Telcom Internet
Quick Start Guide
Pace 4111N
Wireless Gateway (1)
POWER
ETHERNET 1
ETHERNET 2
ETHERNET 3
ETHERNET 4
WIRELESS
BROADBAND
SERVICE
411N
6
Personalize Your
Security Settings
To personalize the security settings on
your Wireless Gateway, open your web browser,
type “http://home” in the address bar and hit
Enter. You will be taken to a new screen – see
Figure 2.
Click on the Wireless link. You will be taken
to a new screen – see Figure 3.
In the box labeled Network Name (SSID),
enter the new name you would like to call your
network.
To change your WiFi security code, scroll down
the page and click on the circle in front of Set
custom encryption key. Enter a new security
code in the box. The security code is case
sensitive and may contain up to 31 alphanumeric characters (no spaces).
You will be asked for a password. Enter the
original WiFi security code (WiFi key) located
on the side of your Wireless Gateway.
To save your changes, scroll down the page and
click Save.
Network
Network Name (SSID): HT## #
SSID Broadcast: Default: Enabled
Serial Number Default Password
Set custom encryption key: •••••• •••••••
Top Networking Features
• Wireless – modify security or settings
Figure 2
Figure 3
POWER
ETHERNET 1
ETHERNET 2
ETHERNET 3
ETHERNET 4
WIRELESS
BROADBAND
SERVICE
411N
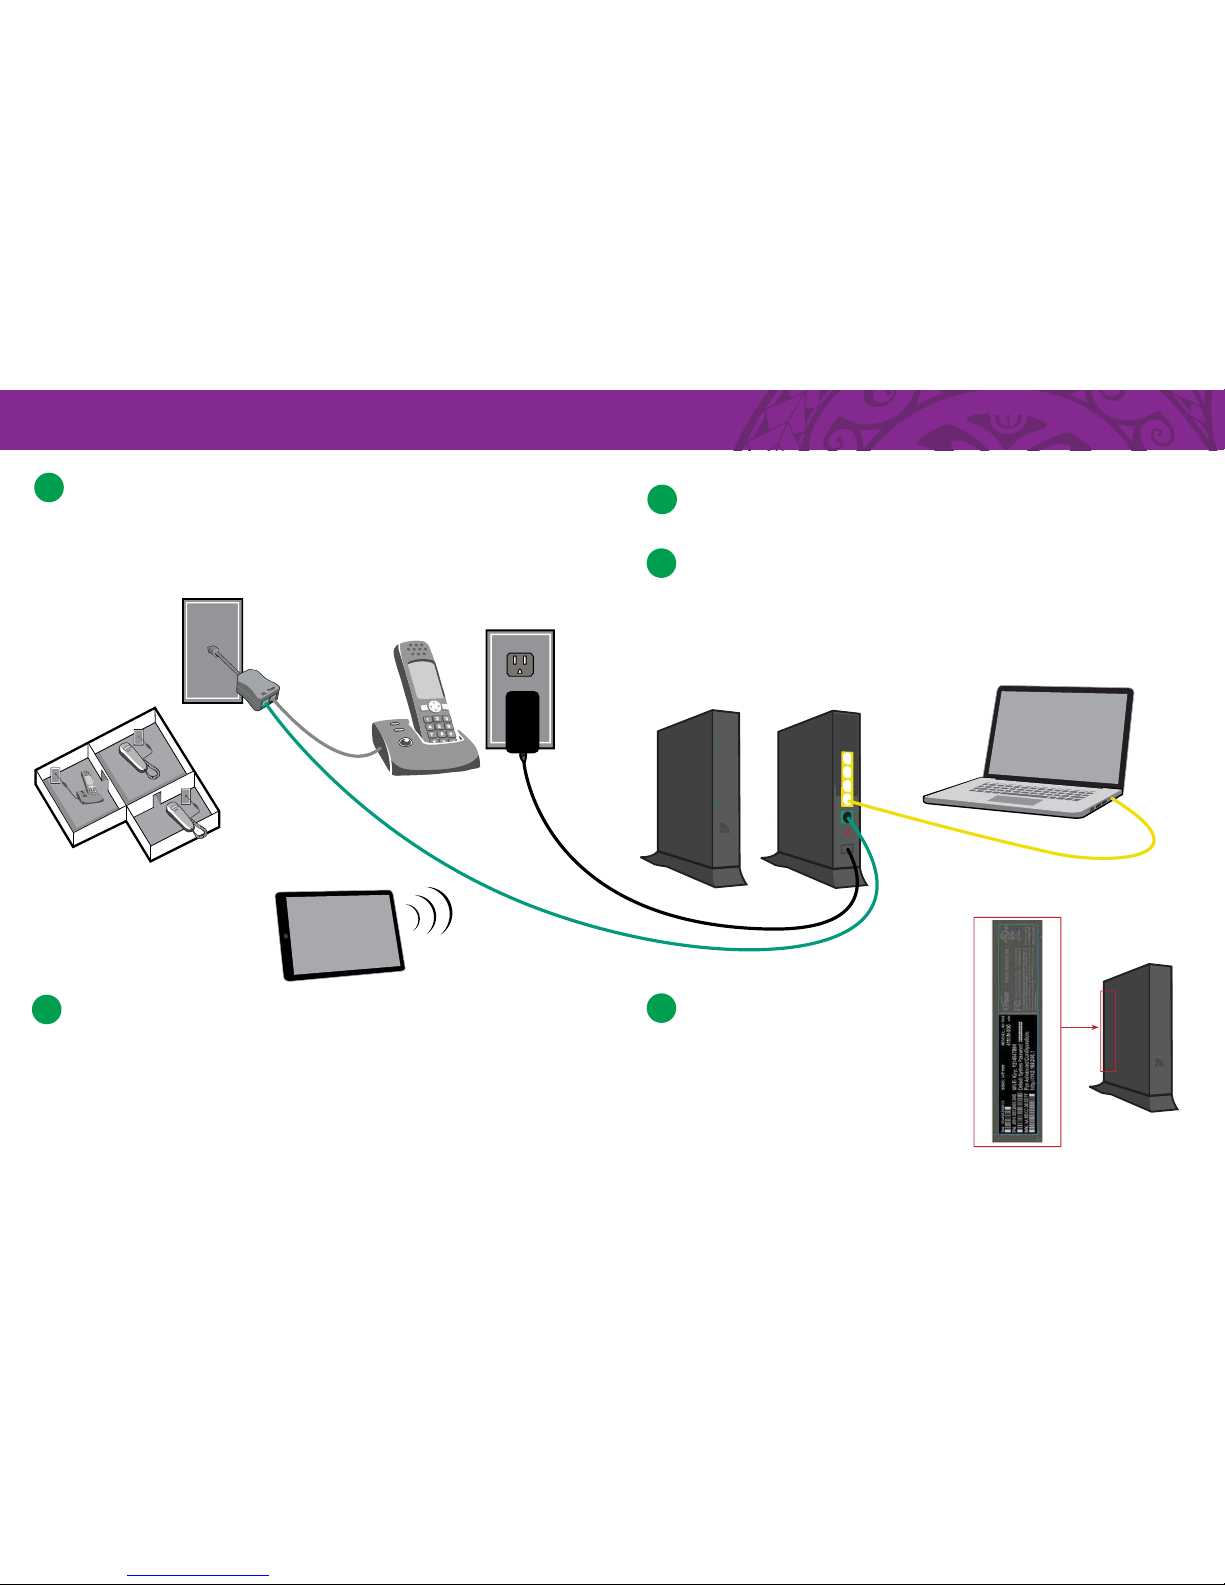
Splitter and Filters
Plug the green Data Cable directly into a live phone jack. If you also want to connect a telephone to the
same phone jack, fi rst plug in the combo Splitter/Filter then plug the Data Cable into the jack labeled DSL.
To prevent static, install a Phone / Fax fi lter on all corded and cordless phones, fax machines and devices
in your home that share the same phone line. If you need more fi lters, call 643-6111.
1
2
3
4
Connect Wireless Gateway
Connect the other end of the green Data Cable to the Wireless Gateway. Connect
the AC Power Adapter to the Wireless Gateway and plug it into a power outlet.
Connect Computer
Connect your computer to the Wireless Gateway with the yellow Ethernet Cable.
You can directly connect up to 4 computers or printers to the Wireless Gateway.
For information on how to set-up and use a wireless connection, refer to Step 5.
Test Your Connection and Register
After you’ve completed Steps 1-3, wait two minutes then check the lights on the front of the
Wireless Gateway. The Power and Broadband lights should be steady green. The Service
light may be blinking or steady green. If the lights on your Wireless Gateway aren’t lighting
up correctly, call 643-6111 for assistance.
Go to hawaiiantel.com/internetsupport to test your connection and register for your free email account.
Installation Diagram
Phone Jack
AC Power Adapter
Yellow
Ethernet Cable
Laptop
Wireless Device
Green
Data Cable
Wireless Gateway
Back
Front
Combo Splitter / Filter
This confi guration applies to both Windows and MAC users.
POWER
ETHERNET 1
ETHERNET 2
ETHERNET 3
ETHERNET 4
WIRELESS
BROADBAND
SERVICE
411N
5
Set-up Your Wireless Network
Go to hawaiiantel.com/internetsupport for instructions
on how to connect a wireless device (smartphone, tab let,
laptop, etc.) to your network.
For your protection, the Wireless Gateway is programmed
with default security settings. The default Network Name
(SSID) and WPA2 WiFi security code (WiFi Key) are on the
side of your Wireless Gateway. See Figure 1.
To personalize the security settings, refer to Step 6 on the
opposite side of this guide.
Figure 1
Wall
 Loading...