

Page 1
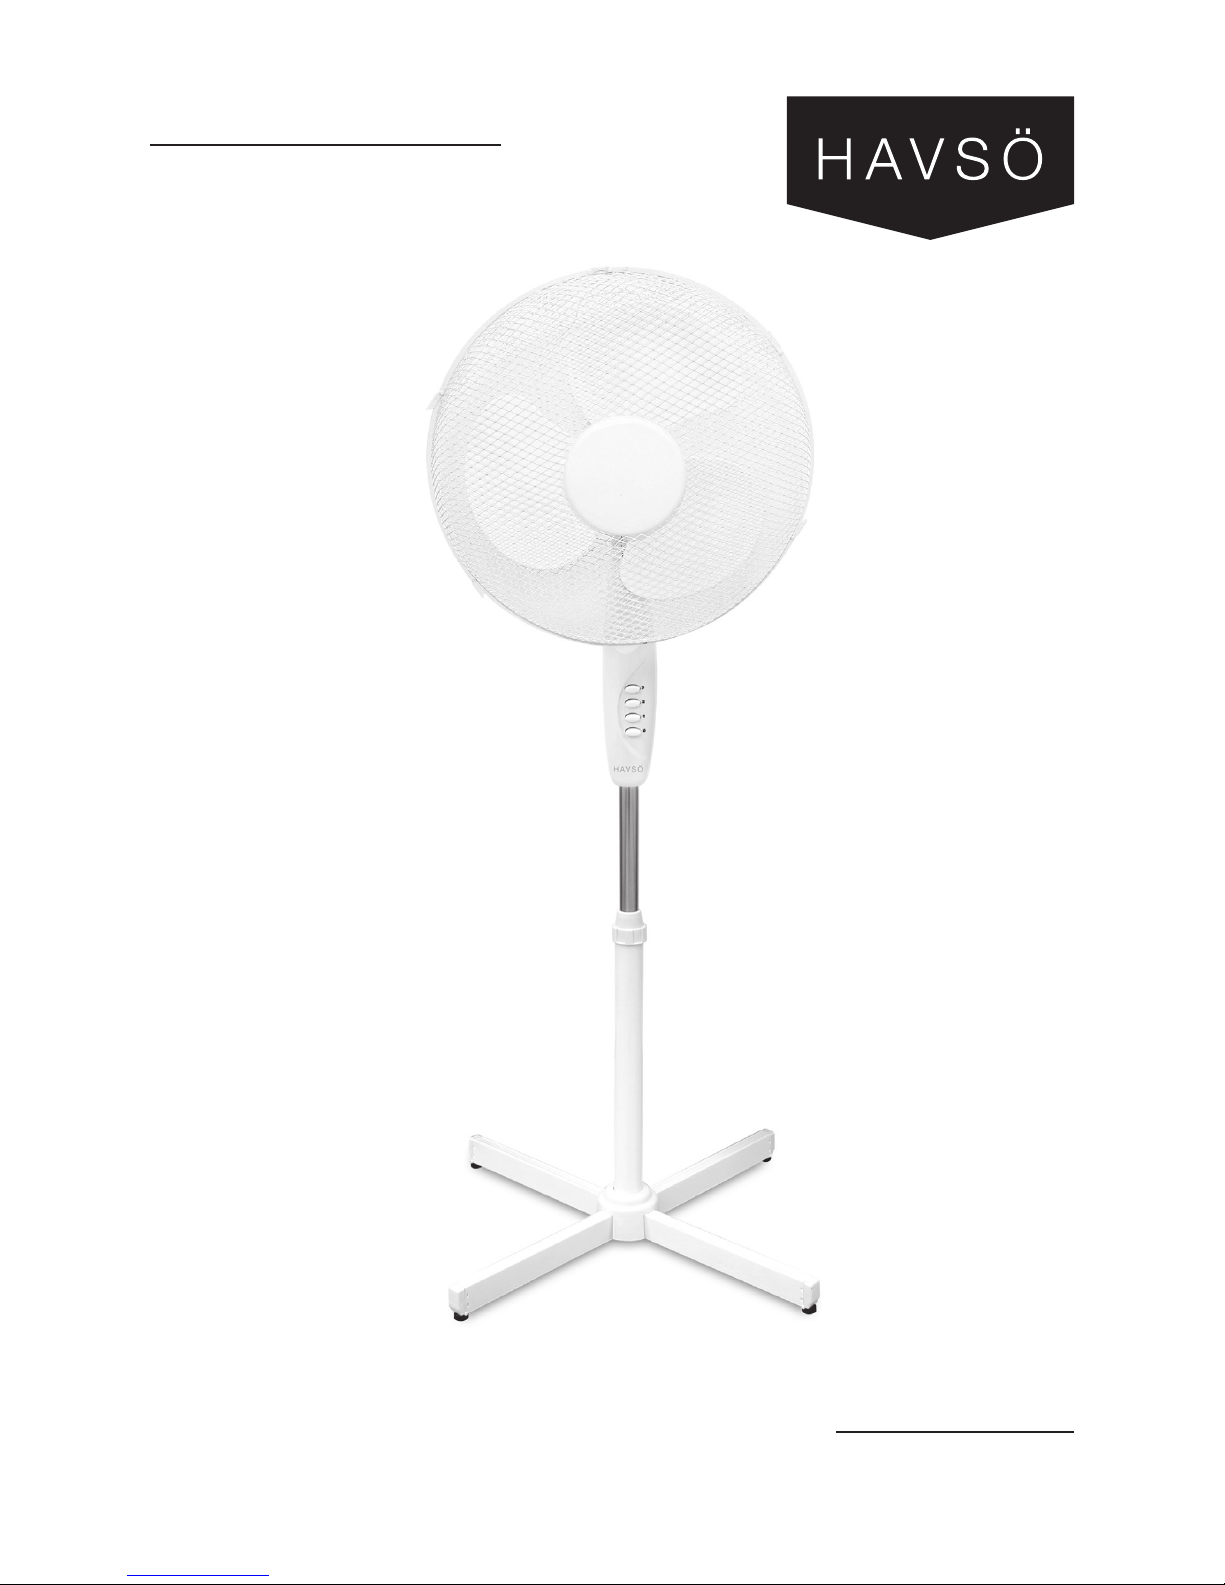
Ebba 2.I
FLOOR FAN
USER MANUAL
Svenska, English
Page 2

Page 3

Svenska
Säkerhetsföreskrifter ............................................ 4-5
Produktöversikt ........................................................6
Användning .............................................................7
Specifikationer .........................................................8
Övrig information ......................................................9
English
Safety precautions .......................................10-11
Product overview .............................................. 12
Operation ......................................................... 13
Specifications ................................................... 14
Other information .............................................. 15
Page 4

Svenska
4
Läs noggrant igenom bruksanvisningen innan du använder produkten
och spara den för framtida bruk. Om du följer dessa instruktioner
kommer du ha glädje av produkten länge.
– Innan du ansluter enheten: Säkerställ att ditt vägguttags spänning
motsvarar den spänning som anges på produktens typskylt
(typskylten är placerad på baksidan av enheten).
– För att förhindra risk för elchock: Öppna aldrig höljet. Det finns
inga delar som du som användare själv kan laga. Överlåt all
service till kvalificerad servicepersonal.
– Reparationer av elektriska enheter får endast utföras av behörig
servicepersonal. Felaktig reparation kan utsätta användaren och
enheten för allvarlig fara.
– Använd inte produkten om den har en skadad kontakt eller sladd,
eller efter att den tappats och skadats på något sätt. Gör du det
kan det leda till elchock/personskador eller skador på egendom.
– Om strömsladden är skadad måste den ersättas av tillverkaren,
dess serviceagent eller liknande kvalificerad servicepersonal för att
undvika fara.
– Koppla inte från enheten genom att dra i sladden, dra i kontakten.
Annars kan sladden eller enheten skadas.
– Tryck inte in föremål i några öppningar på enheten då skada på
enheten och/eller elchock kan uppstå.
– Använd inte enheten till annat än det den är avsedd för.
– Sänk inte ned enheten i vatten eller annan vätska.
– Koppla alltid från enheten innan du utför rengöring och underhåll.
– Placera inte enheten nära värmeavgivande produkter, eller i direkt
solljus.
– Använd inte enheten utomhus.
– Denna utrustning får inte användas av personer (inklusive barn)
med nedsatt känsel, fysisk eller mental förmåga eller har bristfällig
erfarenhet eller kunskap. De ska ha lämplig tillsyn och ges
tillräckliga instruktioner från en person som ansvarar för deras
säkerhet, för att få använda utrustningen.
SÄKERHETSFÖRESKRIFTER
Page 5

Svenska
5
–
Lämna aldrig enheten i närheten av barn. Produkten är ingen
leksak! Noggrann tillsyn krävs när produkten används i närheten
av barn.
– Placera alltid fläkten på en plan och stabil yta.
– Använd inte fläkten i närheten av bad, duschar eller andra våta
utrymmen.
– Lägg inte något på fläkten när den är igång. Detta för att undvika
överhettning.
– Använd inte fläkten tillsammans med en separat timer,
fjärrstyrningsprogram eller annan produkt som kan stänga av eller
på fläkten.
– Barn under åtta år bör bara få stänga av och sätta på fläkten
under förutsättning att de fått tydliga instruktioner av en vuxen. De
bör inte få sätta in och ta ut sladden från eluttaget eller rengöra
fläkten.
– Se till att fläkten är korrekt monterad innan den ansluts till eluttaget.
– Stoppa aldrig in fingrarna eller andra föremål genom fläktens
gallerskydd.
SÄKERHETSFÖRESKRIFTER
Page 6
Svenska
6
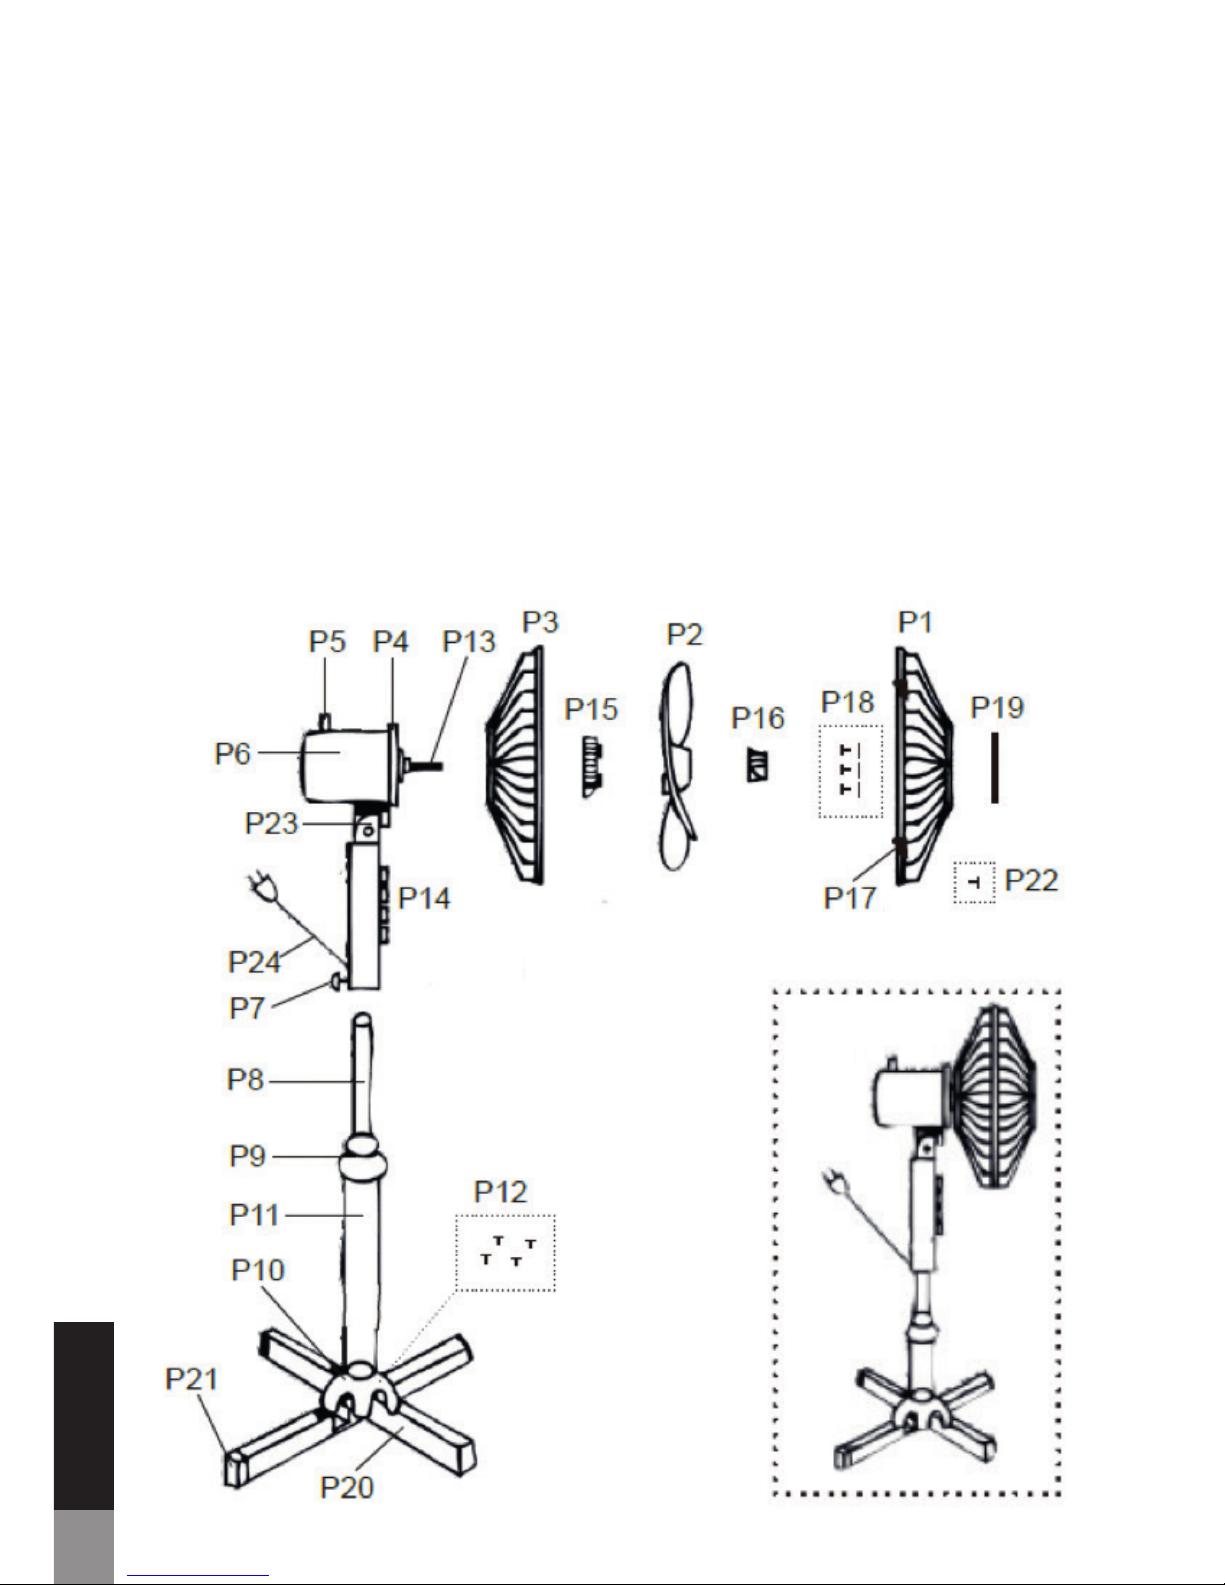
PRODUKTÖVERSIKT
P1 Främre skydd
P2 Fläktblad
P3 Bakre skydd
P4 Motorkåpa
P5 Oscilleringsknapp
P6 Motor
P7 Skruv B
P8 Förlängningsstång
P9 Höjdjustering
P10 Bottenkåpa
P11 Basrör
P12 Skruv A
P13 Axel
P14 Knappar
P15 Låsmutter grill
P16 Låsmutter fläktblad
P17 Fäste
P18 Skruv C
P19 Styrvinge
P20 Basplatta
P21 Plastfötter
P22 Skruv D
P23 Justerbar ledvinkel
P24 Strömkabel
Page 7

Svenska
7
ANVÄNDNING
Montering
1. Ta ur alla delar i lådan och ta bort allt förpackningsmaterial.
2. Montera basplattan (P20) och montera på plastfötterna (P21).
3. Skruva ihop basrör (P11) till basen med hjälp av skruven (P12).
4. Skruva loss höjdjusteringsmuttern (P9) och placera bottenkåpan (P10) på
basen (P20).
5. Skruva fast muttern (P9) på rätt plats.
6. Justera in bottenkåpan över grundplattan/plastfötterna längs med nedre röret
(basrör).
7. Dra ut förlägningsstången (P8) från basröret (P11) och montera motorenheten (P6) på toppen.
8. Placera motorn och kontrollpanellen stadigt på toppen utav förlägningsstången
och dra åt skruven (P7).
9. Skruva loss låsmuttern (P15) från motorkåpan (P4) och sätt det bakre skyddet
(P3) på motorkåpan (P4).
10. Sätt fast det bakre skyddet (P3) med låsmuttern (P15).
11. Placera fläktbladet (P2) på axeln (P13) och sätt fast det med fläktmuttern (P16).
12. Fäst styrvingen (P19) på det främre skyddet med hjälp av skruvarna (P18).
13. Sätt det främre skyddet (P1) på det bakre och säkra den med fästet (P17) och
skruv P22.
14. Ställ in önskad höjd och säkra på plats genom att dra åt höjdjusteringsmuttern
(P9).
15. Om du vill, justera luftflödets riktning med P23.
Obs! Gör samma procedur fast baklänges för att montera ner fläkten.
Användning
1. Anslut den monterade fläkten till eluttaget.
2. Starta fläkten genom att trycka på en av knapparna (P14). Tryck på 0-knappen
för att stänga av fläkten.
Knapp (0) – Av
Knapp (1) – Låg fläkthastighet
Knapp (2) – Medium fläkthastighet
Knapp (3) – Hög fläkthastighet
Oscillering
1. För rotation av fläkt, tryck på oscilleringsknappen (P5).
2. För att stoppa rotation av fläkt, dra ut oscilleringsknappen (P5).
Rengöring och underhållning
– Torka bordsfläkten regelbundet med en torr eller väldigt lätt fuktad trasa. Det
är viktigt att gallerskyddet hålls rent. Använd inte rengöringsmedel som kan få
fläkten att rosta eller skada plasten.
Page 8

Svenska
8
SPECIFIKATIONER
Modellnummer 530014 (Ebba 2.1)
Strömförsörjning AC 230 V, 50 Hz
Effekt 45 W
Storlek Ø 40 cm
Page 9
Svenska
9
ÖVRIG INFORMATION
Miljö
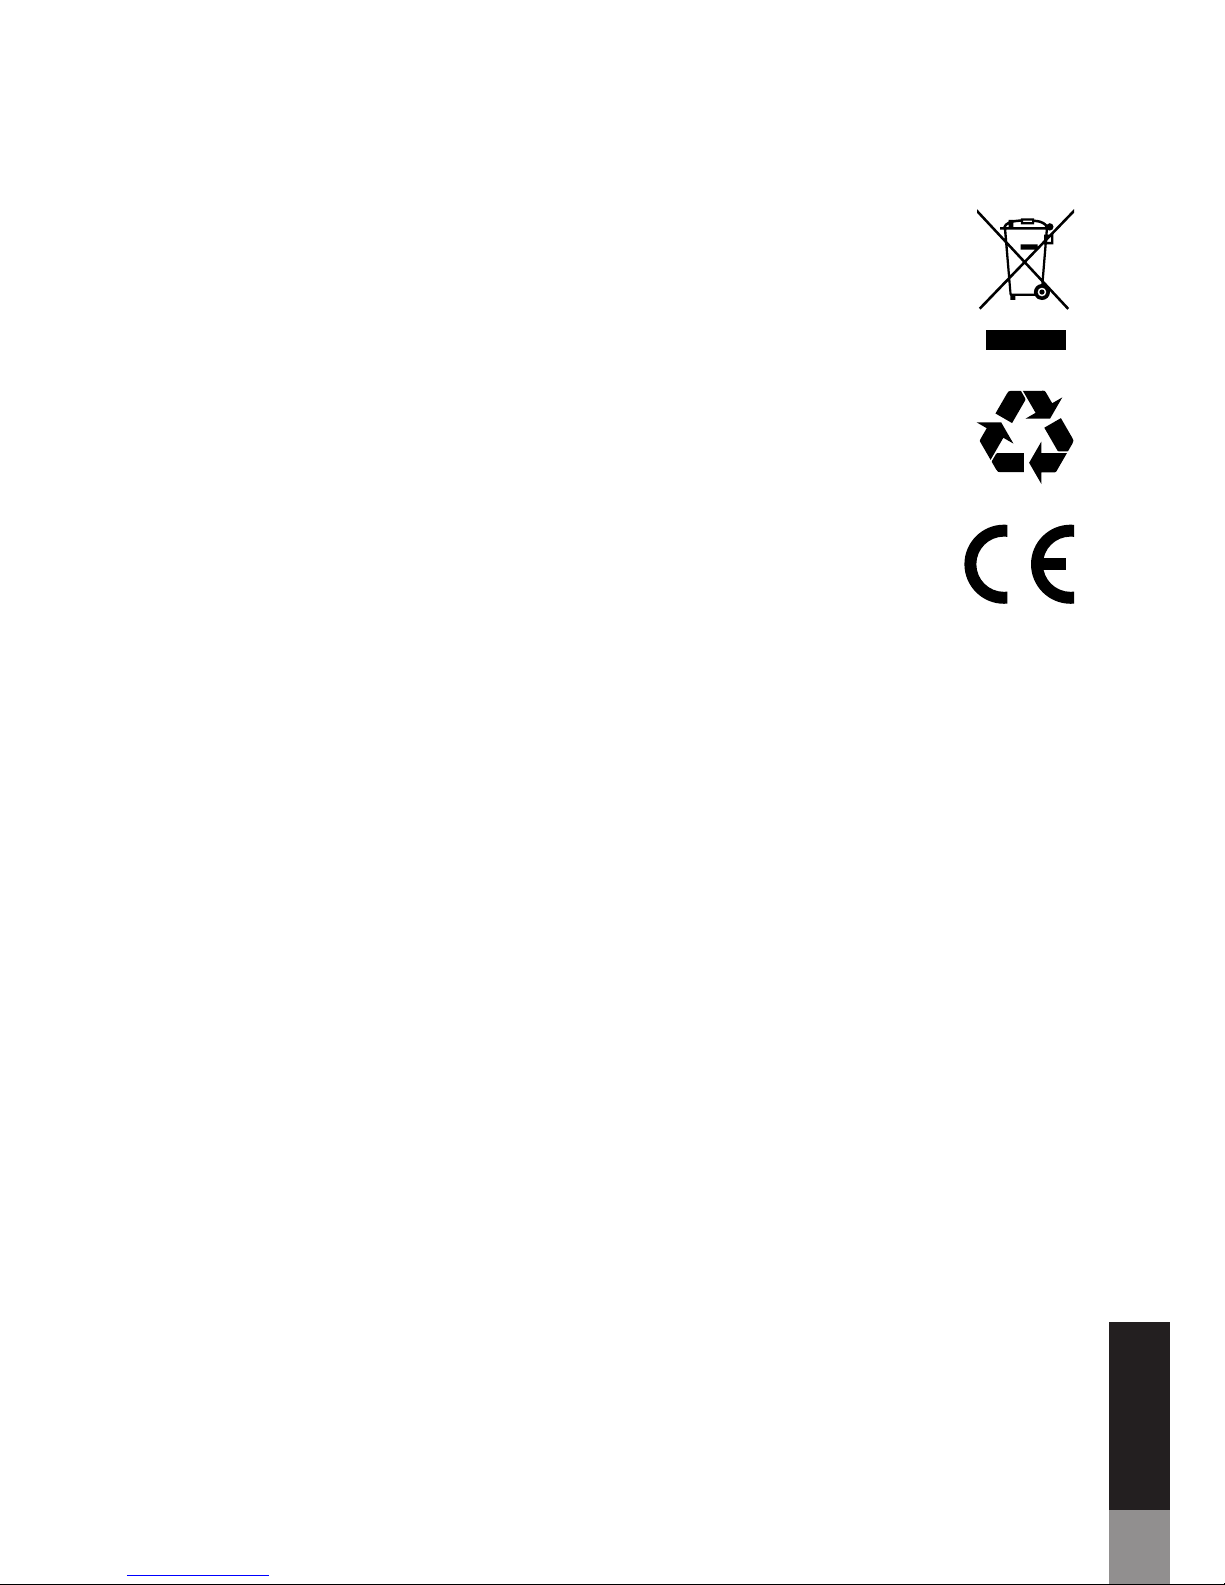
Den här symbolen på produkten eller i instruktionerna betyder att den
elektriska och elektroniska utrustningen ska slängas separat från annat
hushållsavfall när den inte fungerar längre. Inom EU finns separata
återvinningssystem för avfall. Kontakta lokala myndigheter eller din
återförsäljare för mer information.
Den här symbolen på produktens förpackning innebär att
materialet är återvinningsbart.
Lag och säkerhet
Detta märke finns på produkten och i manualen för att visa att den
uppfyller de europeiska säkerhets- och elektromagnetiska kraven.
Denna produkt är tillverkad enligt gällande regler för elektromagnetiska
fält (EMF), vilket innebär att den är säker att använda så länge
säkerhetsanvisningarna följs. Produkten är tillverkad enligt gällande EUlagstiftning, som begränsar användning av skadliga ämnen i elektriska
och elektroniska produkter.
Förbehåll
Vi förbehåller oss rätten att justera eventuella tryckfel samt fortlöpande ändra och
förbättra produkten och medföljande material.
Page 10

English
10
Read this instruction manual carefully before use and save it for future
reference. If you follow these instructions, your appliance will provide
you with years of good service.
– Before you connect the appliance: Ensure that the voltage rating
on the type plate corresponds to your mains voltage (type plate is
located on the back of the product).
– To reduce the risk of electric shock: Do not remove the cover.
There are no user serviceable parts inside. Refer servicing to
qualified service personnel.
– Repairs to electrical appliances shall always be performed by
qualified personnel. Improper repairs may place the user and the
equipment at serious risk.
– Do not operate the appliance with a damaged plug or cord, after
a malfunction or after being dropped or damaged in any way.
Doing so may cause electric shock/personal injuries and property
damage may occur.
– If the supply cord is damaged, it must be replaced by the
manufacturer, its service agent or similarly qualified people to
avoid a hazard.
– Do not remove the appliance from the mains power supply by
pulling the cord, pull the plug. Otherwise damage to the cord and
appliance may occur.
– Do not push objects into any openings as damage to the
equipment and/or electric shock may occur.
– Do not use the appliance for anything other than its intended use.
– Do not immerse the product in water or any other liquid.
– Always unplug the appliance after use and before any cleaning or
maintenance.
– Do not place the appliance near heat emitting appliances or in
direct sunlight.
– Do not use the appliance outdoors.
– The equipment is not intended for use by people (including
children) with reduced physical, sensory or mental capabilities,
SAFETY PRECAUTIONS
Page 11

English
11
or lack of experience or knowledge. They should be given
appropriate supervision and instructions to use the equipment by
a person responsible for their safety.
– Never leave the appliance within reach of children. The product is
not a toy! Close supervision is required when using the appliance
near children.
– Always put the appliance on a flat and stable surface.
– Do not use this fan in the immediate surroundings of a bath,
shower or swimming pool.
– Do not cover the appliance when it is running to avoid risk of
overheating.
– Do not use the appliance with a separate remote control system
or any other device that switches the appliance on automatically,
since a risk of fire exists if the appliance is covered or positioned
incorrectly.
– Children under 8 years old should only be allowed to switch the
appliance on and off provided that it has been placed or installed
in its intended normal operating position and they have been
given supervision or instruction concerning use of the appliance in
a safe way and understand the hazards involved. Children under
8 years old shall not plug in, regulate and clean the appliance or
perform user maintenance.
– Do not connect the fan to the mains power before it is correctly
assembled. The fan is not suitable for use outdoors, in bathrooms
or in other wet or damp environments.
– Never insert fingers or other objects through the grills protecting
the fan.
SAFETY PRECAUTIONS
Page 12
English
12
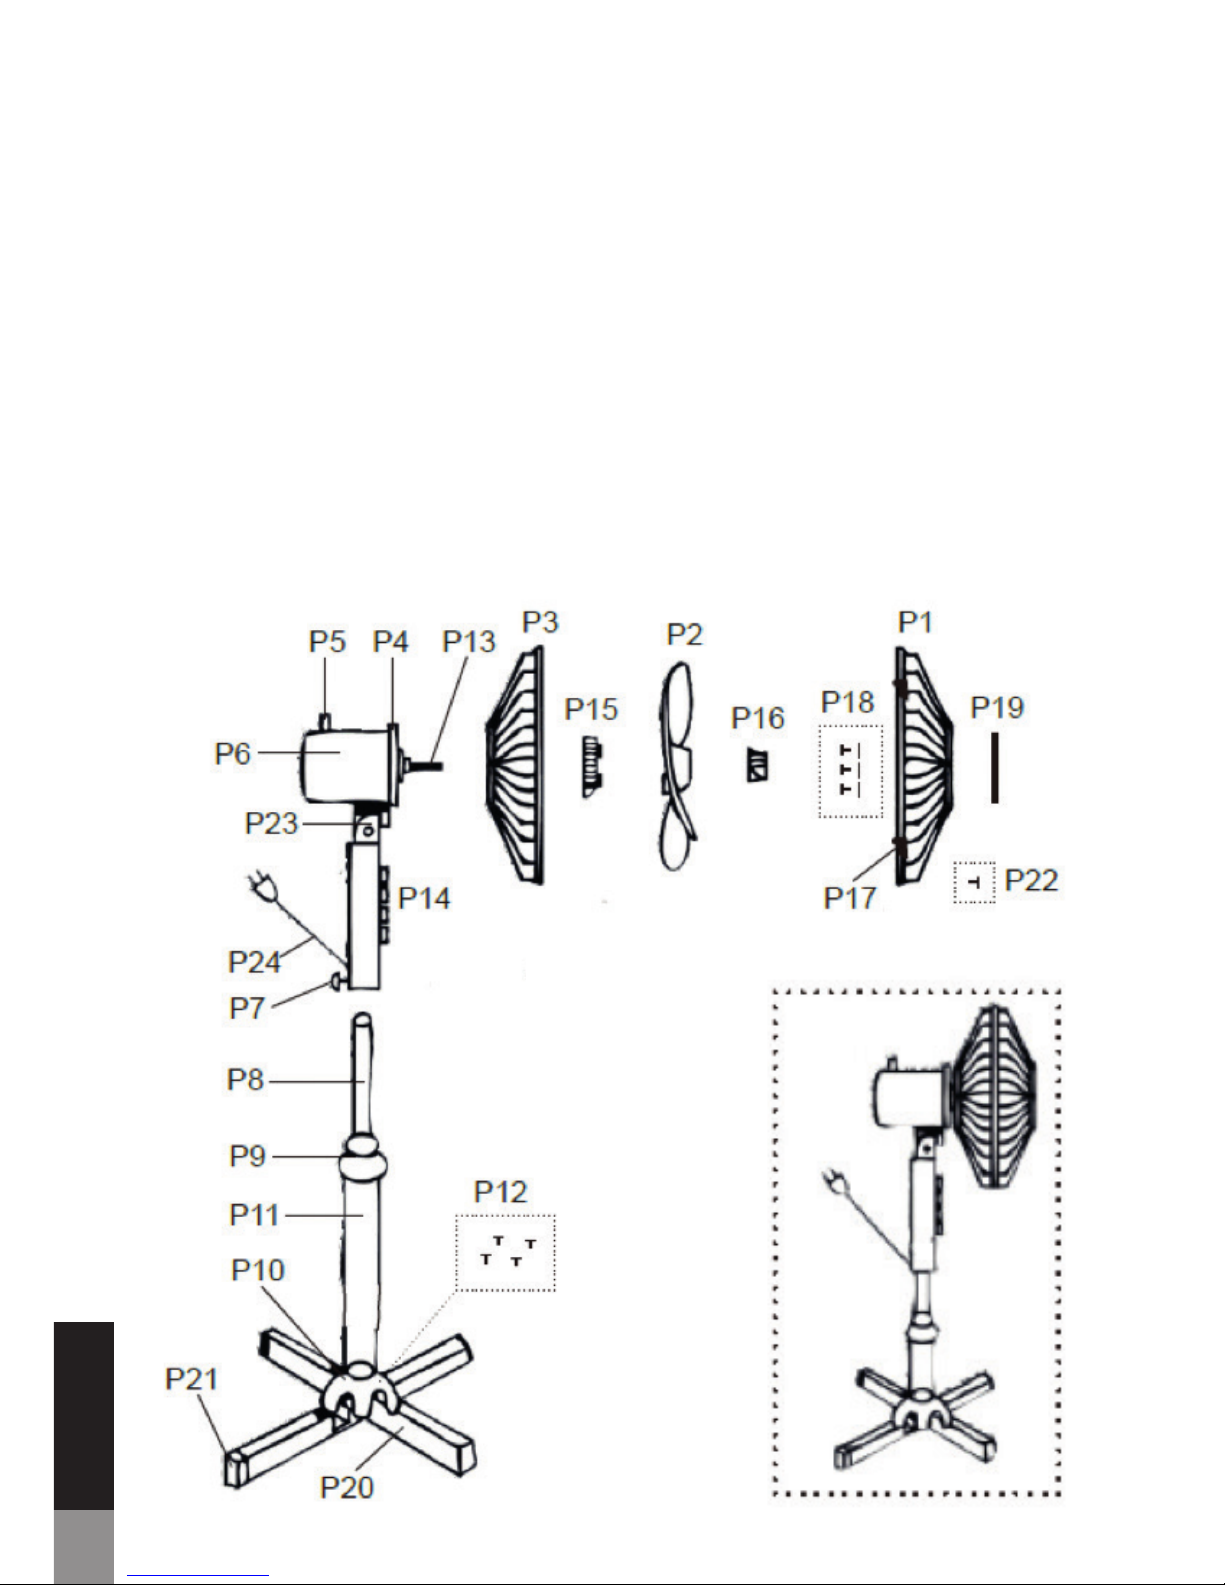
PRODUCT OVERVIEW
P1 Front grill
P2 Blade
P3 Rear grill
P4 Motor cover
P5 Oscillating knob
P6 Motor
P7 Screw B
P8 Extension pole
P9 Height adjustment nut
P10 Base cover
P11 Base tube
P12 Screw A
P13 Shaft
P14 Buttons
P15 Grill nut
P16 Blade nut
P17 Clip
P18 Screw C
P19 Vane
P20 Base
P21 Plastic feet
P22 Screw D
P23 Adjustable joint angle
P24 Supply cord
Page 13

English
13
OPERATION
Assembly
1. Take all parts out of the box and remove all packing material.
2. Assemble the base (P20) and plastic feet (P21).
3. Screw the base tube (P11) to the base by using the screws (P12).
4. Unscrew the height adjustment nut (P9) and place the base cover (P10) on the
base (P11).
5. Return the nut (P9) in place.
6. Slide the base cover (P10) onto the cross base.
7. Slide out the extension pole (P8) from the base tube (P11) and mount the
motor unit (P6) on its top.
8. Place the motor unit firmly on the top of the extension pole, and tighten screw
(P7).
9. Un-screw the grill nut (P15) from motor cover (P4) and put the rear grill (P3) on
the motor cover (P4). Tighten the rear grill by the grill nut (P15).
10. Place the blade (P2) on the shaft (P13) and tighten by blade nut (P16).
11. Attach the vane (P19) to the front grill by the screws (P18).
12. Put the front grill (P1) on the rear grill (P3) and secure it with the clips (P17) and
screw (P22).
13. Adjust the required height and secure in place by tightening the height
adjustment nut (P9).
14. If needed, you can adjust the air flow angle by the joint (P23).
Note: Make everything in reverse procedure to disassemble the unit.
Use
1. Connect the assembled fan to a wall outlet.
2. Start the fan by pressing on one of the buttons (P14). Press the 0 button to
turn off the fan.
Button (0) – Off
Button (1) – Low fan speed
Button (2) – Medium fan speed
Button (3) – High fan speed
Oscillation
1. To activate the oscillation (rotate from side to side), press the oscillation knob
(P5).
2. To stop oscillation, pull the oscillation knob P5 out.
Cleaning and maintenance
– Wipe the fan regularly with a well wrung cloth, and always keep the grill free
of dirt. Never use corrosive or abrasive detergents, as these may damage the
plastic parts of the fan.
Page 14

English
14
SPECIFICATIONS
Model number 530014 (Ebba 2.1)
Power supply AC 230 V, 50 Hz
Effect 45 W
Size Ø 40 cm
Page 15
English
15
OTHER INFORMATION
Environment
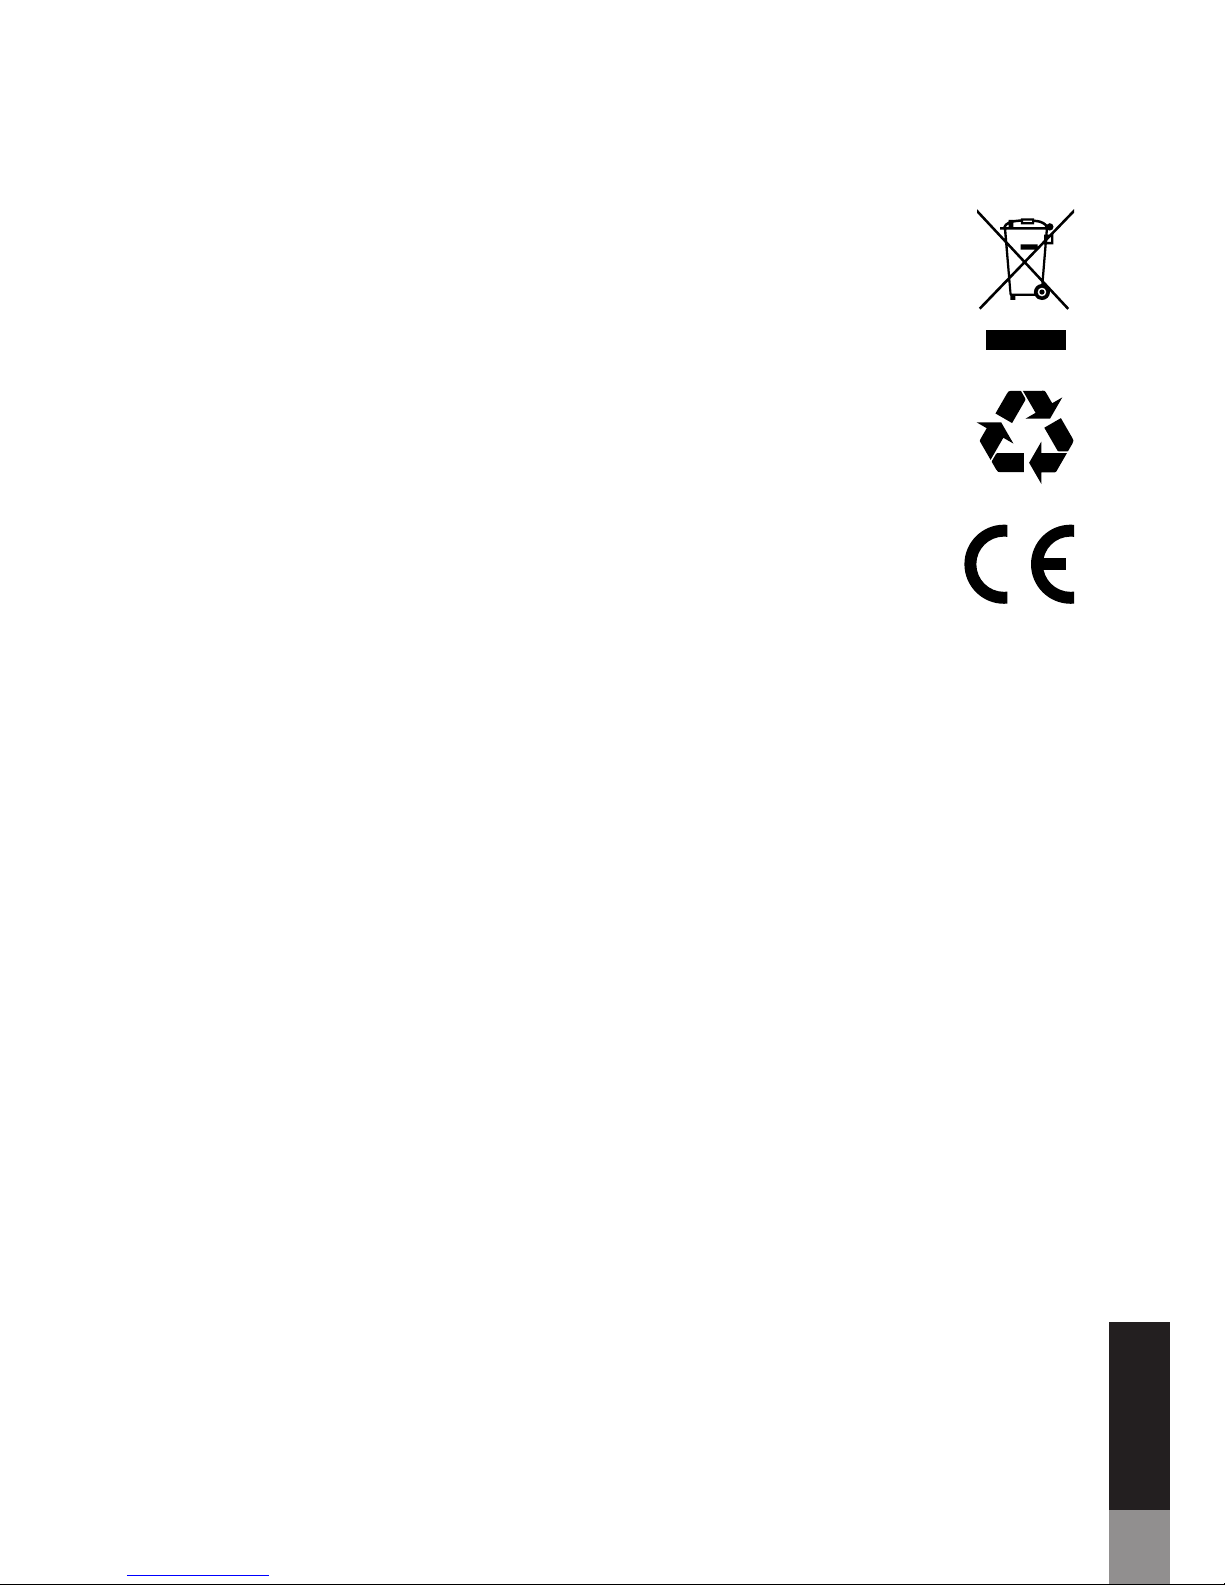
This symbol on the product or in the instructions means that the
electrical and electronic equipment must be disposed of separately
from other household waste when it does not work anymore.
The EU has separate waste collection systems, contact your local
dealer or authority for more information.
This symbol on the products packaging means that the material is
recyclable.
Law and safety
This product has been manufactured according to current regulations
for electromagnetic fields (EMF), which means that it is safe to use if
used according to safety instructions. The product is manufactured
according to current regulations within the EU legislation, limiting the
use of hazardous substances in electrical and electronic equipment.
Reservations
We reserve the right to correct any typographical errors, and reserve the right to
make ongoing changes and improvements to the product and related materials.
Page 16

Made in P.R.C by Bergsala SDA AB
P.O. Box 10204, 434 23 Kungsbacka, Sweden
 Loading...