

Page 1
INSTALL INSTRUCTIONS P-MID-1 w/P-MFK-5
MIDDLE PARTITION w/MOUNTING FILLER PANEL KIT
1997-2008 CHEVROLET/GMC FULL SIZE PASSENGER VANS
TOOLS REQUIRED:
Power drill
Drill bit set
HARDWARE:
QTY DESCRIPTION PART #
5 ¼” x 1 ½” Hex head Lag Bolt GSM33062
6 ¼” x 1” Hex head Lag Bolt GSM33060
20 ¼-20 x ¾” Carriage Bolt GSM32000
12 ¼-20 Serrated Nut GSM30023
8 ¼-20 Nylock Nut GSM30016
1 5/16-18 Nylock Nut GSM30017
1 5/16-18 x 2” Hex Head Bolt GSM33015
2 5/16 Flat Washer GSM31006
8 ¼” x 1” Fender Washer GSM31014
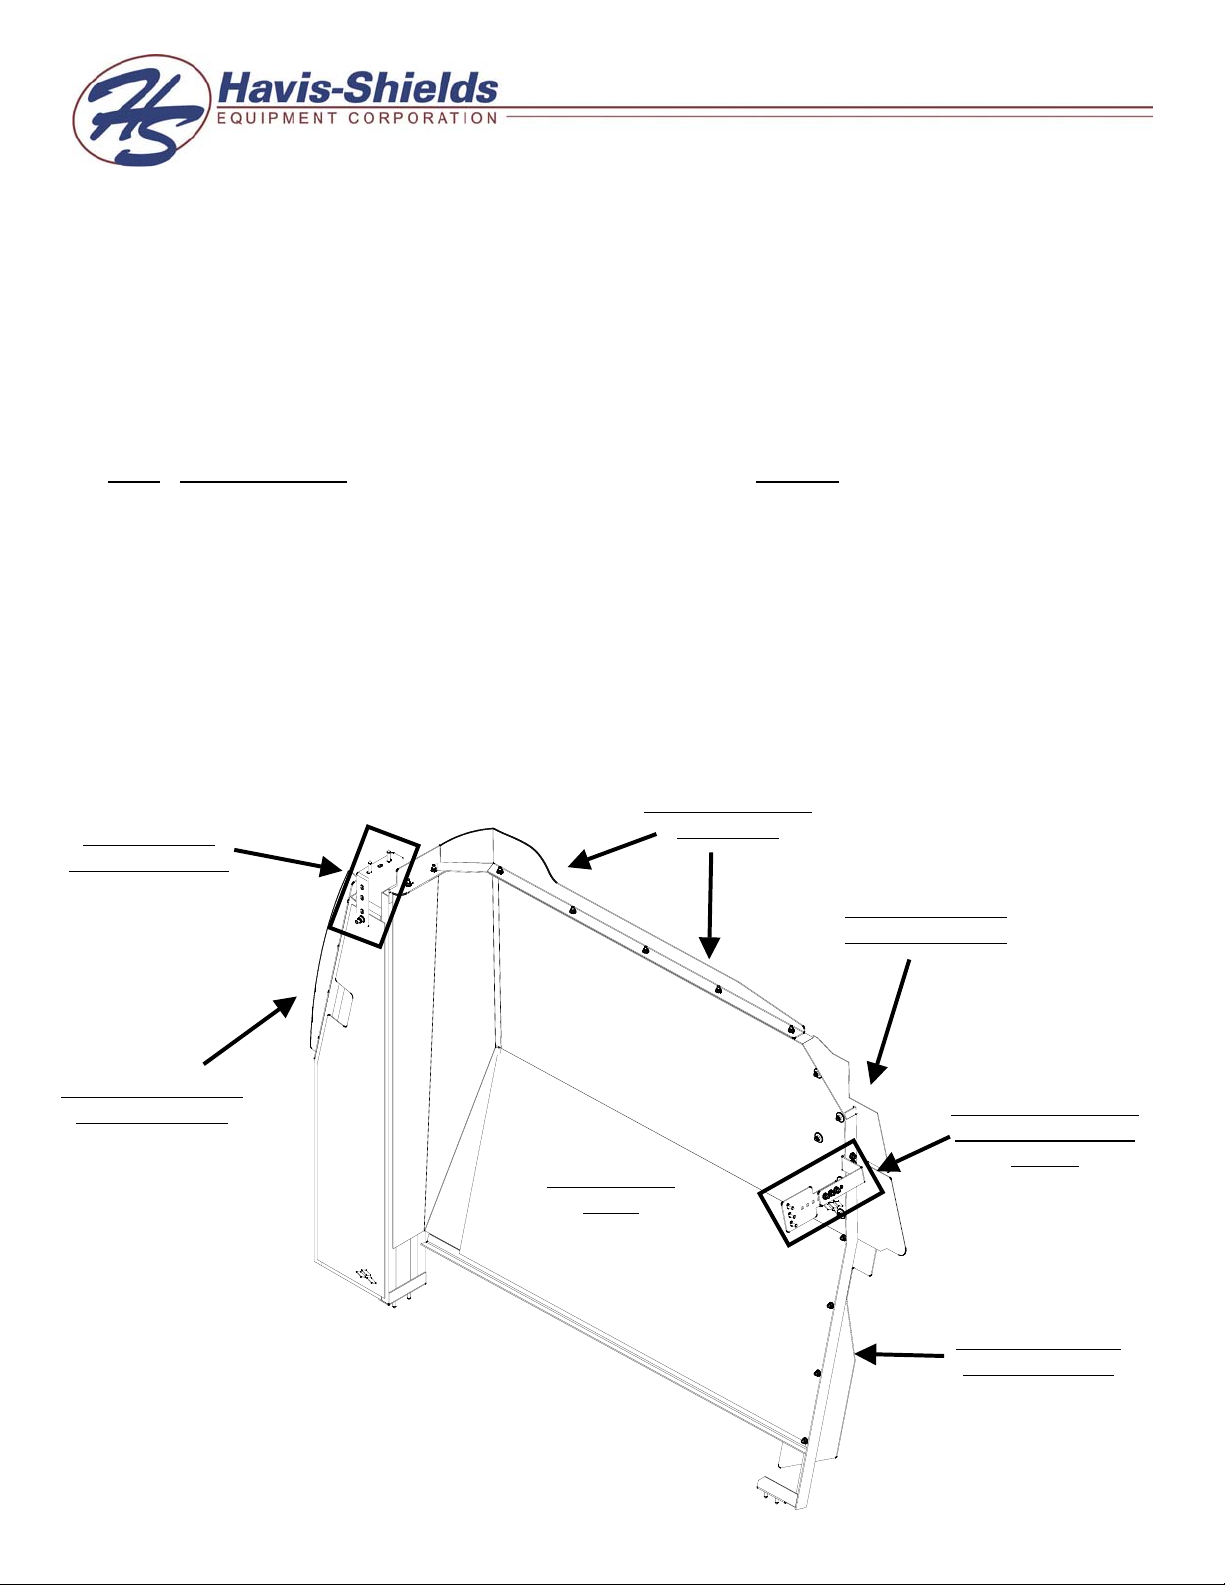
Passenger Side
Mounting Bracket
Ratcheting wrench
Standard & Metric socket set
Upper Center Steel
Filler Panel
Passenger Side Steel
Door Filler Panel
Main Partition
Frame
Driver Side Upper
Lexan Filler Panel
(2-Piece) Driver Side
“B” Pillar Mounting
Driver Side Lower
Steel Filler Panel
Bracket
Page 2
SUB ASSEMBLY:
1. Remove “C” pillar trim panel. This is necessary for driver side mounting bracket.
2. Position upper center filler to partition and mark mounting holes.
3. Drill 5/16” holes on marks.
Always!
Read all instructions before installing any Havis-Shields Equipment Corp products.
Check for obstructions (Wire, brake lines, fuel tank, etc.) before drilling any holes!
Use hardware provided with install kit
INSTALLATION:
1. ATTACH PARTITION TO FLOOR:
• Place partition carefully into vehicle behind the first
row bench.
• Move bottom of partition forward to the back of seat
base on first row bench.
Note: Driver side mounting leg on partition will be forward of seat belt
hold down on floor of van.
• Pre-drill the (3) driver side mounting leg holes with
3/16” drill bit. Be sure to check for obstructions.
• Attach partition to van floor at driver side mounting leg
using (3) ¼” x 1 ½” Hex head lag bolts.
• Proceed to partitions passenger side mounting leg. Be
sure to check that partition is square with the bench seat.
• Pre-drill the (2) passenger side mounting leg holes with
3/16” drill bit. Be sure to check for obstructions.
• Attach partition to van floor at passenger side mounting
leg using (2) ¼” x 1 ½” Hex head lag bolts. Partition is
now self-supporting.
2. ATTACH (2- PIECE) DRIVER SIDE
“B” PILLAR MOUNTING BRACKET:
• Hold 2-piece driver side mounting
bracket to partition and “C-pillar”
of van.
• Determine proper location to
mount 2-piece bracket to partition.
• Drill (2) 5/16” holes where
mounting bracket and partition
meet.
• Attach bracket to partition using
¼-20 x ¾” Carriage bolts and
¼” x 1 ½” Hex Head Lag Bolts
P-MID-1^MFK-5_INST_9-07
Page 3

serrated nuts.
• Press partition as far forward and mark mounting holes where driver side mounting
bracket and “C-pillar” come in contact.
• Pre-drill 3/16” holes into “C-pillar”.
• Attach bracket to C-pillar using (3) ¼” x 1” Hex head lag bolts.
• Plastic trim panel must be notched around bracket to mount.
3. ATTACH PASSENGER SIDE MOUNTING BRACEKT:
• Press partition as far forward as
possible and holding bracket to
partition (square tubing section)
determine where to slot headliner to
accept mounting bracket.
• Slot headliner and position mounting
bracket to be flush with vehicle inner
roof support.
• Mark (3) mounting holes and predrill using 3/16” drill bit.
5/16-18 x 2”
Hex head bolt
• Attach bracket to vehicle using (3)
¼” x 1” Hex head lag bolts.
• Press partition up to bracket and
mark holes where bracket and
partition come together.
• Drill 5/16” holes on these marks and
bolt partition to bracket using 5/1618 x 2” Hex head bolt, washer, and
nylock nut.
4. ATTACH UPPER STEEL CENTER FILLER PANEL:
• Attach upper center filler to partition through the holes pre-drilled at subassembly
using ¼-20 x ¾” Carriage bolts and serrated nuts.
• Tighten all hardware.
Passenger side upper
mounting bracket
P-MID-1^MFK-5_INST_9-07
Page 4

5. ATTACH DRIVER SIDE UPPER LEXAN FILLER PANEL:
• Position driver side ¼” lexan filler panel to partition so that minimal space is between
the vehicles window, (or window guard) and the lexan filler.
NOTE: It is necessary to keep a 1/8” gap between the window or guard and the filler to allow for
expansion and contraction of the lexan during temperature fluctuations.
• Drill (6) 5/16” holes evenly spaced through both the ¼” lexan filler panel and the
partition frame. Attaching to the frame directly will help to avoid filler rattling.
• Bolt lexan filler to partition using ¼-20 x ¾” carriage bolts and nylock nuts.
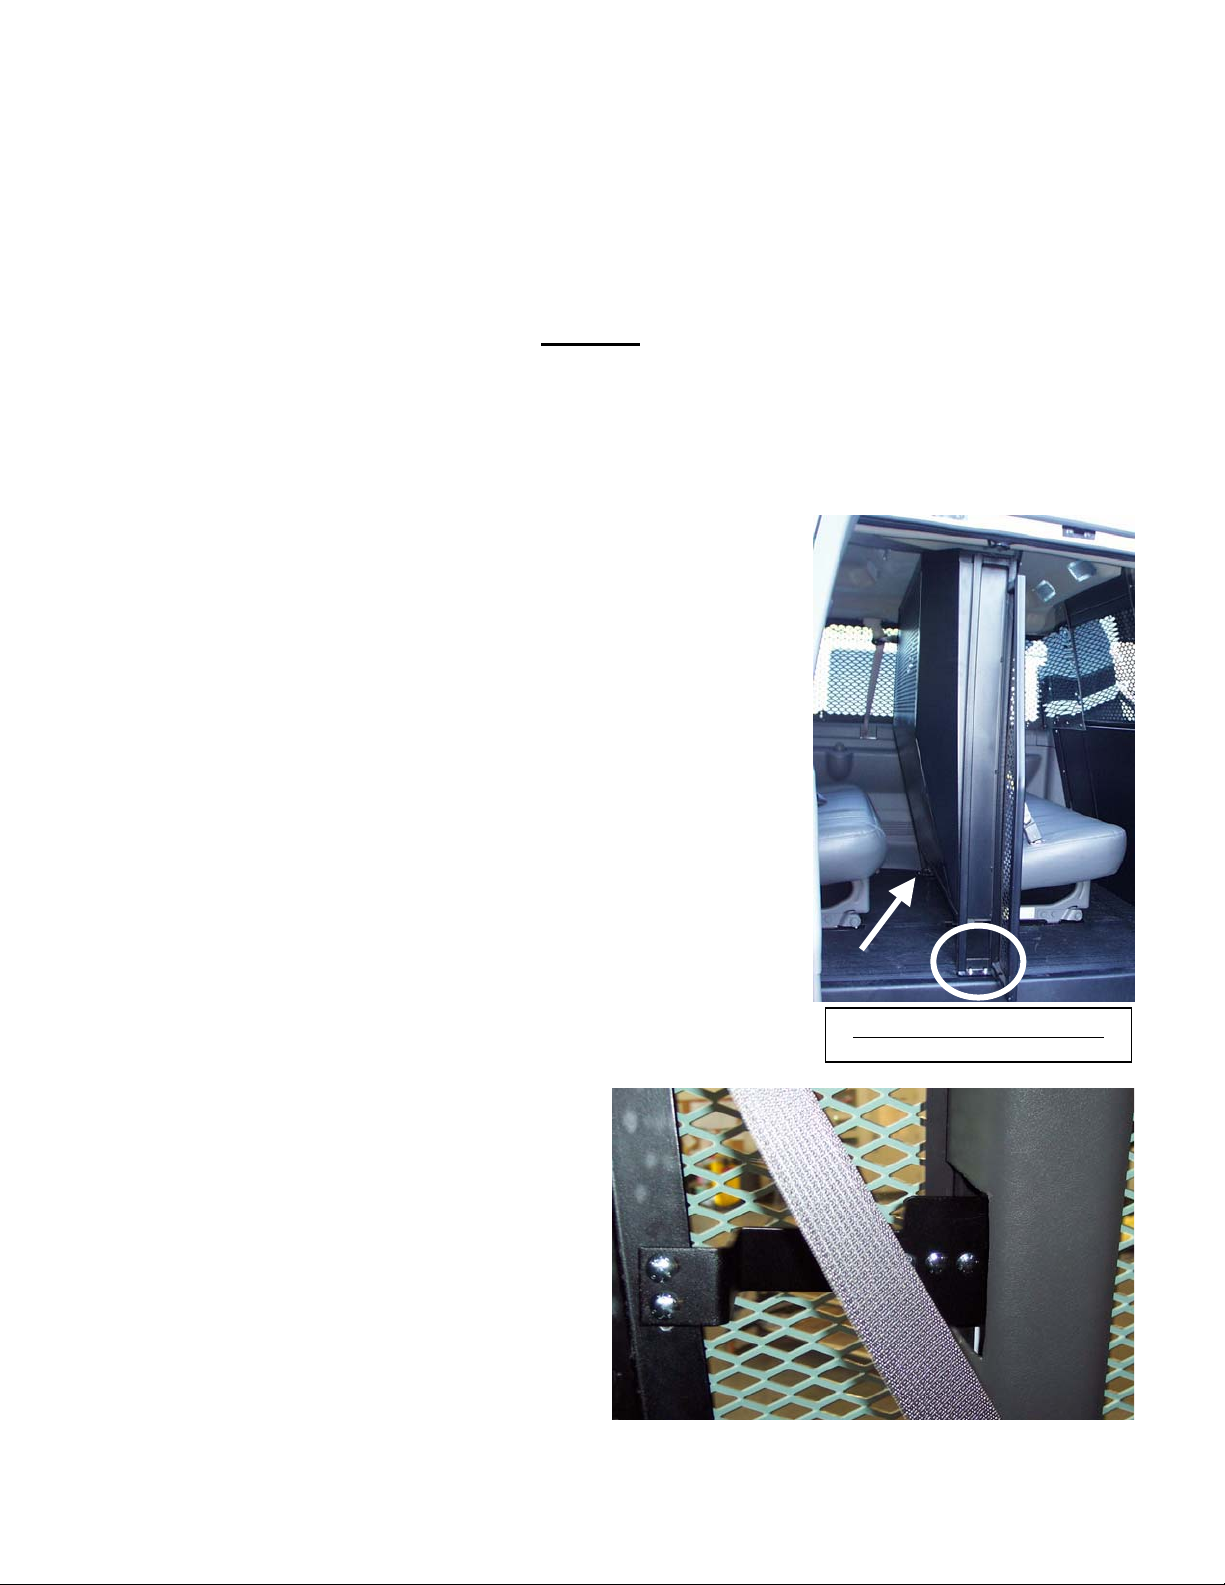
6. ATTACH DRIVER SIDE LOWER STEEL FILLER PANEL:
• Position driver side lower aluminum filler panel tight to vehicles interior trim and
floor.
• Using slots in filler panel as a drill guide mark and drill partition using 5/16” drill bit.
• Attach filler panel to partition using ¼-20 x ¾” carriage bolts and serrated nuts.
7. ATTACH PASSENGER SIDE DOOR STEEL FILLER PANEL:
• Position on front row bench in van close side doors.
• Hold filler panel to partition so that it does not interfere door mechanisms.
• Mark and drill 3/16” holes through partition tubing.
• Attach filler to partition using ¼-20 x ¾” Hex head thread cutting bolts.
• Vacuum out all metal shaving and double check door operation.
¼-20 x ¾”
Lexan
Notched
P-MID-1^MFK-5_INST_9-07
 Loading...