

Page 1

INSTALL INSTRUCTIONS KK-K9-F14-K-PT
K9/PRISONER TRANSPORTATION SYSTEM
2003-2009 FORD EXPEDITION
HARDWARE:
QTY: DESCRIPTION: PART #:
28 ¼-20 x ½” Stainless carriage bolt GSM32022
8 ¼-20 x ¾” Stainless carriage bolt GSM32024
64 ¼-20 flanged serrated nut GSM30023
6 ¼-20 x ¾” Hex head cap screw GSM33001
6 ¼” x 1 ½” Hex head lag screw GSM33062
36 #12 x ¾” Stainless sheet metal screw GSM34177
24 #10 x ¾” Stainless sheet metal screw GSM34170
12 #10 x ½” Stainless sheet metal screw GSM34169
10 10-32 x ¾” Stainless machine screw GSM34098
6 #10 x ¾” Sheet metal screw GSM33195
1 Tube silver caulk PRM97343
1 46” x 45 ½” Rubber Floor mat KNM01029-SUV
10 #10 x ½” Flat head sheet metal screw GSM33150
1 ¼” Lexan shield/PT front partition KNM001220
Always!
¾ Read all instructions before installing any Havis-Shields Equipment Corp products.
¾ Check for obstructions (Wire, brake lines, fuel tank, etc.) before drilling any holes!
¾ Use hardware provided with install kit
¾ For product support, visit the Install Instructions Section of our website at
http://havis.com/Installation/Installation.html
1-800-524-9900.
, email technicalsupport@havis.com or call
Page 2
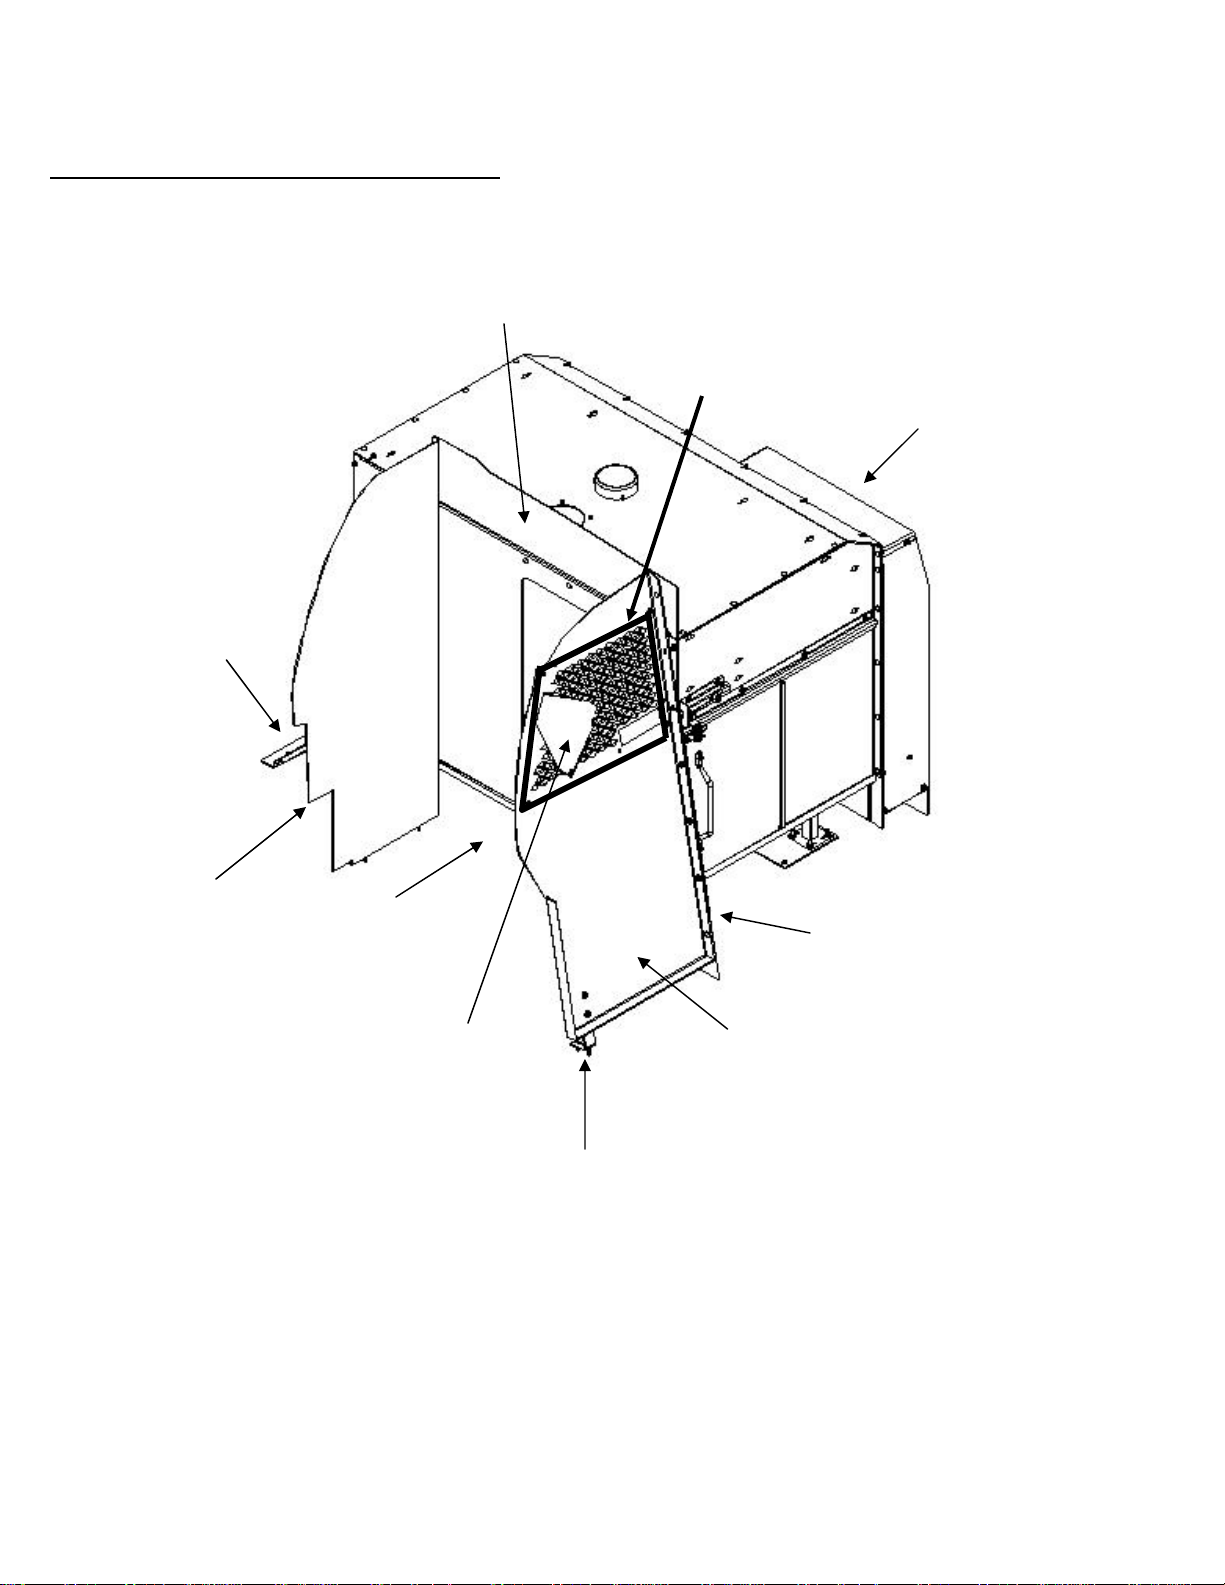
FORD EXPEDITION K9/PT COMBO KIT
Upper passenger
side filler panel
Rear floor mount
bracket
¼” Lexan
shield
Driver-side
tunnel
Rear passenger
side filler panel
Lower passenger
side filler panel
Upper “B”-pillar
mounting bracket
Floor mounting
plates and legs
Front passenger
side filler panel
Lower passenger-side
mounting foot
2
KK-K9-F14-K-PT_INST_11-08
Page 3

View of Expedition door panel
Remove hex head screws holding
lower section of door panel
Remove plastic trim piece. Metal
clips hold on trim
Remove trim piece covering torx
screws under door panel armrest
and remove screws
Remove window/lock switch
assembly from door
Remove plastic door panel
Remove window switch and
reconnect. Wire tie switch in safe
location.
Recommended location for switch
3
Remove speaker from door panel.
Remove screws and unplug
KK-K9-F14-K-PT_INST_11-08
Page 4

2006-2008 FORD EXPEDITION DOOR
Remove bolt
1. Remove the specified bolt and cut on
the line shown left.
2. The upper portion of the cut piece
will remain off.
3. Save for vehicle re-sale.
Cut on this line
Back seat configuration for
Ford Expedition
Remove seat bolts from center
and driver side Back seats.
Remove rear plastic storage
compartment if included.
Leave passenger-side rear seat
Attach the rear floor mount bracket
to the K9 housing with ¼ x ½ bolts.
4
Slide K9 section of assembly
through back hatch of vehicle. Be
careful not to rip headliner or
KK-K9-F14-K-PT_INST_11-08
scratch trim panels.
Page 5

Note: Mounting plate straddles a ridge in the floor. When bolts
are tightened the plate will form to the floor.
7 ¾”
Sub-assemble mounting leg to
mounting plate using ¼” x ¾”
carriage bo
lts and serrated nuts. Set
mounting leg assembly to 7 ¾”
View of mounting foot from
floor of K9
Attach assembly to vehicle
using OEM seat hardware and
nutcerts in vehicle
Adjust mounting foot until K9
unit is level within the vehicle
Attach assembly to K9 floor
using ¼” x ¾” carriage bolts
and serrated nuts
Single mounting
hole
View of mounting feet from
drivers’ compartment
Place tunnel assembly as shown
above
5
Attach tunnel to K9 assembly using ¼” x
¾” and ¼” x ½” carriage bolts and
serrated nuts
Note: ¾” bolts are used where (3) layer
thicknesses of aluminum bolt together
KK-K9-F14-K-PT_INST_11-08
Page 6

View of assembly at this time
Position front partition as
shown and attach to K9
housing assembly
Place front partition filler panel
Position ¼” lexan shield
Using holes in partition mark and
drill shield Attach using ¼” x ¾”
carriage bolt and serrated nut
into vehicle as shown above
Remove “B” pillar upper trim
panel. Remove seat belt bolt
Remove bolt located behind
plastic trim
Remove trim panel to access
bolts for grab handle.
6
Remove grab handle
KK-K9-F14-K-PT_INST_11-08
Page 7

Grab handle removed
Install ceiling filler panel to
passenger side of K9 housing using
¼” x ¾” carriage bolts and nuts
Install “B” pillar mounting
bracket using bolts that hold
grab handle. (Re-installing the
grab handle is optional)
Attach ceiling filler panel to
front partition using ¼” x ¾”
carriage bolt and nut
Attach “B” pillar mounting
bracket to front partition using
¼” x ¾” carriage bolts and nuts
View of ceiling filler
from rear of vehicle
View of ceiling filler from
passenger side rear door
Position rear partition through
vehicles rear hatch
7
Location on inside of K9 assembly
where rear partition will bolt to using
¼” x ¾” carriage bolts and nuts
KK-K9-F14-K-PT_INST_11-08
Page 8

Location where ceiling filler bolts
to rear partition
Attach front partition to vehicle using
6” L-mounting bracket. Bolt bracket
to partition using ¼” x ¾” carriage
bolts and nuts. Bolt “L” mounting
bracket to vehicle using ¼” x 1” Lag
bolts. Pre-drill w/ 3/16” hole
Attach rear partition to floor of
vehicle.
Position floor filler panel to K9
housing, mark holes and pre-drill
K9 housing using 1/8” drill bit
Pre-drill holes using 3/16” drill bit
and attach using ¼”x 1” Lag bolts
Attach to K9 housing using #10 x
¾” sheet metal screws.
Top Inner Screw
Center door panels so edges do not ha ng
over. Attach to door with #10 x ½”
stainless sheet metal screws.
Note: Window guards have holes around
perimeter for permanent mounting.
These holes are not used
window kits! They also come flat in
shipping.
with hinge style
The window guard must be prebent so it fits tight against the
contour of the door window
frame. The aluminum guard can
easily be formed at workbench.
8
Upper
Aluminum
Bracket
Hold window guard with pre-assembl ed
hinge and upper bracket onto window fra me.
Make sure guard is centered on window.
Attach hinge to lower door panel with #10 x
½” stainless sheet metal screws. Mark upper
aluminum bracket location on window frame
and remove from window guard. Attach
upper aluminum bracket onto window frame
with #10 x ½” flat head sheet
KK-K9-F14-K-PT_INST_11-08
metal screws.
Page 9

Hinge up window
guard and reattach to
bracket with 10-32 x
½” Stainless machine
screws and #10 Flat
Standard
door panel
washers.
NOTE: Door panel
fillers are provided for
the Expedition EL.
This is not used for the
standard length
Expedition.
K9 / PT unit installation complete.
Shown with emergency sliding door open between K9 and Prisoner compartment.
Sheet metal seams and gaps need to be carefully
SILICONED at floor area. Allow silicone to dry overnight
before placing in rubber floor mat
9
KK-K9-F14-K-PT_INST_11-08
 Loading...