

Page 1
4
INSTALL INSTRUCTIONS C-VS-800-CV
VEHICLE SPECIFIC CONSOLE &
RADIO/HVAC RELOCATION HOUSING
1997-2008 FORD CROWN VICTORIA
TOOLS REQUIRED:
Ratcheting wrench
Standard/Metric socket set
Screwdriver set
HARDWARE:
QTY DESCRIPTION PART #
2 #10 x ¾” Phillips sheet metal screws GSM33195
1 Torx Screw Kit C-HK-1
Always!
Disconnect the vehicles’ battery. Removing seat bolts on
some vehicles may give the vehicles computer a false
reading resulting in warning lights. This requires the
vehicles’ computer to be reset.
Read all instructions before installing any Havis-Shields
Equipment Corp products.
Check for obstructions (Wire, brake lines, fuel tank, etc.)
before drilling any holes!
Use hardware provided with install kit.
For product support, visit the Install Instructions Section
of our website at
http://havis.com/Installation/Installation.html, email
technicalsupport@havis.com
or call 1-800-524-9900.
Tin snips (if necessary)
Powered Drill w/ 5/16” drill bit
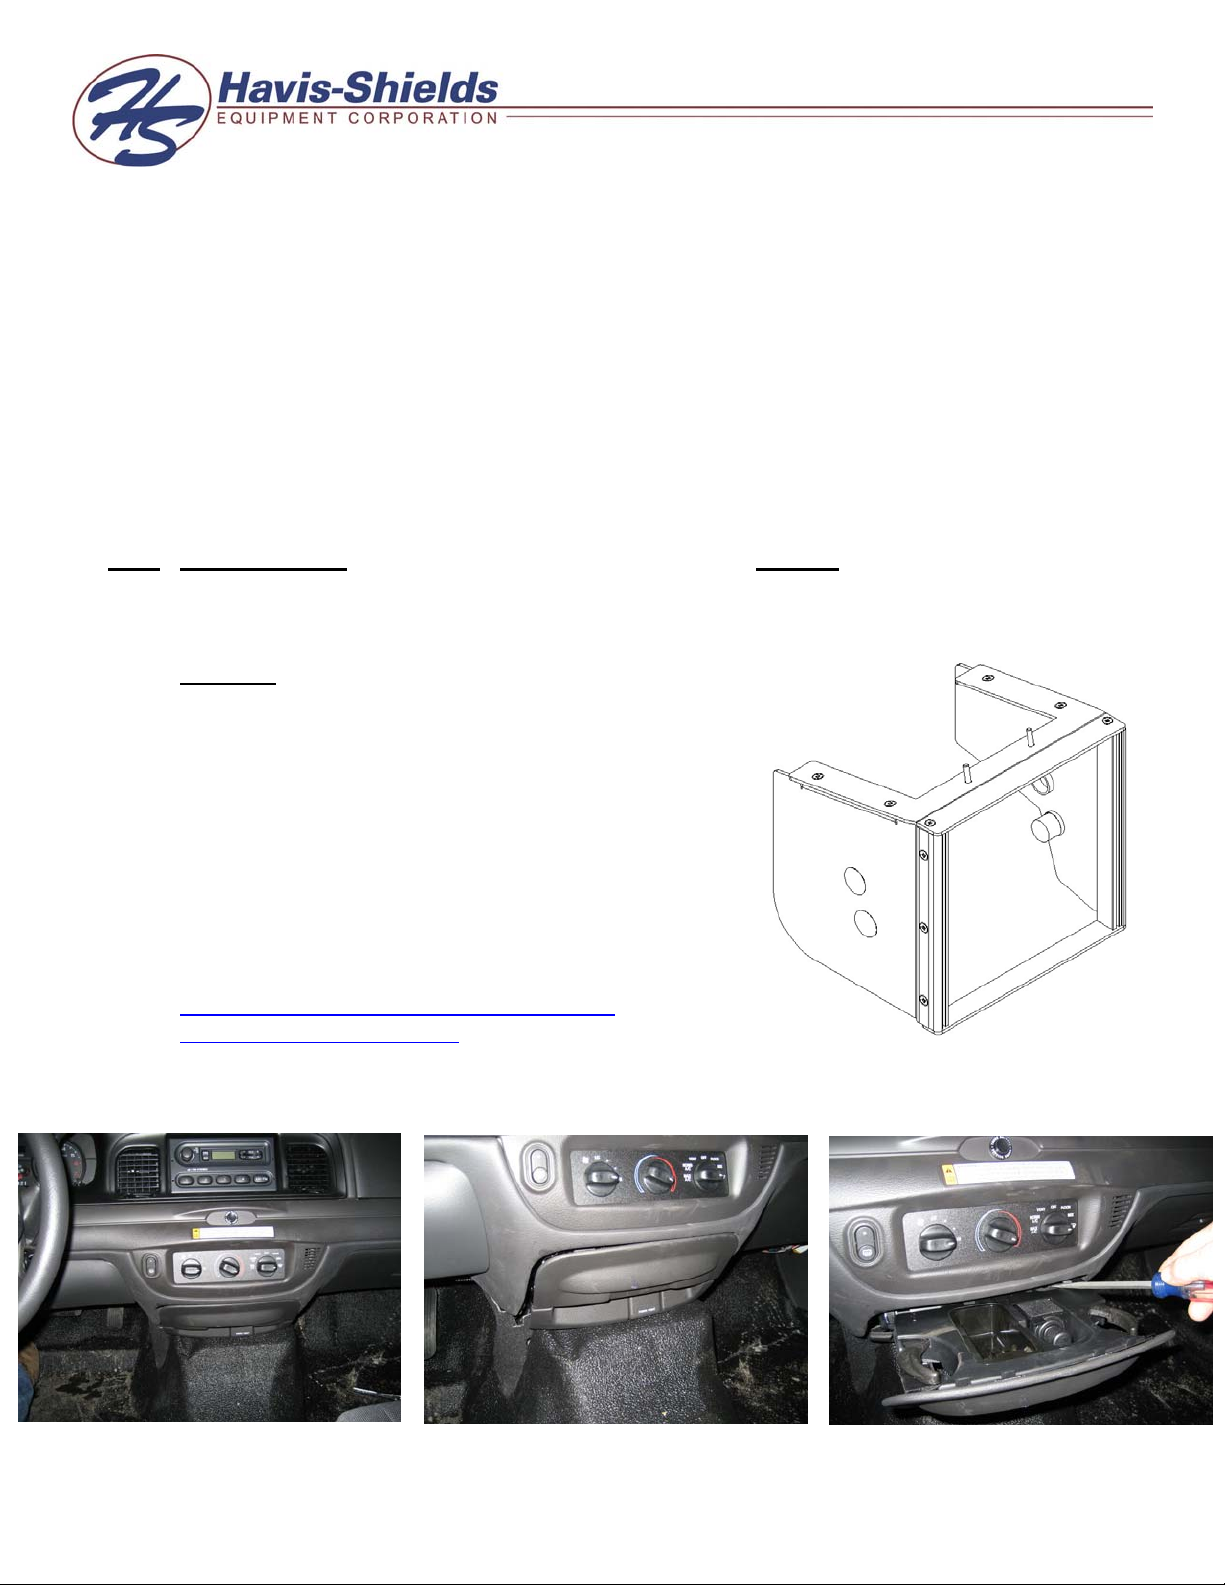
Ford Crown Victoria dashboard
Remove ashtray and power point
housing from dash
A flat head screwdriver is needed to
release the tray from the slide tracks
Page 2
N
N
(If
y)
With the tray removed, wire
harnesses for the lighter outlet and
ashtray light will need to be
removed
Unplug from the accessories.
Remove the ashtray frame from the dashboard by removing the
hex head screws located in the back of the frame.
This is not necessary. If desired, you can cut the power point
bracket out of the ashtray/power point assembly.
ote: This must be removed in order for the console to slide into
the ashtray slide rails.
ote: The next few steps are for application requiring the
relocation of the AM/FM radio and/or the HVAC controls. If
the removal of these controls is not required, proceed to page 3
Remove trim panel as shown above
Remove the (2) screws above the
HVAC controller to ease the removal
of the AM/FM Radio. Remove the
hex head screws holding the
controller to the dash.
necessar
2
Remove the AM/FM radio from the
dash. Unplug the wire harness and
antenna. Re-route harness to OEM
ashtray location
C-VS-800-CV_INST_9-07
Page 3

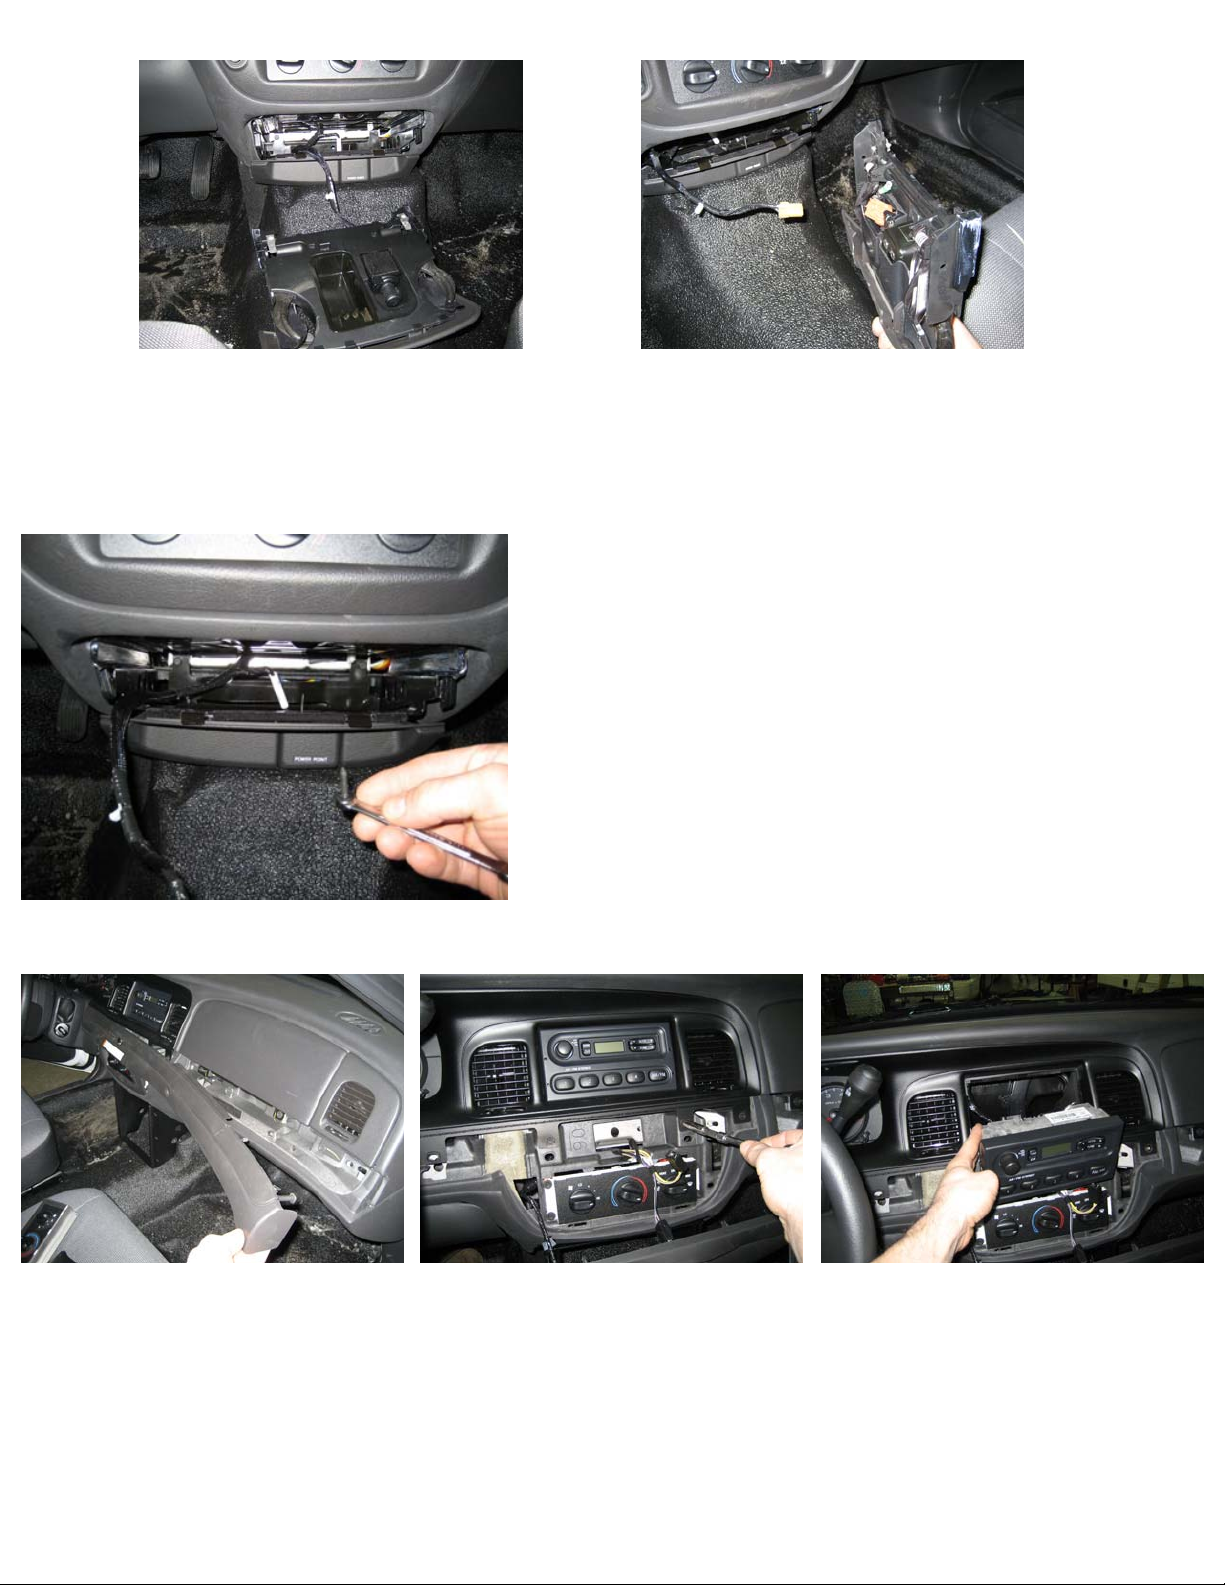
Re-route HVAC controller and the
AM/FM radio harness and antenna
to the VS console
Notch
It is necessary to notch the OEM
ashtray/power point frame assembly if
relocating the HVAC controls to the VS
console. This will allow the HVAC
vacuum hoses to reach the VS console
Note: If NOT relocating
AM/FM radio and/or
HVAC controls, resume
installation at this point
Remove wire plug going to
Ashtray/Power point frame
assembly
Re-install ashtray frame bracket
Drill out spot-welds that hold the
power point bracket to the frame. This
needs to be removed in order for the
console to slide into the rail
Ashtray frame rail re-assembled
Power point detached from
assembly
Slide console into ashtray
frame slide rails
3
C-VS-800-CV_INST_9-07
Page 4

Holes are for screws to attach to the
OEM dash
Attach using #10 x ¾” sheet metal
screws.
View of console from inside
Final installation of console
Install components according to
specific application
Pre-drill OEM dash using holes in
console as a drill template
Install AM/FM radio if necessary, as
shown above.
Install HVAC controller into C-
EB40-ACV-1P as shown and install
into console above AM/FM radio
4
C-VS-800-CV_INST_9-07
 Loading...