

Page 1
INSTALL INSTRUCTIONS C-VS-1000-TAH
VEHICLE SPECIFIC CONSOLE
2007 CHEVY/GMC SUBURBAN/TAHOE/YUKON XL/YUKON
TOOLS REQUIRED:
Ratcheting wrench
Metric/Standard Socket Set
Standard Wrench Set
HARDWARE:
DESCRIPTION PART #
QTY
1 OEM switch bracket CM001800-3
4 ¼-20 Serrated nut GSM30023
2 ¼-20 x ¾” Hex bolt GSM33001
2 #10 x ¾” Sheet metal screw GSM33195
1 Torx screw hardware kit C-HK-1
Power drill w/ 1/8” drill bit (optional)
Screwdriver set
T-20 torx bit
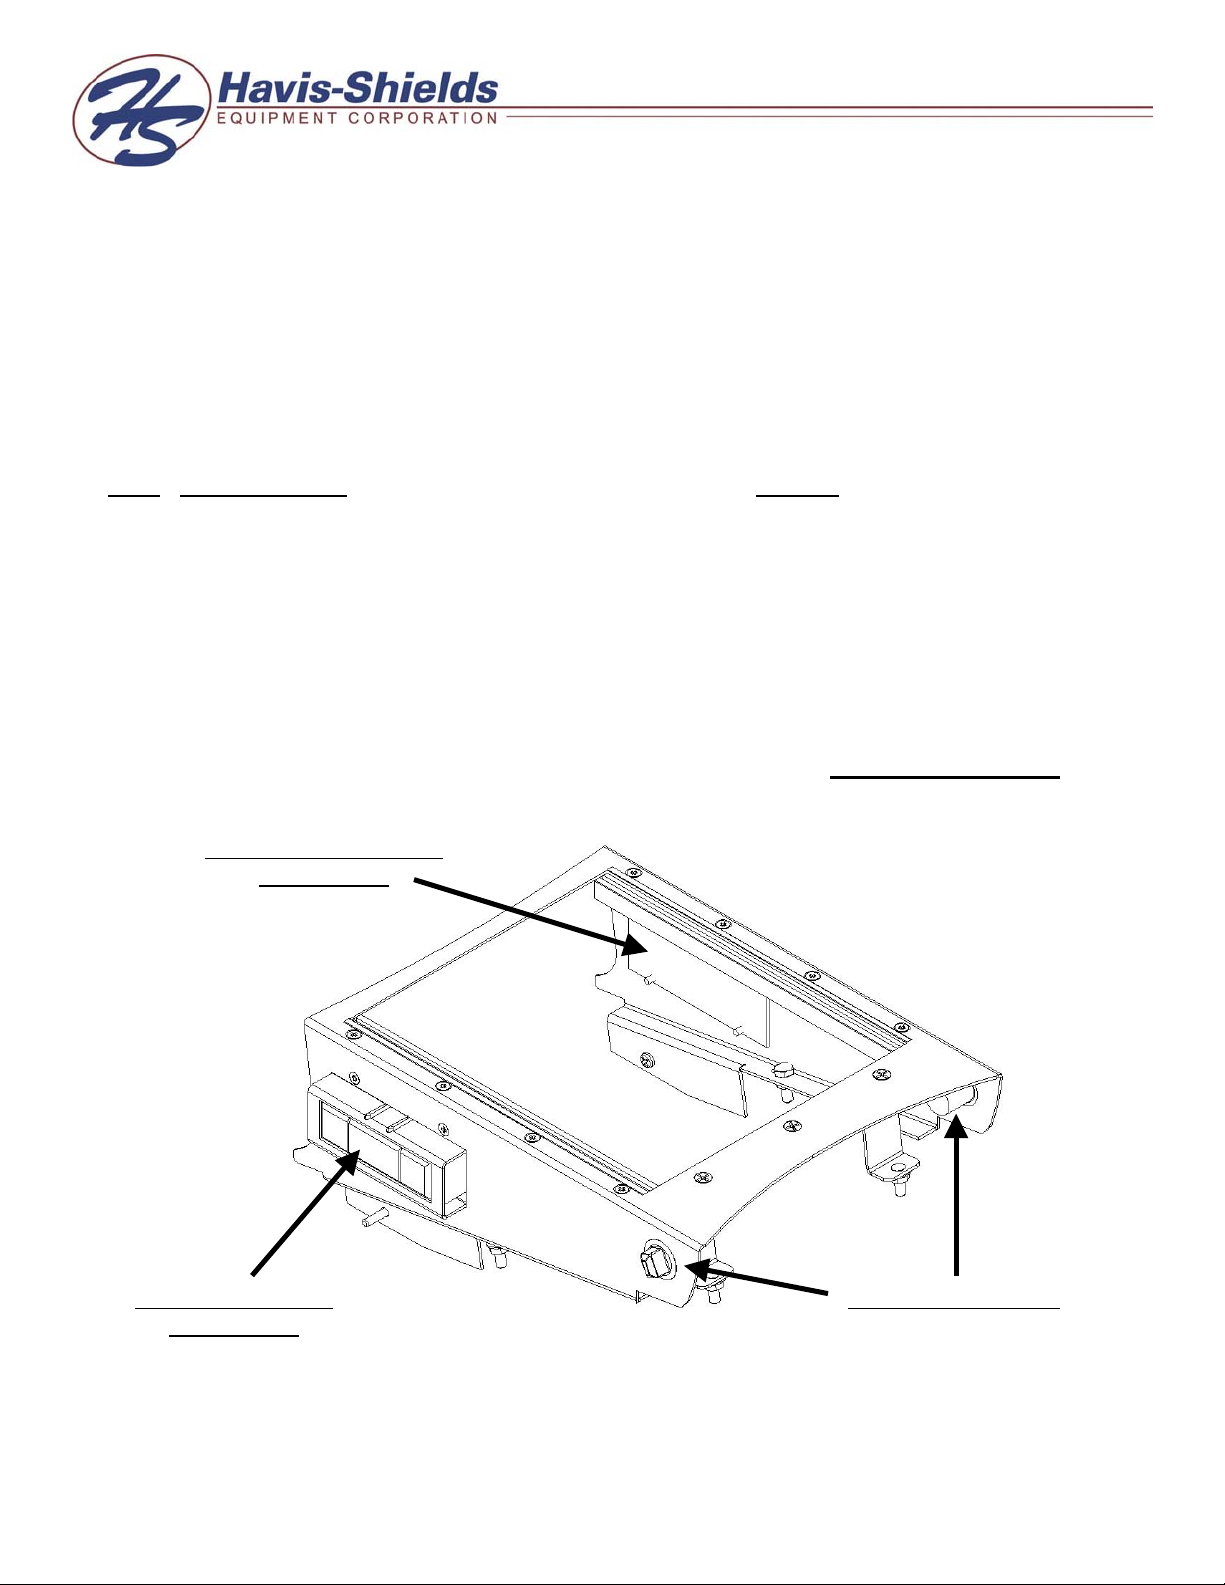
Switch cutout filler plate
CM001800-4
OEM switch bracket
CM001800-3
C-VS-1000-TAH
Supplied lighter plugs
Page 2
N
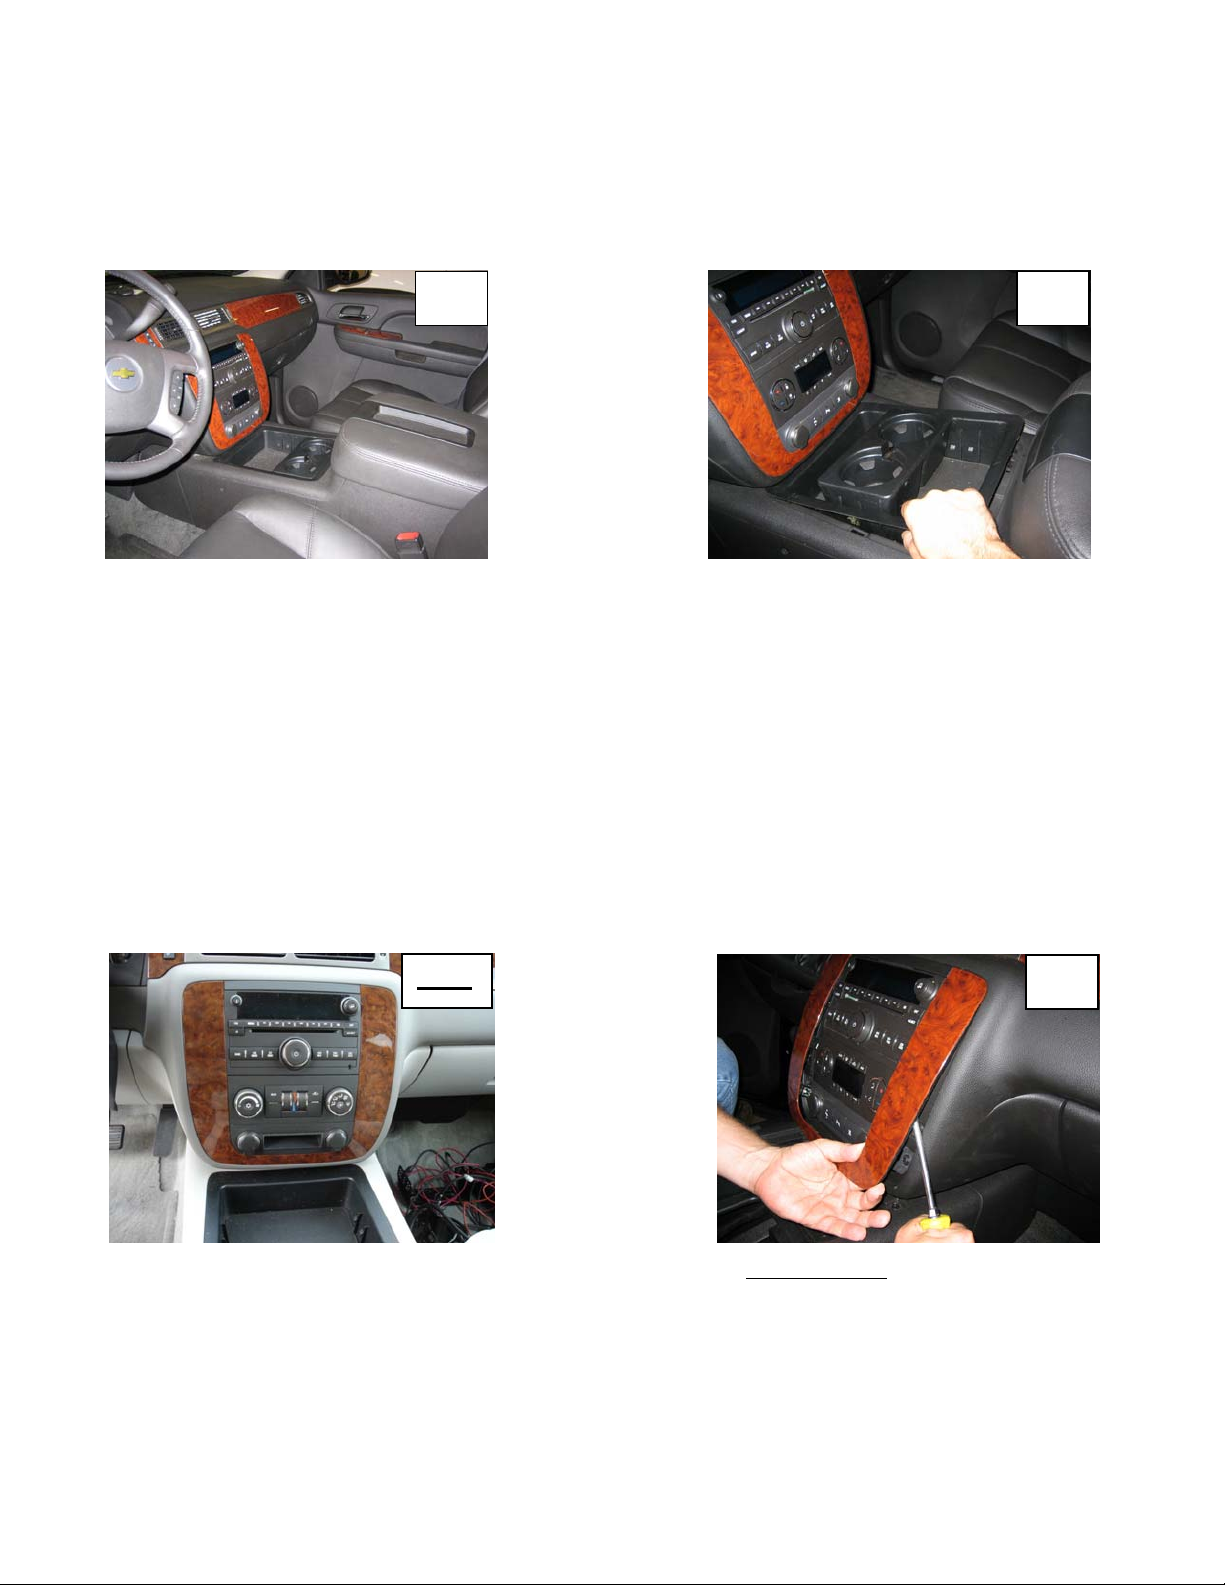
#1
View of factory full-length console
with C-VS-1000-TAH
#2
Remove factory cup holder/accessory
pocket from console
ote:
If your console is not equipped with
adjustable pedal, tow package, and power
brake switches proceed to step #13
#3
CAREFULLY separate trim bezel
from dashboard
C-VS-1000-TAH-INST-1-07
Page 3

#4
#5
#6
Using a flat head screwdriver
concentrate pressure on or around
the trim bezels “J” clips
#7
Remove factory switch box from
trim panel
Remove entire bezel and put aside.
#8
Using a small flat head
screwdriver, unclip fastener
Remove factory trim screws to
remove the lower switch panel on
dashboard
#9
Unplug switch and set aside for
later install
View of factory console at this time
#11#10
Install switch box into
C-VS-1000-TAH (if necessary)
#12
Attach switch box to console
using T-20 torx screws. Do not
over tighten screws. This will
cause the switches to “stick” in
the ON position.
C-VS-1000-TAH-INST-1-07
Page 4

F
#15#14#13
Install lighter plugs and extend
wires as necessary.
#16
Re-attach factory plug into
switch box
or added
support install
#10 x ¾” screws
Slide C-VS-1000-TAH, front side
first, as shown above.
#17
Be sure plug is secure and
wires are carefully routed so
not to chafe
#19
Carefully drop backside of
console as shown
#18
Align rear-mounting studs into
factory console holes and attach
using ¼” Serrated nuts.
#20
Attach middle of VS console to factory console
using ¼” x ¾” Hex bolts and serrated nuts. For
added support #10 x ¾” screws can be installed
Route all wiring to console. Wire,
and install control heads and
accessories (Sold separately)
on front side of console
C-VS-1000-TAH-INST-1-07
 Loading...