

Page 1
INSTALLATION INSTRUCTIONS C-3090’s & C-3089’s
COMPUTER LAPTOP MOUNT AND ACCESSORIES
TOOLS NEEDED:
Ratcheting wrench
Standard socket set
Open-end wrench set
Always!
Read all instructions before installing any Havis-Shields Equipment Corp products.
Check for obstructions (Wire, brake lines, fuel tank, etc.) before drilling any holes!
Use hardware provided with install kit
For product support, visit the Install Instructions Section of our website at
http://havis.com/Installation/Installation.html
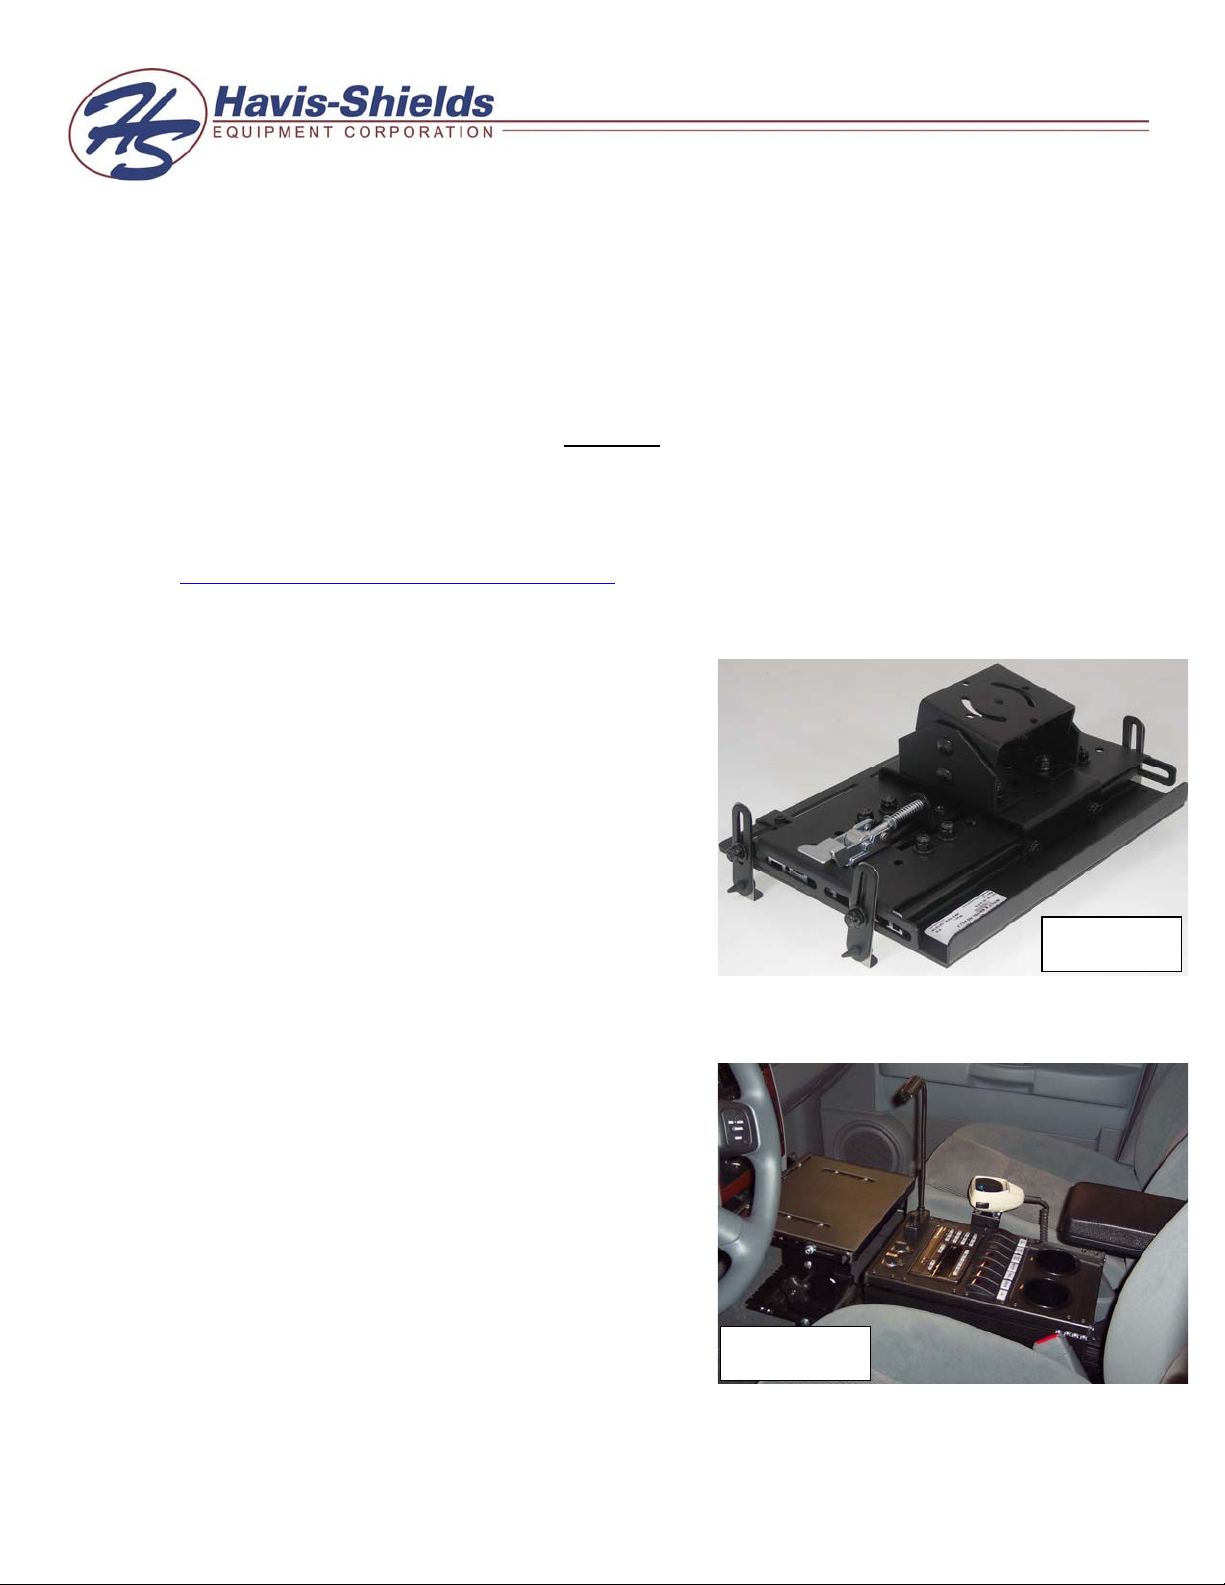
1. MOUNTING C-3090-3 or 4 & C-3089-3 or 4 to C-TCB’S
• Photo #3 on page #2 is a basic assembly
instruction of a C-3090-3 (w/ tilt/swivel)
mounting to a C-TCB-x.
• The tilt/swivel assembly, (Photo #1), which
comes pre-assembled to the C-3090 from the
factory, will bolt directly to the rotating plate,
using the hardware loosely attached to the
plate. You do not need to unassembled the
tilt/swivel from the C-3090.
Note: Be sure the 2” fender washer is assembled between
the rotating plate and the tilt/swivel assembly.
2. C-3090-1 or 2 & C-3089-1 or 2 MOUNTING TO
VEHICLE TRAK MOUNTS:
• The C-3090 will come pre-assembled with
tilt/swivel attached.
• Mount trak kit into vehicle.
• Place console and C-3090 into desired
position on trak. (Photo #2)
Note: Be sure assembly does not interfere with dash or
console.
• Slide ¼-20 hex nuts into slots on side of trak
in location to mount C-3090.
• Attach C-3090 to trak using ¼-20 x ½” hex
bolts and washers. Tighten in desired area.
Allen wrench set
Screwdriver set
Photo #2
Photo #1
Page 2
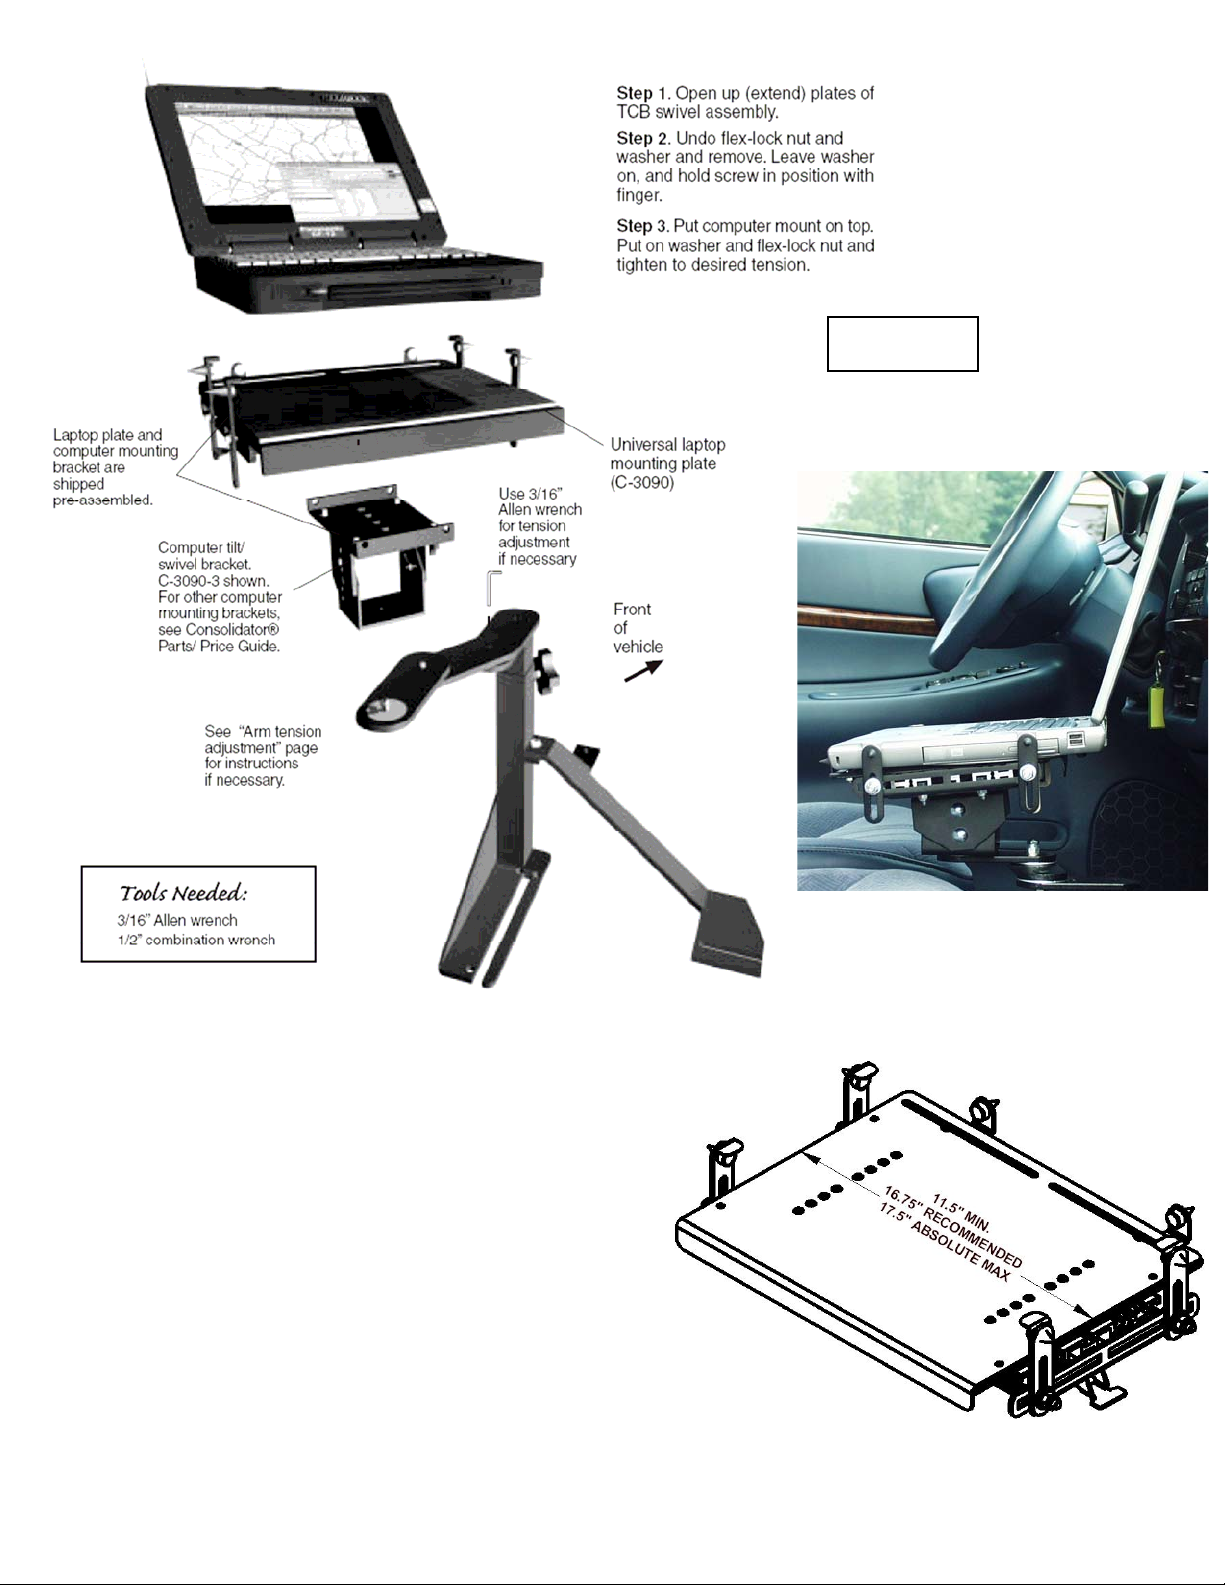
Photo #3
3. ADJUST C-3090 PLATFORM FOR SPECIFIC LAPTOP:
• The C-3090 will need to be adjusted to
properly hold your particular laptop.
Note: Do not adjust the latch on the underside of the
laptop.
• Loosen the “L” clamps on the sides of
the C-3090. (Photo #4)
• Release the latch on the underside of the
laptop.
• Place laptop on top of C-3090 platform
and close the latch.
• Open laptop and adjust “L” clamps so
they are firm against inside lip of
computer on the latch side.
C-3090-INST-10-06
Page 3

• Loosen ¼-20 nylock nuts on the plate on underside of laptop assembly and adjust to
P
P
width of laptop.
• Adjust “L” brackets to clamp the laptop firm.
• Release latch and test for strength. Adjust if necessary.
hoto #4
4. PLATFORM WIDENING INSTRUCTIONS: (Photo #5)
• On larger laptops, it may be necessary to use a different hole pattern on the plate.
• Remove (#1 in photo #5) ¼” nylock nuts and washers
• Remove (#2 in photo #5) bracket and use alternate mounting holes to create a wider
platform.
5. OPTIONAL SCREEN SUPPORT (C-SS & C-SS-2): (Photo #6)
• With laptop adjusted for C-3090, open screen on computer.
• With screen open, remove ¼-20 nylock nut from “L” tab holding laptop.
• Loosely attach optional screen support as shown.
• Adjust screen support around screen and tighten hardware.
• Test screen movement.
#2
#1
hoto #5
Photo #6
C-3090-INST-10-06
Page 4

6. MOUNTING C-TMLOCK
• Photo #7 shows the C-TMLOCK option, which comes assembled from the factory if
ordered with the C-3090.
• Remove 8-32 keps nuts that hold down OEM latch on laptop computer mount.
• Remove Pem studs from laptop computer mount and replace with Pem studs included
with C-TMLOCK assembly.
• Move latch out of way and place C-TMLOCK over Pem studs. Place latch over top of
C-TMLOCK.
• Install keps nuts and tighten.
Photo #7
7. MOUNTING C-ML-MLB TO C-3090 (Photo #8 & 9)
• The map light bracket will bolt to C-3090 on the same frame rail as the support tabs bolt
to.
• Determine exact positioning with laptop mounted on C-3090.
• Attach C-ML-MLB to C-3090 tab rail using ¼-20 x ¾” carriage bolts and nylock nuts.
• Wire map light according to instructions provided.
Photo #8
Mounting location
Photo #9
C-3090-INST-10-06
 Loading...