

Page 1

Parts and Owners Manual
MOWE
SERIAL:
ENGINE MODEL & HP:
DATE PURCHASED:
PURCHASED FROM:
R MODEL:
You must receive special training from the dealer before
operating this mower
.
Page 2

COMMERCIAL MOWER OPERATORS
MANUAL &PARTS LIST
THIS MOWER IS INTENDED FOR COMMERCIAL USE
SPECIAL TRAINING IS REQUIRED TO OPERATE THIS MOWER
SAFELY
MOWER MODEL:
SERIAL:
ENGINE MODEL & HP:
DATE PURCHASED:
PURCHASED FROM: ______________________________
IMPORTANT INFORMATION ABOUT THIS MANUAL
This owner’s manual is considered a permanent part of mower. It must be available to all of the
operatorsand/or person(s) servicing the mower. Should the mower be resold, this manual must remain with
themower. All information, illustrations, and specifications contained in this manual were in effect at the time
of publication. reserves the right to change, modify, and discontinue specifications and design without notice.
If there is a change that has been made to your mower that is not shown or reflected in this manual,please
see your authorized dealer before operating and/or servicing of equipment. Congratulations on the purchase
of your new Commercial Mower. We at are confident that this mower will provide you with years of excellent
performance, durability, and trouble free service when operated and maintained as directed in this manual.
Should you ever have any questions regarding the operation, maintenance, or safety of your mower, please
contact your authorized de aler. A space has been provide d above to record informat ion about your new .
Please take time to record such information for future reference, especially when you contact an authorized
dealer with questions.
mower.
You must receive special trai ni ng from the deal er befor e ope r ati ng this
WARRANTY STATEMENT
This type mower are warranted for one (1) year from the original date of purchase for commercial use one
year for industrial and rental use against defects in material or workmanship, when operated and maintained
in accordance with the Owner’s Manual. will provide, free of charge, any part, no labor will be considered, of
the original equipment returned to us or our authorized servicing representative with transportation or postage
prepaid and which upon examination shall be defective. The cost of replacing items that is subject to normal
wear, such as but not limited to; air filters, belts, blades, oil filters, cables, tubes and tires, will be borne by the
purchaser/owner. Engines are warranted by the engine manufacturer. Please see engine owner’s manual for
engine warranty. This warranty does not cover any mower that has been subject to neglect, negligence,
misuse, or accident, or that has been operated in any way contrary to the operating instructions as specified
in the Owner’s Manual. This warranty does not cover any mower, which has been altered or modifie d,
changing the performance or durabili ty. In ad dit i on, t he wa rran ty is not extend ed to repai rs ma de necessary
by the use of parts or accessories, which, in the reasonable judgment of are compatible with the mower or
adversely affect its operation, performance, or durability. This warranty is not transf erable. assumes no
responsibility or incidental, consequential, or other damages including, but not limited to: expense for gasoline,
expense of delivering the mower to a authorized dealer and expense of returning it to the owner, mechanic’s
travel time and labor, telephone or communication charges, rental of a like product during the time warranty
repairs are being performed, travel, loss or damage to personal
the time or inconvenience. There are no other expressed or implied warranties and liability for consequential
damages under this warranty and are excluded to the extent exclusions are permitted by law. Warranty
service will be authorized only when proof of purchase is provided.The proof of purchase must contain the
2 property, loss of revenue, loss of the use of
1
Page 3

model number, serial number, and date of purchase, purchase price and from whom the unit was purchased.
This warranty is limited to parts replacement only. Please retain the defective parts until the replacement parts
are received. In some case, the parts may be requested to be returned. If parts are requested to be returned,
they must be shipped prepaid and insured. Cost of shipping these parts is the responsibility of the owner or
purchaser of the mower.
.
IMPORTANT OWNER AND DEALER INFORMATION:
Please note that the warranty on this unit is for parts repl ac em e nt on ly. N o addit i onal ex penses or charges
will be considered. Additional expenses and charges include but are not limited to, labor,freight, and travel
time and shop expenses. These charges must be borne by the mowers owner or purchaser. If parts
replacement is required under this warranty, please send a request to your distributor. The request must
contain the following information: part number, quantity, model number,serial number, copy of original bill of
sale and a description of the failure. Replacement parts will be shipped to you at no charge. Installations of
these parts are not covered un der warranty.
IMPORTANT INSTRUCTIONS:
Read the owners manual and make it readily available for future reference.
Be familiar with the operation of the mower. Extreme emphasis should be placed on operator safety and the
mower’s safety features.
Know the correct mower and engine service and maintenance requirements, and be able to perform or have
preformed the service and recommended lubrication as required.
GENERAL
Before servicing, check the mower for such items as belt tension and cutting height adjustment, to be sure
mower functions properly. Check attachment of the rear guard and inspect to make sure the chute guard is
secure.
.
HANDLEBARS
This mower is shipped with the handlebars detached. Handlebars must be bolted into position before use. All
controls must be properly mounted to the handlebars before starting.
Repairs or Service
IMPORTANT: If service or parts are required, be prepared to supply the service person with the model and
serial number of the mower and engine. Include a complete description of the problem encountered.
TRAINING
Read the operating and service instruction manual carefully and completely. Be familiar with all safety
controls and the proper use of the equipment.
NEVER let a child operate a power mower.
Keep the area of operation clear of all persons, especially small children and pets.
PREPARATION
1. Never operate your power mower unless ALL GUARDS are securely attached Do not remove rear guard!
2. Thoroughly inspect area where the mower will be used. Remove all stones, sticks, bones and other foreign
objects. .
3. Wear long pants and substantial shoes when operating the mower. Do not operate mower-wearing sandals,
tennis shoes, sneakers, shorts or loose-fitting clothing that could be caught in moving parts.
4. Check gas level before starting engine. Do not fill gas tank indoors, when the engine is running, or while the
engine is still hot, Wipe off any spilled gasoline before starting engine.
5. Mow only in daylight.
6. Never operate a mower in wet grass. Always be sure of your footing, keep a firm hold on the handle,and
walk, NEVER RUN!
7. NEVER operate a mower without proper eye and hearing protection, i.e.: safety glasses face shield or
goggles.
2
Page 4
STARTING & STOPPING
1. Fill the engine crankcase with oil. Refer to the engine instruction manual supplied with this mower.
2. Fill the gas tank. Refer to engine manual.
3. Pump primer bulb on engine, or set throttle control to proper position.
TO START
1. Hold lever against the handlebar and pull recoil starter cord See figure 1
NOTE: Return cord slowly-DO NOT LET HANDLE SNAP!
Figure1 Figure 2 Figure 3
REMEMBER: The lever control must be held against handlebar to operate the mower. See Figure 2
When the lever is release, the engine and blade will stop. See Figure 3
GOING FORWARD:
Slowly press the control lever down and the mower will start to move forward.
WORK:
start lawn mower, the pressure control line handle the left arm, while the clutch linkage is pressed, push the
clutch control lever, pull the clutch, the blade began to work, lawn mower for mowing.
TO STOP
1. Release all lever controls, engine, and blade will stop. SeeFigure 2
2. IMPORTANT: Release the lever control this will STOP the blade and engine. If this feature fails to function,
DO NOT OPERATE MOWER. Disconnect the spark plug wire and se e y our d e aler.
REMEMBER: The safety features on this mower are for your protection. Do not tamper with or remove these
components.
OPERATION
1. Do not change the engine governor setting or over speed the engine.
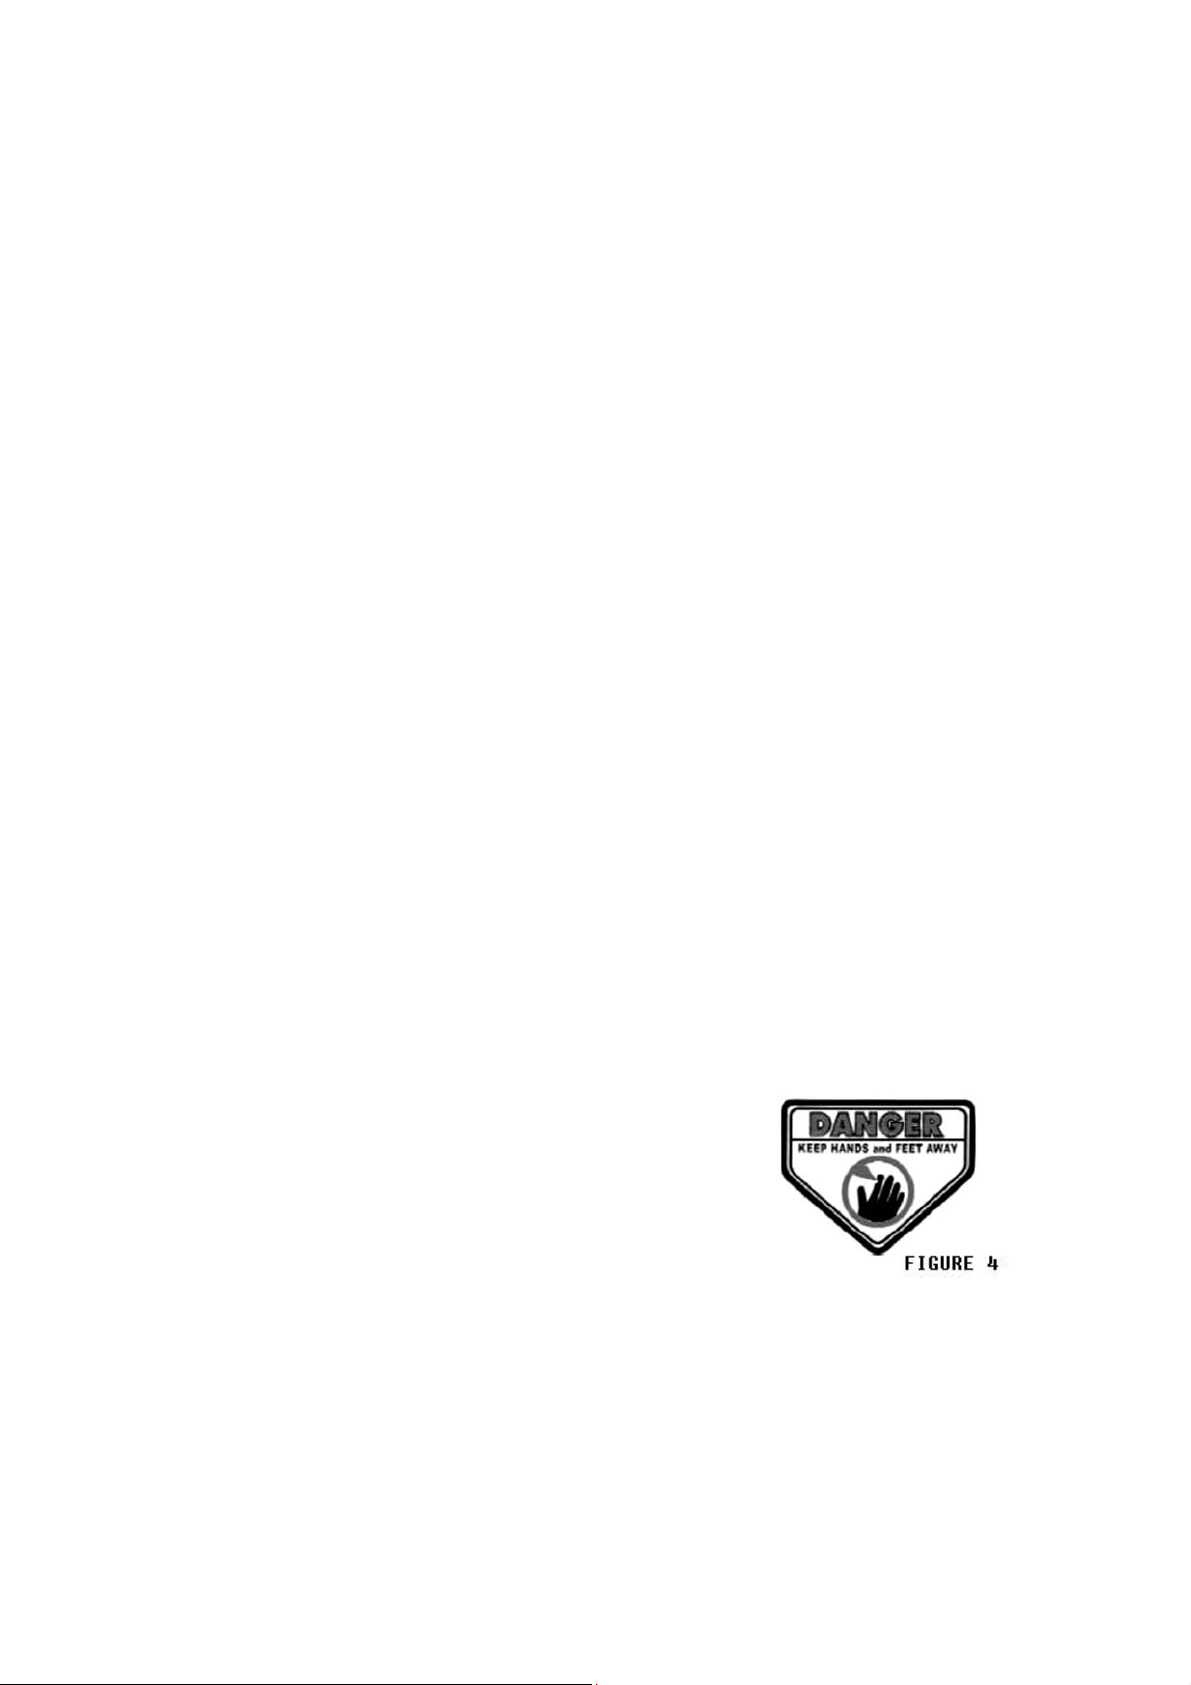
2. Do not put hands or feet near or under rotating parts. Stay clear
Of discharge area while the engine is running (Fig.4).
3. Stop the mower when crossing gravel drives, walks, roads, or any other
area where thrown objects may be a hazard.
4. After striking a foreign object, or if the mower vibrates abnormally, stop the engine, disconnect, and secure
the spark plug wire, Inspect the mower for any damage before restarting.
5. Before cleaning, repairing, or inspecting, make certain the blade and all other moving parts have come to a
complete stop. Disconnect the spark plug and secure the wire away plug to prevent accidental starting.
6. Do not run the engine indoors.
7. Mow across the face of slope, never up and down. Exercise extreme caution when changing directions on
slopes. Do not mow excessively steep slopes.
MAINTENANCE & STORAGE
3
Page 5

1. In order for your safety controls to function at the peak of efficiency, they must be inspected and adjusted
regularly. Initial inspection shall take place after the first two (2) hours. Belt tension is a very critical part of
your safety inspection, and should be checked frequently.
2. Keep all nuts, bolts and screws tight to assure safe mower operation.
3. Never store equipment with gas in the tank or in a building near a spark or flame. Allow the engine to cool
before storing in any enclosure.
4. To reduce fire hazard, keep mower free of grass, leaves or excessive grease.
5. Have your mower service and inspected every year by your authorized dealer, and if you perform repairs
yourself, use only replacement parts.
IMPORTANT: If service or parts are required, be prepared to supply the service person with the model and
serial number of the mower and engi n e Inc l ud e a complete description of the problem en countered.
ENGINE GENERAL
Follow the engine manual supplied with this mower for proper engine maintenance and service. The engine
on your is an item for which the manufacturer maintains a national service organization. FOR ENGINE
PARTS AND REPAIR INSTRUCTIONS, CONTACT THE ENGINE MANUFACTURER’S DEALER.
Yourengine is designed for long lasting service when given proper care. For the proper care instructions,
READ YOUR ENGINE MANUAL!
SPECIAL SERVICE INSTRUCTIONS
Check oil level before every mowing.
Change Oil every eight to ten hours of operation.
Use high quality engine oil.
Use unleaded gasoline.
Keep your engine clean. Dirt and grass accumulation can result in serious damage to the precision parts of
your engine.
ENGINE SERVICE
Refer to engine owner’s manual.
CAUTION: BE SURE TO HANDLE FUEL OUTDOORS, AWAY FROM SPARK OR FLAME.
LUBRICATION
To lubricate your , apply bearing grease through the fitting on the hub housing. .You may use an air pressure
or hand-held grease gu n. T o lub ricate th e w heels on your high quali ty grea se m ay be pack ed ins ide th e w heel
hubs.
CUTTING HEIGHT ADJUSTMENT
Your is adjustable to a accommodated your cutting height requirements by lower and raising the front and
rear wheels.
BLADE SHARPENING-CAUTION
CAUTION: WHEN ADJUSTING, REPLACING OR MOVING THE MOWER BLADE, THE SPARK PLUG
WIRE MUST BE DISCONNECTED TO AVOID ACCIDENTAL STARTING.
CLEANING YOUR MOWER
Clean your mower after each use. Let the engine cool, and then wipe the grass and debris from mower and
engine.Check mower pan for grass and dirt build-up. Disconnect the spark plug and tip mower on its side
(muffler side up) to clean underneath deck. Check the blade and mounting hardware at frequent intervals for
wear and tightness. Replace worn parts with original equipment parts for safety.
4
Page 6

Page 7
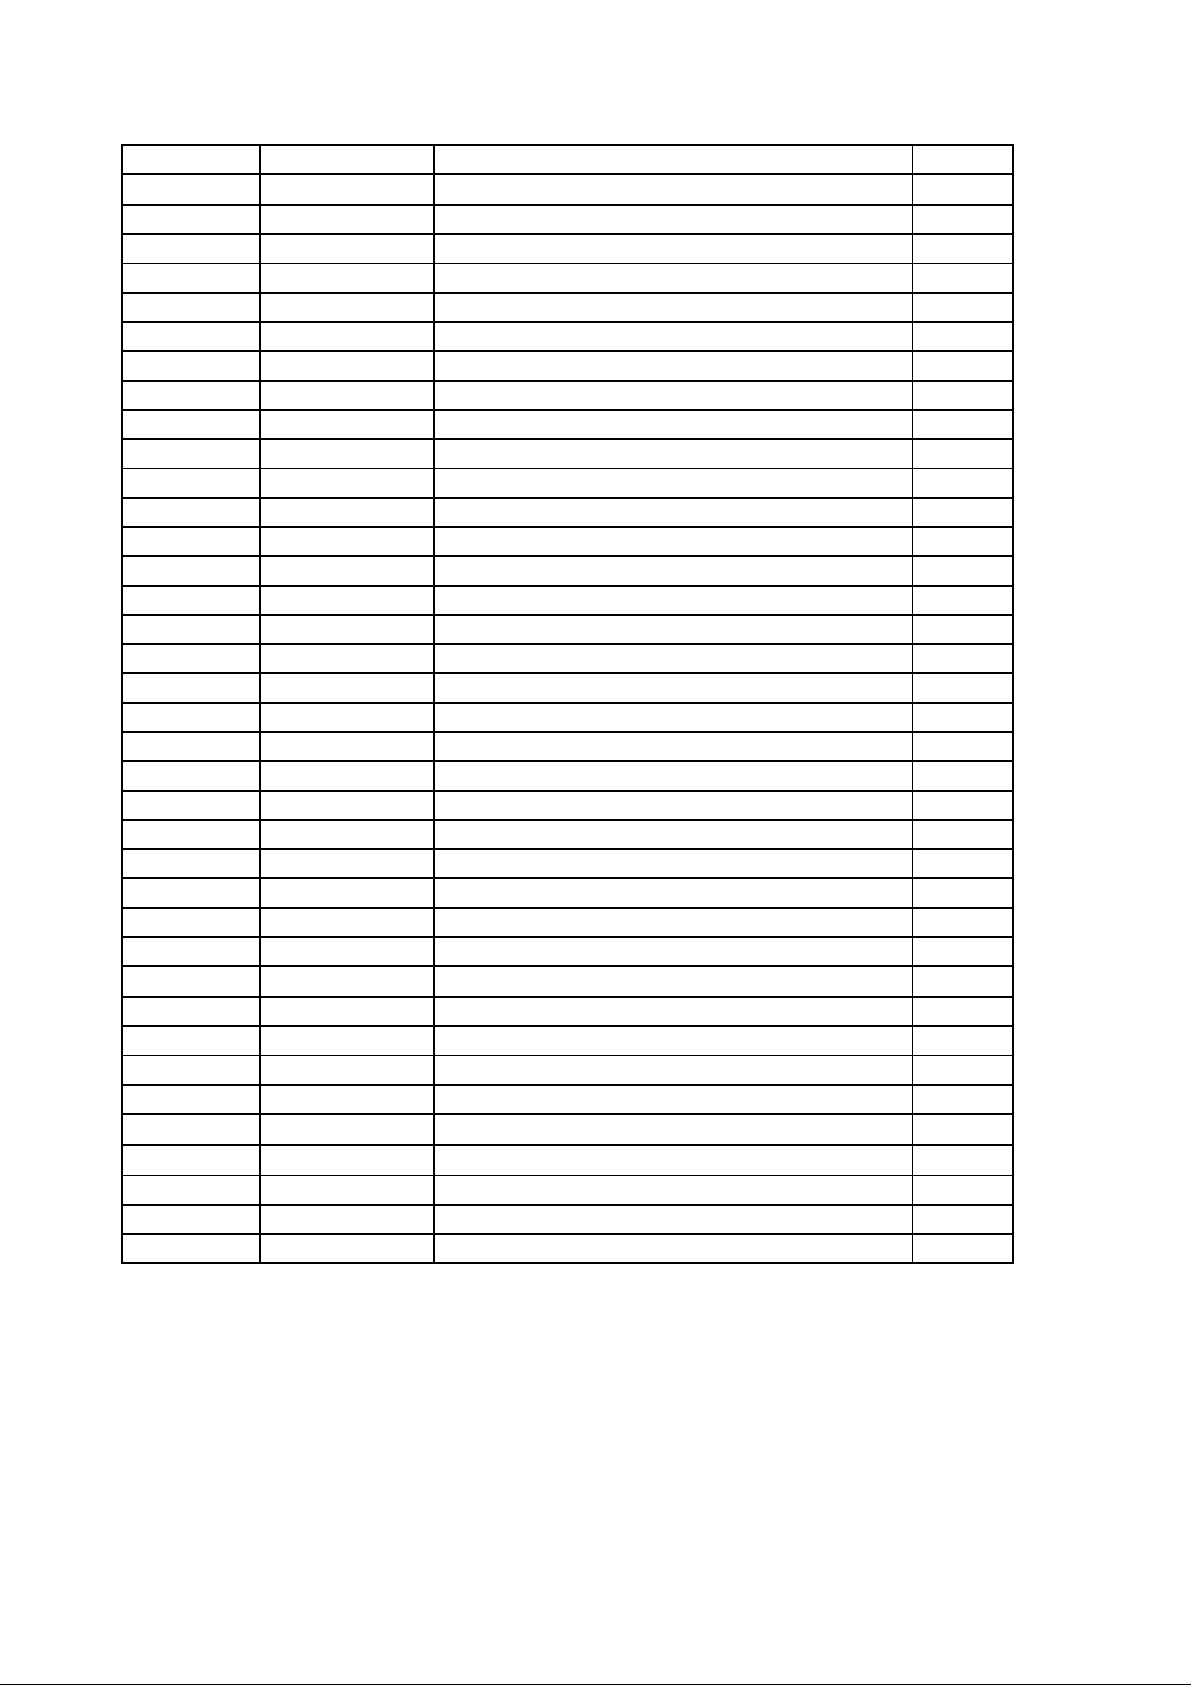
Item NO. Part Number Description Qty
1
424B-045
2 200-006
Nylon Nut M10 GB889-86
Rear Deck
1
2
3 100-015 Space 1
4
5 200-036
6 200-053
7 200-042
424B-046
Tensioner arm 1
Hexagon Bolt M6X20 GB5783
Lock Washer 6 GB93
Plain Washer 6 GB95
4
4
4
8 100-024 Steering shaft bushing 1
9 100-019 Belt pressing wheel pad 1
10 200-022
11 200-052
12 200-031
13 200-010
14
15
424B-047
424B-048
16 200-030
17 200-029
18 200-178
Hexagon Bolt M10X65 GB5782
Hexagon Bolt M10X45 GB5782
Lock Washer 10 GB93
Plain Washer 10 GB95
Belt wheel protective cover 1
Transmission belt pressing wheel 1
Nylon Nut M8 GB889-86
Nut Flange M8 GB6187-86
Hexagon Bolt M8X16 GB5783
13
10
1
1
3
3
1
19 300-005 Belt pressing wheel shaft 1
20 200-104
21 200-024
22 200-021
23 200-109
24 100-103
Hexagon Bolt M8X35 GB5783
Lock Washer 8 GB93
Plain Washer 8 GB95
Clevis Pin 10*20 GB882-86
Hexagon Bolt M10X30 GB5783
4
4
4
2
4
25 400-016 Height adjustment 4
26 400-017 Space 2
27 200-069 Pin 2.5 2
28
424B-049
29 200-007
30 200-107
The front mounting bracket
Nylon Nut M12 GB889-86
Nut M12 GB6170
1
2
2
31 400-009 Front wheel 2
32 400-008 Front wheel axel 2
33
34
424B-050
424B-051
Cutter belt
Tension rod
1
1
35 300-015 Rod End 1
36 200-074 Hexagon Nut M8 1
37 400-010 Chute Ext 1
Page 8

Page 9
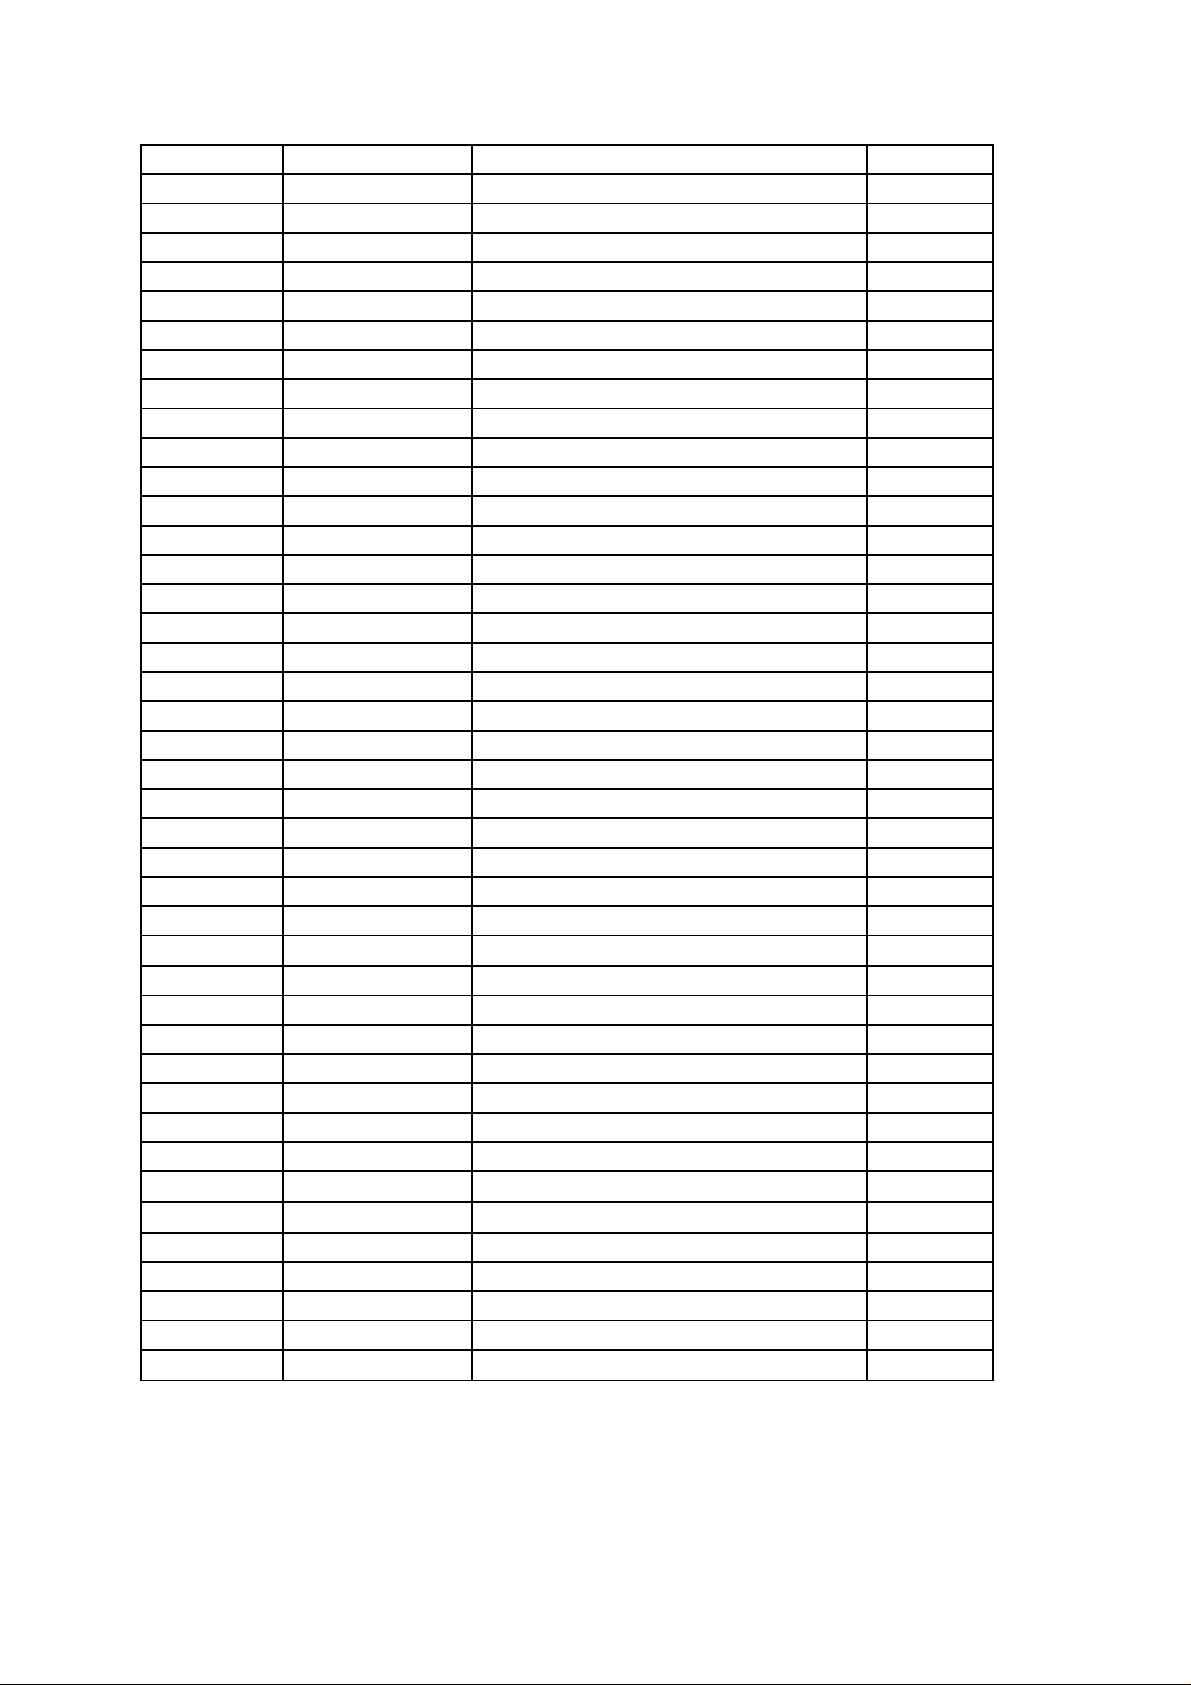
Item NO. Part Number Description Qty
1
424B-025
Plow handle 1
2 400-034 Handle grip 2
3 400-028 Bail weldment 1
4 400-001 Grip 2
5
6
7
8
9
10
11
12
13
14 200-030
15 200-085
16
17 200-178
18
424B-026
424B-027
424B-028
424B-029
424B-030
424B-031
424B-032 Hexagon Bolt M6x12 GB5789
424B-033
424B-034
424B-035
424B-013
ClutchguardⅡ 1
Clutch 1
ClutchguardⅠ 1
connector panel 1
Nylon Nut5/16 1
Engine 1
Engine washer 1
Belt Guard 1
Nylon Nut M8 GB889-86
Hexagon Bolt M8X40 GB5782
Eng. mount 1
Hexagon Bolt M8X16 GB5783
CrossarmⅡ 1
7
16
4
8
19 400-025 Back wheel axel 2
20 400-020 Back wheel washer 4
21 400-026 Back wheel 2
22 200-097
23 200-172
24
424B-037
25 200-006
Nut Flange M14 GB6187-86
Nylon Nut M14 GB889-86
Belt Guard 1
Nylon Nut M10 GB889-86
2
2
1
26 422B-006 Rear deflector 1
27 200-095
28
29
30
424B-038
424B-039
424B-040
31 200-119
32
33
424B-041 Bolt M5x40 GB818-85
424B-042
34 200-013
35
36
37
38
424B-045
424B-046
424B-043
424B-044
Engine Belaying Cleat 1
Pull plate bracket 1
Handrail connecting plate 2
Hexagon Bolt M8X25 GB5783
Clutch controller support 1
Nylon Nut M5 GB889-86
Clutch control handle
Left Bail weldment 1
Push rivet
Clutch switch
Engine Belt 1
4
4
2
2
1
1
39 900-196 Rod End RH8 2
40 200-074 Hexagon Nut M8 2
41
424B-047
Travel control lever
1
Page 10
Page 11
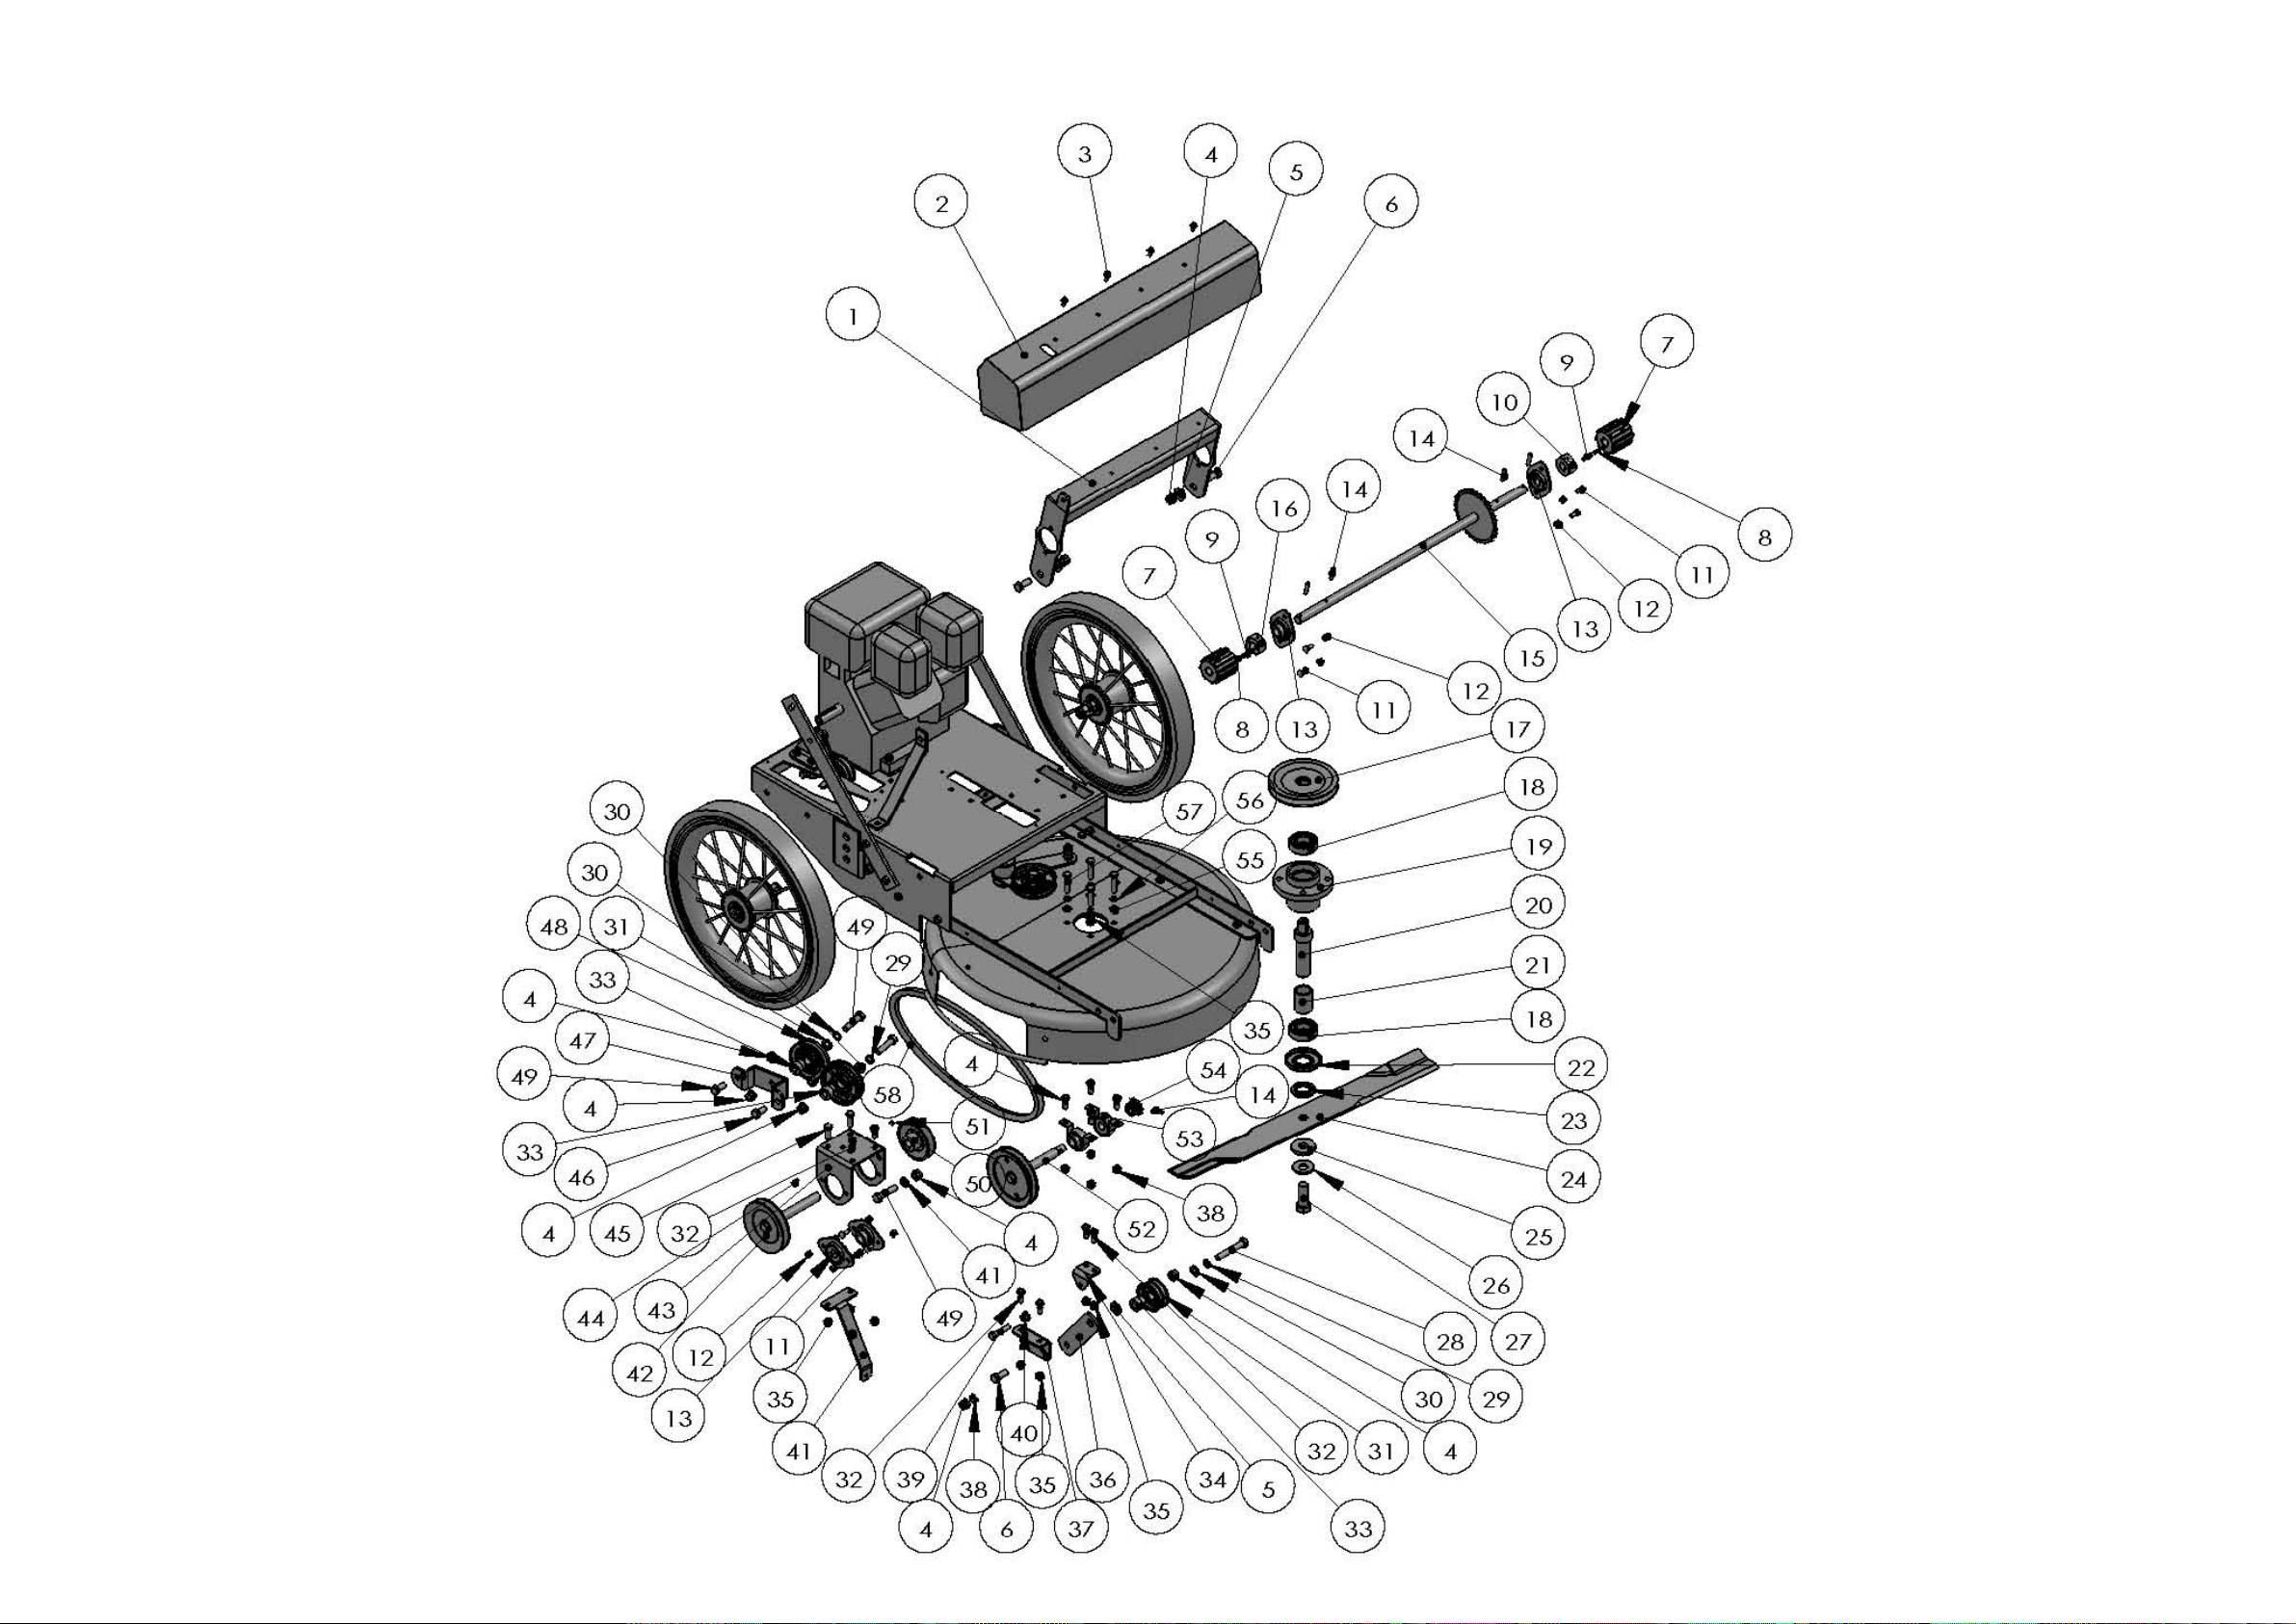
Item NO. Part Number Description Qty
1
2
424B-001
424B-002
3 200-135
4 200-006
5
424B-003
6 200-003
Walking support 1
Sprocket cover 1
Hexagon Bolt M5x12 GB5789
Nylon Nut M10 GB889-86
Washer 3
Hexagon BoltM10x25 GB5783
4
8
2
7 424A-005 Crawler 2
8 424A-006 Spring 2
9 424A-007 Drive pin 2
10 424A-008 RH Ratcher block 1
11
424B-004 Square Nect Bolt M6x20 GB12
12 200-009
13
424B-005
14 200-114
15
424B-006
Nylon Nut M6 GB889-86
Spherical bearing UBPFL202-16 4
Roll pin 5*30 GB879
Cross shaft sprocket 1
8
8
5
16 424A-011 LH Ratcher block 1
17
424B-007
18 200-167
19 700-007
20
424B-008 Cutter Pivot
21 700-008
22 700-010
23
424B-009
Grooved pulley 1
Bearing 1641
Cutter House
Tube,Confine Bearing
Hood,Bearing
Washer 1
2
1
1
1
1
24 424A-032 Blade 24" 1
25 700-029
26 700-028
27 700-021
28 200-022
29 200-031
30 200-010
31
424B-010
32 200-178
33 300-005
34
424B-011
35 200-030
36
37
424B-012
424B-013
38 200-027
39 200-085
40 200-029
41
42
43
424B-014
424B-015
424B-016
44 200-125
45 200-119
46
47
48
424B-017 Hexagon BoltM10x20 GB5783
424B-018
424B-019
49 200-052
50
51
52
53
424B-020
424B-021
424B-022
424B-023
Blade Washer
Saucer Washer
Bolt M16x1.5x45
Hexagon BoltM10x65 GB5782
Lock Washer 10 GB93
Plain Washer 10 GB95
Belt pressing wheel 1
Hexagon BoltM8x16 GB5783
Belt pressing wheel shaft
Spring bracketⅠ 1
Nylon Nut M8 GB889-86
Belt pressing wheel plate
CrossarmⅡ 1
Nut Thin M10 GB6172
Hexagon BoltM8x40 GB5782
Nut Flange M8 GB6187-86
Engine chassis supporting
Pulley
Walking the input shaft support 1
Key 5x6.5x16
Hexagon BoltM8x25 GB5783
Guide wheel support 1
Guide wheel 1
Hexagon BoltM10x45 GB5782
Pulley
Screw GB73 M6*6 1
Pulley
Spherical bearing UEPP202-16 2
1
1
1
1
3
3
10
3
15
1
2
1
1
1
1
1
2
2
3
1
1
54 424A-014 Sprocket 1
55 200-021
56 200-024
57 200-085
58
424B-024
Plain Washer 8 GB95
Lock Washer 8 GB93
Hexagon BoltM8x35 GB5783
Transmission belt
4
4
4
1
 Loading...