

Havaco DELTA 100-A, DELTA 150-A, DELTA 200-A Installation Manual

Air Curtains
Installation manual
DELTA 100-A
DELTA 150-A
DELTA 200-A
Thanks for purchasing this Air Curtain,
Please read these instructions carefully before use.
2
www.havaco.pl
1. PRODUCT INTRODUCTION
2. IDENTIFICATION & INSTALLATION DIMENSIONS
3. INSTALLATION CAUTION
Air curtains are the new top-class products used as a part of modern interiors, cooperating with ventilation and air conditioning systems.
Units are installed at the entrances of supermarkets, theatres, meeting rooms, hotels, offi ce rooms, storerooms, etc. to protect heated
areas against entering the cold air inside (in winter) and against the warm air entering into the air conditioned areas (in summer). Additional function is prevention against the dust, mosquito and nocuous air.
Follow below recommendations when installing the air curtain:
3.1 Please install the unit in a stable place to avoid the shaking and ensure its security (because it maybe causes vibrations, loosening or noise).
3.2 Please install the unit inside the room.
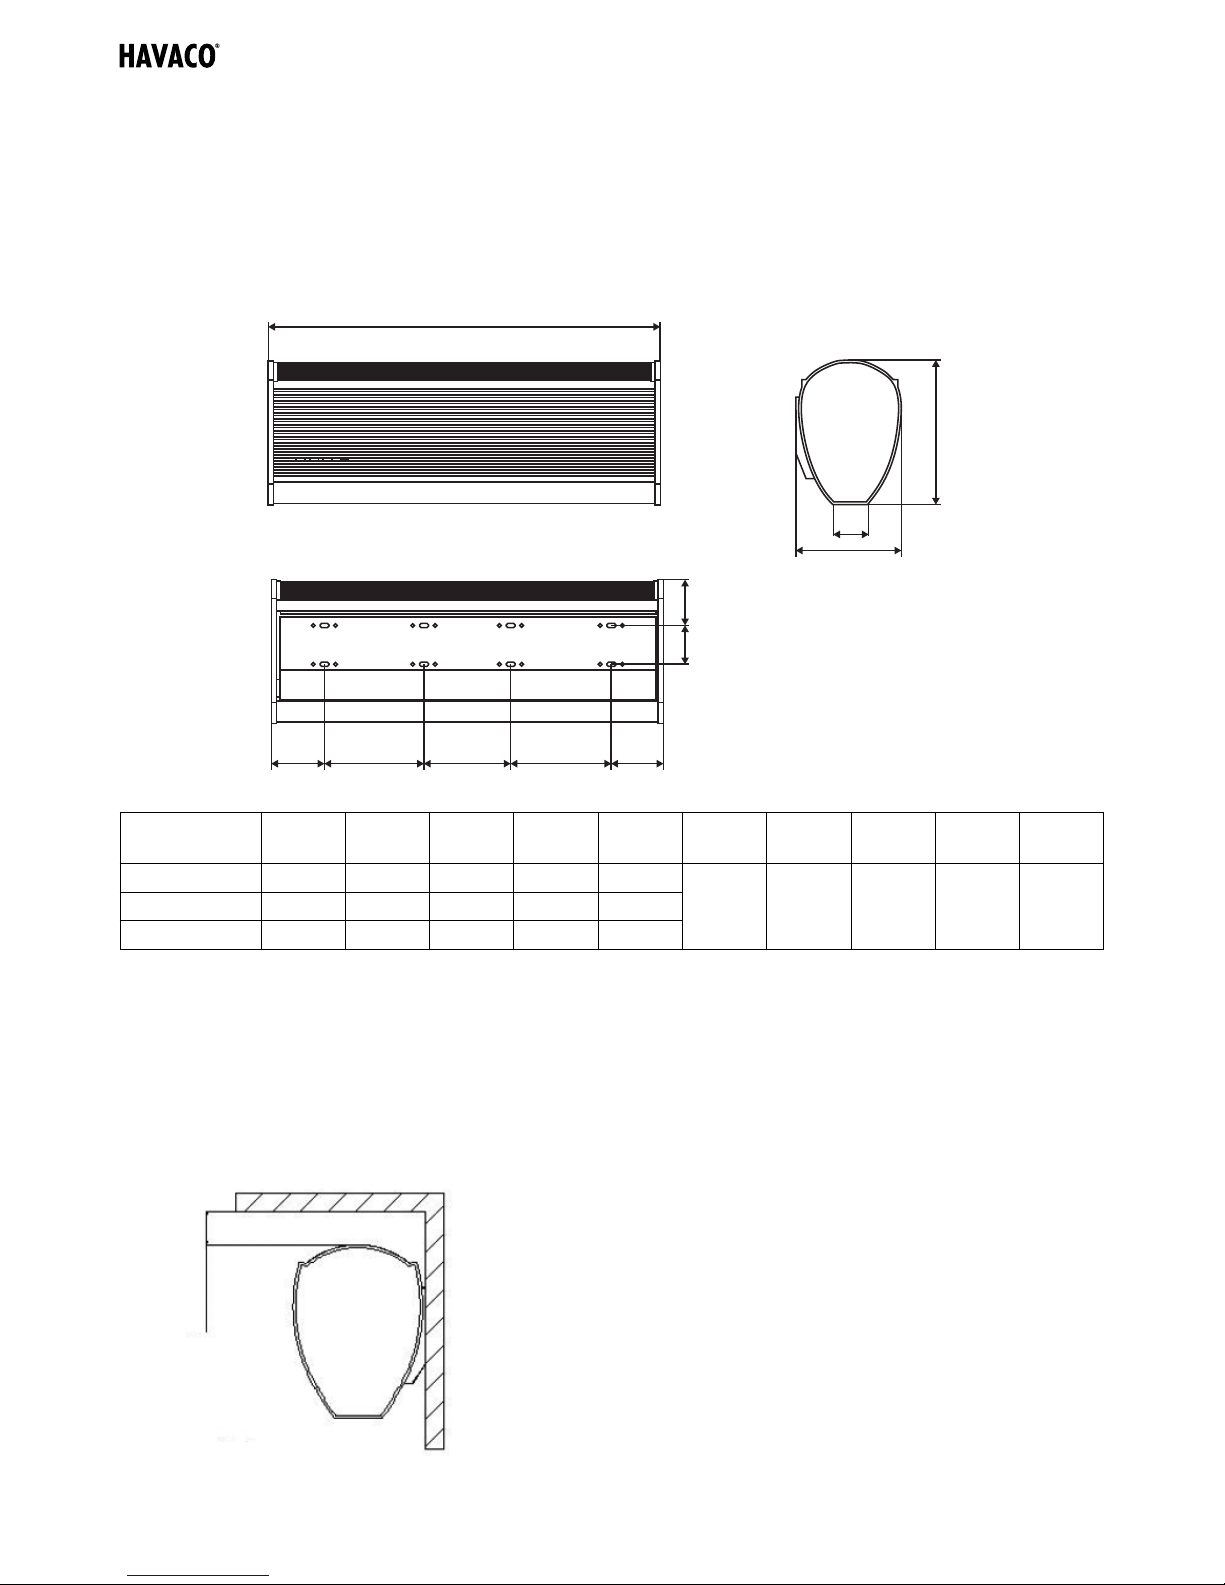
MODEL
A
[mm]
B
[mm]
C
[mm]
D
[mm]
E
[mm]
F
[mm]
G
[mm]
H
[mm]
I
[mm]
J
[mm]
DELTA 100-A 1000 102,5 695 -- --
9
1 90 280 215 56DELTA 150-A 1500 105,0 390 505 390
DELTA 200-A 2000 107,5 500 500 500
More then 50 mm
OUTDOOR ZONEINDOOR ZONE
A
H
I
J
B C D E B
FG
3
www.havaco.pl
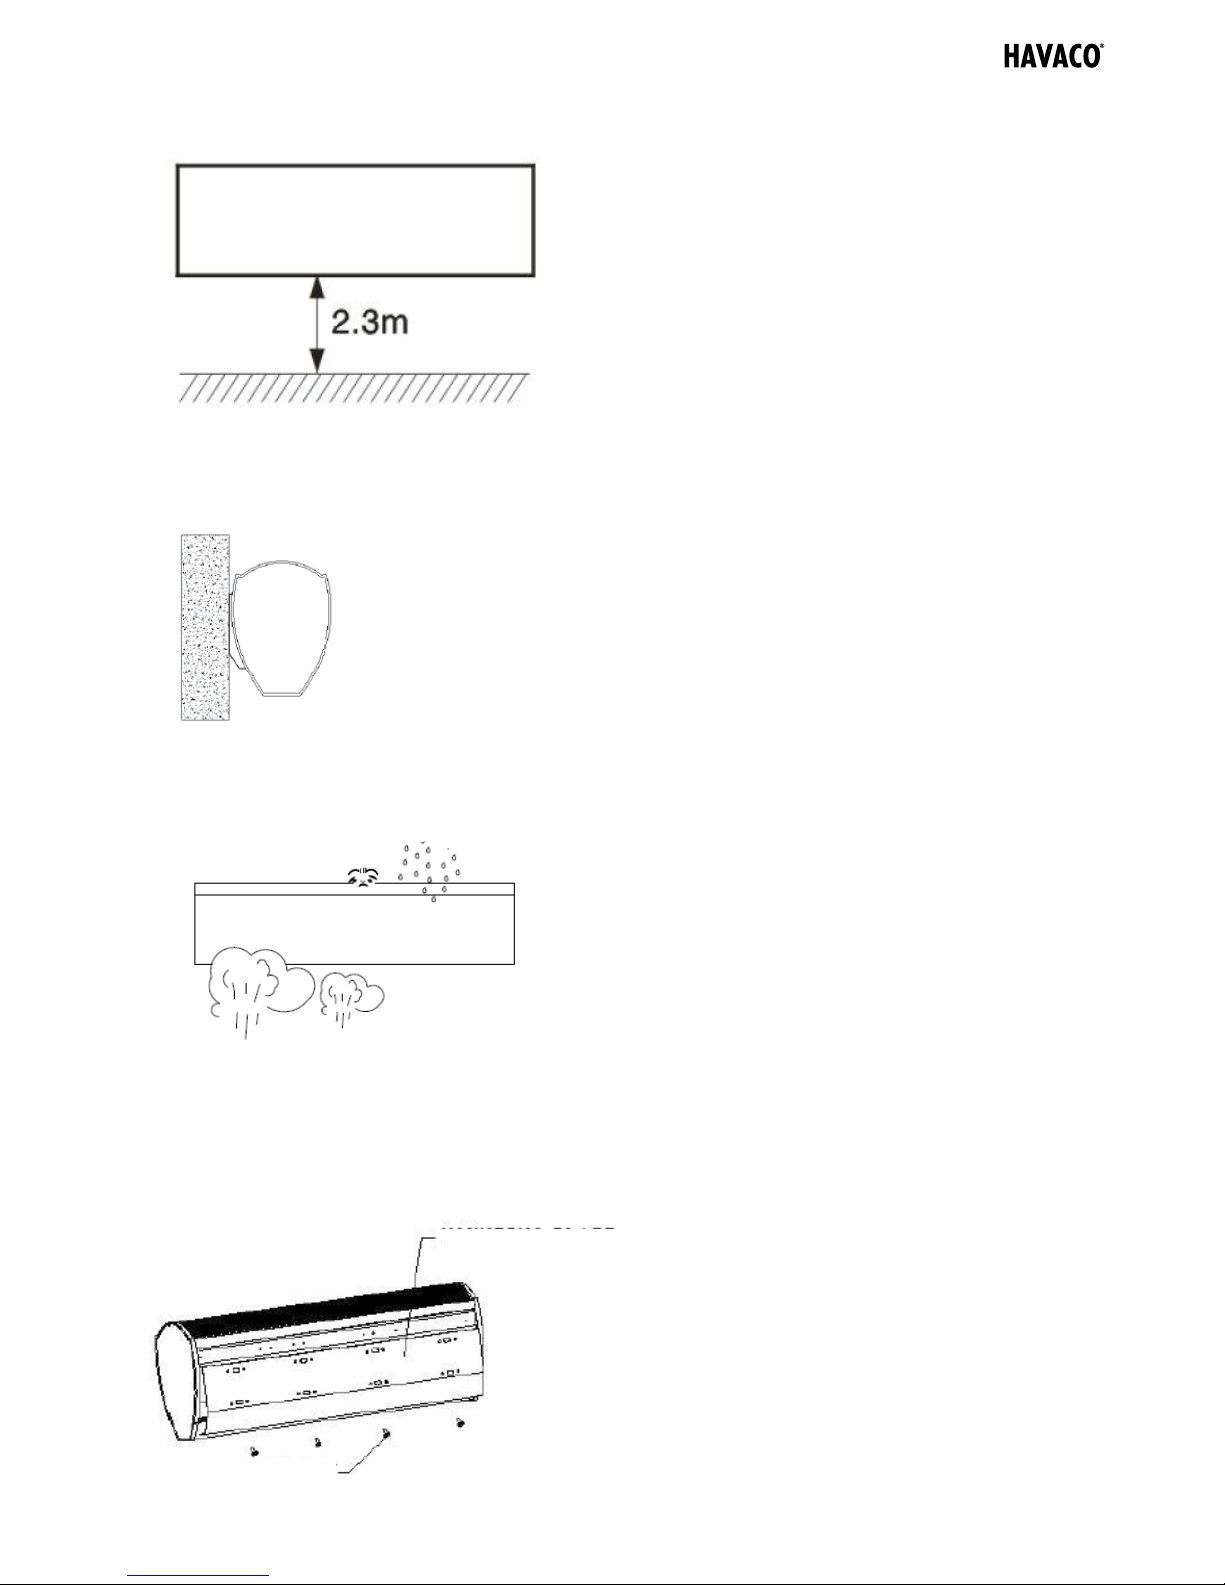
3.3 Don’t install the unit too low, no less than 2.3 meter from the ground. When the entrance is wider than the unit, it is recommended
to install two or more units in parallel. In this case, provide 20-40 mm gaps between the units.
3.4 Install the unit using supplied mounting plate. When hanging it from the ceiling, use the enclosed ceiling brackets.
3.5 Don’t install the unit in a place where it can be exposed to splashing water, excessive steam, explosive gas or corrosive gas.
4. INSTALLATION
A. Installing on the concrete wall:
4.1.1 Removing the mounting plate
Remove the plastic parts, unclamping the fi xed screws on the back of main body to remove the mounting plate.
MOUNTING PLATE
MOUNTING SCREWS
 Loading...