

Hausmann 4002, 4024, 4002-027, 4024-027, 4002-030 Installation And Operation Instructions Manual
...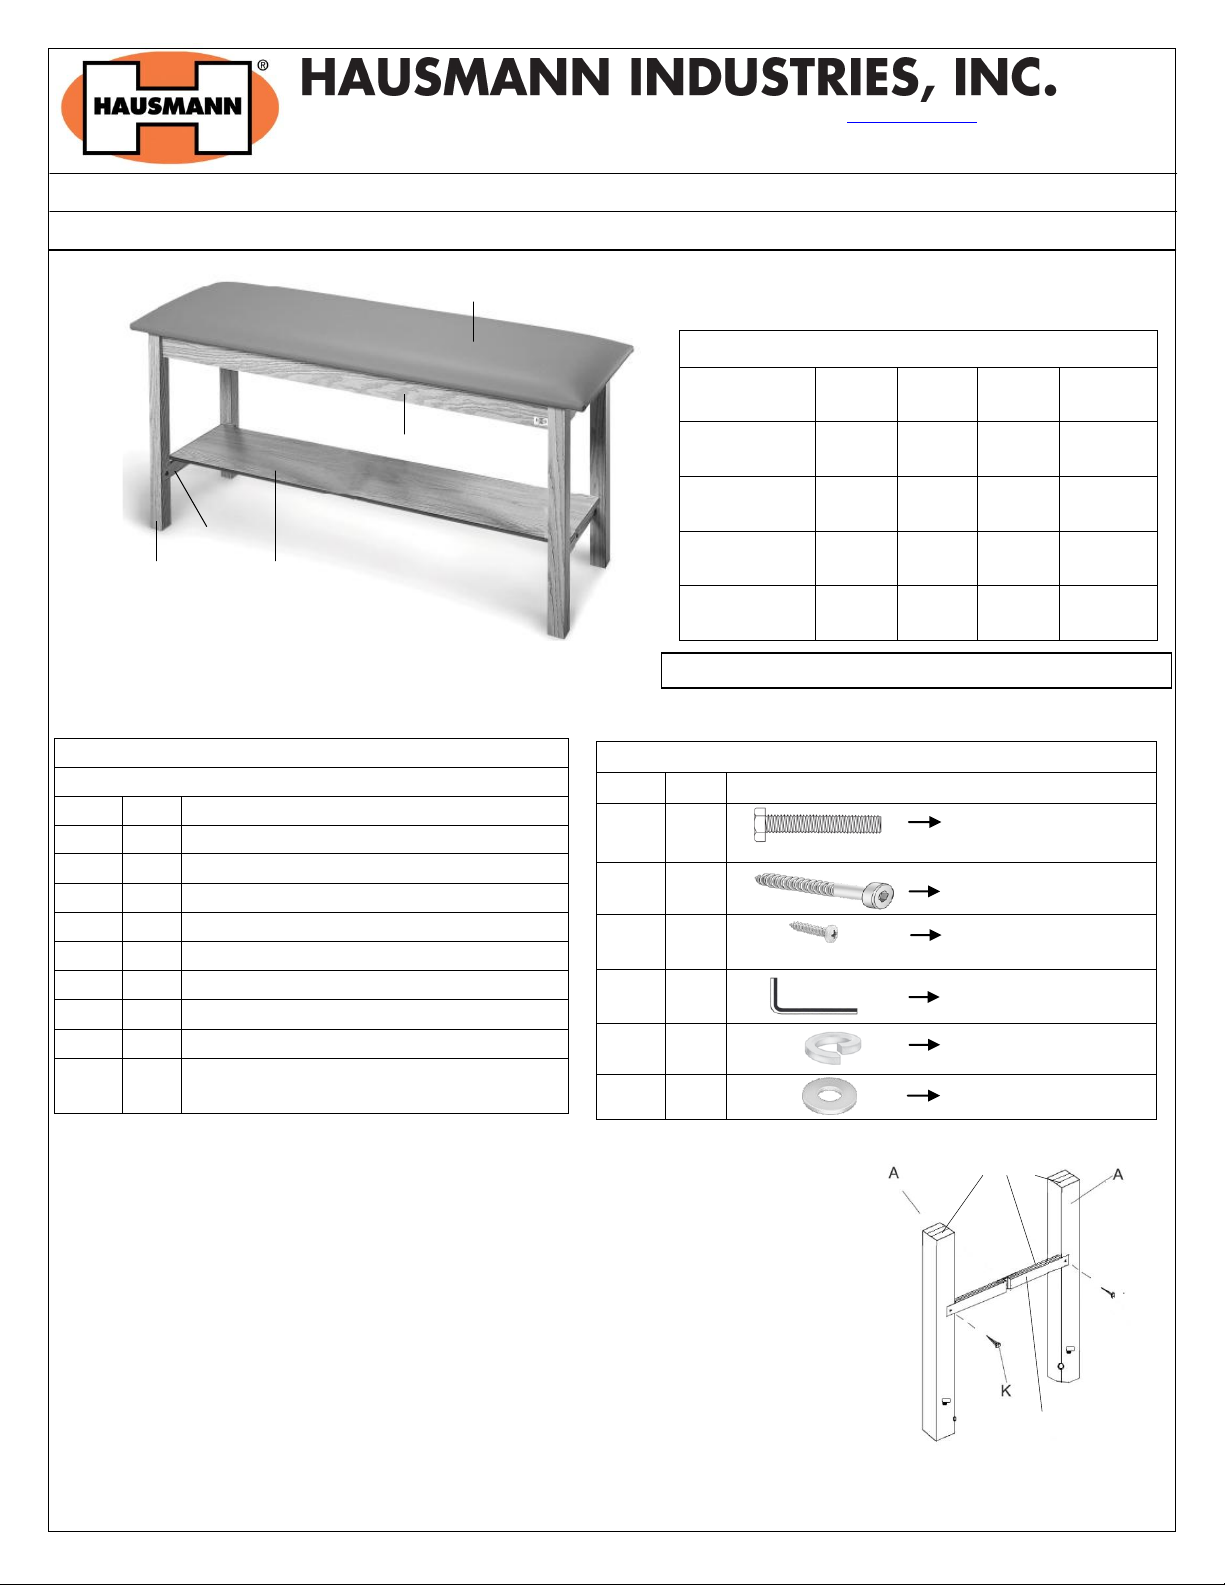
Figure 2: Leg & Short Stretcher
PARTS LIST
Model # 4002, 4024
PART
QTY
DESCRIPTION
A 4 Leg
B 2 Short Stretcher
C 1 Long Stretcher
D 4 Apron (Attached to upholstered top)
E 1 Upholstered Top
F 1 Shelf (Only for 4024)
G 2 Velcro Straps (Only for 4024)
H 4 Corner Plates
N 4 Clips (Installed only with
Backrest/Headrest option)
Product Specifications (4002/4024)
Model #
Length
Width
Height
Weight
Capacity
4002
4024
72”
24”
31”
400lbs
4002-027
4024-027
72”
27”
31”
400lbs
4002-030
4024-030
72”
30”
31”
400lbs
4002-030-078
4024-030-078
78”
30”
31”
400lbs
HARDWARE
PART
QTY
DESCRIPTION
I
4
4 ½” x 5/16” – 18
Hex Bolt
K
6
Socket Hex Screw
N 4 ¾” Philip Screw
(Only with backrest/headrest option)
L
1
4 mm Allen Wrench
M
4
Lock Washer
J 4 5/16” Flat Washer
Short Strecher ‘B’
Unfinished Edges
A B F D E
Figure 1: Model# 4024 Treatment Table
*Adjustable Backrest Option -- Weight Capacity 350 lbs*
130 Union St • Northvale NJ 07647 USA • Tel: (201) 767-0255 • Fax: (201) 767-1369 • www.hausmann.com
Installation/Operation Instructions
Model 4002, 4024 – Quality Line Treatment Tables
Tools Required:
1/2” Socket Wrench
Allen Wrench (included)
Philips Screw Driver (Only for Backrest/Headrest option)
A) INSTALLATION INSTRUCTIONS (Model # 4002, 4024):
1. Attach the Short Stretcher ‘B’ to the Legs ‘A’ with 2” Socket Hex Screw ‘K’ so that
the unfinished edge is facing lower end of the legs as shown in Figure 2.
2. Repeat step 1 for the other pair of legs.
3. Attach the assembled legs with pre-drilled holes facing Corner Plates ‘H’ with
5/16” Flat Washers ‘J’, Lock Washer ‘M’ and Hex Bolt ‘I’ with Lock washer placed
directly under bolt head as shownin Figure 3. Please see the NOTE on the next page
for tables with Backrest/Headrest option.
Rev. 101813 aj Page 1 of 2 ©2013 HAUSMANN INDUSTRIES, INC.
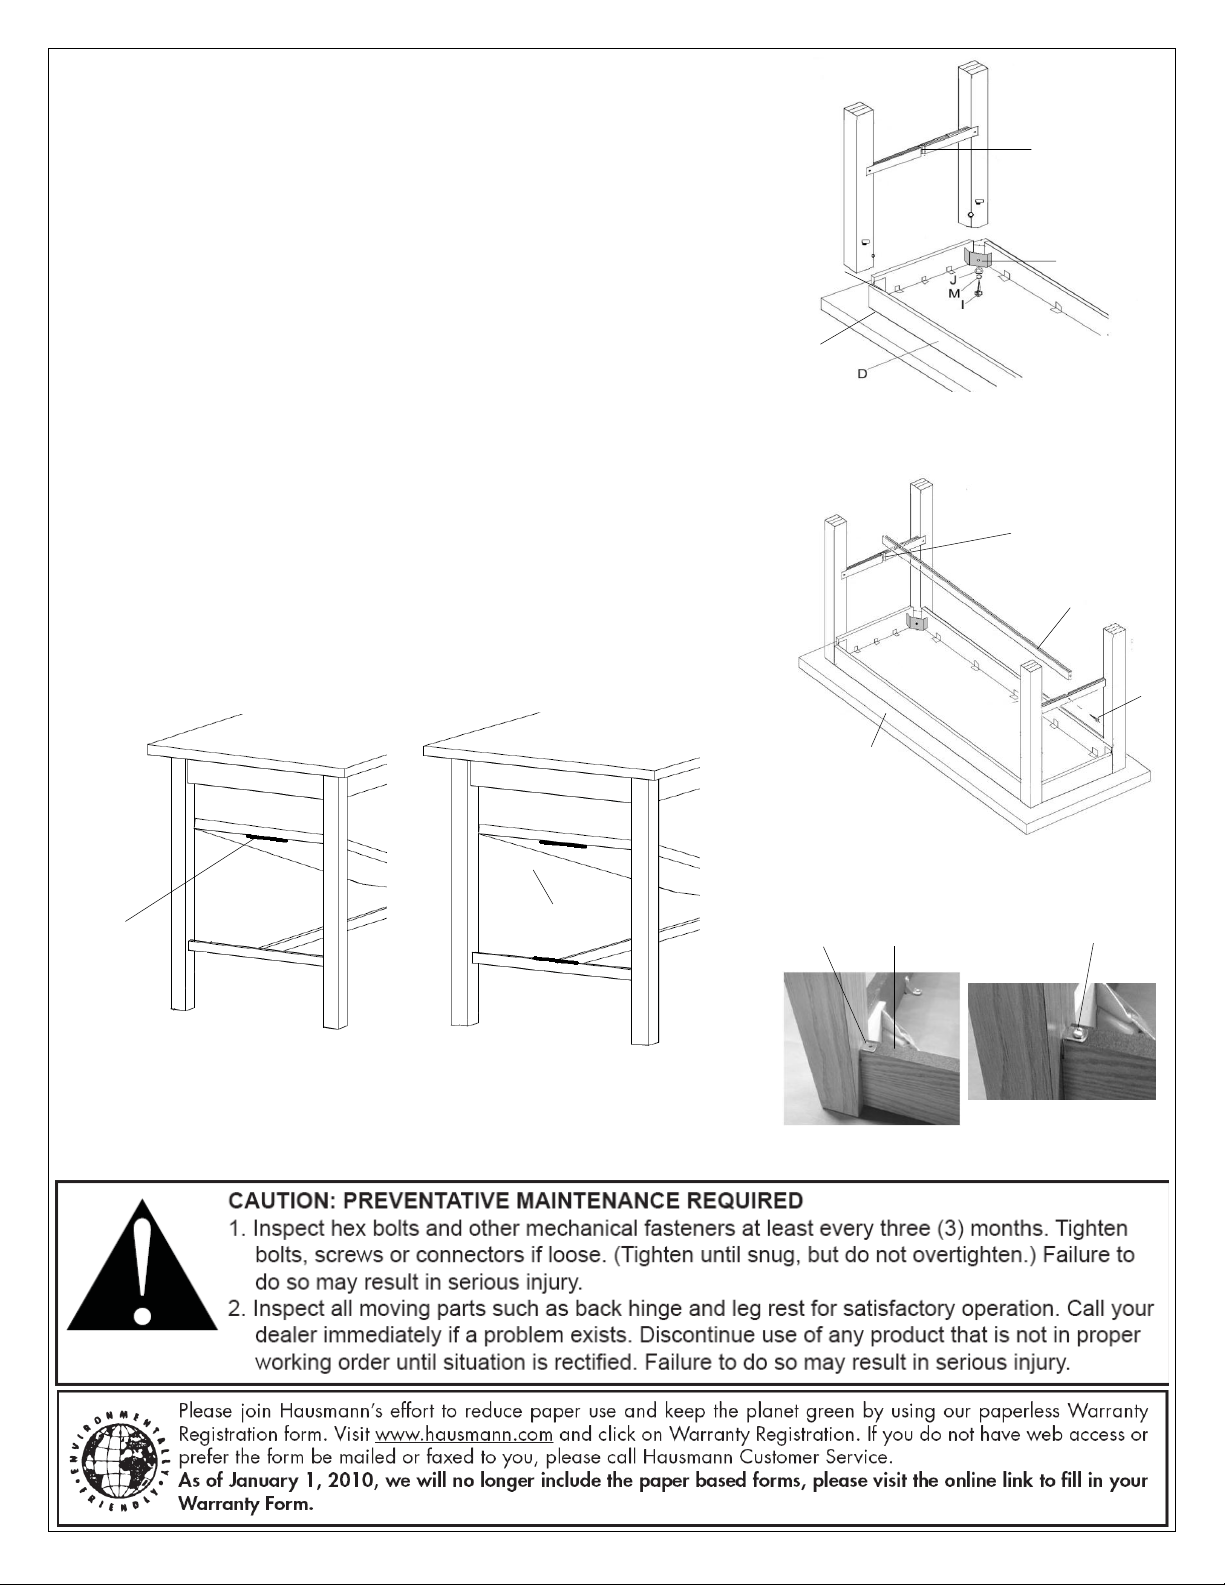
Figure 4: Leg & Short Stretcher
Figure 4: Leg & Short Stretcher
Figure 6: Shelf with Hook & Loop Velcro
Figure 5: Clip secured to apron
Corner Plate ‘H’
Long Stretcher
cutout
Long Stretcher ‘C’
Tabletop
K
Figure 3: Leg & Short Stretcher
Hook &
Loop
Velcro
Loop velcro
Apron top
Apron
bottom
Apron bottom
N
Clip
Long Stretcher cutout
NOTE: (For Backrest/Headrest option only) Make sure that the legs on the
backrest/headrest side flush with the top of the apron and the clip sits flat
on the bottom side of the apron as shown in Figure 5.
4. Tighten Hex Bolt with wrench until you can see lock washer flattening
out.
NOTE: Make sure that the long stretcher cutout is facing inwards as shown
in Figure 3 and 4.
5. After attaching all four legs to the tabletop, attach the Long Stretcher ‘C’
to the short stretchers (unfinished edge away from table top) with
socket hex ‘K’ on each end as shown in Figure 4.
6. (Table with Backrest/Headrest option) Secure clips to the bottm of the
Apron with philip screws ‘N’ as shown in Figure 5.
7. (Step 7 and 8 for Model# 4024 only) Attach Shelf ‘F’ to the long
stretcher by Hook and Loop velcro strips that are factory attached to
the bottom of the shelf as shown in Figure 6.
8. Remove the loop part of the velcro and adhere it in the center of the
short stretcher and carefully place the shelf into position as shown in
Figure 6 and repeat the same procedure for the other side.
NOTE: Handle the shelf very carefully as dropping it on the corners could
result in damaging the corners.
Rev. 101813 aj Page 2 of 2 ©2013 HAUSMANN INDUSTRIES, INC.
 Loading...