

Page 1
HAUSMANN INDUSTRIES, INC.
Please join Hausmann’s effort to reduce paper use and keep the planet green by using our paperless Warranty
Registration form. Visit www.hausmann.com and click on Warranty Registration. If you do not have web access or
prefer the form be mailed or faxed to you, please call Hausmann Customer Service.
As of January 1, 2010, we will no longer include the paper based forms, please visit the online link to fill in your
Warranty Form.
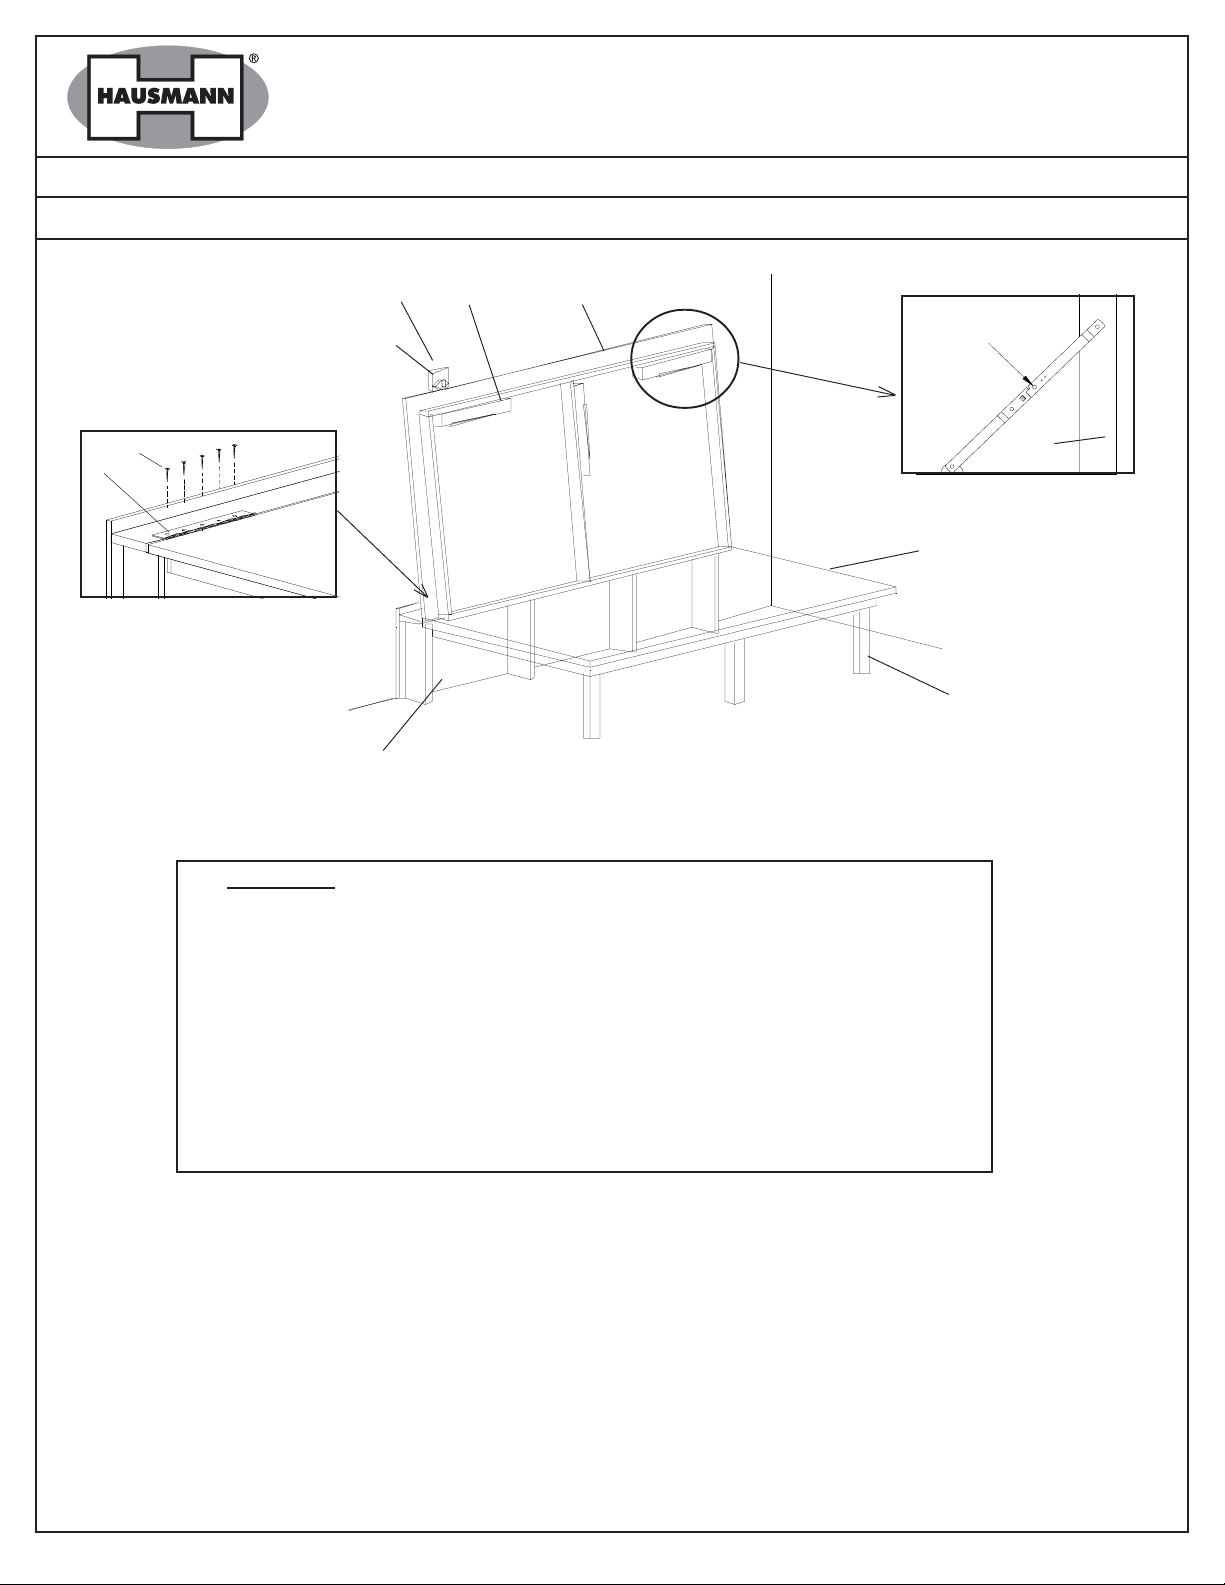
Image shown for 1420
130 Union St • Northvale NJ 07647 USA • Tel: (201) 767-0255 • Fax: (201) 767-1369 • www.hausmann.com
Installation/Operation Instructions
Model 1420 / 1422 - Space Saver Mat Platform
MODEL #1420 - SPACE - SAVER MAT PLATFORM
Latch Mounting Plate ( B )
H
D
Pivoting Latch ( A )
F
E
C
X
Leg
(H) Folding Metal Leg
Brace With Lock
D
G
Parts List:
PART PART # QTY DESCRIPTION
A 1420 - 001 1 Pivoting Latch
B 1420 - 002 1 Latch Mounting Plate
C 1420 - 003 1 Wall Plate
D 1420 - 004 1 Platforn
E 1420 - 005 3 Platform Hinges
F 1420 - 006 12 Screws, 3/4”, #8, Truss, Phil.
G 1420 - 007 3 Legs
H 1420 - 008 3 Folding Leg Brackets
I 1420 - 009 4 Screws, 2 1/2”, #8, Pan, Phil.
rev. 12.06.07 cjr ©2007 HAUSMANN INDUSTRIES, INC.
1
Page 2
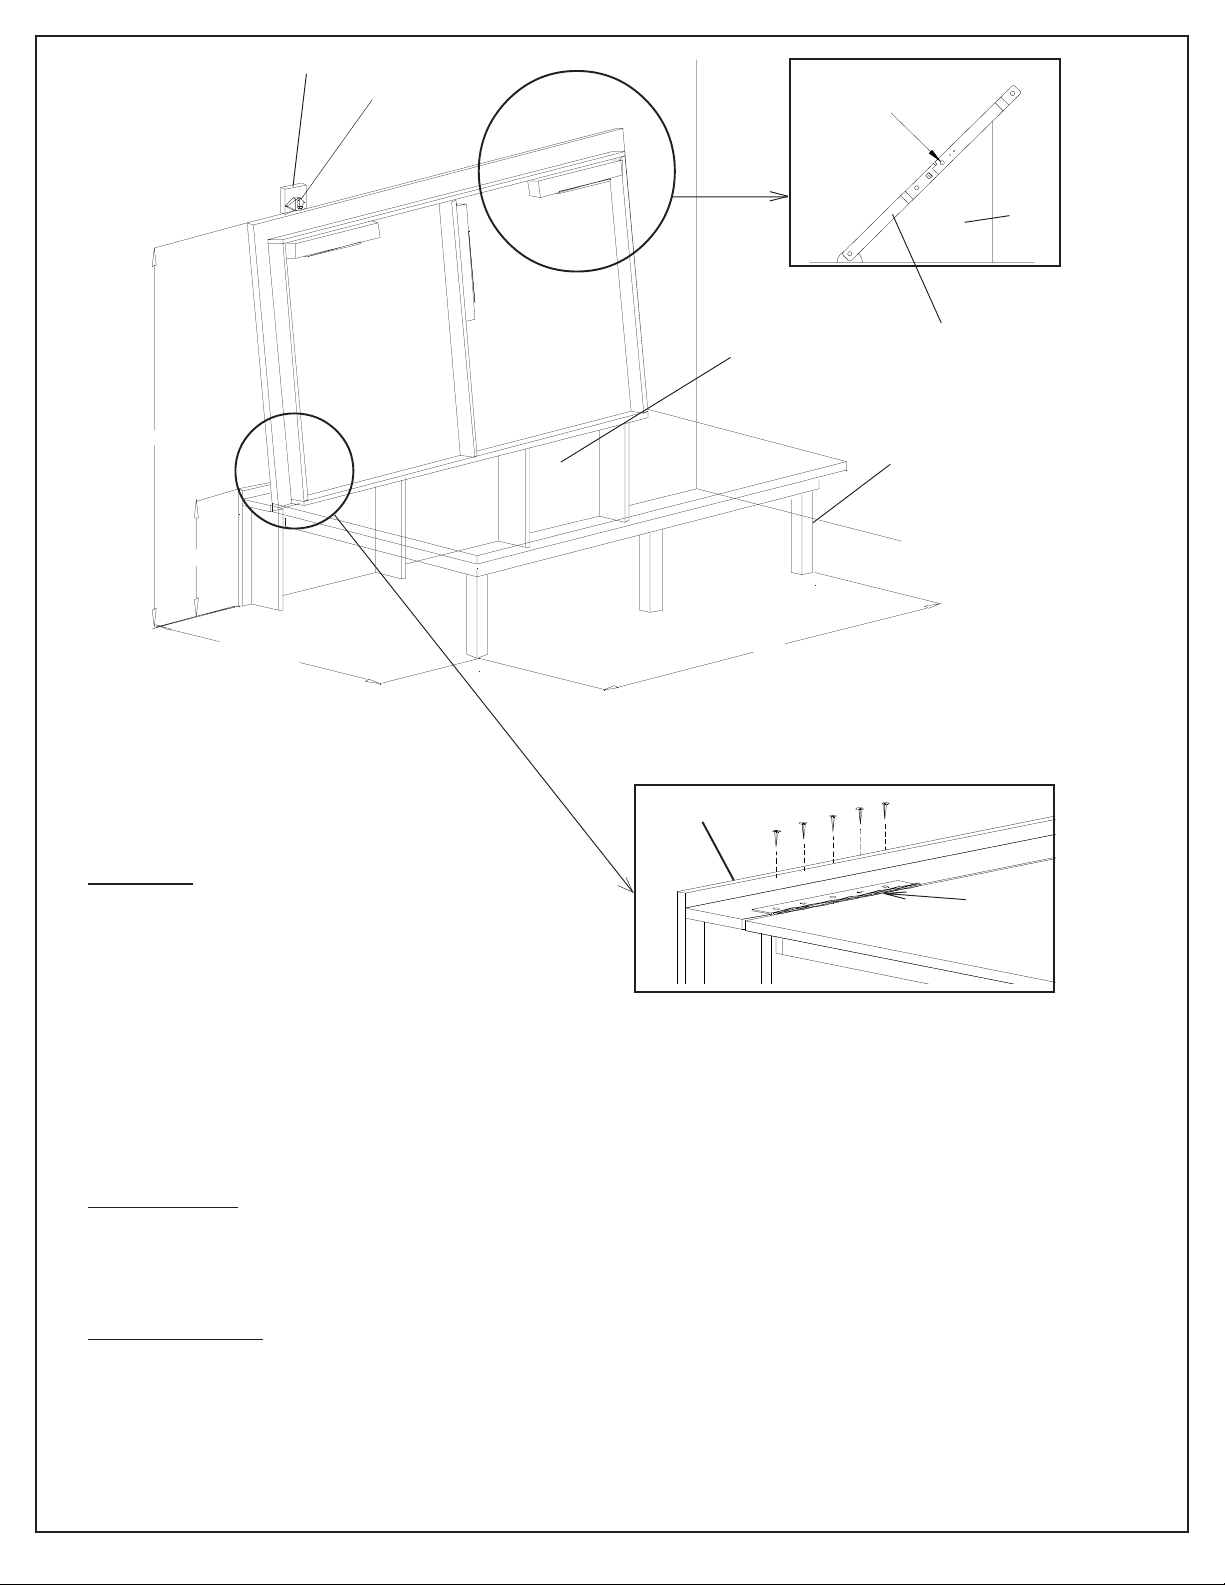
Latch Mounting Plate
Image shown for 1420
Pivoting Latch
x
Leg
Folding Metal Leg
Brace With Lock
Folding Leg
65 1/2”
17 1/4”
52 1/2”
Wall Support Plate
84”
Wall Plate
Installation
1. Mount wall suport plate to wall allowing it to sit on
the f oor, using fasteners (not supplied by
Hinge
Platform
Hausmann Industries). NOTE: Make sure the wall
fasteners are fastened into wall studs.
2. Fold open the legs on the platform and set the
(3) platform hinges on the wall mounting plate. Attach platform hinges to wall mounting plate with the
screws provided. Center platform across wall mount, equal distance left to right.
3. Position the wall latch 65 1/2” above the f oor (47 1/2" for 1422) and mount using fasteners (not supplied
by Hausmann Industries. The horizontal placement of the latch can be varied based on use conditions
and location of wall studs. NOTE: Make sure the latch mounting plate is fastened securely into a stud.
To fold the mat:
1. Slide the wall latch up to allow the table to fold upward.
2. Fold the mat into the wall and lock wall latch.
3. Fold legs by releasing brace locks. While pressing button ‘X’ gently push brace toward leg.
To unfold the mat:
1. Pull out the legs. Be sure that the legs lock into place when fully extended by pulling center of leg brace
toward you.
2. Open wall latches so that they are standing in a position that will allow the mat to fold down. Carefully pull
the table from the wall towards the f oor.
CAUTION: Maintain control over the mat during complete unfolding operation. Do not allow the mat to drop
down unattended.
2
rev. 12.06.07 cjr ©2007 HAUSMANN INDUSTRIES, INC.
 Loading...