

Haukaas Quick Pick Bale Buncher Owner’s Manual
Quick Pick Bale Buncher
Owner’s Manual & Parts Book
018
Owners Manual

Quick Pick Bale Buncher
Table of Contents
Forward 2
Decal Page 3
Setup & Operation 4
Maintenance 8
Parts Drawing - Chamber 9
Parts Drawing - Frame 10
Parts Drawing - Hub & Spindle 12
Parts List 13
Grease Points 16
Quick Sheet 17
Hay Yard 18
1

FORWARD
Haukaas Mfg. Ltd. would like to take this opportunity to thank you for purchasing a
HAUKAAS Bale Mover.
This manual is published as a guide and service reference to assist you, the owner of the
HAUKAAS Bale Mover, in obtaining satisfactory operating performance. It is important that
all persons responsible for the care and operation of this equipment read and understand the
information presented in this manual. A clear understanding of its capabilities and features
will ensure you years of trouble free and efficient use.
In order to achieve the best performance, it is necessary that the unit be treated with reasonable
care, and that the inspection, operating and maintenance procedures contained in this manual
are followed closely.
The illustrations and instructions on the following pages were the most recent available at the
time of publication of this manual. Differences between the unit you received and the views
contained in this manual are the result of a design improvement and /or the addition of optional
accessories specified on your order.
This manual should be considered as part of the machine and should be delivered to the new
owner if the machine is sold or operated by a person other than the original purchaser.
A careful operator is the best insurance against an accident.
Before attempting to operate the HAUKAAS Bale Mover, read this owners manual and all the decals
affixed to the machine. You should also familiarize yourself with this machine before operating
.
2

Quick Pick Decals
3
10 inches
Please study decals and understand their meanings before using this machine.
Setup and Operation Instructions
4
10 inches
10 inches
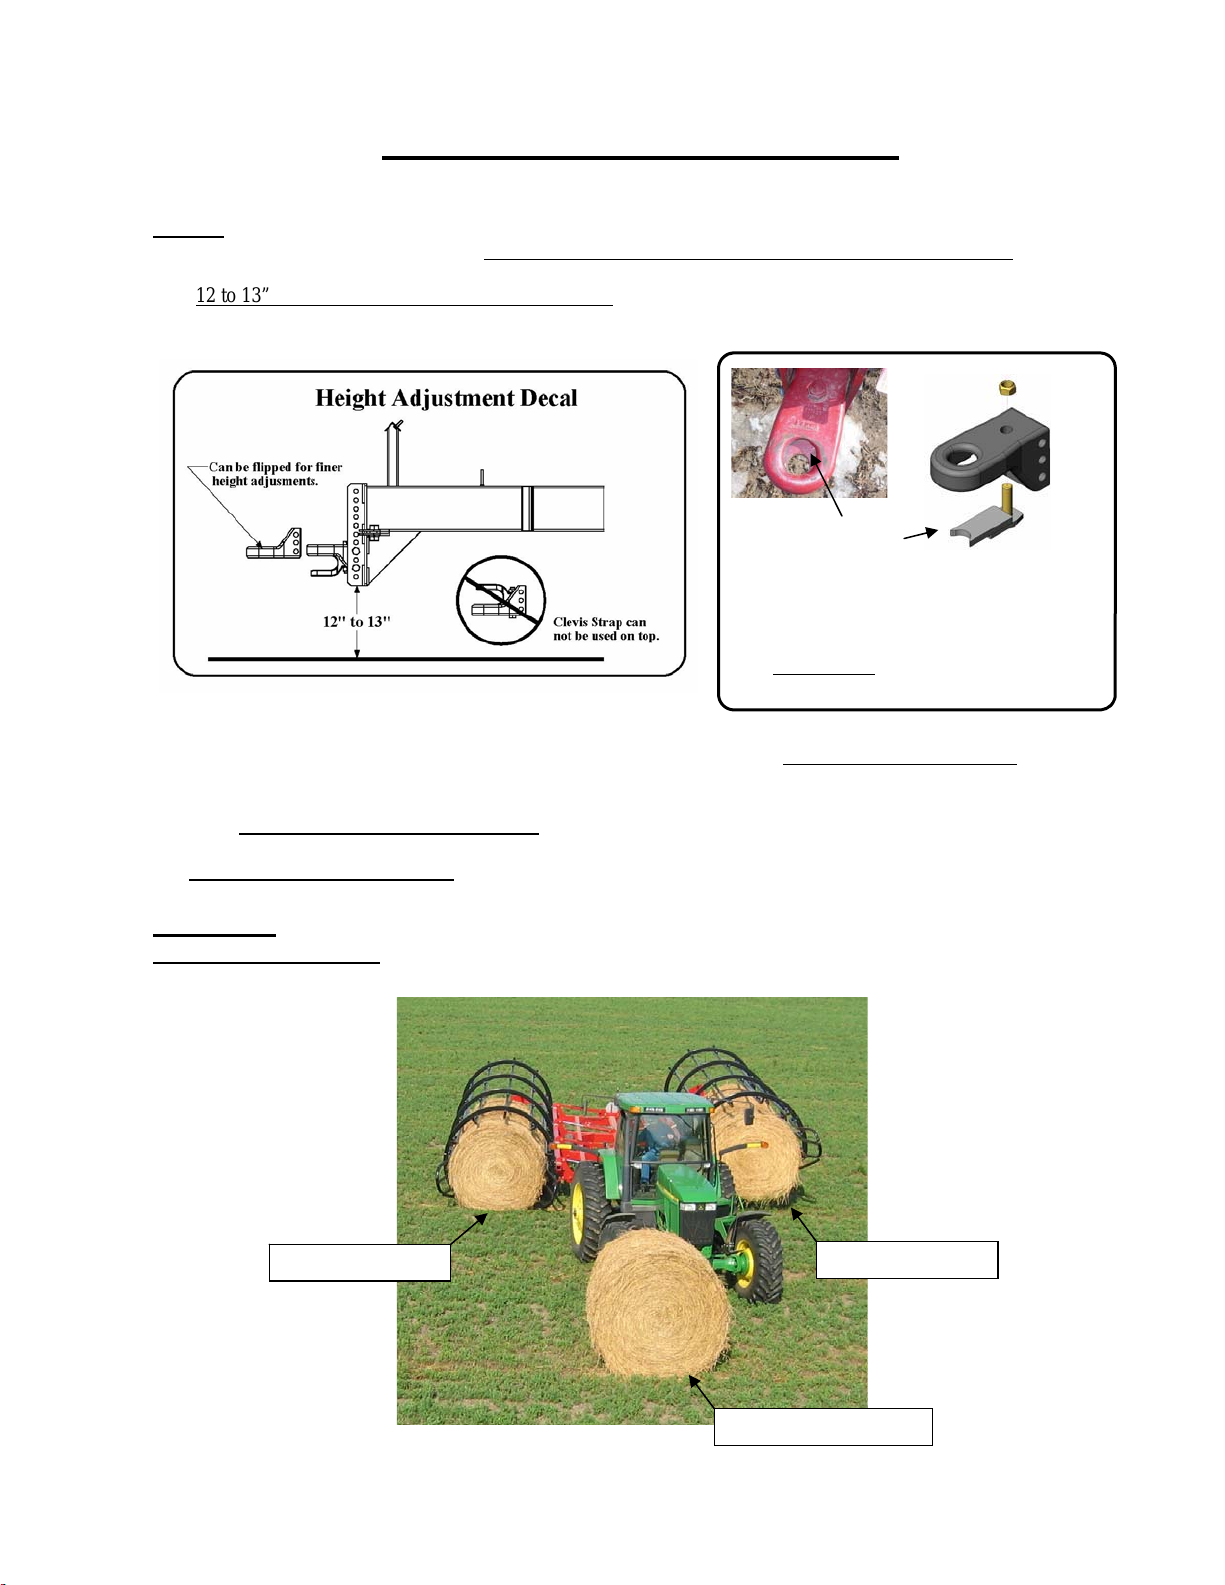
Set-Up
The only set up adjustments required are setting the height of the hitch and hydraulic flow to the cylinders. The unit is
designed to run level or a little bit lower on the front end. We suggest that you locate the tongue assembly so that you
have 12 to 13” from the ground to the bottom of the hitch
.
Hitch Hole Spacer
When not using the Clevis Strap Option it is
recommended to use the Hitch Hole Spacer to
reduce the movement between hitch and draw
pin. Do Not Use
in diameter
a draw-pin larger than 1-1/4”
We recommend that the hydraulic flow to the chambers be set so that it takes 10 seconds to fold a chamber
completely down to the folded position.
Check the wheel bolts, tighten to 125 lbs torque
The tires should be inflated to 50 psi.
. Check again after first day of use.
Operation
Loading the Machine:
The unit is designed to load the bales with both chambers lowered.
Bale being loaded
Bale being carried
from
Next bale to be loaded.
Load the unit evenly so that one bale in the right chamber means the left chamber gets the next one. In
certain conditions 3 on one side and 5 on the other will not be a problem. However in hilly conditions or
poor field conditions it is possible to roll the unit over if it is not loaded properly
over if thereare too many bales on one side and not the other.
. The unit will roll
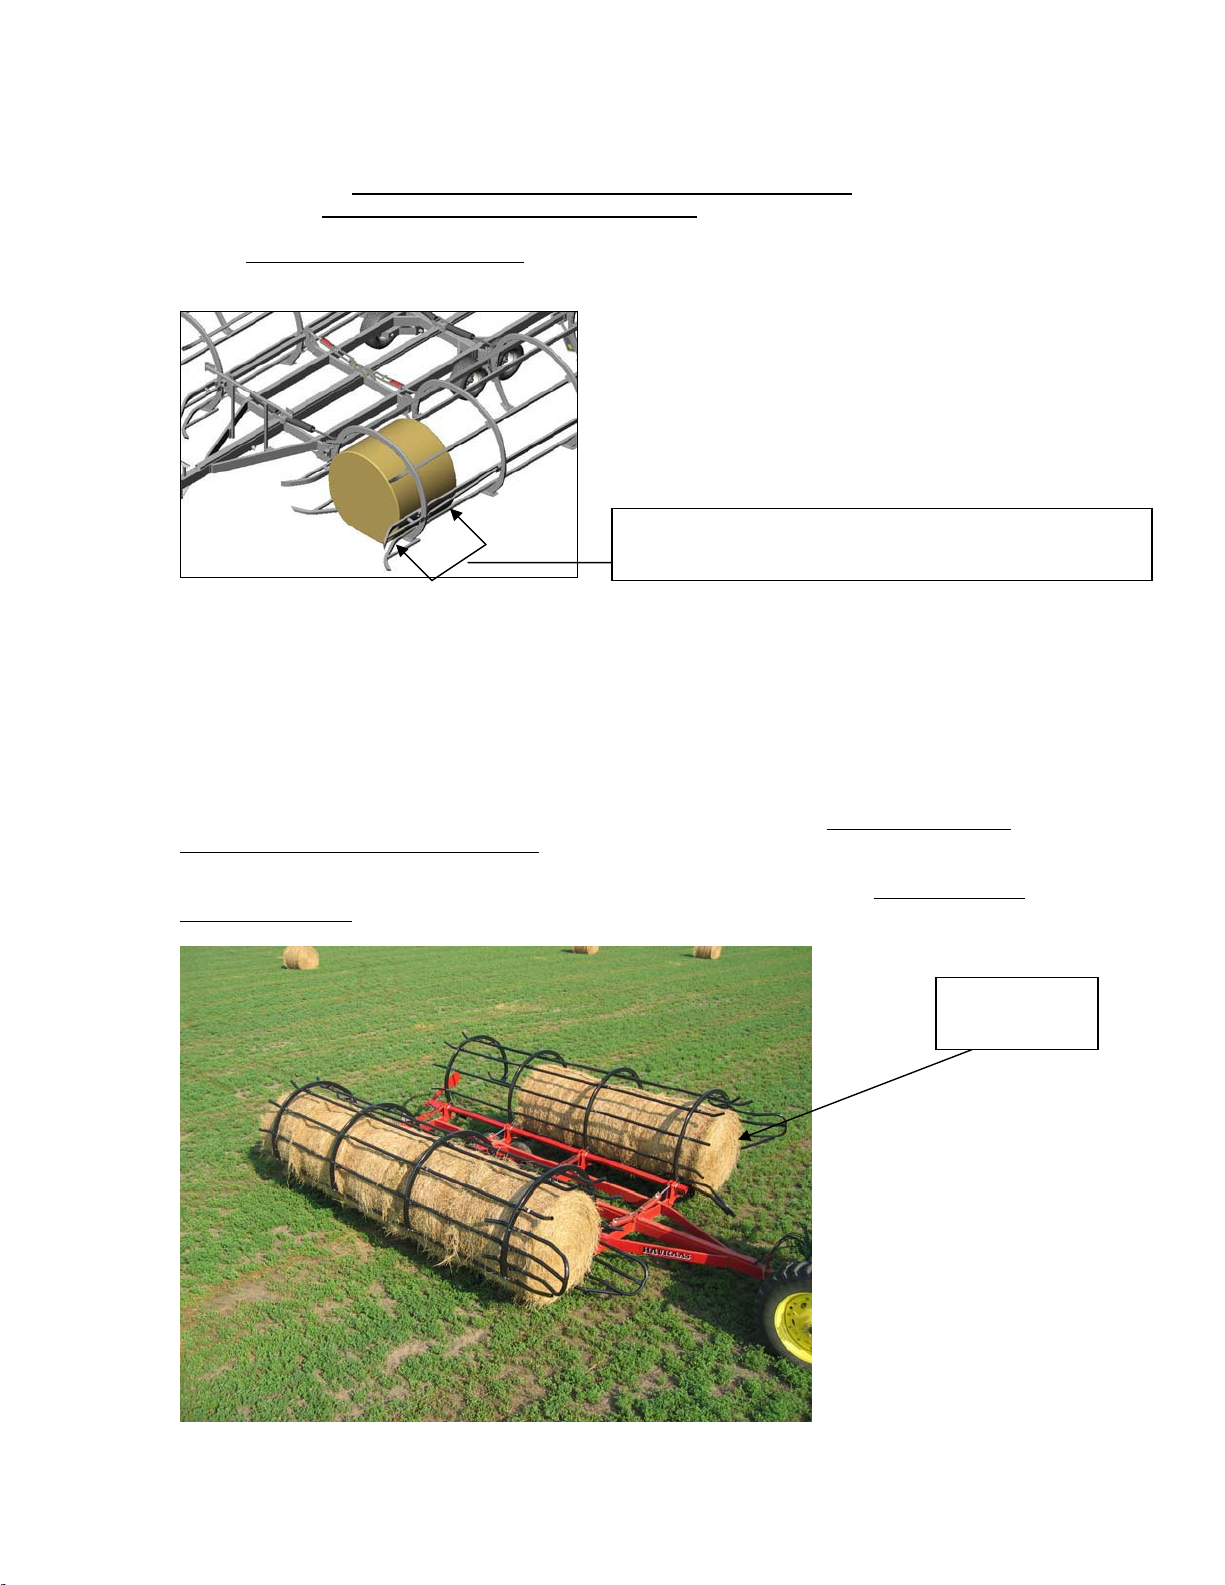
Always load the front of the chambers first
front of the chamber.
. Load the chamber so that the bale you just picked stops at the
The loading bale should be carried at this location in
the chamber.
The loaded bale in the front of the chamber will help align the incoming bale. Load the chamber front to
back as shown in the picture below. Loading in this manner will prevent the bales already loaded in the
chamber from dragging on the ground while loading another bale. What in fact happens is that each time a
bale is loaded all the bales in that chamber are set back down on the ground and the chamber slides over all
of them. Once the new bale is in the front of the chamber the chamber is then picked up again.
It may take an operator a while to perfect the technique but after mastering it the ease and speed of the unit
is quite impressive. Depending on the hayfield it is possible load bales at 4 mph+.
When an operator starts out it is best to clutch each time a bale is loaded. Again we want the bale being
loaded to stop at the entrance of the chamber and stay there until the next bale to be loaded touches it.
Mastering the technique of operating the HAUKAAS Bale Mover is like most things. First you get good,
and then you get fast.
Load front of
chamber first
5
 Loading...