

Page 1
Hatton’s OO gauge 14xx
Locomotive Instruction Sheet
IMPORTANT INSTRUCTIONS. PLEASE READ BEFORE USE.
Controller
This locomotive is fitted with a coreless motor and is designed to work on the more modern
proprietary DC controllers and any DCC system (when fitted with a suitable 6 pin decoder).
As such Feedback controllers, PWM or controllers older than 10 years old may not be
compatible and indeed it is possible you could cause damage to the electrical components
on the model.
Electronic track cleaners
In our experience, the use of electronic track cleaners can cause intereference with modern
motors and, in some extreme cases, cause failure of components. We do not recommend
the use of electronic track cleaners with this product.
Before use
This locomotive requires lubricating before use otherwise you may find your model is a little
noisy or slightly rough out of the box.
Run at a medium speed for 15 minutes in either direction and your locomotive should start
to bed in. Do not run at high speeds and do not stop by turning off the power, reduce speed
gradually. Do not run on carpet or other floor coverings as dust and hairs can cause a lot of
damage to mechanisms.
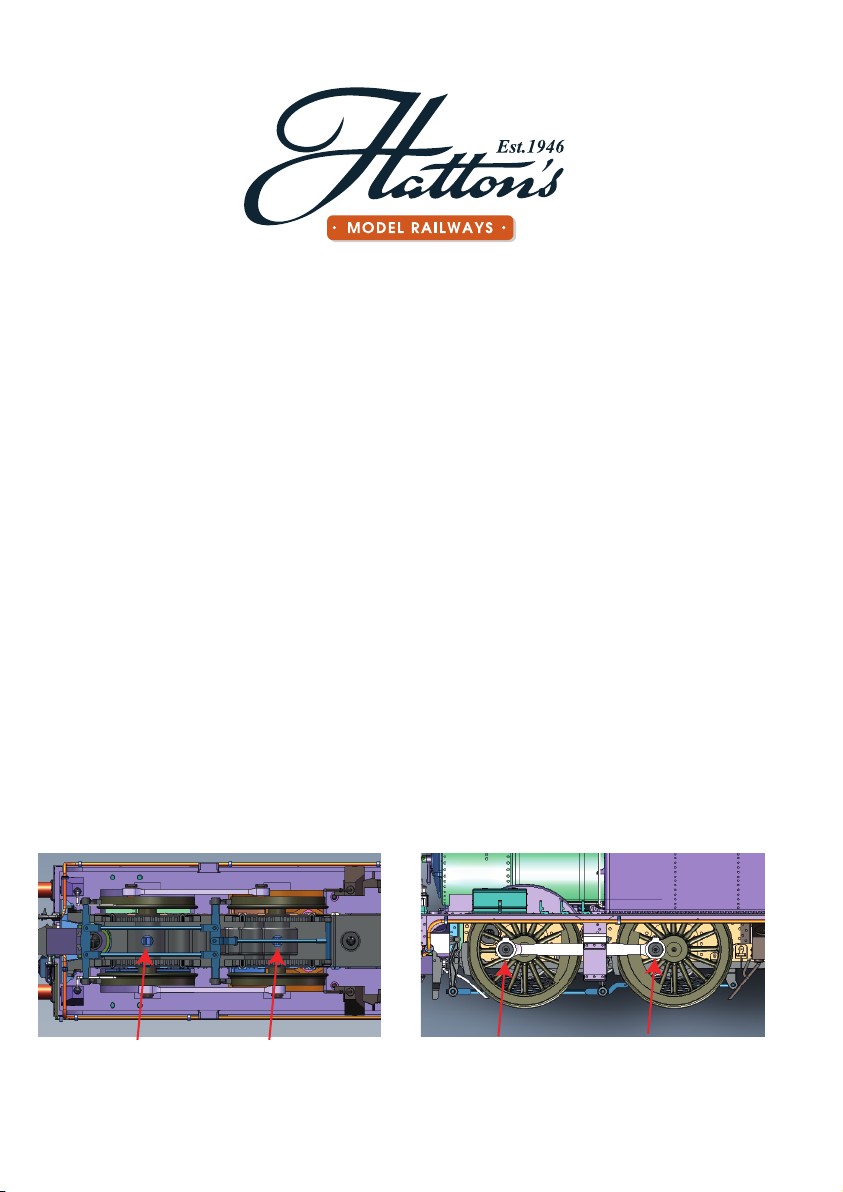
Lubricant should be applied to the gears
seen under the 2 holes on the bottom of
the locomotive.
Lubricant should also be applied between
the wheel faces and coupling rods around
the pins.
Page 2
DC/DCC
Do not run on DCC if you do not have a digital decoder fitted. This will almost certainly cause
damage to your model. Running on DC when fitted with a DCC decoder may work, consult
your DCC decoder instructions for more information.
This model is DCC ready and has a 6-pin socket in the boiler space, pre-fitted with a blanking
plug for use on DC out of the box.
To fit DCC
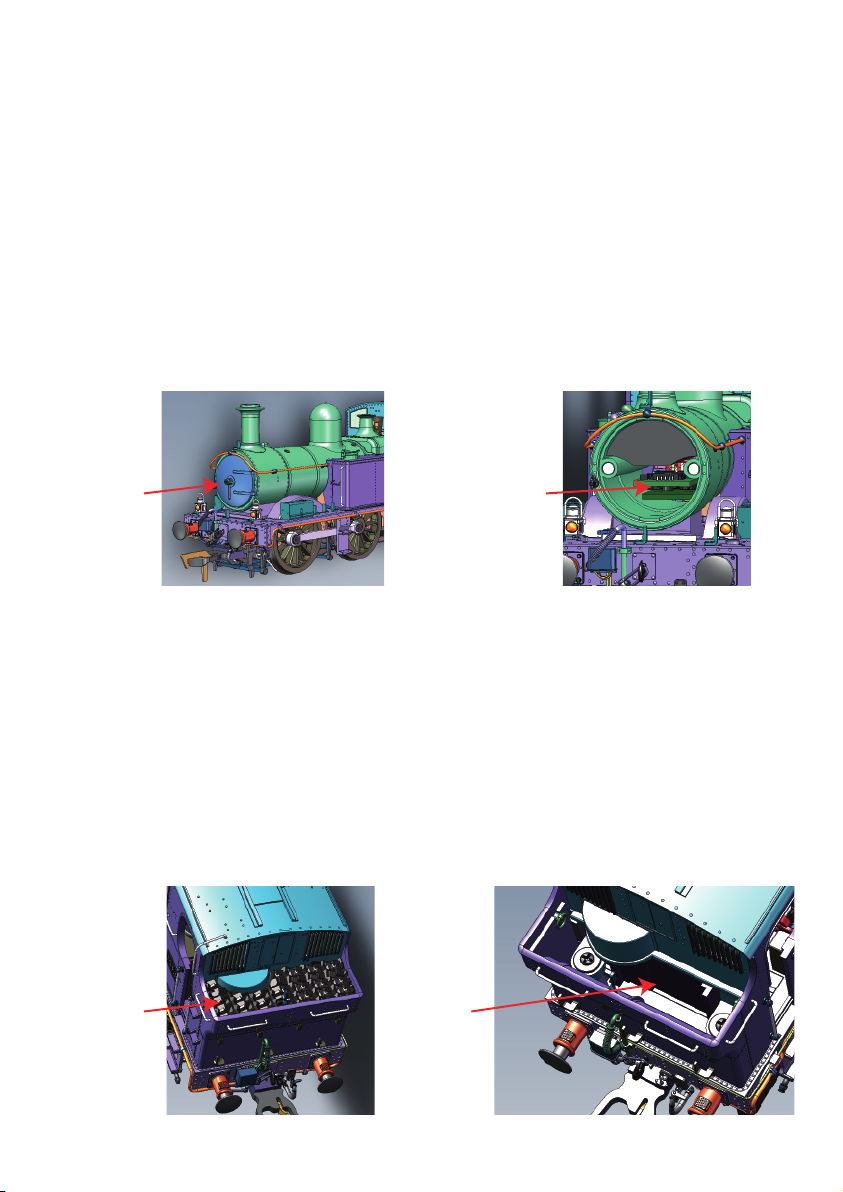
1. Remove smokebox door (secured by 2 magnets).
2. Gently pull out circuit board.
3. Remove blanking plate.
4. Install DCC decoder, making sure that pin 1 is in the correct place.
5. Replace board and decoder in the boiler of the loco.
6. Replace smokebox door making sure it sits flush against the front of the boiler.
Smokebox
door
Circuit board
with blanking
plate
To fit a DCC sound speaker
The 14xx is pre-fitted with wires to aid in installing a DCC sound speaker. It also has an
enclosure in the bunker to house a standard sugar cube speaker (15mm x 10mm x 3mm).
1. Follow steps 1-4 above.
2. Locate the 2 loose wires in the boiler and solder to speaker wires on decoder.
3. Replace board, decoder and speaker wires in the boiler of the loco.
4. Replace smokebox door making sure it sits flush against the front of the boiler.
5. Remove coal load from bunker.
6. Locate the 2 loose wires in the bunker.
7. Solder the wires to the speaker.
8. Locate the speaker sideways in the slot provided with the cone pointing into the cab.
9. Replace coal load making sure it is flush inside the bunker.
Coal
load
Speaker
location
Page 3
Removing the cab
To fit a crew to this locomotive follow these steps:
1. Remove the coal load from the bunker.
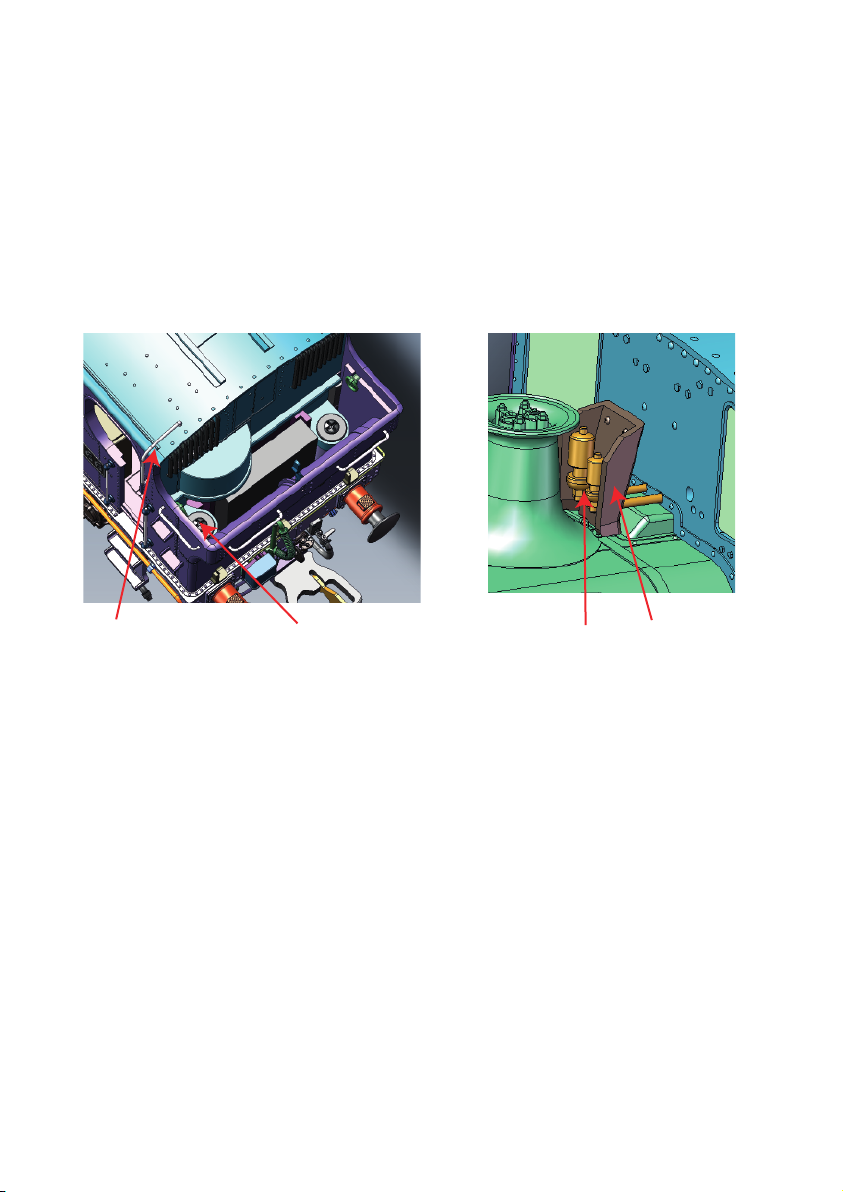
2. Carefully remove the 2 screws towards the bottom of the bunker.
3. Carefully remove the cab handrail from the top of the cab.
4. Carefully remove the whistles and whistle guard (if fitted).
5. Gently pull the cab upwards.
6. Install crew (not included).
7. Replace cab.
8. Replace whistles and guard.
9. Replace cab handrail.
10. Replace screws in bunker.
11. Replace coal load making sure it is flush inside the bunker.
Cab Handrail
Screws Whistles & guard
Warranty Information
We offer a 12 month warranty on all our exclusive products as standard. However, if an
item develops a fault after this time you can still contact us for help and advice, we'll do
our best to resolve the issue for you.
If an item is replaced by Hatton’s between 9 - 12 months after purchase, a warranty of 3
months will be given on the replacement item.
It is preferable to contact us by phone before returning a product thought to be faulty.
Often we can diagnose problems and advise on how to resolve most issues without the
item needing to be returned. If you can't phone us an email is fine but please allow up
to 24 hours for a reply (though we are usually much quicker).
In order for us to be able to process returns quickly and effectively, please enclose a
covering letter detailing the following:
- The fault with the item
- The original invoice number
- Your contact details including telephone numbers (works, mobile etc)
- Details of any correspondence (name of person spoken to, copy of letter, printout of
email).
A limited number of spares will be available but these are only for replacing damaged
or missing parts. We cannot provide ‘extra’ spares for people looking to modify their
locomotives.
Page 4
Detail Parts
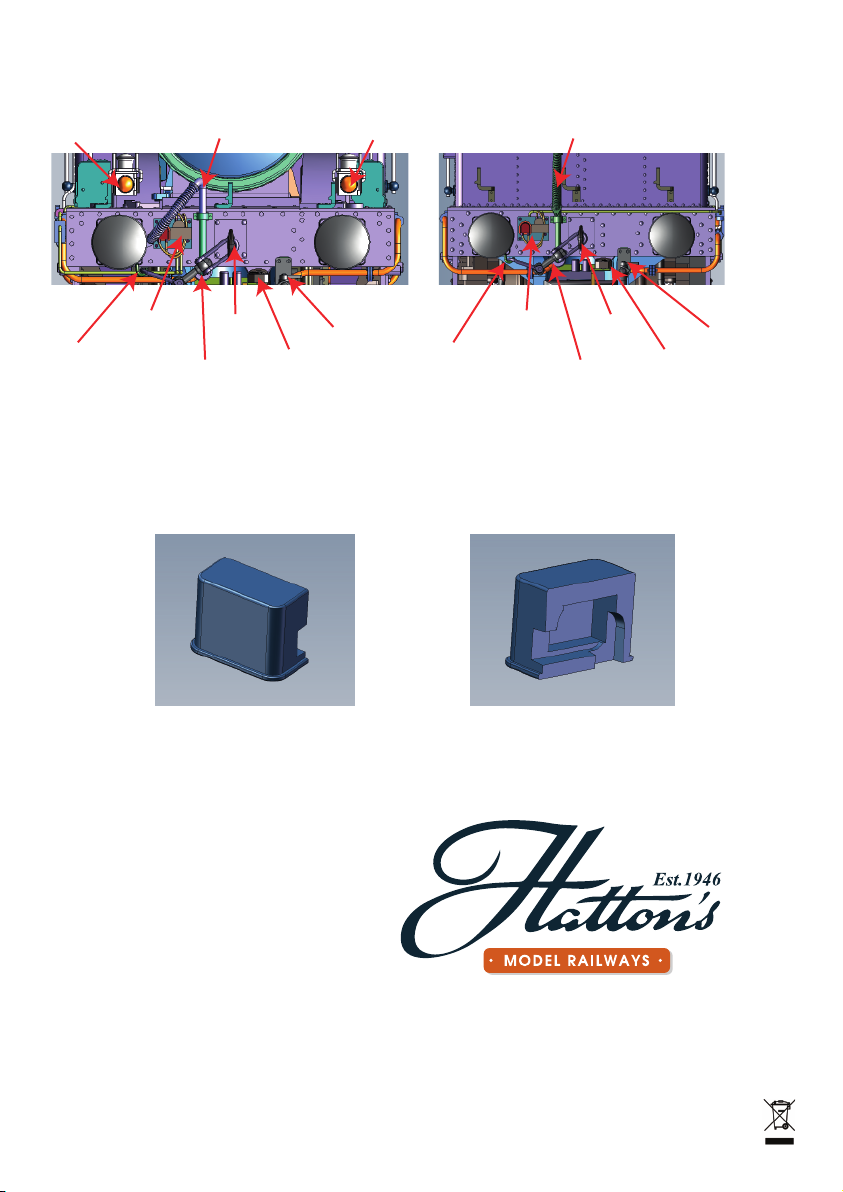
Below is a picture of the front and back bufferbeams showing the details that are included.
Some parts need to be added by the modeller due to their fragile nature.
Lamp
(non working)
Brake pipe
(in 2 parts)
Lamp
(non working)
Brake pipe
Auto gear
(not on 58xx)
Coupling
hook
Coupling
Steam heat pipe
Auto gear
(not on 58xx)
Coupling
storage hook
Auto gear
(not on 58xx)
Coupling
Coupling
hook
(not on 58xx)
Steam heat pipe
Auto gear
Coupling
storage hook
There is also a small part shown below which is included with 14xx/48xx models. It is the
cover for the auto gear to the left of the bufferbeam. Most locomotives had these fitted
ex-works but lost them quckly as crews found it easier to work with the bare panels. To fit,
glue or tack the part over the panel already on the bufferbeam. Alternately, remove the auto
gear panel by gently flicking it off with a scalpel blade and replace with the cover.
Front Rear
Contact Details
Hatton’s Model Railways
17 Montague Road
Widnes
WA8 8FZ
0151 733 3655
Lines are open :
0730 - 1800 Monday - Saturday
0900 - 1700 Sunday
www.hattons.co.uk
Hatton’s products conform to WEEE and RoHS requirements.
If you have a need to dispose of any electrical components, please do so correctly.
 Loading...