

Page 1
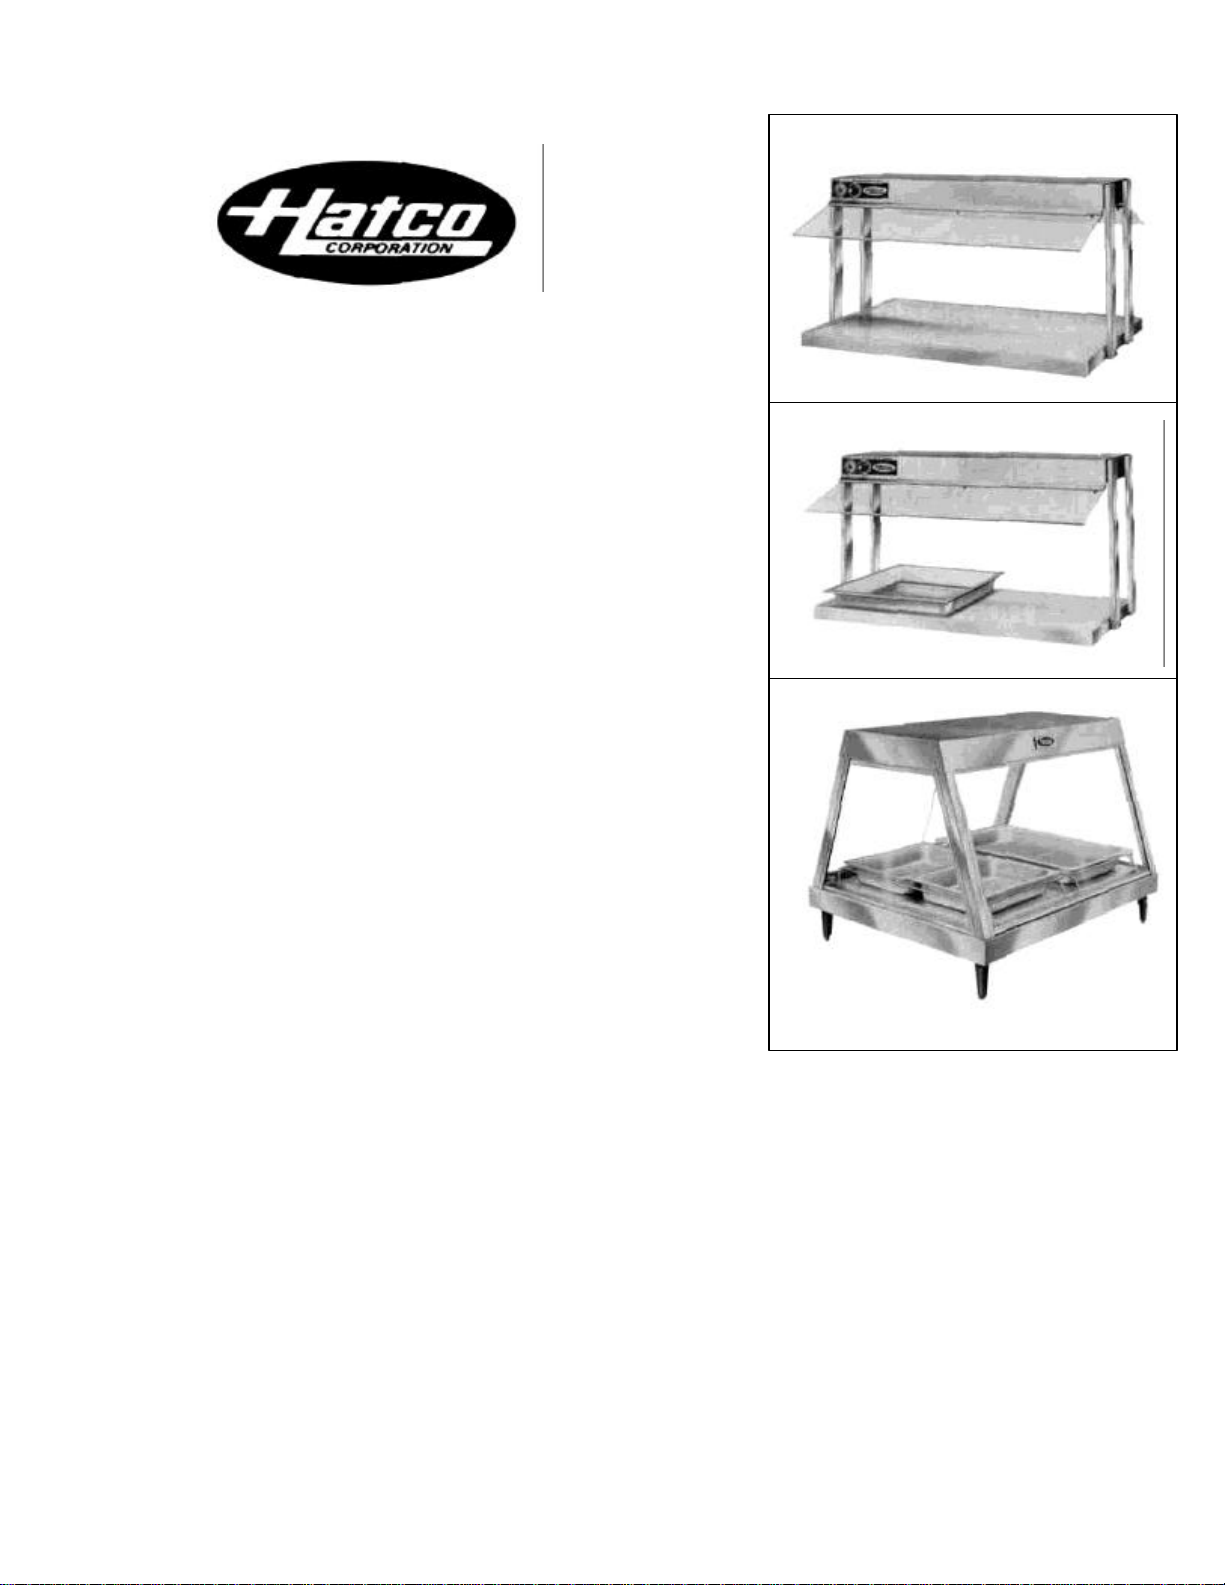
Glo-Ray Food Warmer
Installation
and
Operating
Manual
Models:
Buffet Warmer
Hors d'oeuvre Warmer
Display Case
Page 2

Table of Contents
OPERATION
CLEANING
DISPLAY LIGHT BULB
REPLACEMENT
SAFETY PRECAUTIONS
ACCESSORIES
GENERAL
MODEL DESCRIPTION
SPECIFICAT
IONS
ELECTRICAL REQUIREMENTS
LOCATION
INSTALLATION
Buffet Warmer &
Hor d'oeuvre Warmer
Heated Display Case
Glo-Ray Display Warmers
Cord and Plug Provided Models
Conduit Connected Models
General
Breath Protectors
Glass Doors
Glass Panels
Page No. Page No.
1
1
1
2
2
2
3
3
3
3
3
3
3
4
4
Buffet Warmer &
Hor d'ouevre Warmer
Heated Display Case
Infinite Control
Adjustable Legs
Food Pans
Wire Trivet
5
5
5
5
6
6
6
6
6
6
6
Page 3
GENERAL
Hatco Display Warmers keep all foods at optimum
serving temperatures without affecting quality. These
Glo-Ray warmers have prefocused infrared heat from
above and a thermo -controlled heated base to extend
the holding times of most food. The infrared heating
elements are guaranteed against breakage and
burnout for two years.
All models are shipped with easy to install breath
protectors or display glass and a pre-attached cord and
plug set. All models include incandescent display
lights.
Safety precautions preceded in this manual by the words
WARNING or CAUTION printed in bold face are important.
Warning means there is the possibility of personal injury to
yourself or others Caution means there is the possibility of
damage to the unit.
MODEL DESCRIPTION
BUFFET WARMER & HOPS
D'OEUVRE WARMER SEE FIGURE
1A & 1B
This manual provides the installation and operation
instructions for Glo-Ray Display Warmers. We
recommend all installation and operating instructions
and safety precautions appearing in this manual be
read prior to installation and operation.
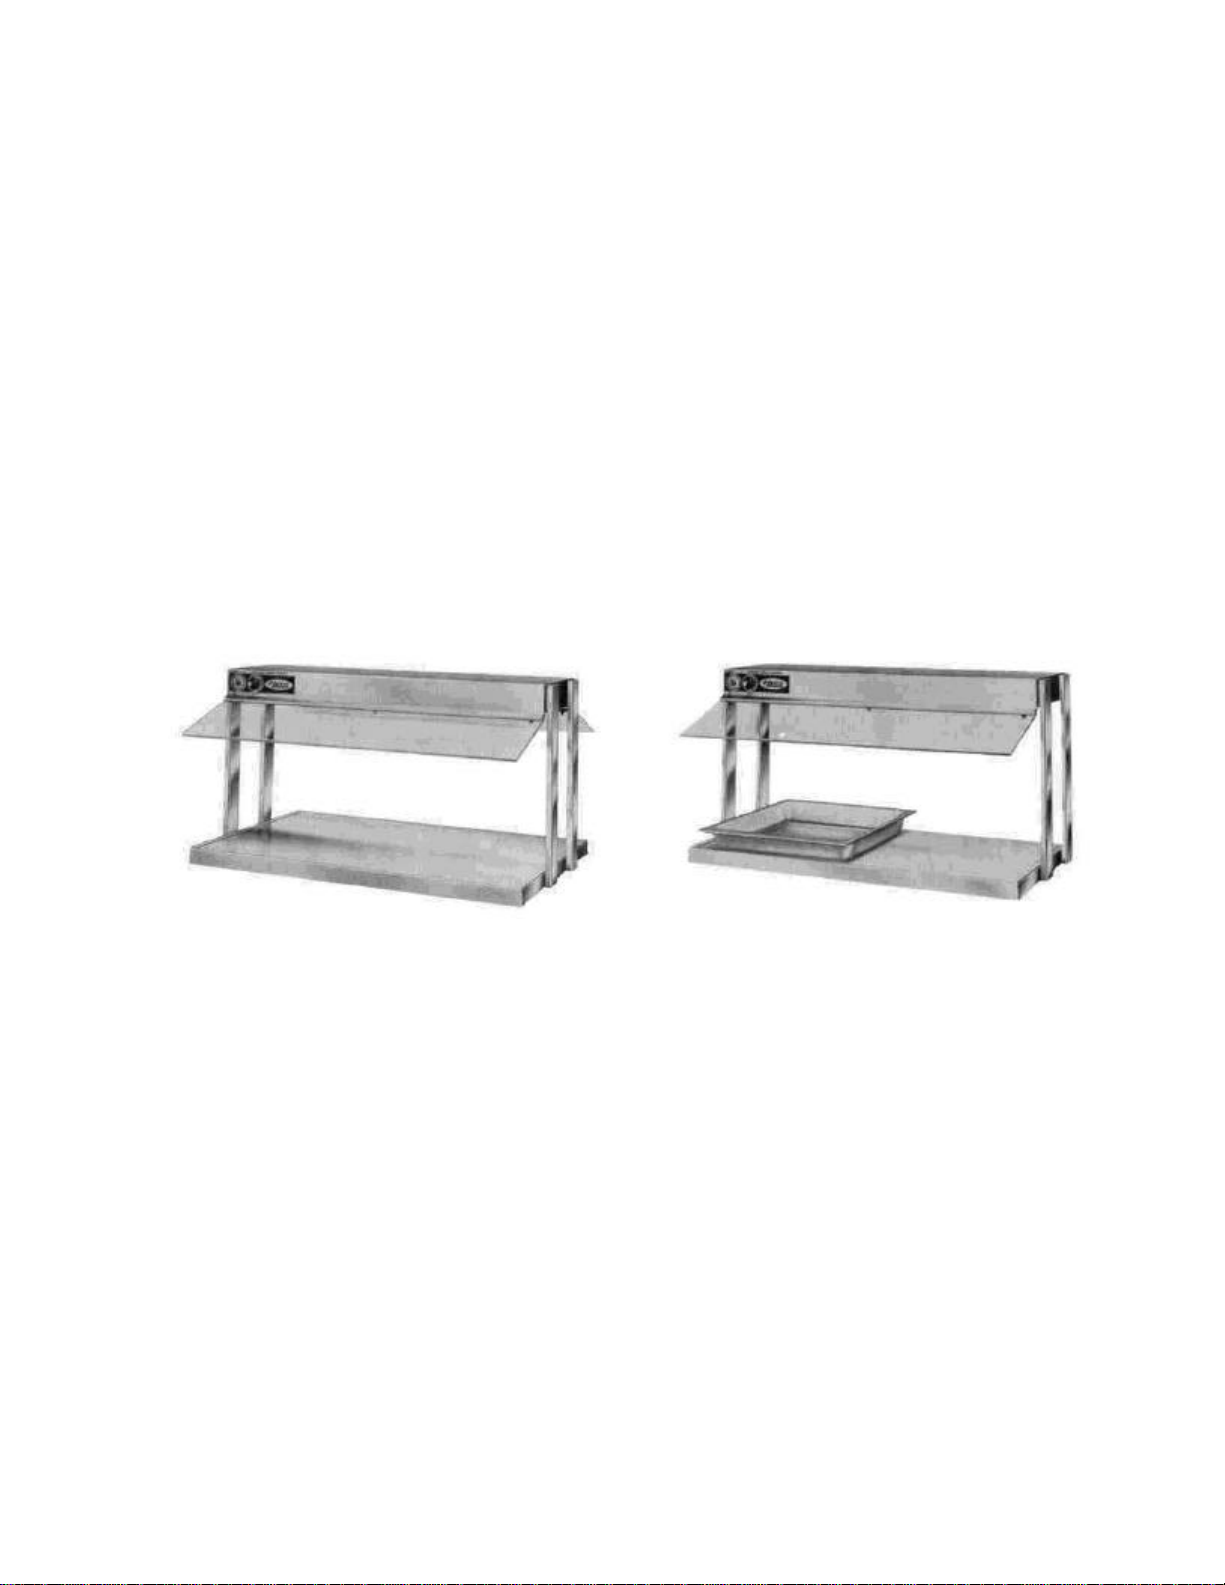
Figure 1A. Buffet Warmers — Model GRBW-30 With Optional Infinite Control
The Glo-Ray Buffet Warmer and Hors d'oeuvre warmer are
perfect for holding hot food on a buffet line or at temporary
serving areas. These Glo-Ray models feature a specially
designed heated base, breath protectors, soft incandescent
lights and a cord and plug set.
Model GRBW is available in lengths from 24 in. up to 72 in.,
holding from 2 to 5 standard food pans. Model GRHW is
available to accomodate one or two standard food pans.
Figure 1B. Hors d'oeuvre Warmer— Model GRHW-1P With
Optional Infinite Control
1
Page 4
HEATED DISPLAY CASE
2
SEE FIGURE 2
SPECIFICATIONS
GLO-RAY DISPLAY WARMERS
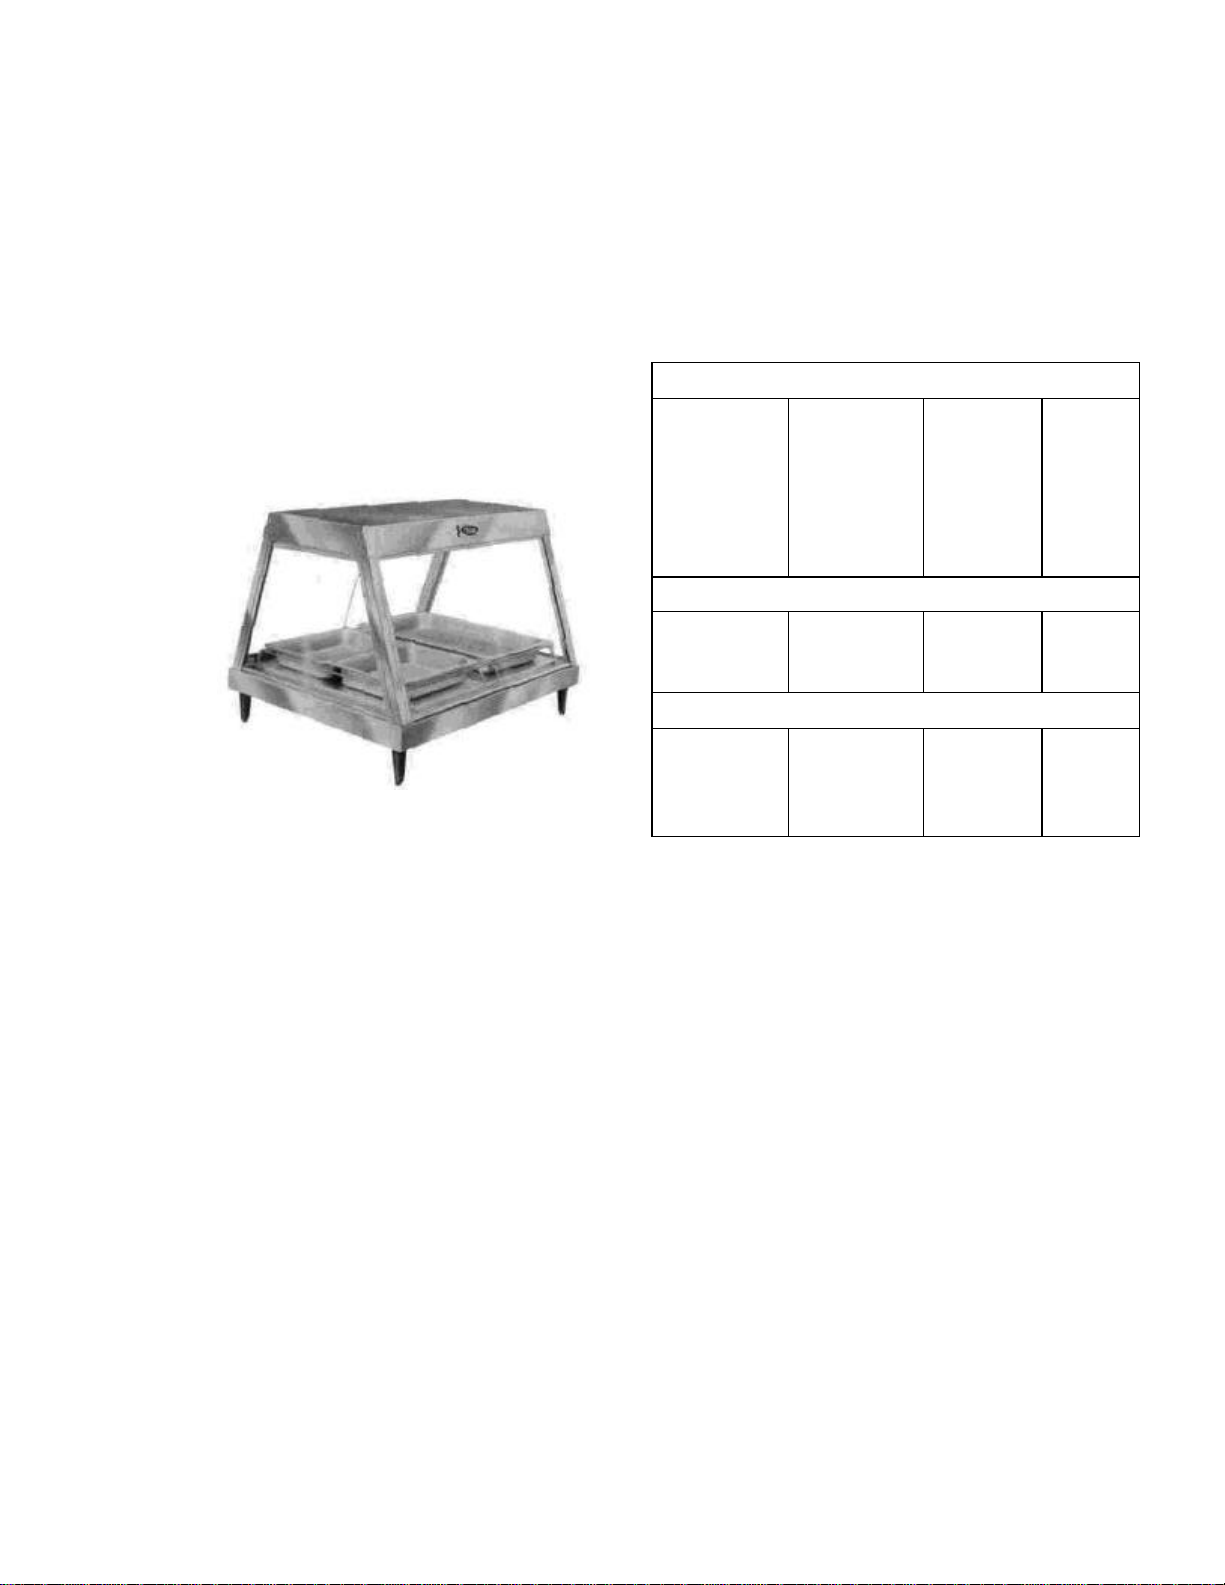
Model GRHD a quality built display case constructed
of stainless steel and aluminum with rollerless sliding
doors and full-view tempered glass sides. Available in
2, 3 and 4 pan sizes, Glo-Ray GRHD has a cool base
construction and incandescent display lights that
illuminate the cabinet interior.
A metal-sheathed element directs heat from above
while the thermo -controlled base conducts heat from
below.
Glo-Ray Food Warmers operate on 115, 208 or 230 volts
depending on type of model. Model GRHW is rated at 115
volts only. Models GRBW and GRHD are available in 115,
115/208 or 115/230 volts.
Buffet Warmers
Model
GRBW-24
GRBW-30
GRBW-36
GRBW-42
GRBW-48
Hors d'oeuvre Warmers
Model
GRHW-1P
Heated Displf ay Case
Model
GRHD-2P
GRHD-3P
Wattage
920
1150
1420
1630
1840
Wattage
920
Wattage
1075
1515
GRBW-54
GRBW-60
GRBW-66
GRBW-72
GRHW-2P
Model
Model
Model
GRHD-4P
Wattage
2130
2400
2630
2865
Wattage
1690
Wattage
1990
Figure 2. Heated Display Case — Model GRHD-2P
With Optional Food Pans
Page 5
ELECTRICAL
INSTALLATION
REQUIREMENTS
For proper installation to local electrical code consult a
licensed electrical contractor.
CORD AND PLUG
PROVIDED MODELS
Install an approved grounded receptacle to receive plug of
models provided with supply cord and plug set.
CONDUIT CONNECTED MODELS
Install a supply wire not lighter than 10 gauge copper, rated
90°C. Hatco provides a 1/2 in. or 3/4 in. trade size knockout,
usually opposite the switch; 6 in. long pigtail leads and a
separate grounding terminal or screw in the wiring
compartment: and UL recognized wire nuts for connecting
supply wires.
LOCATION
It is necessary for safe and proper operation that the
food warmer be placed a reasonable distance from
combustible surfaces.
WARNING
Some exterior surfaces on the display warmers
will get hot. Caution should be taken when
touching these areas to avoid Injury.
GENERAL
Glo-Ray Display Warmers are shipped with most
components pre-assembled. Breath protectors and glass
panels must be installed on location. Care should be taken
when unpacking shipping carton to avoid damage to unit and
components enclosed.
WARNING Legs for Model
GRHD must be installed prior to operation of unit.
BREATH PROTECTORS
SEE FIGURE 3
Models GRBW and GRHW use acrylic breath protectors that
shield the food while allowing easy access. Specially designed housings and mounting hardware make installation
simple.
NOTE
Remove protective paper from acrylic surfaces before
mounting breath protectors.
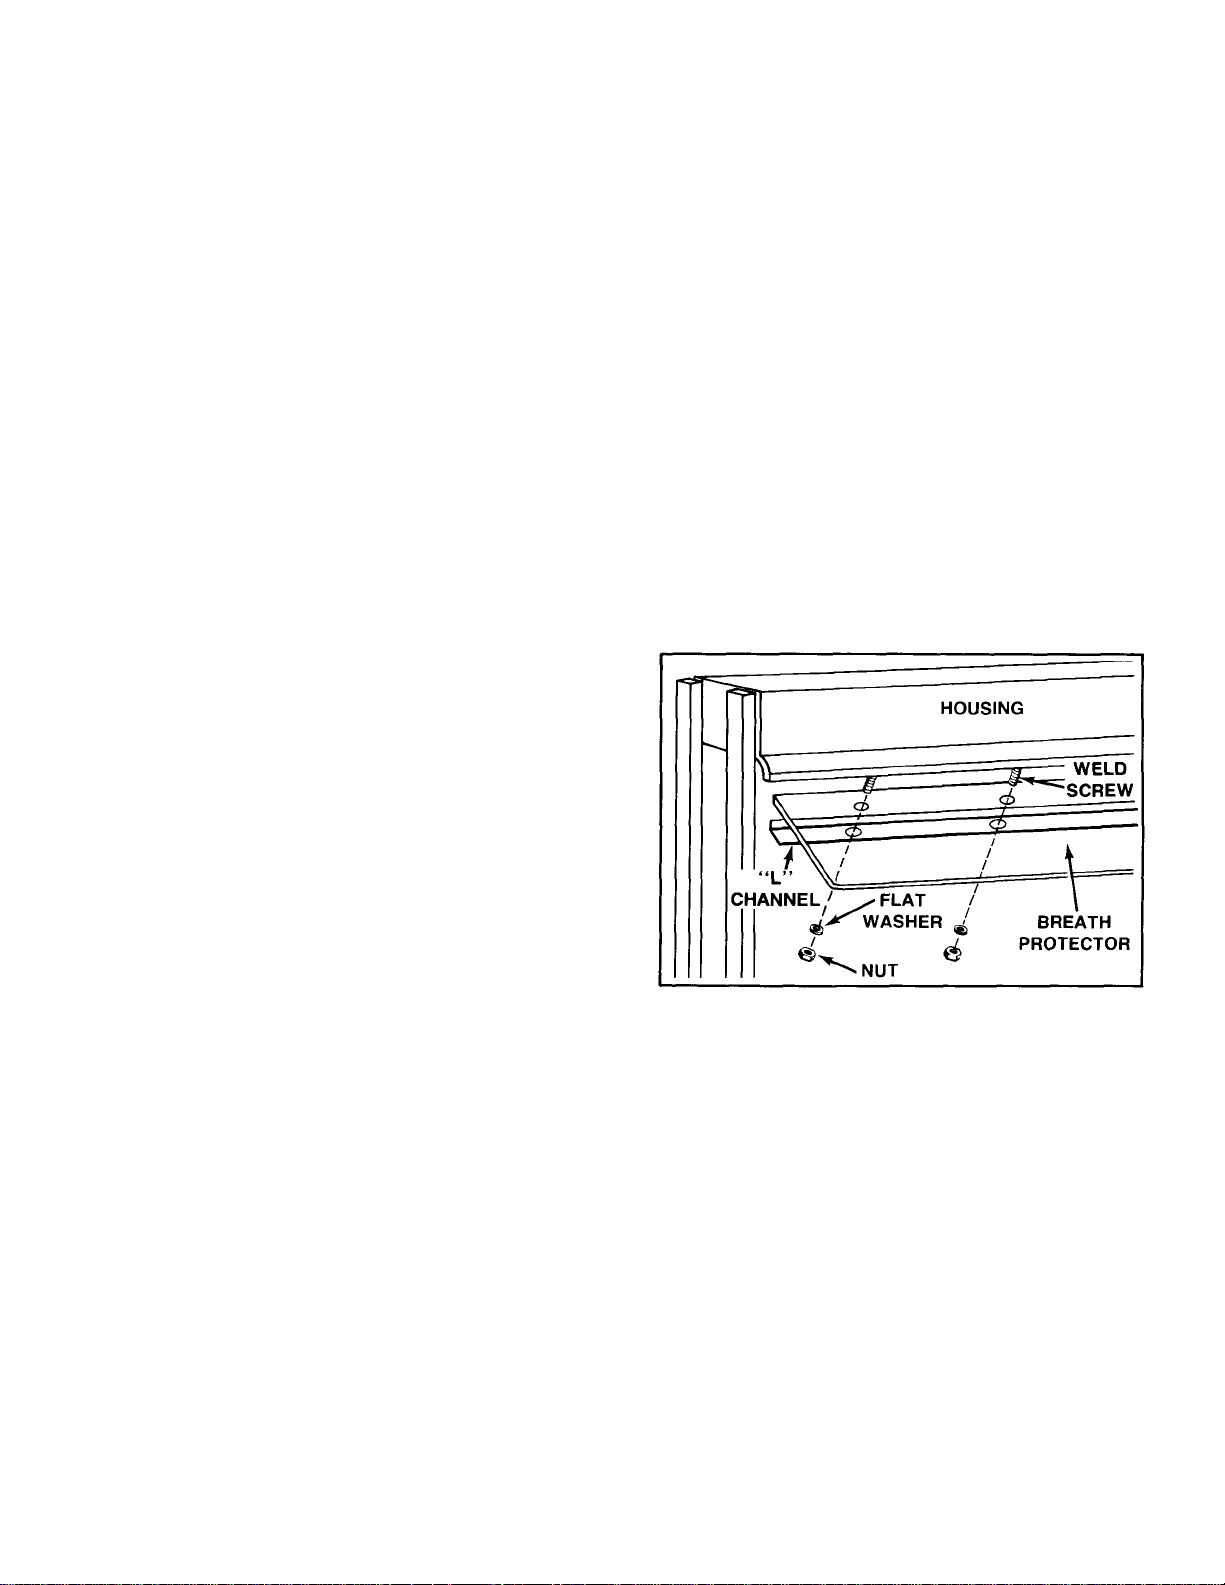
Figure 3. Installing Breath Protectors
3
Page 6
STEP 1 - Slide weld screws into slot provided on housing.
Position as close to holes in protector as possible.
STEP 2 - Carefully place breath protector with "L" channel
against housing while aligning holes with weld screws. Slide
weld screws as necessary to match hole location on both protector and channel.
STEP 3 - Place flat washer over weld screw and attach cap
nut. Tighten cap nuts securely after all have been attached.
NOTE
Make final position adjustment of breath protector before drawing cap nuts
tight.
GLASS DOORS
SEE FIGURE 4
Model GRHD features rollerless sliding glass doors that fit
into special track guides. They are protected during shipping
with reinforced tape that must be removed prior to operation
of unit.
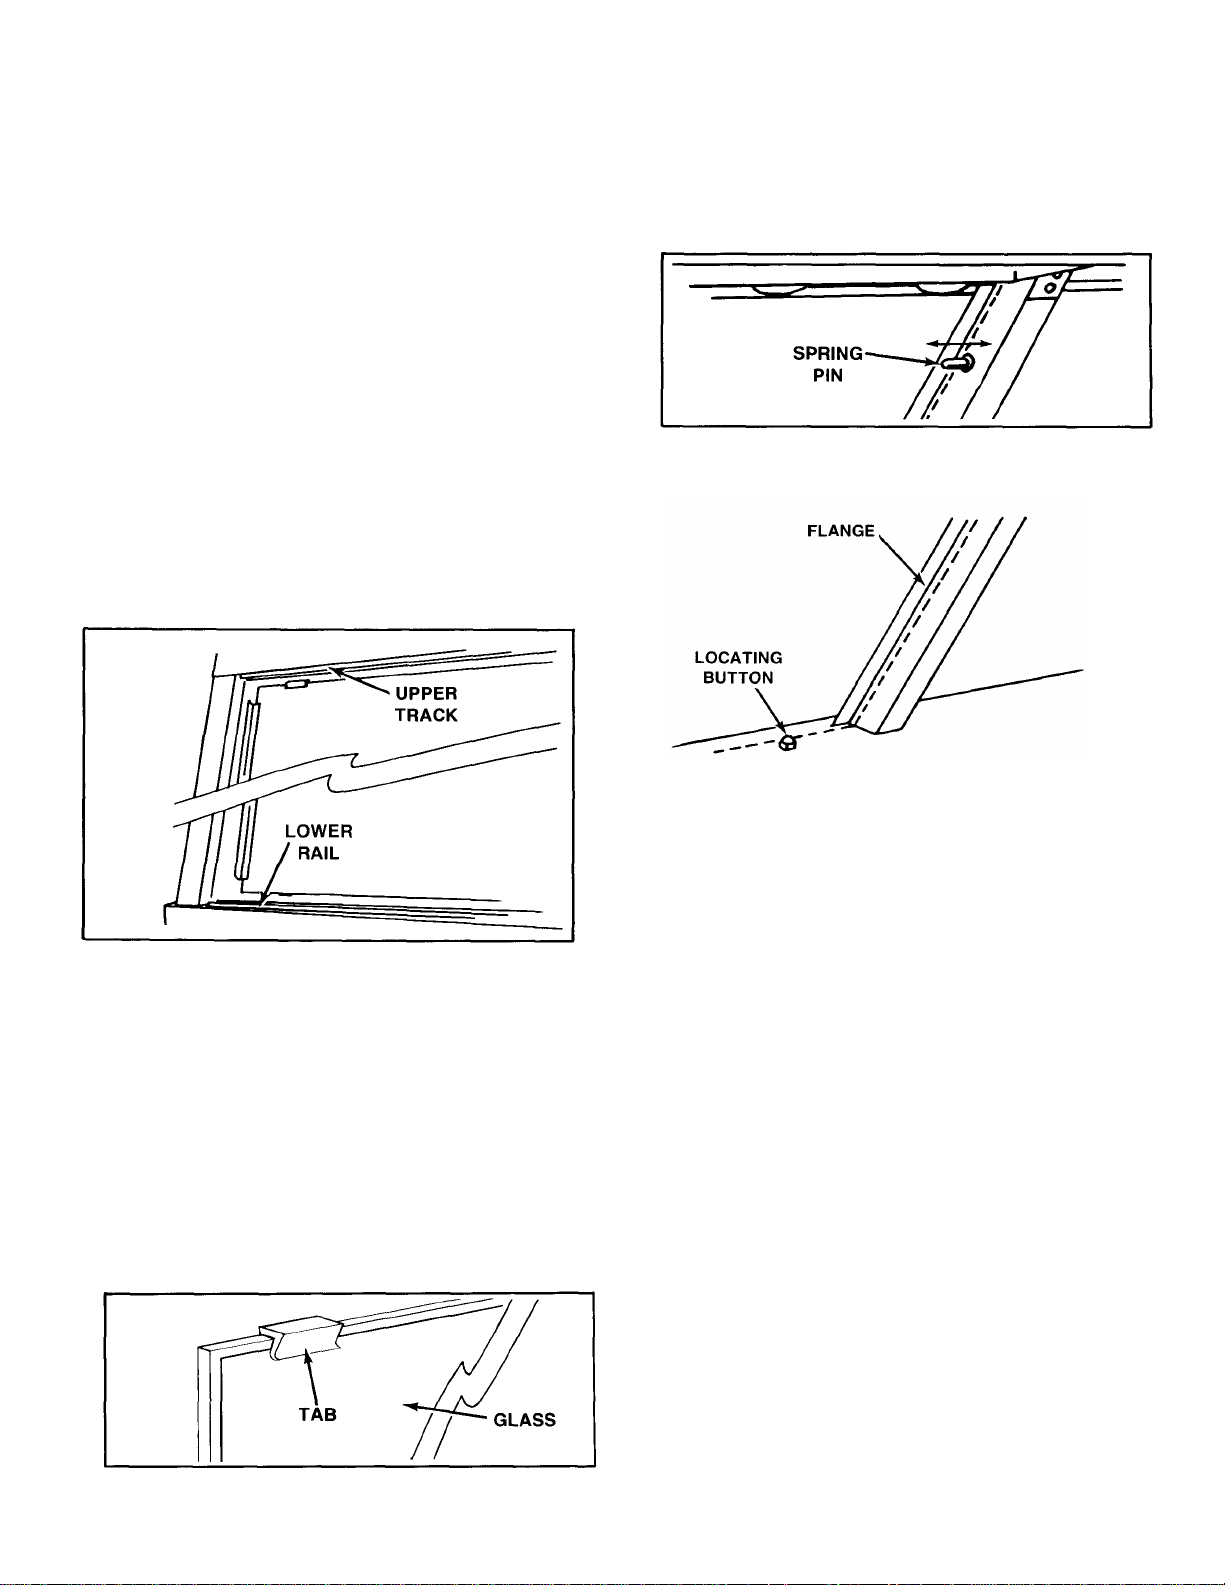
To remove doors, lift right hand door (door with stop) up into
upper track and pull door out from lower rail. Then lift up left
Figure 4. Removing & Replacing Doors.
hand door (door without stop) and pull it out from lower rail.
See Figure 4.
Reverse this pocedure when installing doors. Be careful to
place doors in the proper upper track and lower rail.
GLASS PANELS
To remove and replace the glass panels, the following
steps should be taken:
STEP 1 - Remove front glass panel(s) first. Depress
spring pins on corner posts and tilt glass outward.
See Figure 5B.
Figure 5B. Step One.
STEP 2 - Lift up glass above locating button and pull
away from flange on corner posts. See Figure 5C.
Figure 5C. Step Two.
STEP 3 - Repeat the procedures in Steps 1 and 2 for
removing glass end panels.
To reinstall front and end glass panels, reverse the
procedures in Steps 1 and 2.
NOTE
Bottom edge of glass must be in between locating
buttons on base and flanges on vertical comer posts.
SEE FIGURE 5A, 5B & 5C
The Glo-Ray Model GRHD has glass panels that are protected during shipping by rubber tabs placed on the glass
edges (Fig. 5A). These tabs must be removed prior to
operation of the unit.
Figure 5A. Shipping tabs for glass.
Page 7

OPERATION
CLEANING
BUFFET WARMER & HORS
D'OEUVRE WARMER
The infrared heat and incandescent lights are controlled by
a toggle switch. This switch must be in the "on" position
when using. If the unit is equipped with an optional infinite
switch, this switch will control the heat and the toggle will
activate the lights only.
The heated base is controlled by an "on/off" rocker switch
and a thermostat adjustment knob.
HEATED DISPLAY CASE
The infrared or "top heat" is controlled by 2 knobs with
variable settings from low to high. The heated base or "bottom heat" control can be set to any desired level. A toggle
switch activates the cabinet lights.
NOTE
Lights, top heat and bottom heat can be operated
simultaneously or separately.
To preserve the finish of your Glo-Ray Display Warmer, it is
recommended that exterior surfaces be wiped daily with a
damp cloth. Stubborn stains may be removed with a good
aluminum or stainless steel cleaner or a non-abrasive
cleanser. Use a glass cleaner on all glass panels and doors.
CAUTION
Use only non-abrasive cleaners. Abrasive cleaners
could scratch the finish of the Food Warmer marring its
appearance and making it susceptible to soil
accumulation.
Glo-Ray food holding pans are available in thermoaluminum or stainless steel and should be removed from
the food warmer for washing and sanitizing after each use.
Breath protectors may be removed for thorough cleaning
and polishing. They should be wiped daily with a soft, damp
cloth. If fine scratchs are present, a good acrylic cleaner
may be used to polish the breath protectors and remove the
scratches.
CAUTION
Only soft cleaning cloths should be used to clean
breath protectors. Breath protectors are made of
shatter-proof acrylic and will scratch if proper care is
not taken.
5
Page 8

DISPLAY LIGHT BULB
REPLACEMENT
The display light is an incandescent bulb which illuminates the
warming area. This bulb has a special coating to guard against injury
and food contamination in the event of breakage.
To replace a bulb, disconnect the power supply and wait until the
unit has cooled. Display lamps have a threaded base. Unscrew the
bulb from the unit and replace it with a new specially coated
incandescent bulb. Hatco Shatter-Resistant Bulbs meet NSF
standards for food holding and display areas.
WARNING Only bulbs which meet
NSF standards, specifically designed for food holding areas
must be used. Breakage of bulbs not specially coated could
result in personal injury and/or food contamination.
SAFETY PRECAUTIONS
Use only recommended mounting methods and materials and
approved accessories to prevent personal injury or damage to the
unit.
Be certain that specified safe and proper distances are maintained
between the food warmer and combustible wall or wall type surfaces
and counters.
ACCESSORIES
INFINITE CONTROL
Available on Glo-Ray Buffet and Hors d'oeuvre Warmers, infinite
control allows the operator to manually adjust heat output from full
wattage down to any desired level.
ADJUSTABLE LEGS
Sturdy 4 in. adjustible legs are available for Glo-Ray Buffet Warmers.
FOOD PANS
Stainless steel or thermo-aluminum food holding pans are available
in 2-1/2 in. or 4 in. depths. These pans are offered in full size, half
size or third size.
WIRE TRIVET
Wire trivets are available to prevent foods from touching the bottom
of the food holding pan.
P 0 BOX 340500
MILWAUKEE Wl 53234-0500 USA
(800)558-0607 (414)671-6350
Fax (800) 543-7521 (414)671-3976
March 1987
Printed in U.S.A.
 Loading...