

Haswell Fitness T-202A, T-203A, T-202TV, T-202PAD, T-203PAD User Manual
...
FOR BETTER LIFE
Before using this equipment, please read all “Safety Instructions” Carefully to ensure safe and correct operation
FOR BETTER LIFE
Before using this equipment, please read all “Safety Instructions” Carefully to ensure safe and correct operation
FOR BETTER LIFE
Before using this equipment, please read all “Safety Instructions” Carefully to ensure safe and correct operation
User Manual
T-202A
T-202TV
T-202PAD
T-203A
T-203TV
T-203PAD

CONTENTS
1. SPECIFICATIONS .................................................................................................................................... 1
2. SAFETY INSTRUCTIONS ....................................................................................................................... 2
3. COMPONENT PARTS ............................................................................................................................. 4
4. DESCRIPTION .......................................................................................................................................... 5
5. INSTALLATION LOCATION ................................................................................................................. 5
6. ASSEMBLY AND INSTALLATION ....................................................................................................... 6
7. PART NAMES ......................................................................................................................................... 13
8. CONSOLE – FEATURES AND FUNCTIONS ...................................................................................... 15
9. OPERATION INSTRUCTIONS ............................................................................................................ 17
10. REPLACEMENT OF PARTS ................................................................................................................. 19
11. LUBRICATION ....................................................................................................................................... 20
12. MAINTENANCE LIST ............................................................................................................................ 21
13. TROUBLE-SHOOTING ......................................................................................................................... 21
14. SELF-CHECK ........................................................................................................................................... 22
14.1. Customer’s right .................................................................................................................................. 23
14.2. Chargeable Services ............................................................................................................................. 23
SPECIFICATIONS
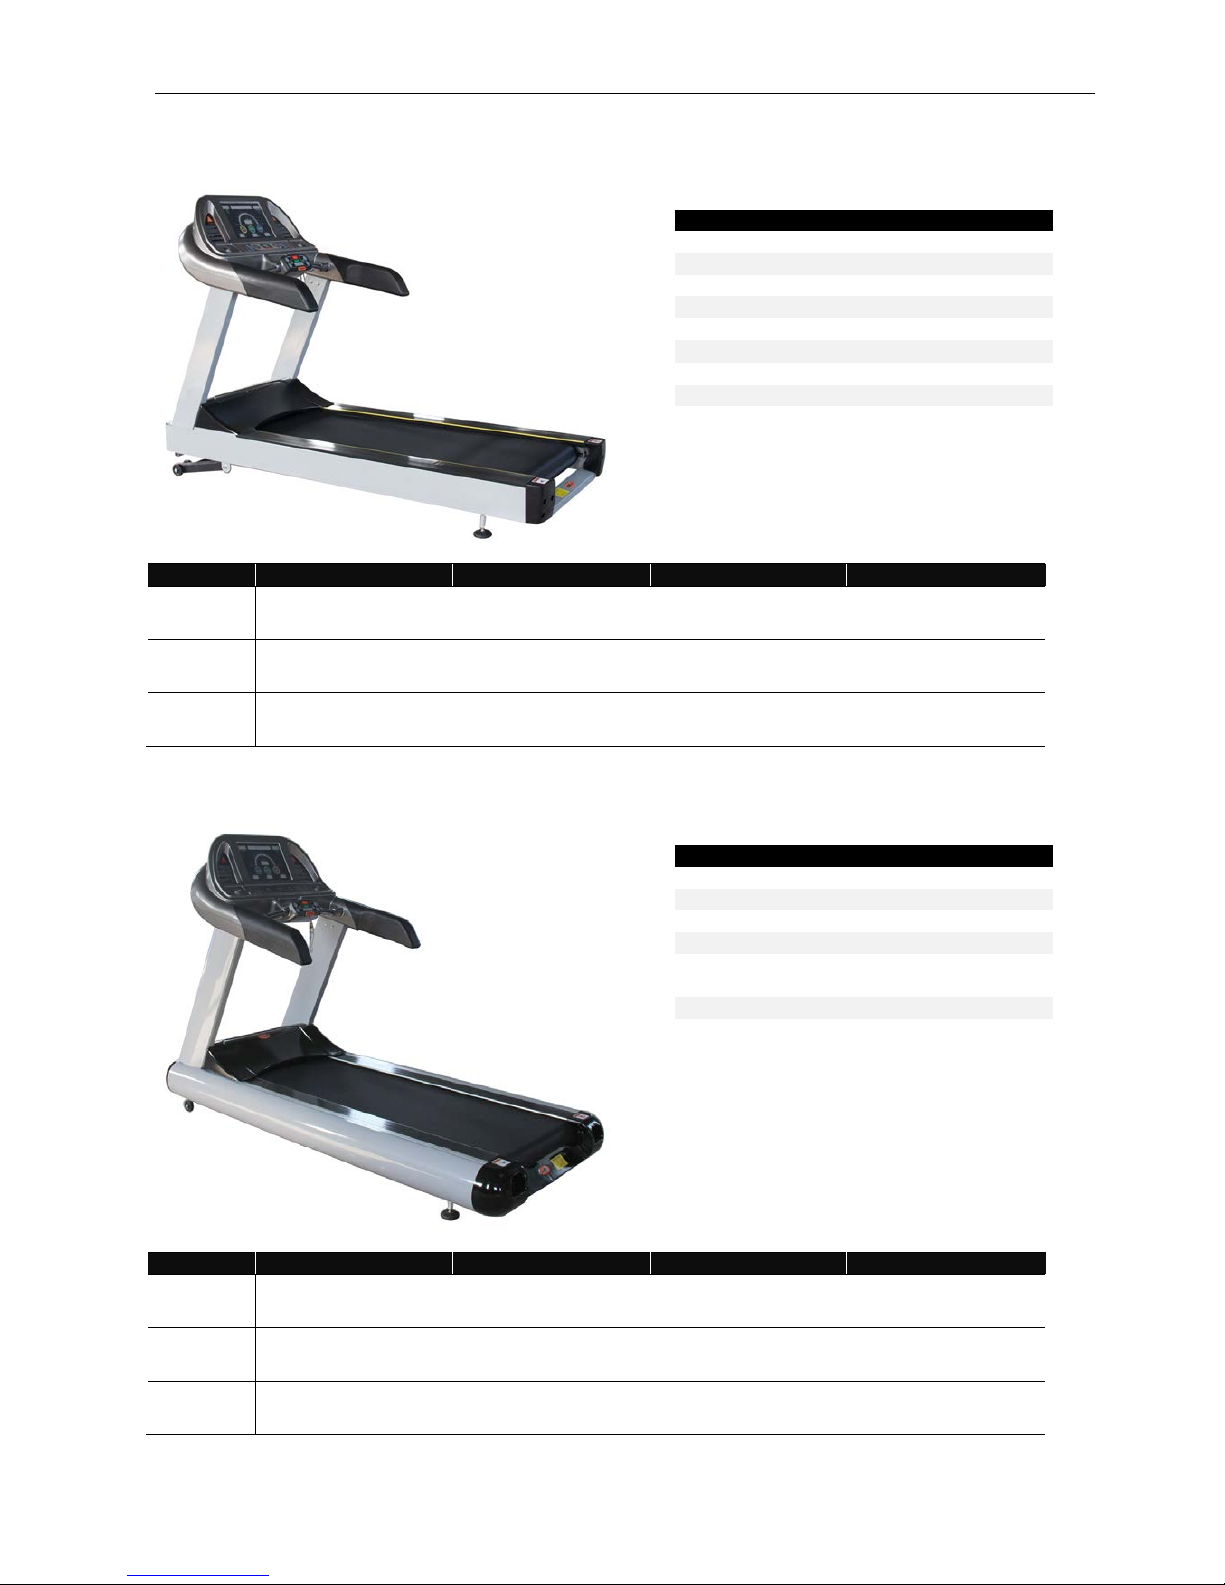
1. SPECIFICATIONS
T-202
Items
Value
1) Speed
0.5~20 KM/H
2) Gradient
0~25%, +1.25%
3) AC Motor
Normal: 3 HP , max:7HP
4) Belt
3450*600*2.5 mm
5) R unway Area
1600*600 mm
6) Assembling
2240*980*1660mm
7) Max loading
200KG
8) Power
220V/110V 50~60 HZ
Models
TV and MP3
Display / Screen
N.W. / G.W.
Remarking
T-202A
N/A
N/A
210KG / 225KG
T-202TV
N/A
19/17/15 inch External
ordinary Screen
212KG / 228KG
T-202PAD
Support
15.6inch Android Pad
Interior Touch Screen
228KG / 232KG
T-203
Items
Value
1) Speed
0.5~20 KM/H
2) Gradient
0~25%, +1.25%
3) AC Motor
Normal: 3 HP , max:7HP
4) Belt
3450*580*2.5 mm
5) R unway Area
1600*565 mm
6) Max loading
200KG
7) Power
220V/110V 50~60 HZ
Models
TV and MP3
Display / Screen
N.W. / G.W.
Remarking
T-203A
N/A
N/A
210KG / 225KG
T-203TV
N/A
19/17/15 inch External
ordinary Screen
212KG / 228KG
T-203PAD
Support
15.6inch Android Pad
Interior Touch Screen
228KG / 232KG
1

SAFETY INSTRUCTIONS
2. SAFETY INSTRUCTIONS
2
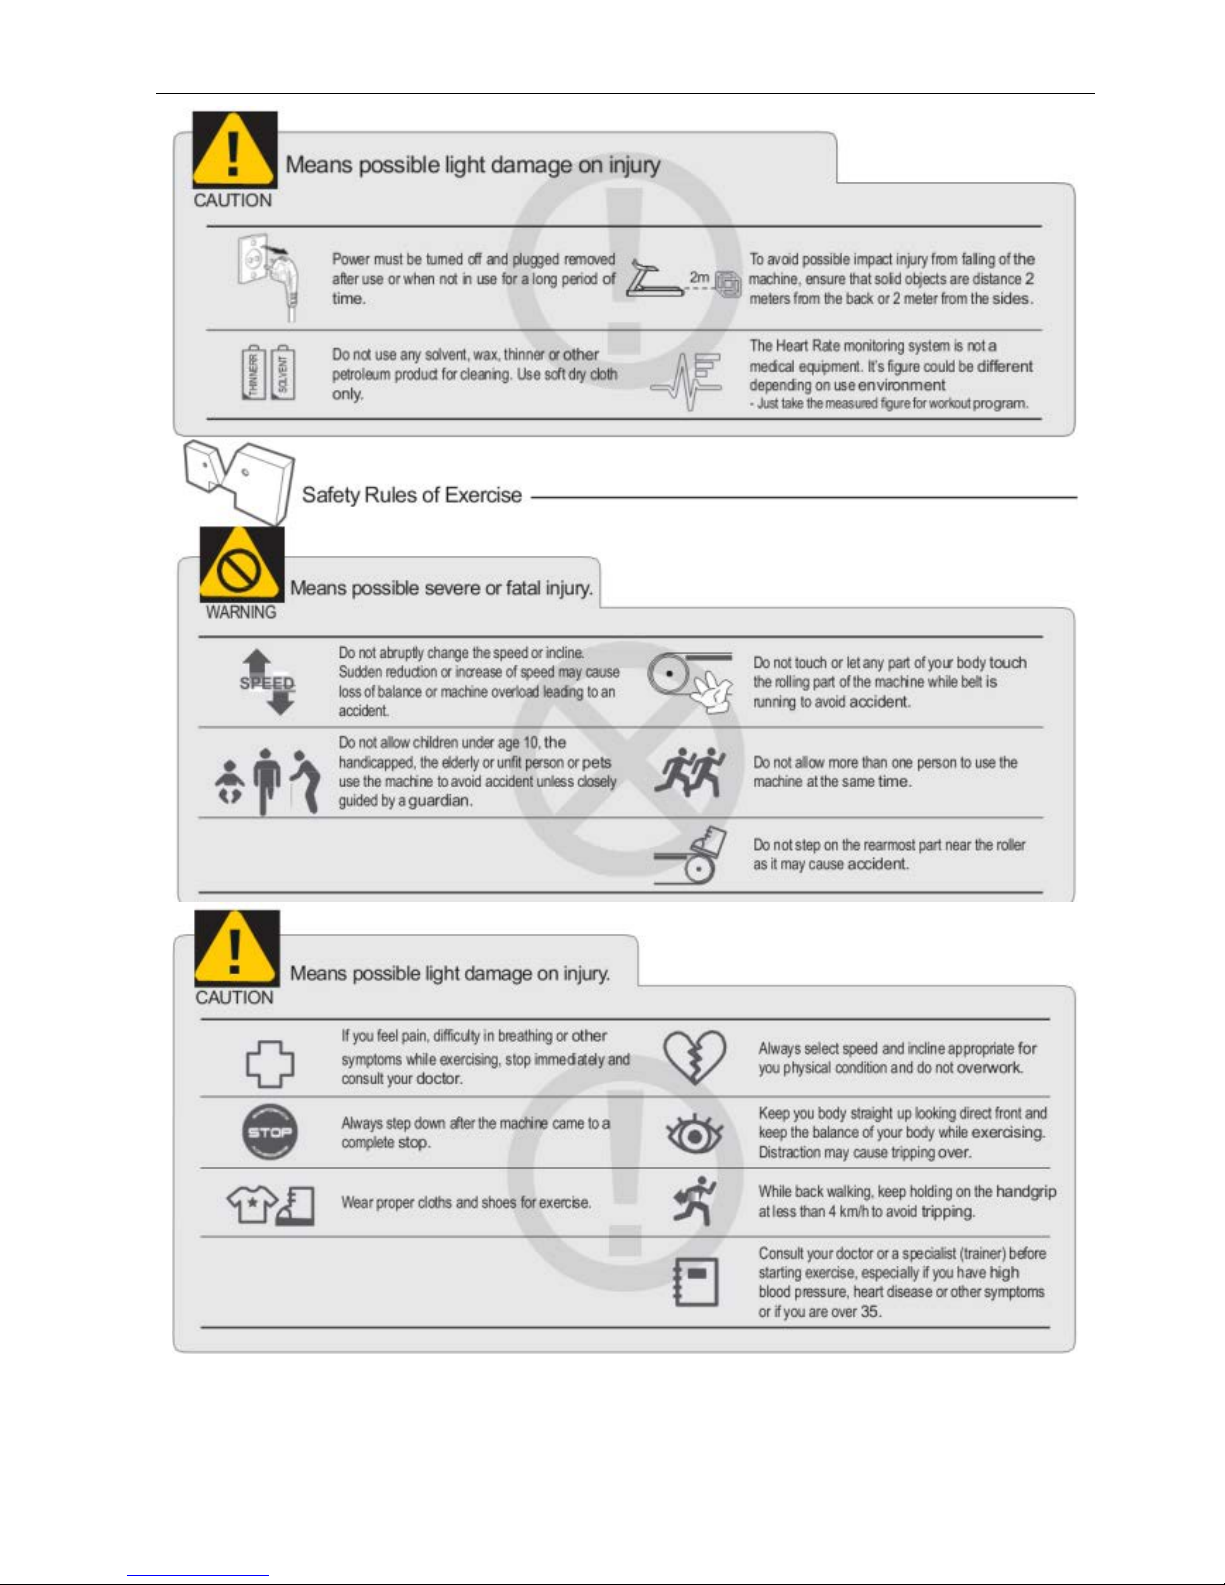
SAFETY INSTRUCTIONS
3
COMPONENT PARTS
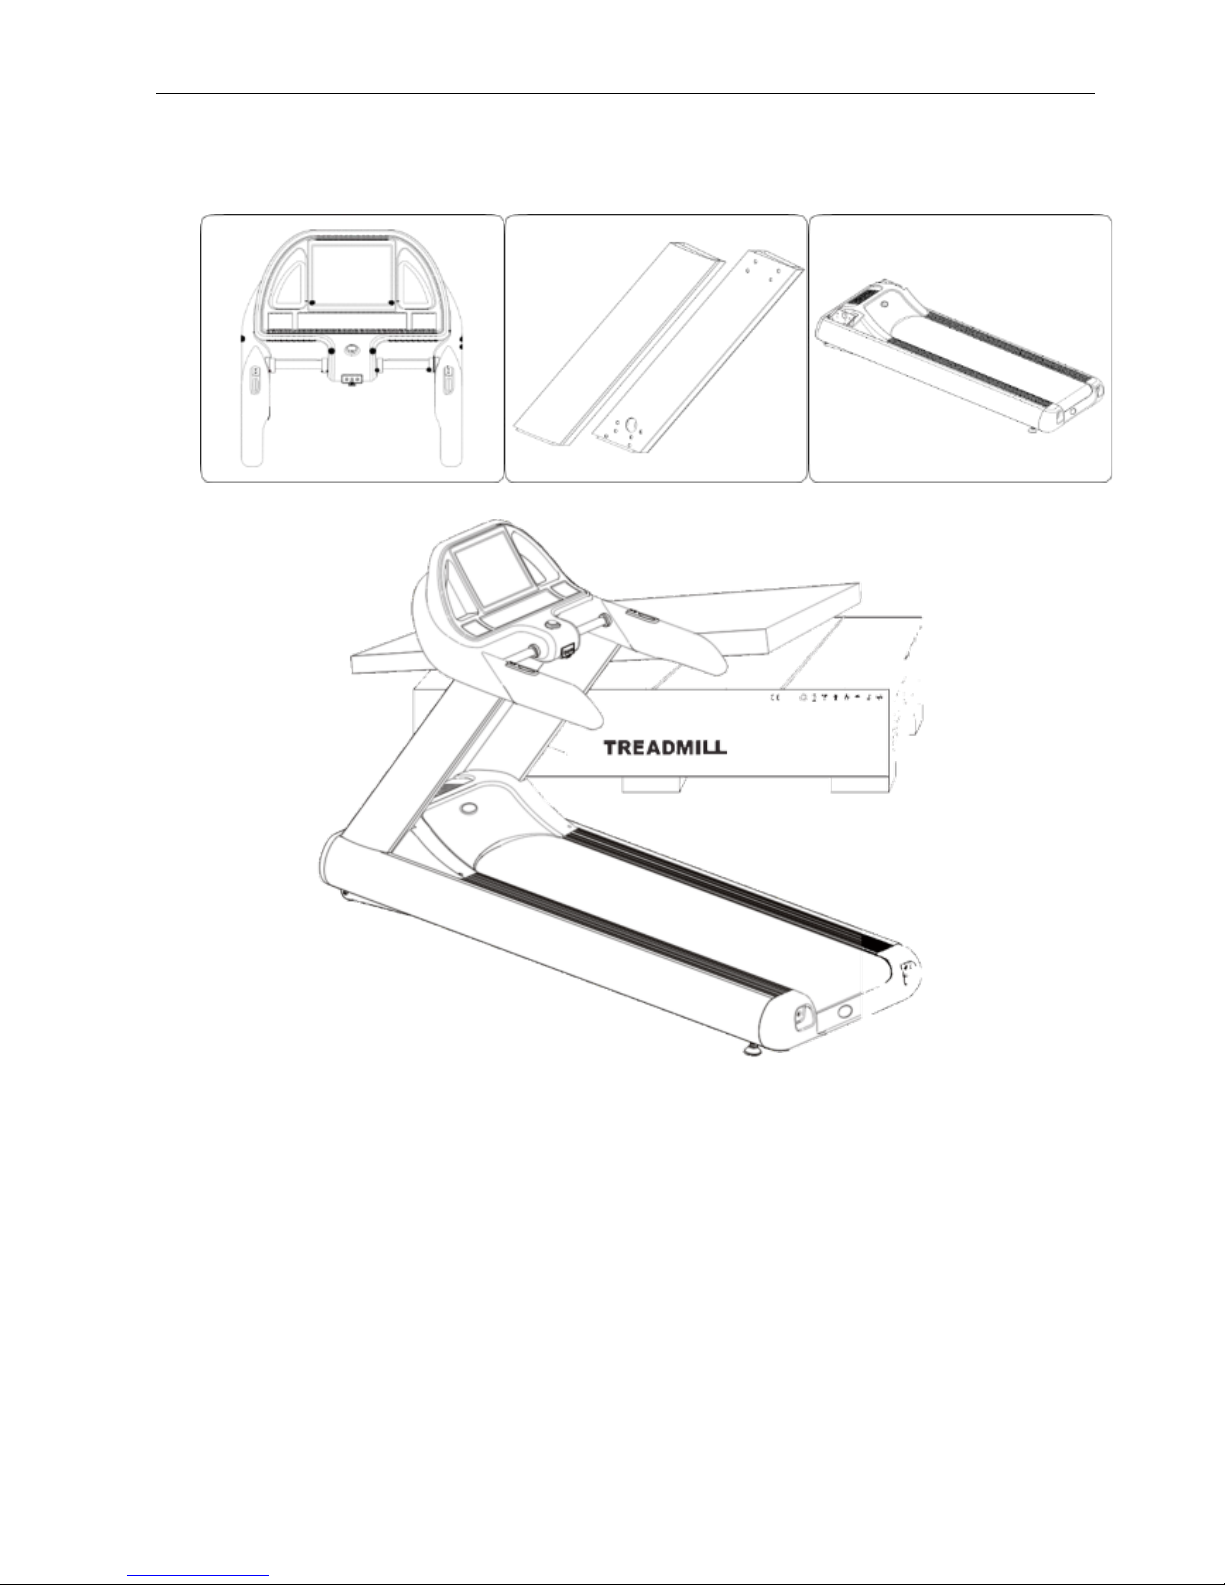
3. COMPONENT PARTS
This product is packed and delivered as semi-assembled.
Console
Post
Body
4

DESCRIPTION
4. DESCRIPTION
T203 series is designed for use in Gyms or fitness centers with the most innovative design. Using powerfu l 3HP( continuous )
AC motor with the latest inverter control technology, it runs quietly, softly and safely.
FEATURES
• The most innovative design
• Attachable 15 inch LCD
• Single-framed aluminum frame with graceful design
• The ultimate Cardio Workout Program especially for your needs
• The worl d-renowned POLAR Heart Rate Monitoring System
5. INSTALLATION LOCATION
•Please check if the ground surface is level and solid. Otherwise, it may cause noise, vibration, and tripping over.
•Please check if the location is indoors with low hum idity and du st lev el. Humidi ty and dust may cause mac hine break -down.
•Please check if any solvent or inflammable substance is nearby.
In case electric spark occurs within the machine due to electric leakage or static, it may lead to an explosion or fire.
•Please allow enough space from surro unding fixt ures.
Please install the machine with enough space in front to allow easy access to the power switch. To ensure safe use, allow
spaces of at least 2m at the back and 1m on each side.
•Please link less than 2 sets of Treadmill with power cable coming from one 30A ELB(Earth Leakage Breaker)
Over load current could generate abnormal operation of Treadmill
•Please use standard plug and socket and make sure the power outlet has been grounded.
•When moving, lift up the bottom of rear cover so that the machine can be moved easily on front wheels. 7
•If the entire machine has to be hauled up, 4-5 adults should do it carefully to avoid injury or accident.
5
ASSEMBLY AND INSTALLATION
6. ASSEMBLY AND INSTALLATION
After unpacki ng all the components, assemble and install the machine as per the following procedure.
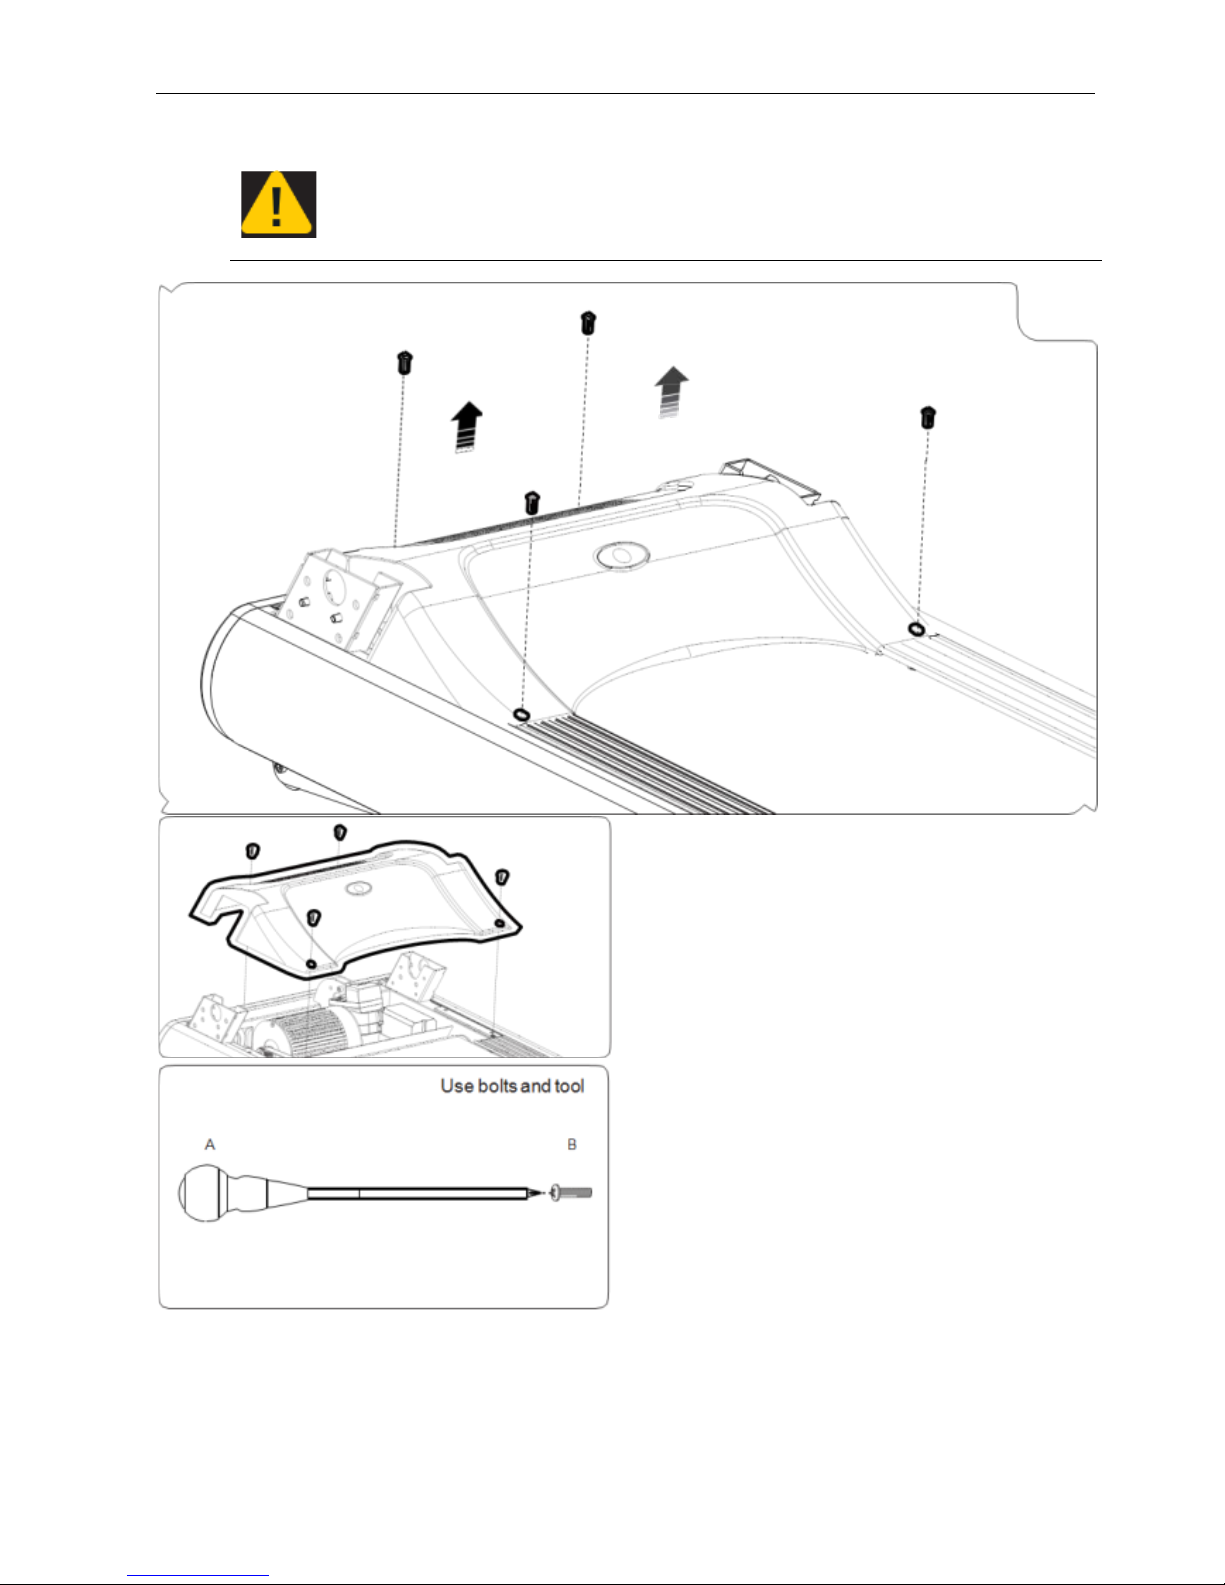
CAUTION
Power connection should be at standard
voltage
Treadmill should be mounted on level floor. Avoid uneven surfa ce.
After the installation, Treadmill should be
grounded.
Please remove any foreign material from around motor area before the test
operation.
Detaching the Motor Cover
1. Pull out 4 screws (5mm) at each corner of the motor
cover with a screwdriver
2. Lift the cover up to detach it from the frame.
Use bolts and tool
A. Phillips Screwdriver
B. M5 X 20 Pan head screw x 4pcs
Body
6
 Loading...