

Page 1

IJ40-0012-1
4127762B/B
1 1/24/2006
1
WARNING!
Do not under any circumstances attempt to remove the machine
covers or attempt to repair the WJ 65/95/110. There are no
operator serviceable parts thereunder.
The WJ 65/95/110 product is licensed for use under the conditions
of the Post Office. This license is issued subject to the product
being secure at all times. Any removal of covers or dis-assembly
of the product will result in the license being revoked and may result
in the Post Office requesting Hasler to remove the product from
use.
The ink cartridge system used within the WJ 65/95/110 contains
Post Office approved ink. This cartridge should not be tampered
with in any way or the use of non approved inks be undertaken. This
will breach any Post Office licence agreement on the product and
may result in the Post Office requesting Hasler to remove the
product from use.
FCC COMPLIANCE STATEMENT
This equipment has been tested and found to comply with the limits
for a Class A digital device, pursuant to Part 15 of the FCC Rules.
These limits are designed to provide reasonable protection against
harmful interference when the equipment is operated in a commercial environment.
This equipment generates, uses, and can radiate radio frequency
energy and, if not installed and used in accordance with this
instruction manual, may cause harmful interference to radio communications. Operation of this equipment in a residential area is
likely to cause harmful interference, in which case the user will be
required to correct the interference at his own expense.
Page 2

2
IJ40-0012-2
4127762B/B
1 1/24/2006
MODEM APPROVAL REQUIREMENTS
This equipment contains a modem which has been approved for
connection to analog public switched telephone networks . However,
due to differences between individual telephone networks provided
in different areas, the approval does not, of itself, give an
unconditional assurance of successful operation on every network
termination point.
In the event of problems, you should contact your equipment
supplier in the first instance.
INSTALLATION
The power plug on this equipment is intended to serve as the
device for isolation of the electrical supply. The equipment should
be installed in close proximity to an easily accessible grounded
power supply and analog telephone socket.
WARNING: FOR SAFETY THIS EQUIPMENT MUST BE
GROUNDED
The WJ 65, WJ 95 and WJ 110 Mailing Machines have been
designed to meet the safety requirements of UL1950. The peripheral
interfaces meet the SELV requirements of that standard, therefore
in order to maintain the level of safety provided by the WJ 65,
WJ 95 and WJ 110, the interface of any equipment connected to the
WJ 65, WJ 95 and WJ 110 interfaces must also meet the SELV
requirements of UL1950.
Caution, to reduce the risk of fire, use only No. 26 AWG or
larger telecommunication line cord.
No part of this document may be reproduced or transmitted in any
form or by means, electronic or mechanical, for any purpose
without the express written permission of Hasler Inc.
Copyright© Hasler 2004
Page 3

IJ40-0012-3
4127762B/B
1 1/24/2006
3
WELCOME
Congratulations on choosing the Hasler WJ 65/95/110 mailing
system. The WJ 65/95/110 is the result of the expertise and
innovative capabilities of the worldwide Hasler group and, using
ink jet technology, it will integrate into your working environment to
enhance your mail processing operation.
The WJ 65/95/110 has many capabilities that will be important to
your business:
As well as being productive (up to 6600 items per hour), the
WJ 65/95/110 is designed to be a user friendly machine that can
fit into any working environment with its innovative and attractive
design, simple user settings and very low noise level. The high
volume capacity and sealed inker makes it easy and safe to
handle, and the user interface is particularly clear with a graphic
interface and 5 memories to store favourite jobs.
The WJ 65/95/110 is adaptable and as such can handle many
different types of mail up to 3/8" thick. The optional feeder can be
used to process, in a continuous cycle, items of sizes ranging from
DL to C4 and up to 1/4" thickness. For thicker mail items or
packages, adhesive labels can be automatically dispensed.
The WJ 65/95/110 is connectable. It can exchange data with
Hasler scales and printers in order to provide optimal mail
processing and reporting.
Finally, the WJ 65/95/110 is a unique communication tool for your
company. Its high quality printing combined with its integrated
library of message/adverts, mini dies and free format text will
afford you extra tools to enhance your company’s image and the
impact of your mail.
Page 4

4
IJ40-0012-4
4127762B/B
1 1/24/2006
Page 5

IJ40-0012-5
4127762B/B
1 1/24/2006
5
CONTENTS
1. INSTALLATION.......................................................................9
1.1 Introduction............................................................... 9
1.2 Fitting the Moistener Unit Wick ............................... 10
1.3 Attach the Moistener Unit/Platform Infill to the Plain
Platform.................................................................. 10
1.4 Attach the Moistener/Platform Infill to the Autofeed .. 11
1.5 Attach the WJ 65/95/1 10 to the Hand Feed Platform or
Autofeed ................................................................ 11
1.6 Weigh Platform....................................................... 12
1.7 Fill the Label Dispenser..........................................14
1.8 Machine Connections ............................................. 15
1.9 Machine Connections (continued) ........................... 16
1.10 Position Receiving Tray..........................................17
1.11 Filling the Moistener Unit Reservoir......................... 17
1.12 Entering activation codes ....................................... 18
2. CONTROLS AND FEATURES............................................. 24
2.1 Introduction............................................................. 24
2.2 Machine ................................................................. 25
2.2.1 Display Panel................................................. 27
2.2.2 Function Keys ................................................ 28
3. PRINTING POSTAGE ..........................................................29
3.1 Introduction............................................................. 29
3.2 Getting started........................................................ 30
3.2.1 Log On (Pin Entry Mode)................................ 30
3.2.2 Departmental Operation................................. 31
3.2.3 How T o Select a Postage Value ..................... 32
3.2.4 High V alue Selection...................................... 33
3.2.5 Printing an Envelope ...................................... 35
3.2.6 T o Change a Department............................... 35
4. POSTAGE CLEARING WITH AUTOFEED .......................... 37
4.1 Envelope feeding ................................................... 37
4.2 Envelope misfeed................................................... 39
Page 6

6
IJ40-0012-6
4127762B/B
1 1/24/2006
5. PRINTING LABELS ............................................................. 41
5.1 Filling the Label Dispenser ..................................... 41
5.2 Printing a Label ...................................................... 42
6. PRINTING WITH WEIGH PLATFORM ................................ 43
6.1 Weigh Platform Preparation ................................... 43
6.2 T are Function.......................................................... 46
6.3 Using differential weighing (optional) ...................... 46
7. ENVELOPE MOISTENER ...................................................49
7.1 Using the Envelope Moistener with Plain Platform... 49
7.2 Using the Envelope Moistener with an Autofeed...... 4 9
7.3 Filling the reservoir .................................................50
8. PRINTING OPTIONS ...........................................................51
8.1 What can I print?..................................................... 51
8.2 Print mode selection............................................... 52
8.3 Modifying the imprint .............................................. 53
8.3.1 Choosing a Slogan, Rate Die or Text.............. 53
8.3.2 Date Advance (for Pre Dating Mail) ................ 54
9. MAINTAINING PRINT QUALITY .......................................... 56
9.1 Cleaning the Ink Cartridge ...................................... 56
9.2 Making a T est Print................................................. 57
9.3 Replacing an Ink Cartridge ..................................... 59
10. METER REGISTERS ...........................................................62
10.1 Selection ................................................................ 62
10.2 Printing a Register.................................................. 63
10.3 Printing with External Printer ...................................64
11. ADDING POSTAGE .............................................................. 65
1 1.1 Warning pending Credit’ Procedure....................... 66
1 1.2 Clearing a PO lockout ............................................ 66
12. MAINTAINING YOUR ACCOUNT.......................................68
12.1 Account number ..................................................... 68
12.2 Account balance..................................................... 68
12.3 Statements ............................................................. 68
Page 7

IJ40-0012-7
4127762B/B
1 1/24/2006
7
12.4 Post Office regulations ........................................... 69
12.5 Postage now ..........................................................69
12.6 St andard TMS® Bank Accounts ............................. 70
12.7 Where T o Mail Y our Deposit:................................... 72
13. MEMORY FUNCTIONS .......................................................74
13.1 Saving a Memory Function ..................................... 74
13.2 Recalling a Memory Function.................................. 75
14. SUPERVISOR SETTINGS ...................................................76
14.1 Introduction............................................................. 76
14.2 Entry to SUPERVISOR mode ................................. 77
14.3 Departments control ...............................................79
14.3.1 Changing the User PIN................................... 80
14.3.2 To Assign a Department................................. 81
14.4 WJ 65/95/110 machine setup menu........................ 85
14.5 Memory Cards ....................................................... 93
14.5.1 How T o Load Data Using a Memory Card ......93
14.5.2 How To Replace Data Using a Memory Card . 94
15. REPORTS ............................................................................95
15.1 Typical Reports.......................................................95
15.2 Printing a Report .................................................... 95
15.3 Setting the Report Destination ................................ 97
15.4 Printing with External Printer ...................................97
16. TROUBLE SHOOTING .......................................................99
17. QUICK REFERENCE GUIDE ............................................101
18. INTERNATIONAL LETTER POST COUNTRY CODE
CHART ................................................................................ 102
19. CONTACT INFORMATION ................................................104
Page 8

8
IJ40-0012-8
4127762B/B
1 1/24/2006
Special icons
Signals an essential piece of information that cannot be
missed.
Signals an important issue.
Indicates an interesting idea or trick
Illustration through an example
Page 9

IJ40-0012-9
4127762B/B
1 1/24/2006
9Installation
1. INSTALLATION
1.1 Introduction
Your WJ 65/95/110 should be installed on a flat horizontal surface
adjacent to easily accessible power and telephone line outlets.
Allow sufficient free space as follows:
- above the machine to enable opening of the covers.
- at the rear of the machine for cooling.
The power plug on this equipment is intended to serve as the
device for isolation of the mains supply, where possible it is
advisable to connect to a switched power outlet.
Please do not connect your WJ 65/95/110 Mailing machine to the
power outlet until you have attached the accessories.
Page 10
10
IJ40-0012-10
4127762B/B
1 1/24/2006
Installation
1.2 Fitting the Moistener Unit Wick
First remove the moistening wick from its packaging.
Before fitting ensure that the wick is thoroughly wetted.
Raise the brush, then take the wetted wick and feed into the water
trough as shown.
Lower the brush into place.
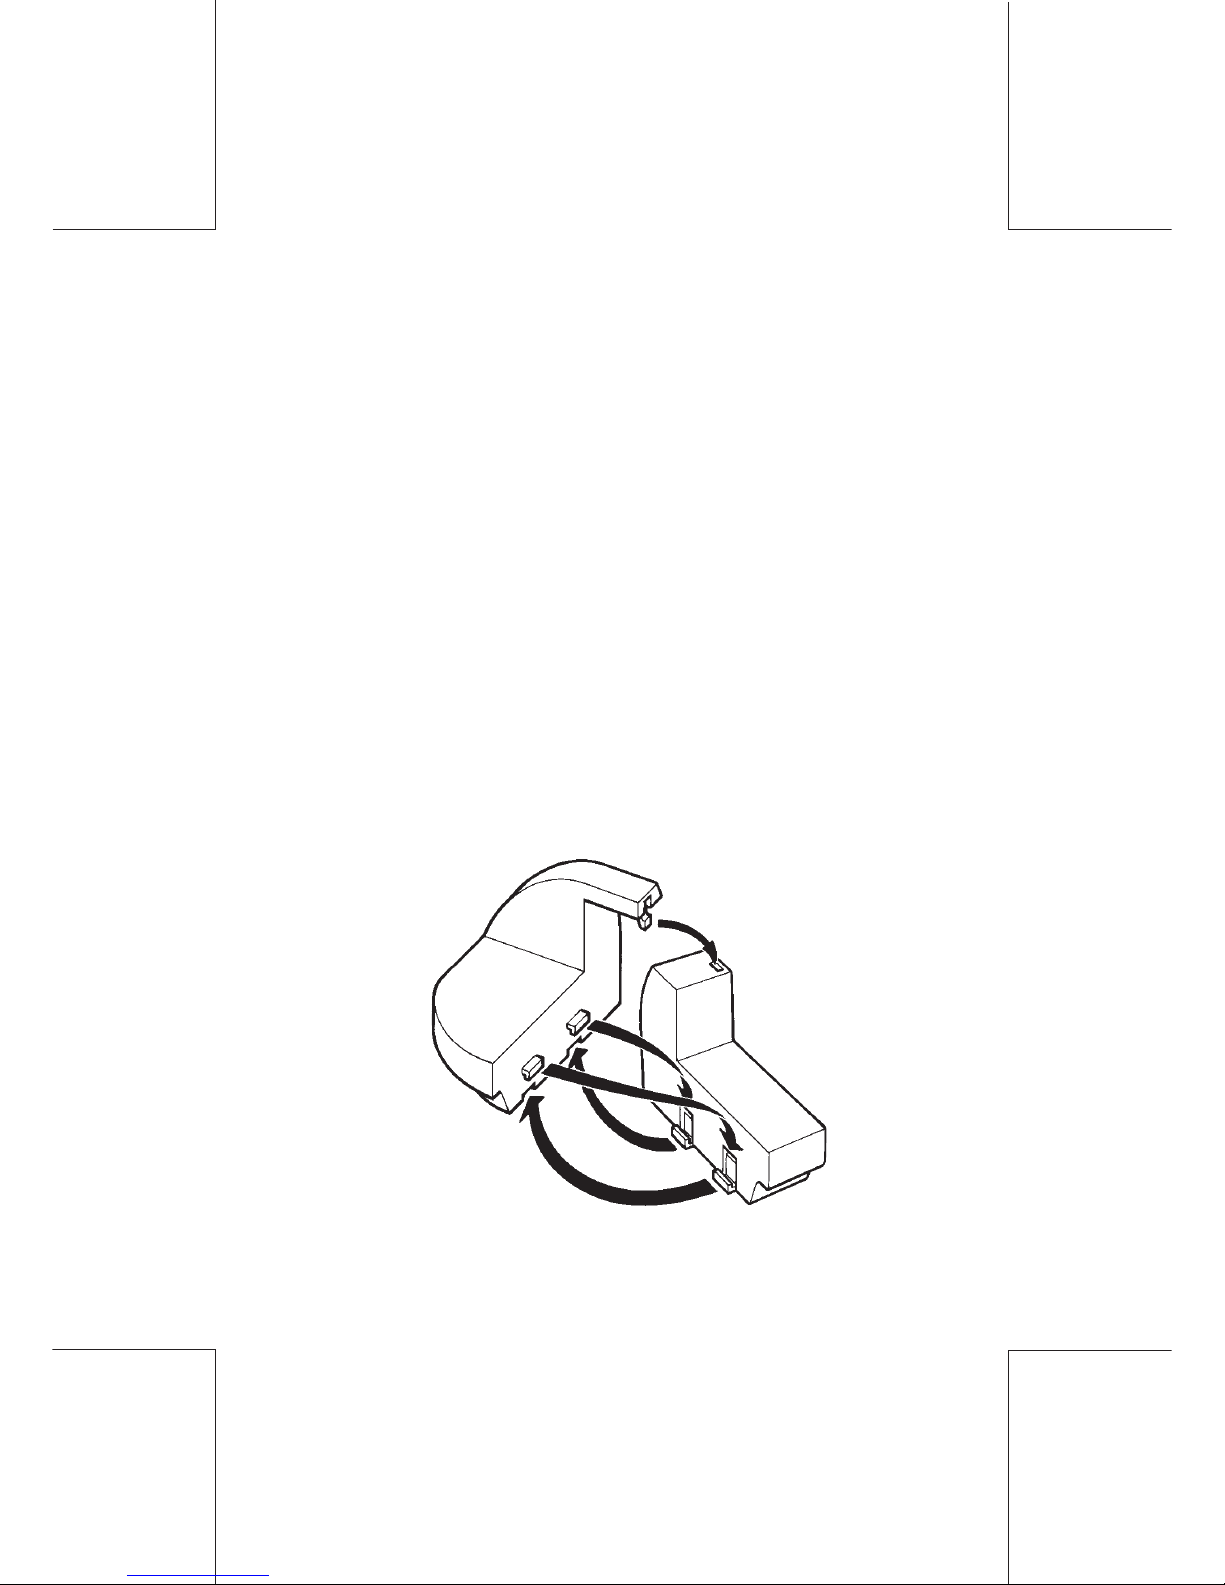
1.3 Attach the Moistener Unit/Platform Infill to the Plain
Platform
When attaching the Moistener Unit/ Platform Infill to the Plain
Platform, ensure that the Tabs and Slots interlock as illustrated.
Page 11
IJ40-0012-11
4127762B/B
1 1/24/2006
11Installation
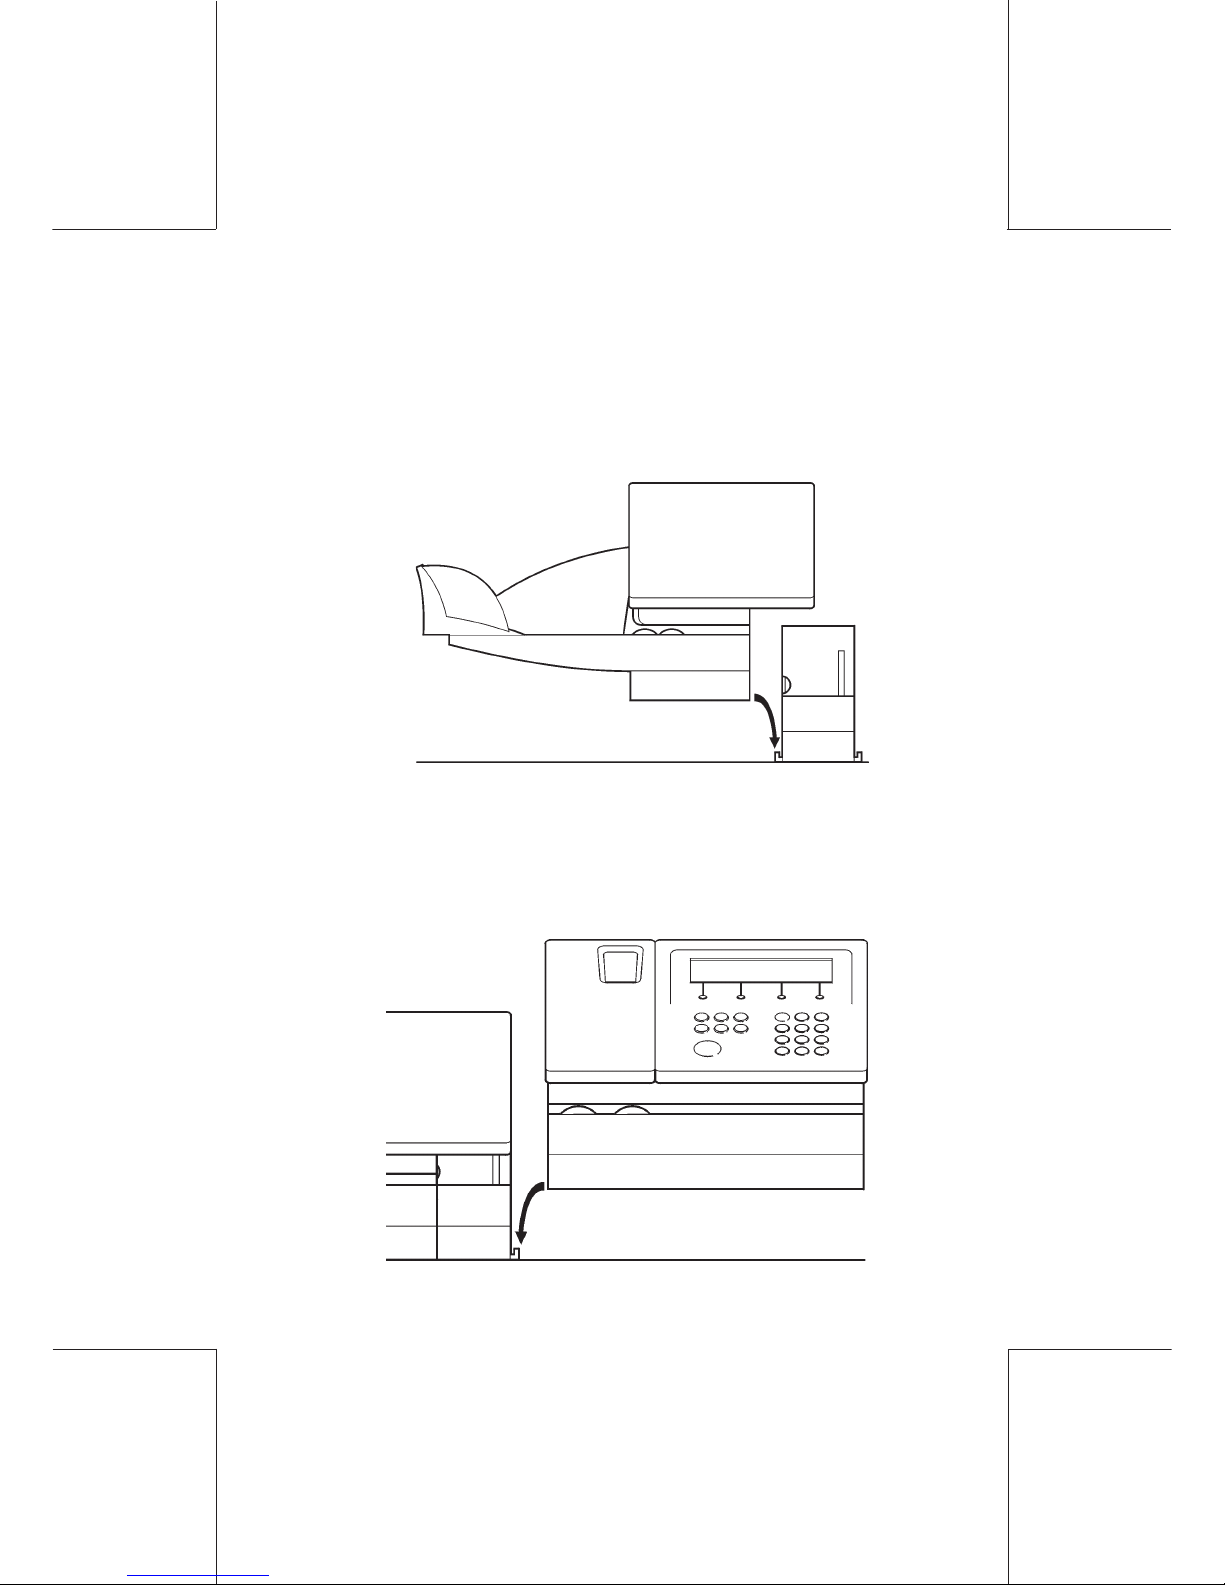
1.4 Attach the Moistener/Platform Infill to the Autofeed
If an Autofeed is to be fitted, first attach the Moistener Unit/Platform
Infill to the Autofeed ensuring that the slots on the Autofeed fit tightly
over the tabs on the Moistener Unit/Infill Platform as illustrated.
1.5 Attach the WJ 65/95/110 to the Hand Feed Platform or
Autofeed
Lower the WJ 65/95/110 into position so that the slots fit over the
tabs as illustrated.
Page 12
12
IJ40-0012-12
4127762B/B
1 1/24/2006
Installation
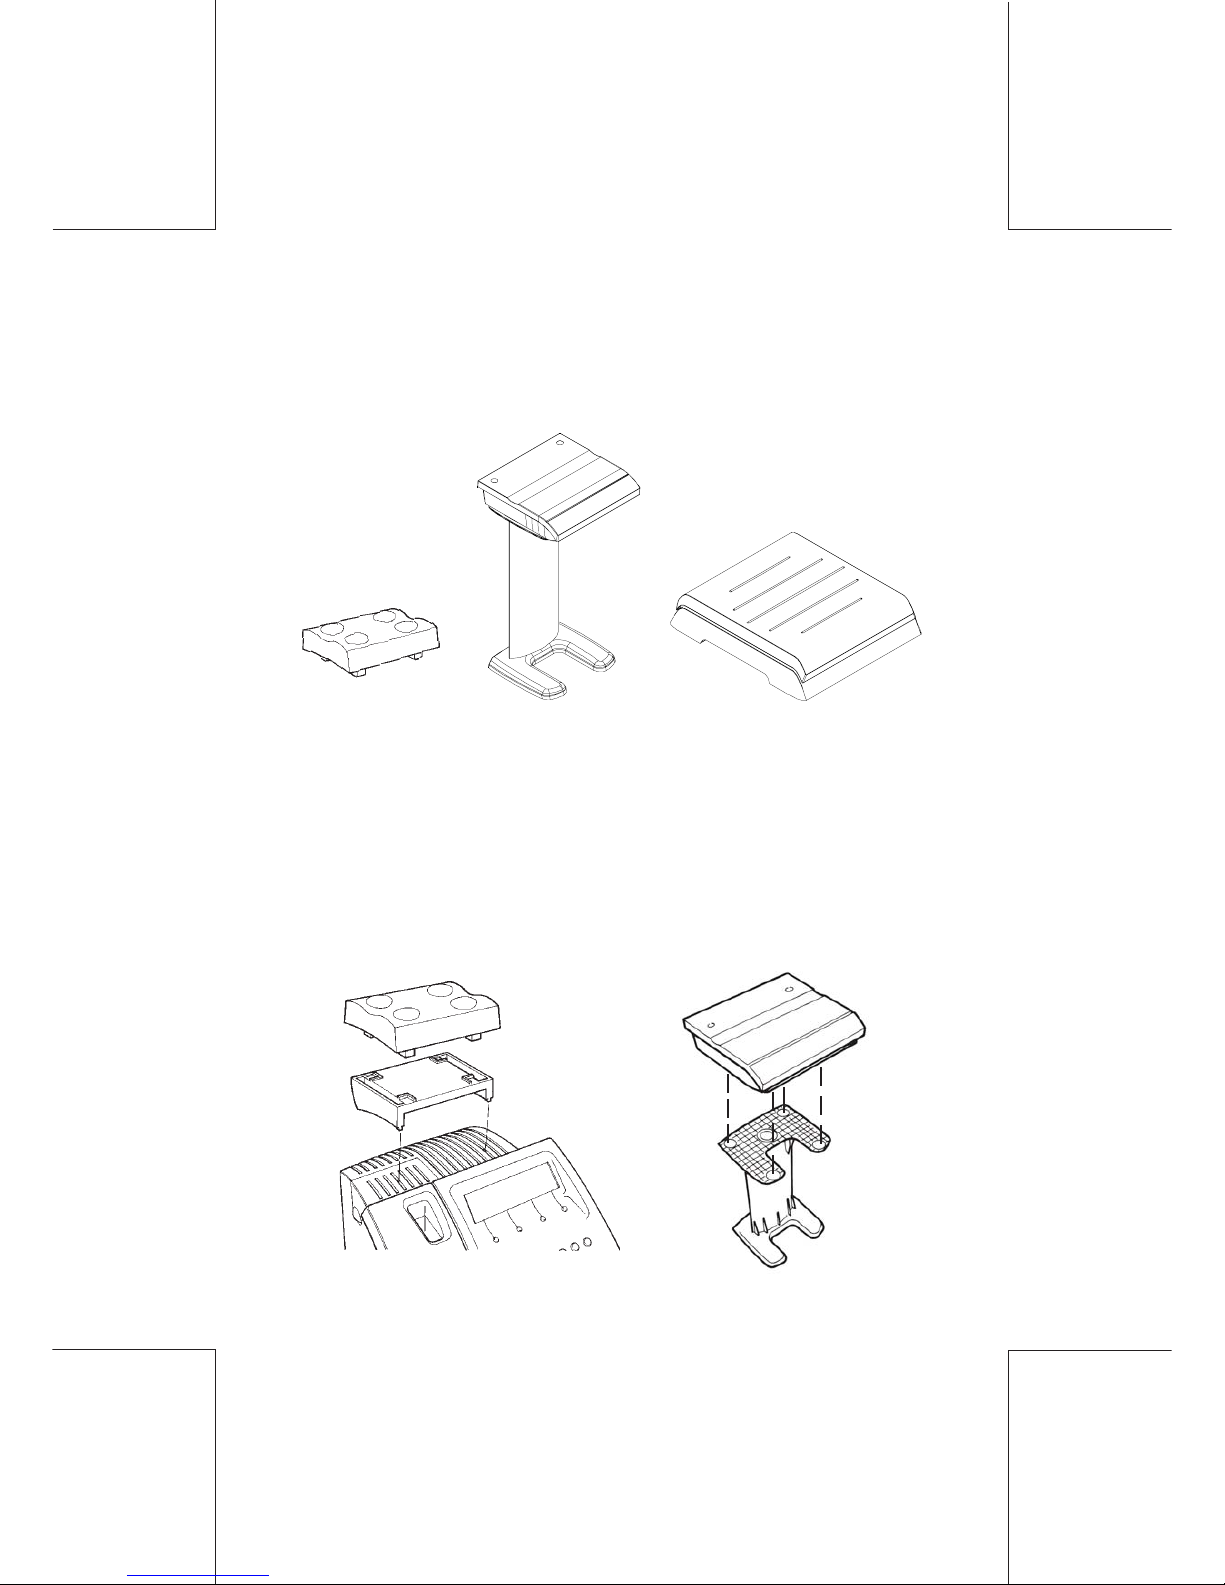
1.6 Weigh Platform
Three weigh platform ranges may be connected to the mailing
machine. The model number is located at the rear of the scale for
identification.
Attach the WP 5 and WP 10/20 Weigh Platform & Support (Option)
Sufficient cable has been provided with your weigh platform to
enable the unit to be placed on the desk adjacent to the postage
meter if this is preferred.
Position the weigh platform on its support. Excess cable can be
loosely coiled under the support.
Position the Support Platform so that the pins on the underside fit
into the locating points on the rear casing of the WJ 65/95/110.
WP 5
WP 10/20
(optional support)
WP 30/70
(external display
optional for this
range)
Page 13
IJ40-0012-13
4127762B/B
1 1/24/2006
13Installation
WP 30/70
WP 10/20
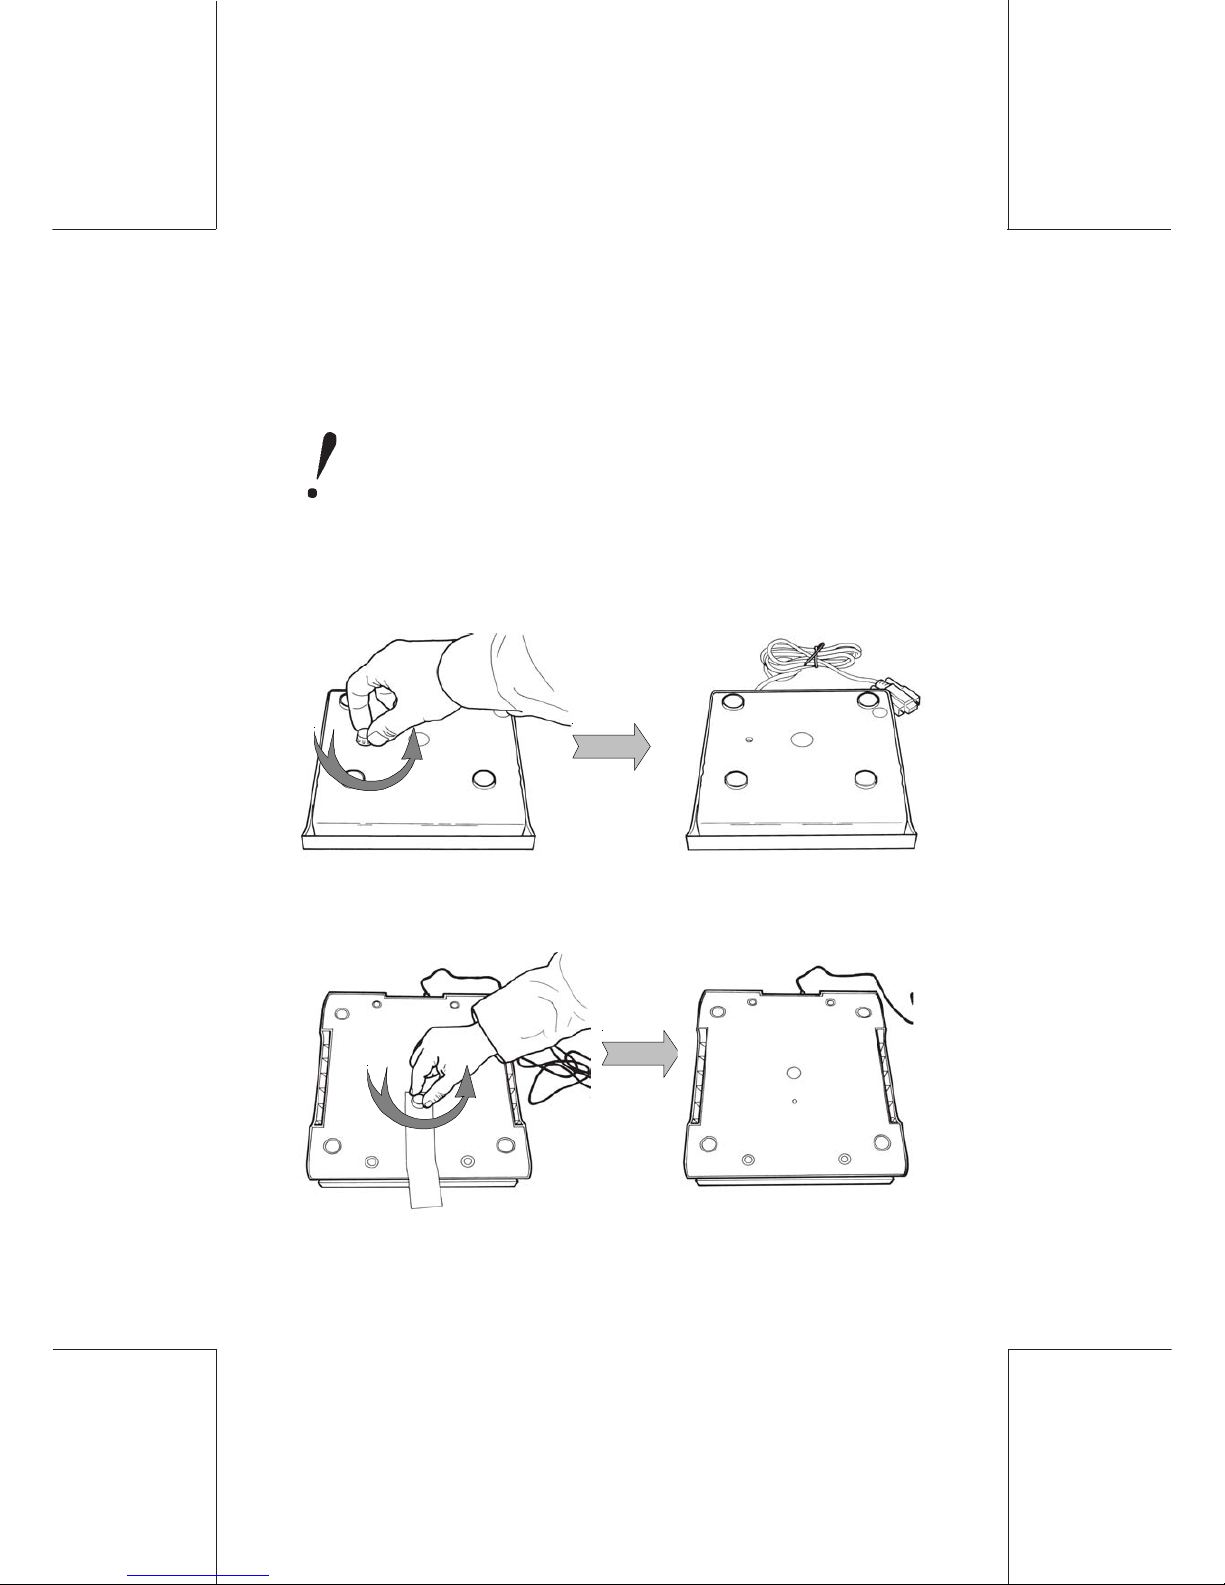
WP 10/20 and WP 30/70 type weigh platform installation procedure
Take the weigh platform out of the packaging and remove the
screw which is underneath the weigh platform.
Keep this screw: it must be used when moving the weigh
platform.
Page 14
14
IJ40-0012-14
4127762B/B
1 1/24/2006
Installation
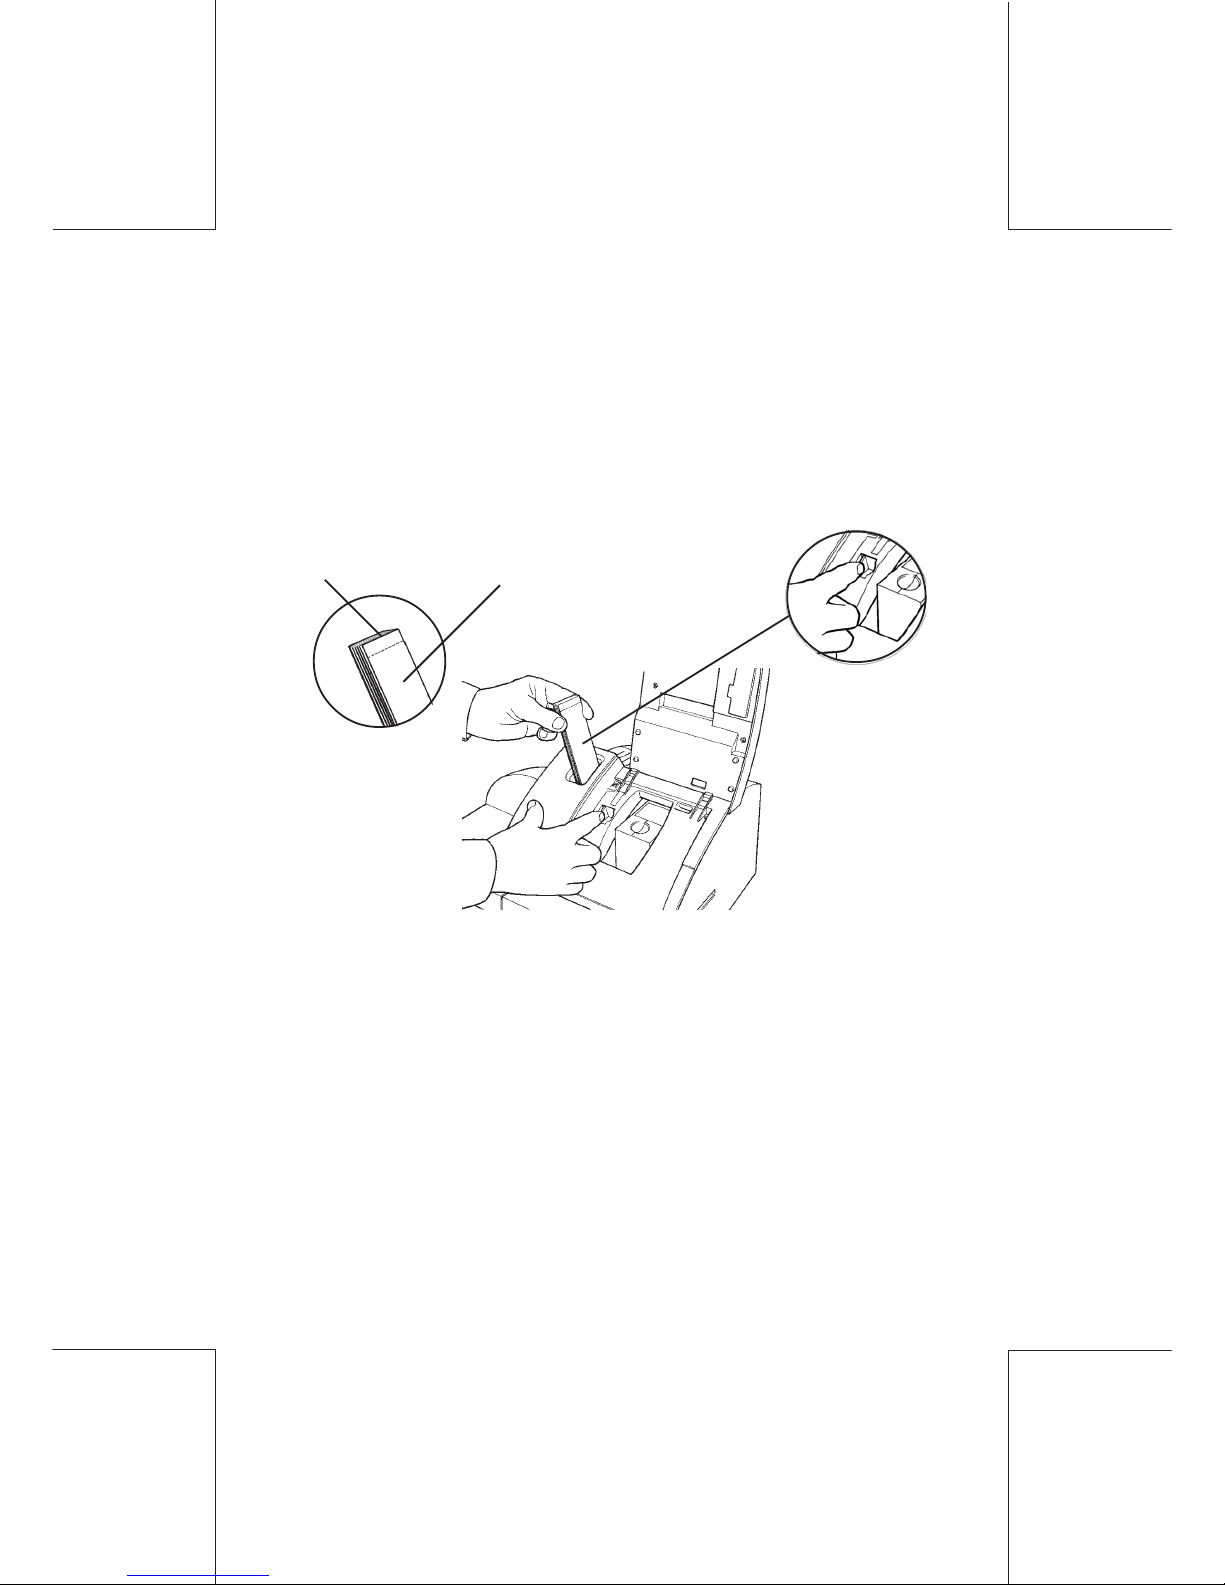
1.7 Fill the Label Dispenser
Tab
Printing
Surface
Page 15
IJ40-0012-15
4127762B/B
1 1/24/2006
15Installation
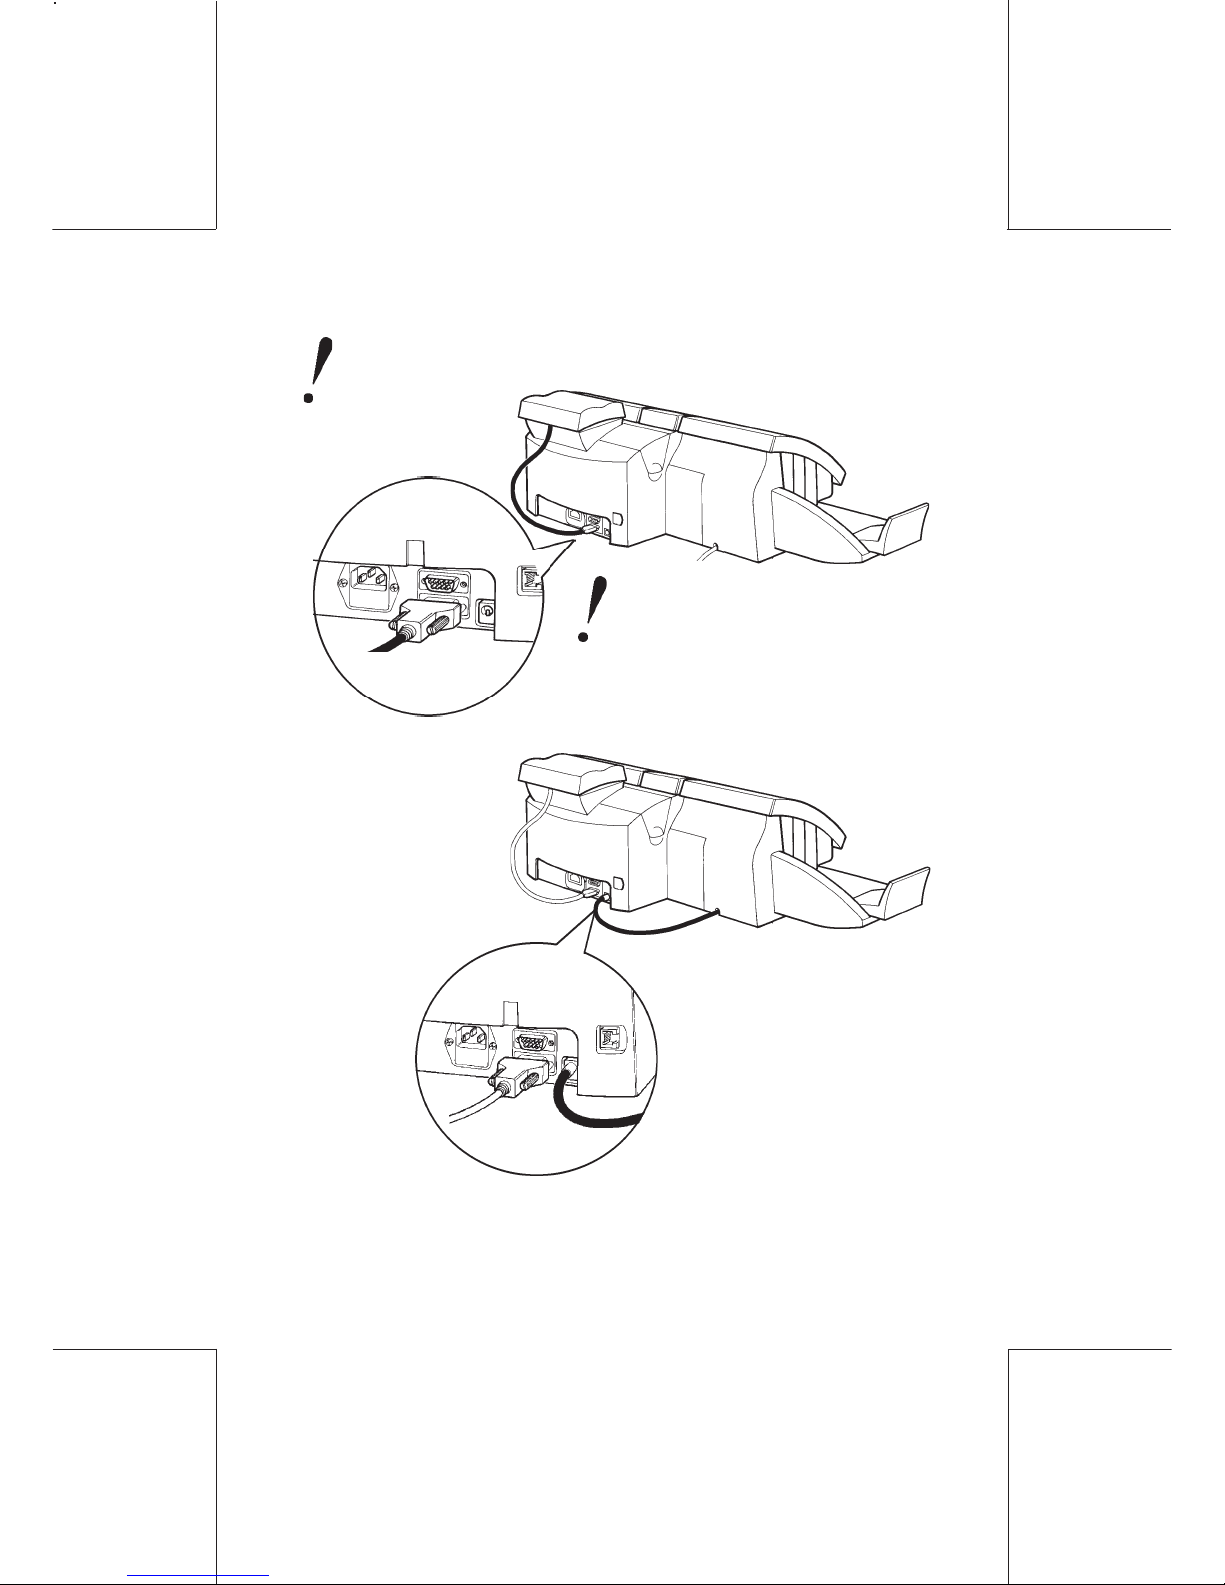
1.8 Machine Connections
Weigh Platform/Scale Connection (Option)
Autofeed Connection (Option)
Unplug the power lead from the base for the following
operations.
Connect the weigh platform to
the connector marked "COM 2"
at the back of the mailing machine.
Page 16
16
IJ40-0012-16
4127762B/B
1 1/24/2006
Installation
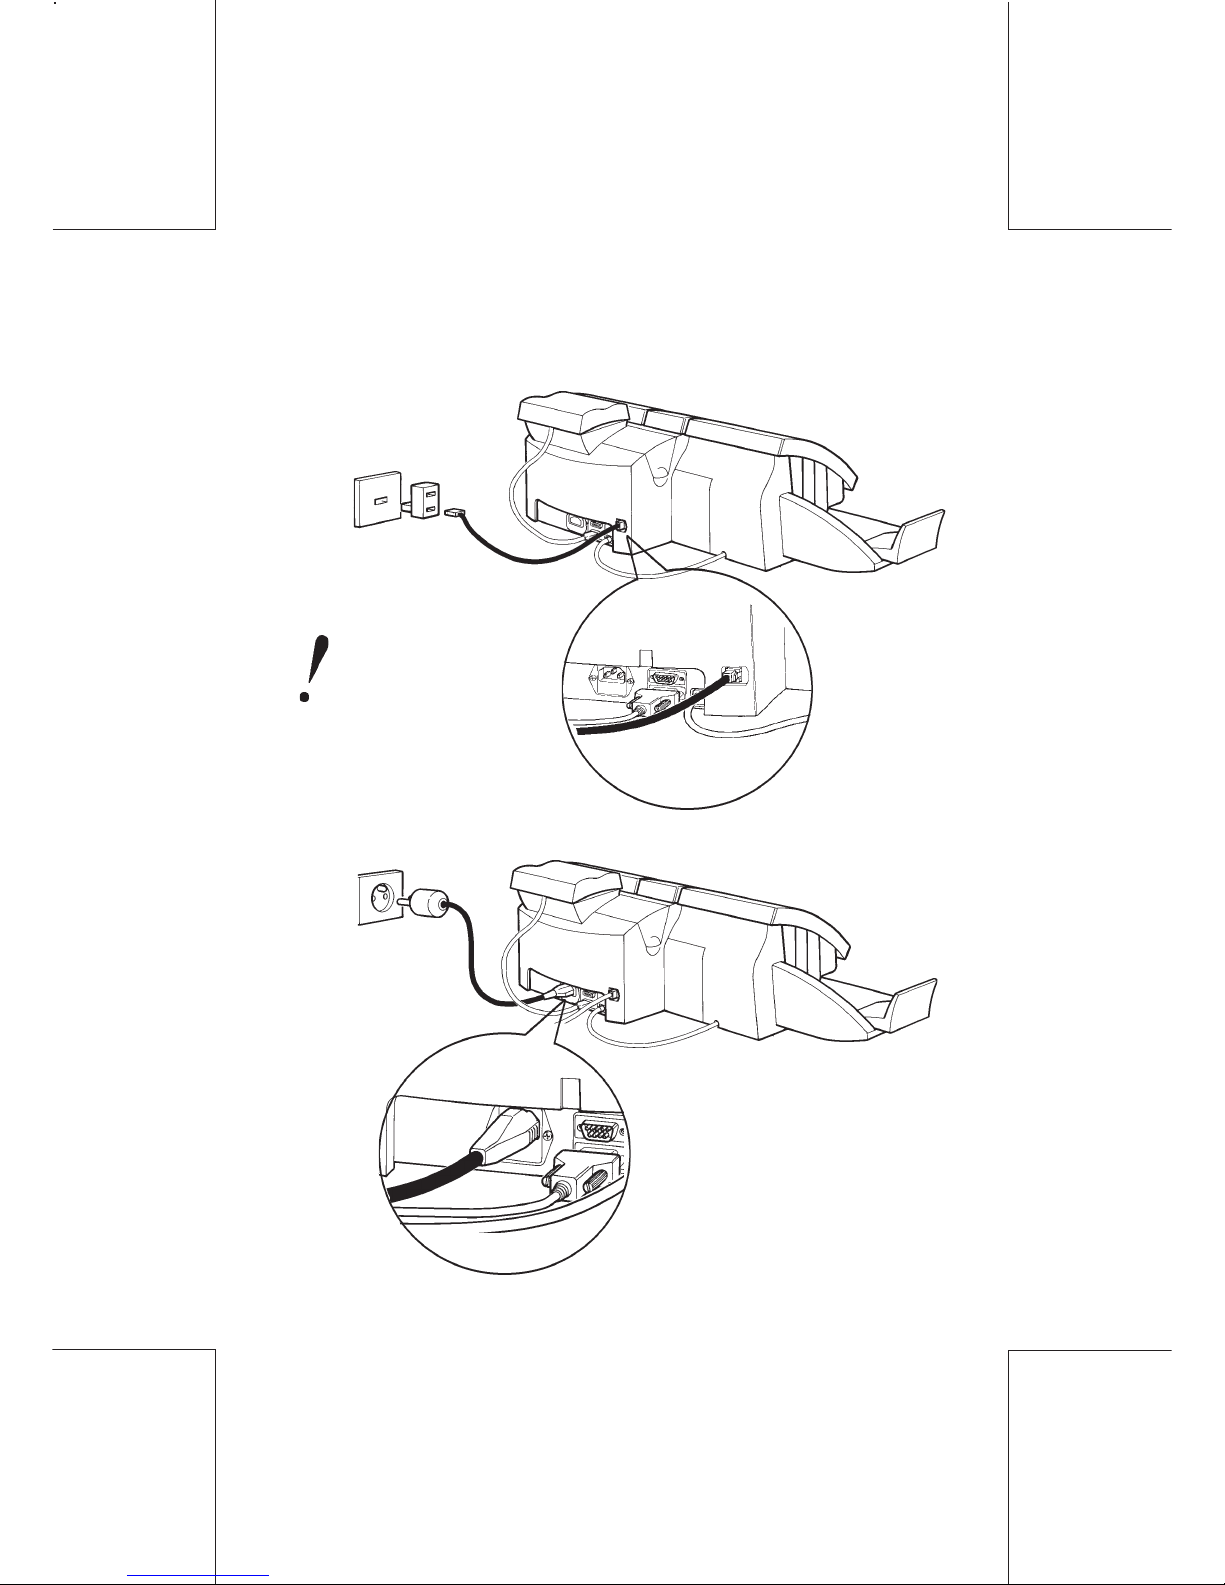
1.9 Machine Connections (continued)
Telephone Connection
Power Cord Connection
Caution, to reduce the
risk of fire, use only
No. 26 AWG or larger
telecommunication
line cord.
Page 17
IJ40-0012-17
4127762B/B
1 1/24/2006
17Installation
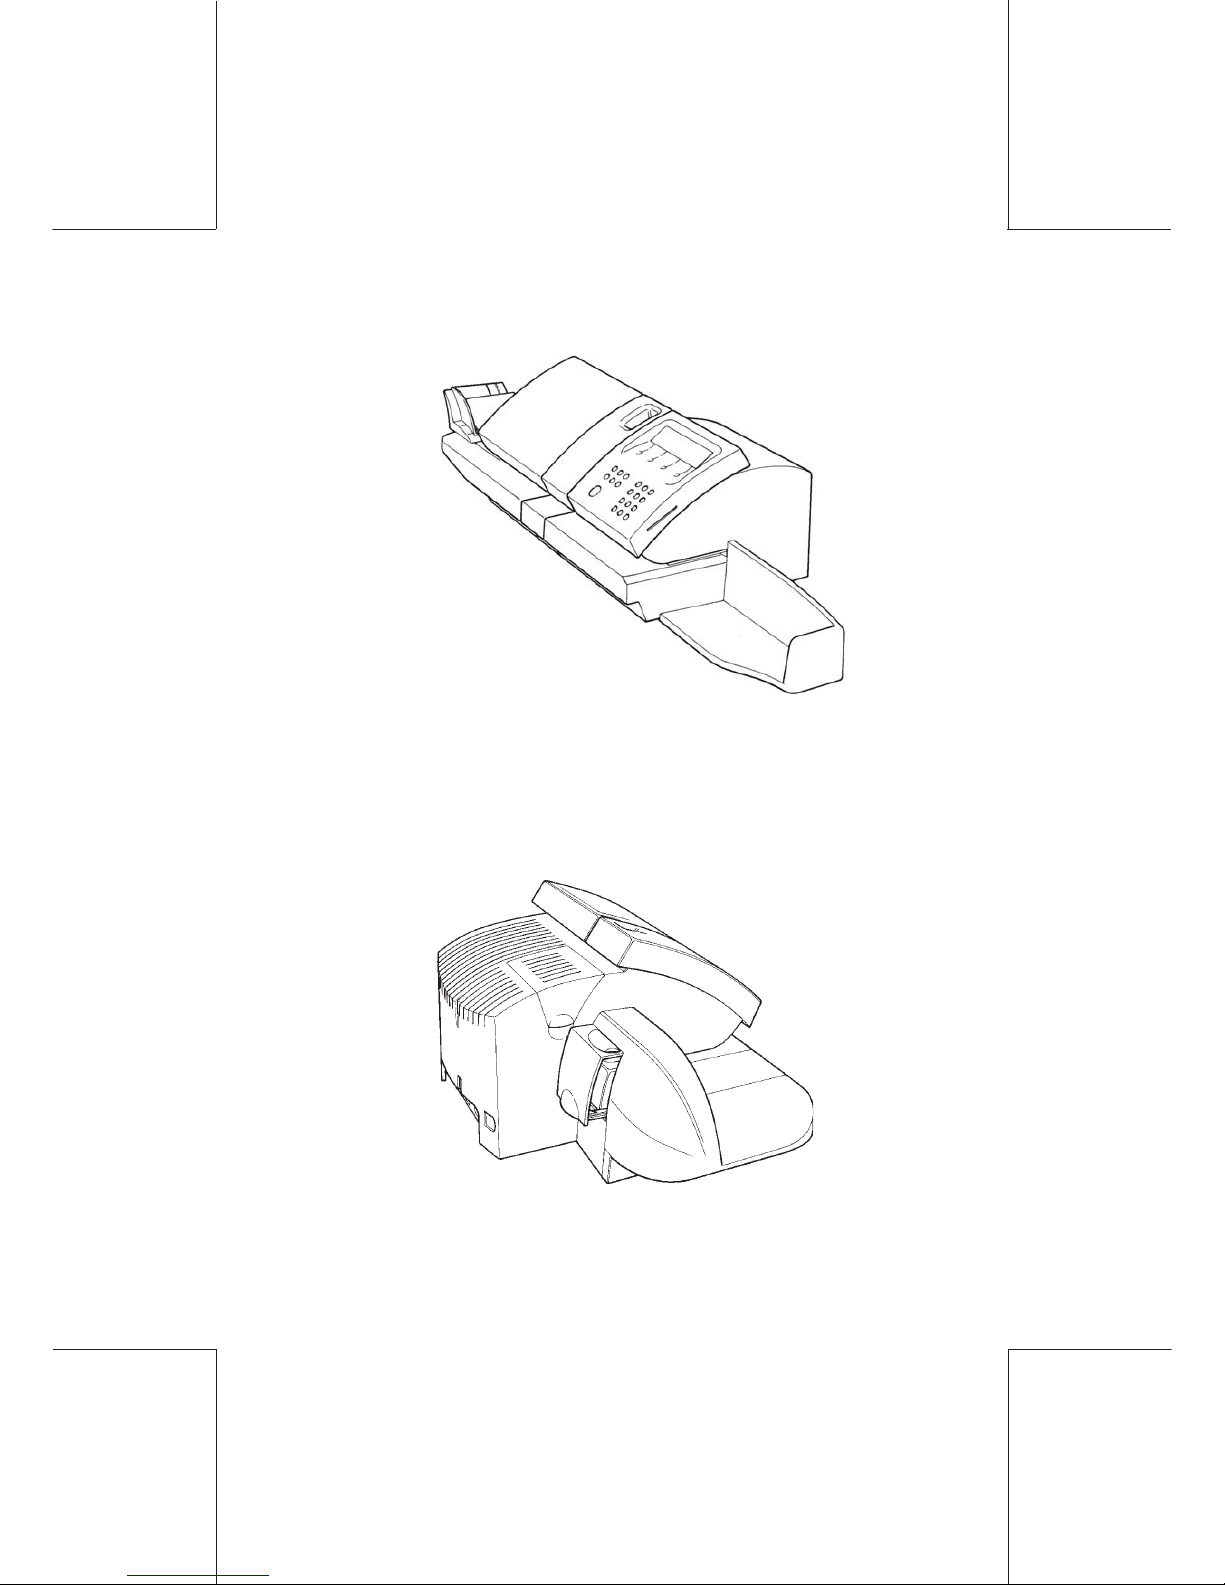
1.10 Position Receiving Tray
1.11 Filling the Moistener Unit Reservoir
For safety, always disconnect the postage meter from the power
supply when filling the moistener reservoir, keep the postage
meter top cover closed and take care not to spill sealing solution
onto the machine.
Open the reservoir compartment and fill with sealing solution.
Close the reservoir compartment.
Page 18
18
IJ40-0012-18
4127762B/B
1 1/24/2006
Installation
1.12 Entering activation codes
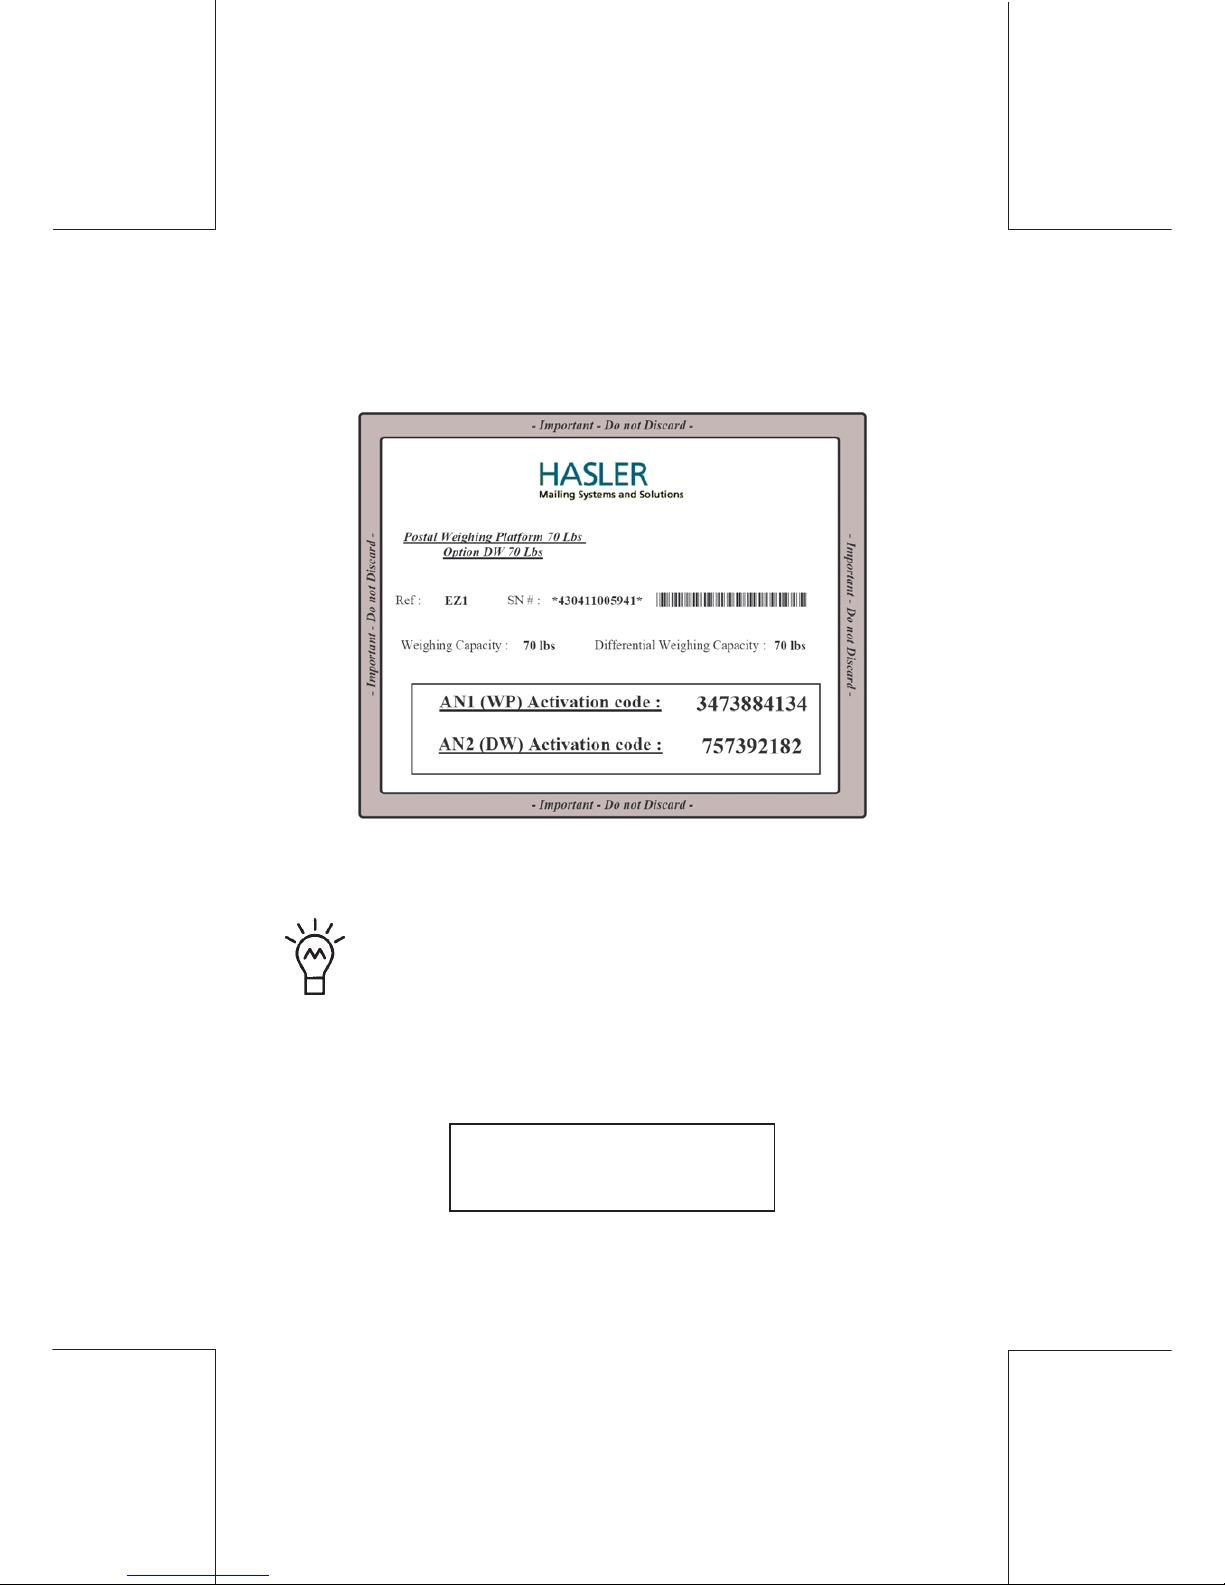
A licence like the one below is in the packaging:
It contains the activation codes necessary for the following steps.
Stick the label with the "AN1" (and "AN2" code if applicable)
activation codes at the back of the WP model and below.
Keep your codes in an easy to access document. They will
be useful in case of further upgrade of your system. The
self-adhesive label is at the bottom of the document which
is delivered with the WP (inserted in the pouch outside of
the box).
Stick the label here
Page 19
IJ40-0012-19
4127762B/B
1 1/24/2006
19Installation
Process:
- Remove any items on the WP, then reconnect the power lead at
the back of the mailing machine.
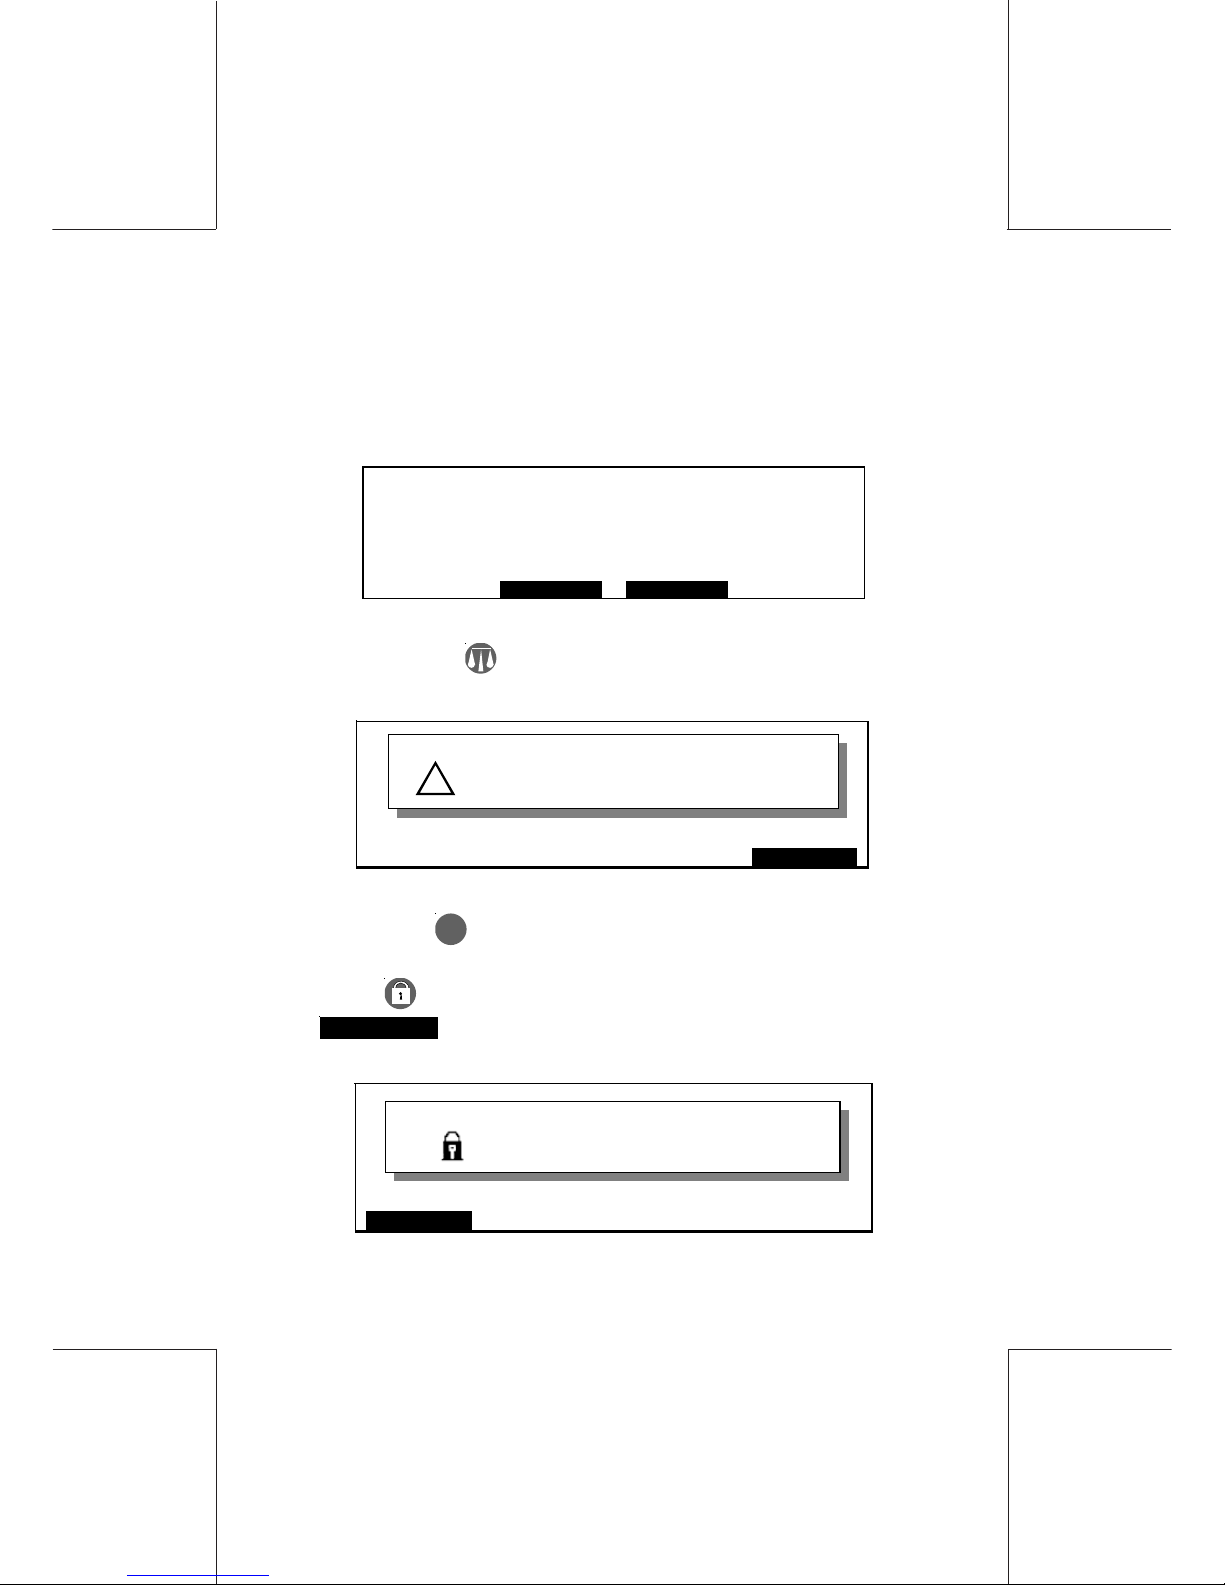
- From the Hasler USER/SUPERVISOR screen, go to the User
mode as shown in the following screen:
75.55
USER
15/01/2002
IMPRINTMODE
0.00
- Then press on . Check that the number displayed matches
with the "WP serial number" which is printed on the label:
OK
NO ACTI VATION CODE FO R
410411 001211
!
- Then press OK to escape.
- Press then select the SUPERVISOR mode by selecting
SUPERVIS
(left side on the display).
The message ENTER SUPERVISOR PIN will appear:
ESC
ENTER SUPERVISOR PIN
- - - -
Page 20
20
IJ40-0012-20
4127762B/B
1 1/24/2006
Installation
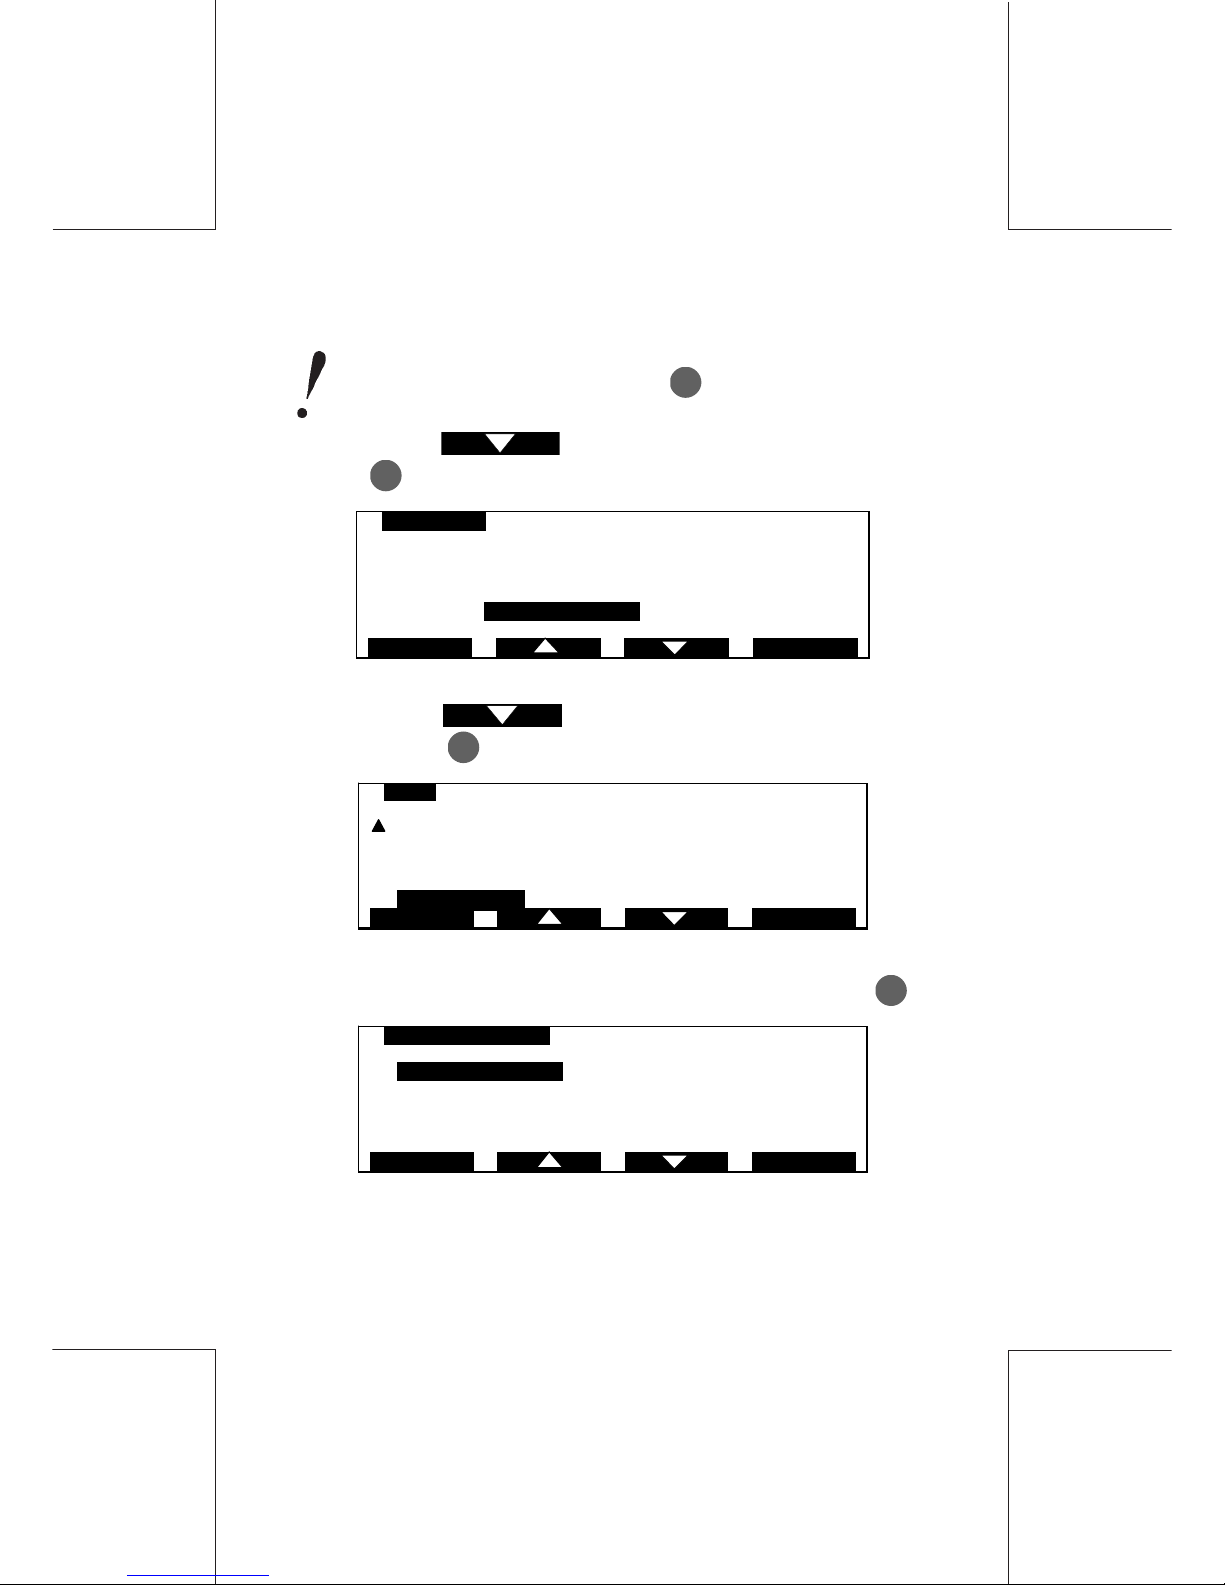
- Enter the supervisor PIN code but
DO NOT validate the code with
OK
- With the key , select the line "SETUP" and confirm
using OK:
SUPERVISOR
1 SECURITY & DEPT
2REGISTERS
3 LOAD F RO M MEM O RY CAR D
4SETUP
O
K
ESC
- With the key , select the line "WP FEATURE" and
confirm using OK:
SETUP
6POC
7 LANGUAGE American
8 REPORT ON LABEL
9 PC CONNECTI O N
W P FEAT URE
OKESC
10
- Select the line "ACTIVATION CODE" and confirm using OK:
W P FEAT URE
1 ACTIVATI O N CODE
2 GEODESIC COD E 00345
OKESC
Page 21
IJ40-0012-21
4127762B/B
1 1/24/2006
21Installation
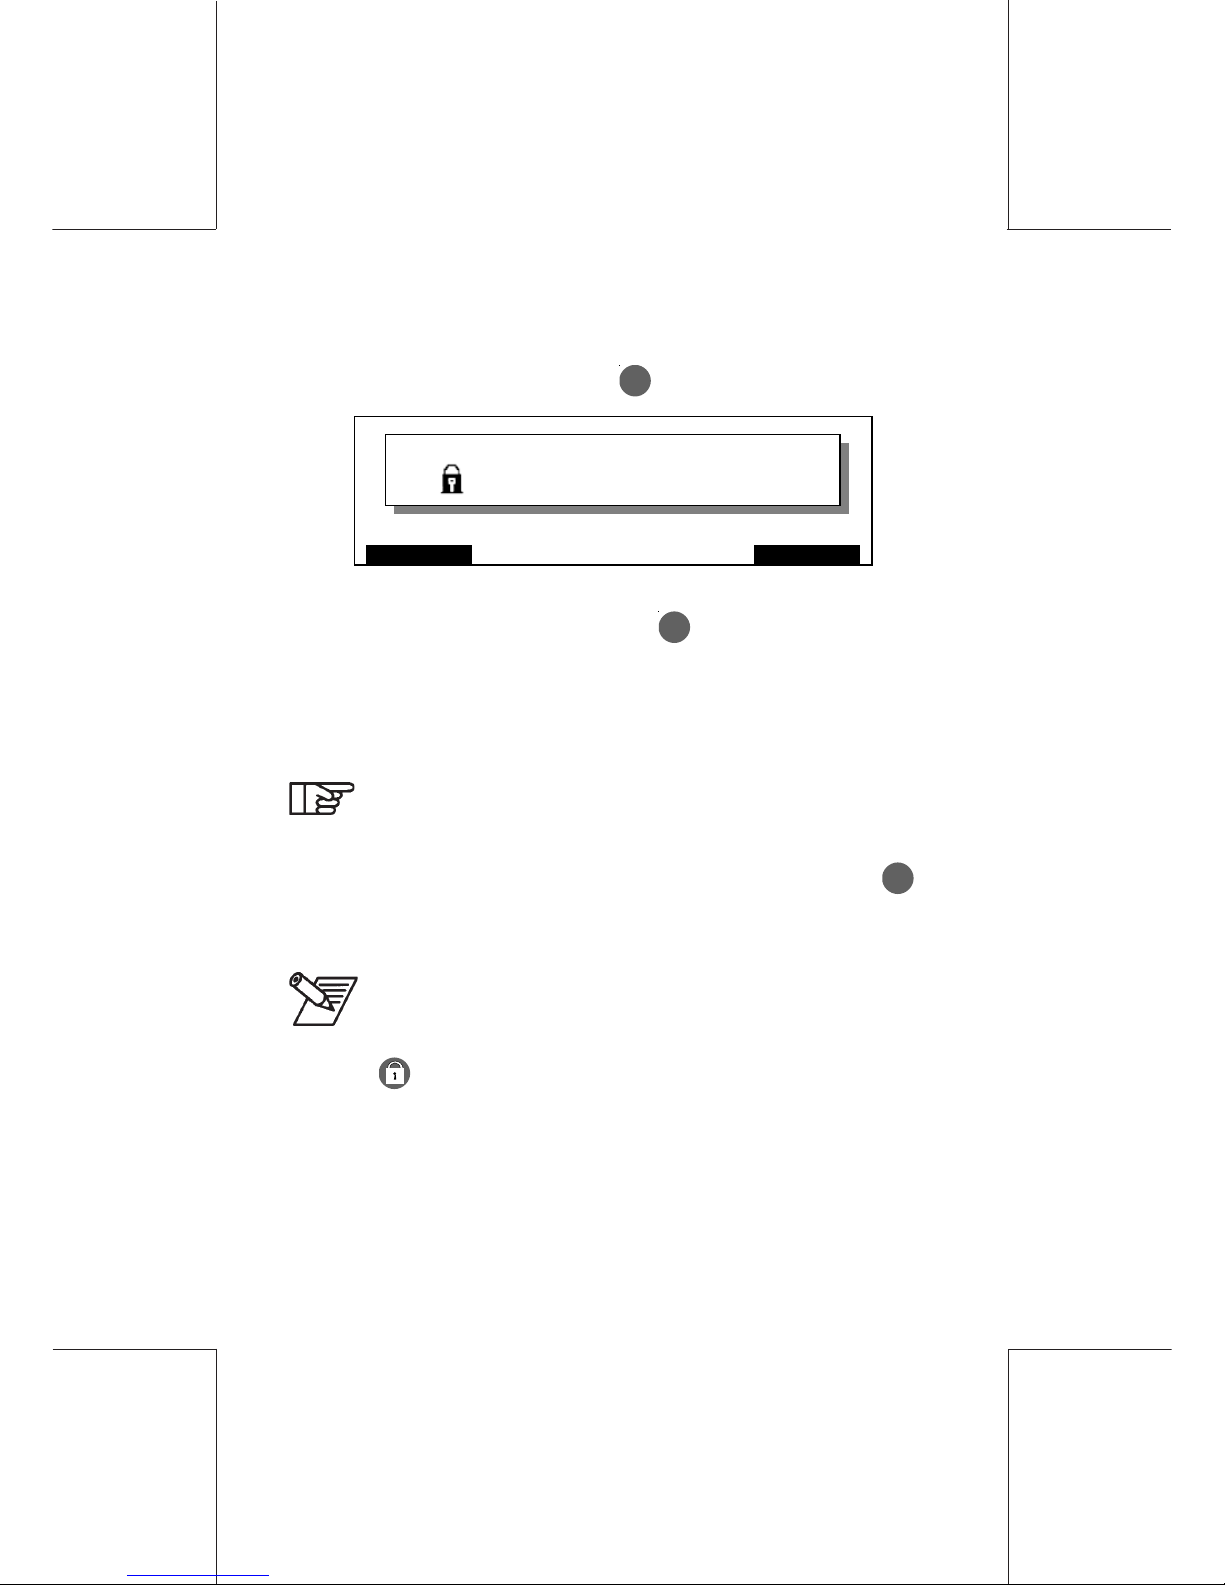
- Enter the 1st activation code "AN1" (10 digits) which is on the
document delivered with the WP (inserted in the pouch outside
of the box), then confirm using
OK
:
ESC OK
ACTIVATION CODE
12345678 90
- Validate the message “WEIGHT CAP ACTIVATED FOR
1234567890" by pressing the key OK.
- If the machine is capable of Differential Weighing (DW), repeat
the previous operation in order to enter the 2nd activation code
"AN2" (10 digits) which is on the same document as the "AN1"
code.
The screens for entering the AN2 code are the same as the
AN1 code.
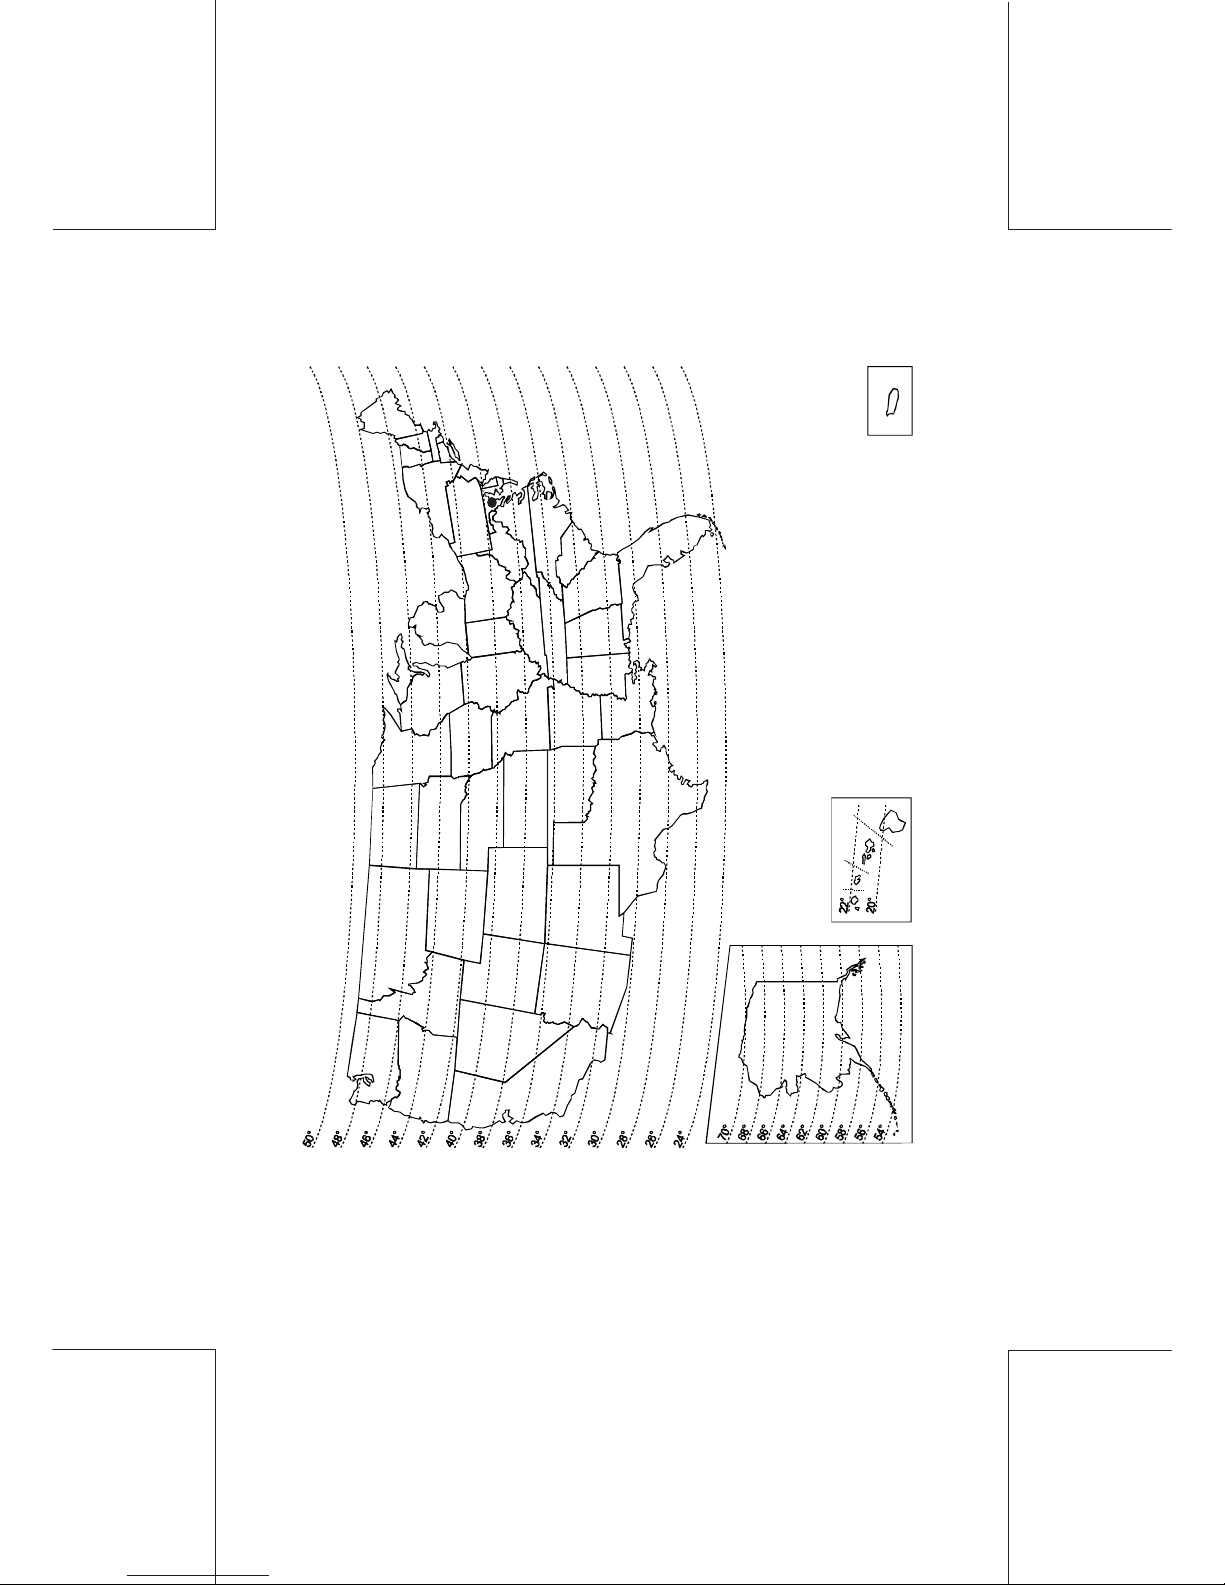
- Select now the choice GEODESIC CODE and validate by OK;
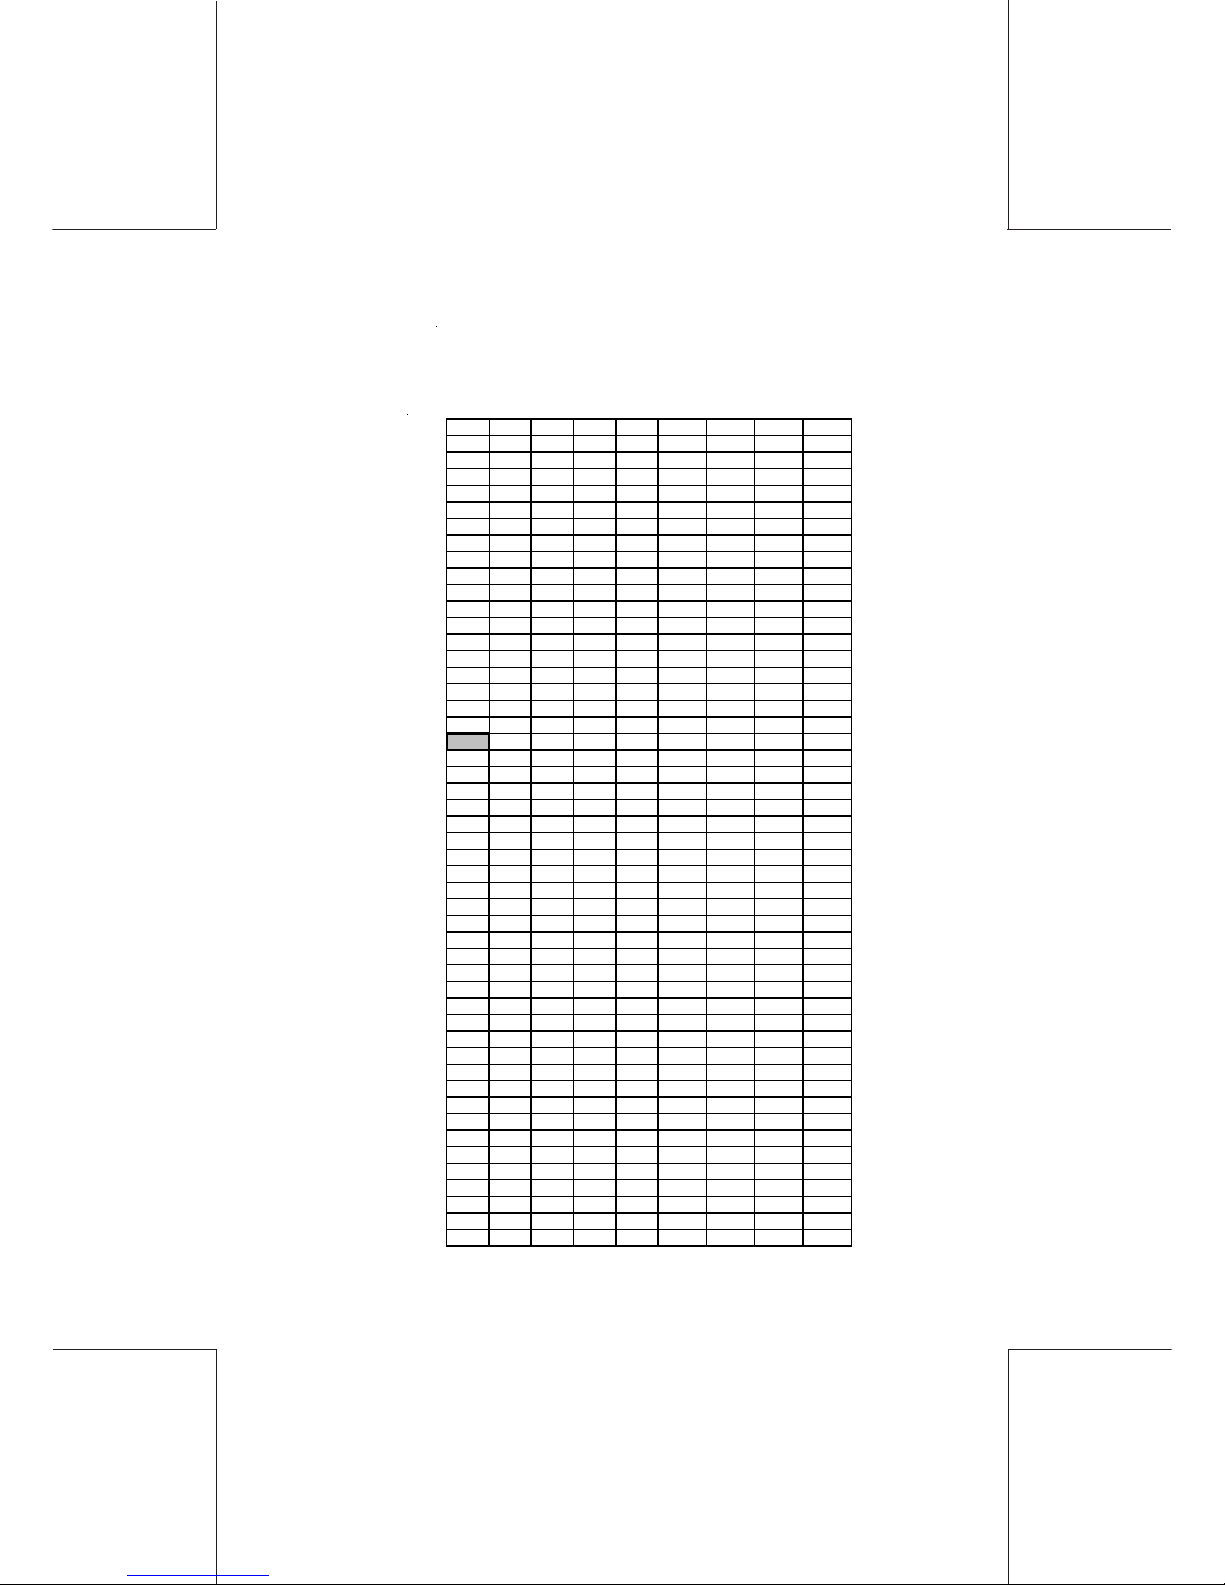
- Locate your town on a map, read the latitude and the altitude, and
find the geodesic code in the table two pages farther.
Washington's latitude is between 39° and the 40°, and the
altitude is under 650 ft, so the code is 10528.
- Press , remove any item that might be on the WP then unplug
and re-plug the power lead to the base in order to initialise the
system. Refer to the IJ40/50 User guide for more details on WP
use.
The WP is now ready for use.
Page 22
22
IJ40-0012-22
4127762B/B
1 1/24/2006
Installation
Washington
Page 23
IJ40-0012-23
4127762B/B
1 1/24/2006
23Installation
10177 10177
10153 10160
10146 10153
10511 10528
10498 10504
10481 10498
10733 10740
10726 10733
10719 10726
10849
10832
10825
10818
10801
10795
10788
10764
10757
10740
10726
10719
10702
10689
10672
10665
10641
10634
10610
10603
10580
10573
10559
10542
10528
10511
10498
10481
10467
10450
10436
10429
10405
10399
10375
10368
10351
10337
10320
10306
10290
10283
10276
10252
10245
10238
10221
10214
10207
10191
10771
10535
10207
10764 10771 10788 10795 10801 10818 10825 10832
10757 10764 10771 10788 10795 10801 10818 10825
10740 10757 10764 10771 10788 10795 10801 10818
10757 10764 10771 10788 10795 10801
10740 10757 10764 10771 10788 10795
10733 10740 10757 10764 10771 10788
10702 10719 10726 10733 10740 10757 10764
10696 10702 10719 10726 10726 10733 10740 10757
10672 10689 10696 10702 10719 10726 10733 10740
10665 10672 10689 10696 10702 10719 10726 10733
10658 10665 10672 10689 10696 10702 10719 10726
10634 10641 10658 10665 10672 10689 10696 10702
10627 10634 10641 10658 10665 10672 10689 10696
10610 10627 10634 10641 10658 10665 10665 10672
10597 10603 10610 10627 10634 10641 10658 10665
10580 10597 10603 10610 10627 10634 10641 10658
10566 10573 10580 10597 10603 10610 10627 10634
10559 10566 10573 10580 10597 10603 10610 10627
10542 10542 10559 10566 10573 10580 10597 10603
10528
10535 10542 10559 10566 10573 10580 10597
10528 10535 10542 10559 10566 10573
10511 10528 10535 10542 10559 10566
10498 10504 10511 10528 10535 10542
10467 10474 10481 10498 10504 10511 10528
10450 10450 10467 10474 10481 10498 10504 10511
10436 10443 10450 10467 10474 10481 10498 10504
10429 10429 10436 10443 10450 10467 10474 10481
10405 10412 10429 10436 10443 10450 10467 10474
10399 10399 10405 10412 10429 10436 10443 10450
10375 10382 10399 10405 10412 10429 10436 10443
10368 10368 10375 10382 10399 10405 10412 10429
10344 10351 10368 10375 10382 10399 10405 10412
10337 10344 10344 10351 10368 10375 10382 10399
10313 10320 10337 10344 10351 10368 10375 10382
10306 10313 10320 10337 10344 10344 10351 10368
10283 10290 10306 10313 10320 10337 10344 10351
10276 10283 10290 10306 10313 10320 10337 10344
10252 10269 10276 10283 10290 10306 10313 10320
10245 10252 10269 10276 10283 10290 10306 10313
10238 10245 10252 10269 10276 10283 10290 10290
10214 10221 10238 10245 10252 10269 10276 10283
10207 10214 10221 10238 10245 10252 10269 10276
10191 10207 10214 10221 10238 10245 10252 10269
10184 10191 10207 10214 10221 10221 10238 10245
10184 10191 10207 10214 10221 10238
10177 10184 10191 10207 10214 10221
10160 10177 10184 10191 10207 10214
10139 10146 10153
10191
10160 10177 10184 10191
10184
10122 10139 10146 10153 10160 10177 10184
10115 10122 10139 10146 10153 10160 10177
0 m / 0 ft
200 m / 650 ft
400 m / 1300 ft
600 m / 1950 ft
800 m / 2600 ft
1000 m / 3300 ft
1200 m / 3950 ft
1400 m / 4600 ft
1600 m / 5250 ft
1800 m / 5900 ft
64 °
65 °
66 °
40 °
41 °
42 °
23 °
24 °
25 °
20 °
21 °
22 °
26 °
27 °
28 °
29 °
30 °
31 °
32 °
33 °
34 °
35 °
36 °
37 °
38 °
39 °
43 °
44 °
45 °
46 °
47 °
48 °
49 °
50 °
51 °
52 °
53 °
54 °
55 °
56 °
57 °
58 °
59 °
60 °
61 °
62 °
63 °
67 °
68 °
69 °
70 °
Altitude
Latitude
Page 24

24
IJ40-0012-24
4127762B/B
1 1/24/2006
Controls and features
2. CONTROLS AND FEATURES
2.1 Introduction
The following pages detail the Controls and Features associated
with your WJ 65/95/110 Mailing machine, please take the time to
read them carefully.
Page 25

IJ40-0012-25
4127762B/B
1 1/24/2006
25Controls and features
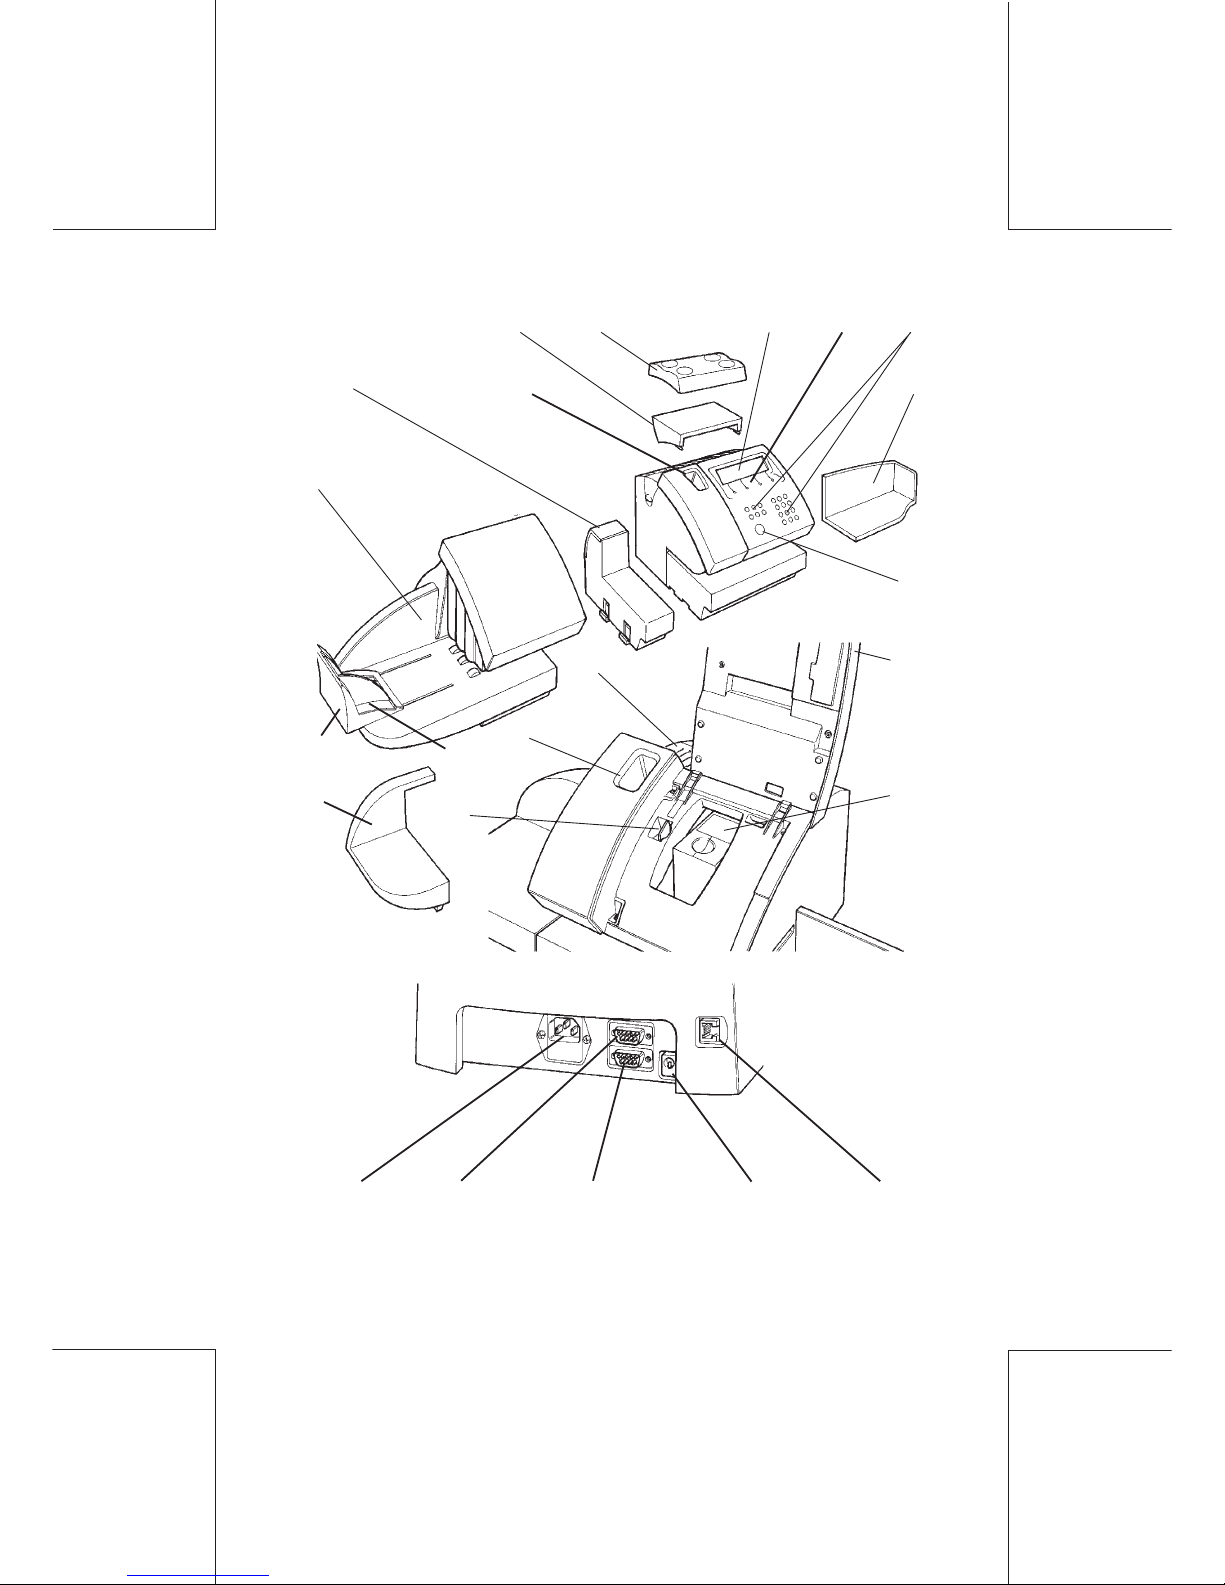
2.2 Machine
1. Display presents a visual indication of
the machine set up andstatus.
2. Soft Keys keys with functions as depicted
on the display.
3. NumericalKeypad & enables the operator to access
Function Keys user functions.
4. Start/Stop Button used to Start/Stop the Machine.
5. Autofeed Automatic envelope feeder
6. Envelope Guide adjustable envelope guide.
7. Side Guide adjustable envelope guide.
8. Feed Platform provides a flat surface to assist
feeding of mail.
9. Receiving Tray collects printed mail.
10. Weigh Platform in conjunction with the WJ 65/95/110
will weigh and calculate postage for
items up to 5 pounds
11. Weigh Platform Support supports the weigh platform and
provides a cable tidy.
12. Precut Label Dispenser holds up to 50 labels.
13. Label Release Lever release to fill the Precut Label Dis
penser.
14. Infill Unit standard supplied Infill Platform or
optional Moistener Platform.
15. Memory Card Reader used to load new postage rate and
customer data.
16. Ink Cartridge Ink Cartridge/Printing Head.
17. Power Input 110- 120V AC 60Hz input.
18. Accessory Port connection for printer, PC connection.
19. Weigh Platform connection for weigh platform or
Connection external scale.
20. Autofeed Connector connection for Autofeed Unit.
21. Telephone Socket enables connection to Postage-
On-Call® Reset Center - analog
phone line is required (same as
standard fax machines)
22. Meter Cover may be removed to allow access
to meter.
Page 26
26
IJ40-0012-26
4127762B/B
1 1/24/2006
Controls and features
11 10 1 2 3
5
14 12 9
13
22 15
4
16
12
67
8
17 18 19 20 21
Page 27

IJ40-0012-27
4127762B/B
1 1/24/2006
27Controls and features
LOW INK
$150.20
0
MARKETING
DEPARTME IMPRINT
03/19/02
MODE
$ 9.50
0
A
C
B
2.2.1 Display Panel
Text Message Publicity Message Rate Die Date Postage Value
Resource Level Total Credit
Indicator
Soft Keys
M
MENU
START
STOP
7 8
9
4
5
6
1 2
3
0
C
OK
Envelope/Label Feed
St art/Stop Button
Clear Key Confirmation
Key
Function Keys Numerical Keypad
Page 28
28
IJ40-0012-28
4127762B/B
1 1/24/2006
Controls and features
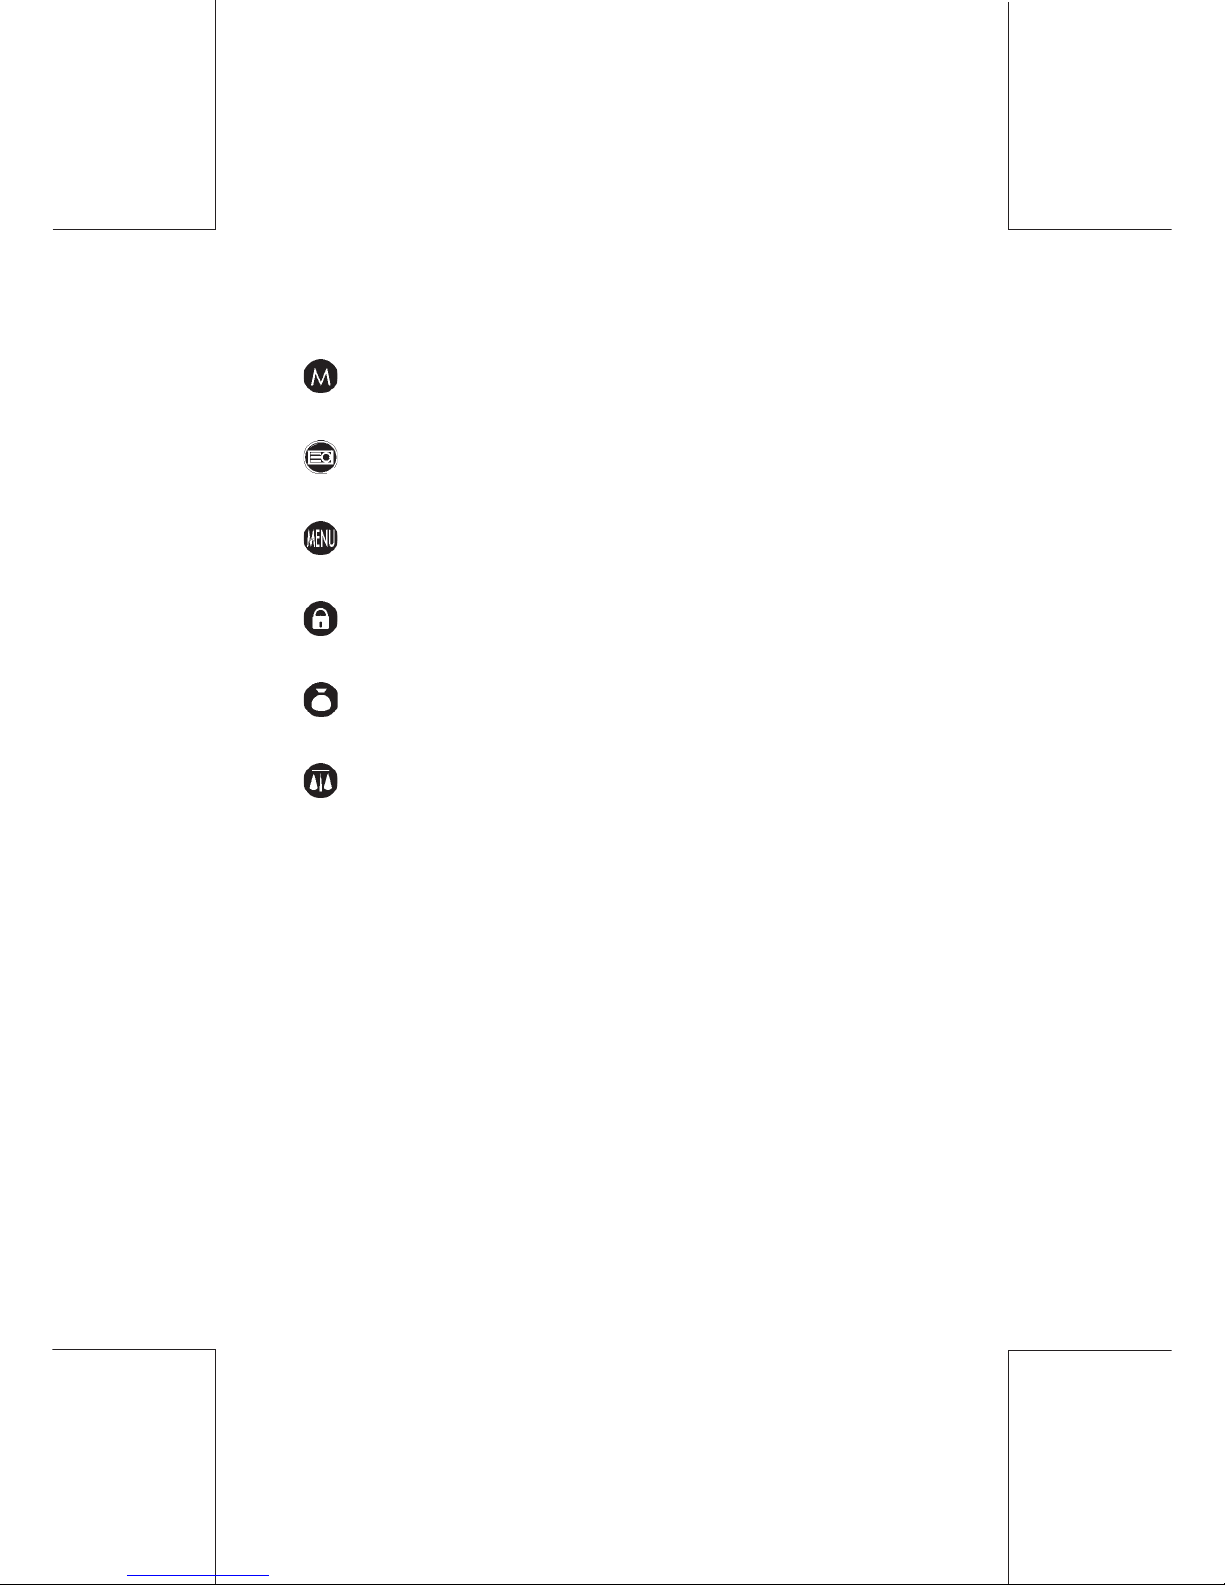
2.2.2 Function Keys
Job Memory Key : S toring and recalling memorised jobs.
(please refer to Memory functions)
Label Key : Label mode selection.
(please refer to Printing labels)
Menu Key : Access to Function Menu.
Lock : Return to Standby/Locking.
Funds Key : Access to Recredit.
(please refer to Adding postage)
Weigh Platform Key : Weigh Platform Mode Selection
(please refer to Printing with weigh
platform)
Page 29

IJ40-0012-29
4127762B/B
1 1/24/2006
29Printing postage
3. PRINTING POSTAGE
3.1 Introduction
In order to achieve the best impression, your WJ 65/95/110
requires an even surface on which to print, therefore on bulky or
uneven items correct folding of the contents will help considerably.
Use a label if in doubt.
It is sometimes unavoidable that your mail will contain staples,
paper clips and other fixings. The machine will accept these, but
it is recommended that the fixings are situated at the bottom of the
envelope. This will avoid the risk of damage to your printing head.
In the event that a satisfactory print cannot be achieved due to bulky
contents (Max.3/8") the envelope should be treated as a packet
and a label used.
It is recommended that the WJ 65/95/110 is left powered on at all
times. This will assist in maintaining print quality. In the event that
you have to power the machine down, first press to allow the
machine to return to standby mode, then wait for approximately
one minute to allow the ink cartridge to return to the park position
before removing the power.
Page 30
30
IJ40-0012-30
4127762B/B
1 1/24/2006
Printing postage
3.2 Getting started
3.2.1 Log On (Pin Entry Mode)
To enter USER mode from the Standby screen:
Press the key. The machine will enter Ready mode.
If the machine is protected by a USER PIN, the following screen will
be observed:
This number may be changed or removed by the supervisor,
please refer to Supervisor Settings.
If the correct PIN is entered the Ready Mode screen will be observed.
If an incorrect PIN is entered the machine will continue to prompt for
USER PIN entry.
If an incorrect PIN is entered for eight or more attempts, the meter
will be locked, in this event please refer to Setting the User Status.
ESCAPE
ENTER USER PIN
- - - -
$150.20
7
50.00
USER
03/19/02
MODE IMPRINT
$0.00
0
SUPERVIS USER
Page 31
IJ40-0012-31
4127762B/B
1 1/24/2006
31Printing postage
The Default Stamp Value is factory set to $0.00, to change this
value, please refer to Supervisor Settings.
The machine is supplied with all departments set to OFF.
In order to activate the departments, please refer to
Departments Control.
3.2.2 Departmental Operation
If your machine has been set for departmental operation a list of
available departments will be observed:
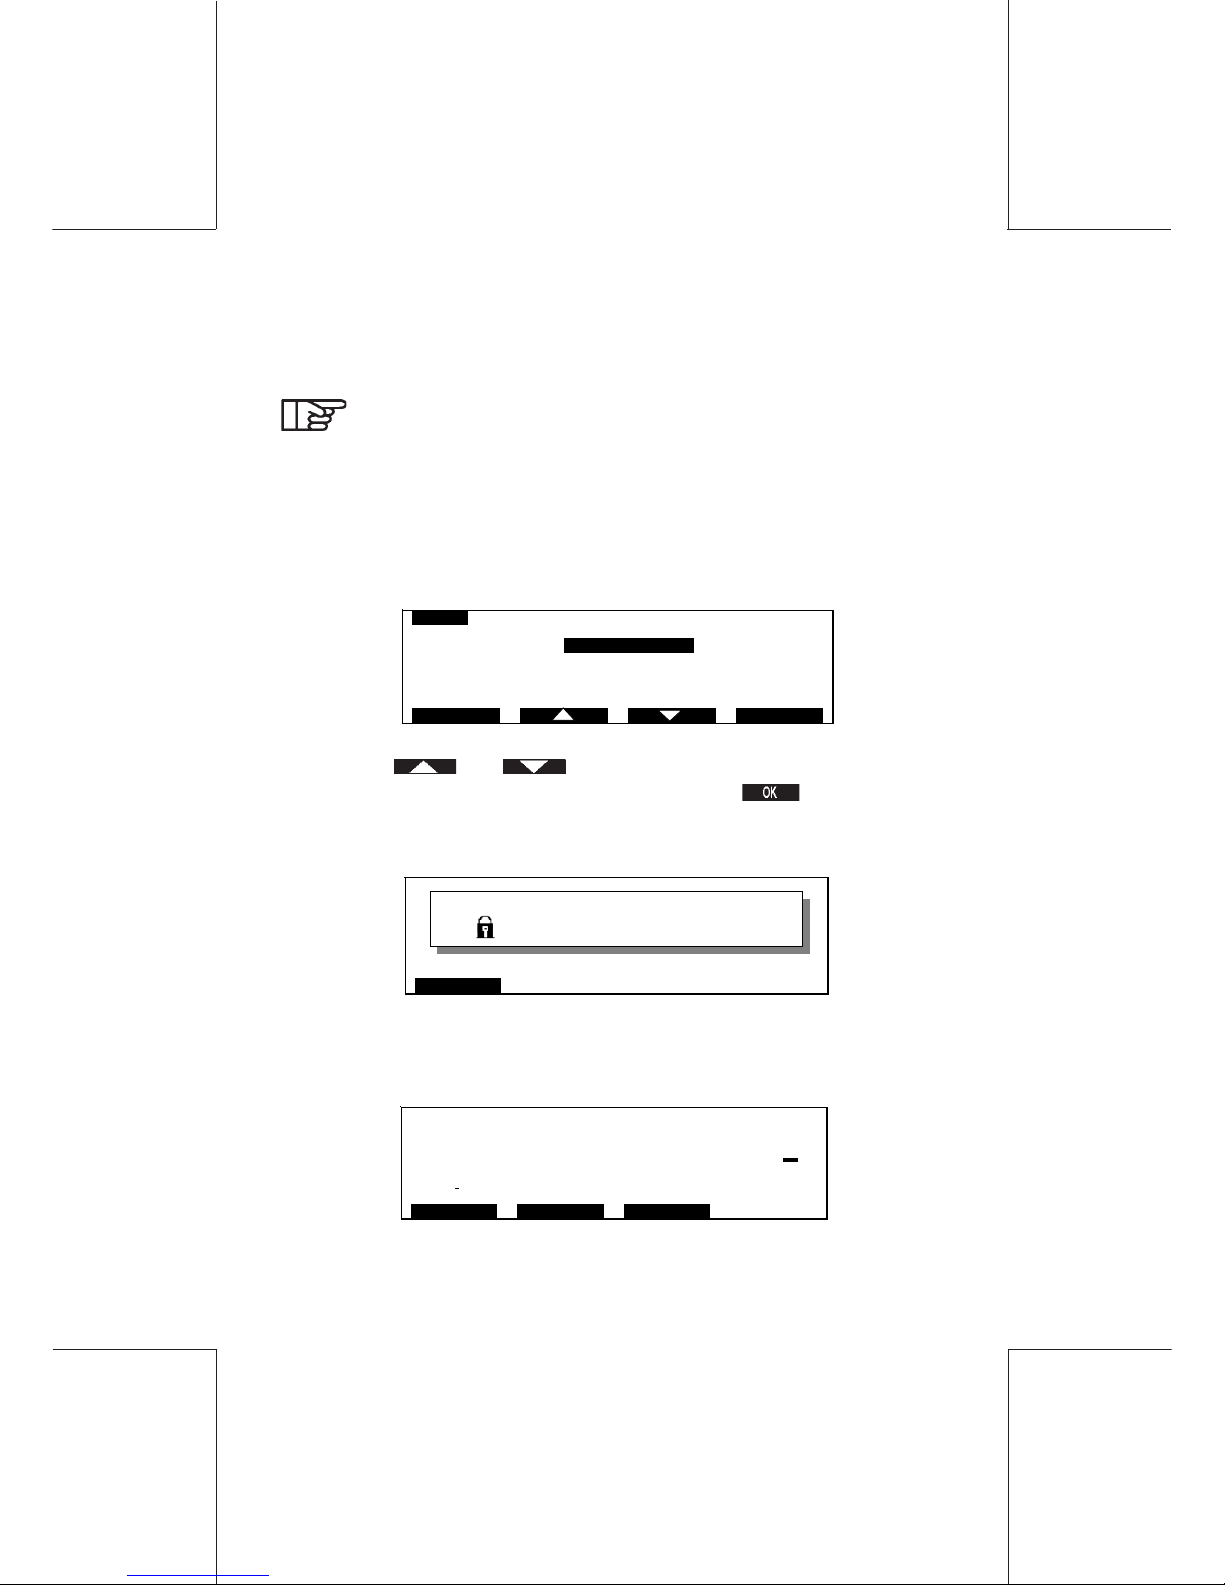
Using the and keys, or an appropriate number key,
select your department from the list and press to confirm.
If your department is protected, you will be prompted to enter
your Department PIN:
Enter the PIN using the numerical keypad. If the PIN is correct the
Department Ready screen will be observed:
DEPT
1 MARKETING
2 ACCOUNTS
3SALES
4
5
OKESCAPE
ESCAPE
ENTER DEPARTMENT PIN
- - - -
$150.20
7
MARKETING
03/19/02
DEPT MODE IMPRINT
$0.00
0
Page 32
32
IJ40-0012-32
4127762B/B
1 1/24/2006
Printing postage
If not you will be prompted to try again. (The Department PIN is not
the same as the User PIN. The Department PIN may be changed
or removed by the supervisor, please refer to page Departments
control).
If your department is not protected, you will not be prompted
to enter the Department PIN and the Department Ready screen
will be observed.
3.2.3 How To Select a Postage Value
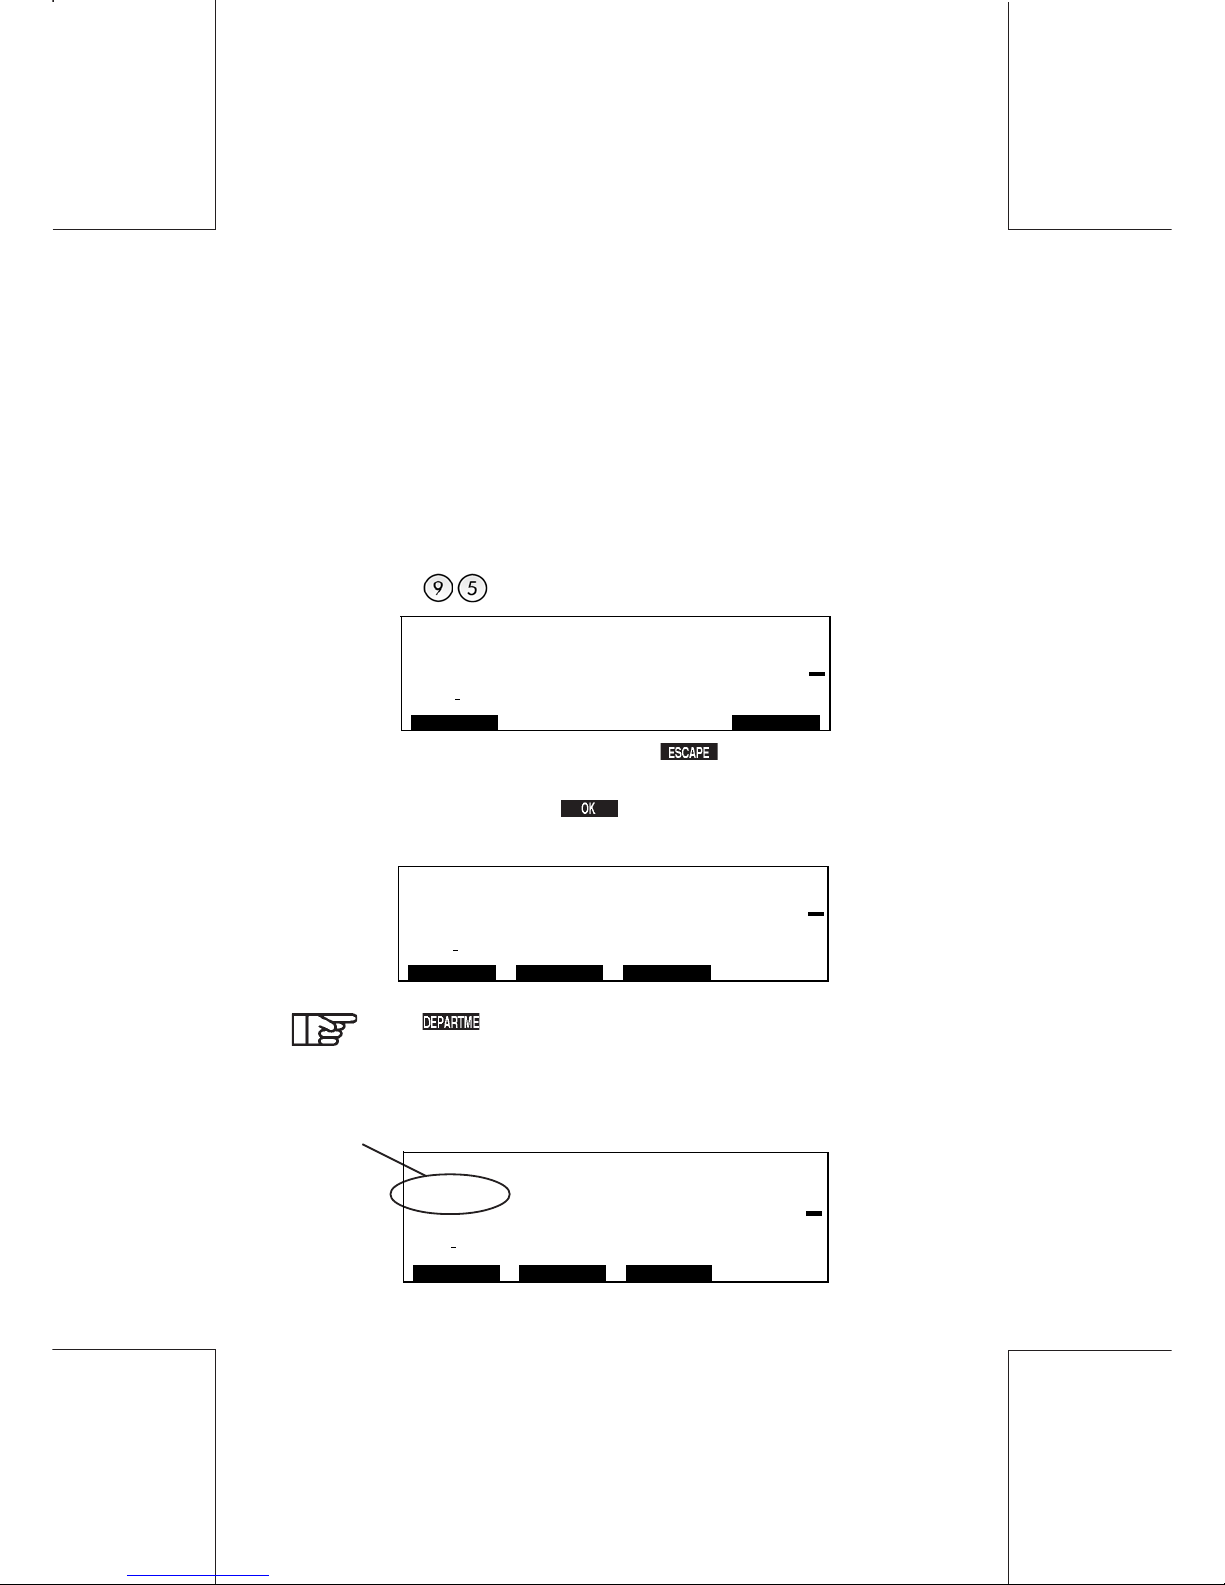
Using the numerical keypad, enter the required postage, (e.g. 95
cents press )the value display will flash:
If an incorrect value is entered, press and enter the correct
value.
To confirm the value, press , the following display will now be
observed.
The icon will only be present if the machine is set
for departmental operation.
Low Credit
When machine credit falls below or equal to the low credit level, the
LOW CREDIT indicator will be observed:
LOW CREDIT
$49.50
7
MAR KETING
DEPT
03/19/02
MODE IMPRINT
$0.95
0
$150.20
7
MARKETING
03/19/02
DEPT MODE IM P RI NT
$0.95
0
$150.20
7
MARKETING
03/19/02
OKESCAPE
$0.95
0
Page 33
IJ40-0012-33
4127762B/B
1 1/24/2006
33Printing postage
It is now time to add more credit, please refer to "Adding postage".
The default Low Credit value is factory set to $50.00, to change this
value please refer to Machine setup.
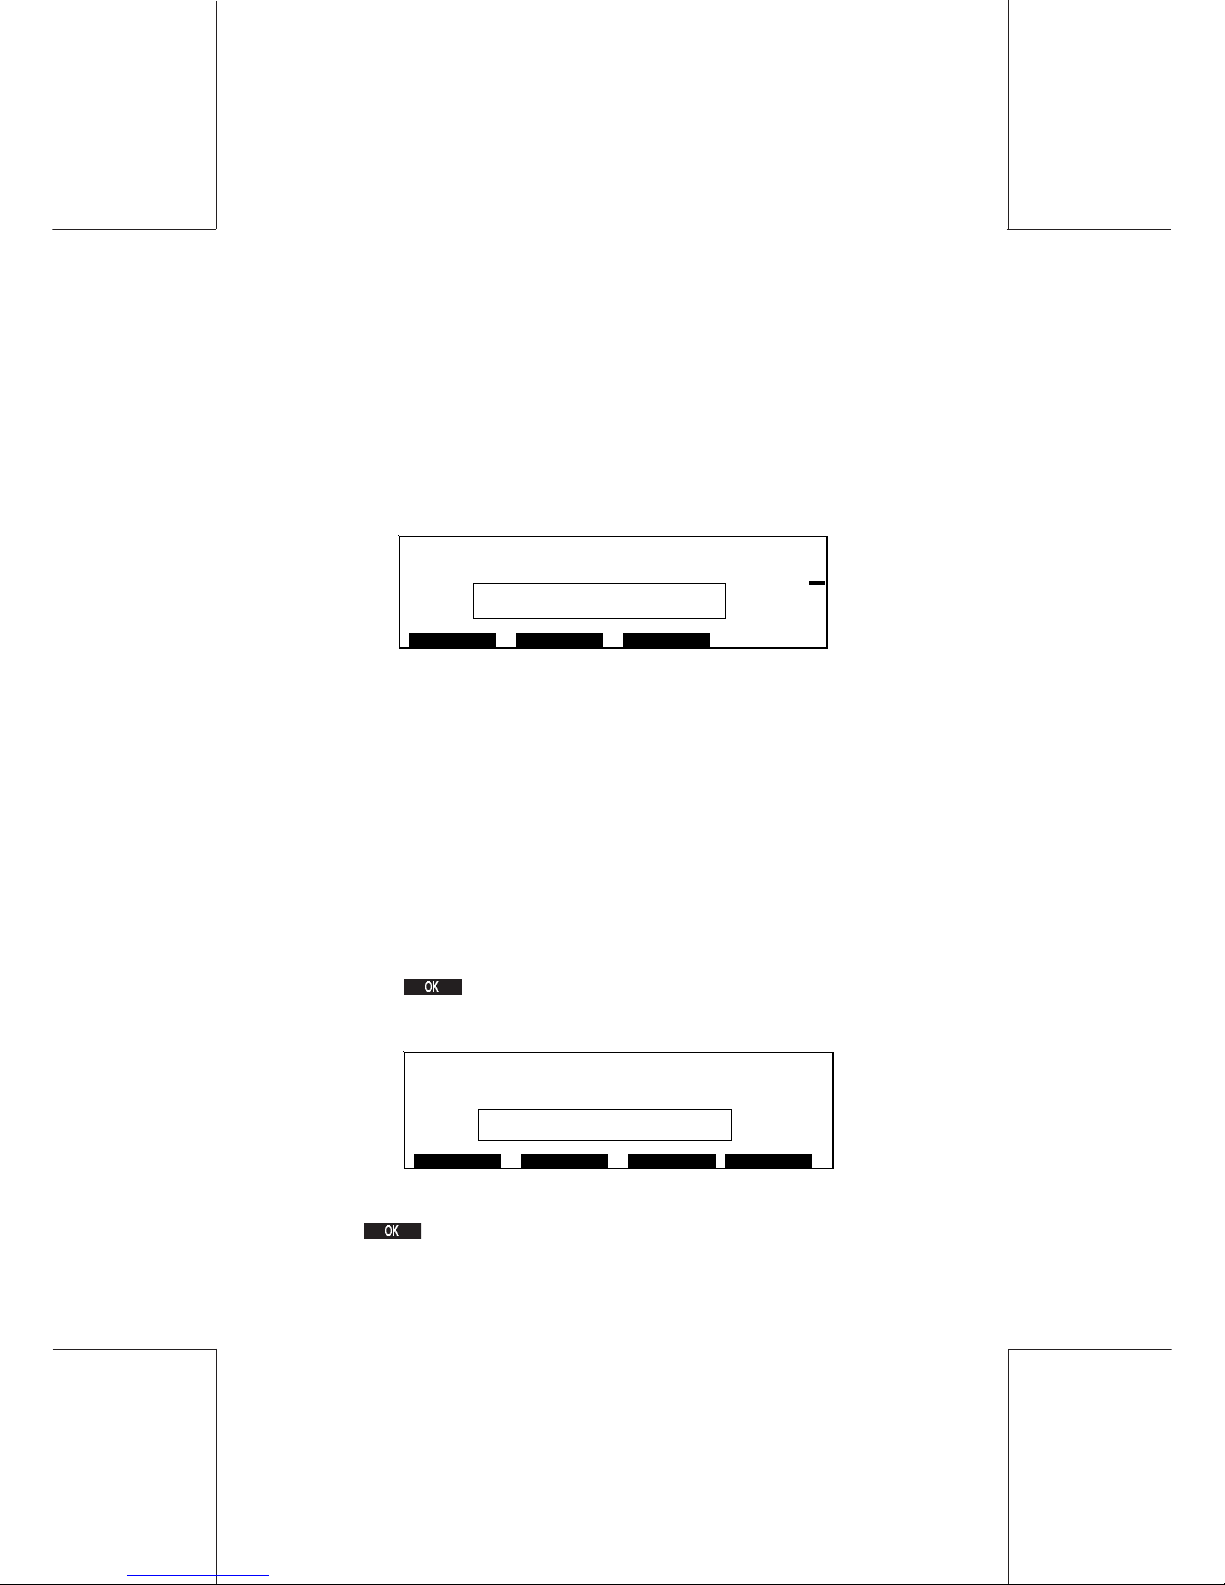
Insufficient Credit
When the value selected exceeds the available credit, printing will
be disabled and the INSUFFICIENT CREDIT screen will be
observed:
To ADD CREDIT, please refer to Adding postage.
3.2.4 High Value Selection
If a value greater than or equal to the High Value setting is selected,
the machine will not print unless the high value setting is confirmed.
The default High Value Threshold is set at $10.00 (To change the
High Value setting, please refer to Supervisor Settings).
Printing a high value
From Ready Mode, set the required postage value (e.g. $12.50)
and press to confirm.
The High Value warning screen will now be observed:
Printing is disabled.
Press to return to Ready Mode screen with the High Value
confirmed.
DEPT MODE I M P RINT
$0.95
0
I N S U F F I C I E N T C R E D I T
$0.80°
DEPT MODE IMPRINT OK
$12.50
0
HIGH VA LU E - ARE YO U SU RE ?
Page 34
34
IJ40-0012-34
4127762B/B
1 1/24/2006
Printing postage
If you wish to reject the High Value value selection, enter the
correct value and press
to confirm. The High Value Warning
will be observed, if the value is now correct press
to return
to Ready Mode with the new high value confirmed.
If you are printing more than one item at a high value, always check
that the value is correct for all items being processed.
The High Value Warning is automatically suppressed
when values are received from a Weigh Platform.
YOU ARE NOW READY TO PROCESS
YOUR MAIL
Page 35
IJ40-0012-35
4127762B/B
1 1/24/2006
35Printing postage
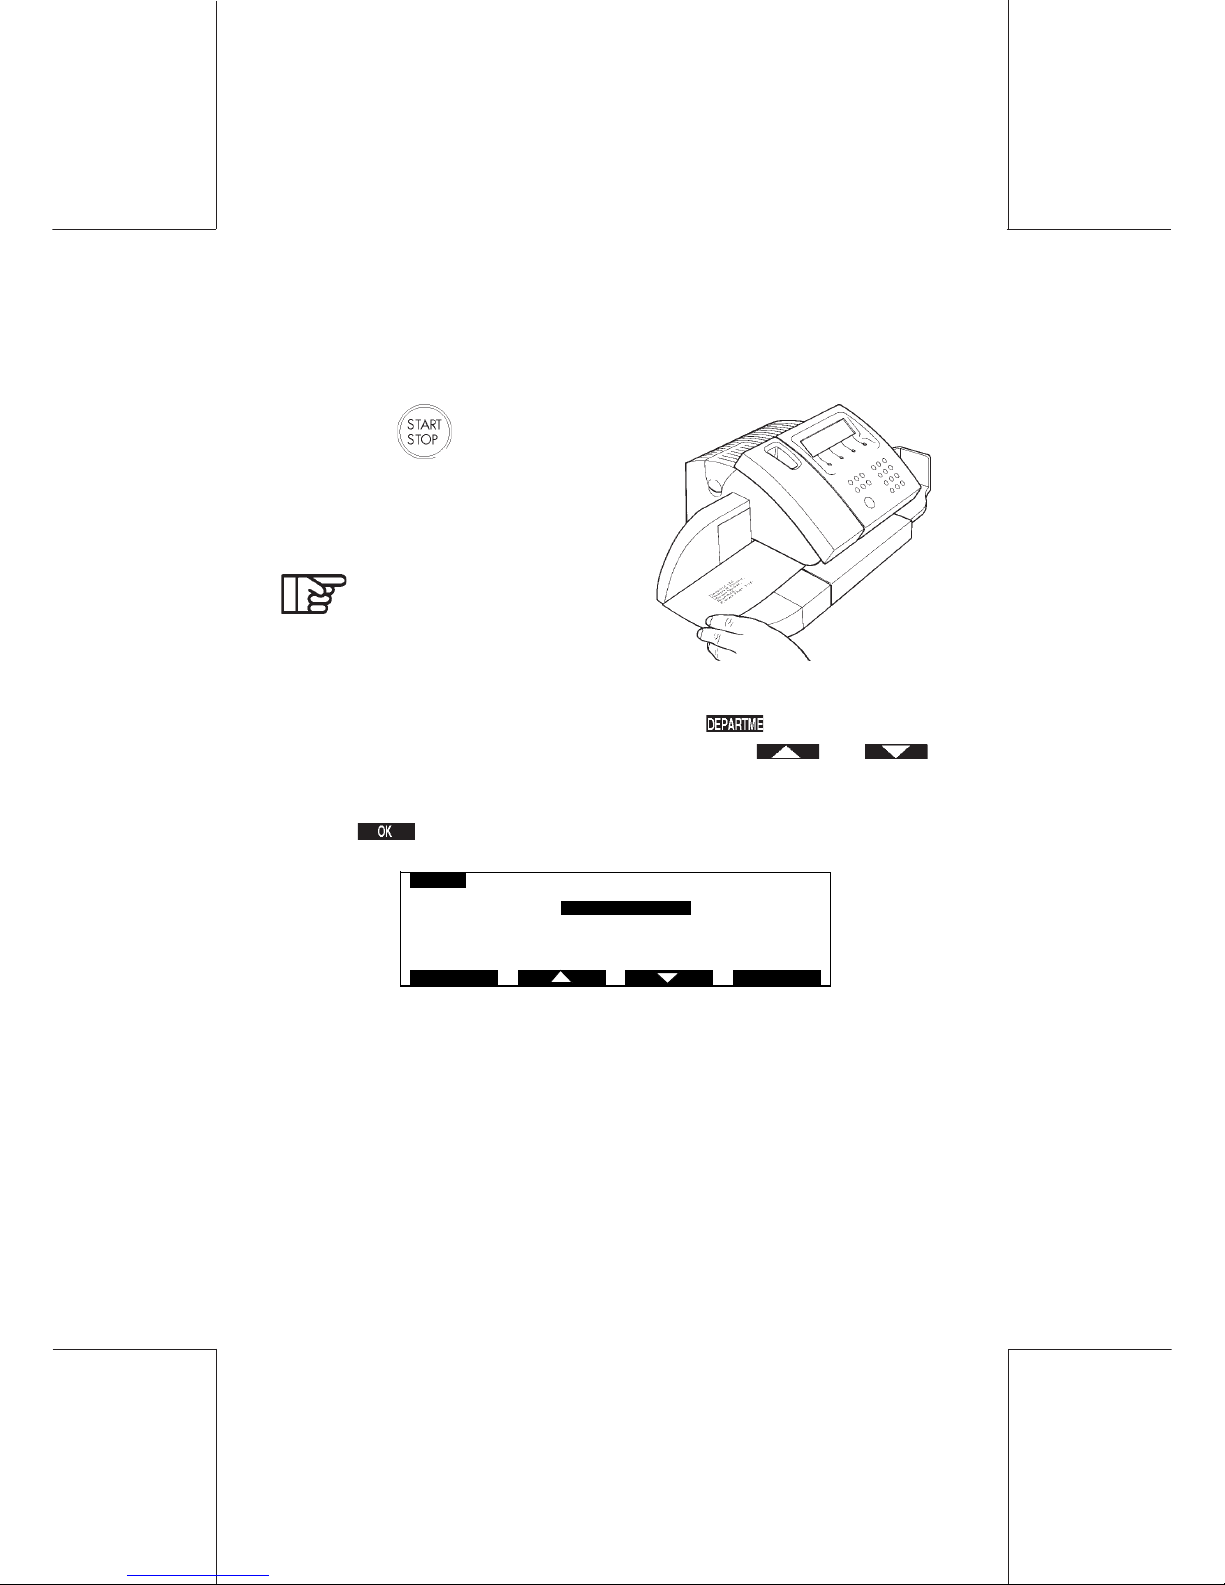
3.2.5 Printing an Envelope
Insert the envelope with the side to be printed facing upwards as
illustrated.
Press the button; after a short
pause, the motor will start.
Printed envelopes will subsequently
be deposited into the receiving tray.
For an envelope exceeding
3/8" thick, a label must be
used, refer to Printing labels.
3.2.6 To Change a Department
From Department Ready Mode, press the button to display
the list of available departments, then using the and
keys, or the appropriate number key, select your department from
the list.
Press to confirm.
If the department is protected, you will be prompted to enter your
new Department PIN.
If the PIN is correct the new Department Ready screen will be
observed:
DEPT
1 MARKETING
2 ACCOUNTS
3SALES
4
5
ESCAPE OK
Page 36
36
IJ40-0012-36
4127762B/B
1 1/24/2006
Printing postage
If the PIN is correct the new Department Ready screen will be
observed:
If the PIN is incorrect the prompt to enter the Department PIN will be
repeated.
To Log Off
From any screen, press the key to go to the Standby screen.
$150.20
ACCOUNTS
DEPT
03/19/02
MODE IMPRINT
$0.95
0
7
Page 37
IJ40-0012-37
4127762B/B
1 1/24/2006
37Postage clearing with autofeed
4. POSTAGE CLEARING WITH AUTOFEED
Used in conjunction with the WJ 65/95/110, the Automatic Feeder
permits a large range of envelope sizes and thicknesses to be
processed.
4.1 Envelope feeding
Check that all envelopes have been sorted into stacks of same size,
thickness and denomination with the address facing upwards and
the top edge of the envelopes all the same side of the stack.
Take one envelope from the stack and place it on the
platform, address side upwards with the top edge
against the left-hand side as shown.
Move the rear guide forward until the
edge of the envelope aligns with the
face of the guide.
Move the side guide towards the
envelope leaving sufficient clearance
to allow the envelope to move freely.
Return the envelope to its stack.
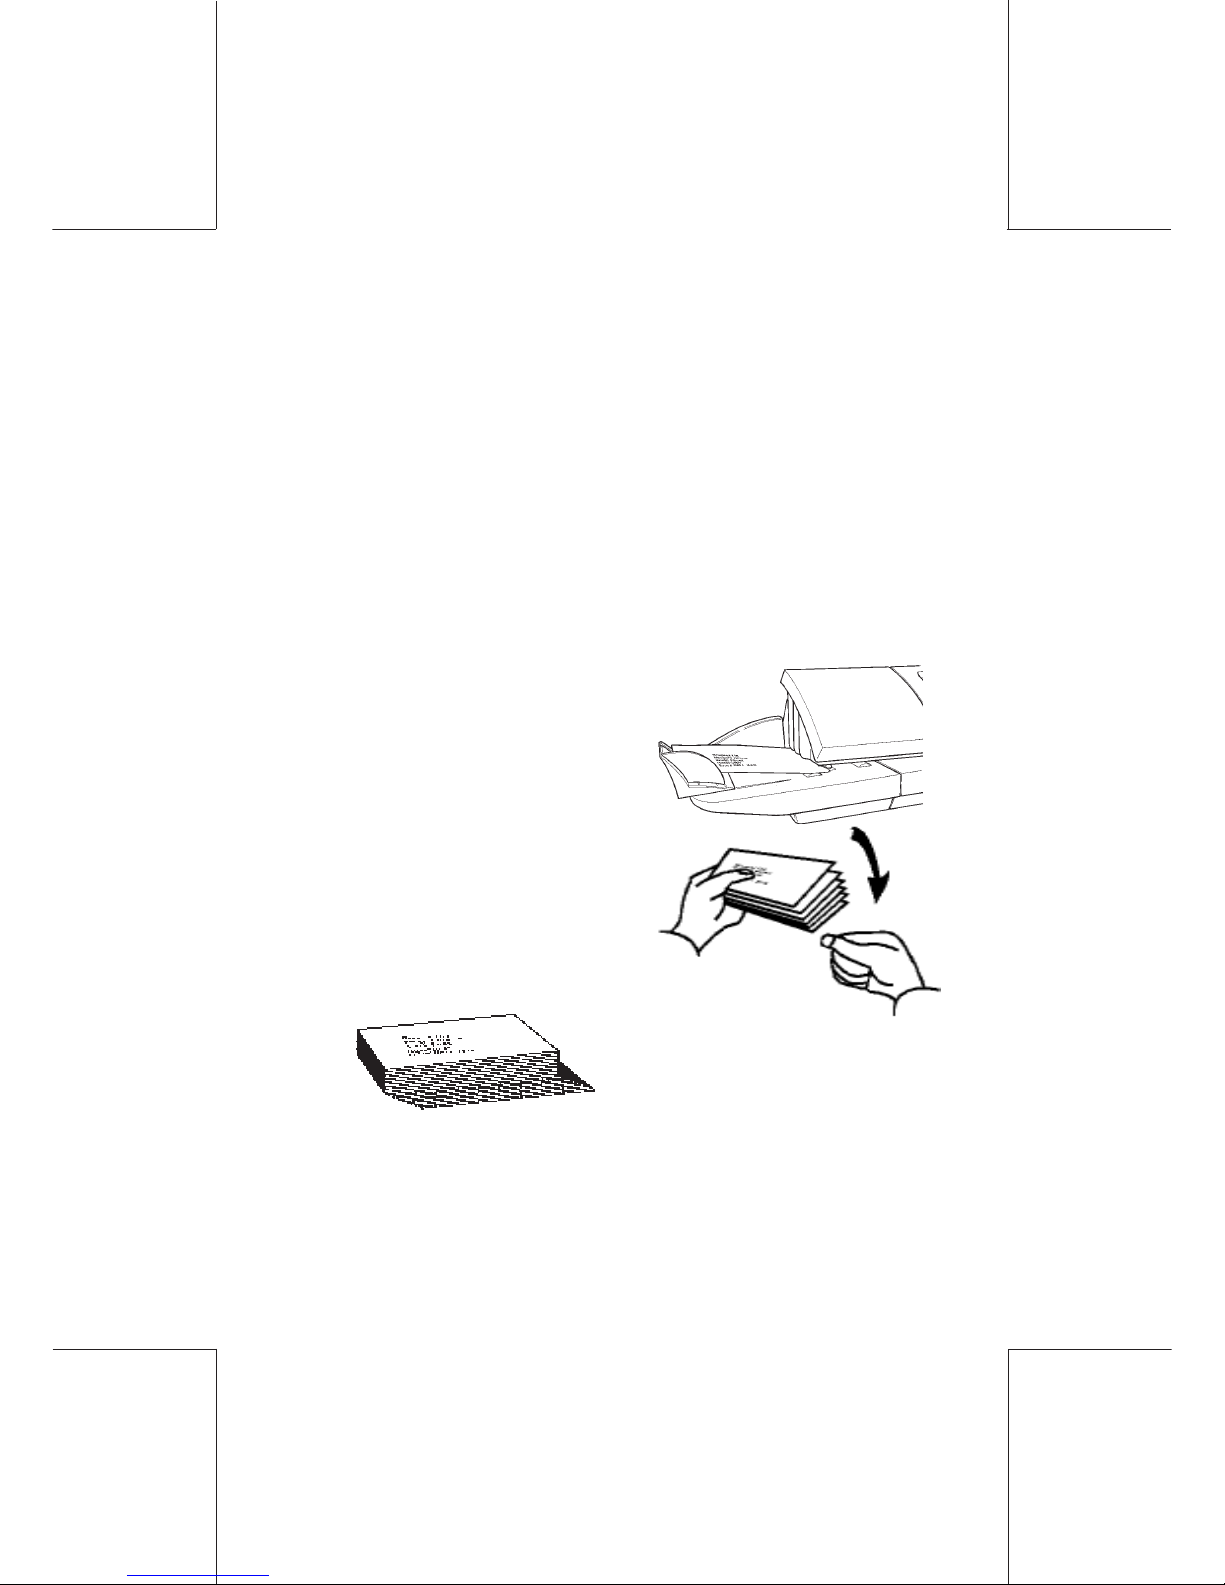
Fan the envelopes to separate them
Bevel the edge of the stack
Place the envelopes on the feed platform, with their upper edge
resting against the side guide as shown.
Page 38
38
IJ40-0012-38
4127762B/B
1 1/24/2006
Postage clearing with autofeed
Ensure that the envelopes are stacked along the side and front
guides. If necessary, re-adjust the side
guide by resting it against the envelopes
without pressing.
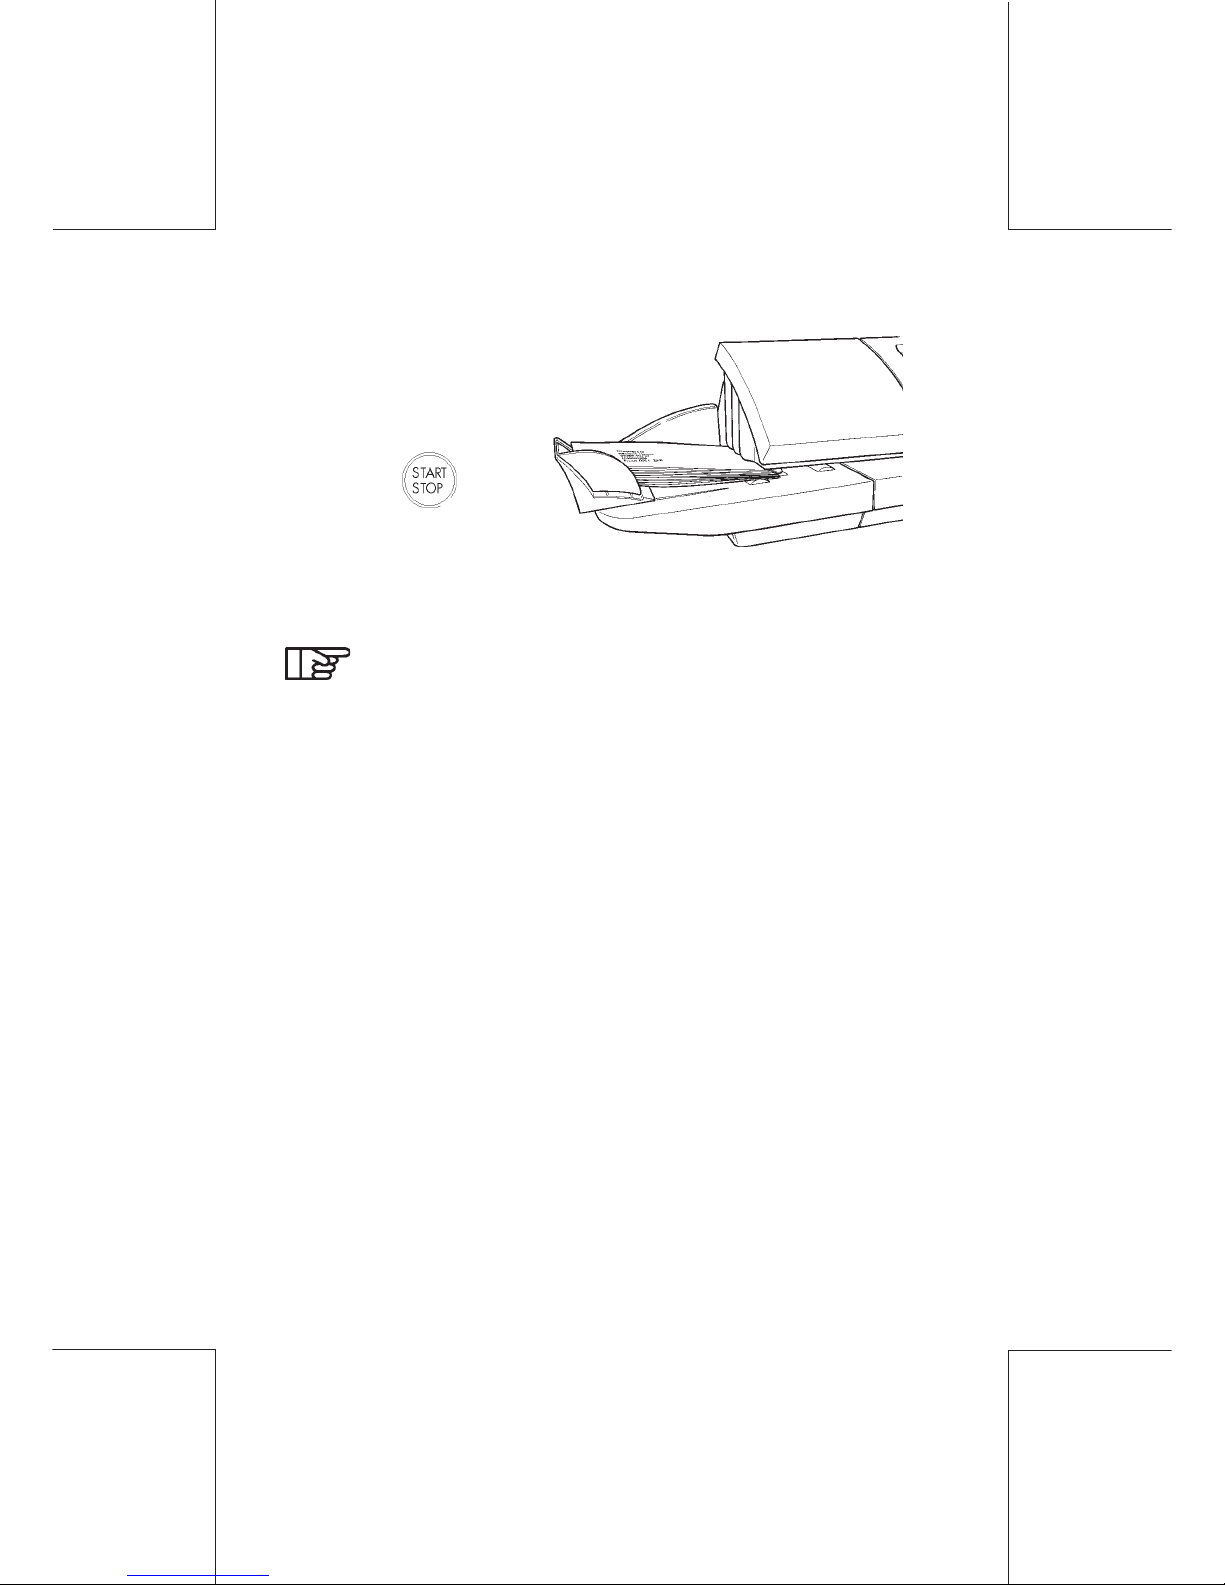
Press the button,
after a short pause the motor will start.
Printed envelopes will subsequently be deposited into the receiving
tray.
Envelopes exceeding 1/4" in thickness should be hand
fed, for an envelope exceeding 3/8" thick, a label must be
used, refer to Printing labels.
Page 39
IJ40-0012-39
4127762B/B
1 1/24/2006
39Postage clearing with autofeed
4.2 Envelope misfeed
In the unlikely event of an envelope misfeed, the following procedure
must be followed:
When using an Autofeed the whole of the following procedure
must be followed, when an Autofeed is not connected, start from
operation 7.
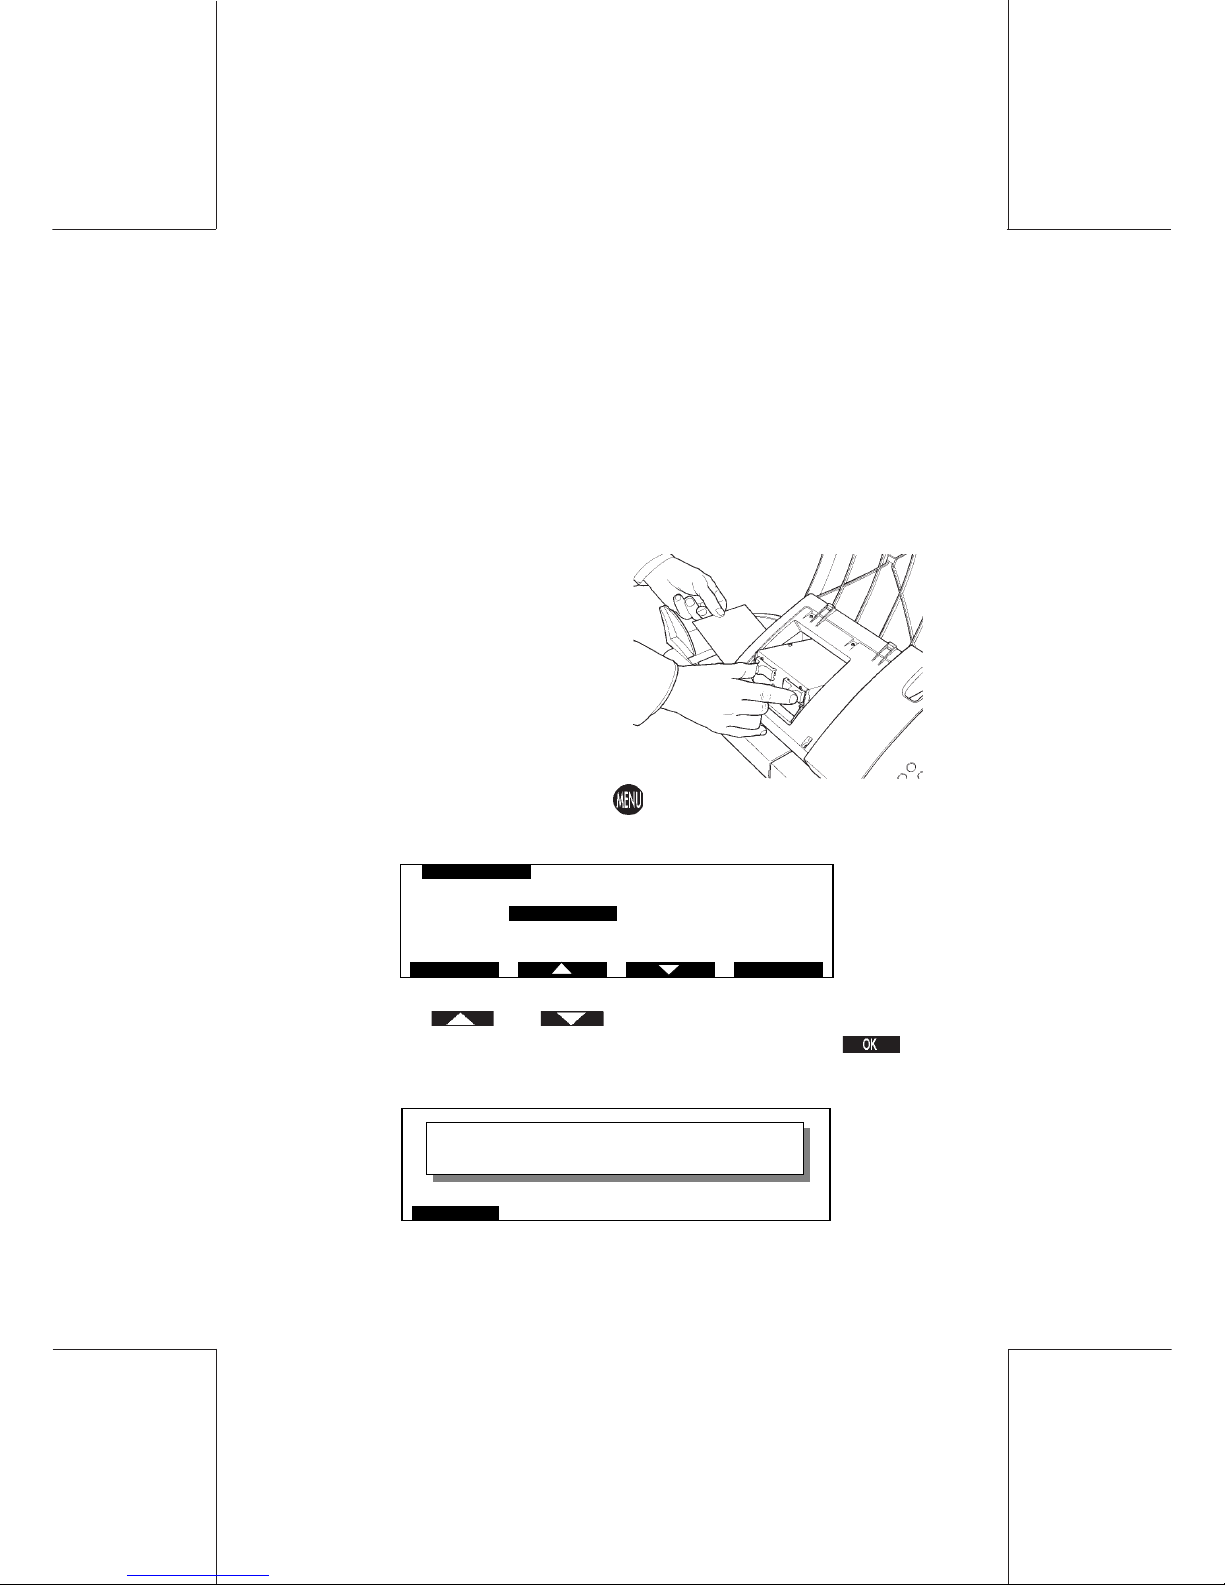
1. Remove all free envelopes from the feed tray;
2. Open the Autofeed top cover;
3. Using the thumb and fore finger,
squeeze the sliders to release
the feed mechanism as illustrated;
4. Remove the obstruction;
5. Close the feed mechanism by
applying downwards pressure to
the top of the feed mechanism
until it is heard to click home;
6. Close the Autofeed top cover.
7. From Ready Mode, press the key, the MAIN MENU screen
will be observed:
8. Using the and keys, or the appropriate number
key, move the cursor to CLEAR MAIL PATH and press to
confirm, the following screen will be observed:
ESCAPE
PRESS START
MAIN MENU
1REGISTERS
2 CARTRIDGE
3 SUPERVISOR
4 CLEAR MAIL PATH
5 WEIGHING MODE Differential
OKESCAPE
Page 40

40
IJ40-0012-40
4127762B/B
1 1/24/2006
Postage clearing with autofeed
9. Press the button.
After a short pause the track should clear and the screen return to
the MAIN MENU .
10. Press to return to Ready Mode.
You are now ready to resume processing
your mail
Page 41
IJ40-0012-41
4127762B/B
1 1/24/2006
41Printing labels
5. PRINTING LABELS
5.1 Filling the Label Dispenser
The label dispenser is an integral part of the WJ 65/95/110 Mailing
machine and when filled will hold up to 50 labels.
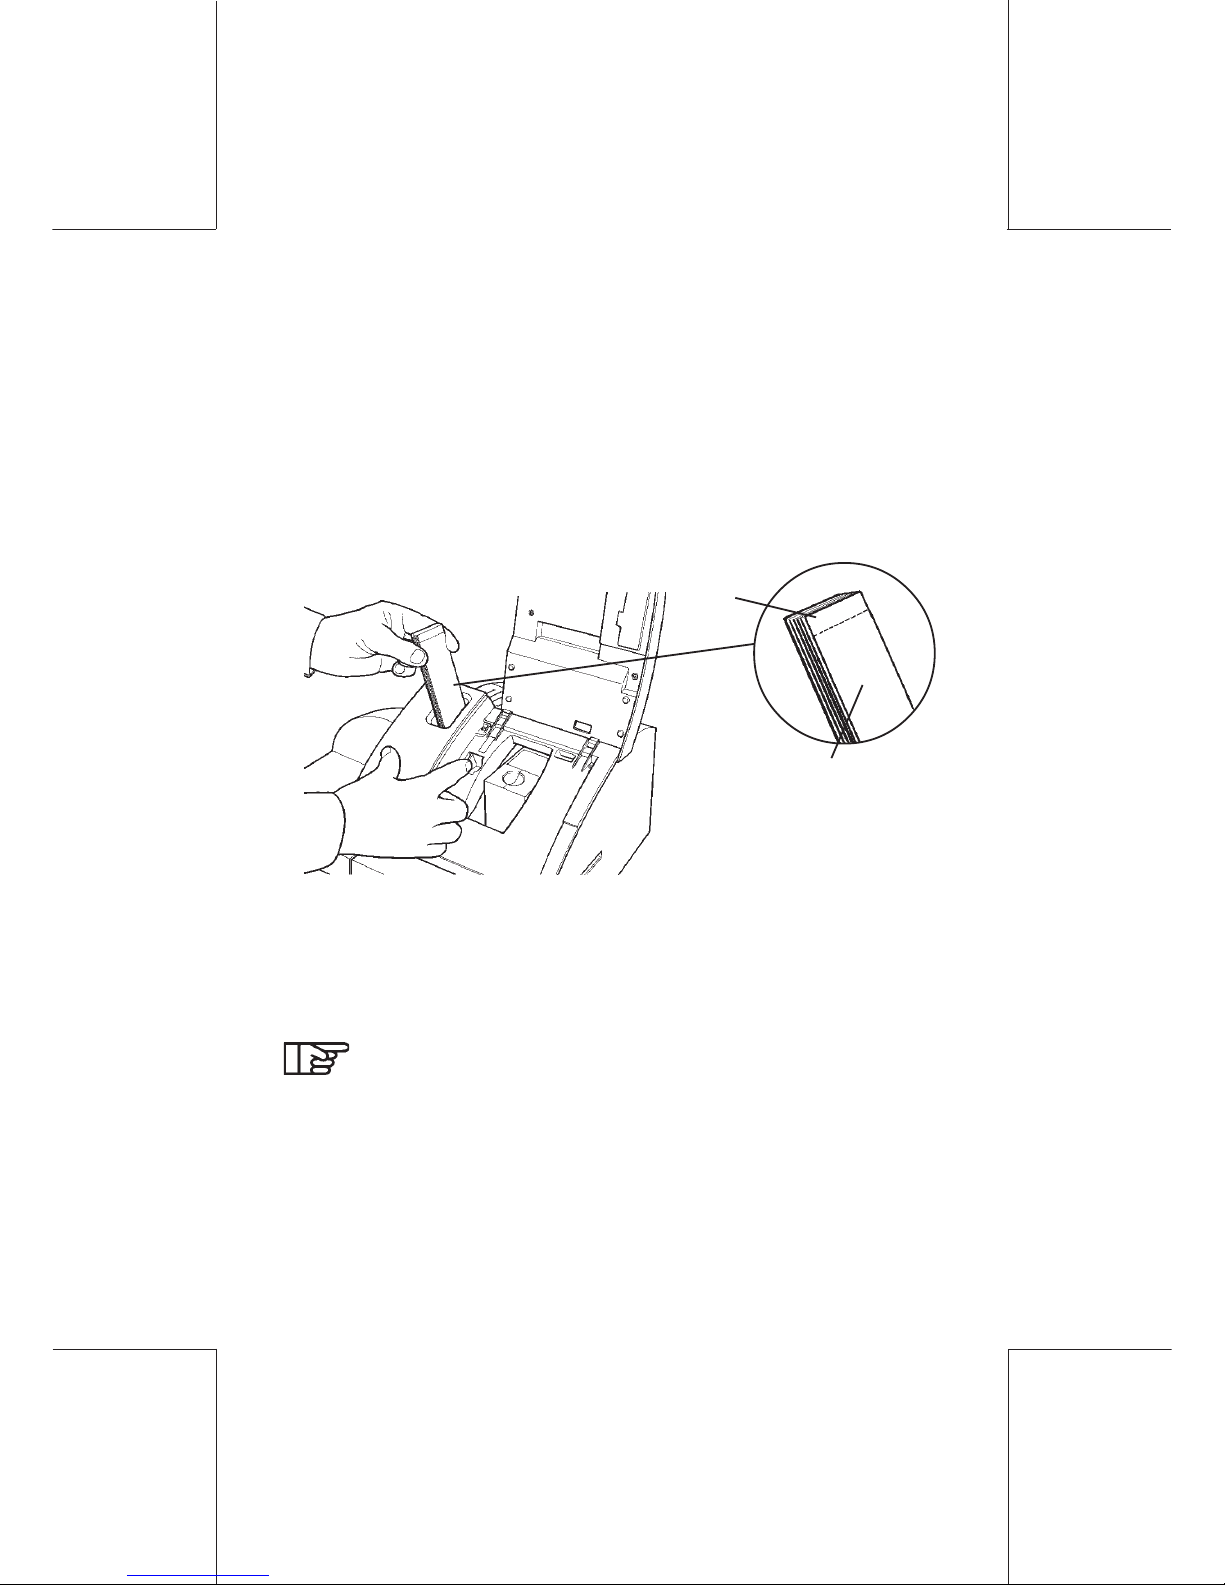
Open the top cover to gain access to the label release lever.
Labels are inserted in the dispenser with the tab uppermost and
the label side to be printed the direction of travel.
Using one finger, apply pressure to the label release lever thus
allowing the labels to drop into contact with the feed mechanism,
then release the lever.
Close the top cover.
Hasler Approved Labels are supplied in boxes of 1000.
Please refer to "Ordering Supplies" for information on ordering
Hasler approved supplies.
Tab
Printing
Surface
Page 42
42
IJ40-0012-42
4127762B/B
1 1/24/2006
Printing labels
5.2 Printing a Label
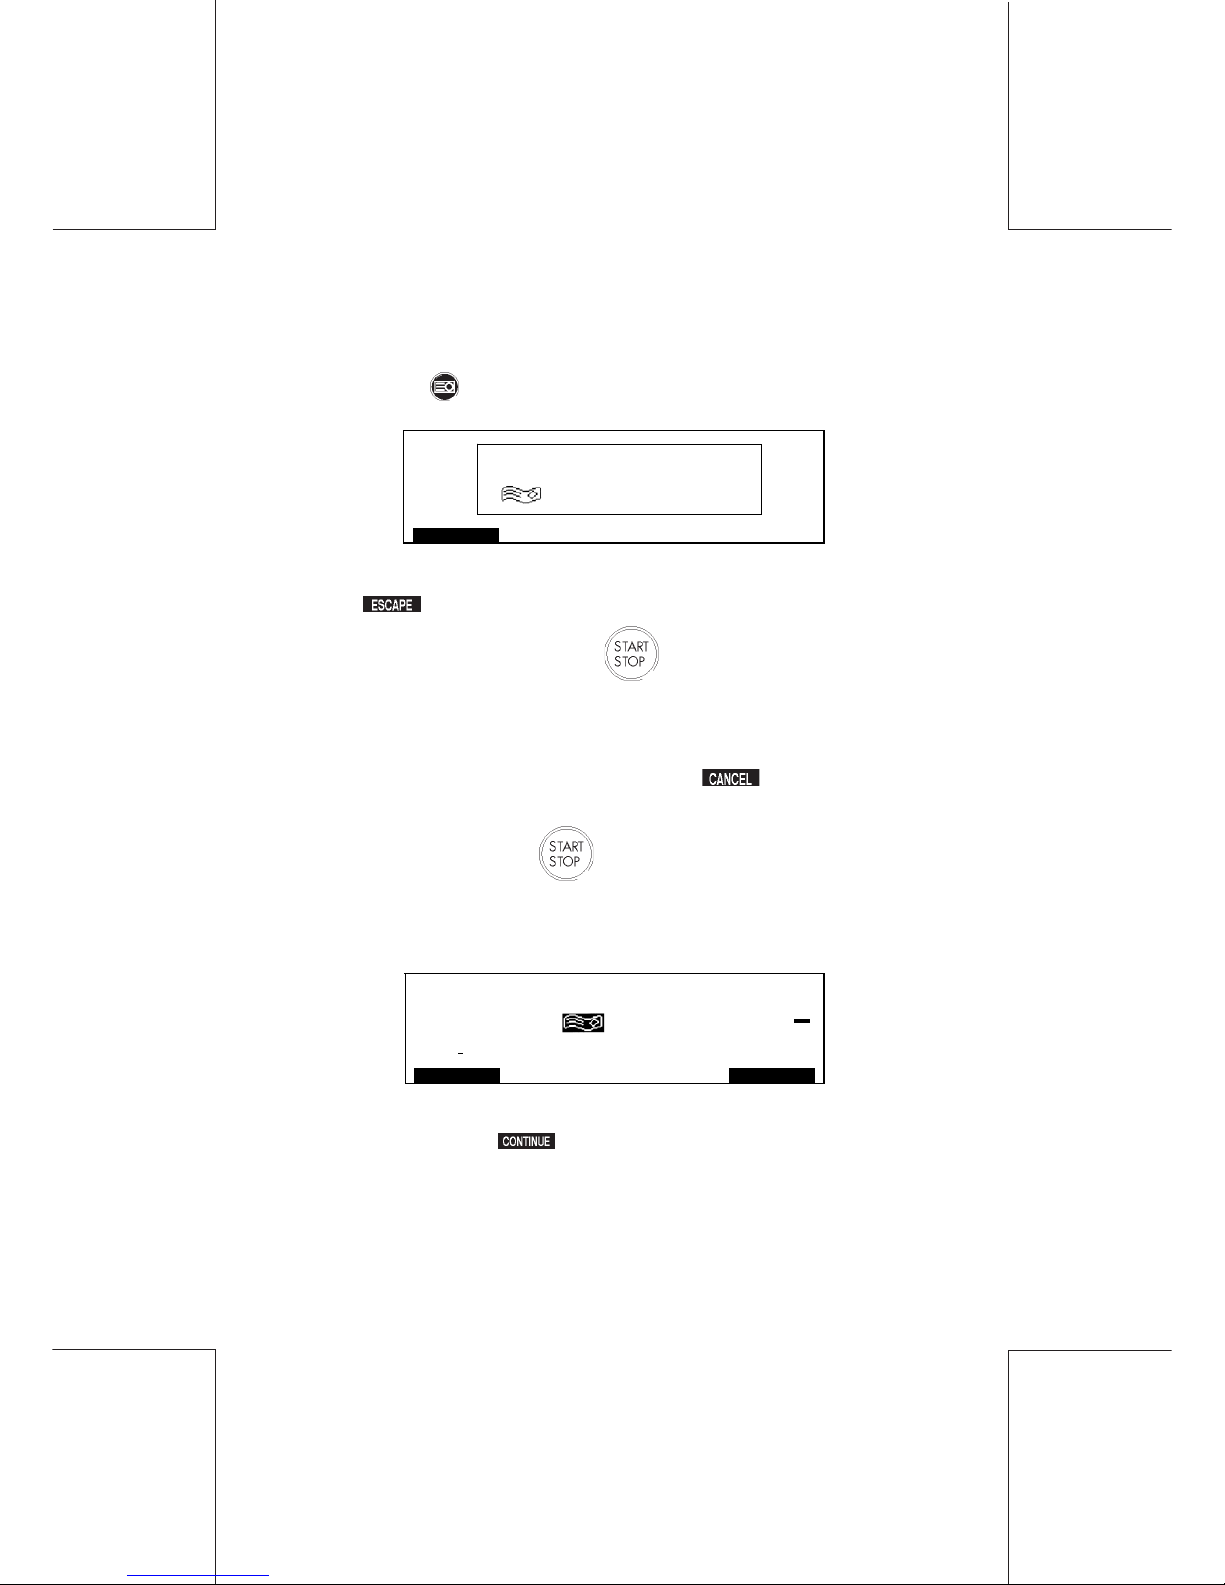
When feeding labels, first select the postage value required, press
the label key the following screen will be observed:
To return to the Ready Mode screen with Label selection cancelled,
press .
To print a single label press the button, a single label will be
printed at the displayed value.
If you are required to print more than one label, use the numerical
key pad to enter the number of labels to be processed (1 - 99).
If an incorrect quantity is entered, press and re-enter the
correct quantity.
To print labels press the button.
The machine will print automatically the required number of labels
at the displayed value.
If during the label printing process the following display is observed:
First replenish the label dispenser as detailed in "Filling the label
hopper", then press to complete the label printing process.
Take up the printed label, peel off the backing sheet and affix the
label to the parcel or packet.
The machine will return automatically to the Ready Mode screen
with label selection cancelled.
PLEASE ENTER NO. OF LABELS
1
ESCAPE
1
$150.20
7
ACCOUNTS
ESCAPE
03/19 /02
CONT IN UE
$0.95
0
Page 43
IJ40-0012-43
4127762B/B
1 1/24/2006
43Printing with weigh platform
6. PRINTING WITH WEIGH PLATFORM
BENEFITS OF USING A WEIGH PLATFORM
Used in conjunction with your WJ 65/95/110, the weigh platform will
weigh and calculate the correct rate and value for items up to 5 pounds.
Setting of values for printing is automatic.
When postal rates change, your machine may be updated by
installing a Rate Card which can be obtained from Hasler.
For information relating to the installation of new postal rates,
please refer to "Memory cards".
6.1 Weigh Platform Preparation
Ensure that the weigh platform is plugged in to the correct port at the
back of the machine (please refer to Controls and Features and that
the platform surface is clear of any obstruction.
From Ready mode, press .
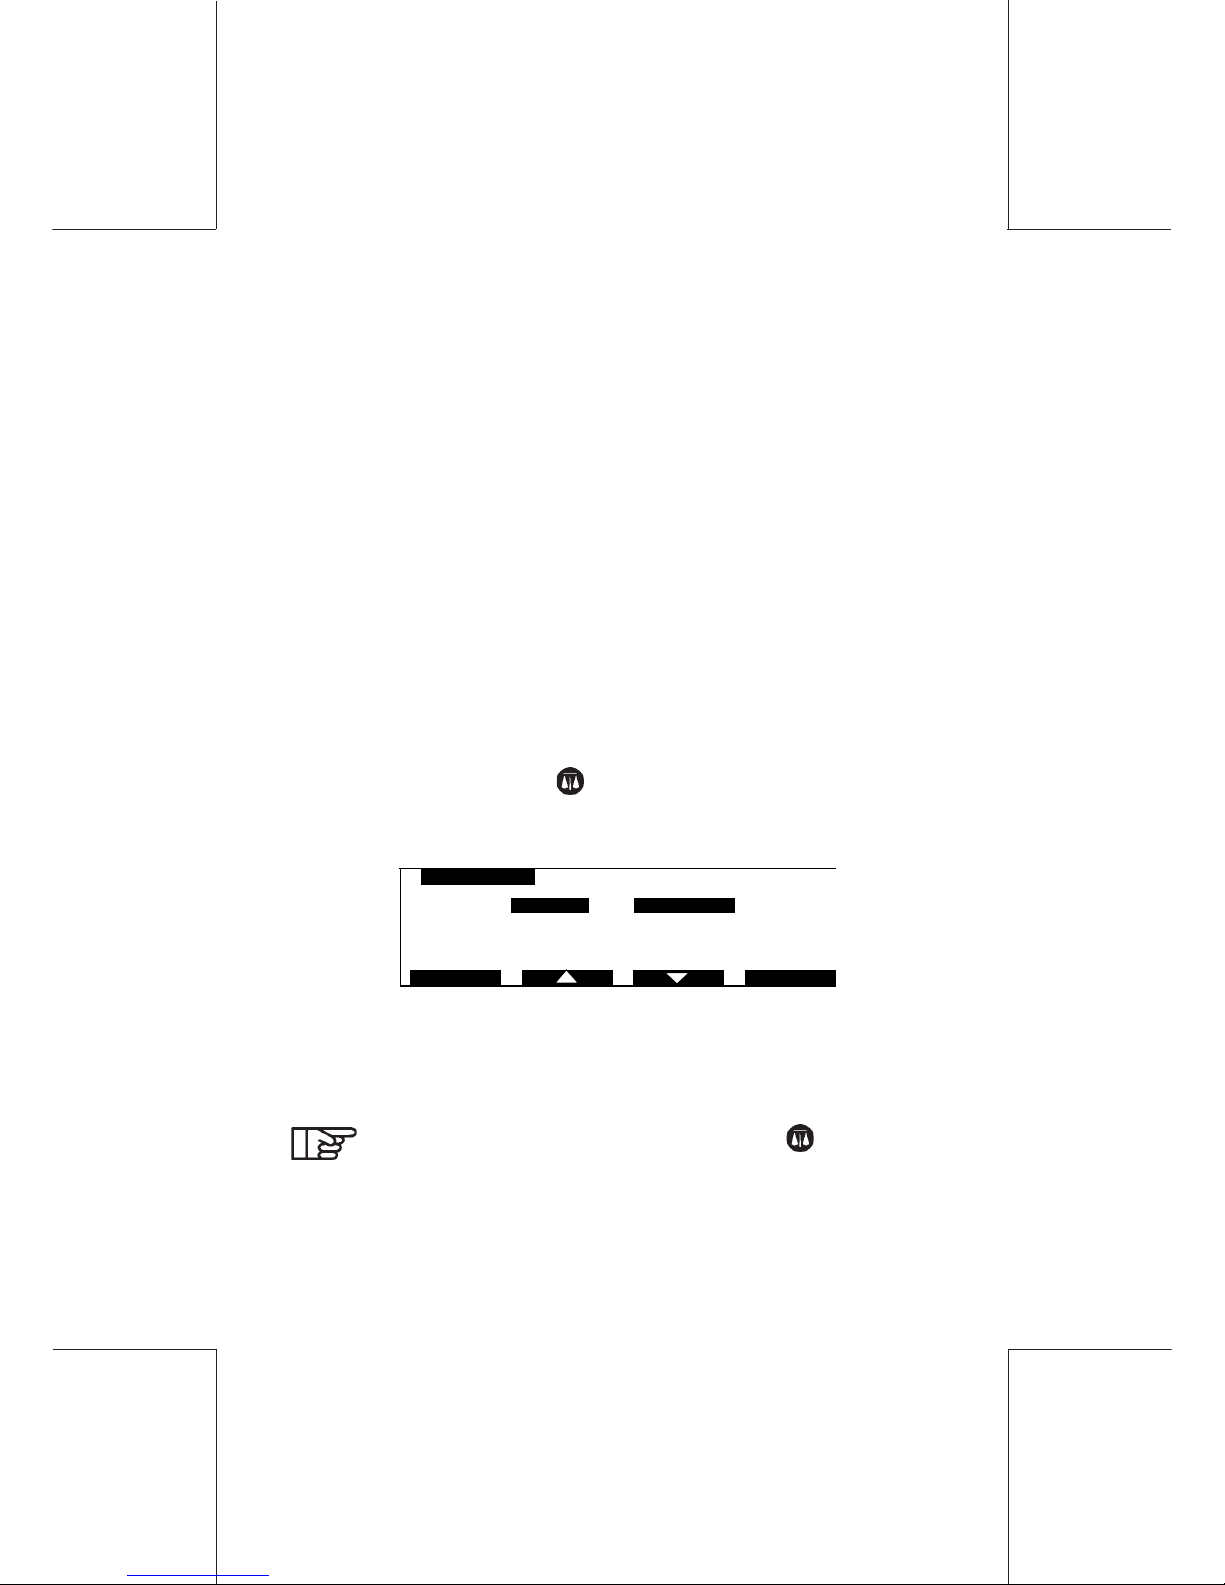
The WEIGH PLATFORM screen will now be observed:
Current RATE setting will be displayed.
If NO WEIGH PLATFORM is displayed instead of the Weight and
Postage Rate, check scale connection and start again.
If the weight indicated exceeds 0g press to Zero the
weigh platform.
1RATE 1st Class/Priority
2 FO RMAT Le tter
3 SERVICE NONE
0.0 0z
WEI GH PL A TFORM
ACCEPT MODIFY
Page 44
44
IJ40-0012-44
4127762B/B
1 1/24/2006
Printing with weigh platform
HOW DO I CALCULATE THE CORRECT POSTAGE AND
RATE?
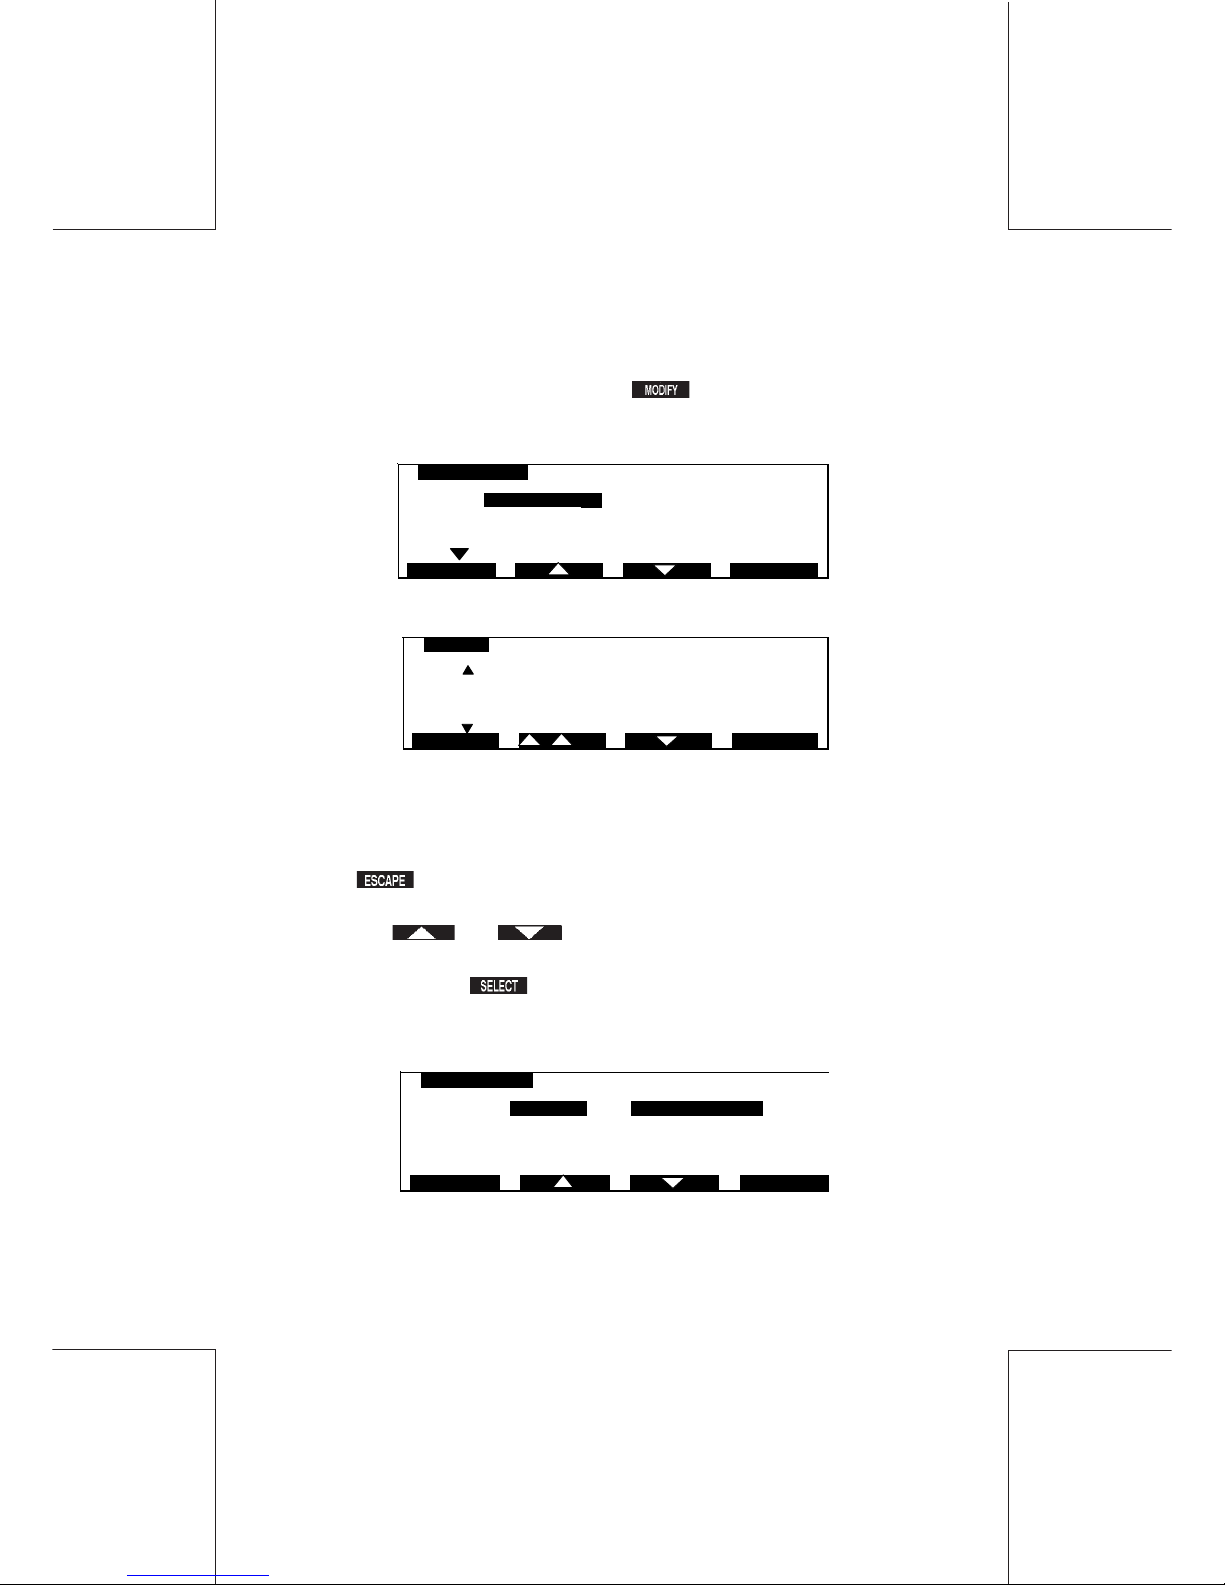
To change the RATE setting press , the RATES screen will
be observed:
A list of Postage Rates currently available will now be displayed.
To return to the previous screen with Rate setting unchanged,
press .
Using the and keys, or the appropriate number key,
select required Rate option from list, (e.g. 8 Global Pr Large
Envelope) press to confirm.
The following typical screen will now be observed:
1 1st Class/Priority
2 Priority Flat
3 Ex p r e ss P O -Add r
4 Parcel Po st
5 Post Card
SELECT
RATES
ESCAPE
RATES
6BPM Flat
7 Int Air Letter
8 Global Pr La rge Env
9 Global Pr S mall Env
10 Globa l Pr by We igh
ESCAP E SELECT
1 RATE Global Pr Large Env
2 FORM AT Letter
3 SERVICE NONE
0.0 0z
WEIGH PLA T FO RM
MODIFYACCEPT
Page 45
IJ40-0012-45
4127762B/B
1 1/24/2006
45Printing with weigh platform
For some rates, you will be prompted to make further selections.
Make your selection as required and return to the WEIGH
PLATFORM screen.
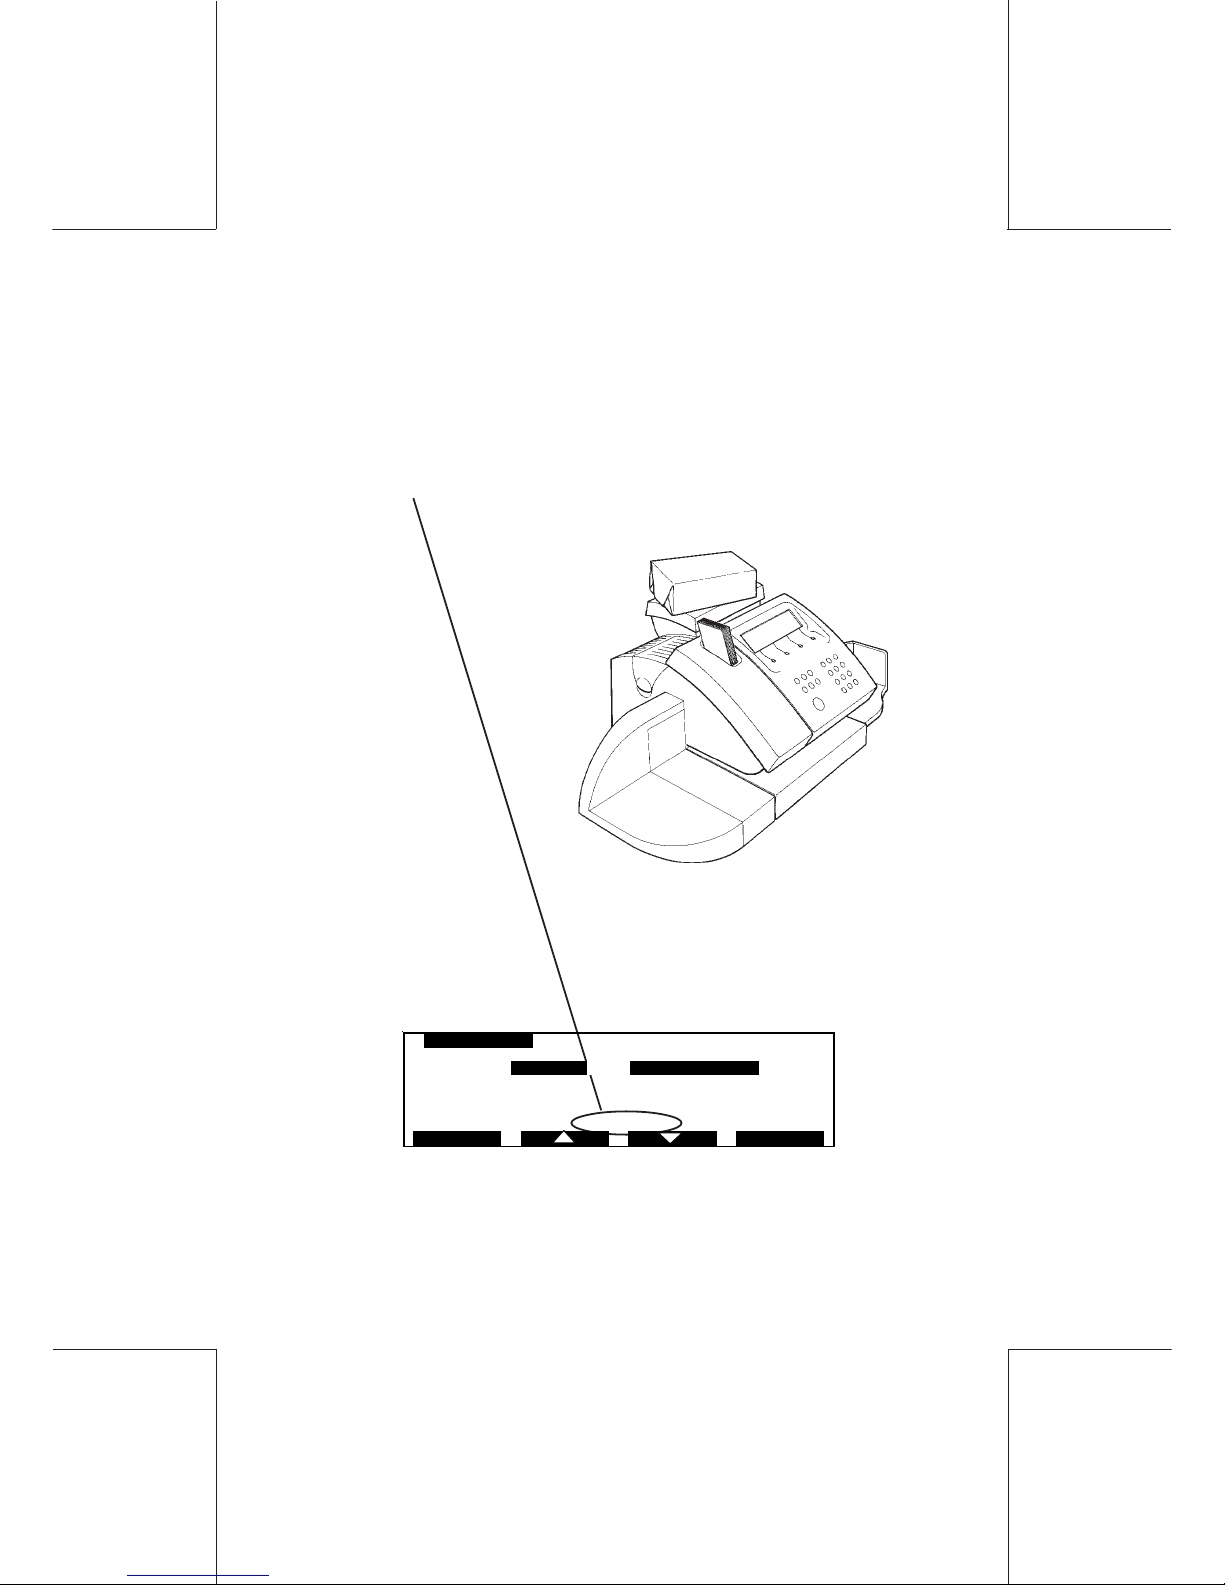
Place item to be weighed on the platform, the weight and postage
will be displayed.
1 RATE Global Pr Large Env
2FORMAT Letter
3SERVICE NONE
0.8 0z $0.25
MODIFYACCEPT
WEIGH PLATFORM
Page 46
46
IJ40-0012-46
4127762B/B
1 1/24/2006
Printing with weigh platform
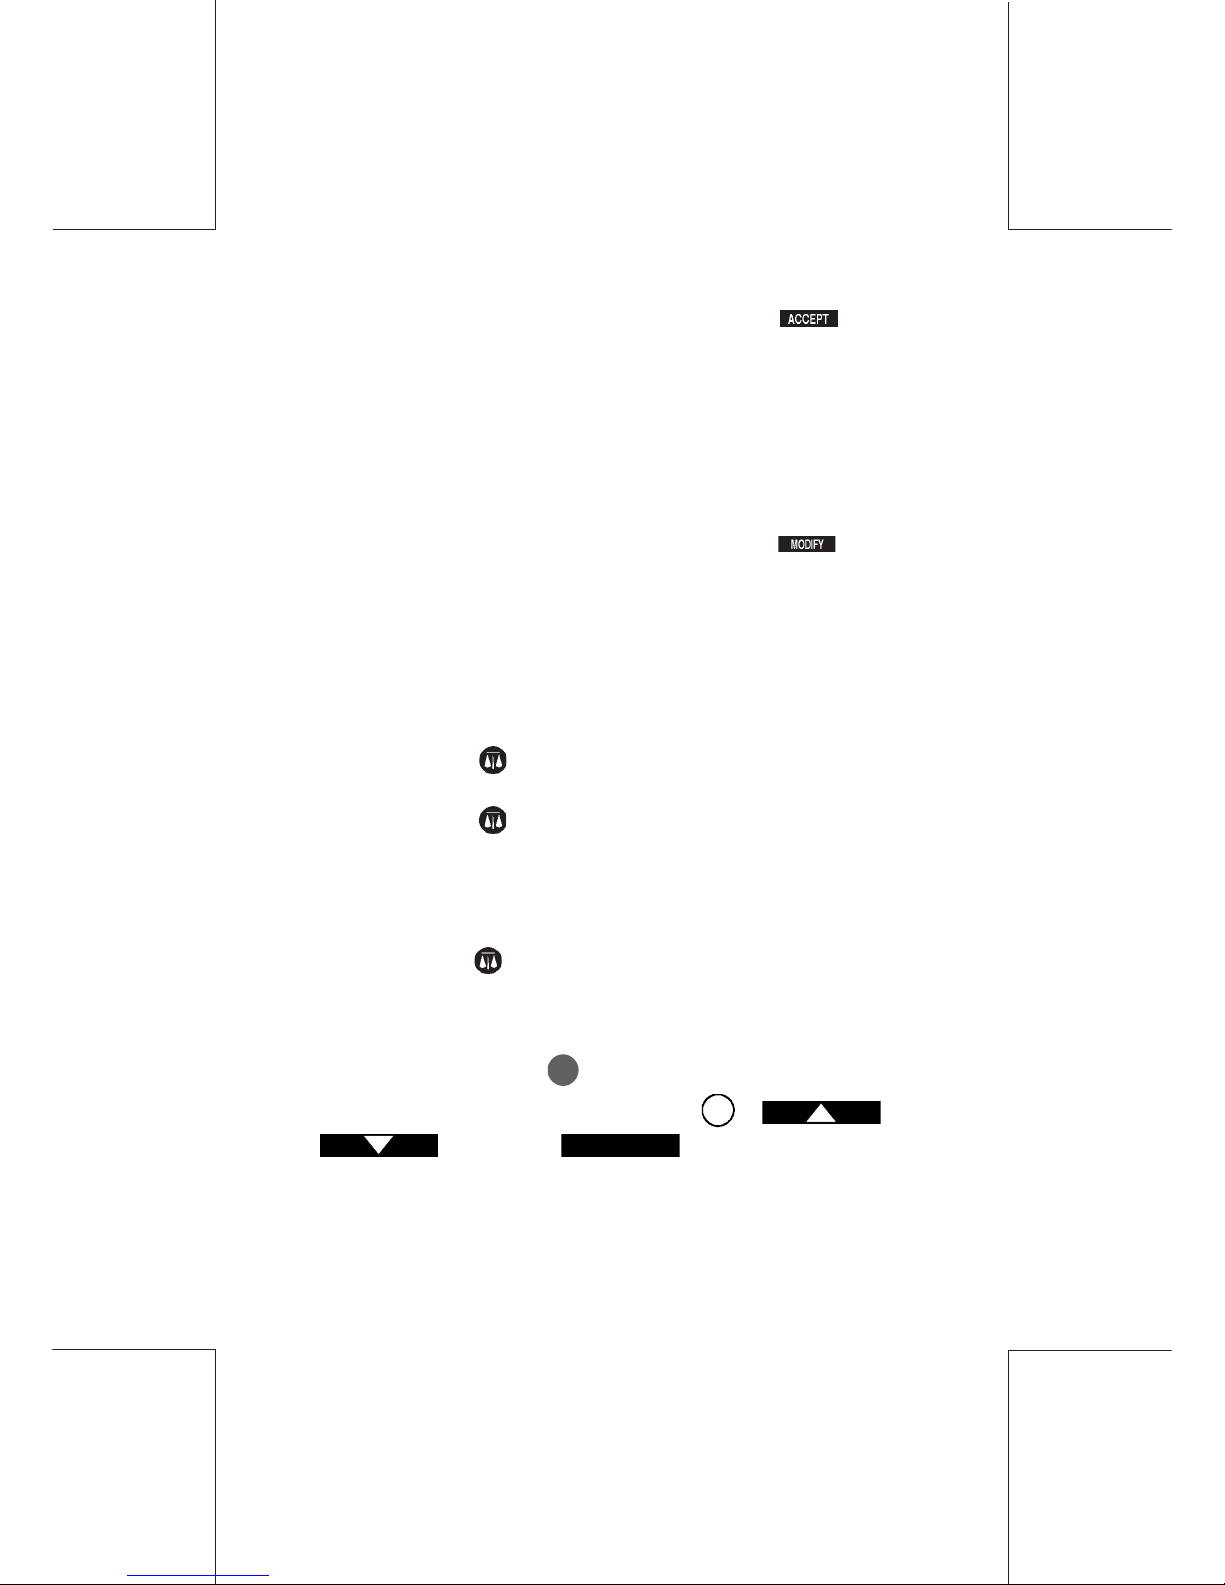
If you wish to accept the Postage displayed, press to return
to Ready Mode with the postage value displayed.
YOU ARE NOW READY TO PRINT POSTAGE AT
THE CORRECT POSTAGE VALUE
If you wish to reject the Postage displayed, press , you will
be returned to the RATES screen where you may revise your
settings.
To weigh further items repeat the procedure.
6.2 Tare Function
1. Press: .
2. Place an empty container on the platform.
3. Press: , zero weight will now be displayed.
4. Place the filled container on the platform. The weight
now displayed will be that
of the contents of the container.
5. To return to normal use, clear the scale platform and
press the displayed weight will return to 0g.
6.3 Using differential weighing (optional)
- In USER MODE, press
MENU
;
- Select "WEIGHING MODE" by pressing 5 or and
, and press
OK
; the following screen is
displayed:
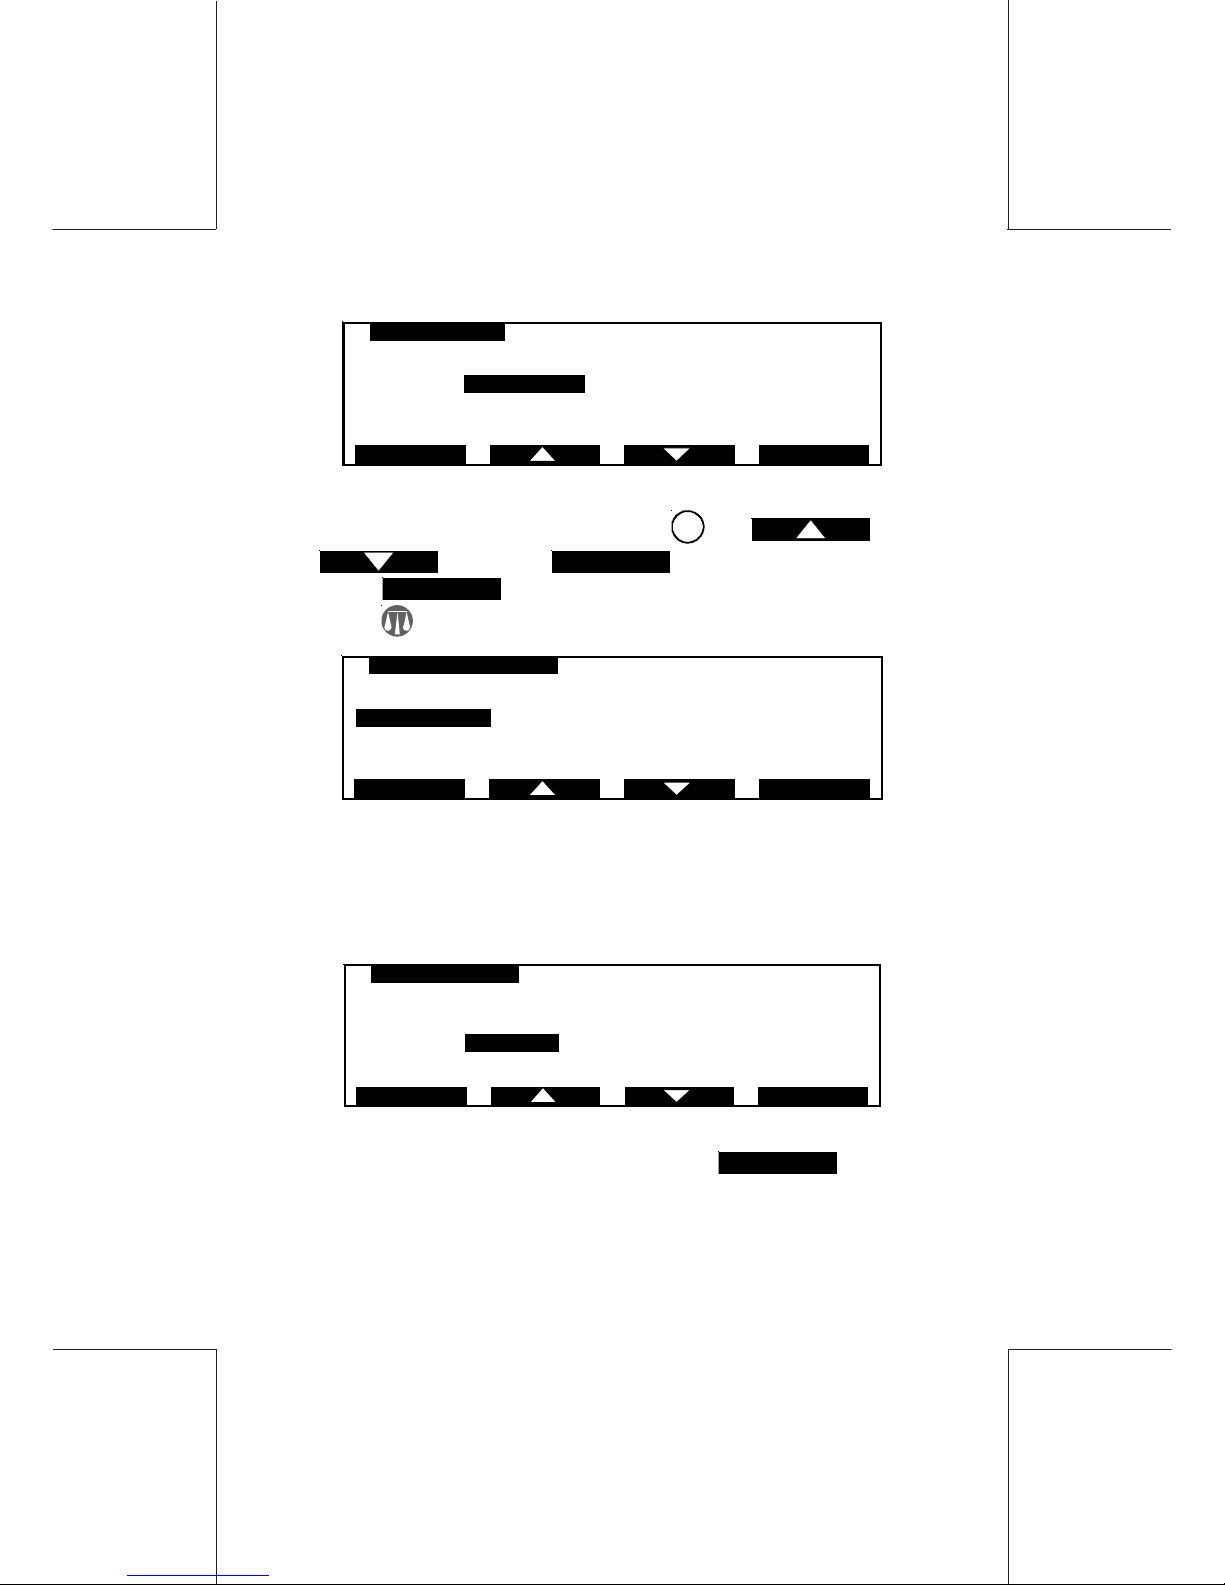
Page 47
IJ40-0012-47
4127762B/B
1 1/24/2006
47Printing with weigh platform
WEIGHING MODE
1 Standard
2 Differential
ESCAPE OK
- Select "Differential" by pressing 2 or and
, and press
OK
;
- Press
ESCAPE
.
- Press , the following screen is displayed:
DIFFERENTIAL WEIGHING
1 RATE 1 st Class/ Priority
2 DESTINATION Canada
3 DEPT PC ABSENT MODE
4 PRINT LABEL MODE No label
OK MODIFY
- Select RATE and DESTINATION like in Standard mode;
- Select DEPT if in PC CONNECTION MODE
- Select PRINT LABEL MODE and press modify (if necessary),
the following screen is displayed:
PRINT LA BEL MODE
1 No confirmation
2 A fter confir mation
3 No label
ESCAPE OK
- Select "No label" for example, and press
OK
.
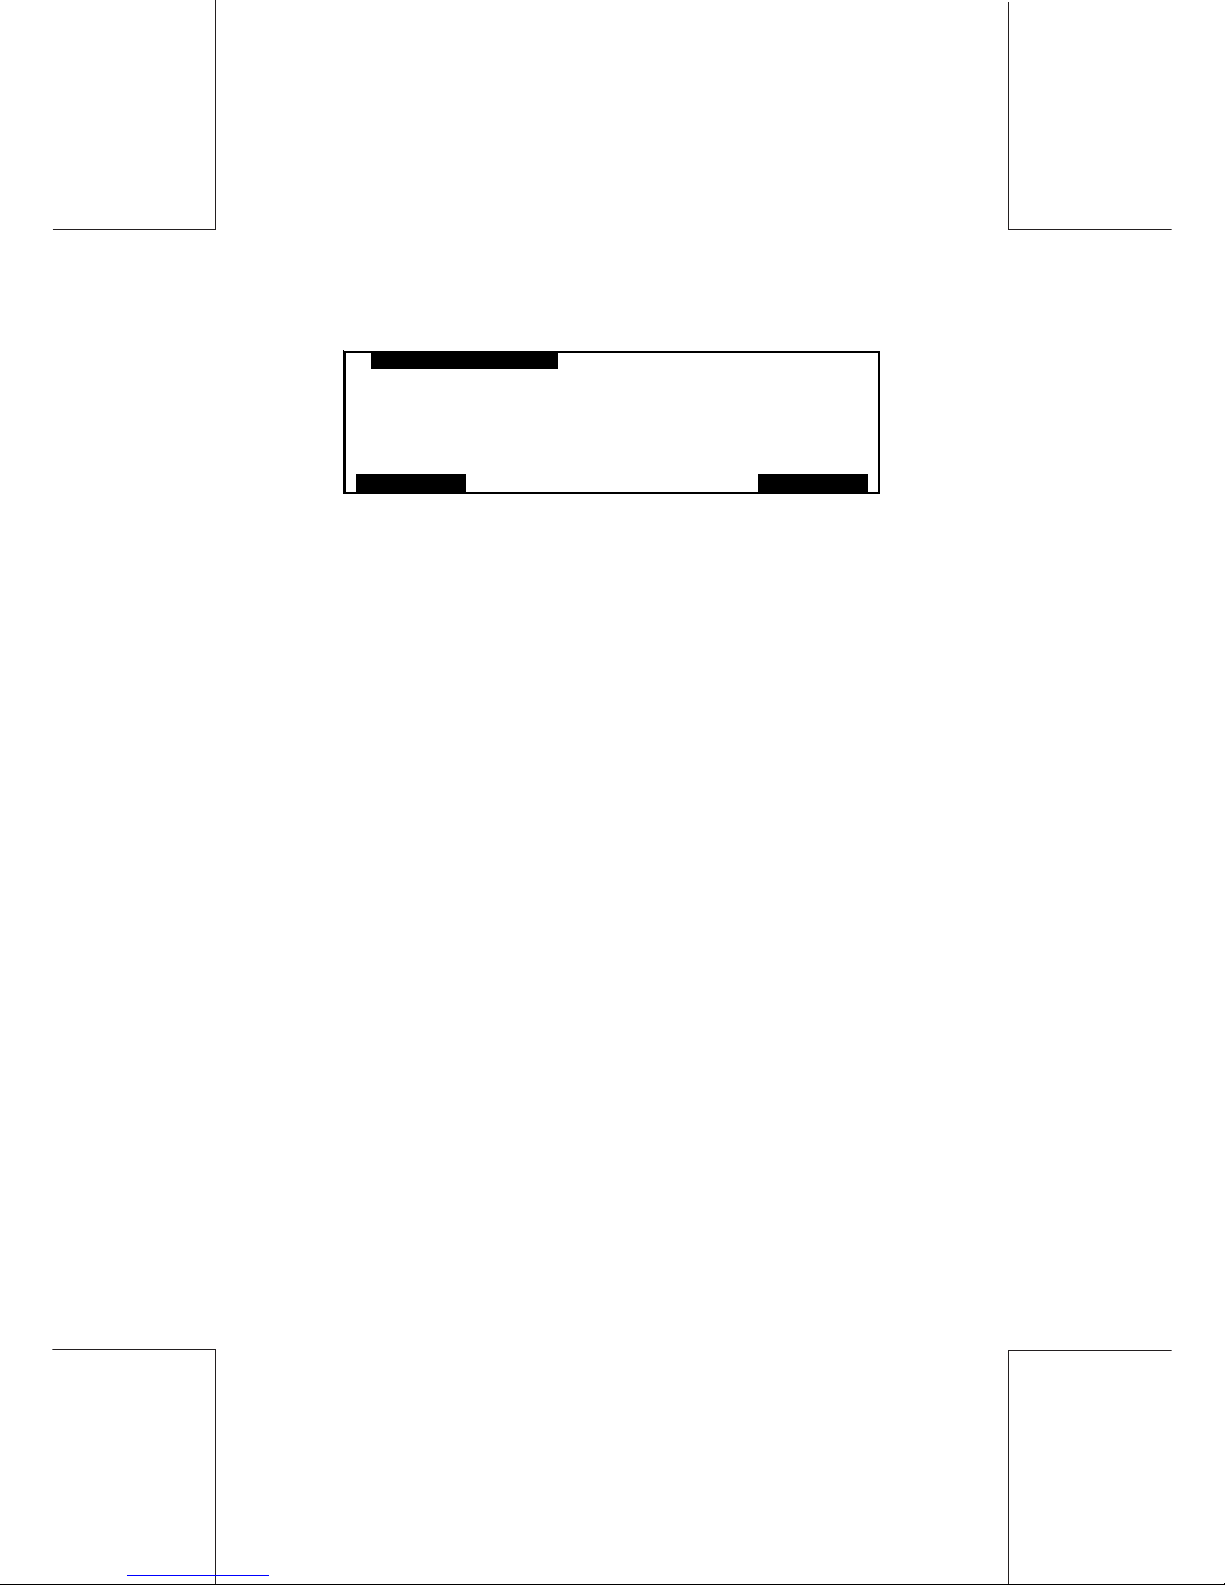
Page 48
48
IJ40-0012-48
4127762B/B
1 1/24/2006
Printing with weigh platform
The following screen is displayed:
DIFFERENTIAL WEIGHING
RATE 1C
REMOVE ONE ITEM DEST,
FORMAT Le
PC ABSENT MODE SERV. NONE
LABEL OFF
ESCAPE MODIFY
- Place a stack of items (if it is not yet done) on the weighing
platform, remove one item and print it.
Page 49

IJ40-0012-49
4127762B/B
1 1/24/2006
49Envelope moistener
7. ENVELOPE MOISTENER
Your WJ 65/95/110 Postage Meter used in conjunction with a
Moistener Unit will seal and print envelopes in a single operation.
The moistener may be set to non-seal mode if sealing is not
required enabling the unit to be used as a normal feed platform.
If seal only is required, the postage meter mode may be set to
SEAL ONLY (please refer to PRINTING OPTIONS).
The Moistener Unit may be used with an Autofeed Unit or with the
Hand Feed Platform.
7.1 Using the Envelope Moistener with Plain Platform
Set the Moistener ON/OFF control to (ON).
Press the button, after a short pause the motor will start.
Each envelope must be fed into the moistener unit with the flap
downwards and top edge against the platform mail guide. A two
handed approach is preferable with particular attention being paid
to keeping the envelope flat.
A continuous sliding action is made until the envelope contacts the
postage meter rollers. The envelope will be drawn through the
postage meter and deposited into the receiving tray.
7.2 Using the Envelope Moistener with an Autofeed
Set the Moistener ON/OFF control to (ON).
Load the Autofeed Platform as detailed in "Postage printing with
autofeed".
Press the button, after a short pause the motor will start and
sealed envelopes will be deposited into the receiving tray.
Page 50

50
IJ40-0012-50
4127762B/B
1 1/24/2006
Envelope moistener
7.3 Filling the reservoir
For safety, always disconnect the postage meter from the power
supply when filling the moistener reservoir, keep the postage
meter top cover closed and take care not to spill sealing solution
onto the machine.
Open the reservoir compartment and fill with sealing solution.
Close the reservoir compartment.
CAUTION
If sealing solution is spilt and enters the postage meter mechanism,
DO NOT reconnect the machine to the power supply, DO NOT
attempt to remove the machine covers, CONTACT HASLER
SERVICE.
Page 51
IJ40-0012-51
4127762B/B
1 1/24/2006
51Printing options
8. PRINTING OPTIONS
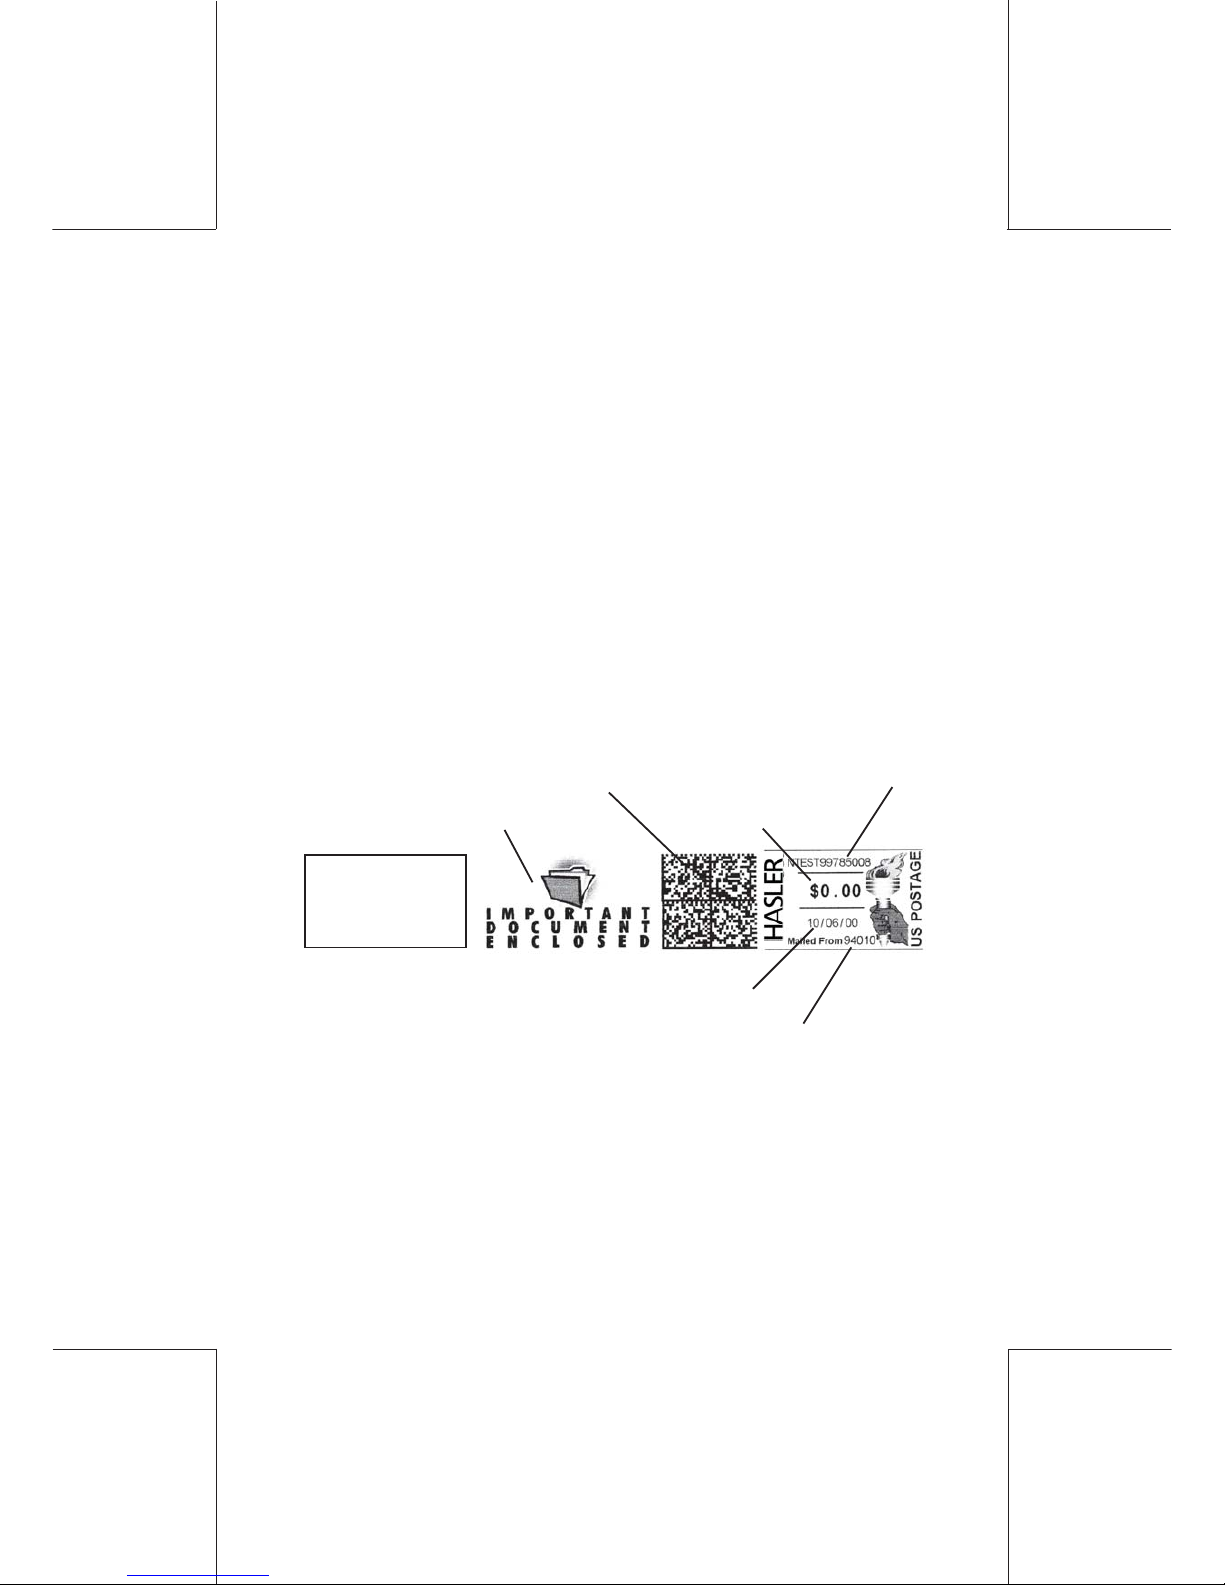
8.1 What can I print?
Your WJ 65/95/110 is capable of operating in various modes:
IN NORMAL (POSTAGE) MODE
In Normal (Postage) mode, you can print postage, select a message from a number of pre-loaded messages (Slogans) or select
one from two of your own design (when ordered from Hasler), in
addition to a Slogan you can compose and print your own Text, you
can also select from a number of Rate Dies. It is also possible to
Advance Date your mail by up to seven days.
When fitted with a Moistener it is also possible to moisten and seal
envelopes.
PostagePostage
Postage
Meter Serial No.
Date
Y our Zip Code
(Updated if you move)
Up to 8 preloaded
messages
2 messages to
customer design
Advertisement
Security Bar Code
Y our Own
T ext Message
Page 52

52
IJ40-0012-52
4127762B/B
1 1/24/2006
Printing options
8.2 Print mode selection
From Ready Mode, press the
key, the MODE selection
screen will be observed:
Current Mode will be displayed.
In addition to the Normal (Postage) Mode, the following functions
may be accessed directly from the MODE screen:
DATE ONLY : Prints the date instead of a postage
imprint.
SLOGAN ONLY : Prints a slogan instead of a postage
imprint.
SLOGAN & DATE : Prints a slogan and the date instead
of a postage imprint. .
STAMP: - NO DATE : Prints an undated stamp.
PASS THROUGH : Moistens and seals envelopes only.
Using the
and keys, or the appropriate number key,
select required option from list, (e.g. DATE ONLY) press to
confirm.
Or to return to Ready Mode with mode setting unchanged, press
.
MODE
1NORMAL
2DATE ONLY
3 SLOGAN ONLY
4 SLO GA N & DAT E
5 STAMP - NO DATE
OKESCAPE
DATE ONLY
03/19/02
ACCOUNTS
MODE IMPRINT
Page 53
IJ40-0012-53
4127762B/B
1 1/24/2006
53Printing options
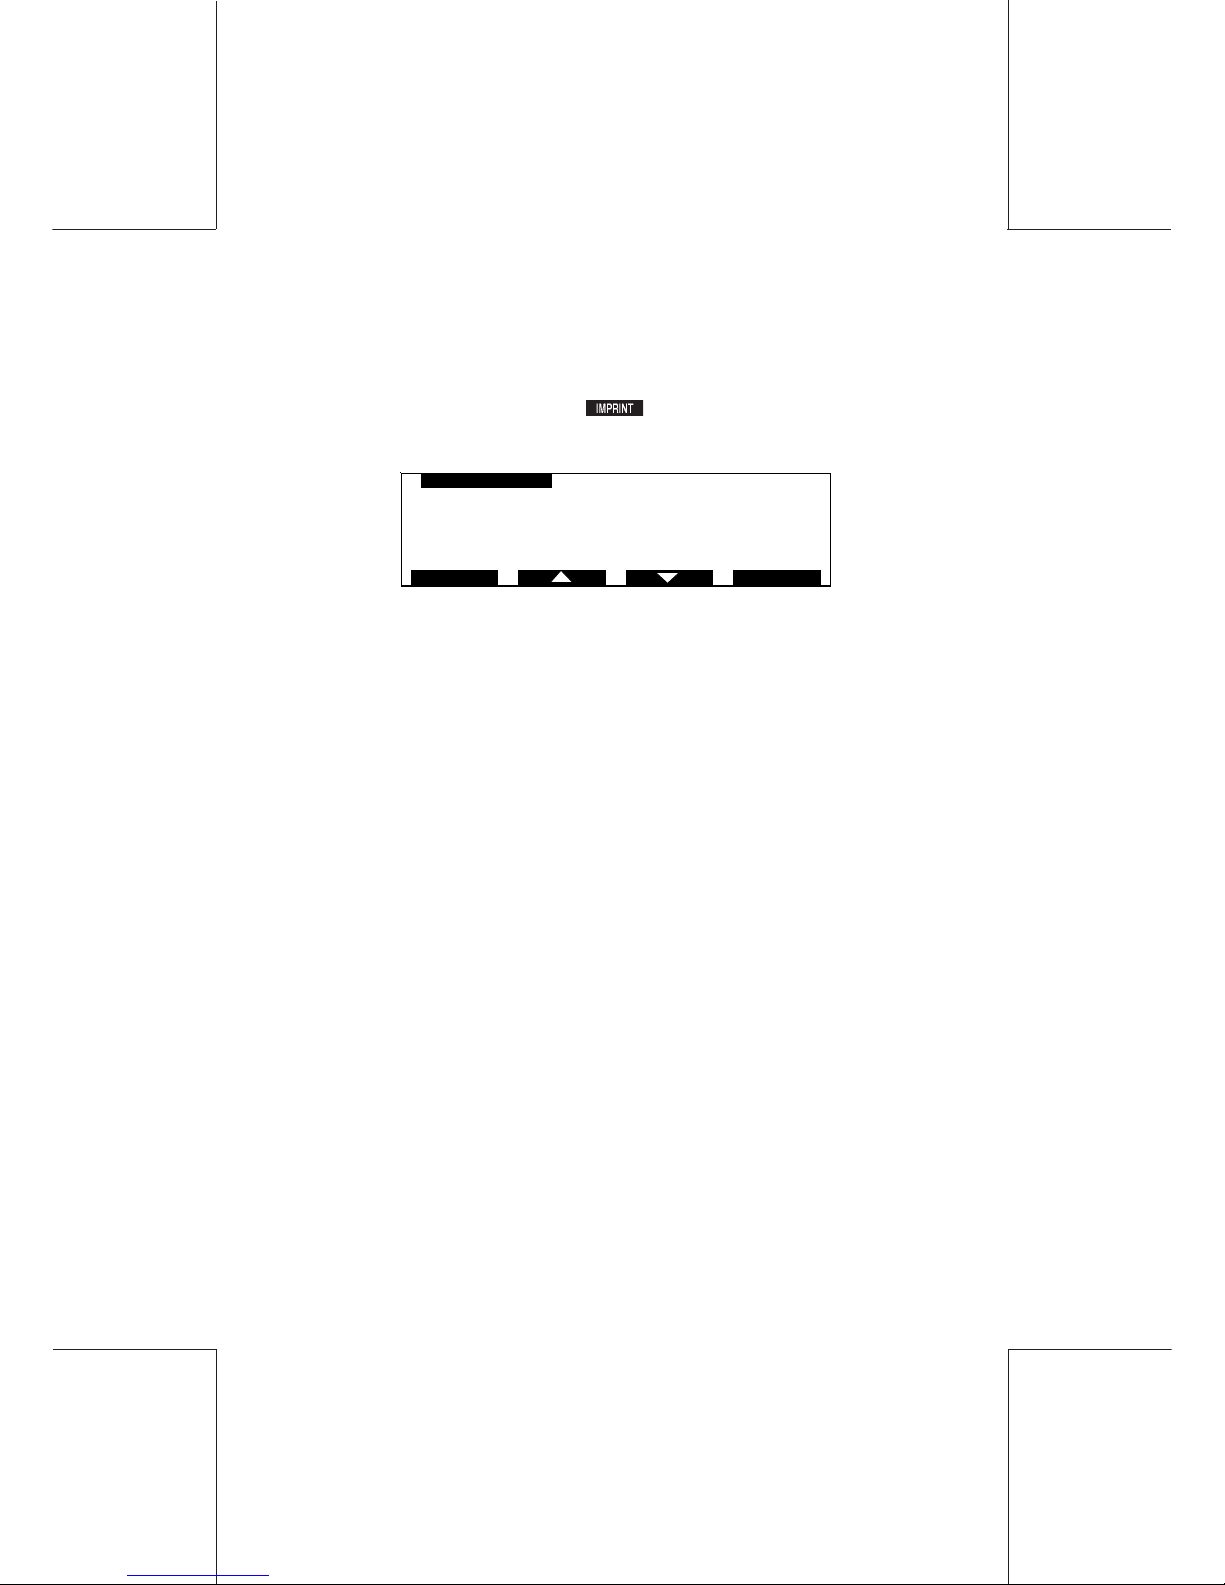
8.3 Modifying the imprint
The IMPRINT menu is used to modify the setup of the imprint as
follows:
From Ready Mode, press the key the following screen will
be observed:
SLOGAN : you may select one Slogan from seven pre-
loaded Slogans (plus two personalised Slogans).
RATE DIE : you may select one Rate Die from seven
pre-loaded Rate Dies.
DATE ADVANCE : the posting date can be advanced by up to
seven days.
8.3.1 Choosing a Slogan, Rate Die or Text
You can select a Slogan and/or Rate Die from a number of preloaded Slogans/Rate Dies.
Slogans, Rate Dies and Text messages may be combined within
the same Imprint. (Provided the envelope or label is long enough
to take the print).
The method of selection for Slogans, Rate Dies and Text is the
same, therefore for the purpose of this example we will illustrate
selecting a Slogan.
1 SLOGAN Air Mail
2 RATE DIE 1ST CLASS A CR
3 DATE ADVANCE 03/19/02
IMPRINT
ESCAPE OK
Page 54
54
IJ40-0012-54
4127762B/B
1 1/24/2006
Printing options
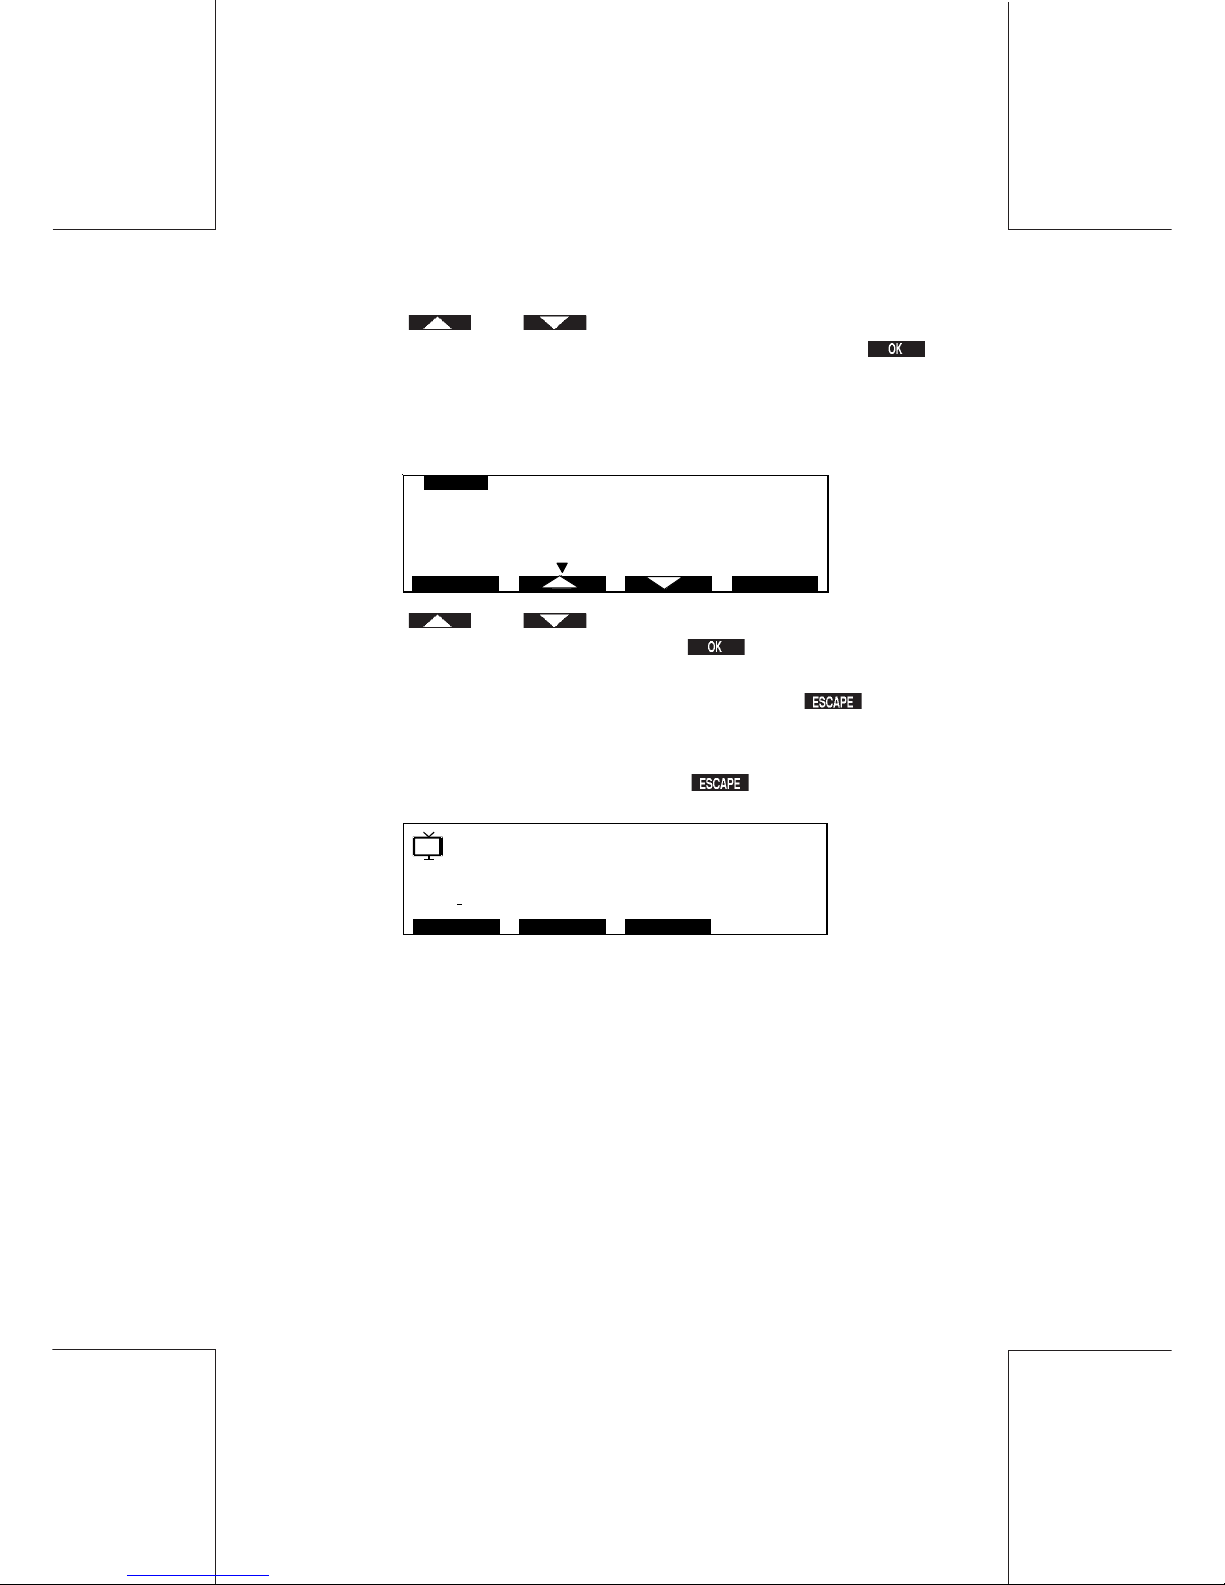
Using the and keys, or the appropriate number,
make your selection from the list e.g. 1 SLOGAN and press
to confirm, the SLOGAN screen will be observed.
If a slogan is already selected, that slogan will be highlighted:
Using the and keys, or the appropriate number,
make your selection from the list, press to confirm.
If you wish to retain the current selection, press the key to
return to the IMPRINT menu screen.
To return to Ready Mode screen press .
The Icon displayed in the top lefthand corner of the screen indicates
that a slogan has been selected.
8.3.2 Date Advance (for Pre Dating Mail)
Your machine is fitted with its own calendar/clock, therefore current
date setting is automatic. If you wish to prepare mail ahead of time
it is possible to advance the posting date by up to seven days.
$150.20
7
ACCOUNTS
DEPT IMPRINTMODE
03/19/02
$0.00
0
SLOGAN
1OFF
2 Air Mail
3 First Class
4 Recycle
5 S. Gr etting s
OKESCAPE
Page 55
IJ40-0012-55
4127762B/B
1 1/24/2006
55Printing options
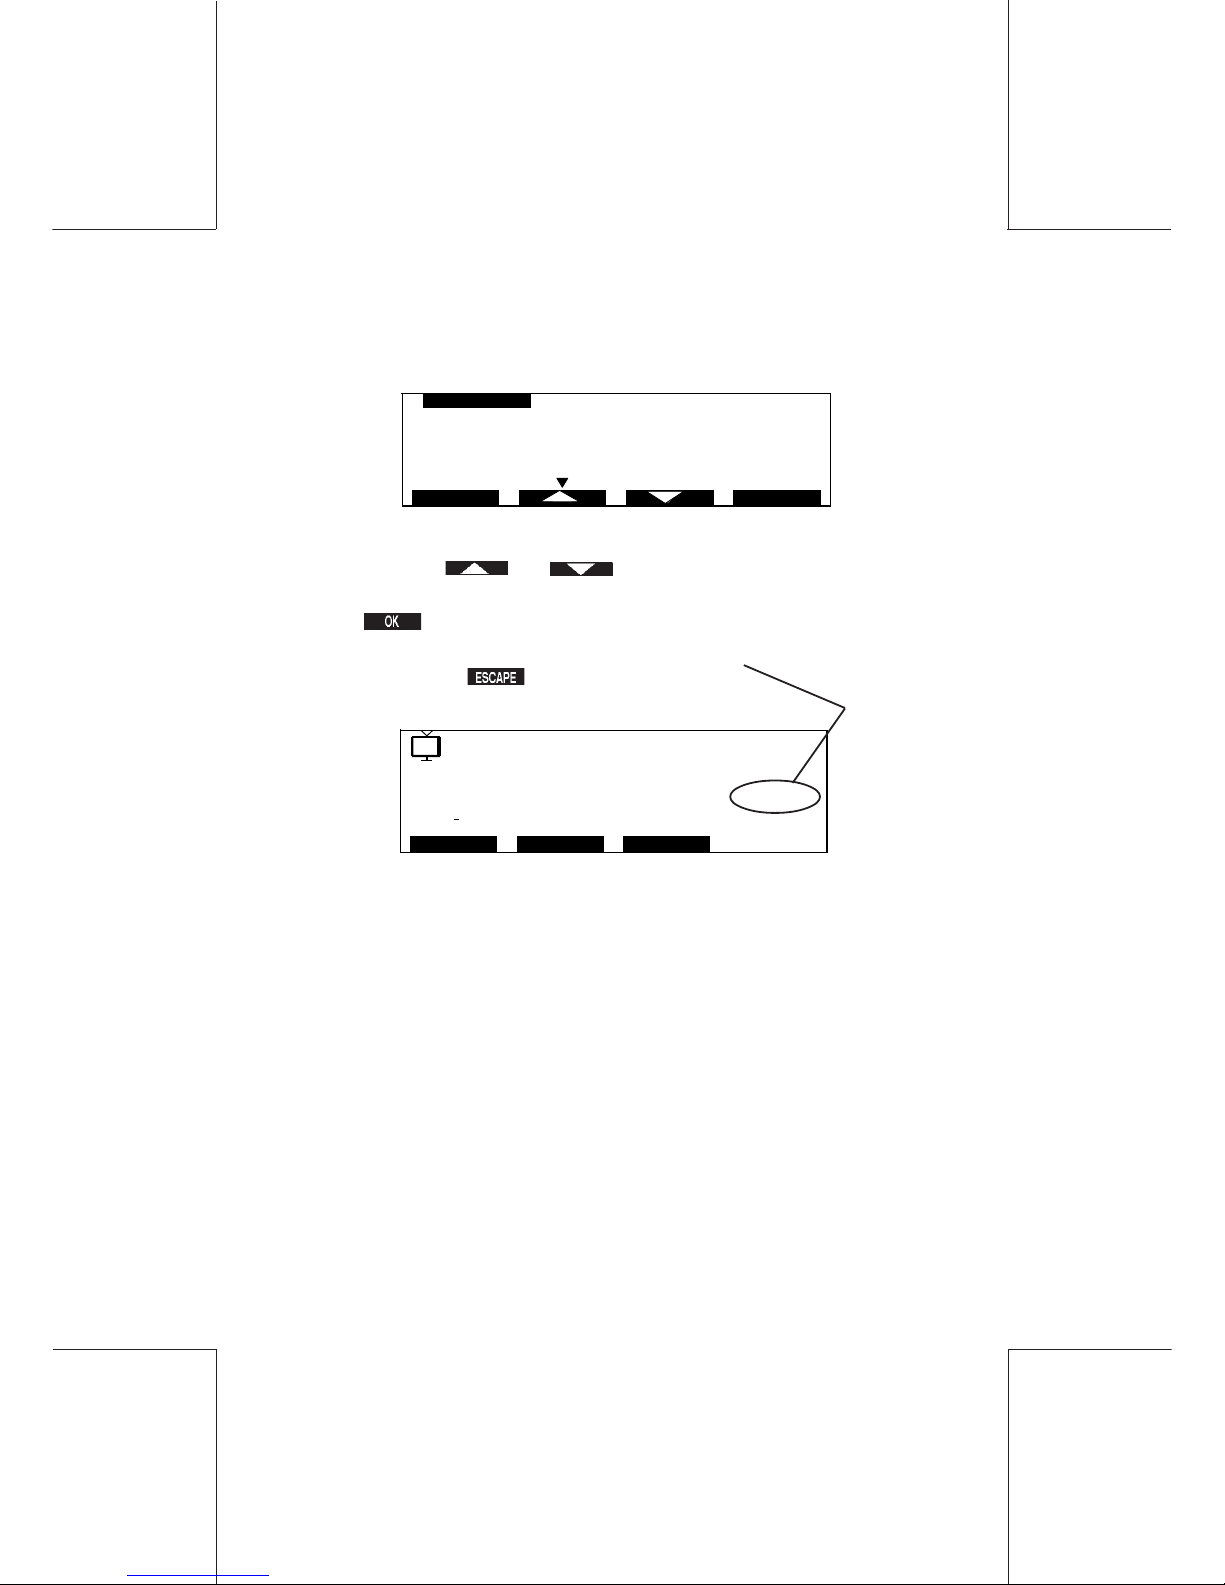
From the IMPRINT screen select DATE ADVANCE, the following
screen will be observed:
Next, using the and keys, select from the list the date
on which you wish to post your mail.
Press to confirm and return to the IMPRINT screen.
To return to Ready Mode with the Advanced Postage Date
displayed, press .
YOU ARE NOW READY TO PROCESS YOUR
PRE DATED MAIL
On completion of your pre dated mail run, your meter MUST be
reset to the current date.
However, if the Timeout period is exceeded, your meter will go to
Standby and the Date Advance setting be automatically
cancelled.
$150.20
7
ACCOUNTS
03/22/02
DEPT MODE IMPRINT
$0.00
0
DATE ADVANCE
1 03/19/02
2 03/20/02
3 03/21/02
4 03/22/02
5 03/23/02
ESCAPE OK
Page 56
56
IJ40-0012-56
4127762B/B
1 1/24/2006
Maintaining print quality
9. MAINTAINING PRINT QUALITY
Under normal operating conditions, your WJ 65/95/110 postage
meter will produce excellent quality prints.
However, if lines are missing from the stamp or the machine has
remained unused for several days it will be necessary to clean the
Ink Cartridge.
9.1 Cleaning the Ink Cartridge
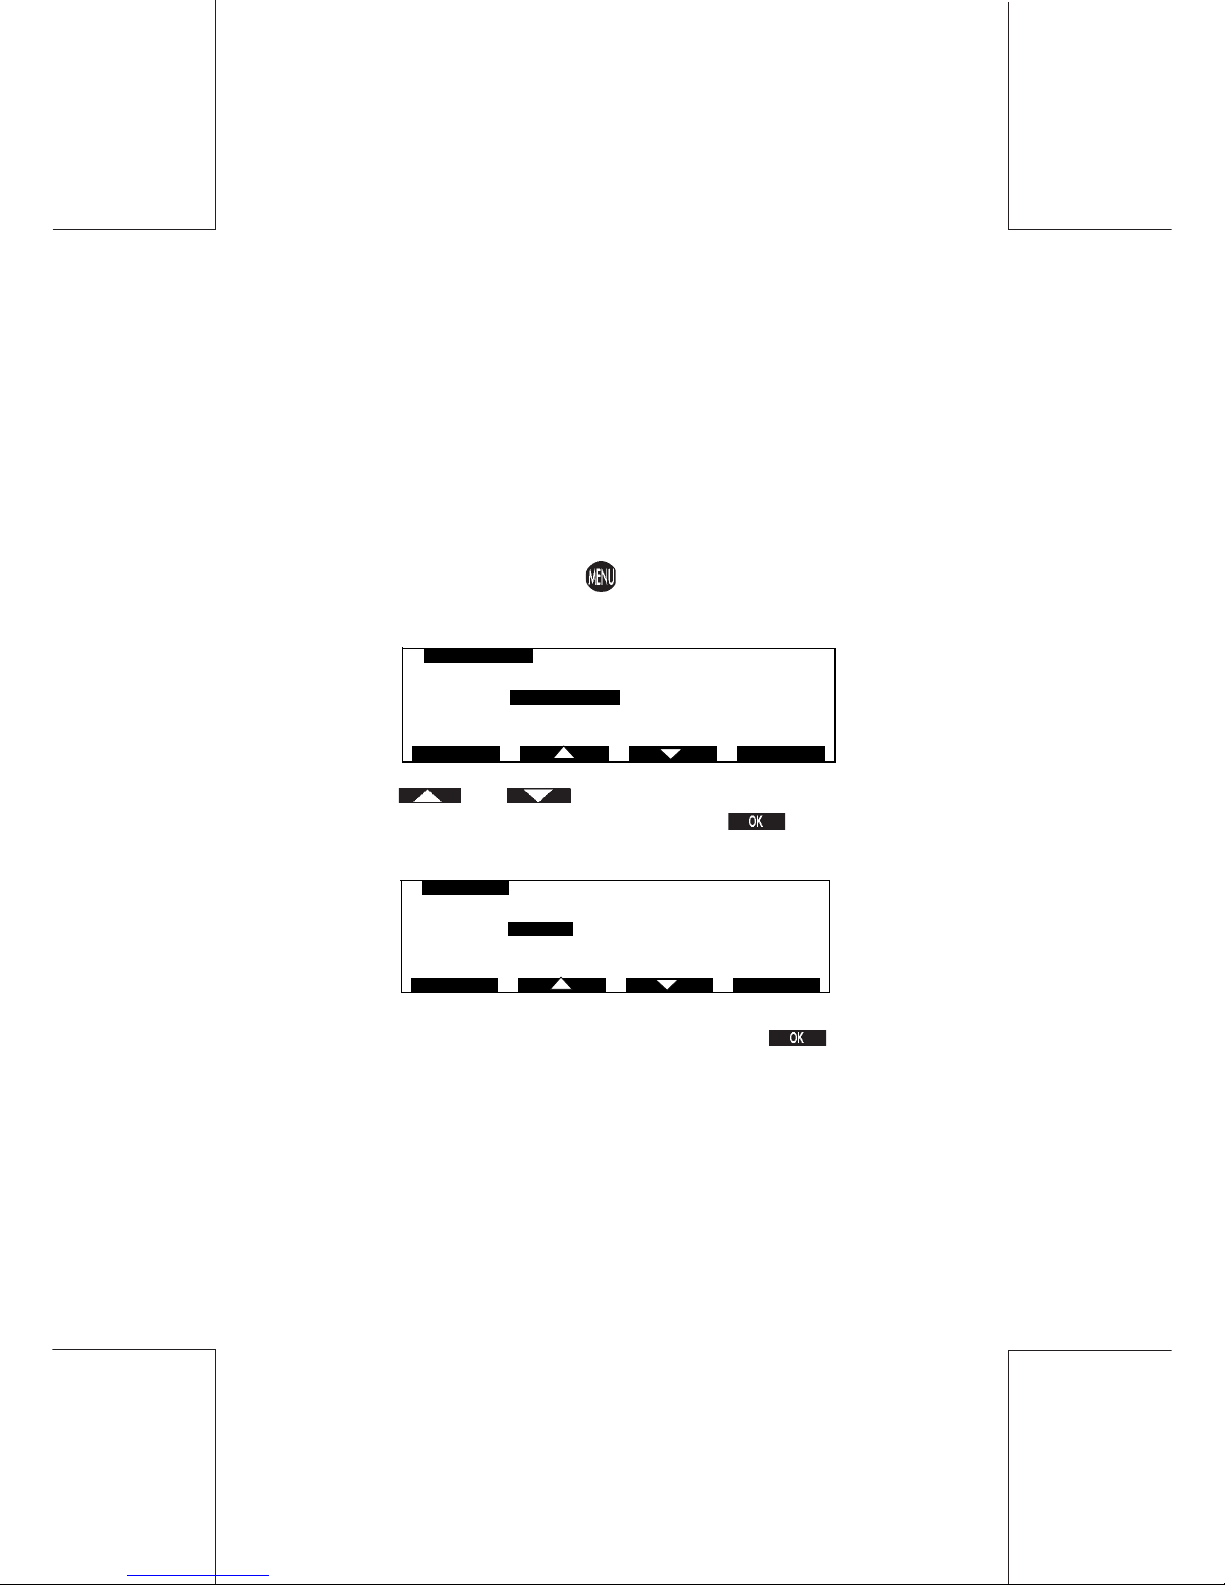
From Ready Mode, press the key, the MAIN MENU screen will
now be observed:
Using the and keys, or the appropriate number key,
move the cursor to CARTRIDGE and press to confirm.
The CARTRIDGE menu will now be observed:
Select the CLEAN option from the list and press to start the
cleaning cycle.
On completion of the cleaning cycle the screen will revert to the
CARTRIDGE menu.
You may now make a test print.
CARTRIDGE
1TEST PRINT
2CLEAN
3REMOVE
ESCAPE OK
MAIN MENU
1REGISTERS
2 CARTRIDGE
3 SUPERVISOR
4 CLEAR MAIL P ATH
5 WEIGHING MODE Differential
OKESCAPE
Page 57
IJ40-0012-57
4127762B/B
1 1/24/2006
57Maintaining print quality
9.2 Making a Test Print
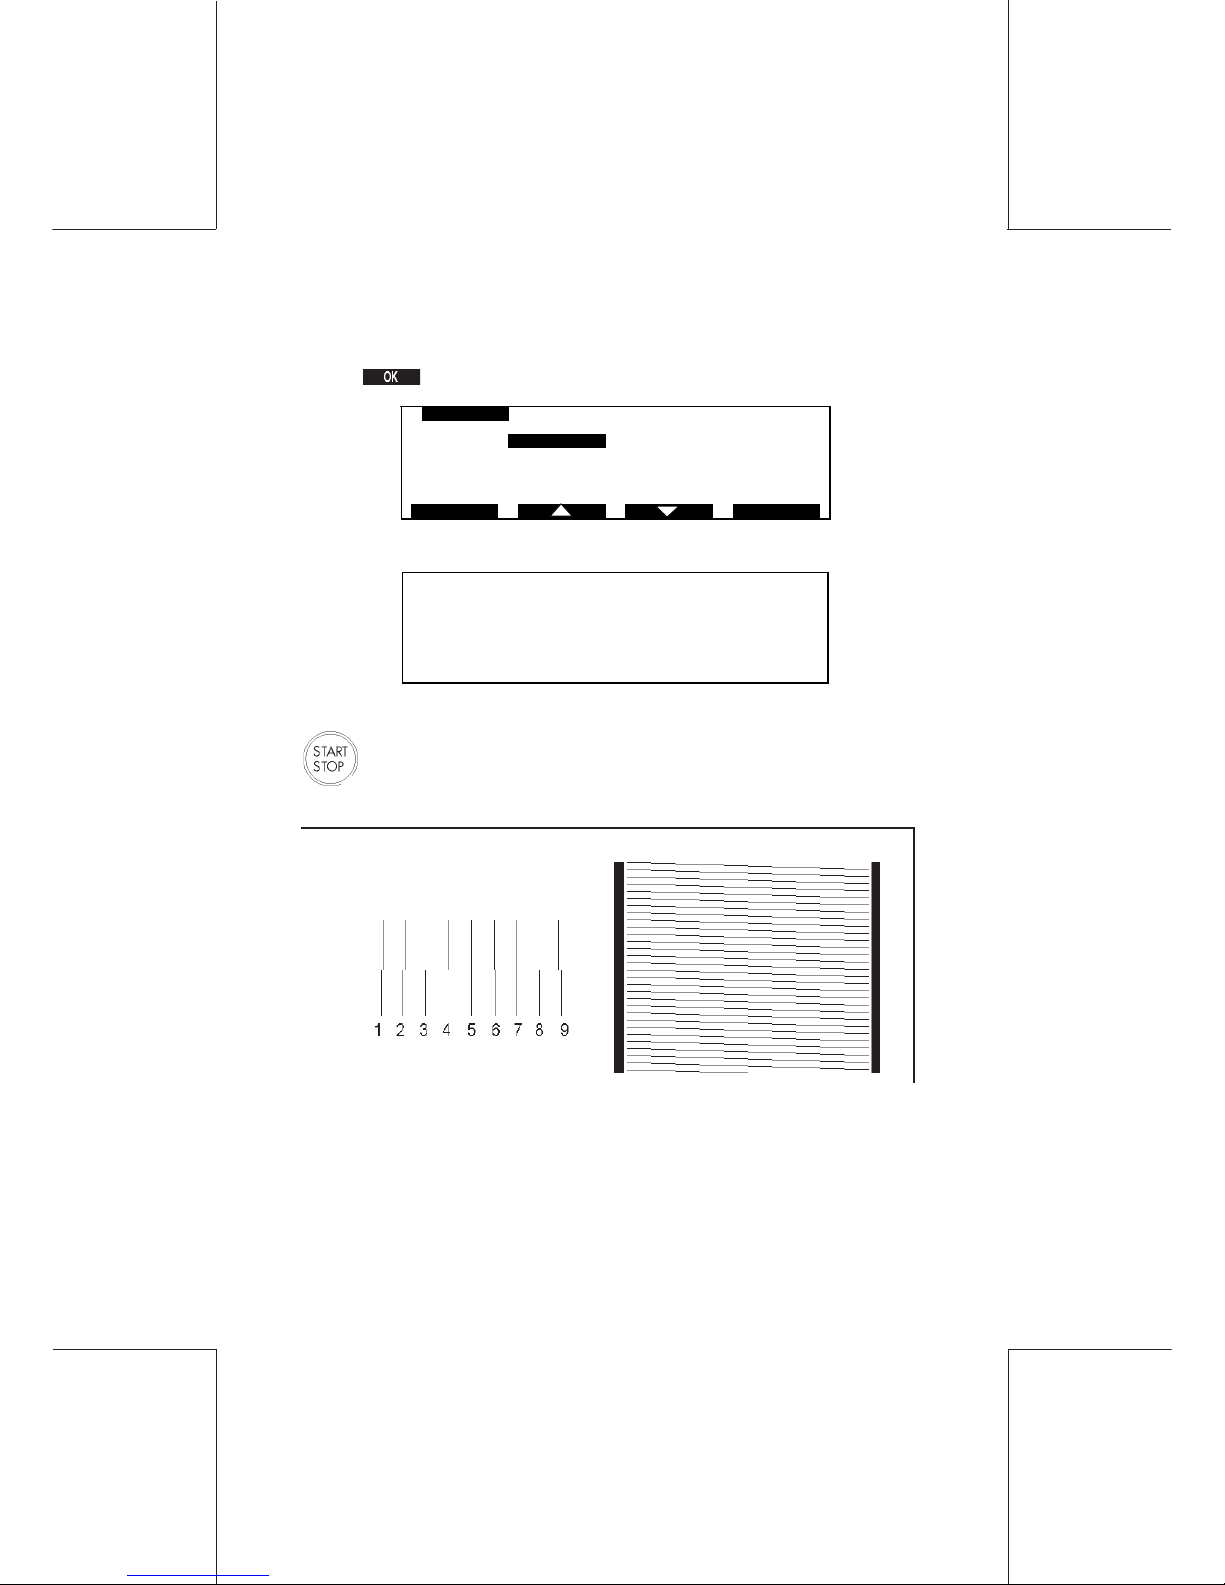
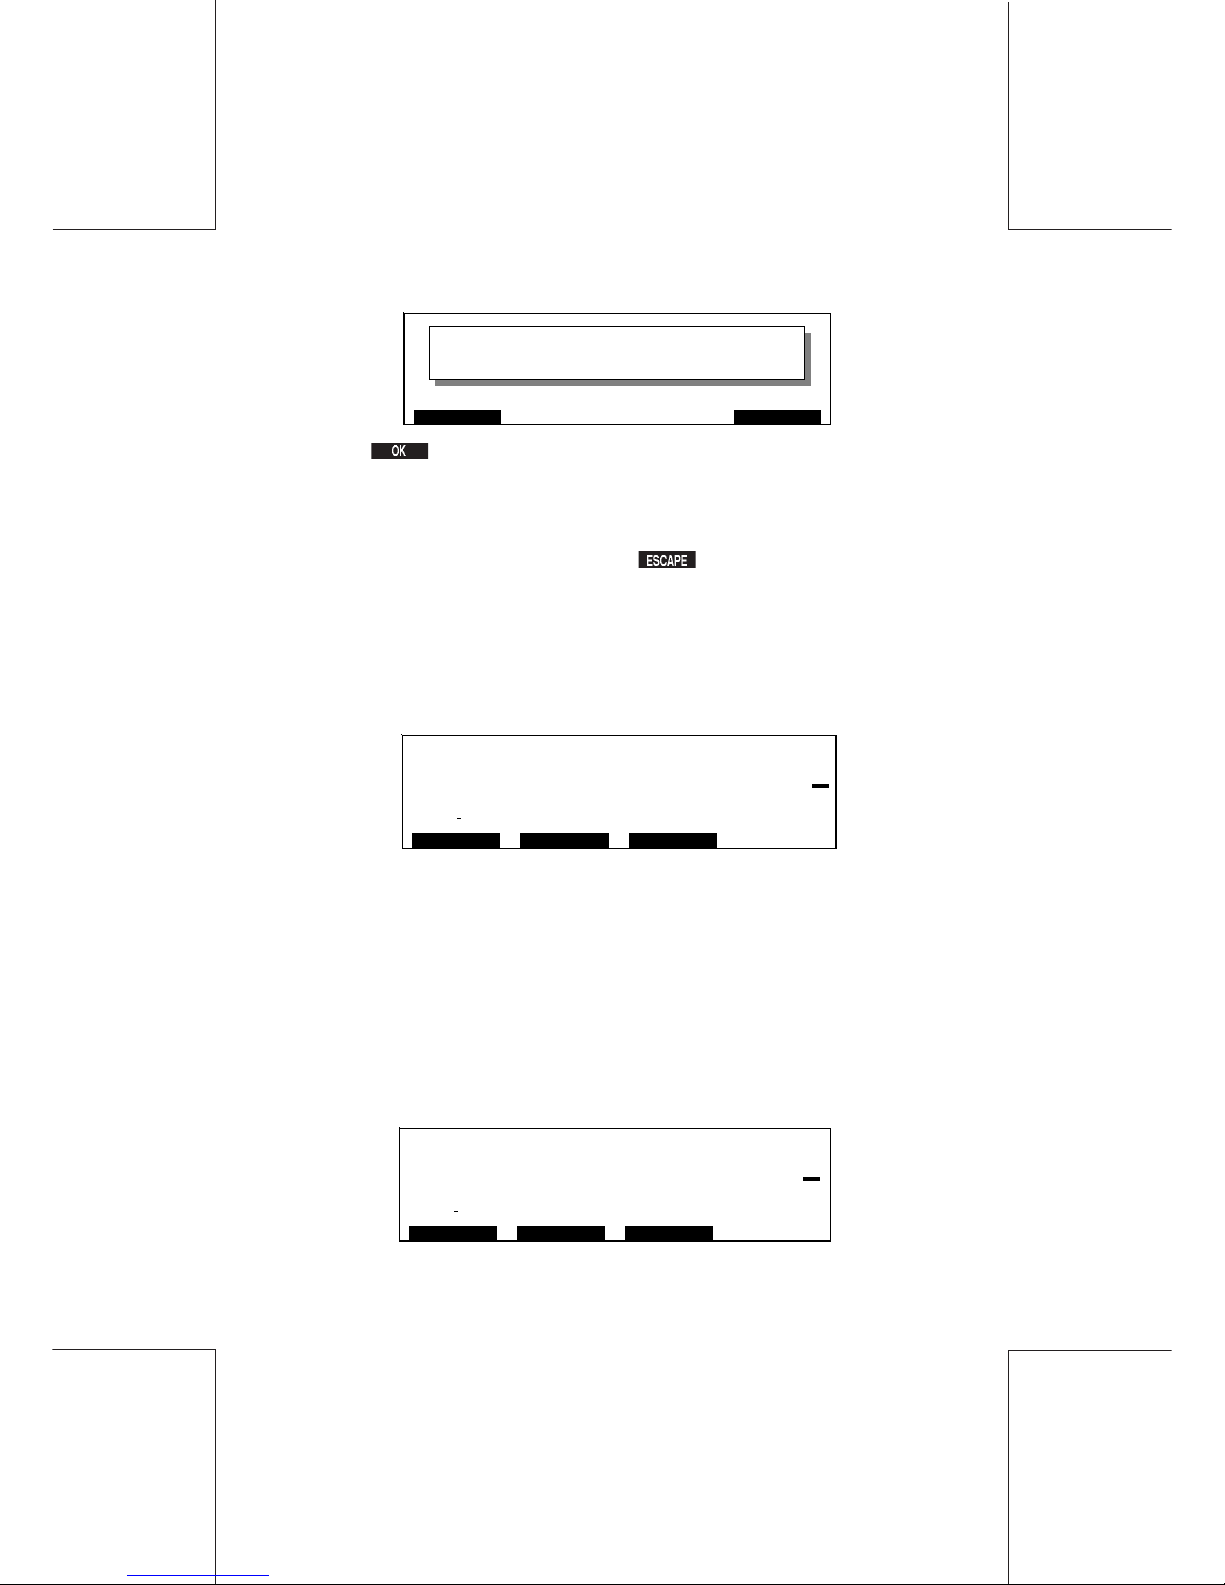
Select the TEST PRINT option from the CARTRIDGE menu and
press to confirm.
The prompt to produce a Test Print will now be displayed.
To make a Test Print, insert a blank envelope or card and press
.
Inspect the Test Print to ensure that all lines are clear and present.
To set the alignment, enter the number that provides the straightest
line (for the example above line 5) by pressing the appropriate
numeric key on the keypad.
CARTRIDGE
1TEST PRINT
2CLEAN
3REMOVE
OKESCAPE
TEST PRINT
03/19/02
Page 58
58
IJ40-0012-58
4127762B/B
1 1/24/2006
Maintaining print quality
Press to confirm. If any lines are missing, repeat the
cleaning and test print process upto three times, if this process
fails to restore print quality, fit a new ink cartridge as detailed in
"Replacing an ink cartridge".
If the test print is satisfactory, press twice to return to Ready
Mode.
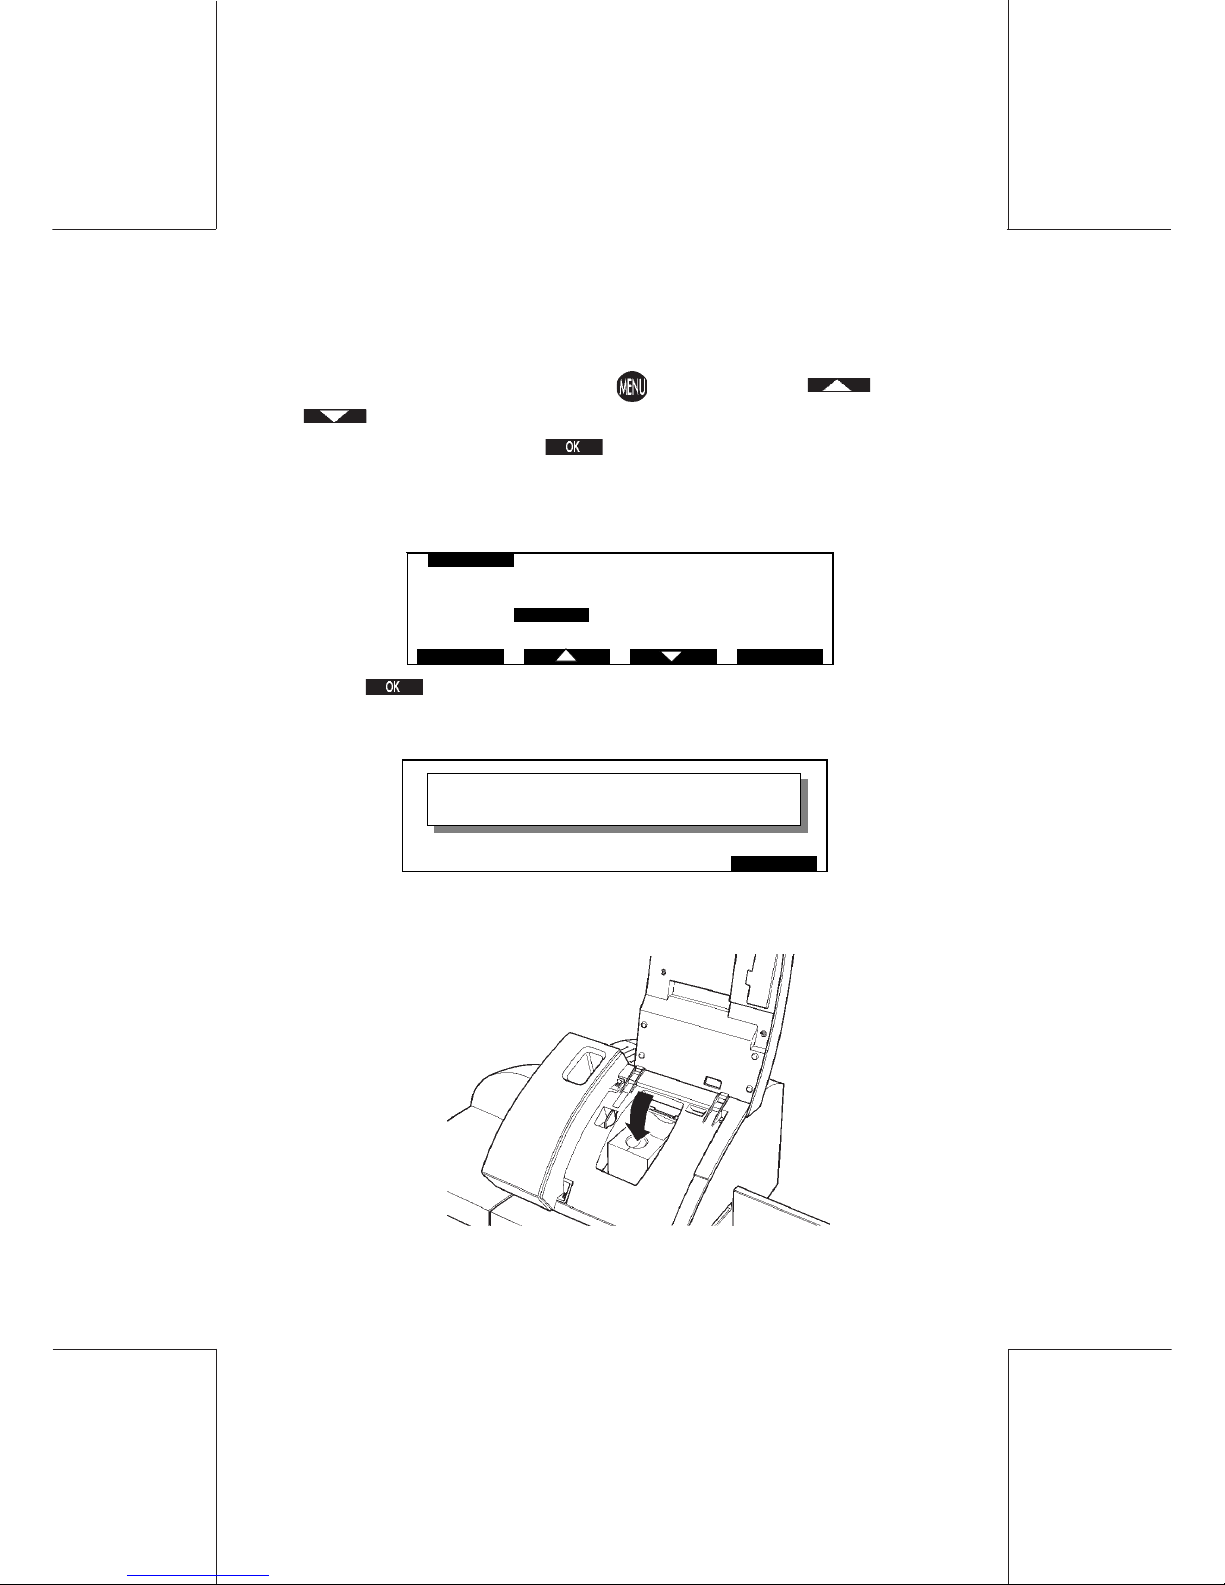
Low Ink
Should the ink cartridge require replacing, the LOW INK display
will be observed:
You have approximately 200 impressions available, after which
the Ink Cartridge MUST be replaced (see below).
No Ink
When the NO INK display is observed, printing is disabled and the
Ink Cartridge MUST be replaced before any printing operations
can be resumed.
ESC O
K
ENT ER STRAIGHT EST LINE NO.
5
LOW INK
$150.20
7
ACCOUNTS
03/19/02
DEPT MODE IMPRI NT
$0.95
0
NO INK
$150.20
7
ACCOUNTS
DEPT MODE IMPRINT
03/19/02
$0.95
0
Page 59
IJ40-0012-59
4127762B/B
1 1/24/2006
59Maintaining print quality
9.3 Replacing an Ink Cartridge
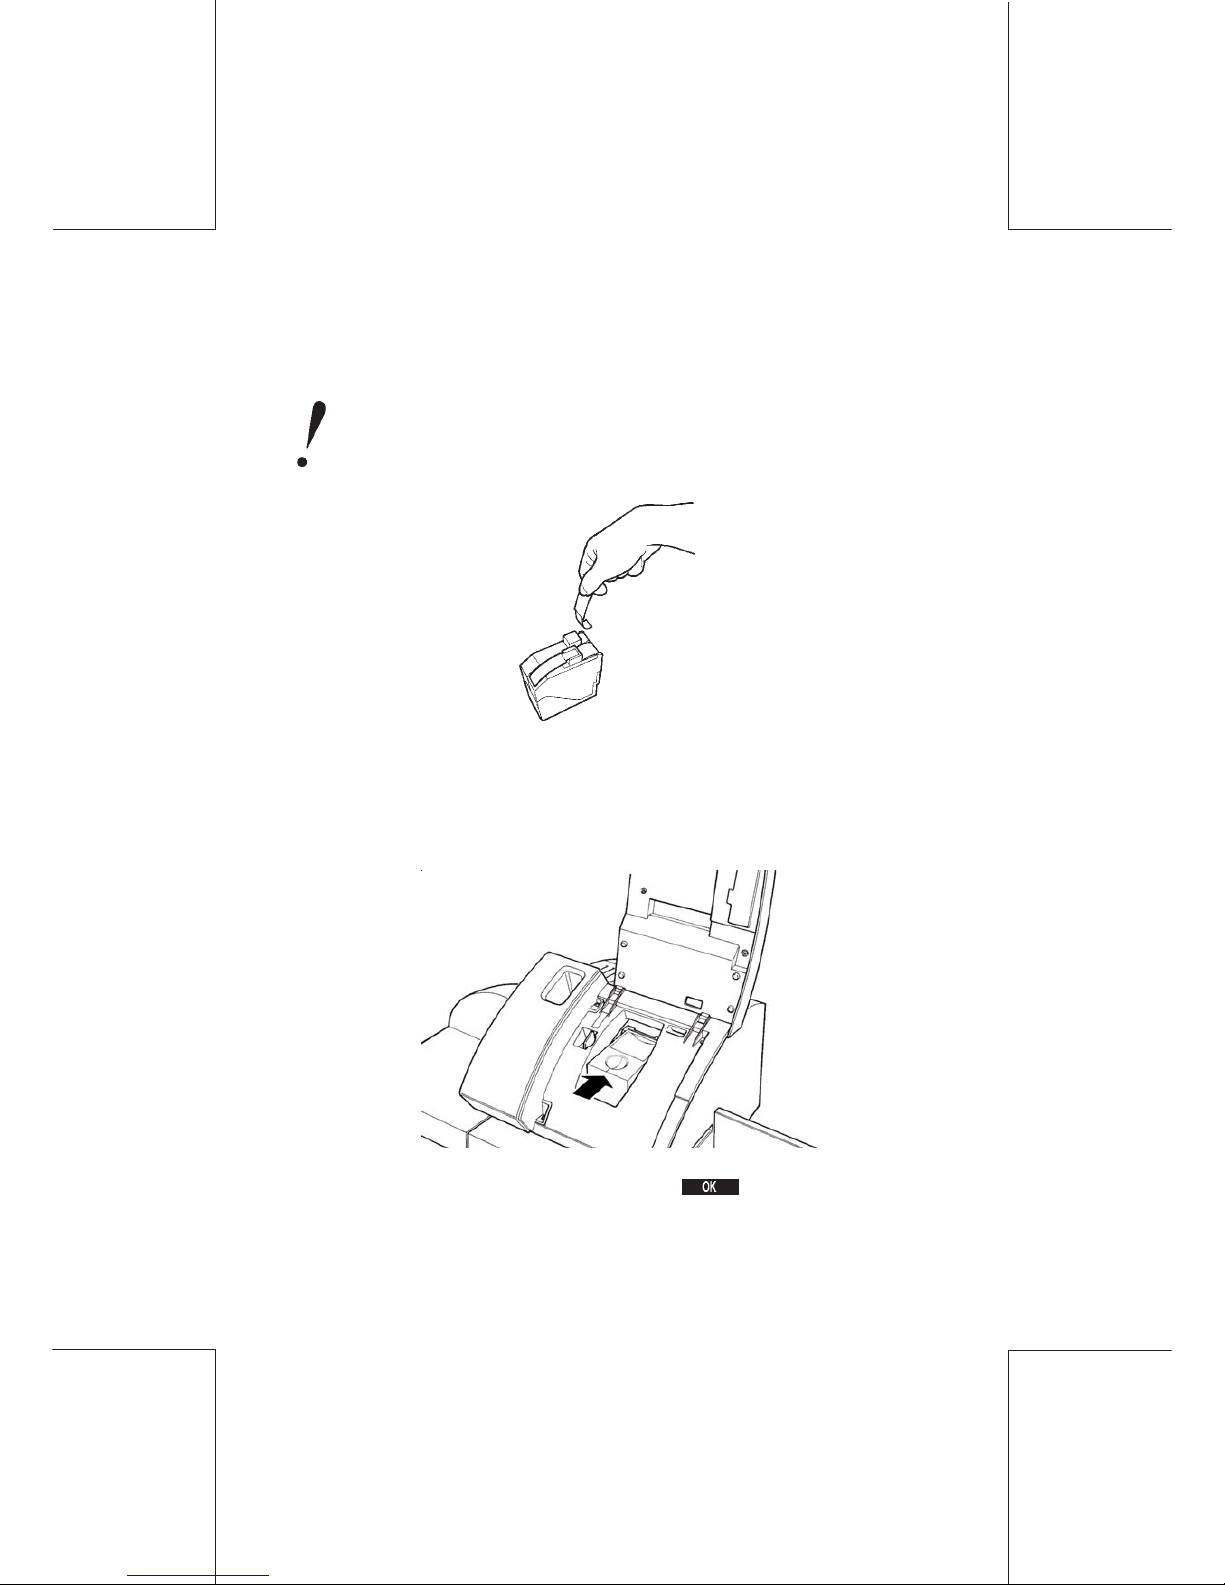
From Ready Mode, press the key. Using the and
keys, or the appropriate number key, move the cursor to
CARTRIDGE and press to confirm.
Select the REMOVE option from the CARTRIDGE menu:
Press to confirm.
After a short time, the following screen will be observed:
Open the machine top cover.
Press on the front of the
Ink Cartridge as shown in order
to remove it.
CARTRIDGE
1TEST PRINT
2CLEAN
3REMOVE
OKESCAPE
OK
CARTRIDGE
INSERT CARTRIDGE & PRESS OK
Page 60
60
IJ40-0012-60
4127762B/B
1 1/24/2006
Maintaining print quality
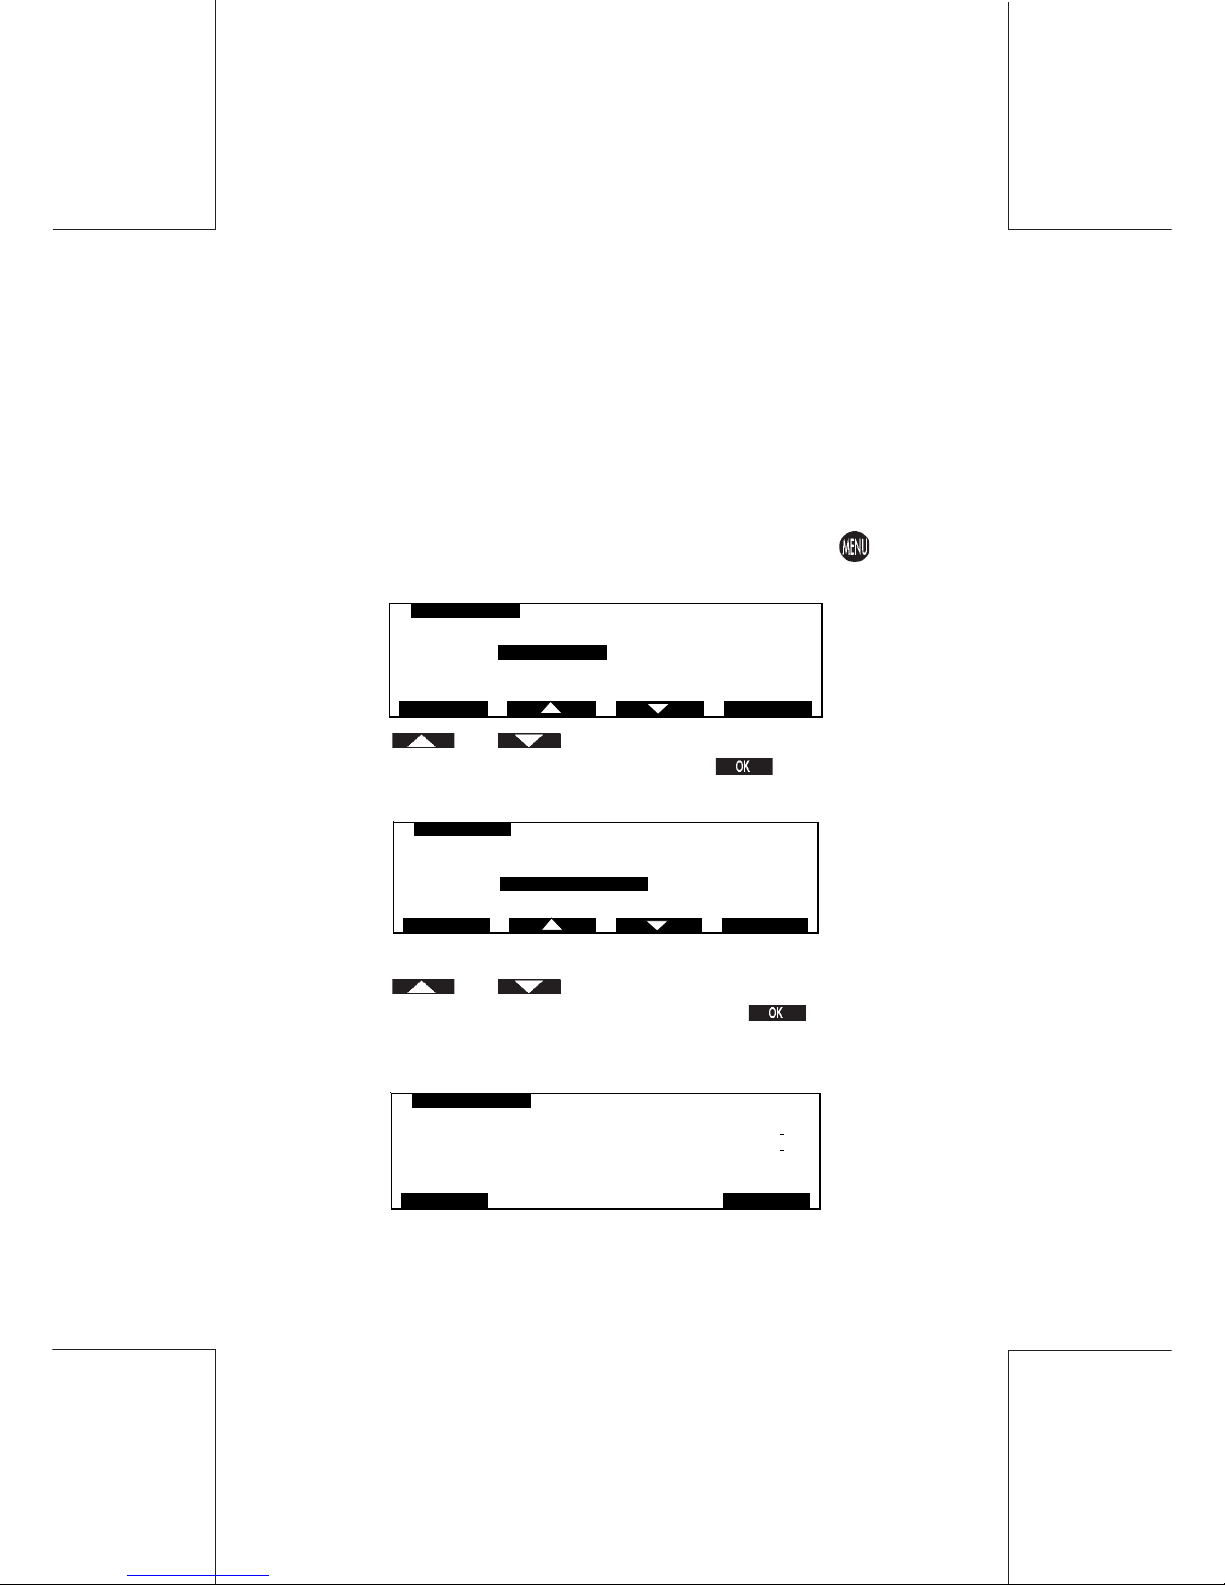
Carefully withdraw the used Ink Cartridge and discard.
Remove the new Ink Cartridge from its packaging and carefully
remove the tape seals.
Do NOT touch or remove the copper strip on Ink Cartridges.
Place the new cartridge into its holder, and lock it in position by
carefully pushing down on the depressed circle on top of the
cartridge with your index finger, then using your thumb to push the
rear of the ink cartridge in the direction illustrated.
Close the machine top cover and press .
Page 61

IJ40-0012-61
4127762B/B
1 1/24/2006
61Maintaining print quality
After a short delay the prompt to make a Test Print will be
observed:
Please refer to "Making a Test Print".
TEST PRINT
03/19/02
Page 62
62
IJ40-0012-62
4127762B/B
1 1/24/2006
Meter registers
10. METER REGISTERS
Your postage meter is equipped with a series of electronic registers
to monitor postage printing transactions. A number of departments
are available in which separate registers showing postage used
and items printed are stored.
10.1 Selection
To select a Meter Register from Ready Mode, press the key,
the following screen will be observed:
MAIN MENU
1REGISTERS
2 CARTRIDGE
3 SUPERVISOR
4 CLEAR MAIL PATH
5 WEIGHING MODE Differential
OKESCAPE
Using the and keys, or the appropriate number key,
move the cursor to REGISTERS and press to confirm, the
list of registers available to view will now be displayed:
REGISTERS
1 BATCH REGISTERS
2POSTAGE SET
3 M AI N RE G IS T E RS
OKESCAP E
Using the
and
keys, or the appropriate number key,
select a register option from the list then press
to confirm.
e.g. MAIN REGISTERS:
SUM M ARY RE P O RT
DESCENDING
ASCENDING
POST OFFICE ITEMS 540
$150.20
7
$749.70
3
PRINTESCAPE
Page 63
IJ40-0012-63
4127762B/B
1 1/24/2006
63Meter registers
10.2 Printing a Register
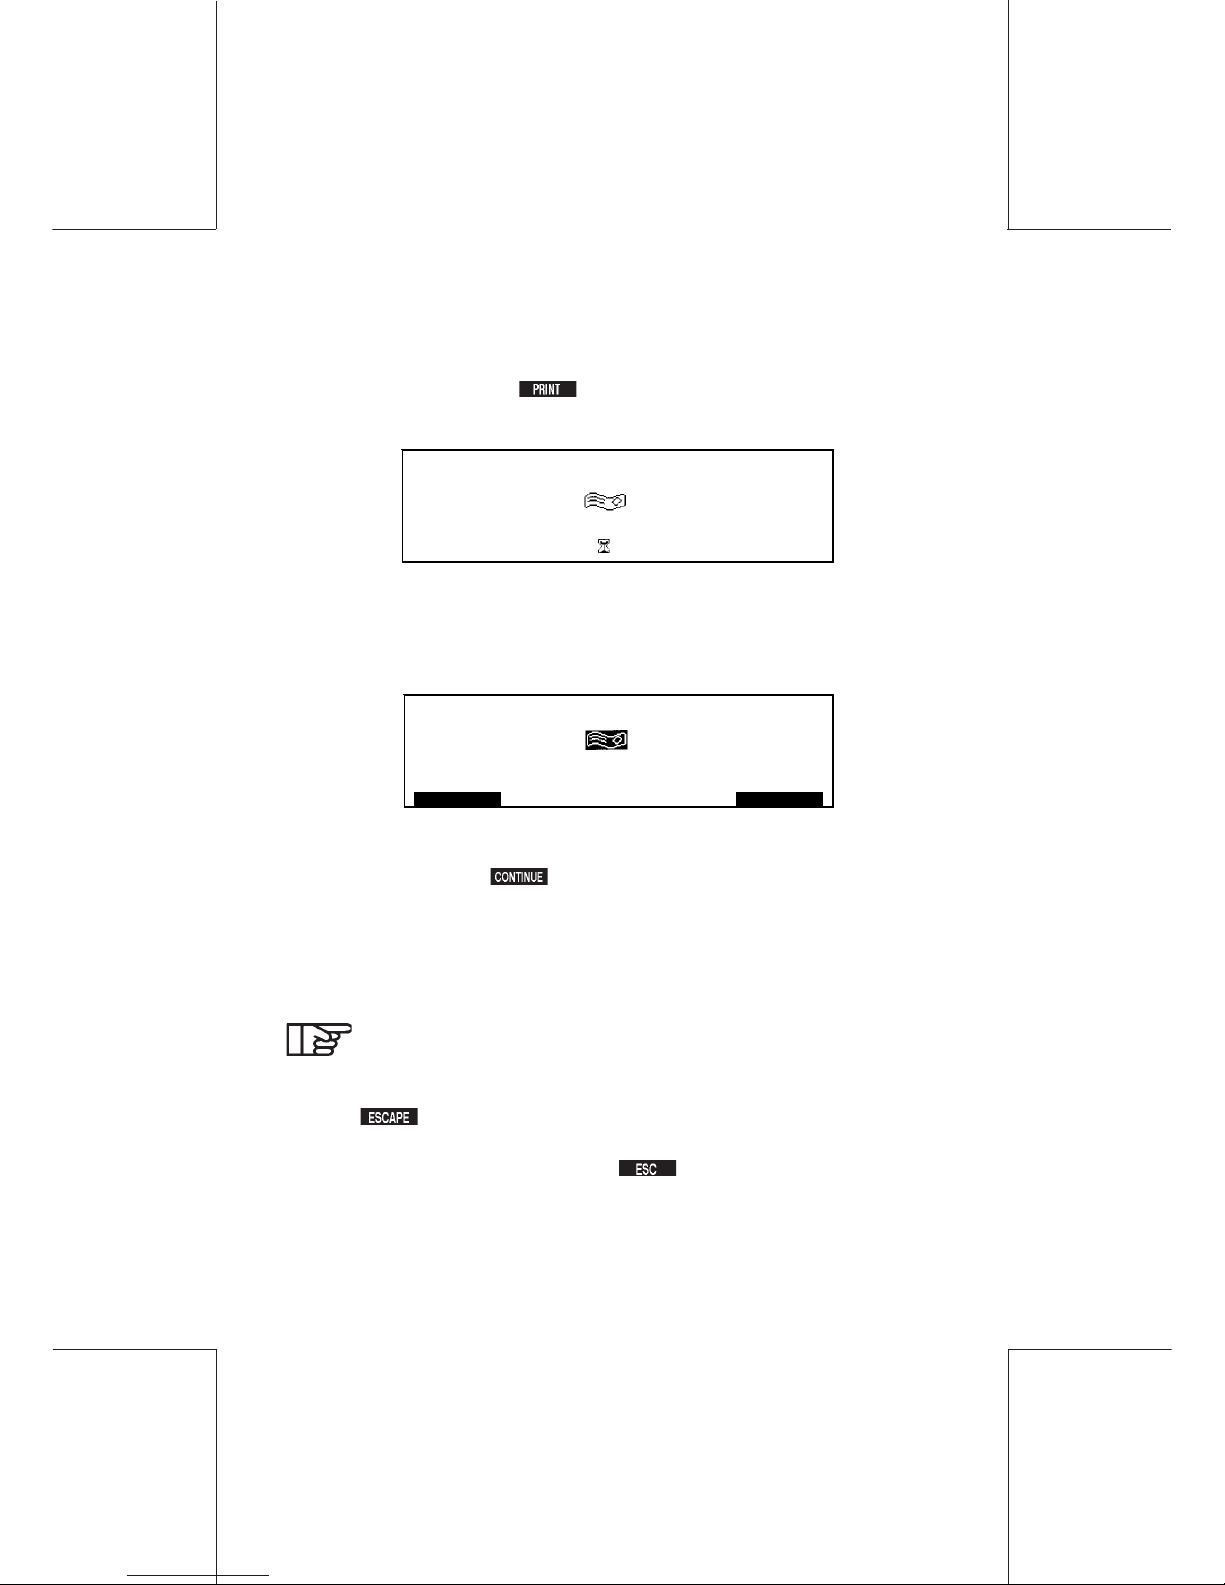
To print a register press , if the method of print is set to Internal,
the following screen will be observed:
After a few seconds, your register data will be printed on a label and
you will be returned to the DEPARTMENT REGISTERS screen.
If during the register printing process the following display is
observed:
First replenish the label dispenser as detailed in "Filling the label
hopper", then press to complete the report printing process.
If after a short wait, you are returned to the register screen your
method of print may be set to External Printer, please refer to
Printing with External Printer below.
The method of print (Label or External Printer) is set in
Supervisor Mode, please refer to "Reports".
Press to return to the REGISTERS screen.
To return to Ready Mode, press twice.
REPORTS
1 03/19/02
REPORTS
1 03/19/02
ESCAPE CONTINUE
Page 64

64
IJ40-0012-64
4127762B/B
1 1/24/2006
Meter registers
10.3 Printing with External Printer
Before proceeding to print registers using an external printer ensure
that the printer lead is connected to the Upper Accessory Port at the
back of the machine, (please refer to Controls and Features) and
that the printer power lead is connected to an adjacent power outlet.
Set the printer to ON and the status to ONLINE.
From your selected registers screen press , after a short
period of time, you will be returned to the screen and the register data
will have been printed.
If the registers screen does not re-appear after a few seconds and
the printer does not print, re-check all printer connections and ensure
that the printer status is set to ONLINE.
Page 65
IJ40-0012-65
4127762B/B
1 1/24/2006
65Adding postage
11. ADDING POSTAGE
Postage may be purchased from the Post Office, using the Hasler
Tele Meter Setting® system.
Connect one end of the telephone link cable to the Modem Socket
( ) at the rear of the machine and the other end to an adjacent
telephone line outlet. The meter only requires connection to the
telephone line outlet during the Add Postage or Clear Lockout
transaction.
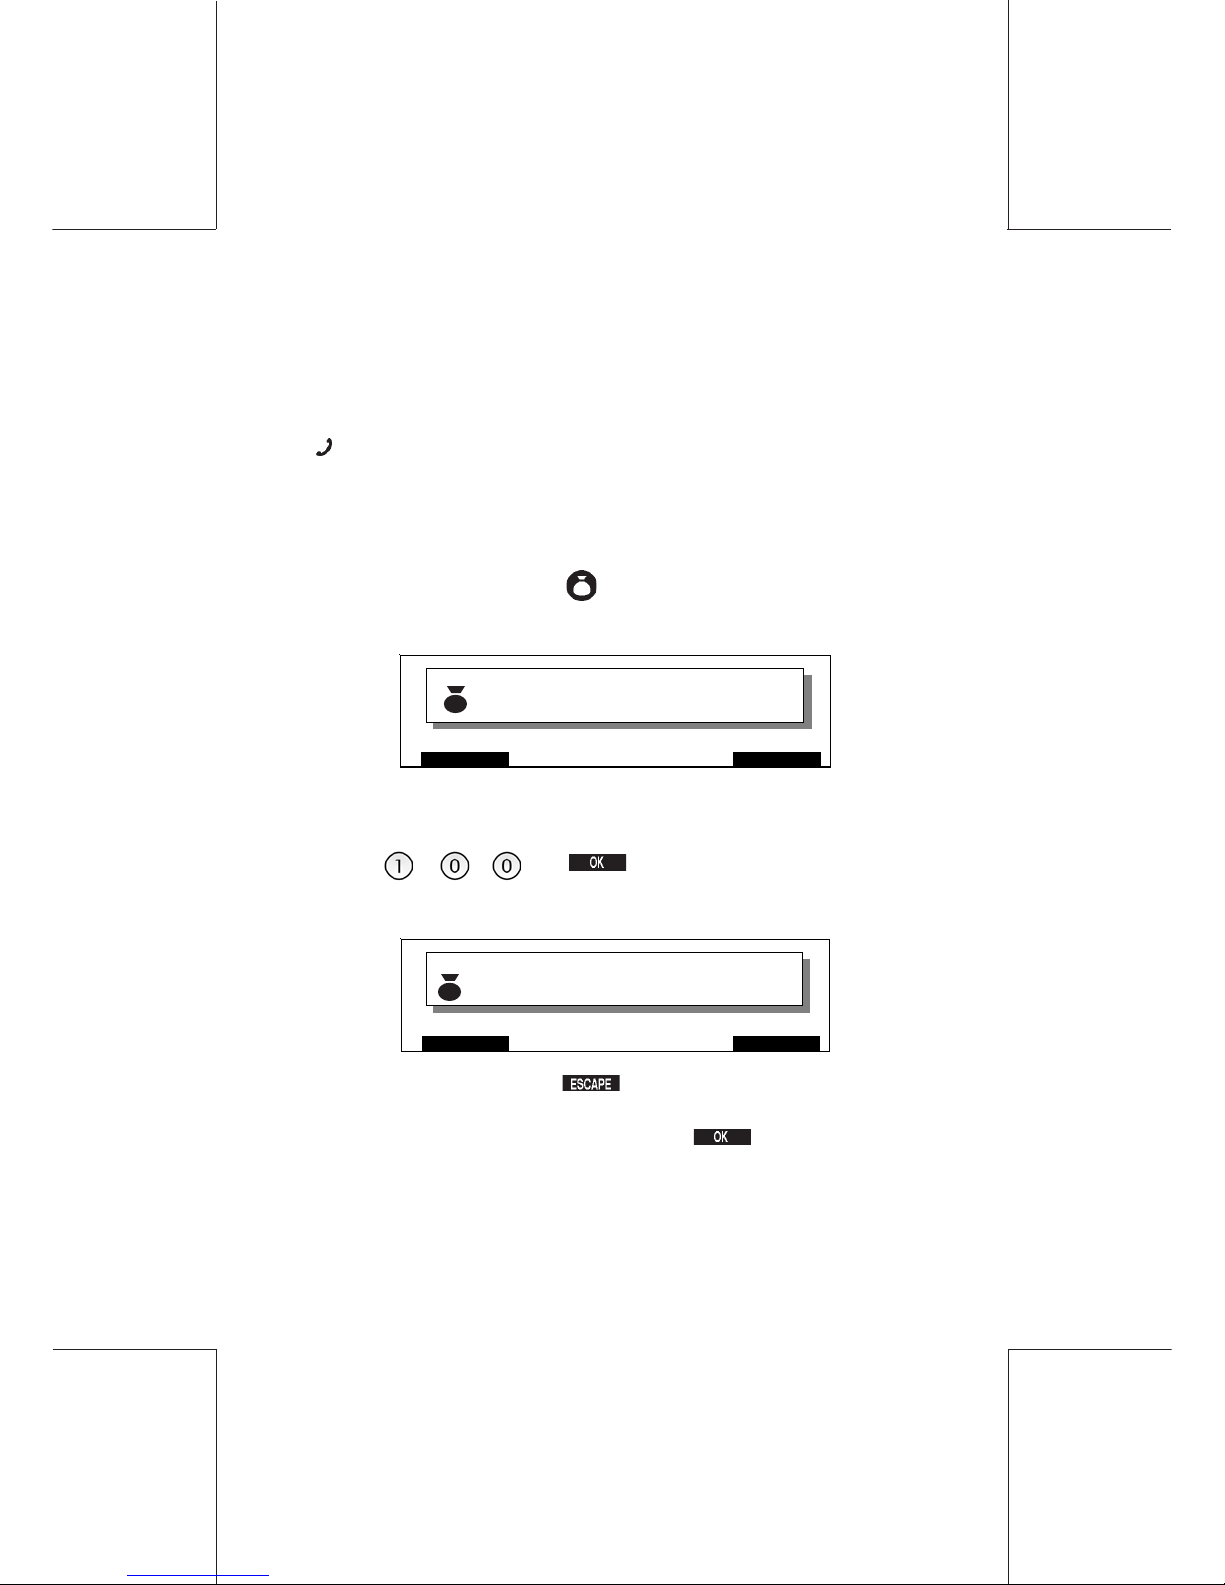
From Ready Mode, press .
The ENTER AMOUNT screen will be observed.
Using the numeric key pad, enter the amount of postage you wish
to purchase (whole dollars only) e.g. 100.
Press: , , and to confirm.
You will now be asked to verify the amount before proceeding.
If amount incorrect, press and start again from the Enter
Amount screen.
If the amount displayed is correct, press to confirm.
OKESCAPE
ENTER AMOUNT
$0.00
ESCAPE OK
CONFIRM AMOUNT
$100.00
Page 66
66
IJ40-0012-66
4127762B/B
1 1/24/2006
Adding postage
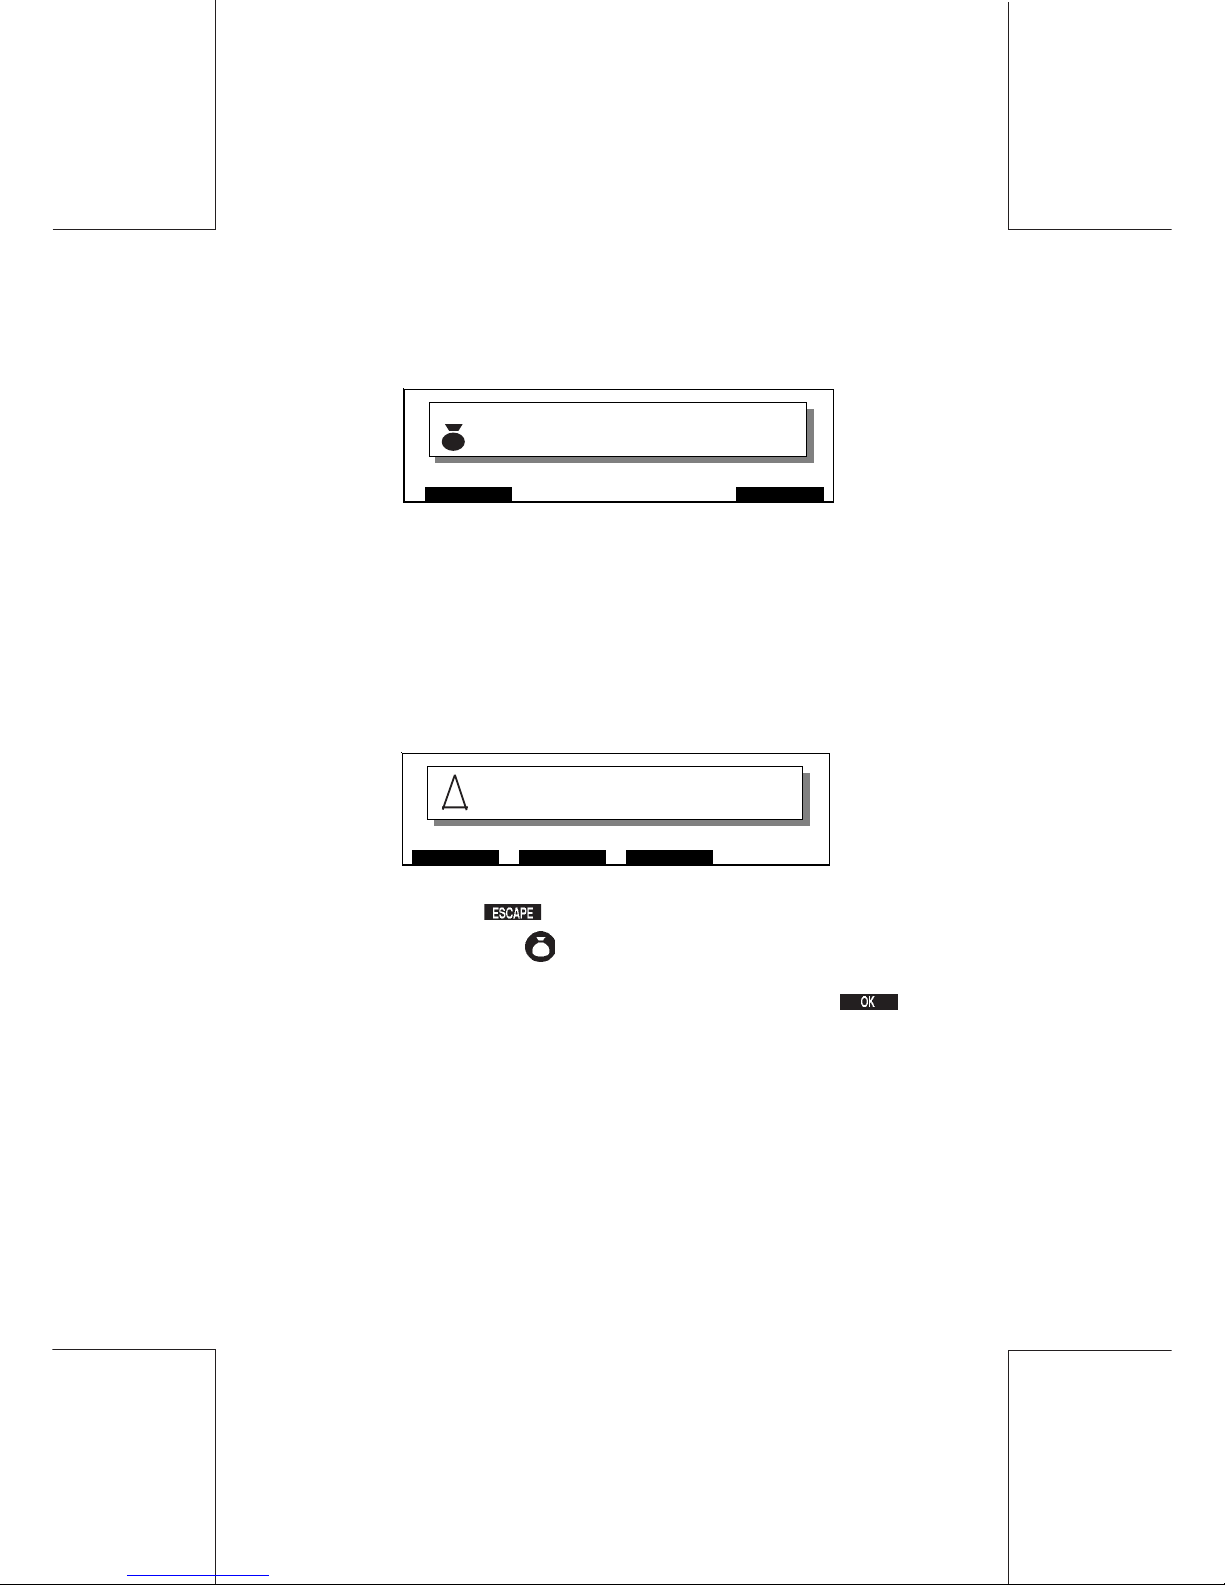
On completion of the ADD POSTAGE transaction, the following
screen will be observed:
11.1 Warning pending Credit’ Procedure
Completing an Interrupted Add Postage Transaction
If an Add Postage transaction is accidentally interrupted before
the transfer has been completed, the WARNING PENDING
CREDIT screen will be observed when returning from Locked
mode after the machine has been unplugged.
In this case, press to return to Ready Mode .
Press the FUNDS key to automatically finish the incomplete
transaction.
On completion of the Add Postage transaction, press to
return to Ready Mode.
11.2 Clearing a PO lockout
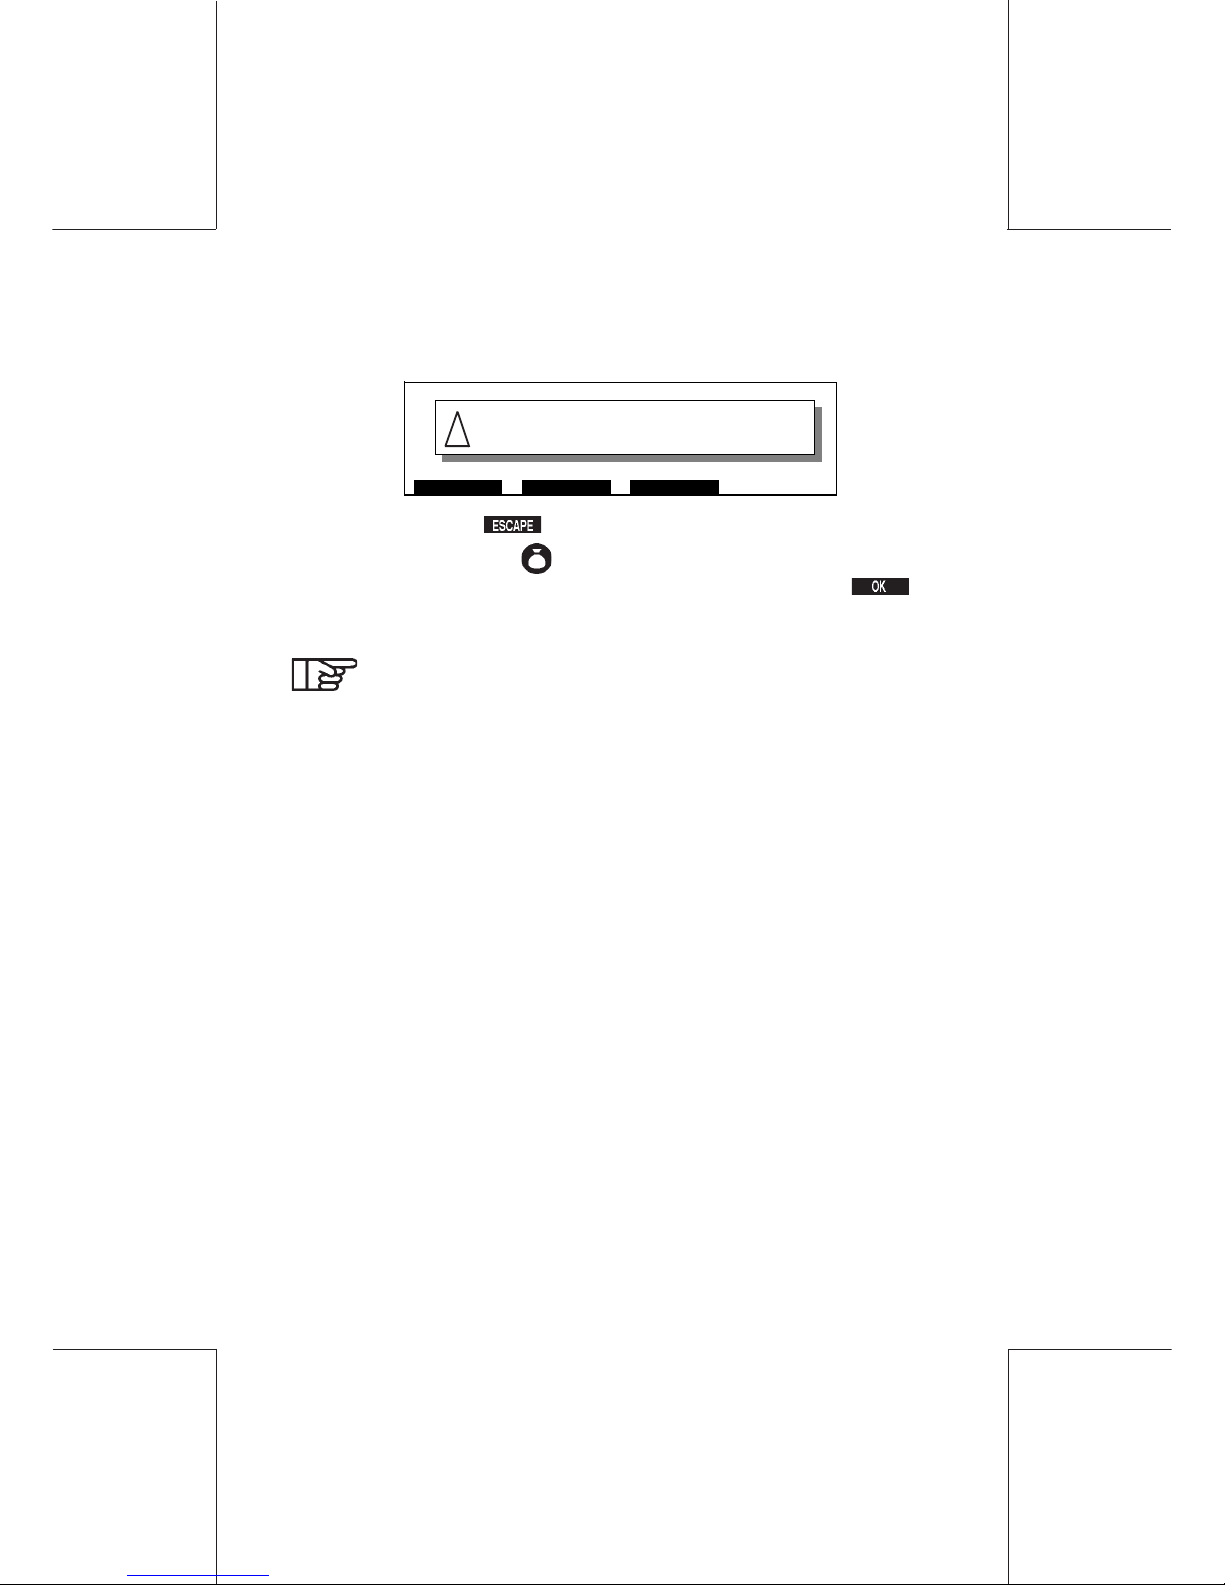
USPS regulations require that your meter must be set at
least once every three months. The meter has an internal
timer that tracks your reset activity. After three months
without adding postage, a PO LOCKOUT message is
displayed and postage printing is disabled.
ESCAPE OK
FUNDING DONE
$100.00
ESCAPE O
K
IMPRINTMODE
WARNING
PENDING CREDIT
!
Page 67
IJ40-0012-67
4127762B/B
1 1/24/2006
67Adding postage
To clear the lockout:
In this case, press to return to Ready Mode .
Press the FUNDS key to automatically clear the PO Lockout.
On completion of the Clear PO Lockout transaction, press to
return to Ready Mode.
The machine only requires connection to the telephone
line outlet during the Add Postage and Clear Lock-Out
transaction.
ESCAPE MODE IMPRI NT
WARNING
PO LO CKOUT P RESS F UNDS KEY
!
Page 68

68
IJ40-0012-68
4127762B/B
1 1/24/2006
Maintaining your account
12. MAINTAINING YOUR ACCOUNT
12.1 Account number
After you sign a rental agreement for your meter, you will be
assigned a TMS® (Tele Meter Setting) Bank Account Number.
An account confirmation Welcome Letter will be mailed to you
indicating your TMS® Bank Account Number and your Mailer
Agreement Number. These number should be kept in a safe place,
yet be readily available, because they are used for all TMS®
account maintenance transactions.
12.2 Account balance
You can use the Hasler Automated TMS® system to check your
TMS® Bank Account status and other important TMS® information.. Simply call 1-800-248-8013 and use your touchtone phone to
enter your TMS® Bank Account Number and your Mailer Agreement Number. Then select from the menu options.
You can also go online to (1) www.infonowonline.com or (2)
www.haslerinc.com and select Postage Accounts (TMS). You will
need to enterTMS® Bank Account Nnumber and your Mailer
Agreement Number. Then select from the menu options.
With either system, you can then receive details regarding your
Account Balance (includes the current balance, the available
balance and any unpaid advances), You can also receive information on holiday schedules, meter operating guides, liscensing
forms, payment addresses, and customized TMS Bank Account
statements.
12.3 Statements
You can receive a daily, weekly,monthly, or quartly statement of all
activity in your TMS® Bank Account. To be setup on Automatic
Page 69

IJ40-0012-69
4127762B/B
1 1/24/2006
69Maintaining your account
Statements you must make a request by fax (1-800-237-0692) or by
calling (1-800-248-8013). The website address is
www.infonowline.com. This statment includes deposits, remote
meter settings, transaction fees and the ending account balance.
-If there is no account activity you will not receive a
statement.
-You can request statements to be emailed or faxed
automatically to your location.
12.4 Post Office regulations
United States Postal Service regulations require that your meter
must be audited at regular intervals (currently set at 90 days). For
your convenience an audit is automatically performed each time
you add postage.
If you do not add postage or perform an audit within a 90 day period,
a “PO LOCKOUT” message is displayed on the meter and postage printing is disabled. To clear the lockout, simply press the
key and a CLEAR LOCKOUT transaction will be processed via the
modem connection. When the transaction is completed, postage
printing is enabled for another 3 months.
See Clear Lockout.
12.5 Postage now
Get the postage you need, when you need it, without having to call
ahead of time. PostageNow, a service of the United States Postal
Service, gives you the option to seamlessly fund your postage
needs simply by setting your postage meter!
With PostageNow ™ TeleFunds™
Last-minute mailings are no longer a problem. Now, you can have
immediate access to additional postage funds simply by setting
your meter! Postage funds will auto-matically be debited from your
Page 70

70
IJ40-0012-70
4127762B/B
1 1/24/2006
Maintaining your account
specified corporate bank account, usually the next business day,
but the postage is provided immediately by the USPS. No
prefunding required.
Choosing seamless postage funds availability with PostageNow
TeleFunds means you won’t have to maintain a minimum balance
in your TMS Bank Account. And, with PostageNow TeleFunds,
there’s never a transfer processing fee—ever.
To begin using PostageNow TeleFunds, simply fill out the ACH
Customer Authorization and Agreement form, check the
PostageNow TeleFunds option, and fax the form with a voided
check to 1-800-237-0692. There is a one-time, $15 set-up fee for
new accounts and a $10 pre-note (test of the corporate bank
account).
With PostageNow OnDemand
If you prefer to have more control over your postage, you may
choose instead to call ahead to debit a specified amount of
postage funds from your corporate bank account with PostageNow
OnDemand. The PostageNow OnDemand option can only be
accessed during the operating hours of the TMS Center. There will
be a $5 processing fee each time you call to debit funds. To begin
using PostageNow OnDemand, simply fill out the ACH Customer
Authorization and Agreement form, check the PostageNow
OnDemand option, and fax the form with a voided check to
1-800-237-0692. There is a one-time, $15 set-up fee for new
accounts and a $10 pre-note (test of the corporate bank account).
12.6 Standard TMS® Bank Accounts
Standard TMS® Bank Accounts are prefunded and require that
money be in your TMS® Bank Account to add postage to your
meter. After using the TMS® system to add money to your meter,
Page 71

IJ40-0012-71
4127762B/B
1 1/24/2006
71Maintaining your account
your account decreases by the amount of the postage added.
Remember to deposit sufficient funds to cover your planned setting
withdrawals.
Upon receipt of the check, your TMS® Bank Account will be
credited with your deposit (allow 7 to 10 business days for the check
to be received and posted).
Make your check out to United States Postal Service, and write
your TMS® Bank Account on the check.
Always enclose your Coupon with your check. This will assure the
fastest and most accurate bank processing. You will receive a
package of coupons in the mail shortly after setting up your TMS®.
Bank Account. Replacements are re-ordered automatically when
you submit your 8th coupon with your check.
Page 72

72
IJ40-0012-72
4127762B/B
1 1/24/2006
Maintaining your account
12.7 Where To Mail Your Deposit:
From The United States Postal Service
And Hasler , Inc.
1 All checks for postage should be made payable to: United
States Postal Service
** Your Five digit AMS-TMS Account # must appear on your
check.
** Be sure to include your coupon with the green stripe with your
check.
2 There are three lock box locations to send First Class Mail.
Please use the closest lock box for your location.
USPS-Hasler
P.O. Box 7247-0217
Philadelphia, PA 19170-0217
USPS-Hasler
P.O. Box 0527
Carol Stream, IL 60132-0527
USPS-Hasler
P.O. Box 894757
Los Angeles, CA 90189-4757
Please allow up to 7-10 days for the funds to post to your account.
Page 73

IJ40-0012-73
4127762B/B
1 1/24/2006
73Maintaining your account
3 Also, there is one location for overnight service delivery.
ENTIRE UNITED STATES
ATTN: Team One - TMS
Citibank Lockbox # 0217
1615 Brett Rd
New Castle, DE 19720
Please allow up to 48 hours after receipt for your funds to be
available.
4 The Post Office will accept Wire Transfers:
Send Wire Transfers to:
Citibank , 111 Wall St., New York, NY 10043
ABA Routing # 021000089
USPS/Hasler
Account # 4067-8617
Detail Payment Field:
TMS Account #
Include your TMS Acct # to ensure accurate credit for your transfer
Send ACH Transfers to:
Citibank, 111 Wall St., New York, NY 10043
ABA Routing # 021000089
USPS/Hasler
Account # 4067-8617
Type:
CCD/CCD+ TMS Postage Account # in postions in 40 thru 47
5 If we can be of further assistance, please contact any TMS
Representative at 1-800-248-8013 or FAX 800-237-0692.
Page 74
74
IJ40-0012-74
4127762B/B
1 1/24/2006
Memory functions
13. MEMORY FUNCTIONS
Frequently used print combinations may be pre-programmed as a
memory function, five preset memory slots are available for selection.
13.1 Saving a Memory Function
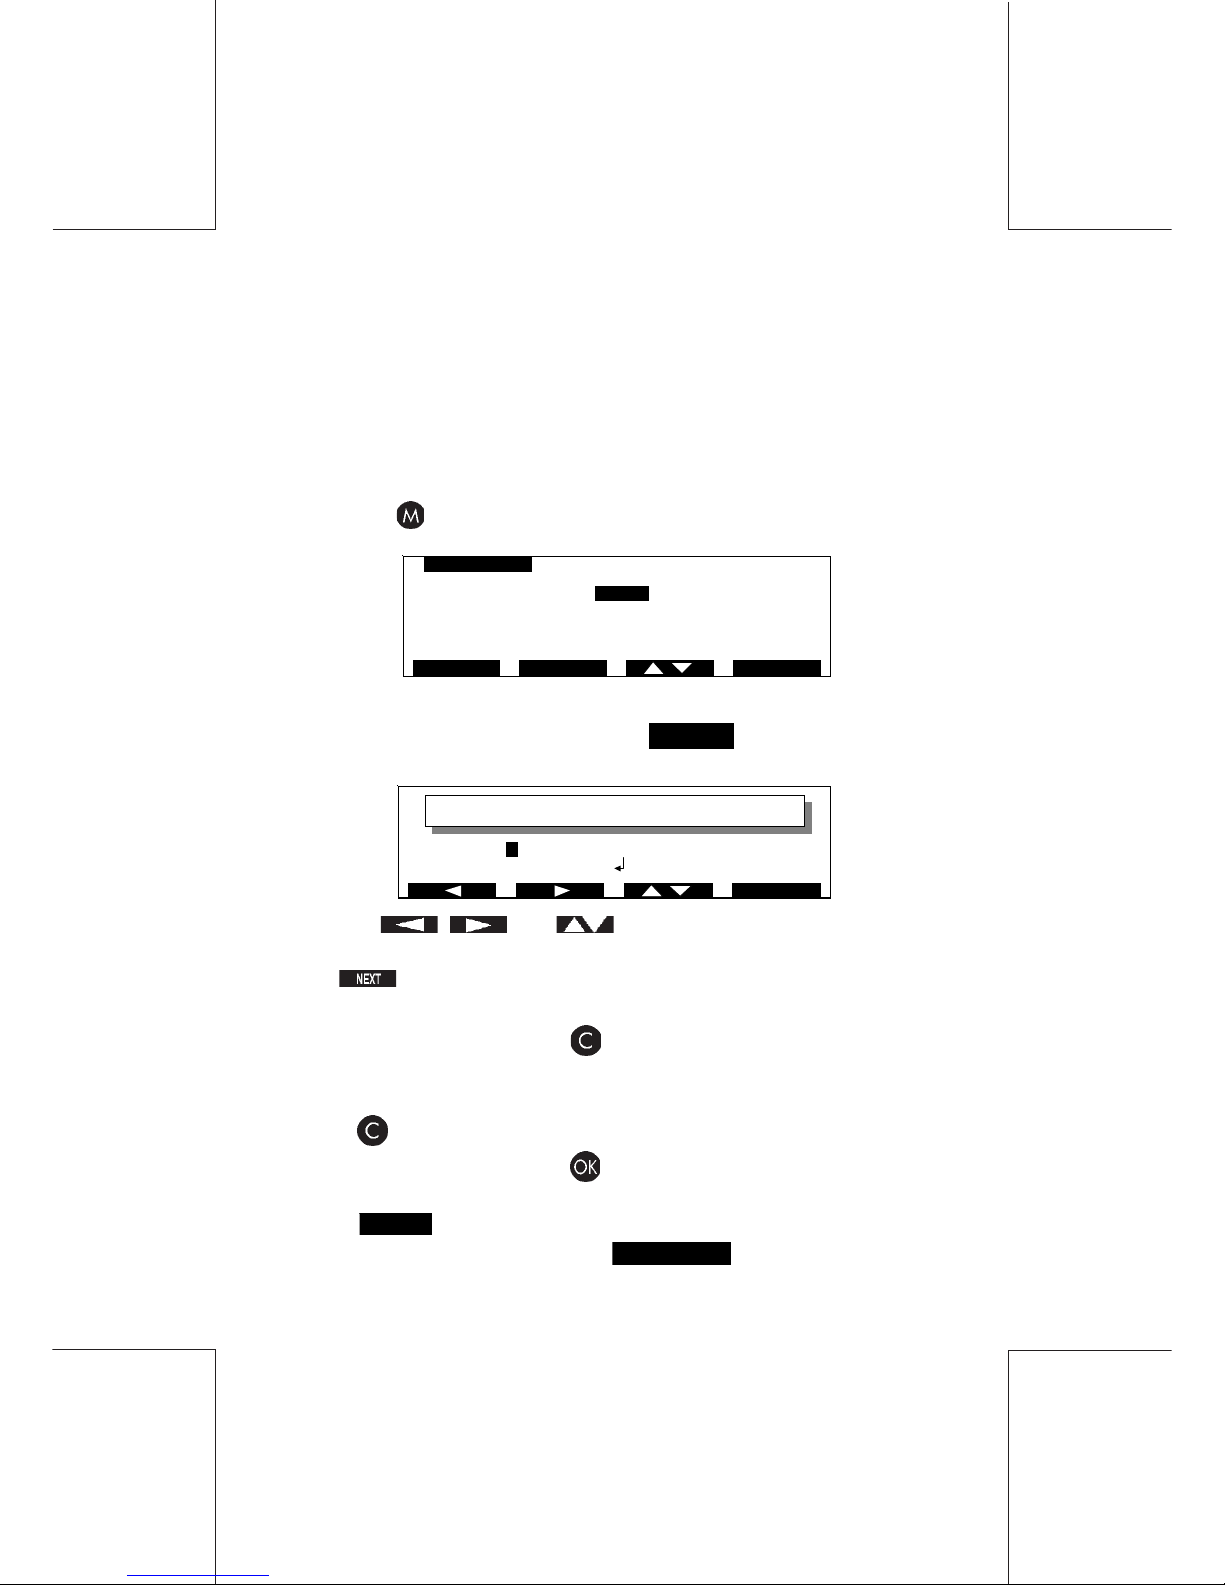
Setup your preferred print combination, then press about 5 seconds the key, the following screen will now be observed:
Select the Job Memory in which you wish to save your program. If
you want to enter a name, press
EDIT
. You will then be
prompted to enter a name for your Job Memory
Use the , and keys to move the cursor to the
character to be defined.
The key is used to confirm selection and move the cursor to
the next character.
To delete a character press .
To enter a number in the Memory Name, use the numeric keypad.
To return to the previous screen with the Memory Name unchanged
press .
To confirm your entry, press .
This operation will overwrite the previous memory setting.
Press
SAVE
to confirm.
To return to Ready Mode press
ESCAPE
.
MEMORY SAVE
1M1
2M2
3M3
4M4
5M5
ESCAPE SAVEEDIT
ABCDEFGHIJKLMNOPQRSTUVWXYZ - #&£/+$.?
€
NEXT
MEMORY NAM E
Page 75
IJ40-0012-75
4127762B/B
1 1/24/2006
75Memory functions
13.2 Recalling a Memory Function
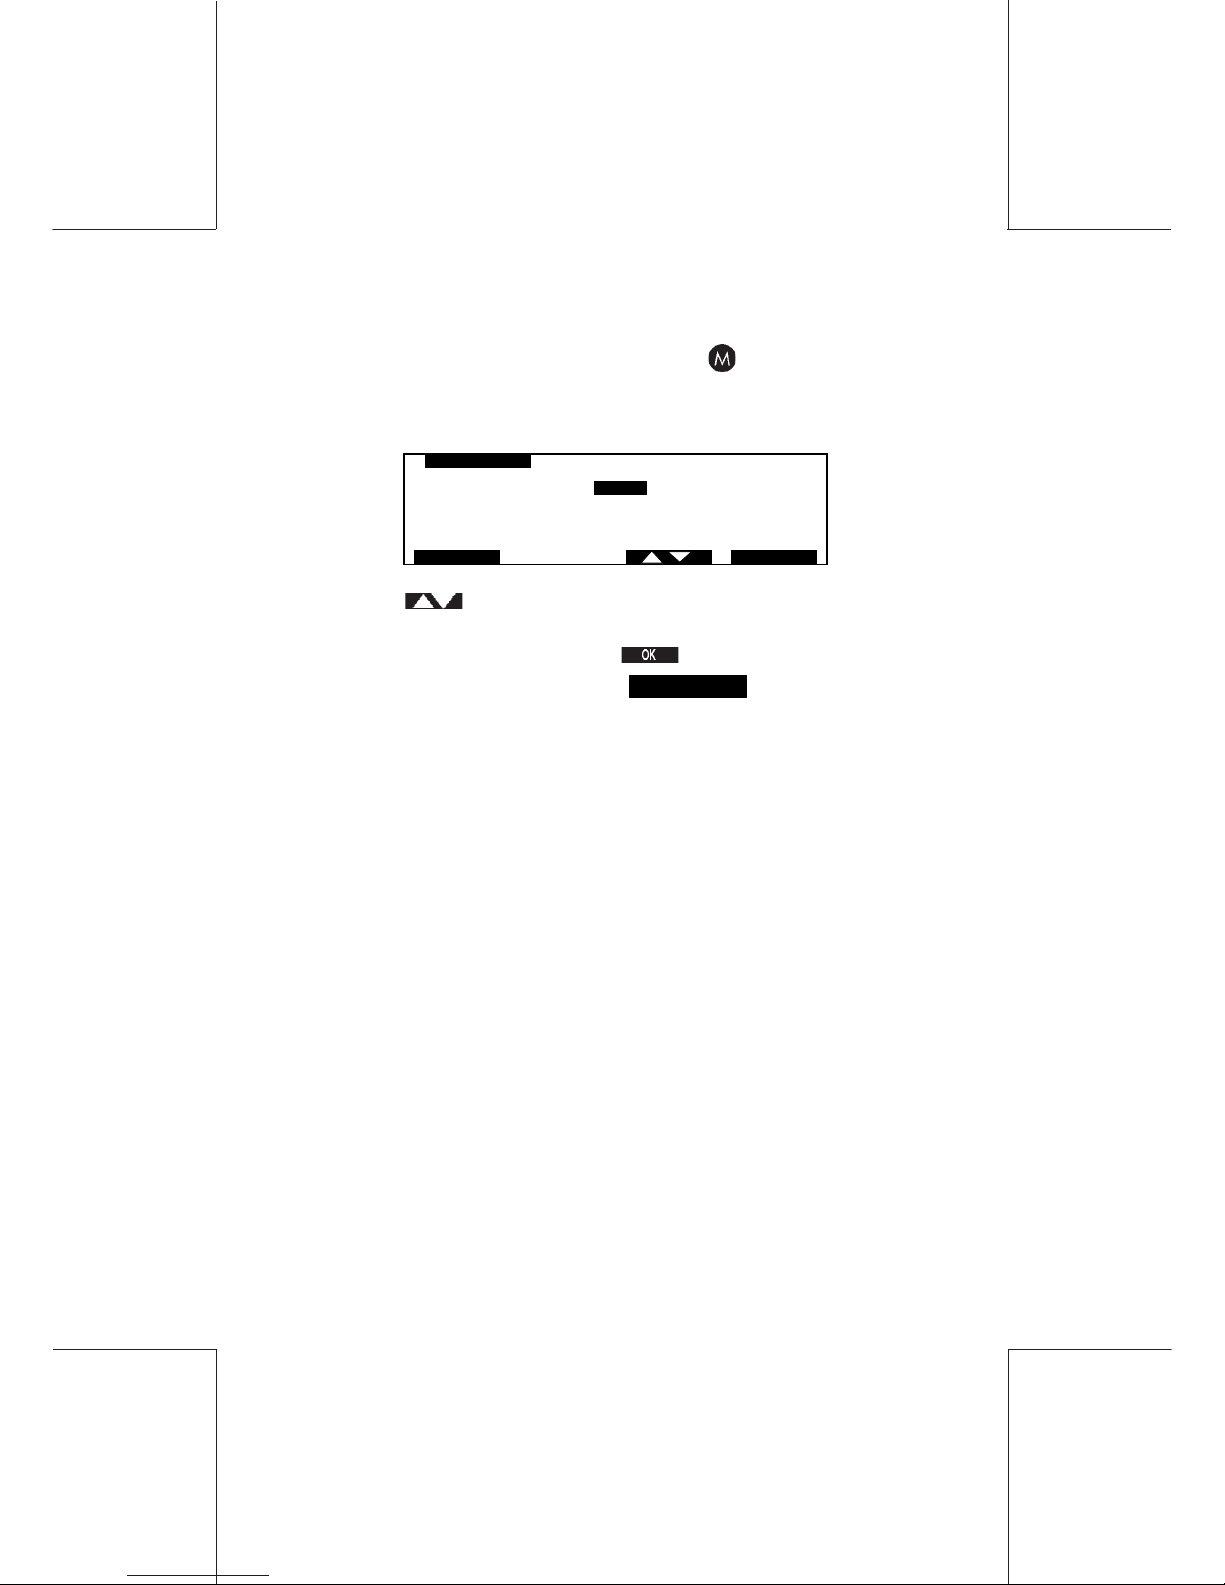
From Ready Mode, press (shortly) the key to display the
MEMORY RECALL screen; a list of memories will now be
observed:
Using the key or the appropriate numerical key, move the
cursor to make your memory recall selection.
To confirm your selection, press .
To return to Ready Mode, press
ESCAPE
.
MEMORY RECALL
1M1
2M2
3M3
4M4
5M5
ESCAPE OK
Page 76

76
IJ40-0012-76
4127762B/B
1 1/24/2006
Supervisor settings
14. SUPERVISOR SETTINGS
14.1 Introduction
In Supervisor Mode, the supervisor can access all machine
functions, except postage printing. Navigation procedure from
screen to screen is the same as in the user mode, except that the
supervisor mode includes a number of extra configuration function
keys. By definition, the supervisor has free access to all the
departments and as such he/she is not prompted by the machine
to enter any code after the Supervisor Code has been entered.
For security purposes, only a supervisor or other responsible
person should be permitted to make changes to these settings.
Page 77
IJ40-0012-77
34127762B/B
1 1/24/2006
77Supervisor settings
14.2 ENTRY TO SUPERVISOR mode
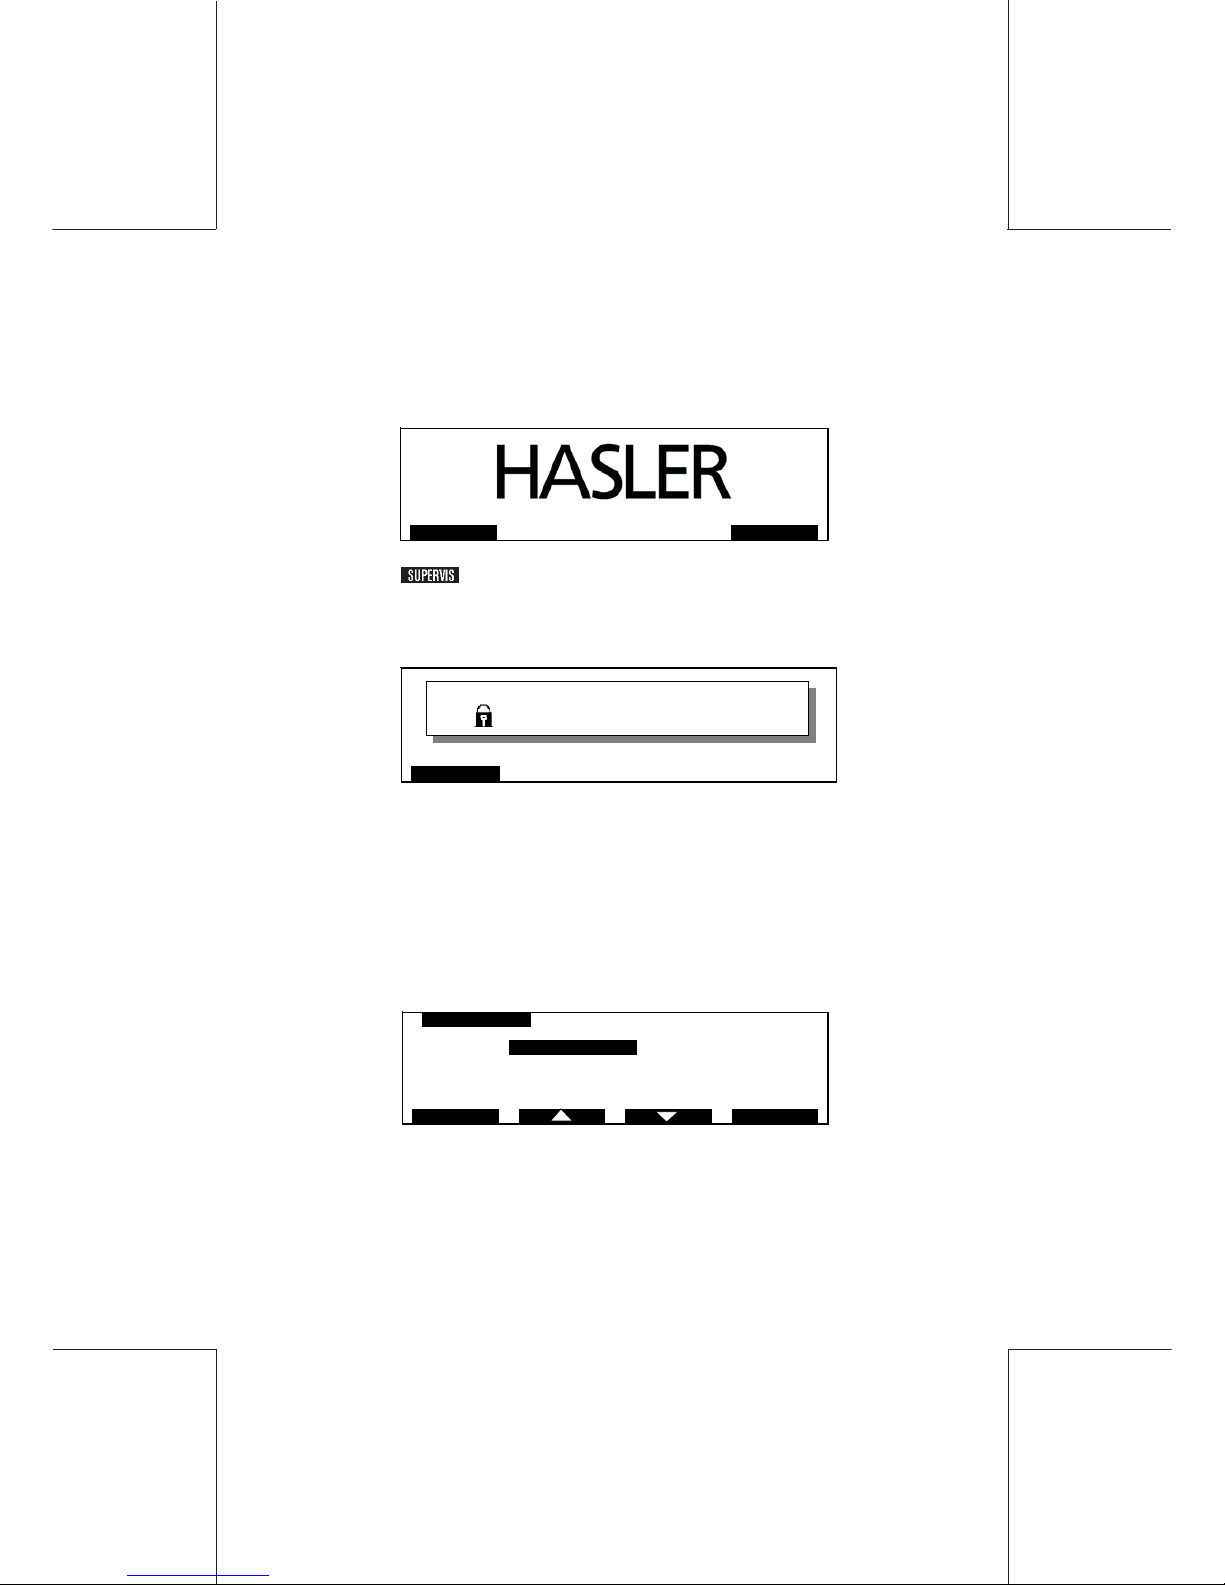
To enter SUPERVISOR mode from the Standby screen:
Press the key.
Or from the MENU key in USER Mode by selecting SUPERVISOR.
The prompt to ENTER SUPERVISOR PIN will be observed:
Enter the Supervisor PIN.
If an incorrect PIN is entered the machine will continue to prompt for
SUPERVISOR PIN Entry until the correct PIN is used.
Having successfully entered Supervisor Mode, the SUPERVISOR
screen will be observed:
ESCAPE
ENTER SUPERVISOR PIN
- - - -
1 SECURITY & DEPT
2REGISTERS
3 LOAD FROM MEMORY CARD
4SETUP
ESCAPE OK
SUPERVISOR
SUPERVIS USER
Page 78

78
IJ40-0012-78
4127762B/B
1 1/24/2006
Supervisor settings
The following functions may be accessed directly from the
Supervisor Ready screen:
SECURITY & DEPT : allows the supervisor to
access the department
setup andsecurity
functions.
REGISTERS : provides access to
registers
LOAD FROM MEMORY CARD : enables supervisor to en-
ter data to the machine
memory e.g. Advert Cards,
Rate Cards (When postal
rates change) and Town
Cards(When you change
location).
SETUP : allows access to machine
setup.
Page 79
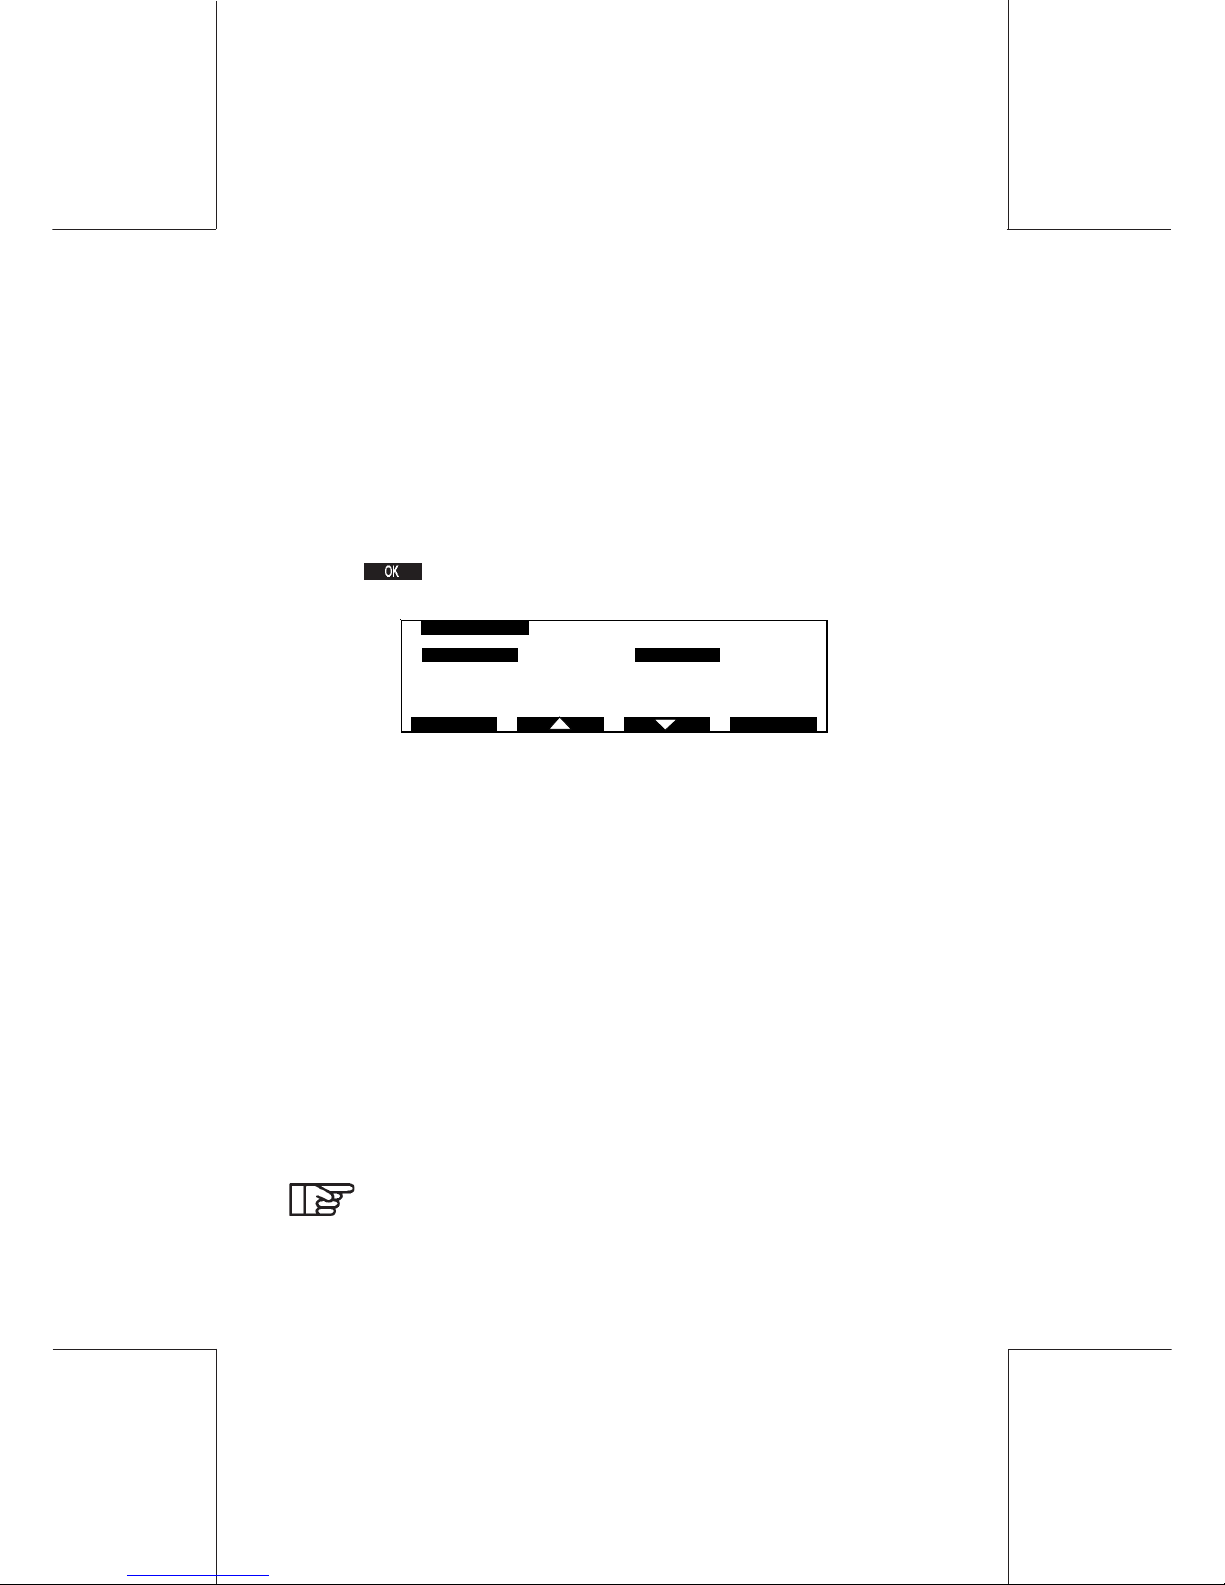
IJ40-0012-79
34127762B/B
1 1/24/2006
79Supervisor settings
14.3 Departments control
In Non-Departmental Operating mode, all values are assigned to
Department 0.
In Departmental mode WJ 65 has 35 departments, while WJ 95
has 45 departments (option 1) or 100 (option 2), and WJ 110 has
50 departments (option 1) or 150 (option 2) available for assignment
by the supervisor.
From the SUPERVISOR menu, move the cursor to option
1 SECURITY & DEPT.
Press to confirm.
The following screen will now be observed:
The following functions may be accessed directly from the
Departments Control screen:
STATUS : allows supervisor to enable
Departmental operation.
SET UP DEPT : allows supervisor to setup
Departments.
DEPARTMENT SELECTION : allows supervisor to select the
department.
LAST RESET ALL DEPT : allows supervisor to reset All
Registers to zero.
USER PIN : allows supervisor to set the 4
digit User PIN.
USER STATUS : allows supervisor to set the
User Status.
When in Departmental Operating Mode access to NonDepartmental Operating Mode (Department 0) is disabled.
1 STATUS DISABLED
2 S ET UP DEP T
3 DEPARTMENT SELECTION PICK UP FROM LIST
4 LAST RESET ALL DEPT 00/00/00
5 USER PIN 0000
ESCAPE OK
SECURITY & DEPT
Page 80
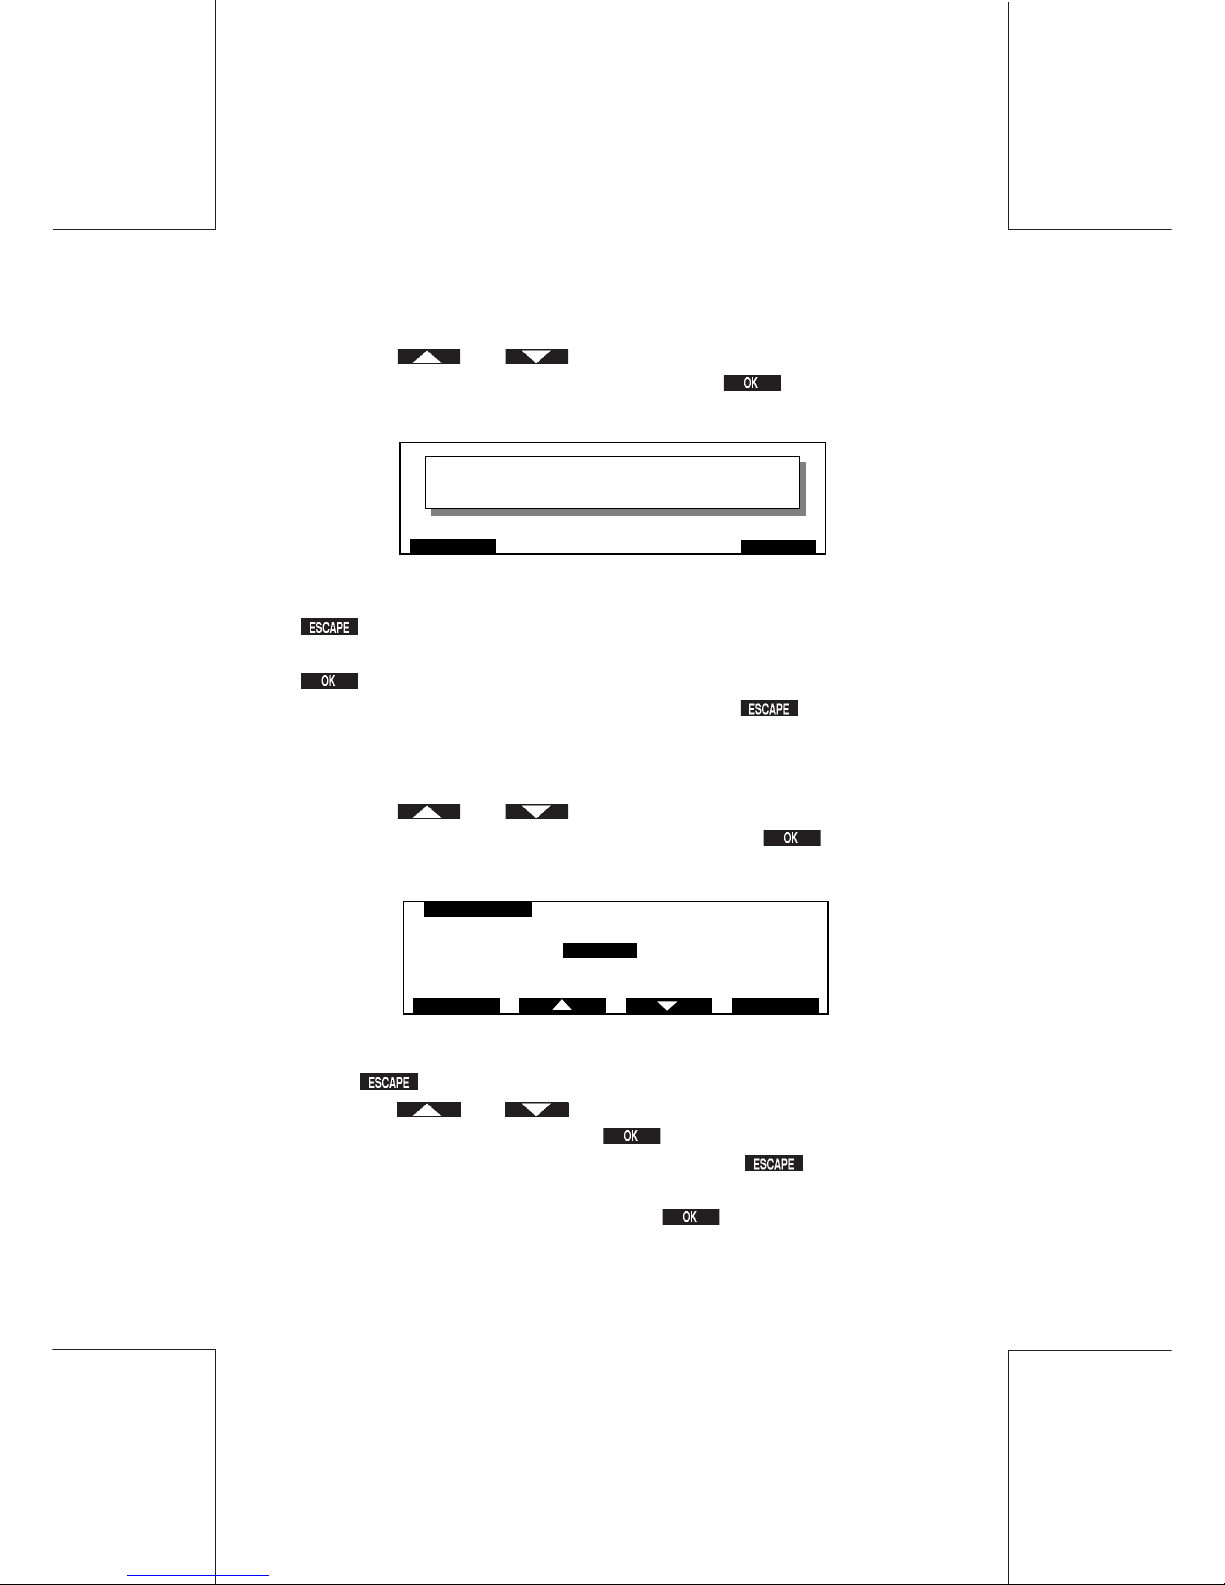
80
IJ40-0012-80
4127762B/B
1 1/24/2006
Supervisor settings
14.3.1 Changing the User PIN
Using the and keys, or the appropriate number key,
move the cursor to 2 USER PIN and press to confirm, the
following screen will be observed:
To return to the previous screen with the User PIN unchanged, press
.
To change the User PIN, enter the new 4 digit value, then press
to confirm.
To return to the SUPERVISOR screen press .
SETTING THE USER STATUS
Using the and keys, or the appropriate number key,
move the cursor to 3 USER STATUS and press to confirm,
the following screen will be observed:
To return to the previous screen with the User Status unchanged,
press .
Using the and keys, or the appropriate number key,
make your selection and press to confirm.
To return to the SUPERVISOR screen, press .
"LOCKED" will appear if you enter more than 8 bad codes.
To unlock, select "OPEN" and press .
OK
ESCAPE
USER PIN
- - - -
1CLOSED
2OPEN
3LOCKED
OK
USER STATUS
ESCAP E
Page 81
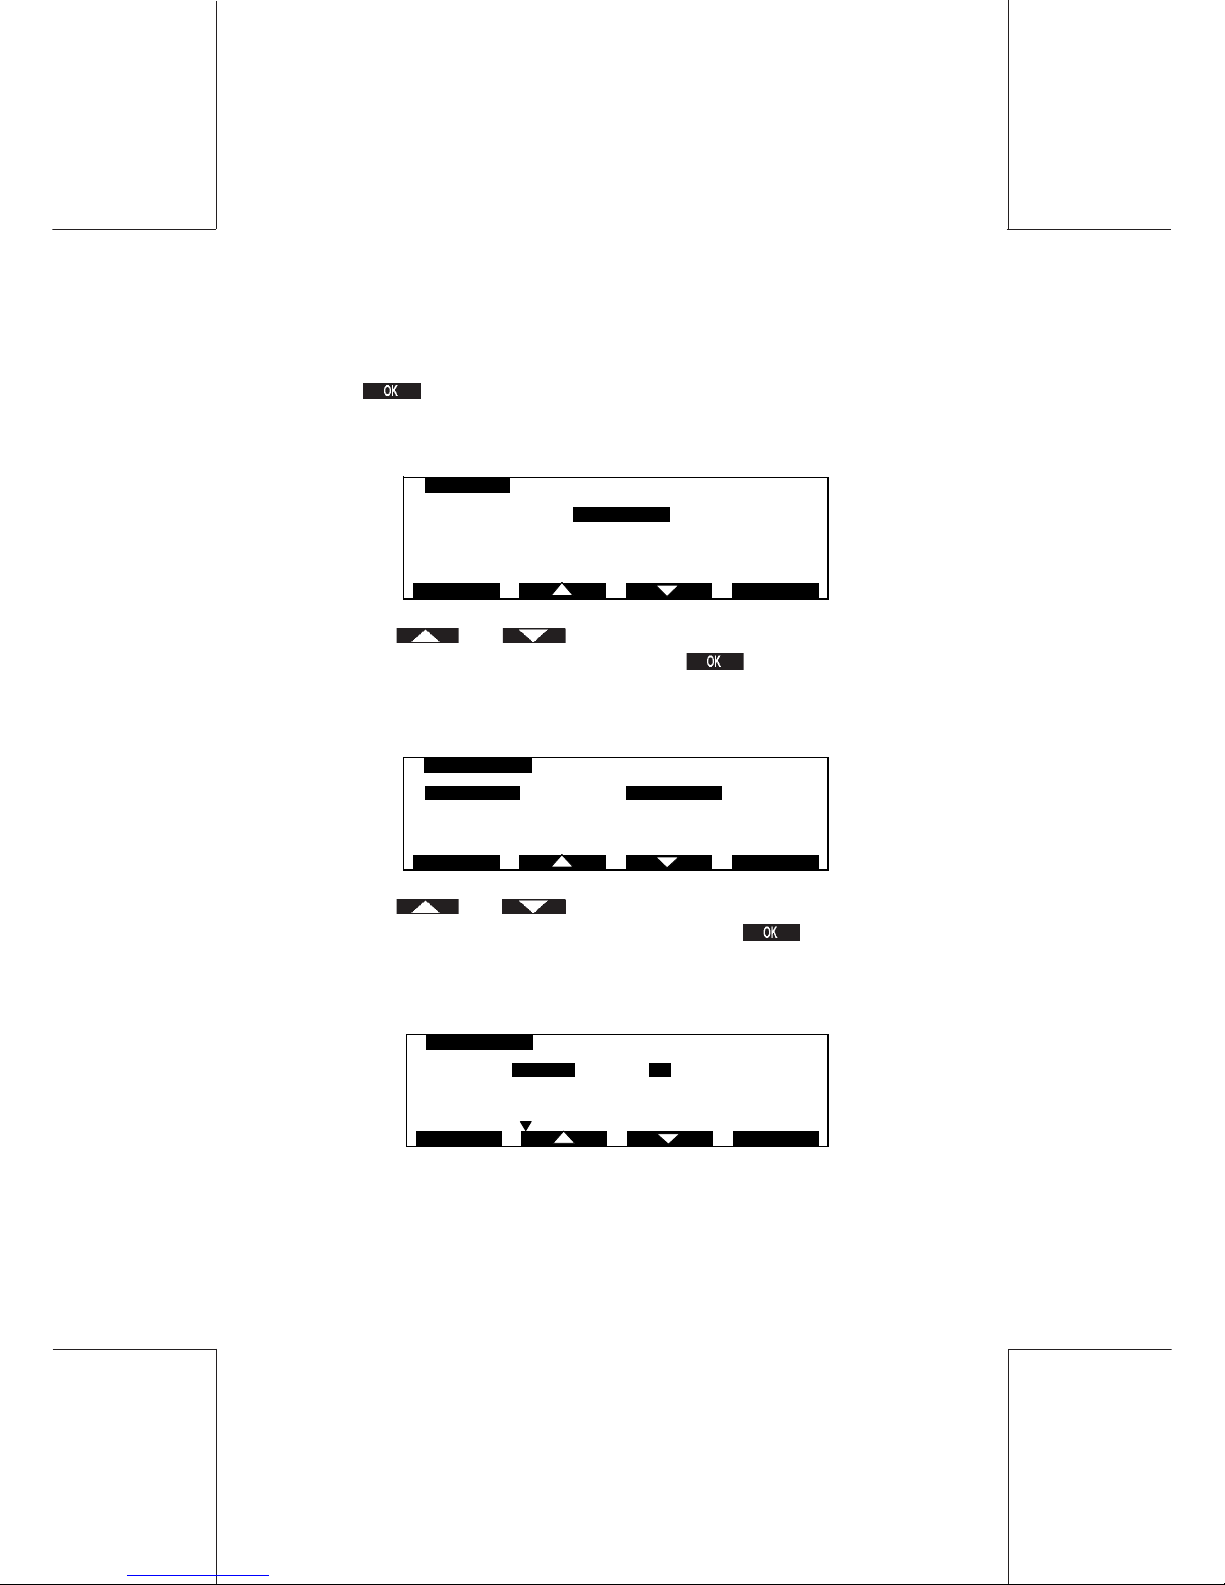
IJ40-0012-81
34127762B/B
1 1/24/2006
81Supervisor settings
14.3.2 To Assign a Department
From the SECURITY & DEPT menu, move the cursor to STATUS.
Press to confirm.
The following screen will be observed:
Using the and keys, or the appropriate number key,
move the cursor to ENABLED and press to confirm, you will
be returned to the SECURITY & DEPT screen with the status
changed to ENABLED.
Using the and keys, or the appropriate number key,
move the cursor to SET UP DEPT and press to confirm.
The following screen will be observed:
STATUS
1DISABLED
2 ENABLED
ESCAPE OK
1 STATUS ENABLED
2 SETUP DEPT
3 DEPARTMENT SELECTION PICK UP FROM LIST
4 LAST RESET ALL DEPT 00/00/00
5 USER PIN 0000
OKES CAPE
SECURITY & DEPT
1DEPT 1 C
OK
SET UP DEPT
ESCAP E
Page 82
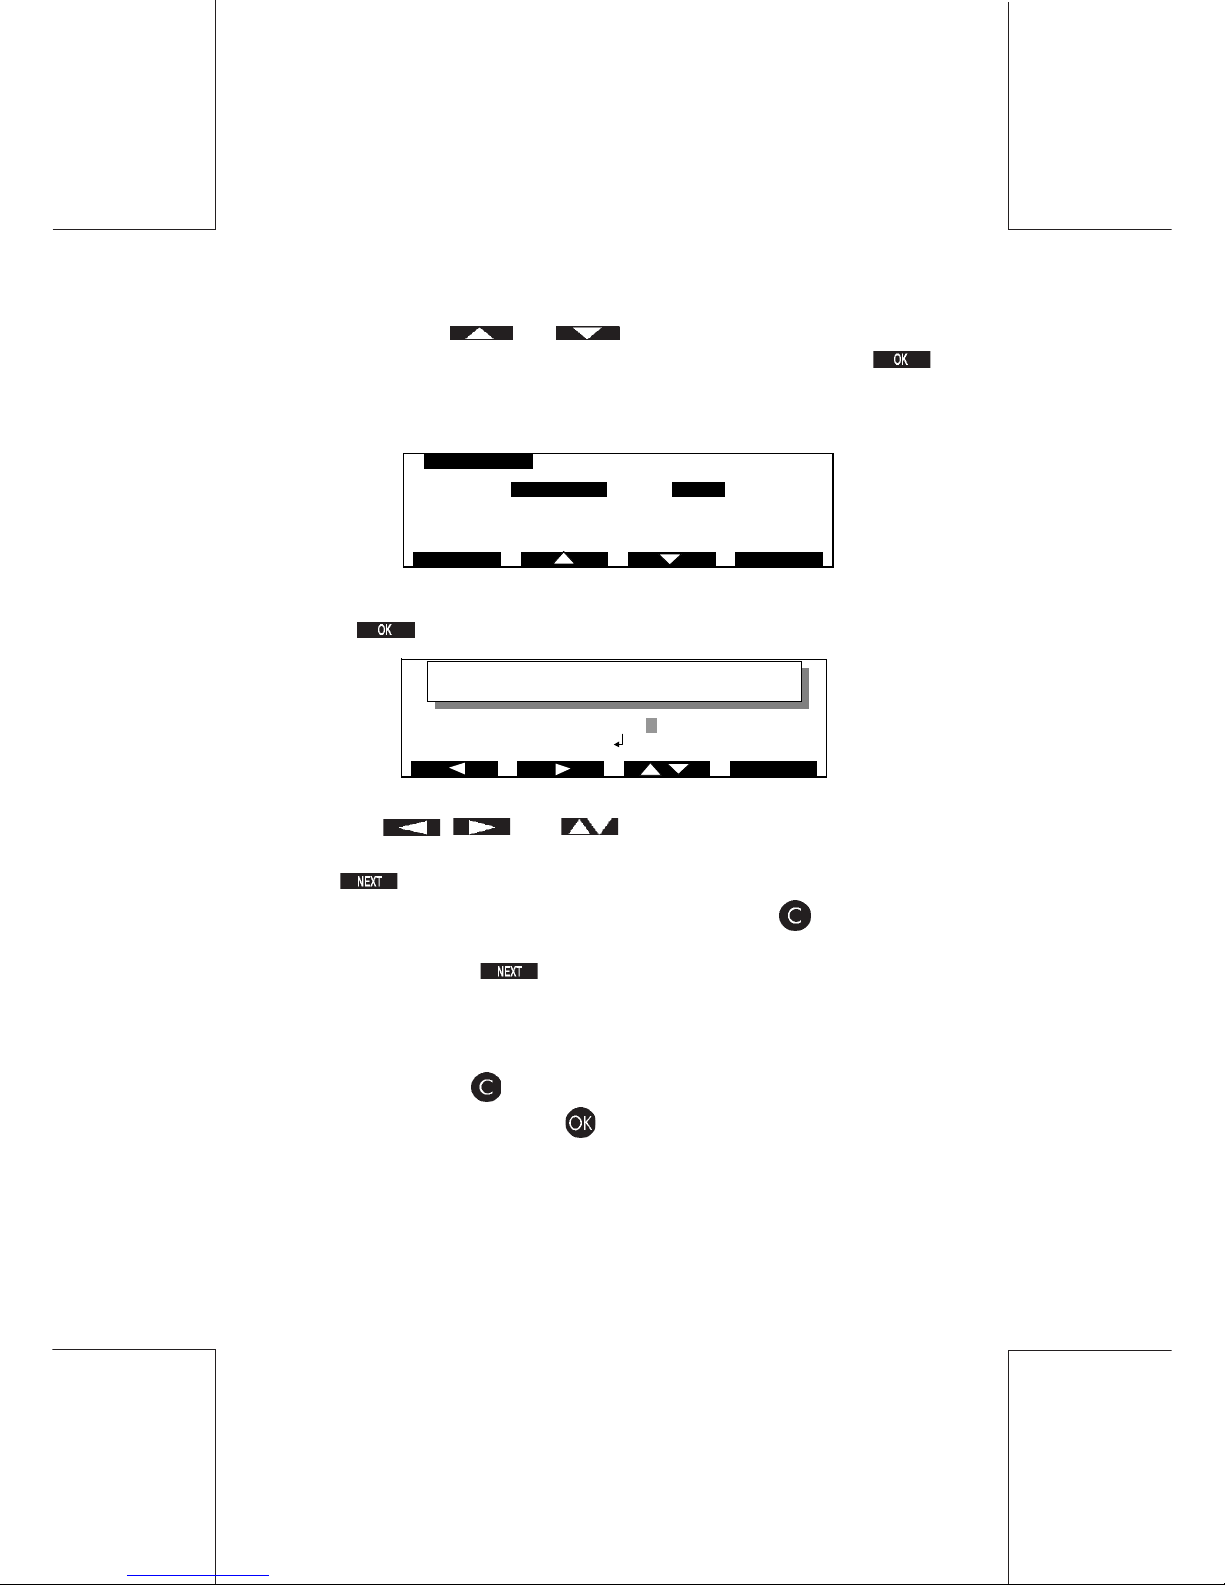
82
IJ40-0012-82
4127762B/B
1 1/24/2006
Supervisor settings
Again using the and keys, or the appropriate number
key, move the cursor to the Number you wish to set and press
to confirm, the DEPARTMENT SETTINGS screen for the selected
department will be observed:
To set a Department Name, move the cursor to DEPT NAME and
press to confirm, the following screen will be observed:
ABCDEFGH I JKLMNOPQRST
UV
WXY
Z -
#&/+$ '.?
,
NEXT
DEPT NAME
-
Use the , and keys to move the cursor to the
character to be defined.
The key is used to confirm the selection and move the cursor
to the next character. To delete a character press .
To enter numbers in the text use the numeric keypad, you do not
need to press the key to confirm selection when entering
numbers.
A department name is limited to 16 characters including spaces.
To return to the previous screen with the Department Name
unchanged press until the screen changes to the previous one.
To confirm your entry press .
To Change a Department Name, select DEPT NAME as
described above.
1 DEPT NAME NONE
2 DEPT CODE 1
3 DEPT PIN 0000
4 STATUS CLOSED
5 LAST RESET 00/00/00
DEPT SETTINGS
OKESCAPE
Page 83
IJ40-0012-83
34127762B/B
1 1/24/2006
83Supervisor settings
Using the key, delete characters of the old Department Name.
Press as many times as required to erase the Department
Name completely, then enter the new name as previously detailed.
To set a Department Code, move the cursor to DEPT CODE
and press to confirm, the following screen will be observed:
Using the numerical keypad enter/change the account number,
press to confirm.
To return to the previous screen with account number unchanged
press .
To set a Department PIN, move the cursor to DEPT PIN and
press to confirm, the following screen will be observed:
To change the Department PIN, enter the new value, then press
to confirm.
To return to the previous screen with the Department PIN
unchanged, press .
ESCAPE OK
DEPT PIN
- - - -
ESCAPE OK
DEPT CODE
-
Page 84
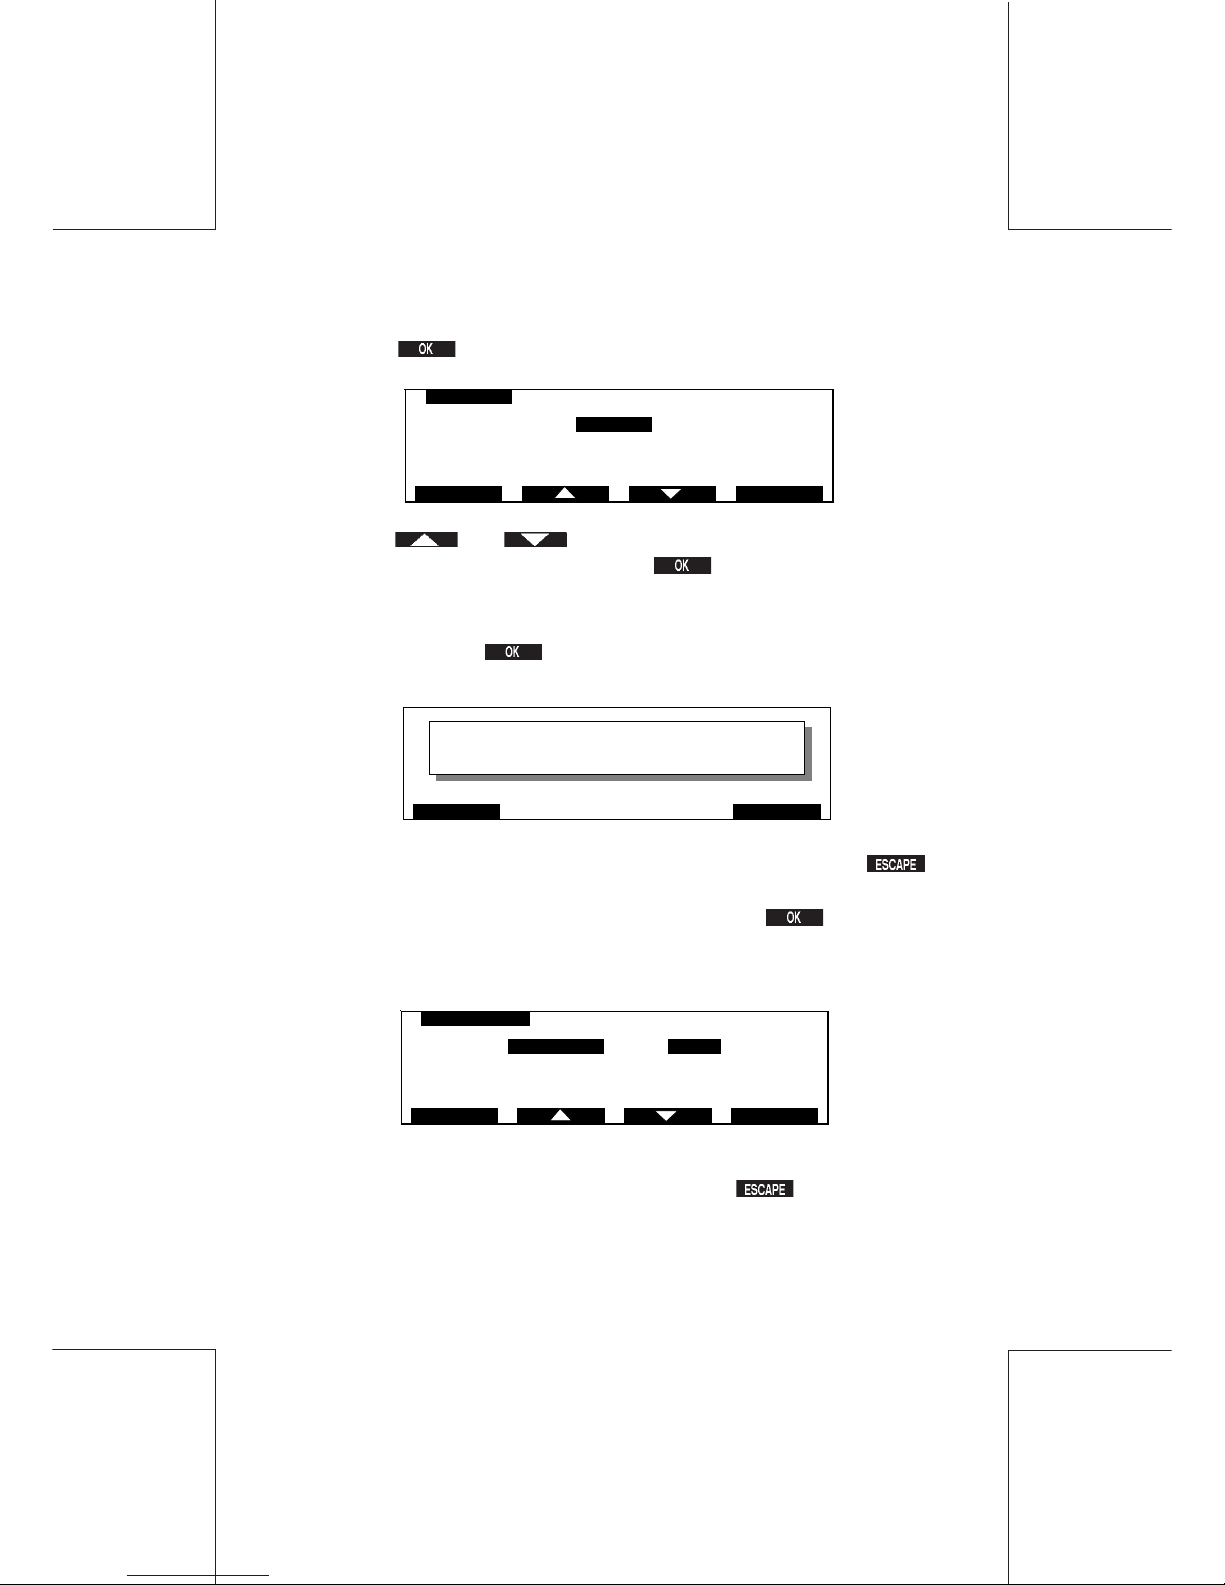
84
IJ40-0012-84
4127762B/B
1 1/24/2006
Supervisor settings
To Change the Department Status, move the cursor to STATUS
and press to confirm, the following screen will be observed:
Using the and keys, or the appropriate number key,
move the cursor to OPEN and press to confirm.
To Reset the Department Registers, move the cursor to LAST
RESET and press to confirm, the following screen will be
observed:
To return to the previous screen with data unchanged, press .
To reset current Department Data to zero, press to confirm,
the following screen will now be observed with the current date
displayed as LAST RESET:
Your Department is assigned and ready for use.
To return to the SUPERVISOR screen press .
STATUS
1CLOSED
2OPEN
3LOCKED
ESCAPE OK
ESCAPE CONTINUE
DEPT DATA WILL BE ERASED
1 DEPT NAME NONE
2 DEPT CODE 1
3 DEPT PIN 0000
4 STATUS OPEN
5 LAST RESET 03/03/02
DEPT SETTINGS
OKES CAPE
Page 85

IJ40-0012-85
34127762B/B
1 1/24/2006
85Supervisor settings
14.4 WJ 65/95/110 machine setup menu
The SETUP menu provides access to the following supervisor
functions :
1. High Value
A High Value Warning will be displayed in User Mode when a value
exceeding or equal to the High Value threshold is selected, this
value may be changed (Default High Value set to $1.00)
2. Low Credit
The Low Credit Warning will be displayed in User Mode when the
credit level falls below or equal to the Low Credit threshold, this
value may be changed (Default Low Credit value set to $50.00)
3. Time
The machine clock is set to local time, the year cannot be changed,
however to facilitate Summer/Winter time may be changed.
4. Sleep Mode
If the machine is left for a period of time it will automatically return
to Sleep Mode. The time out period may be changed (Default
Sleep Mode time out set to 5 minutes)
5. Motor Timeout
Controls the length of time the motors run after processing the last
item of mail; for instance inserter timeout is set for a few minutes.
6. Key Beep
May be set to sound when a key is pressed, this setting may be
changed (Default set to ON)
Page 86

86
IJ40-0012-86
4127762B/B
1 1/24/2006
Supervisor settings
7. Default Stamp Value
Enables the supervisor to define a default postage value (Default
Stamp Value set to $0.00).
8. Telephone Settings
The telephone numbers of the Hasler Tele Meter Setting® Resetting system and Helpdesk are stored in the mailing machine.
9. Registration
Enables Change Address, Audit and Withdrawal transactions.
10. Language
Details Language setting (Factory set to American English).
11. Report On
Enables the supervisor to determine report printing mode e.g.
internal label printer, remote printer or PC (Factory set to internal
label printer).
12. PC Connection (not yet available)
13. Lock Keyboard
14. WP Feature
Allows the supervisor to activate WP 10 lb. (and higher), to select
the appropriate geographic code and (optional) to activate the
differential weighing.
Page 87
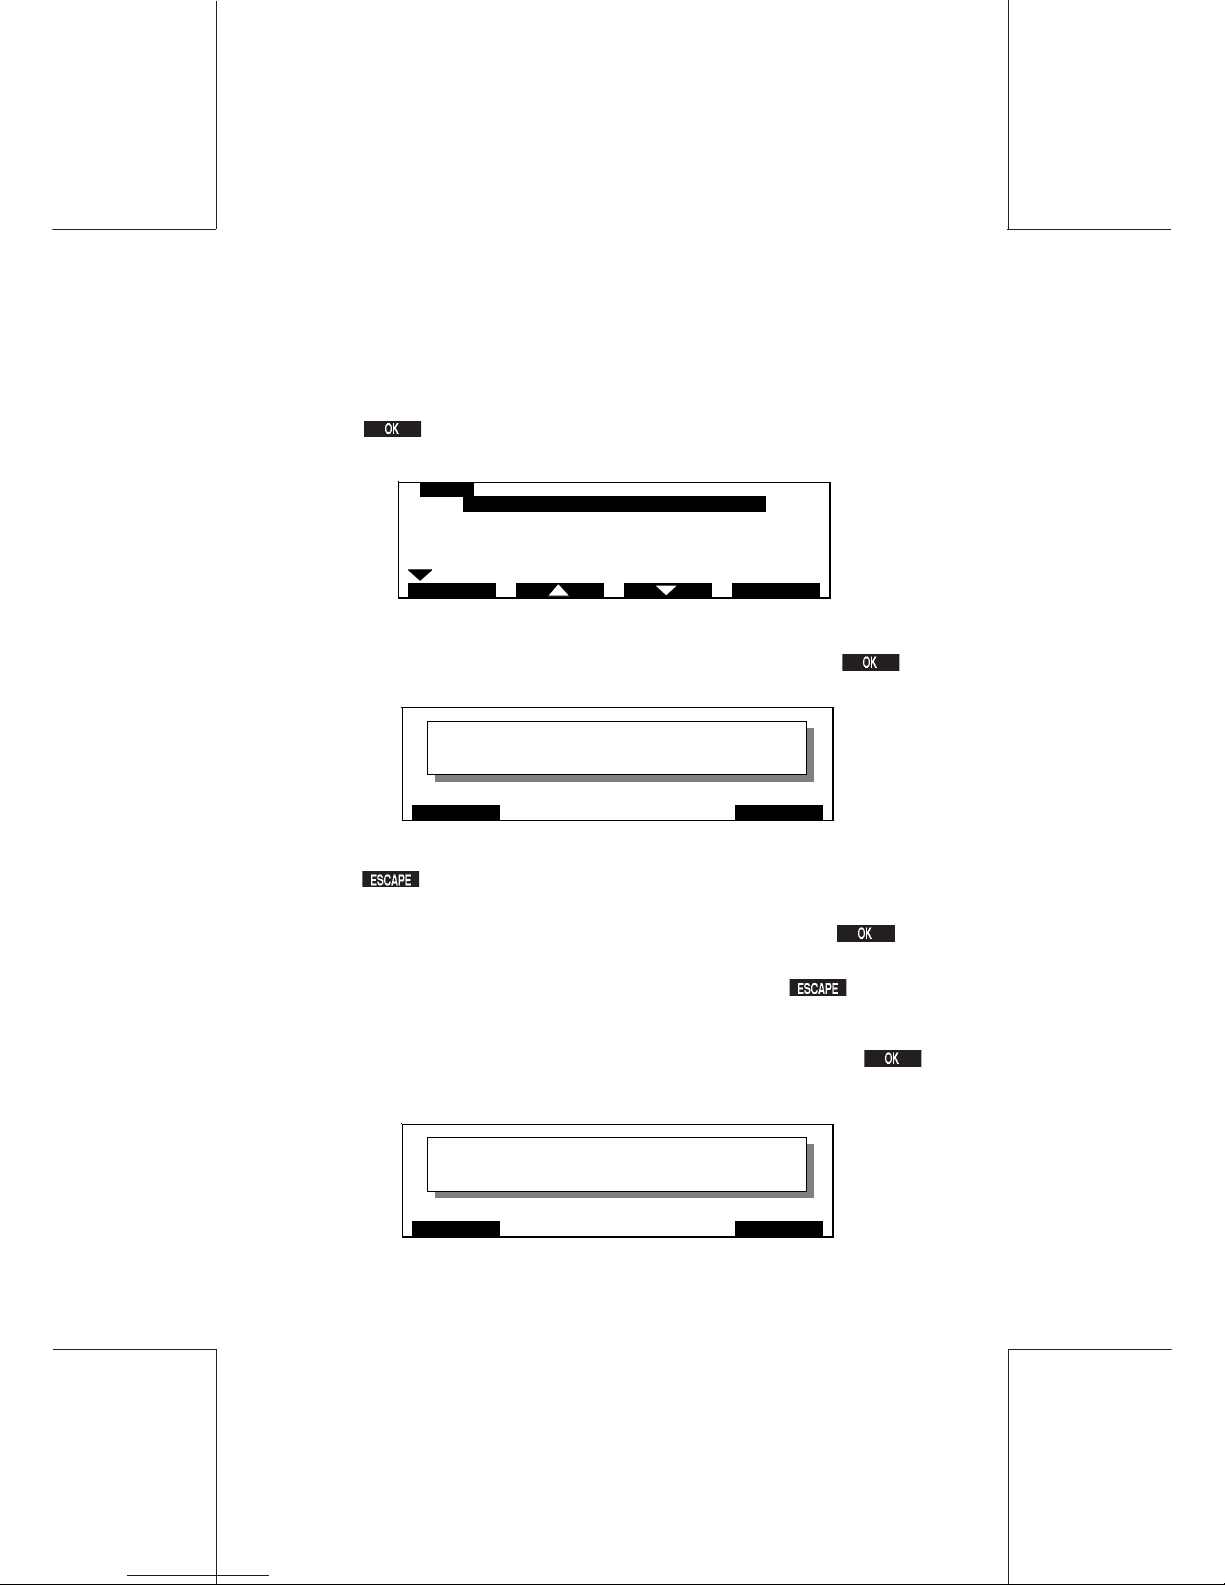
IJ40-0012-87
34127762B/B
1 1/24/2006
87Supervisor settings
SETUP
1 HIGH V ALUE $10.00
0
2 LOW CREDIT $50.00
0
3 TIME 09.50
4 SLEEP MODE 5
5 MOTOR TIMEOUT LONG
ESCAPE OK
MACHINE SETUP
From the SUPERVISOR menu, move the cursor to the SETUP
option.
Press to confirm.
The following screen will now be observed:
High Value
From the SETUP screen select HIGH VALUE and press to
confirm, the following screen will be observed:
To return to the SETUP menu with the original value unchanged,
press .
To change the High Value, enter the new value (with no point or
comma, e.g. 100 corresponds to $1.00), then press to
confirm.
To return to the Supervisor Ready screen, press twice.
Low Credit
From the SETUP screen select LOW CREDIT and press
to confirm, the following screen will be observed:
ESCAPE OK
HIGH VALUE
$ 0.00
ESCAPE OK
PE MODE VEILLE
0
LOW CREDIT
$ 0.00
Page 88
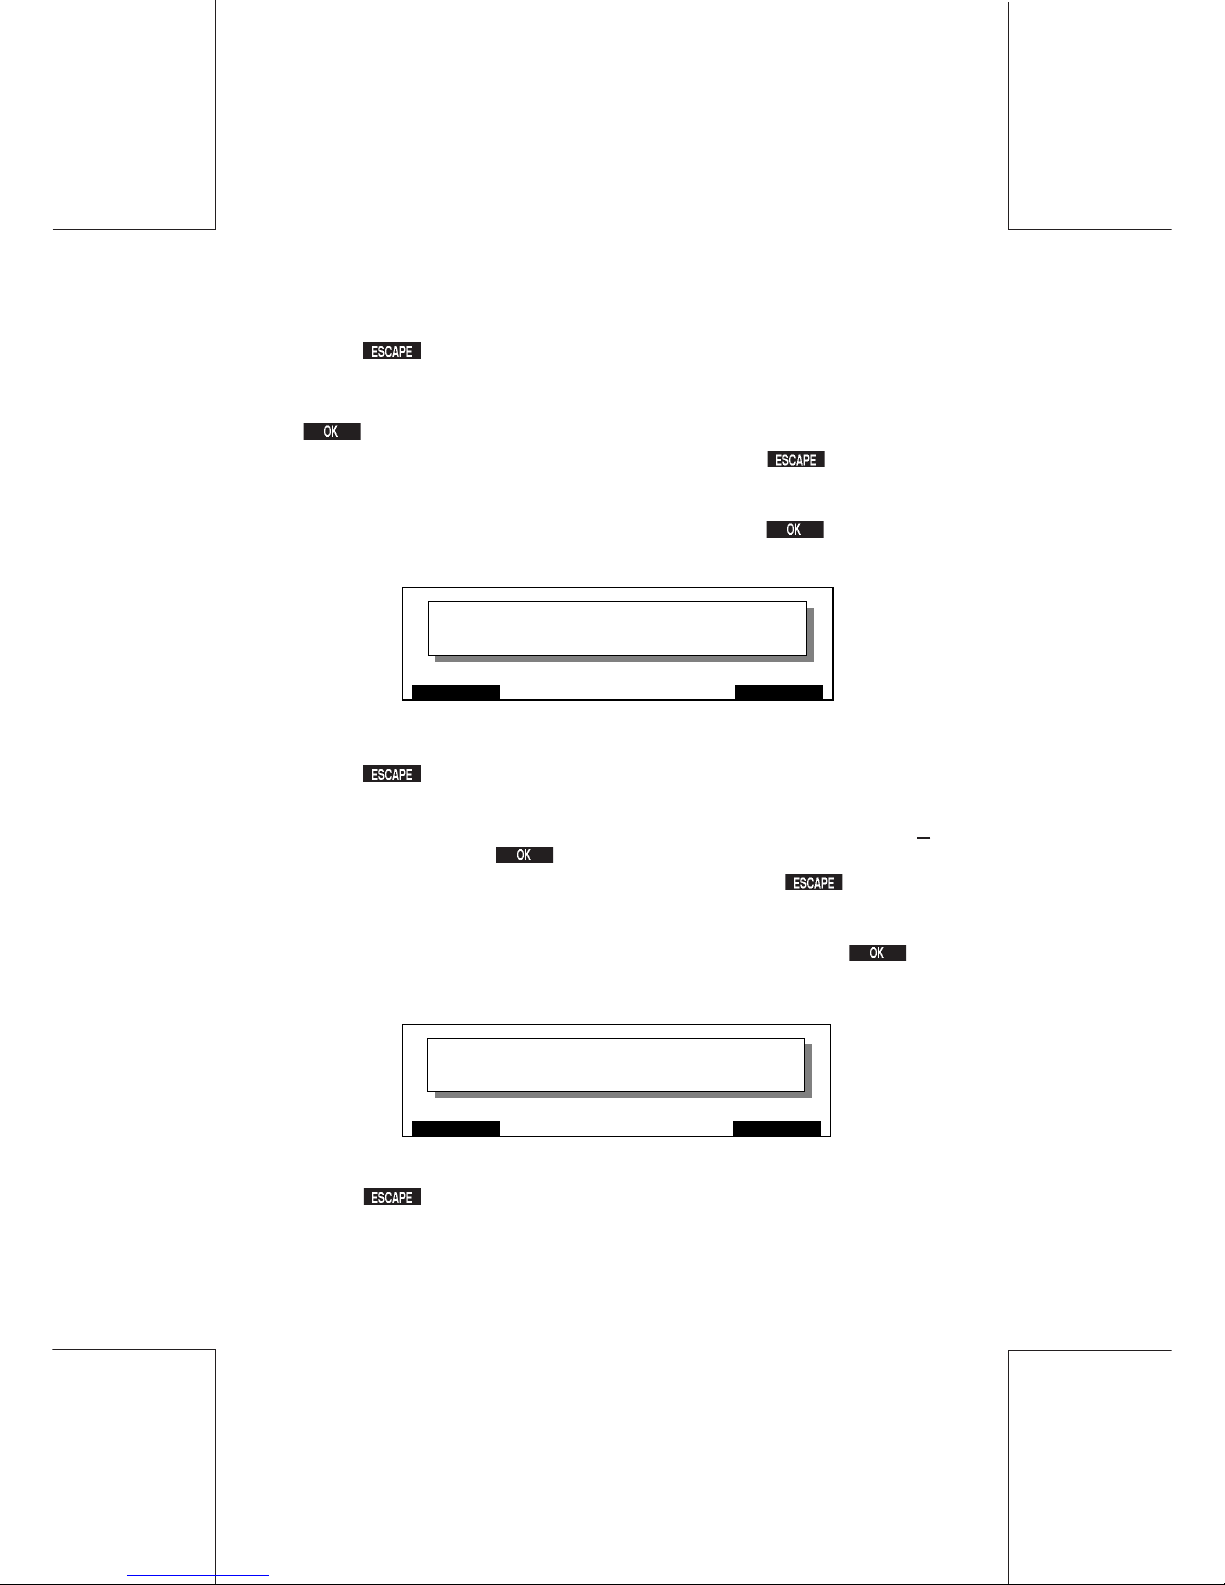
88
IJ40-0012-88
4127762B/B
1 1/24/2006
Supervisor settings
To return to the previous screen with the original value unchanged,
press .
To change the Low Credit Threshold, enter the new value (with no
point or comma, e.g. 5000 corresponds to $50.00), then press
to confirm.
To return to the Supervisor Ready screen press twice.
Time
From the SETUP screen select TIME and press to confirm,
the following screen will be observed:
To return to the previous screen with the Time Setting unchanged,
press .
To change the Time Setting, enter the new value, (with no point or
comma, e.g.:1345 corresponds to 1.45 pm, maximum variance +
3hours), then press to confirm.
To return to the Supervisor Ready screen press twice.
Sleep Mode
From the SETUP screen select Sleep Mode and press to
confirm, the following screen will be observed:
To return to the previous screen with the original value unchanged,
press .
ESCAPE OK
TIME
- - : - -
ESCAPE OK
SLEEP MODE
0
Page 89
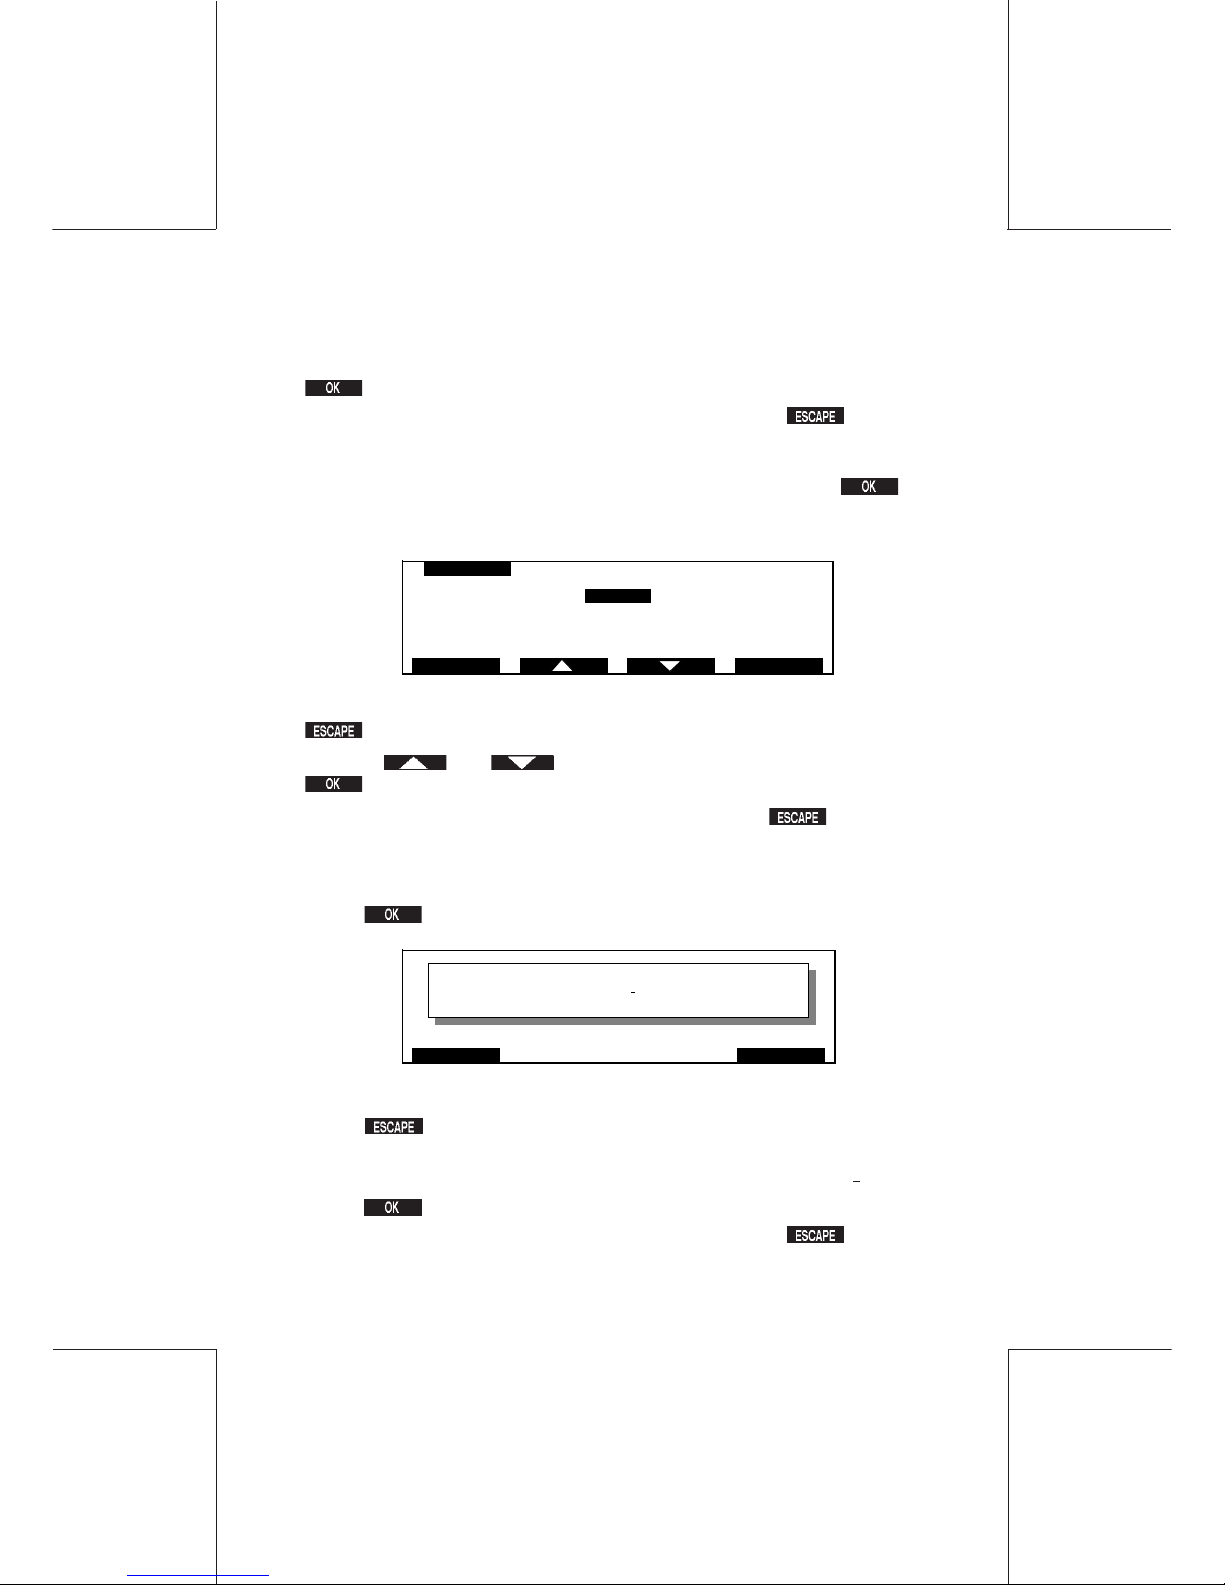
IJ40-0012-89
34127762B/B
1 1/24/2006
89Supervisor settings
To change the Sleep Mode time period, enter the new value (with
no point or comma, e.g. 5 corresponds to 5 minutes), then press
to confirm.
To return to the Supervisor Ready screen press twice.
Key Beep
From the SETUP screen select KEY BEEP and press to
confirm, the following screen will be observed:
To return to the previous screen with the Setting unchanged, press
.
Use the and keys to change the setting, then press
to confirm.
To return to the Supervisor Ready screen press twice.
Default Stamp Value
From the SETUP screen select DEFAULT STAMP VALUE and
press to confirm, the following screen will be observed:
To return to the SETUP menu with the original value unchanged,
press .
To change the DEFAULT STAMP VALUE, enter the new value
(with no point or comma, e.g. 1000 corresponds to $1.000), then
press to confirm.
To return to the Supervisor Ready screen press twice.
KEY BEEP
1ON
2OFF
ESCAPE OK
ESCAPE OK
DEFAULT ST AM P V ALUE
$0.00
0
Page 90
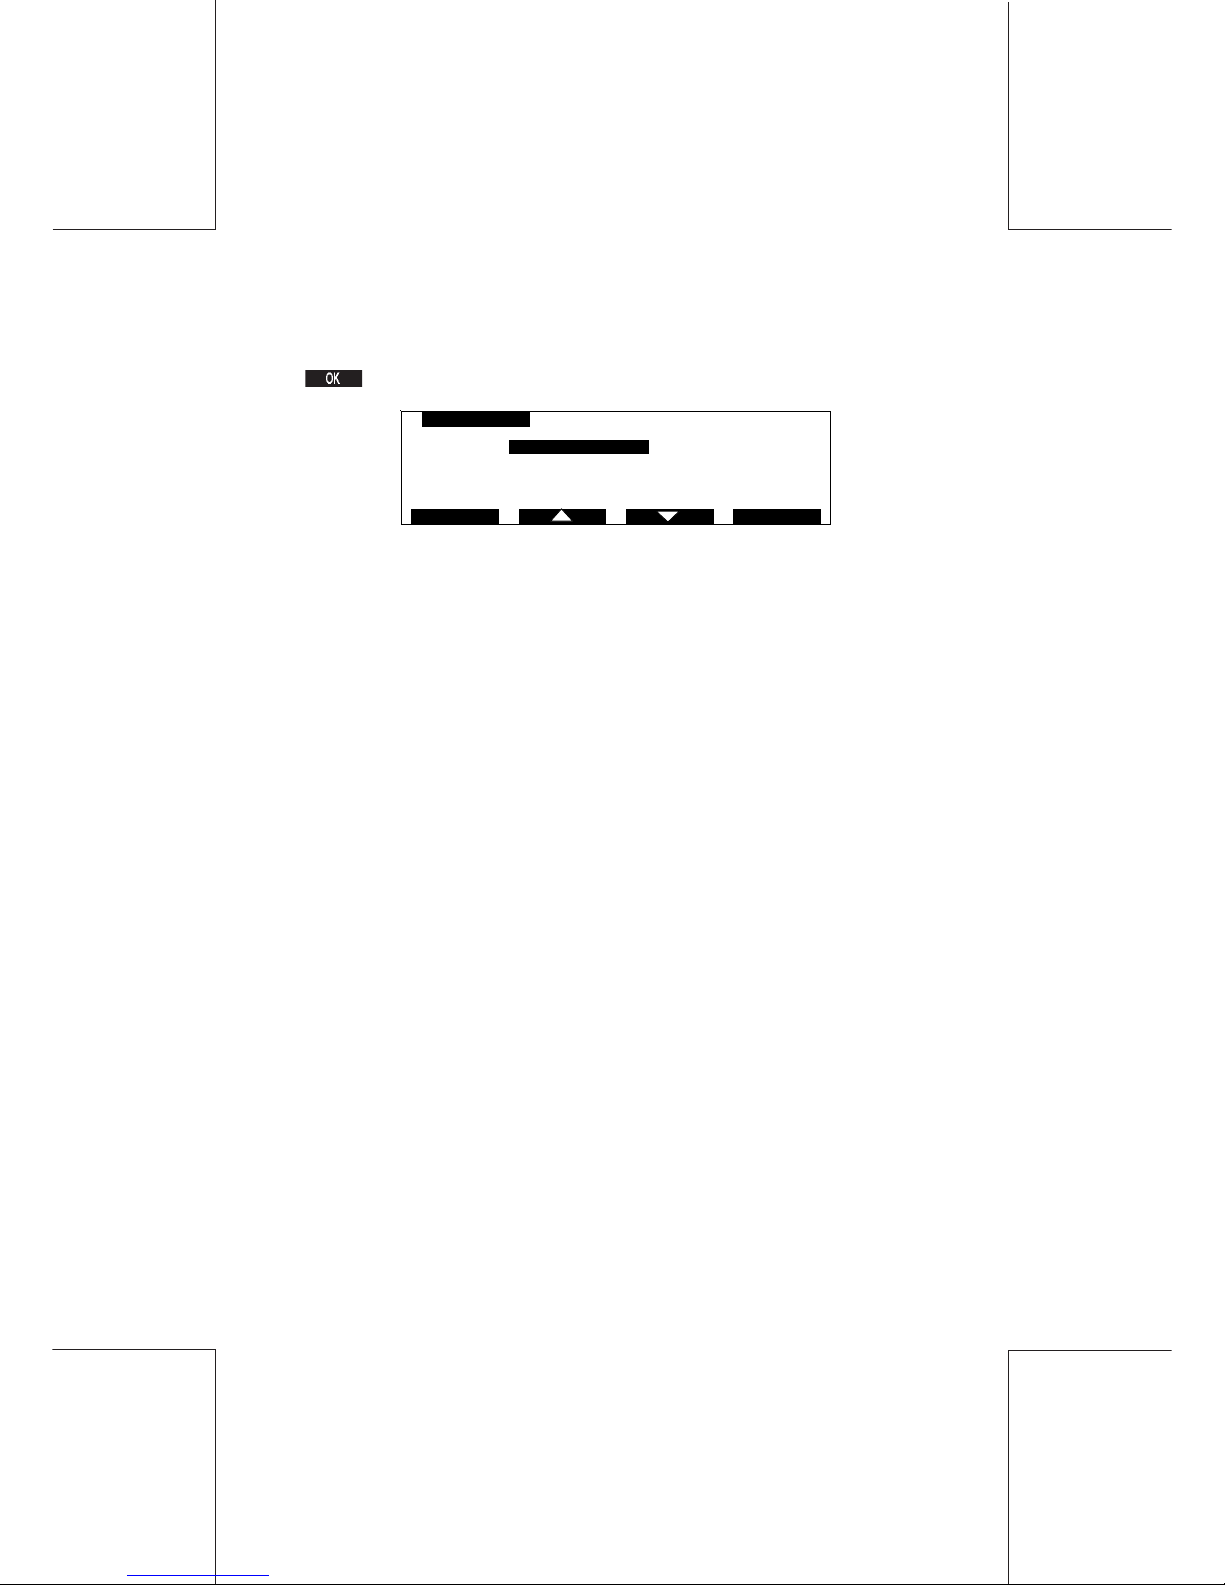
90
IJ40-0012-90
4127762B/B
1 1/24/2006
Supervisor settings
Registration
From the SETUP screen select REGISTRATION and press
to confirm, the following screen will be observed:
Change Address
If you have changed your address, call the Hasler Customer
Care at 1-800-446-6027. A customer service representative will
take your information and guide you through the update procedure.
Audit
USPS regulations require that your meter must be set at least once
every three months and the meter has an internal timer that tracks
your reset activity. If you wish to avoid a PO LOCKOUT, you can
perform an AUDIT transaction any time prior to the timer expiration. When the Audit transaction is completed, postage printing is
enabled for another 3 months.
Withdraw
The Withdraw procedure is only required if you are cancelling your
meter contract or if there is a technical problem with your meter.
Call the Hasler Helpdesk at 1-800-243-6275 and a customer
service representative will take your information and guide you
through the withdraw procedure. Your meter should always be
withdrawn before returning it to Hasler.
1 CHANGE ADDRESS
2 AUDIT
3 WITHDRAW
OK
REGISTRATION
ESCAPE
Page 91
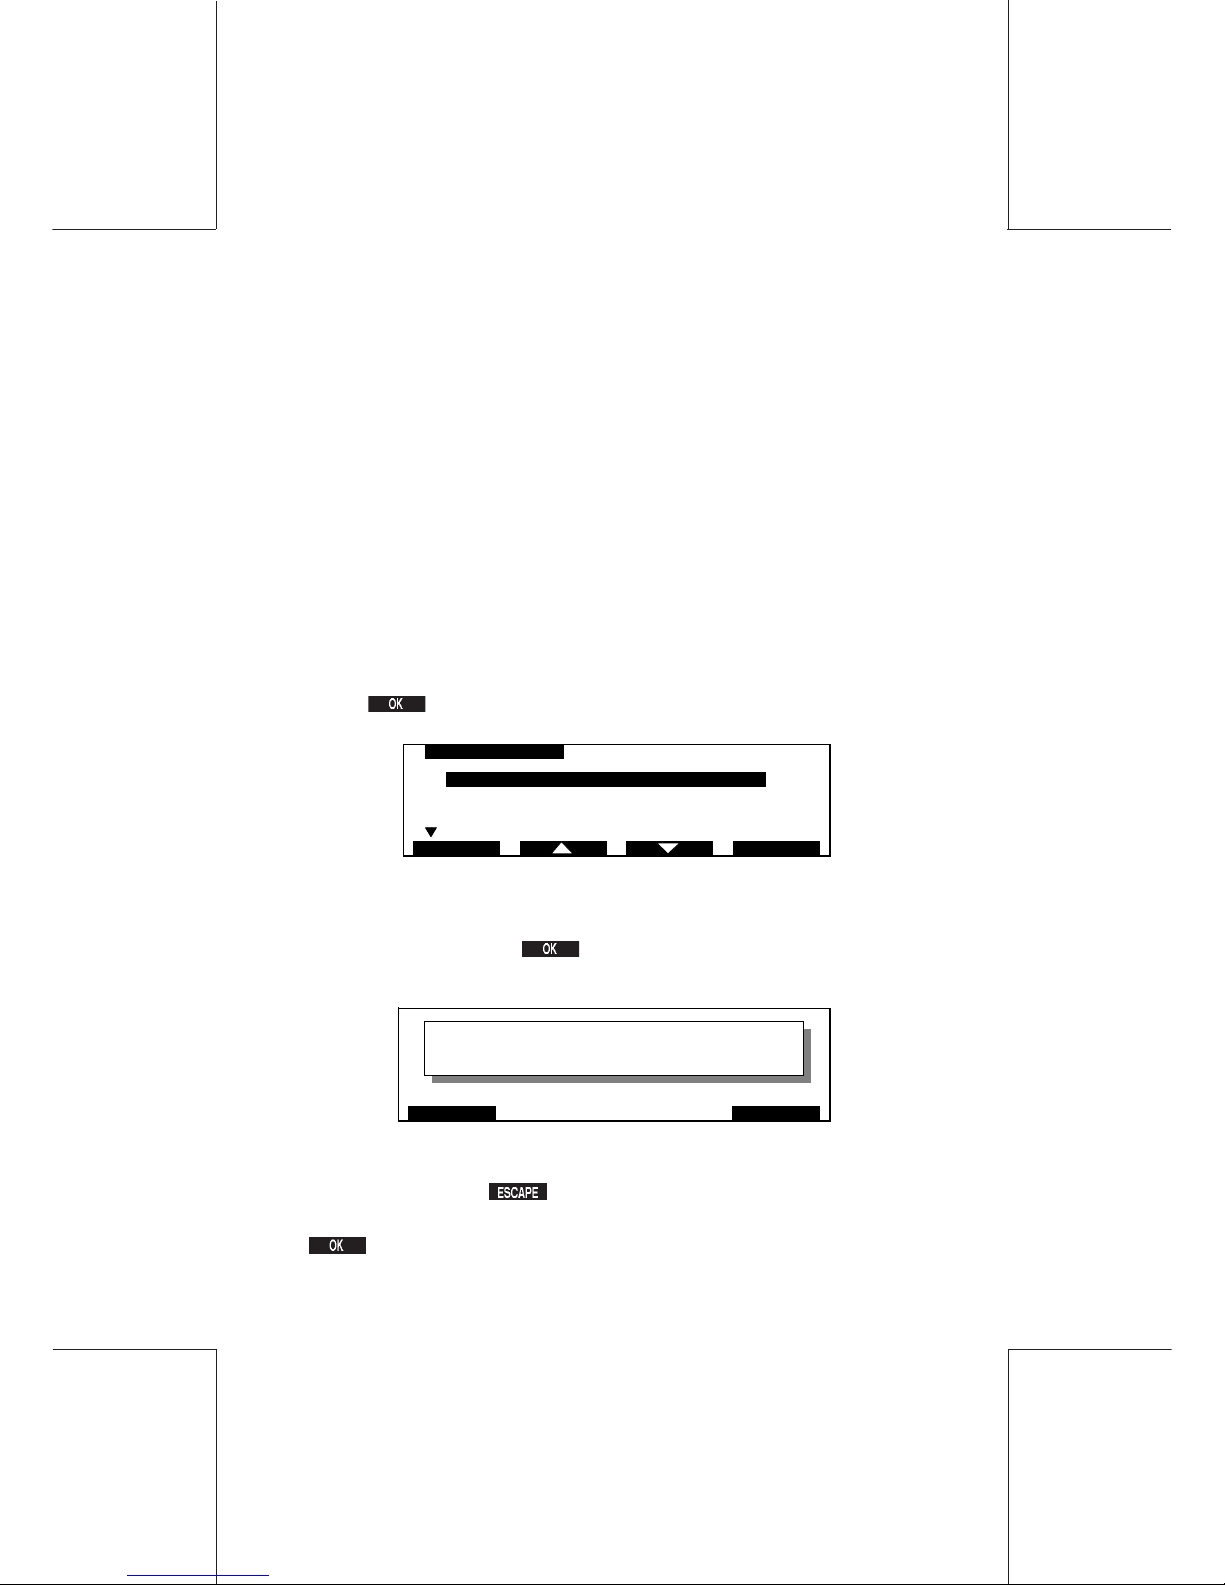
IJ40-0012-91
34127762B/B
1 1/24/2006
91Supervisor settings
Telephone Settings
The telephone number of the Hasler Tele Meter Setting® re-setting
center is stored in the mailing machine. This is used when you
want to purchase postage.
Modification of the telephone number is permitted only by the
supervisor. Such a setting may be necessary in case of modification of your telephone network (for example a new prefix for an
external line), or if you are advised that the Hasler Tele Meter
Setting® number has changed.
Telephone Number Change
From the SETUP screen select TELEPHONE SETTINGS and
press to confirm, the following screen will be observed:
If you are advised of a telephone number change, move the cursor
to the number to be changed (e.g. 1 POSTAGE REFILL
NUMBER) and press to confirm, the following screen will
now be observed:
To return to the SETUP menu with the telephone number
unchanged, press .
Or enter the new number using the numeric key pad, then press
to confirm.
OKESCAPE
POSTAGE REFILLNO.
NONE
TELEPHONE SETTINGS
1 POSTAGE REFILL NO. NONE
2 HELP DES K NO. NONE
3 REM OT E NO . NONE
4PREFIX NONE
5 PAUSE 0
OKESCAPE
Page 92
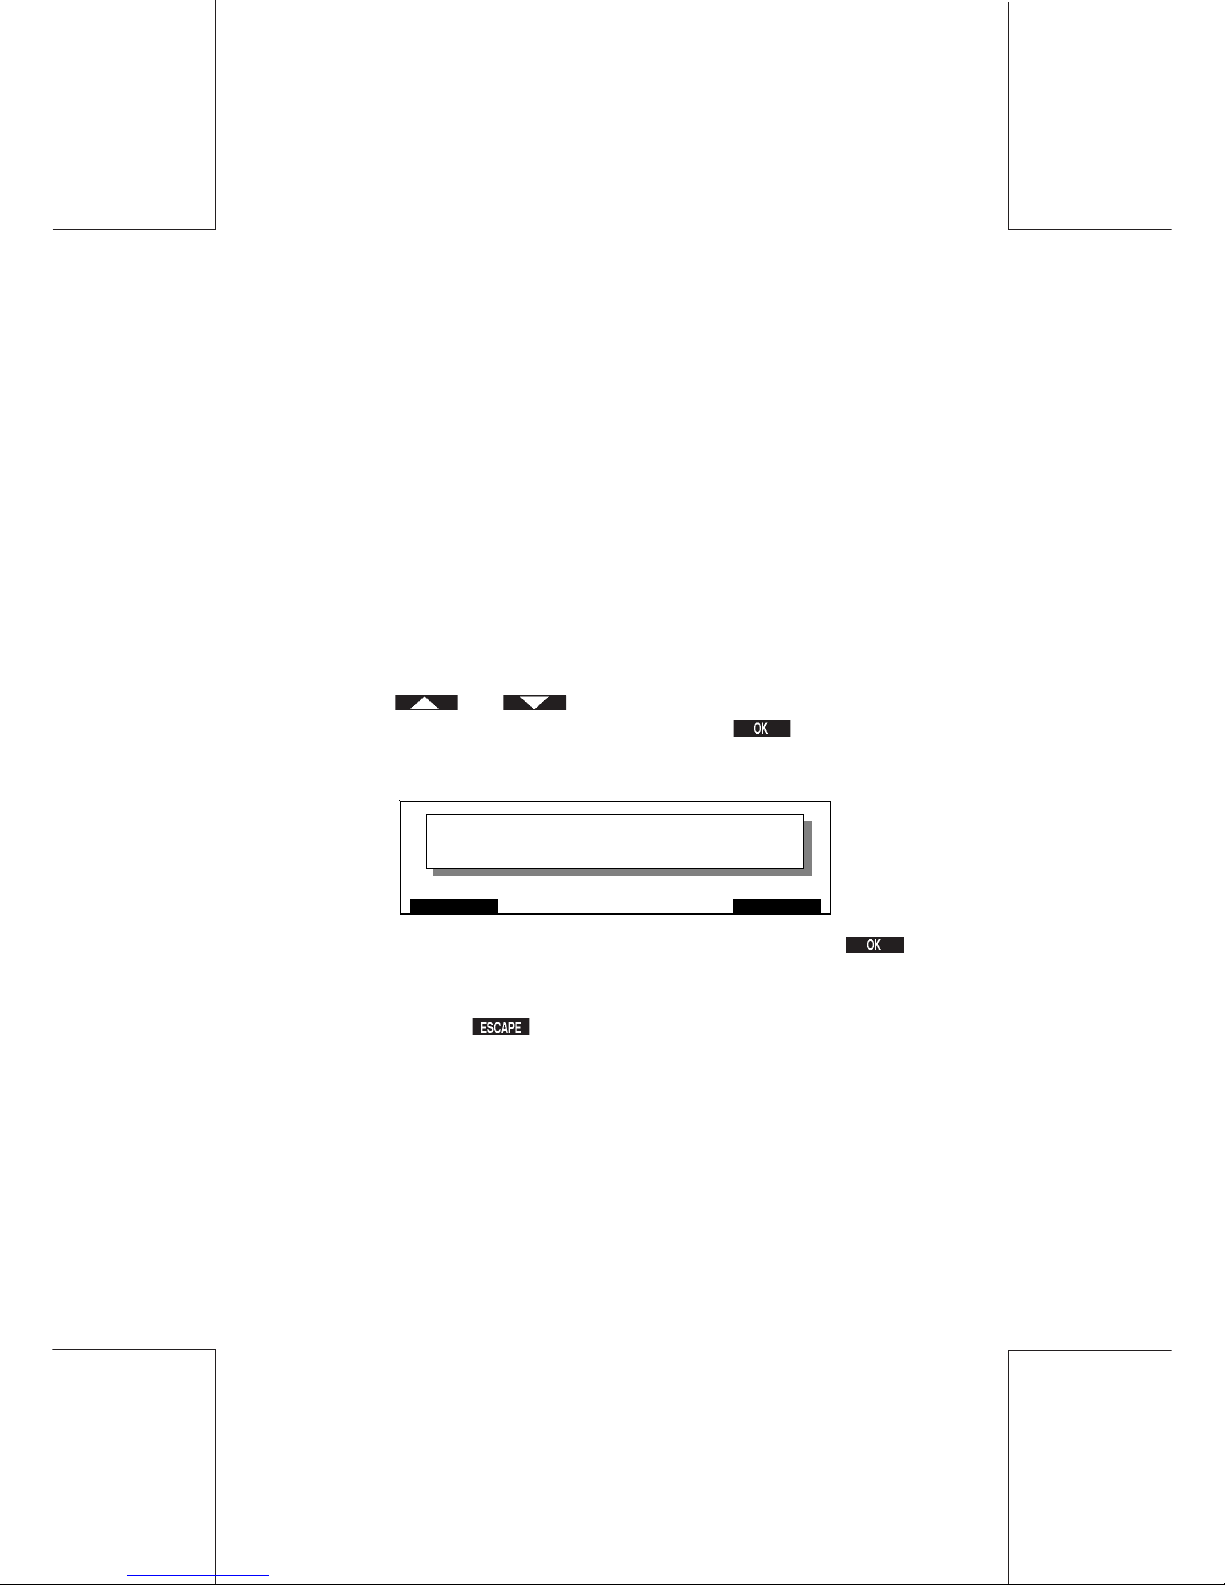
92
IJ40-0012-92
4127762B/B
1 1/24/2006
Supervisor settings
Changes to Prefix, Pause, Dialing method, Tone Detect
and Dial Delay Settings
PREFIX If your outside line is routed through a
switchboard, telephone numbers must be prefixed by the
appropriate outside line digit (for most systems this is a 9 or a 0).
PAUSE With some telephone networks it may be
necessary to enter a pause between the outside line digit and the
telephone number.
DIALING METHOD You can choose the type of dialing.
TONE DETECT You may wish to wait for a dial tone to be
detected before dialling out.
DIAL DELAY You may wish to enter a delay between dialing
attempts (in seconds).
Using the and keys, or the appropriate number key,
move the cursor to make a selection and press to confirm, the
following typical screen will be observed:
Using the numerical key pad enter your prefix and press to
confirm.
Or, to return to the TELEPHONE SETTINGS screen with the prefix
unchanged press .
ESCAPE OK
PREFIX
NONE
Page 93
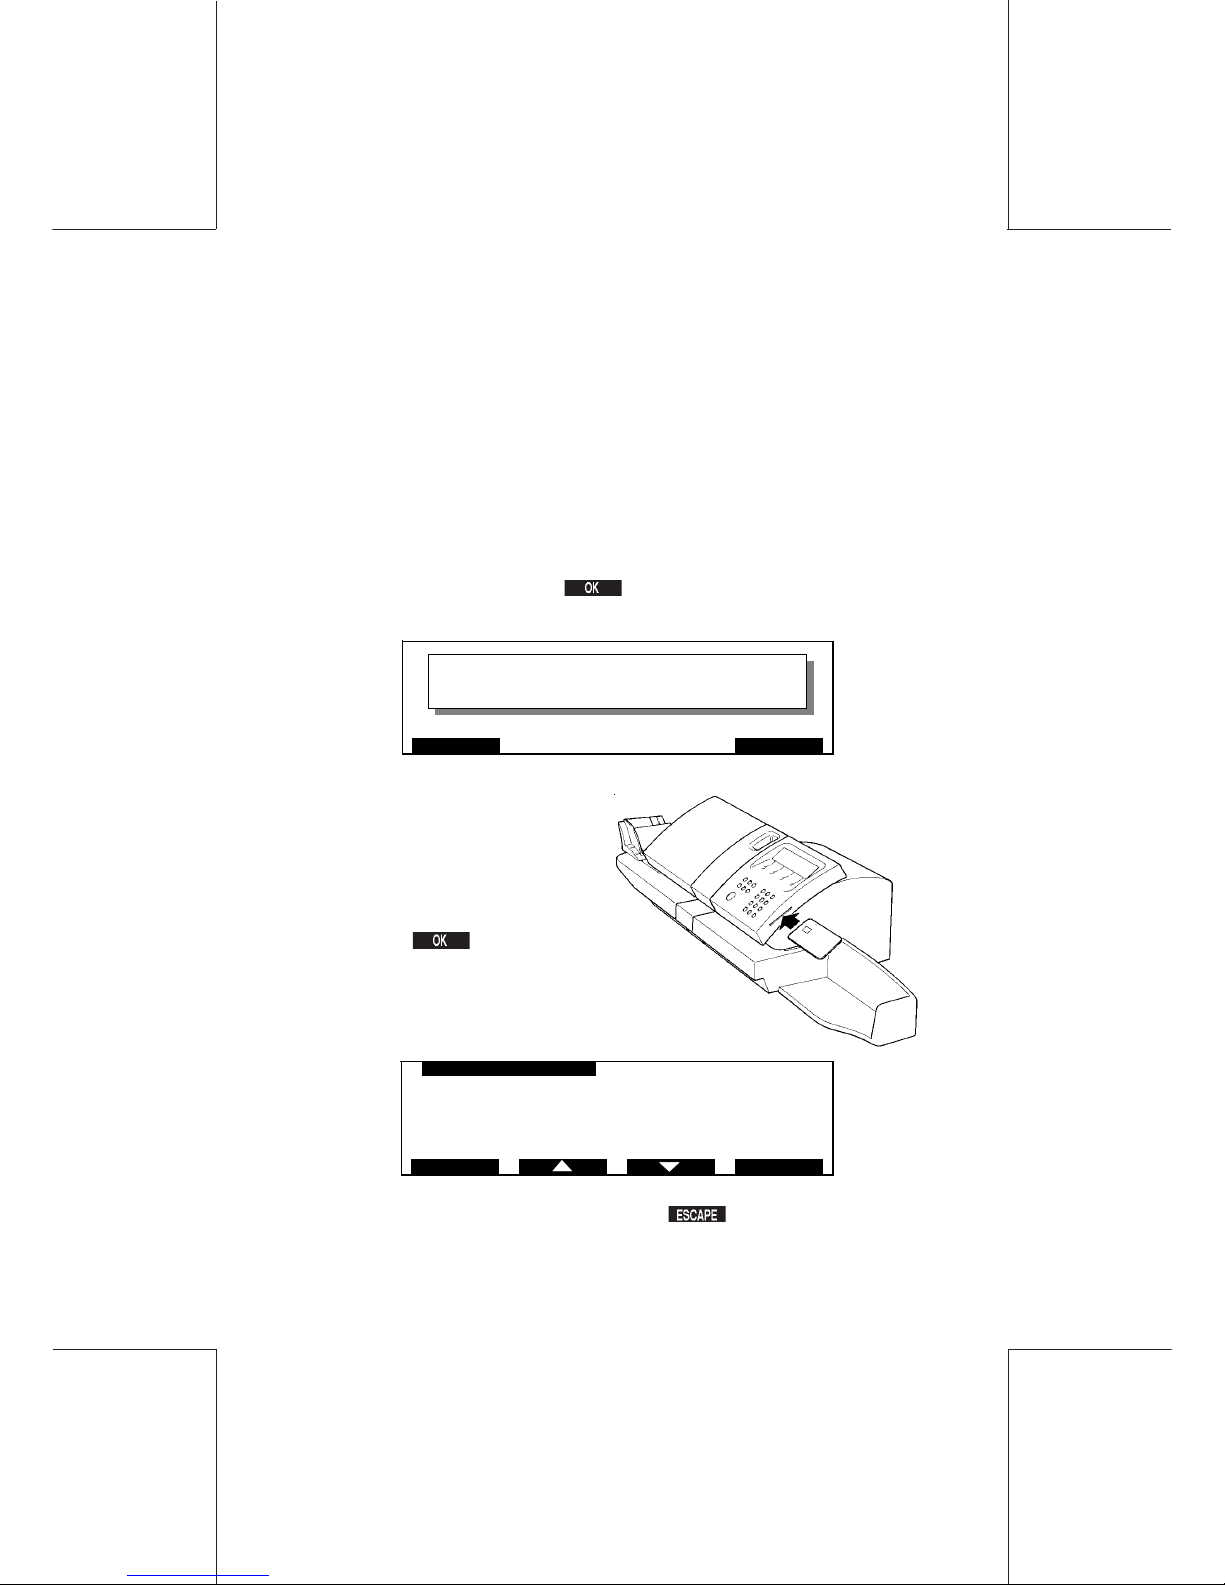
IJ40-0012-93
34127762B/B
1 1/24/2006
93Supervisor settings
14.5 Memory Cards
The following memory cards are currently available from Hasler:
Slogan Cards (one message per card)
Rate Card (when postal rates change)
14.5.1 How To Load Data Using a Memory Card
The following example illustrates the loading of a slogan/message, (remember only 2 slogans/messages can be stored in the
machine at any one time in addition to the 7 preloaded slogans).
1. From the SUPERVISOR screen select LOAD FROM
MEMORY CARD and press to confirm, the following screen
will be observed:
Insert the memory card face
uppermost into the card reader,
on the right hand side of the
machine as illustrated:
2. Press to confirm.
The prompt to load the Memory Card
Message/Slogan will now be observed:
To return to the previous screen press
.
ESCAPE OK
INSERT CARD
LOAD FROM M EMORY CARD
1 SLOGAN 1
ESCAPE OK
Page 94
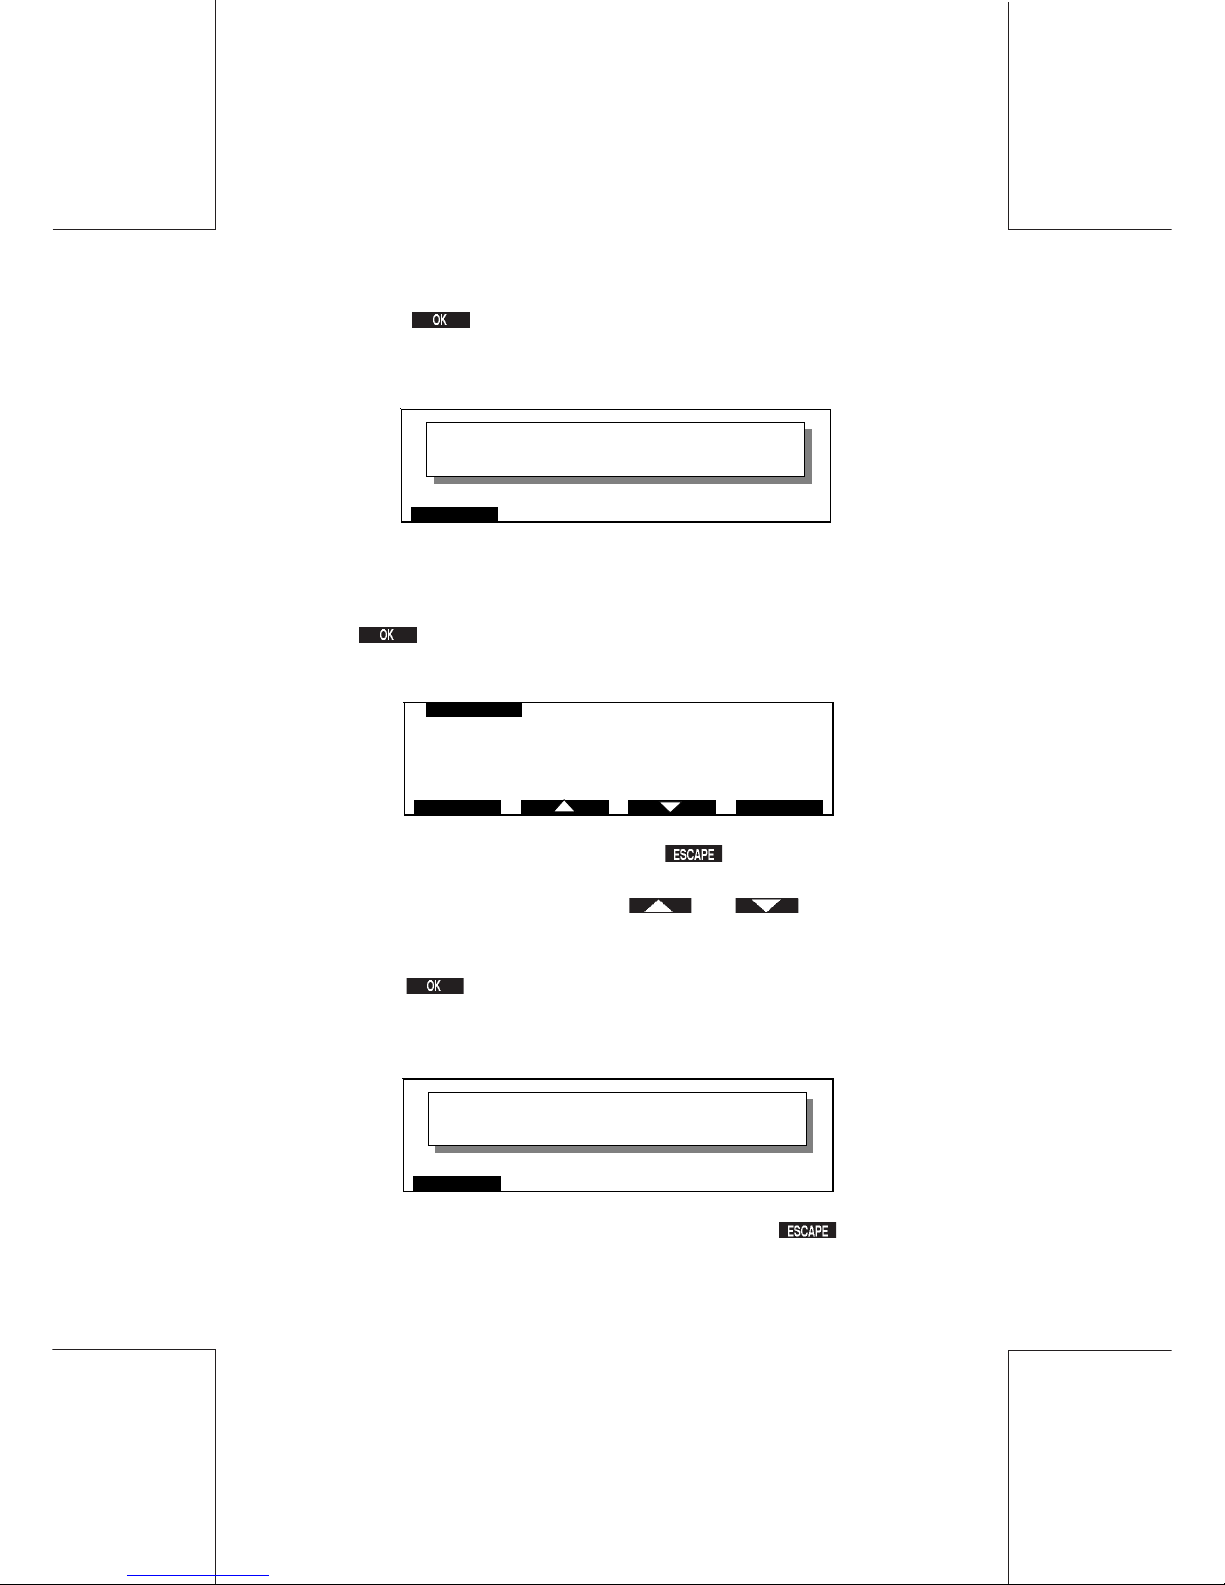
94
IJ40-0012-94
4127762B/B
1 1/24/2006
Supervisor settings
3. Press to initiate the downloading operation:
On completion of the downloading process the following screen
will be observed:
14.5.2 How To Replace Data Using a Memory Card
Repeat operations 1 and 2 then:
Press to confirm.
The following display will now be observed:
If you do not wish to replace a file, press twice to return to the
Supervisor Ready screen.
If you wish to replace a file, use the and keys, or the
appropriate number key to move the cursor to the message/
slogan to be replaced.
Now press to initiate the downloading operation.
On completion of the downloading process, the following screen
will be observed:
To return to the Supervisor Ready screen press twice.
ESCAPE
LOADING FROM M EMORY CARD
LOADING COM PL ETE
ESCAPE
LOADING FROM MEMORY CARD
LOADING COMPLETE
REPLACE FILE
1 SLOGAN 1
2 SLOGAN 2
ESCAPE OK
Page 95

IJ40-0012-95
4127762B/B
1 1/24/2006
95Reports
15. REPORTS
Supervisor Reports can be printed using the mailing machine's self
adhesive label printer or by connection to an approved external
printer. Your WJ 65/95/110 has been factory set for internal
(LABEL) printing, to select external (PRINTER) printing, see
below.
15.1 Typical Reports
DEPARTMENT REGISTERS
DEP NAME TOTAL ITEMS
MARKETING $235.67 759
R & D $27.12 69
ACCOUNTS $8.52 18
SALES $107.52 512
15.2 Printing a Report
Starting from the SUPERVISOR menu, move the cursor to the
REGISTERS option.
Press to confirm.
The following screen will now be observed:
REGISTERS
1 SETUP
2 MAIN REGISTERS
3 EVENTS
4 WEI GH ING PLATFOR M REPORT
5 DEPARTMENT REGISTERS
ESCAPE OK
Page 96
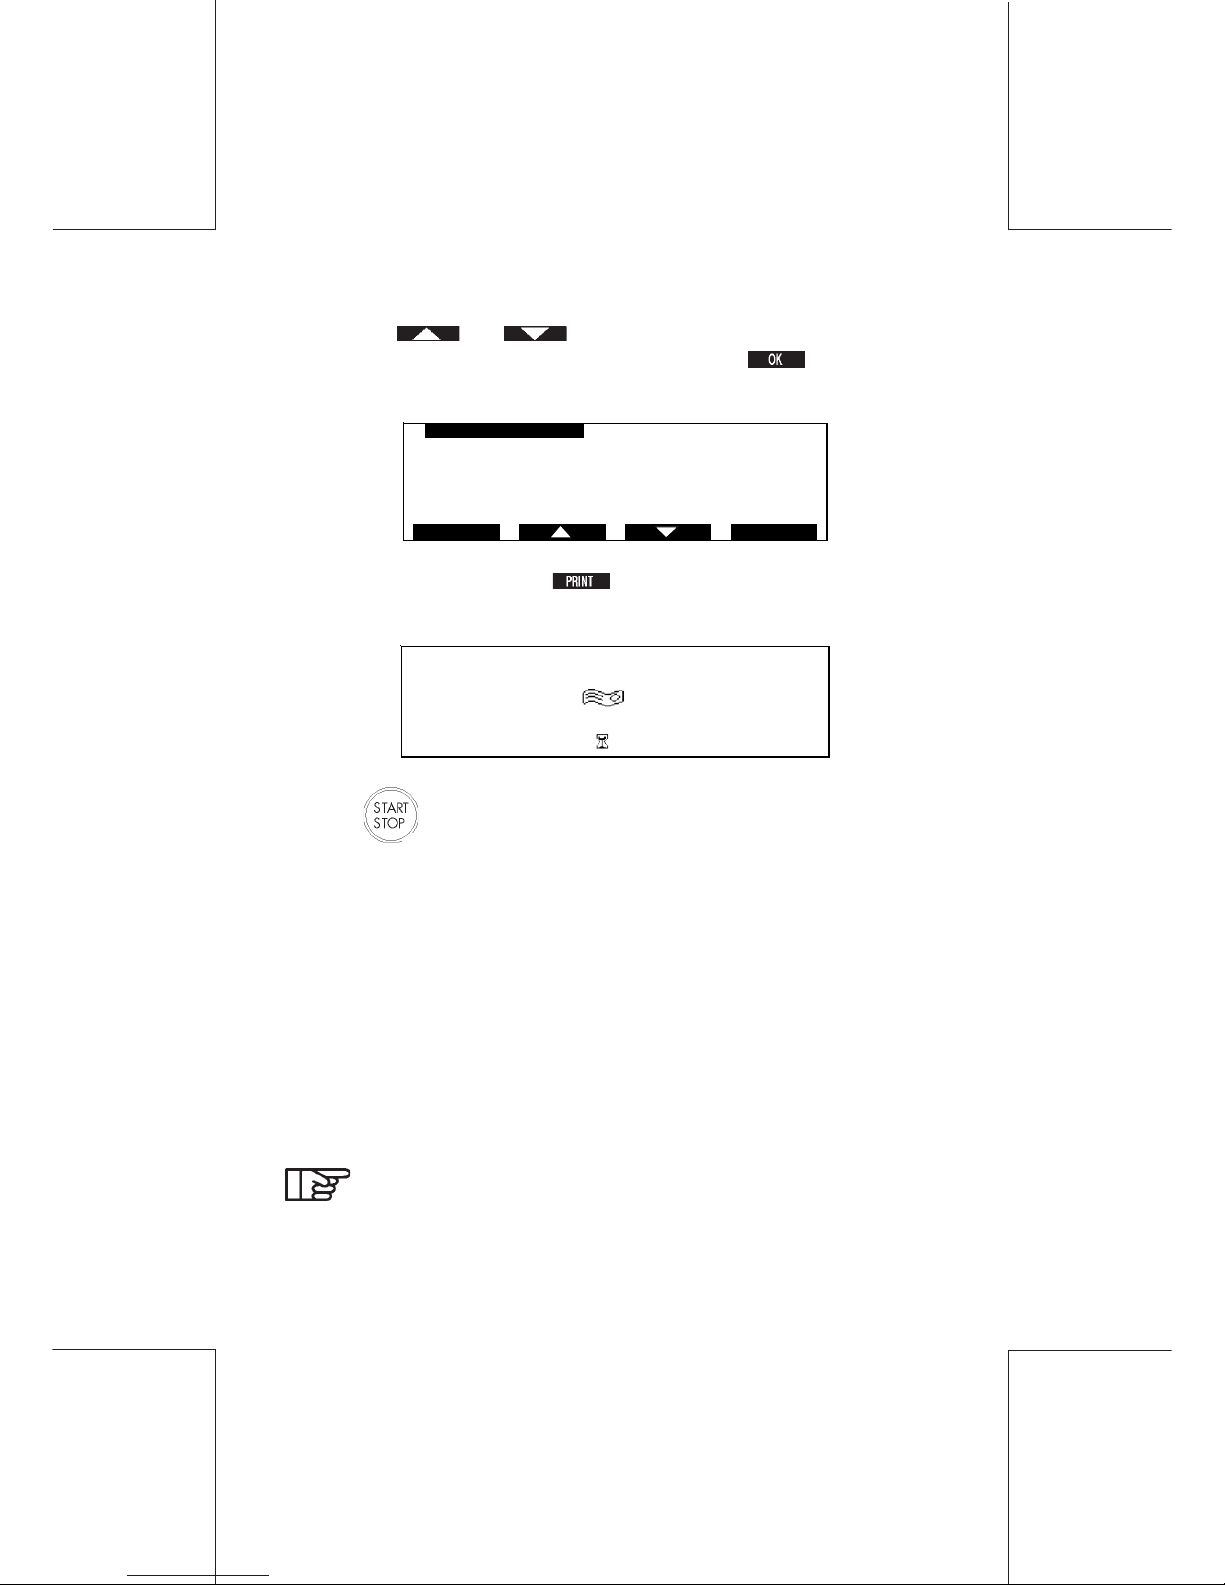
96
IJ40-0012-96
4127762B/B
1 1/24/2006
Reports
Using the and keys, or the appropriate number key,
select a register option from the list and press to confirm.
e.g. 5 DEPARTMENT REGISTERS:
To print a register press , if the method of print is set to
LABELS (Internal), the prompt to FEED LABEL will be observed:
Press .
When report printing is initiated, the screen will display a label icon
with a block/label number alongside. This number decrements as
report printing progresses, (nine department label blocks for WJ65,
twelve for WJ95), plus one label containing the user report).
On completion of printing, the DEPARTMENT REGISTERS.
screen will be observed.
If the method of print is set to EXTERNAL PRINTER, please refer
Printing with External Printer below.
To change the method of print please refer to Setting the
Print Destination below.
REPORTS
1 0 03/19/02
DEPAR T MENT RE GIS TE RS
DEPT NAME DEPT NO
DEPT 1
00/00/00
0.000
0
POSTAGE
ITEMS
ESCAPE PRINT
Page 97
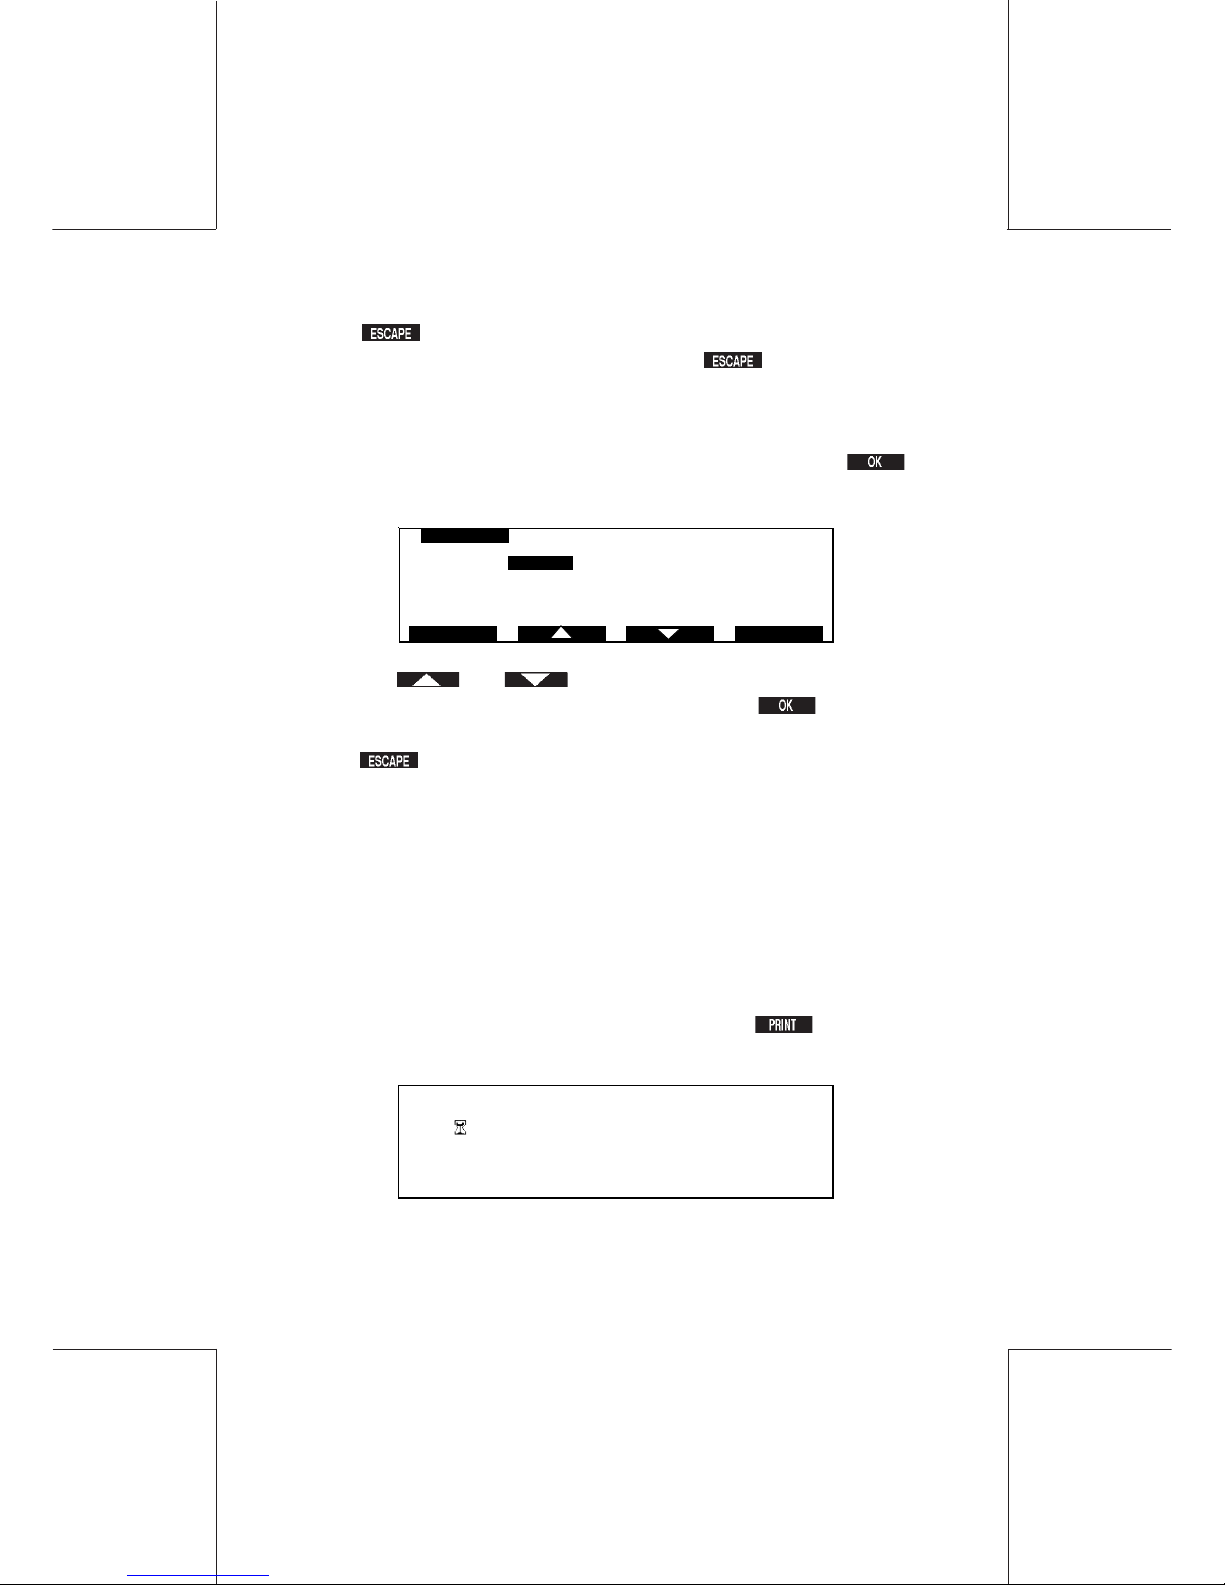
IJ40-0012-97
4127762B/B
1 1/24/2006
97Reports
Press to return to the REGISTERS screen.
To return to SUPERVISOR screen press twice.
15.3 Setting the Report Destination
From the SETUP screen select REPORT ON and press to
confirm, the following screen will be observed:
Using the and keys, or the appropriate number key,
move the cursor to make a selection and press to confirm.
Or, to return to the SETUP screen with the print destination unchanged
press .
15.4 Printing with External Printer
Before proceeding to print registers using an external printer
ensure that the printer lead is connected to the Upper Accessory
Port at the back of the machine, (please refer to "Controls and
Features") and that the printer power lead is connected to an
adjacent power outlet.
Set the printer to ON and the status to ONLINE.
From your selected registers screen, press , the WAIT
screen will now be observed:
After a short period of time, the screen will return to DEPARTMENT
REGISTERS and the registers will have been printed.
REPORT ON
1 LABEL
2 EXTERNAL P RINT ER
ESCAPE OK
Page 98

98
IJ40-0012-98
4127762B/B
1 1/24/2006
Reports
There is no external printer feedback to your mailing machine, therefore If the department registers screen does not
re-appear after a few seconds and the printer does not print,
re-check all printer connections and ensure that the printer
status is set to ONLINE.
Page 99

IJ40-0012-99
4127762B/B
1 1/24/2006
99Trouble shooting
16. TROUBLE SHOOTING
PROBLEM SOLUTION
WJ 65/95/110 will not start: Is the WJ 65/95/110 connected to the
power supply?
Is the main power outlet switch set to
ON?
Is the machine Top Cover properly
closed?
Check plug fuse (5A).
Check machine fuse (1.6A).
The printer does not Is the printer switched to ON?
operate: Is the printer connected to the power
supply?
Is the main power outlet switch set to
ON?
Check plug fuse.
Have you selected the correct print
mode? (please see "Setting the re-
port destination").
The Autofeed does not Check the connection to the WJ 65/
operate 95/110 (please see "Machine
connections").
The machine does not Check that you have made the corprint: rect Print Mode Selection (please
see "Printing options").
Did you remove the protective tape
from the Ink Cartridge before fitting?
(please see "Replacing an ink
cartridge").
Poor print quality: Clean the Inker (please see "Cleaning
the ink cartdridge").
Envelopes not fed Autofeed incorrectly loaded (please
properly or fed double: s ee "Postage printing with autofeed").
Page 100

100
IJ40-0012-100
4127762B/B
1 1/24/2006
Trouble shooting
PROBLEM SOLUTION
Labels do not feed Avoid leaving the labels in the
properly: machine for too long.
Avoid overloading the dispenser
(50 max).
The scale does not Check the scale connection
communicate (please see "Machine connections").
with the machine:
 Loading...