

Mailing Systems
And Solutions
HASLER
America’s better choice
An ISO 9001 Quality System
Certified company
Operating
Guide
WJ20

Model Number ____________________
Serial Number ____________________
Dealer Phone ____________________
Hasler , Inc.
19 Forest Parkway
Shelton, CT 06484-6140
TEL 800-793-0180
203-926-1087
FAX 203/929-6084
E-Mail info@haslerinc.com
Web: http://www.haslerinc.com

HASLER Customer Comment Card
06/2003 WJ20
WJ20 Operating Guide 06/2003 Form 50815
We at Hasler would like to hear your comments about this manual and our
product.
Please, fill out the following form and mail to:
Jim Koonz or FAX to: Jim Koonz
P.O. Box 858 (203)-925-2441
19 Forest Parkway
Shelton, CT 06484-0904
Jkoonz@ahmail.com
Rate The Manual
by checking the
appropriate box.
What did you like?
What didn’t you like?
Are there any improvements or features that you would like to see added
to the product?
Optional Information: Name
Phone Number
Company
Thanks, we appreciate your response.
Great
Very
Good
Good
Fair Poor
Very
Poor

This page intentionally left blank.

HASLER
16/2003 WJ20 Pub - 1
Publication Notice
This manual is a non-controlled document.
This manual has been carefully compiled and checked for
accuracy. Information in this manual does not constitute a
warranty of performance. Furthermore, Hasler®, Inc.
reserves the right to revise this publication and make
changes, from time to time, in its content.
Hasler®, Inc. ASSUMES NO LIABILITY WHATSOEVER FOR
ANY LOSSES OR DAMAGES INCURRED AS A RESULT OF
INFORMATION CONTAINED IN THIS MANUAL.
Proprietary Notice
This publication contains information proprietary and
confidential to Hasler®, Inc. Any reproduction, disclosure, or
use of this publication is expressly prohibited Hasler®, Inc.
may otherwise authorize in writing.

HASLER Introduction
06/2003 WJ20
The WJ20 has many capabilities that will be important to your
business:
• Prints all postage values 24 hours a day, seven days a
week at up to 20 envelopes per minute.
• Automatically changes the date, ensuring that you
always post your mail with the correct date.
• TMS® with direct connect allows you to download
additional postage quickly and easily.
• Optional scale weighs items up to four pounds and
automatically calculates the right postage. Rate
updates are loaded via a Memory Card.
• Has digital technology with an IBIP (Information Based
Indicia) two-dimensional (square) barcode, which
means that your meter exceeds all current USPS
regulations and conforms to the most stringent
security requirements of USPS.
• Long life inkjet cartridge - 2500 imprints or 9 months
life.
• 8 standard pre-loaded advertisements and 2 optional
customized advertisements can be loaded via Memory
Card.

HASLER Cautions & FCC
06/2003 WJ20 FCC - 1
Cautions
Do not under any circumstances attempt to remove the
machine covers or attempt to repair the WJ20. There are no
operator serviceable parts.
The WJ20 product is licensed for use under the auspices of
the Post Office. This license is issued subject to the product
being secure at all times. Any removal of covers or
disassembly of the product will result in the license being
revoked and may result in the Post Office requesting Hasler
to remove the product from use.
The ink cartridge system used within the WJ20 contains Post
Office approved ink. This cartridge should not be tampered
with in any way or the use of non-approved inks be
undertaken. This will breach any Post Office license
agreement on the product and may result in the Post Office
requesting Hasler to remove the product from use.
FCC Compliance Statement
This equipment has been tested and found to comply with the
limits for a Class A digital device, pursuant to Part 15 of the
FCC Rules. These limits are designed to provide reasonable
protection against harmful interference when the equipment is
operated in a commercial environment. This equipment
generates, uses, and can radiate radio frequency energy and,
if not installed and used in accordance with this instruction
manual, may cause harmful interference to radio
communications. Operation of this equipment in a residential
area is likely to cause harmful interference, in which case the
user will be required to correct the interference at his/her own
expense.

HASLER Cautions & FCC
FCC - 2 WJ20 06/2003
Modem Approval Requirements
This equipment contains a modem which has been approved
for connection to analog public switched telephone networks.
However, due to differences between individual telephone
networks provided in different areas, the approval does not, of
itself, give an unconditional assurance of successful
operation on every network termination point.
In the event of problems, you should contact your equipment
supplier in the first instance.
Installation Safety
The power plug on this equipment is intended to serve as the
device for isolation of the electrical supply. The equipment
should be installed in close proximity to an easily accessible
grounded power supply and analog telephone socket.
WARNING: FOR SAFETY THIS EQUIPMENT MUST BE
GROUNDED
WARNING: DO NOT UNDER ANY CIRCUMSTANCES
ATTEMPT TO REMOVE THE POWER SUPPLY OR
METER COVERS. THERE ARE NO OPERATOR
SERVICEABLE PARTS THEREUNDER.

HASLER Table of Contents
06/2003 WJ20
Installation
Installation Tips 1-1
Connections To The Unit 1-1
To Startup And Process An Item 1-2
Controls & Features
Memory Card 2-1
Control Locations 2-2
Control Descriptions 2-3
Menu Structure 2-4
Printing Postage
Printing Postage 3-1
Printing Tips 3-2
Envelope Specifications 3-2
Labels 3-2
Printing Modes 3-3
Print Mode Selection 3-5
Pre-Dated Mail 3-6
Advertisement Selection 3-7
Memory Settings
Programming A Memory Function 4-1
Recalling A Memory Function 4-2
Weigh Scale
Benefits Of Using A Weigh-Scale 5-1
Weigh-Scale Connections 5-2
Weigh-Scale Postage/Rate Selection 5-3

HASLER Table of Contents
WJ20 06/2003
Meter Registers
Available Registers 6-1
Meter Register Selection 6-2
Postage Available Register 6-2
Postage Used Register 6-2
Total Items Counter 6-2
Low Postage Warning 6-3
Insufficient Postage 6-3
Low Ink 6-3
No Ink 6-3
Adding Postage
Modem Connection 7-2
Adding Postage 7-3
Clearing A PO Lockout 7-5
Completing An Interrupted Transaction 7-6
Maintaining Your TMS Account Number 7-7
TMS Account Number 7-7
TMS Account Balance 7-7
TMS Statements 7-8
Post Office Regulations 7-8
PostageNow 7-9
PostageNow™ TeleFunds™ 7-10
PostageNow™ OnDemand 7-10
Information Whenever You Want It Online Or By Phone 7-10
Managing Your Account 7-11
Standard TMS Bank Accounts 7-12
Where To Mail Your TMS Bank Account Deposit 7-13
Contact Information 7-14
Memory Card
Load Data Using A Memory Card 8-2
Print Quality
To Clean The Print Head 9-1
To Replace (install) The Ink Cartridge 9-3

HASLER Cautions & FCC
06/2003 WJ20
Reports
Meter Summary Report 10-1
Postage Set Report 10-1
Setup Report 10-2
Printing A Report 10-3
Setup Mode
To Enter Setup Mode 11-1
High Value Setting 11-2
Low Postage Setting 11-3
User PIN Setting 11-4
Time Setting 11-5
Time Out (Sleep Mode) Setting 11-6
Key Beep Setting 11-7
Preset Postage Setting 11-8
Modem Telephone Setup 11-9
Help Desk Telephone Setup 11-10
Other Telephone Setup Options (Prefix, Pause, Tone
Detect, Blind Dial)
11-11
Registration Setup 11-15
Withdrawing Meter 11-16
Appendix A
Contact Information A-1
How To Perform Common Functions A-2
Troubleshooting Tips A-3
Appendix B
Country Codes
Appendix C
Display And Error Messages
Index

This page intentionally left blank.
HASLER Getting Started Section 1
06/2003 WJ20 Page 1 - 1
Installation Tips
Your WJ20 should be installed on a flat horizontal surface
adjacent to easily accessible power and telephone line
outlets.
Allow sufficient free space as follows:
• above the machine to enable opening of the covers.
• at the rear of the machine for cooling.
The power plug on this equipment is intended to serve as the
device for isolation of the power supply; where possible it is
advisable to connect to a switched power outlet.
Do not connect your WJ20 Postage Meter to the power outlet
until you have attached the accessories.
Installation Tips 1-1
Connections To The Unit 1-1
To Startup And Process An Item 1-2
To Lock The Unit 1-4
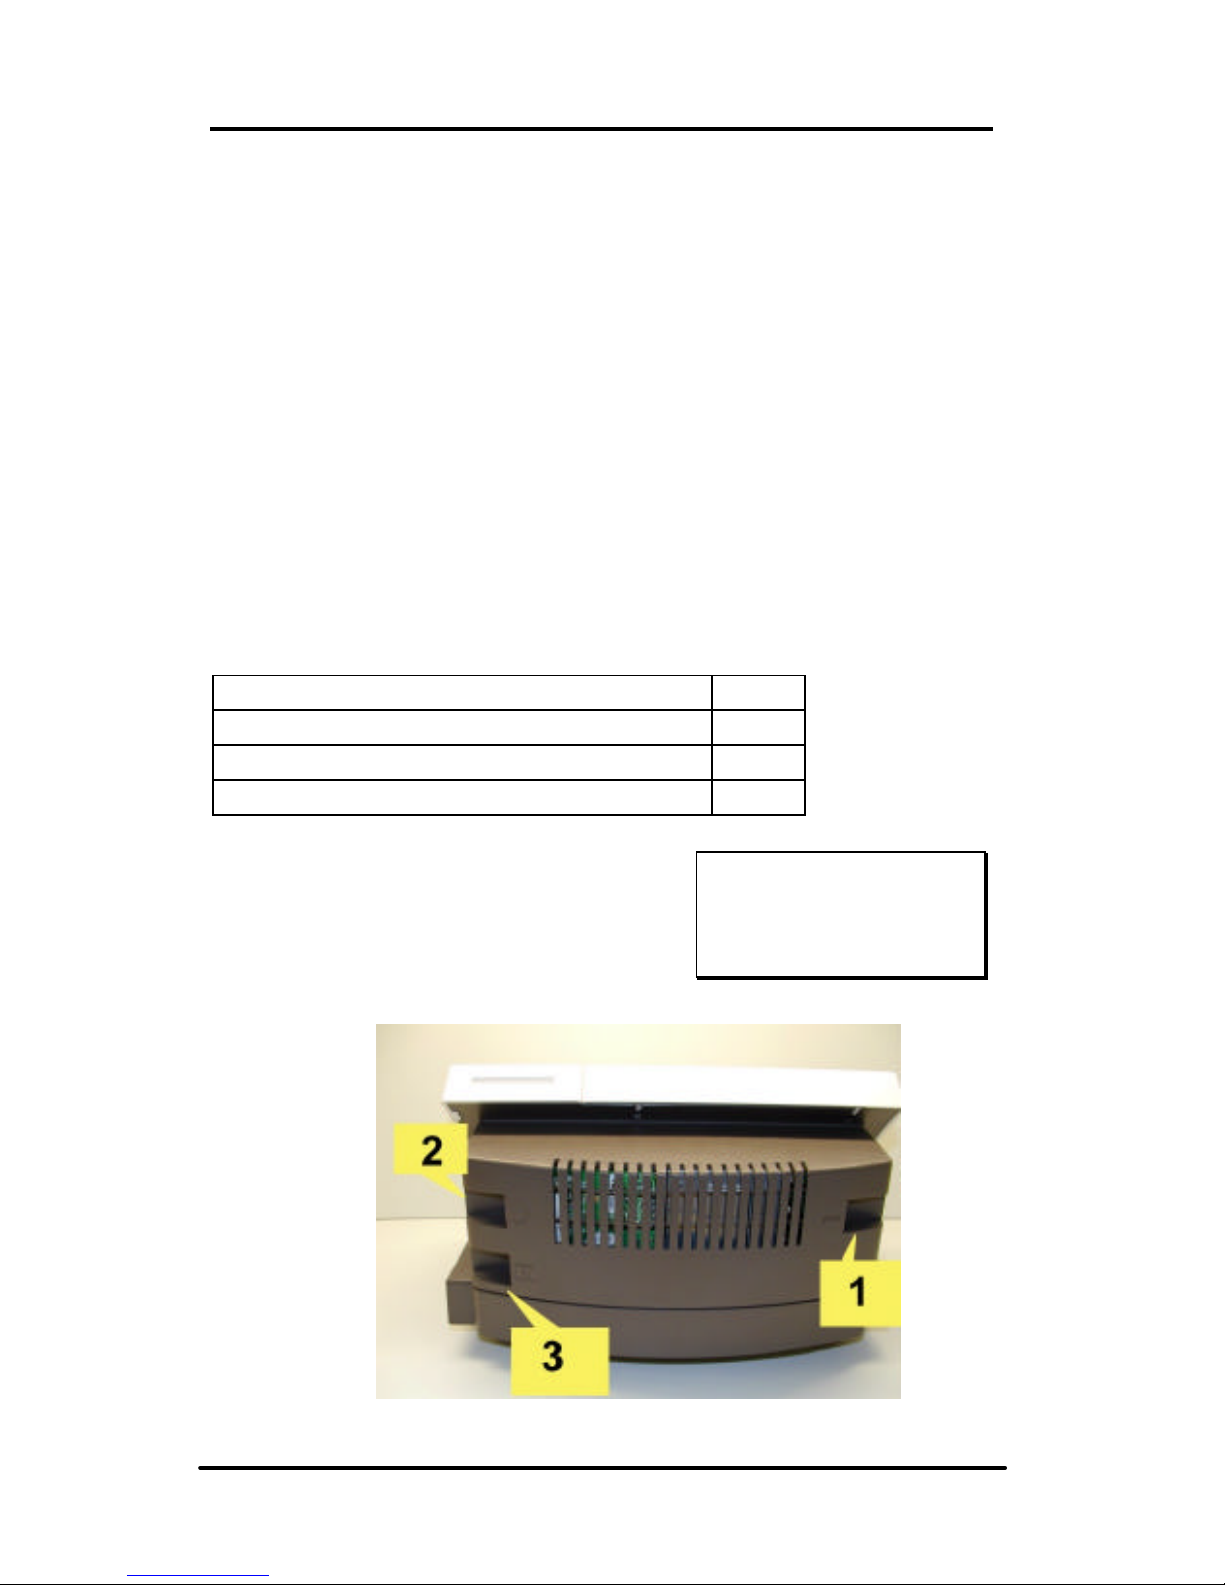
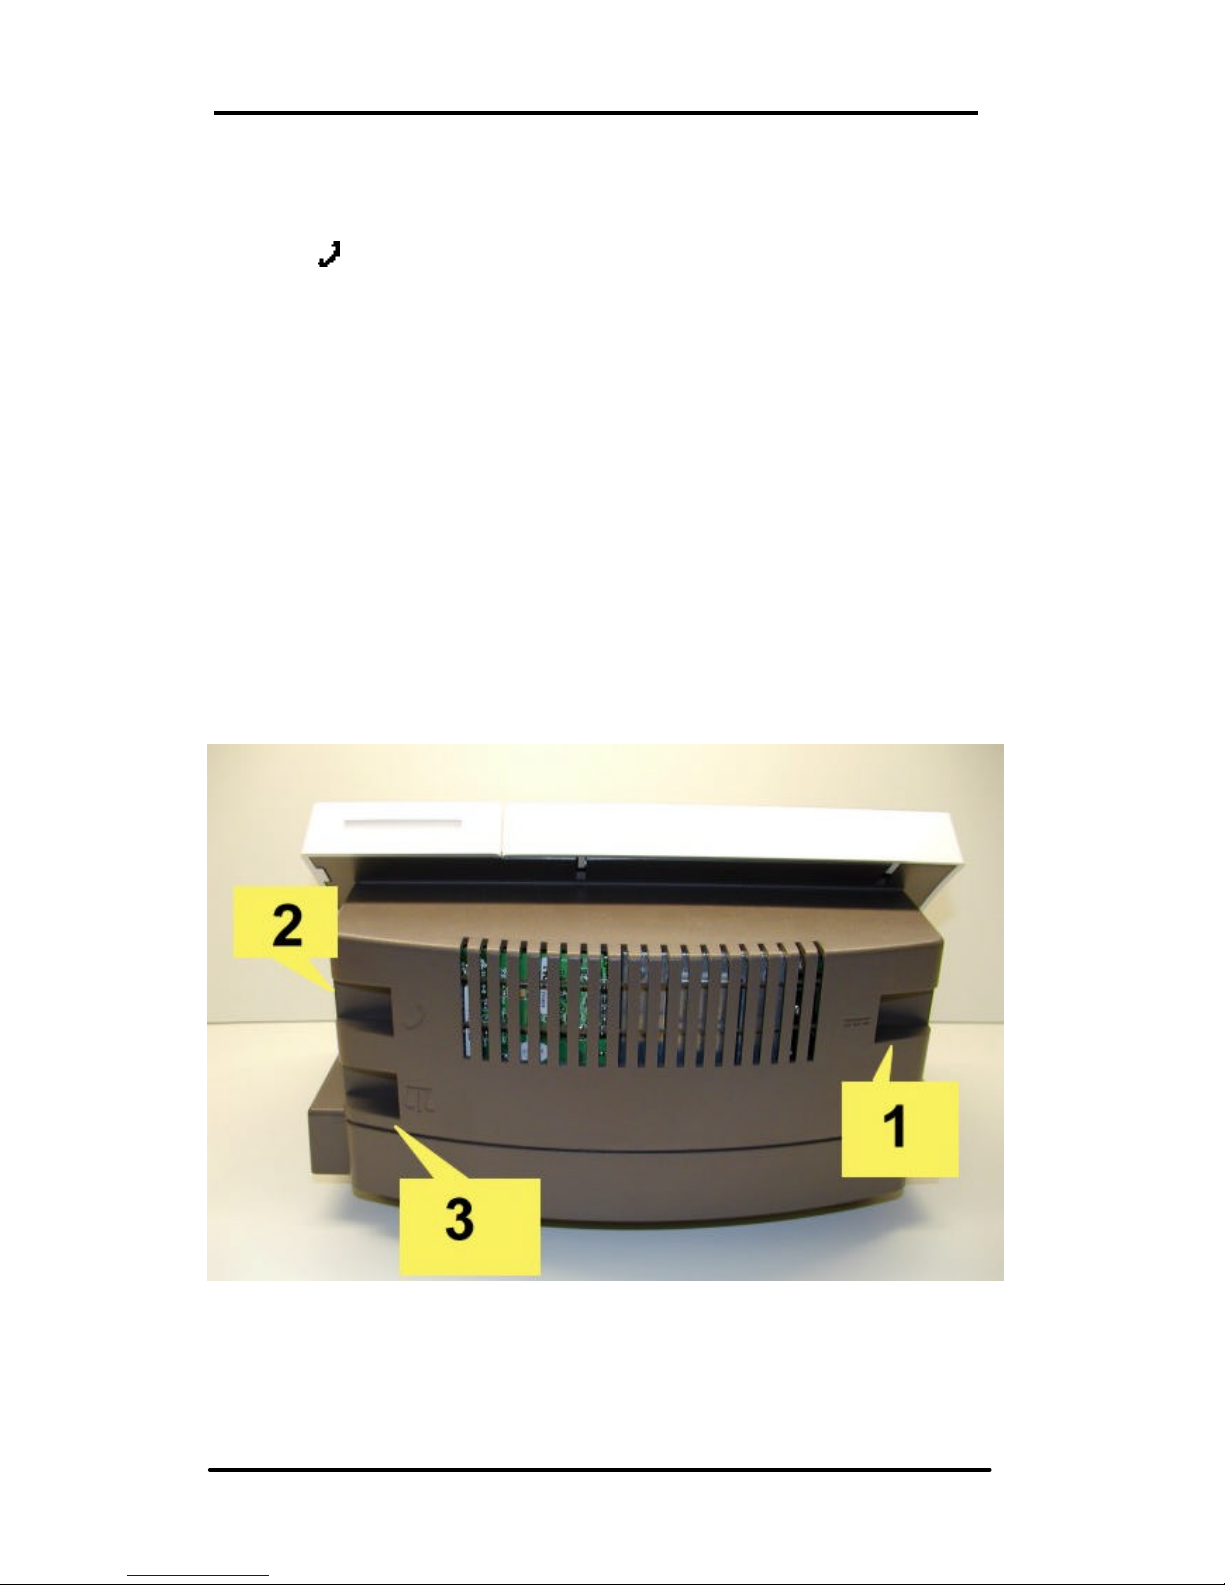
Connections To The Unit
The WJ20 has 3 connection ports:
(1) Power adapter,
(2) Modem (phone line)
(3) Optional weigh-scale
Unit - Back View
Ink Cartridge
installation is covered
in Section 9.
HASLER Getting Started Section 1
Page 1 - 2 WJ20 06/2003
LOCKED
_ _ _ _
READY $0.00
12/12/02
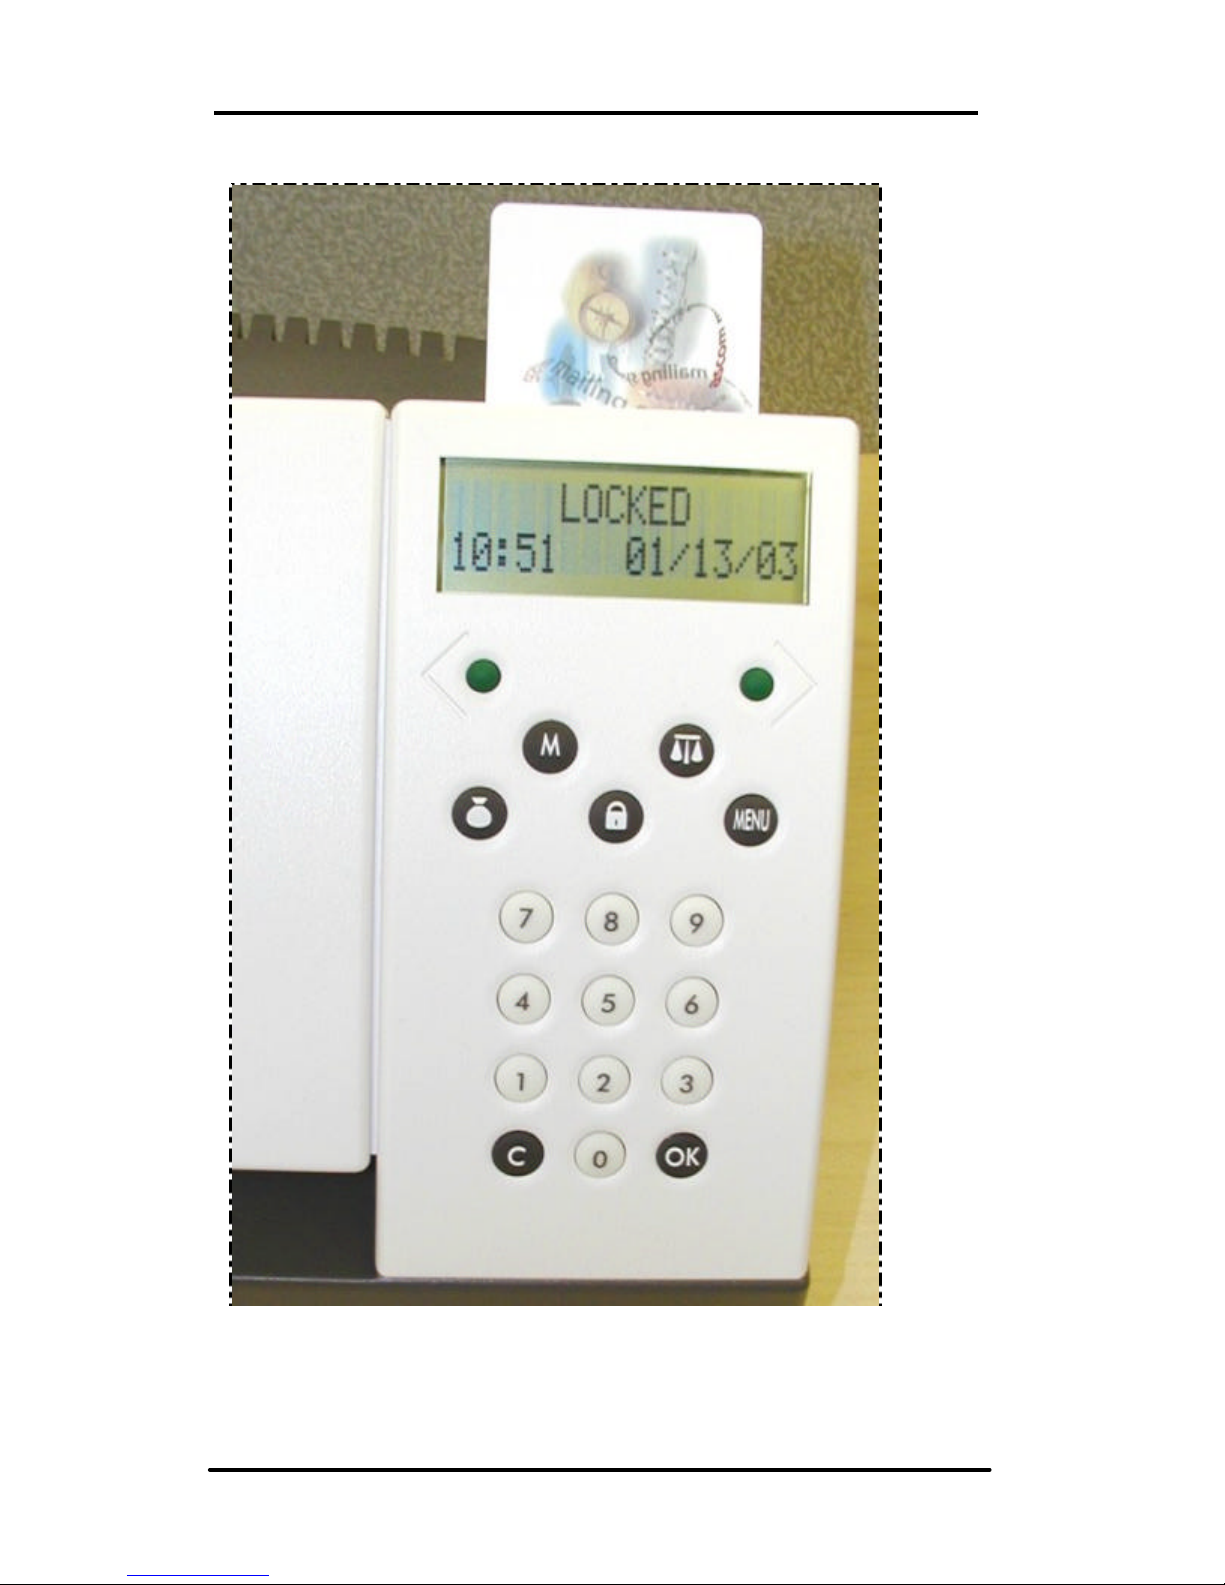
To Startup And Process An Item
Set the switch on the power supply outlet to the OFF position,
connect the power unit to the power supply outlet and the
other end to the D.C. input socket () at the back of the
machine.
Now set the switch on the power outlet socket to ON.
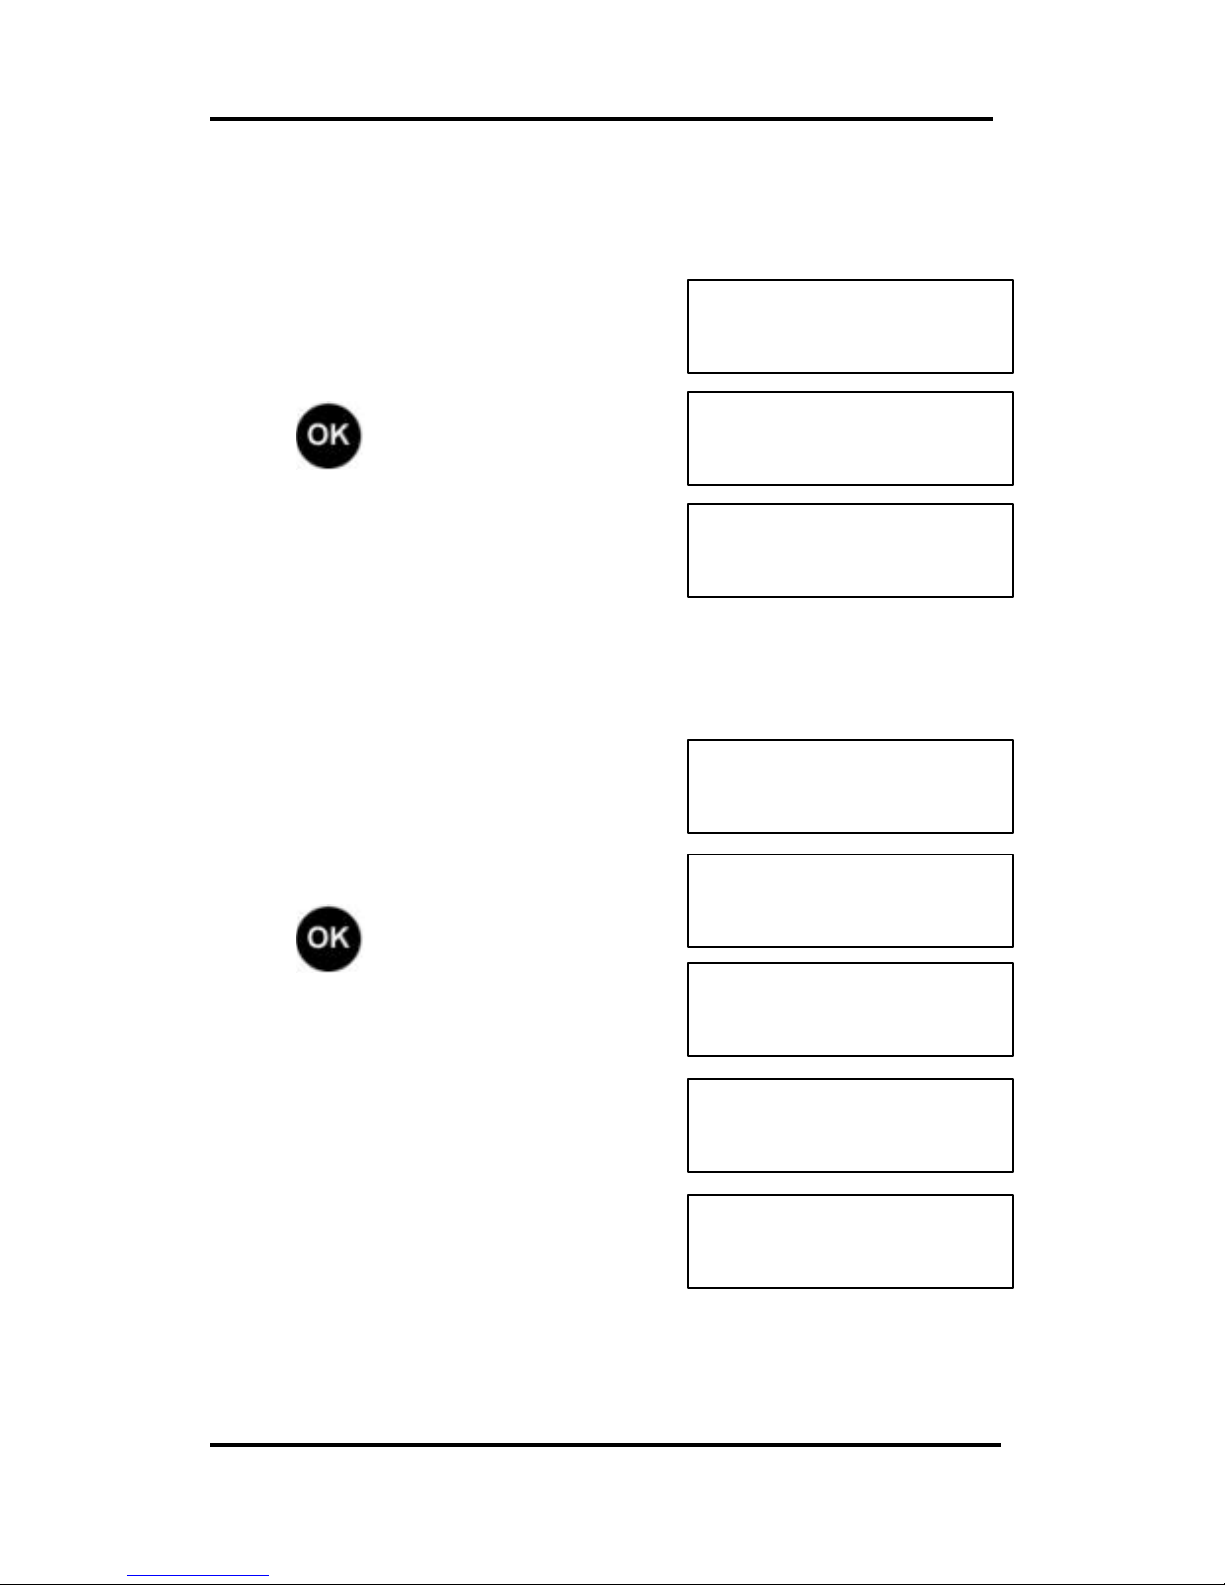
When the machine is ready, the following displays will be
observed:
Followed by:
To unlock the machine,
press (or any key) and enter
the User PIN.
Example: Enter PIN 1 2 3 4
Notes:
If using the machine for the first time, the Factory Default PIN
is set to 1 2 3 4.
If an incorrect PIN is entered, check PIN for accuracy, press
and try again.
If WARNING PENDING CREDIT is displayed press to
clear the message.
WELCOME TO WJ20
PLEASE WAIT
LOCKED
09:01 12/12/02
HASLER Getting Started Section 1
06/2003 WJ20 Page 1 - 3
READY $0.37
12/12/02
ENTER POSTAGE
$0.00
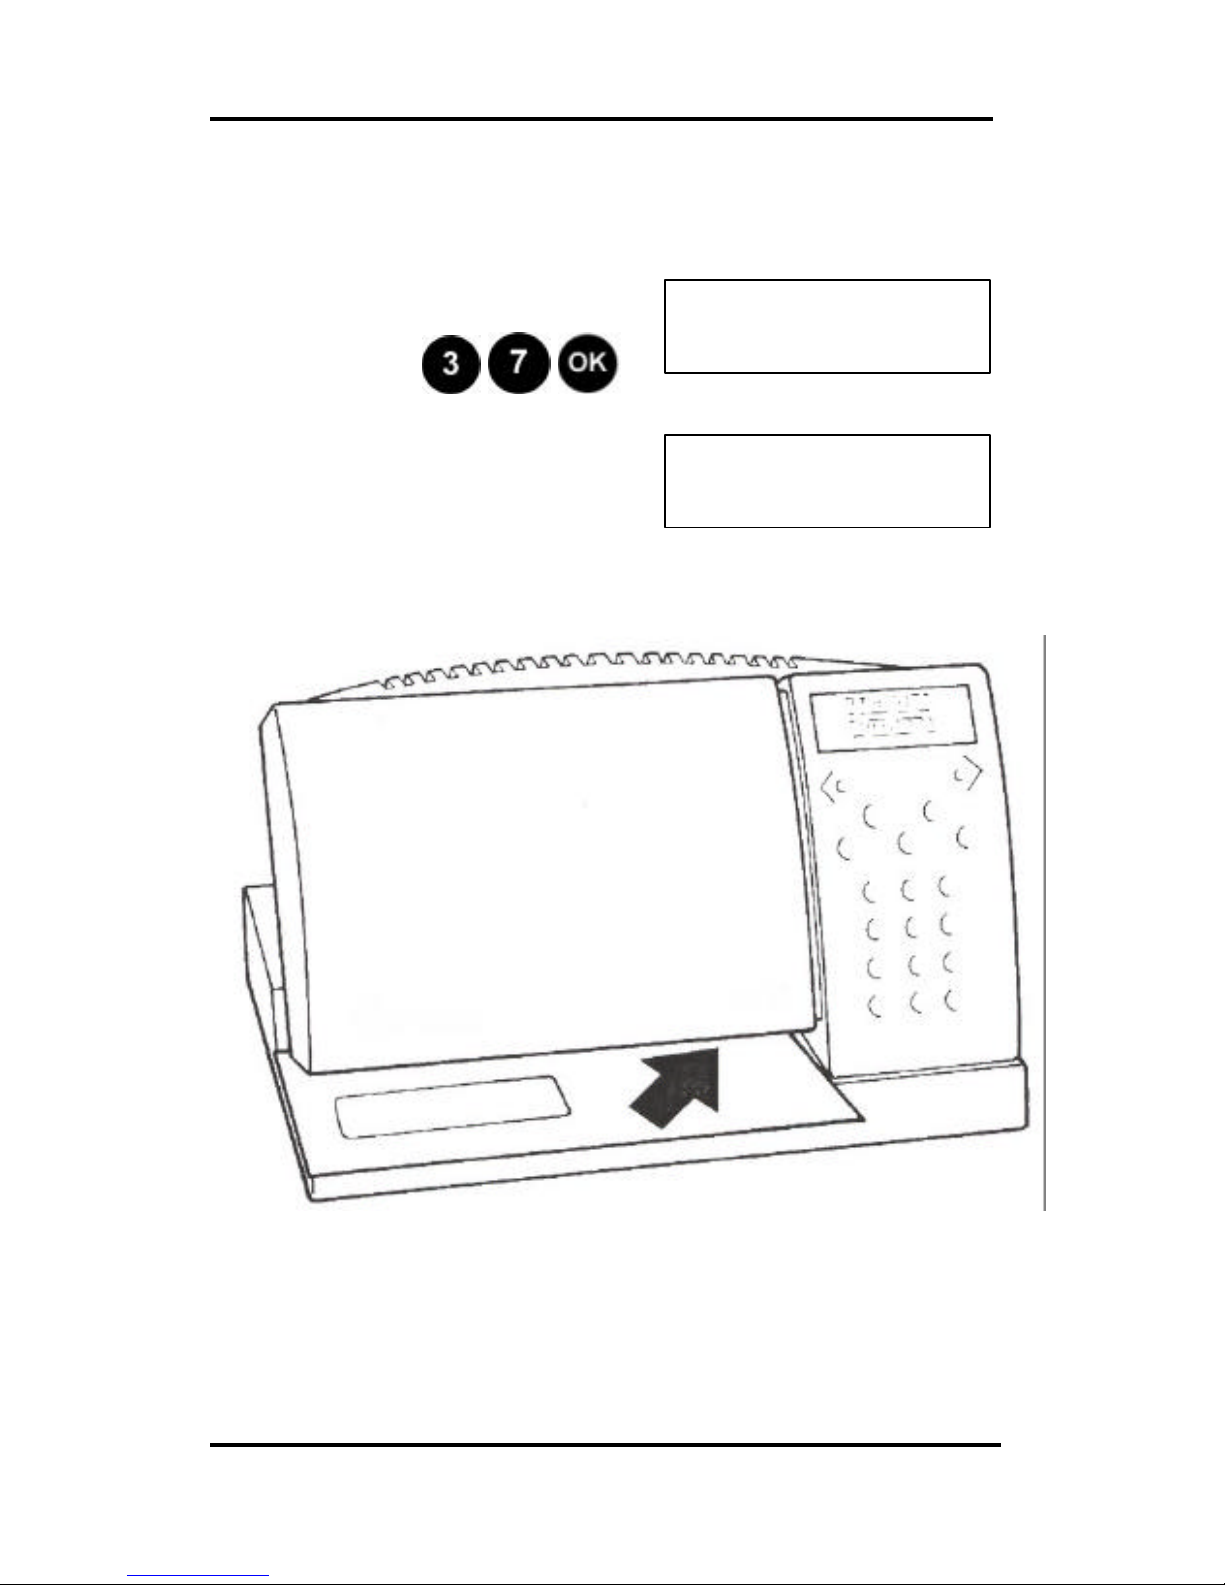
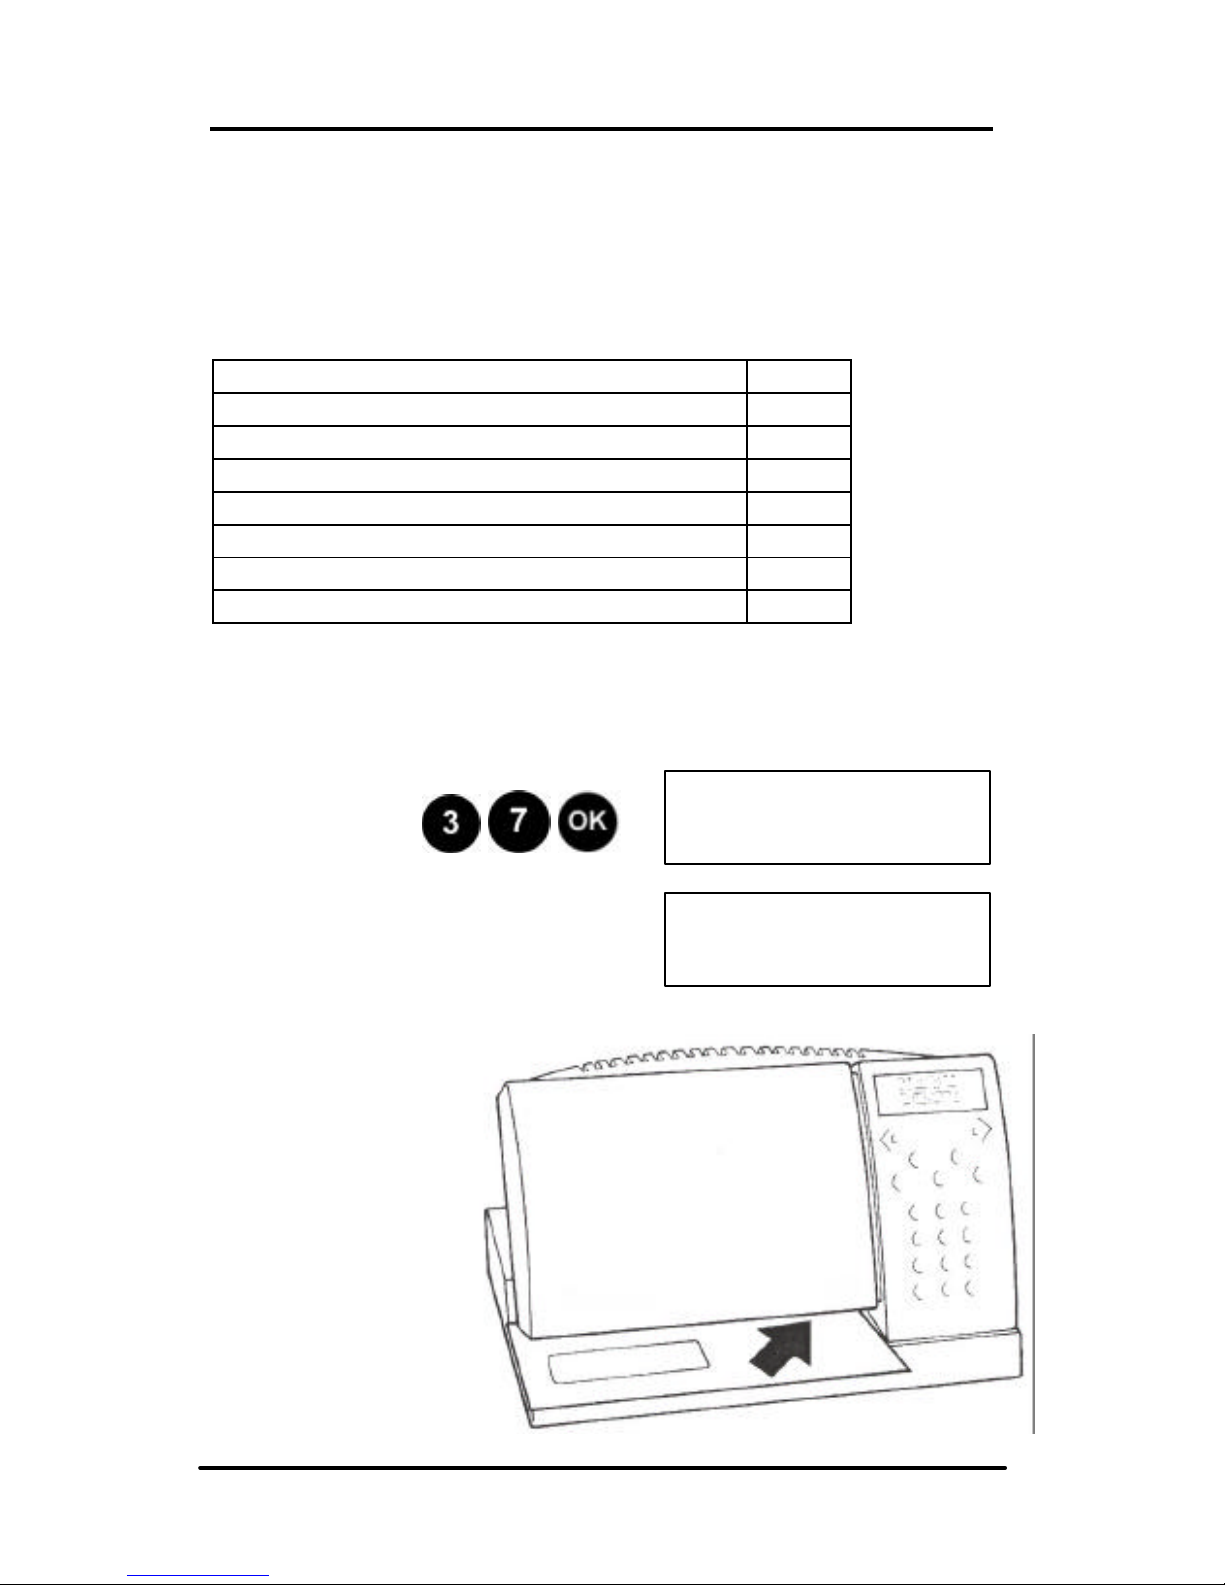
To Select a Postage Value
Using the numerical keypad, select the required
postage value … for example 37 cents.
Example: Press
You are now ready to print
postage.
Feed the envelope in as shown below:
Tapes are used in the same manner. First one side of the
two-tape sheet is used, the printed tape is the peeled and
placed on the item. The other side of the two-tape sheet can
then be used for another item.
Continued on the next page.
HASLER Getting Started Section 1
Page 1 - 4 WJ20 06/2003
ENTER POSTAGE
$0.00
LOCKED
09:01 12/12/02
To change the postage value
press a numeric key, then enter
the new postage value.
The indicia will be printed on the envelope or tape.
To Lock The Unit
Press and the WJ20 will
return to the lock mode and
require the password entry to
unlock.
HASLER Controls Section 2
06/2003 WJ20 Page 2 - 1
Controls & Features
The following pages detail the Controls and Features
associated with your WJ20 mailing system, please take the
time to read them carefully.
Memory Card 2-1
Control Locations 2-2
Control Descriptions 2-3
Menu Structure 2-4
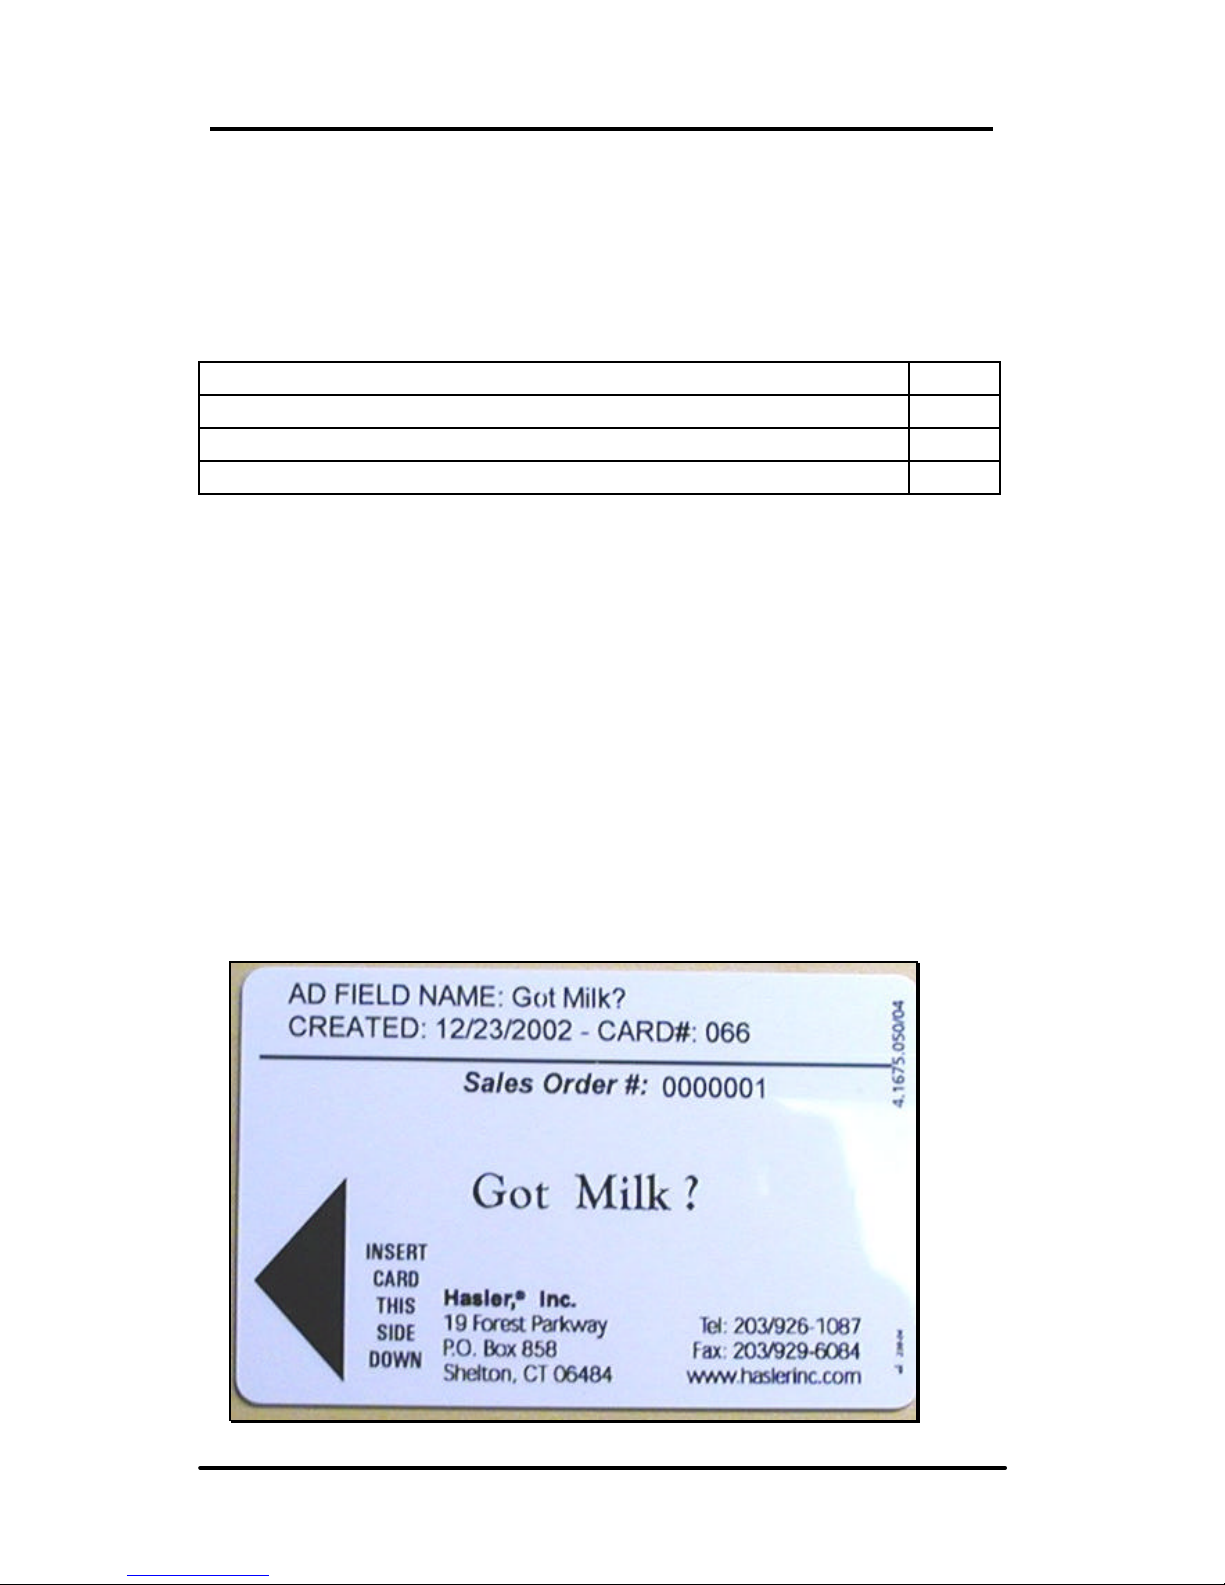
Memory Card
A number of memory cards are available to enable the user to
enter data into the machine memory.
Advertisement Message Card
Containing a message prepared to customer requirements
(please contact Hasler).
Rate Card
Available, only when used in conjunction with a scale. When
postal rates change, a new Rate Card may be obtained from
Hasler.
HASLER Controls Section 2
Page 2 - 2 WJ20 06/2003
HASLER Controls Section 2
06/2003 WJ20 Page 2 - 3
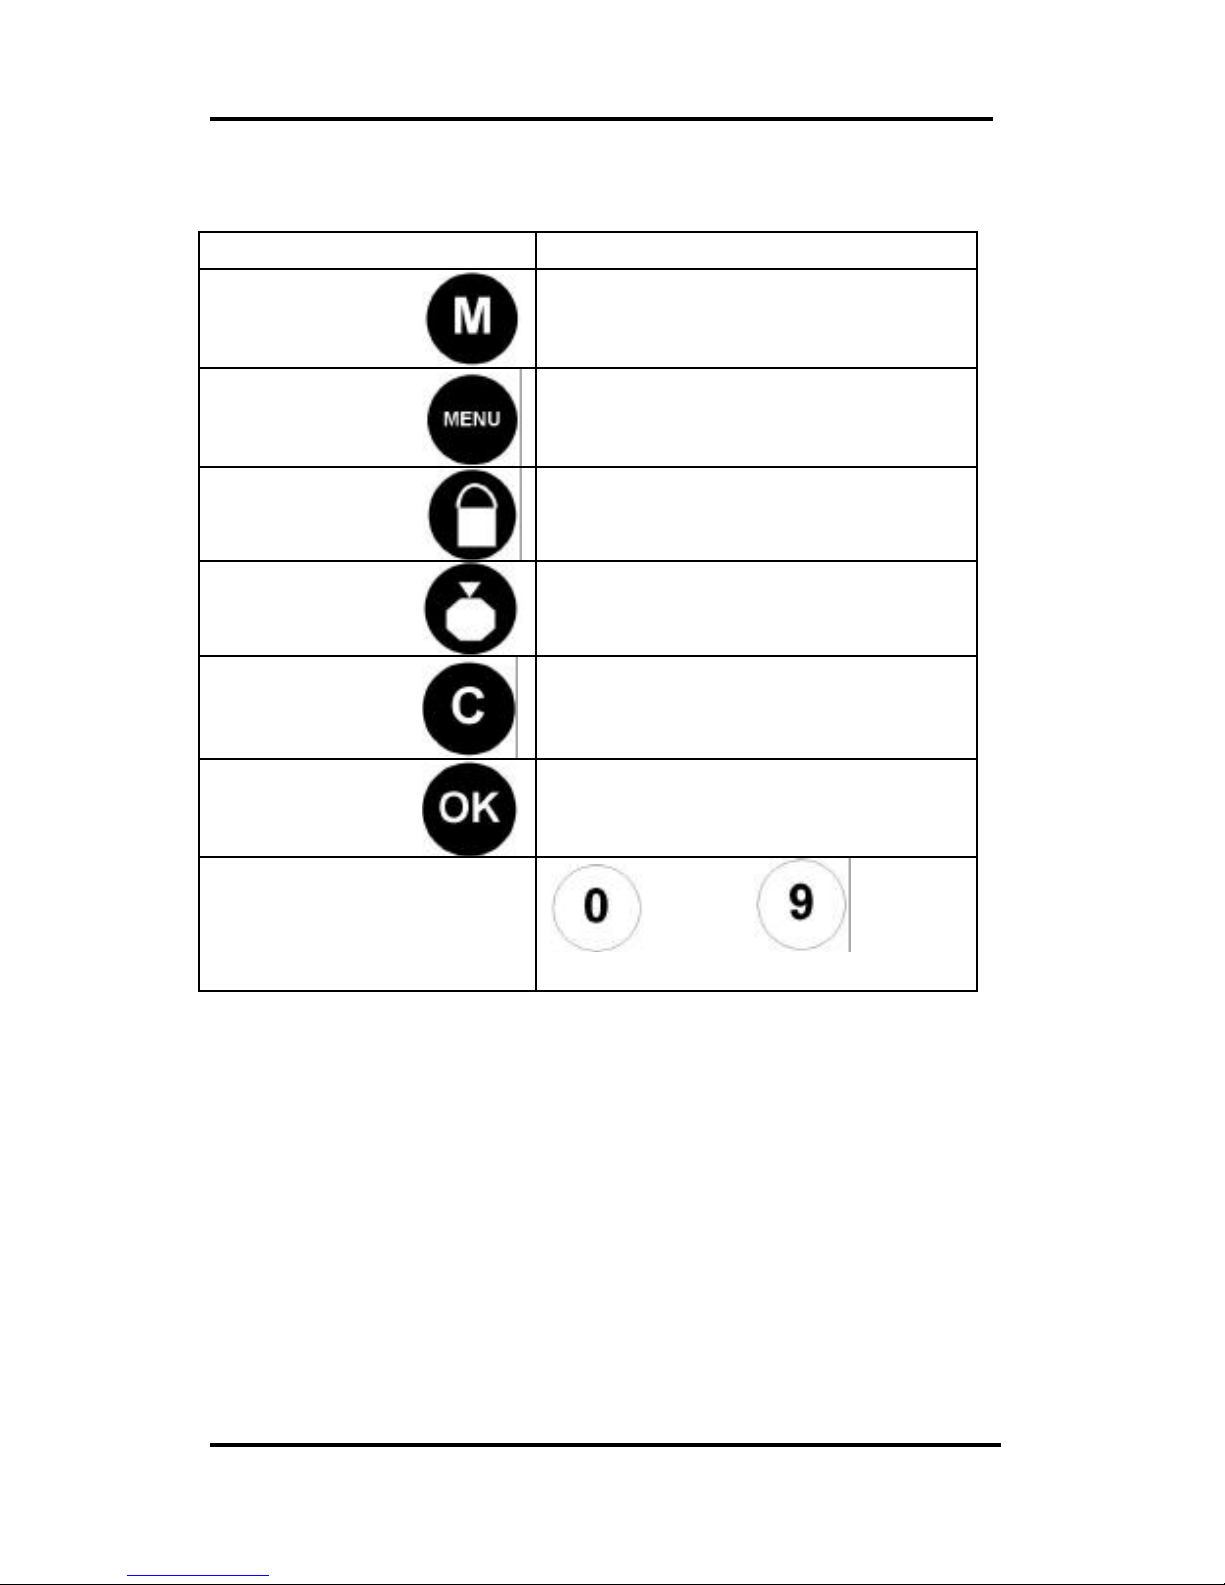
Function Keys Description
Job Memory Storing and recalling memorized
jobs.
Menu Key Access to Function Menu
Lock Return to Standby/Locking
Funds Access to Load Postage
(Recredit)
Clear Key Used to clear an entry
Confirmation
Key
Used to confirm an entry or
selection
Numeric Keys
through
Used to enter numeric values
HASLER Controls Section 2
Page 2 - 4 WJ20 06/2003
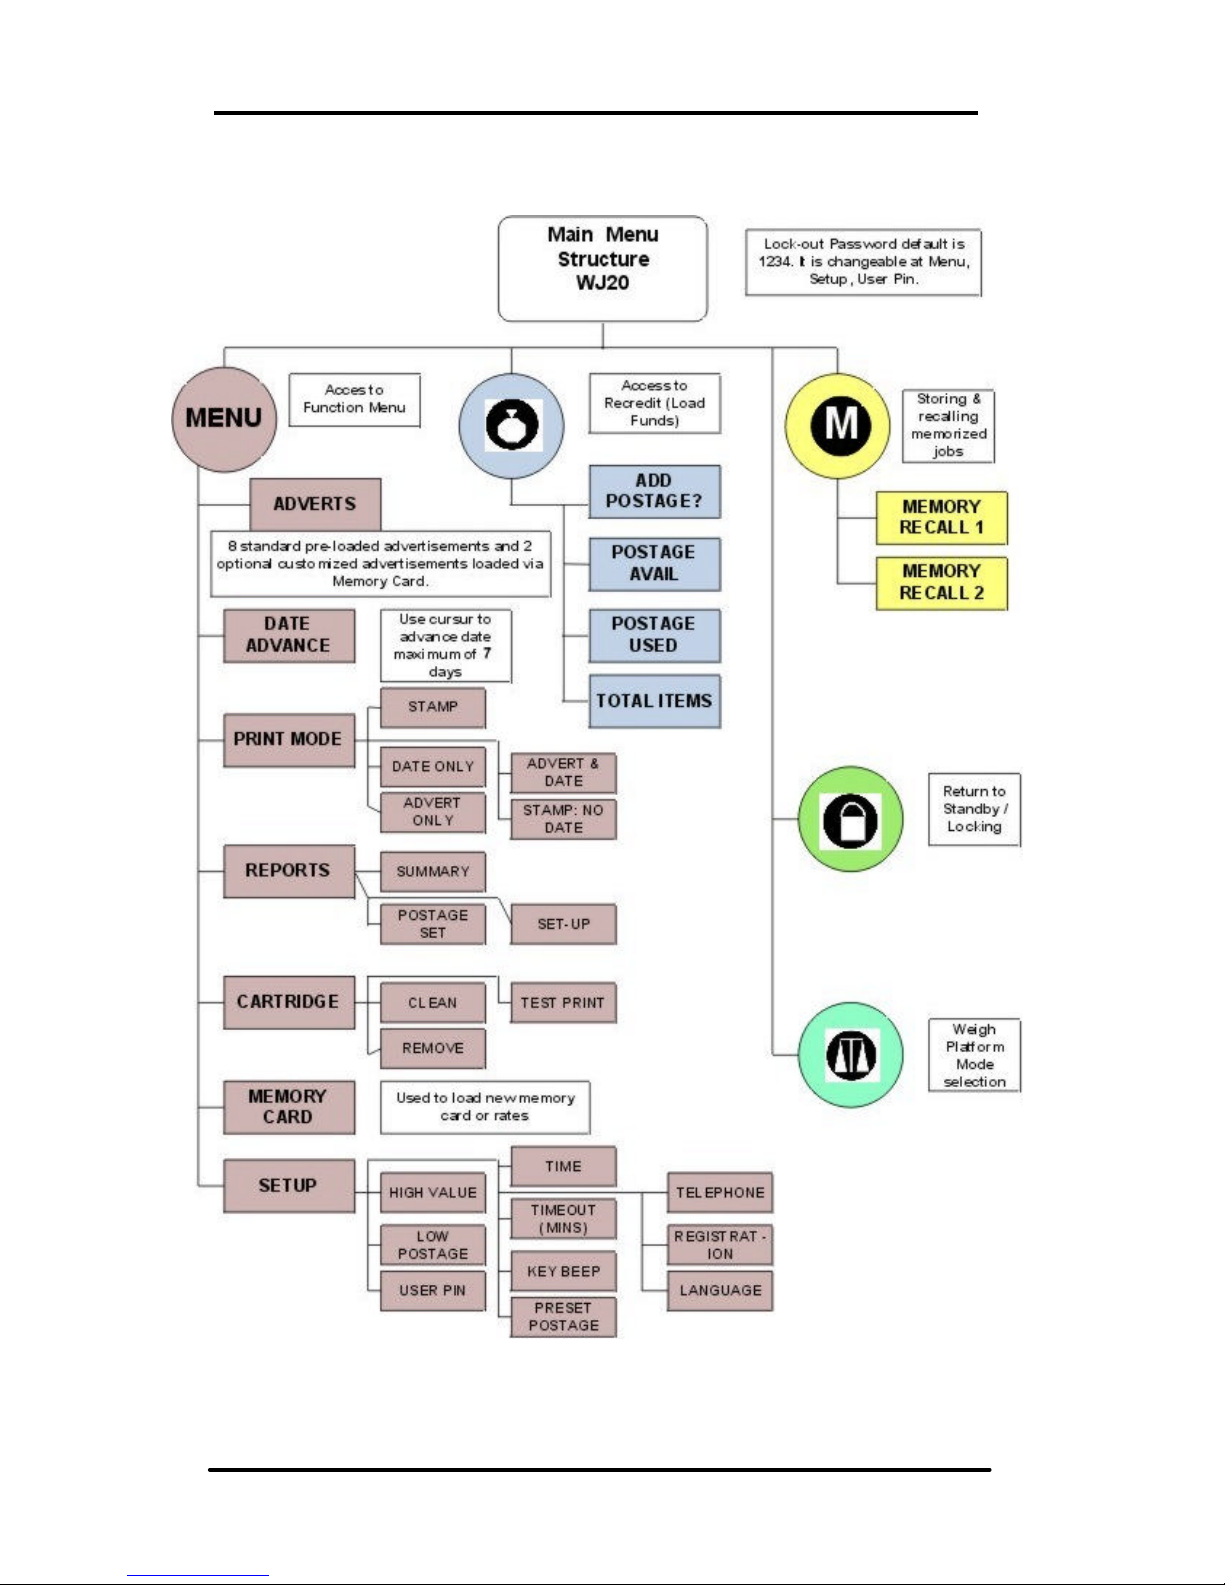
Menu Structure
HASLER Printing Section 3
06/2003 WJ20 Page 3-1
READY $0.37
12/12/02
ENTER POSTAGE
$0.00
Introduction
In order to achieve the best impression, your WJ20 requires
an even surface on which to print, therefore on bulky or
uneven items correct folding of the contents will help
considerably. Use a label if in doubt.
Printing Postage 3-1
Printing Tips 3-2
Envelope Specifications 3-2
Labels 3-2
Printing Modes 3-3
Print Mode Selection 3-5
Pre-Dated Mail 3-6
Advertisement Selection 3-7
To Print Postage
Using the numerical keypad, select the required
postage value … for example 37 cents.
Example: Press
You are now ready to print
postage.
Feed the
envelope in as
shown:

HASLER Printing Section 3
Page 3 - 2 WJ20 06/2003
Printing Tips
If your mail contains staple fasteners, paper clips and other
fasteners, it is recommended that the fasteners be situated at
the bottom of the envelope. This will avoid the risk of damage
to your printing head. In the event that a satisfactory print
cannot be achieved due to bulky contents (Maximum .3
inches) the envelope should be treated as a packet and a
label (meter tape) used.
Envelope Specifications
Length 5.5” minimum No maximum
Depth 3.5” minimum No maximum
Thickness 3/8” maximum, use labels (meter tapes) for over
3/8 inches
Speed:20 envelopes per minute
Labels (Meter Tapes)
For an envelope exceeding 3/8 inch thick, a label must be
used.
For posting parcels or packets, a pre-cut self adhesive label
approved by Hasler should be used. When feeding a label,
select the postage value required and feed the label
into the machine in the same way as you would an
envelope. Take up the printed label, peel off the backing sheet
and affix the label to the parcel or packet.
HASLER Printing Postage Section 3
06/2003 WJ20 Page 3 - 3
Printing Modes
Your WJ20 is capable of operating in various printing modes:
Stamp (Postage) Mode
Date Only Mode
Advert Only Mode
Advert + Date Mode
Stamp No Date Mode
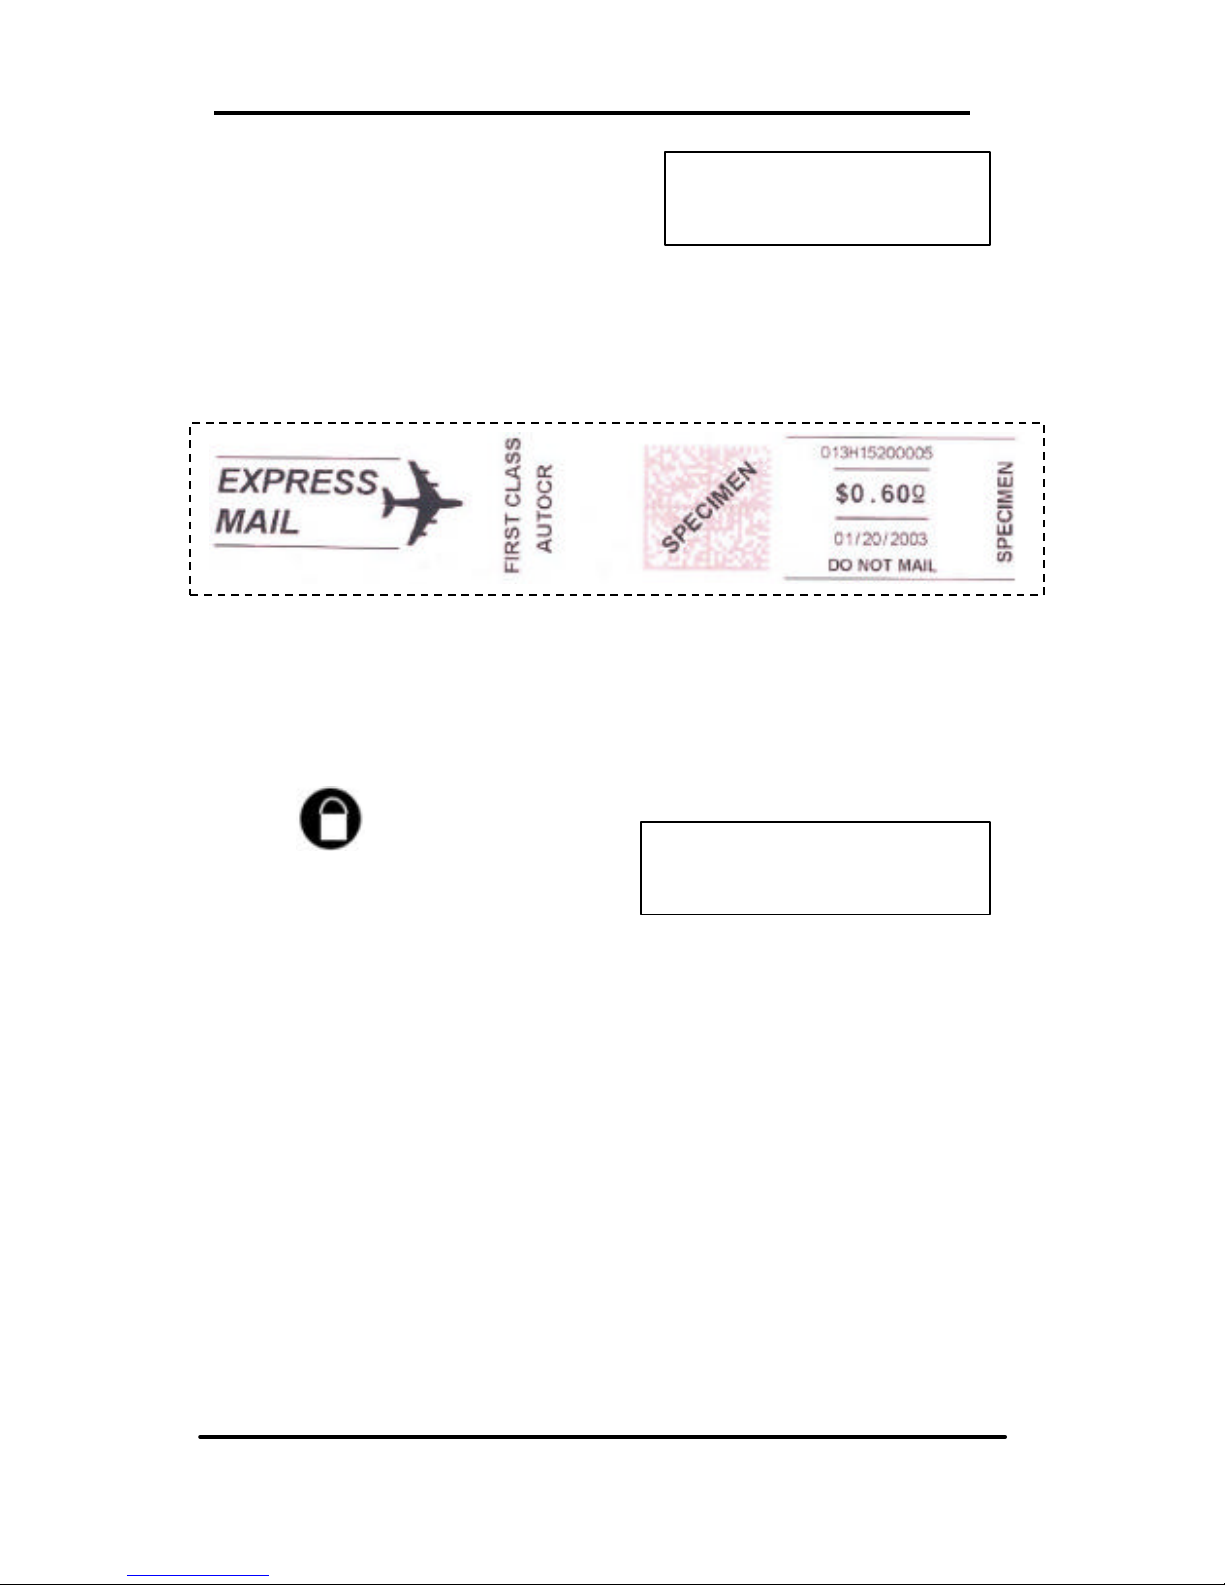
In stamp (postage) mode, you can print postage, pre-date
your mail, select an advertisement message from eight preloaded messages or select one from two of your own design
(when ordered from Hasler).
Continued the next page.
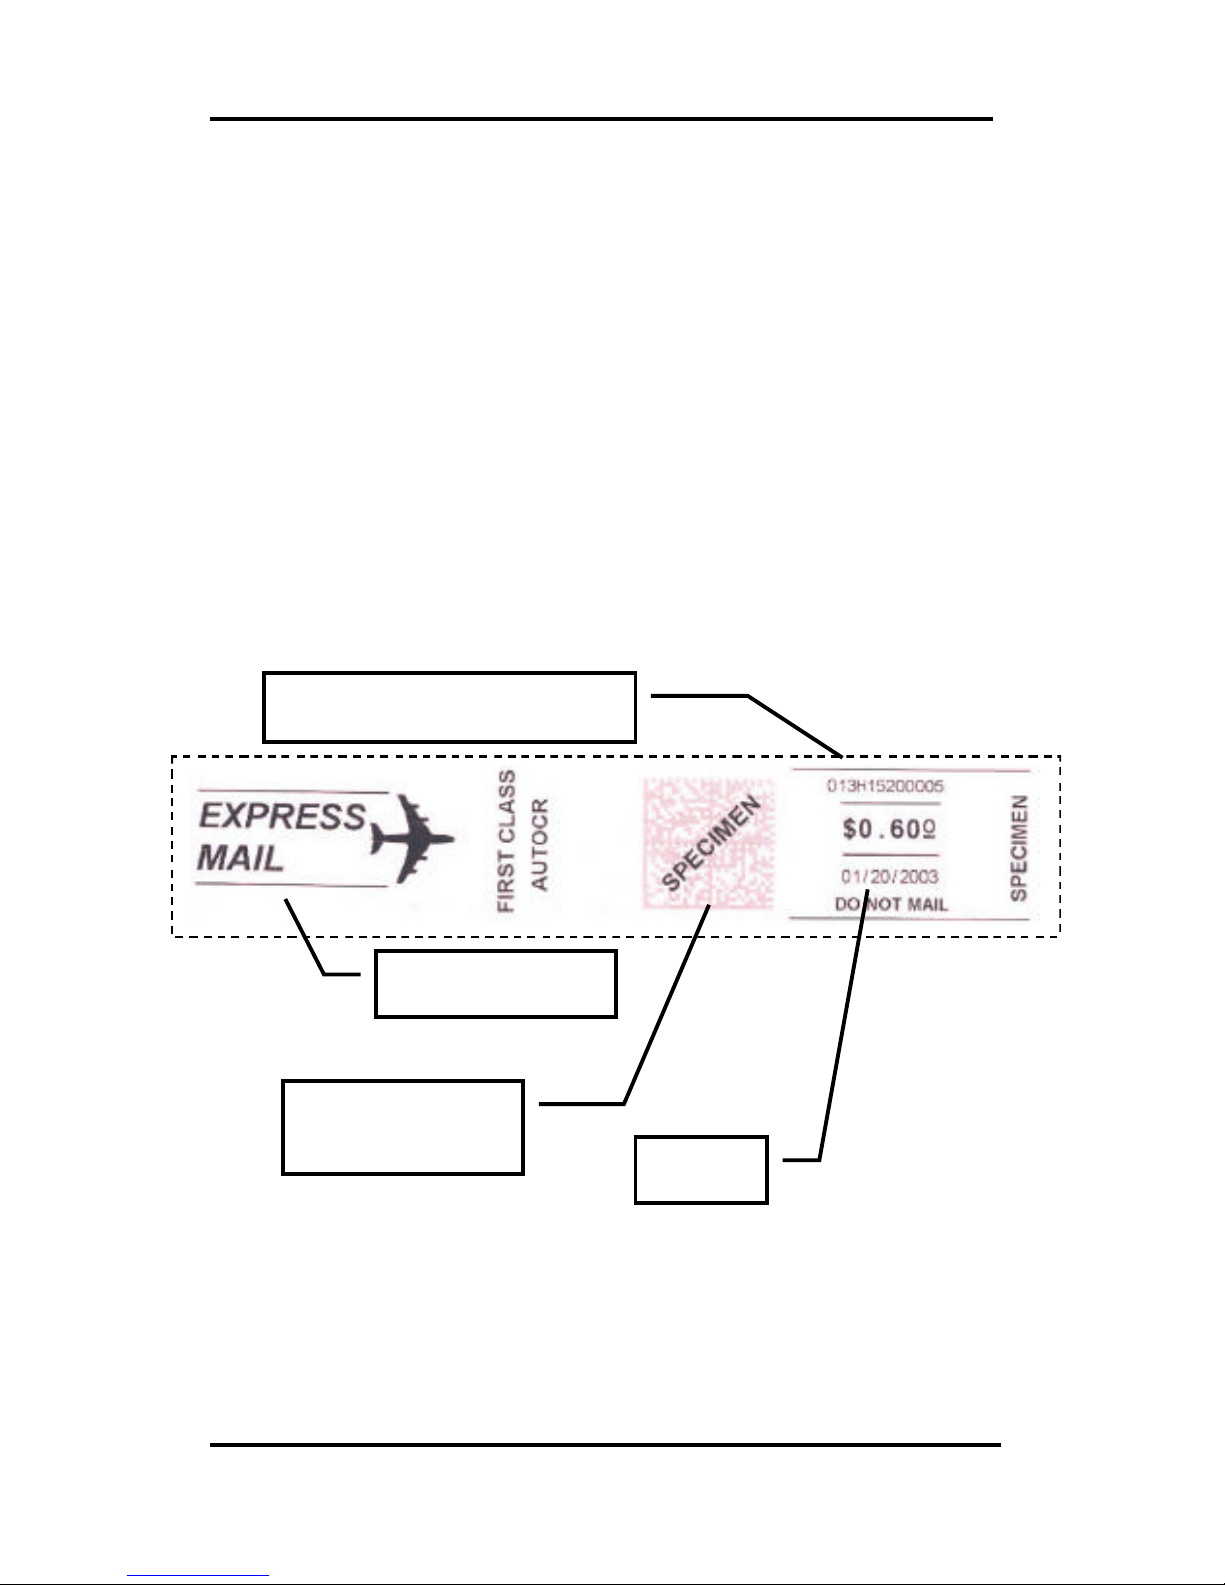
Advertisement
Meter Serial Number
Security Bar
Code
Date
HASLER Printing Section 3
Page 3 - 4 WJ20 06/2003
RECEIVED
09-30-02
RECEIVED
09-30-02
In date only mode, the following
typical print may be used to register
incoming mail.
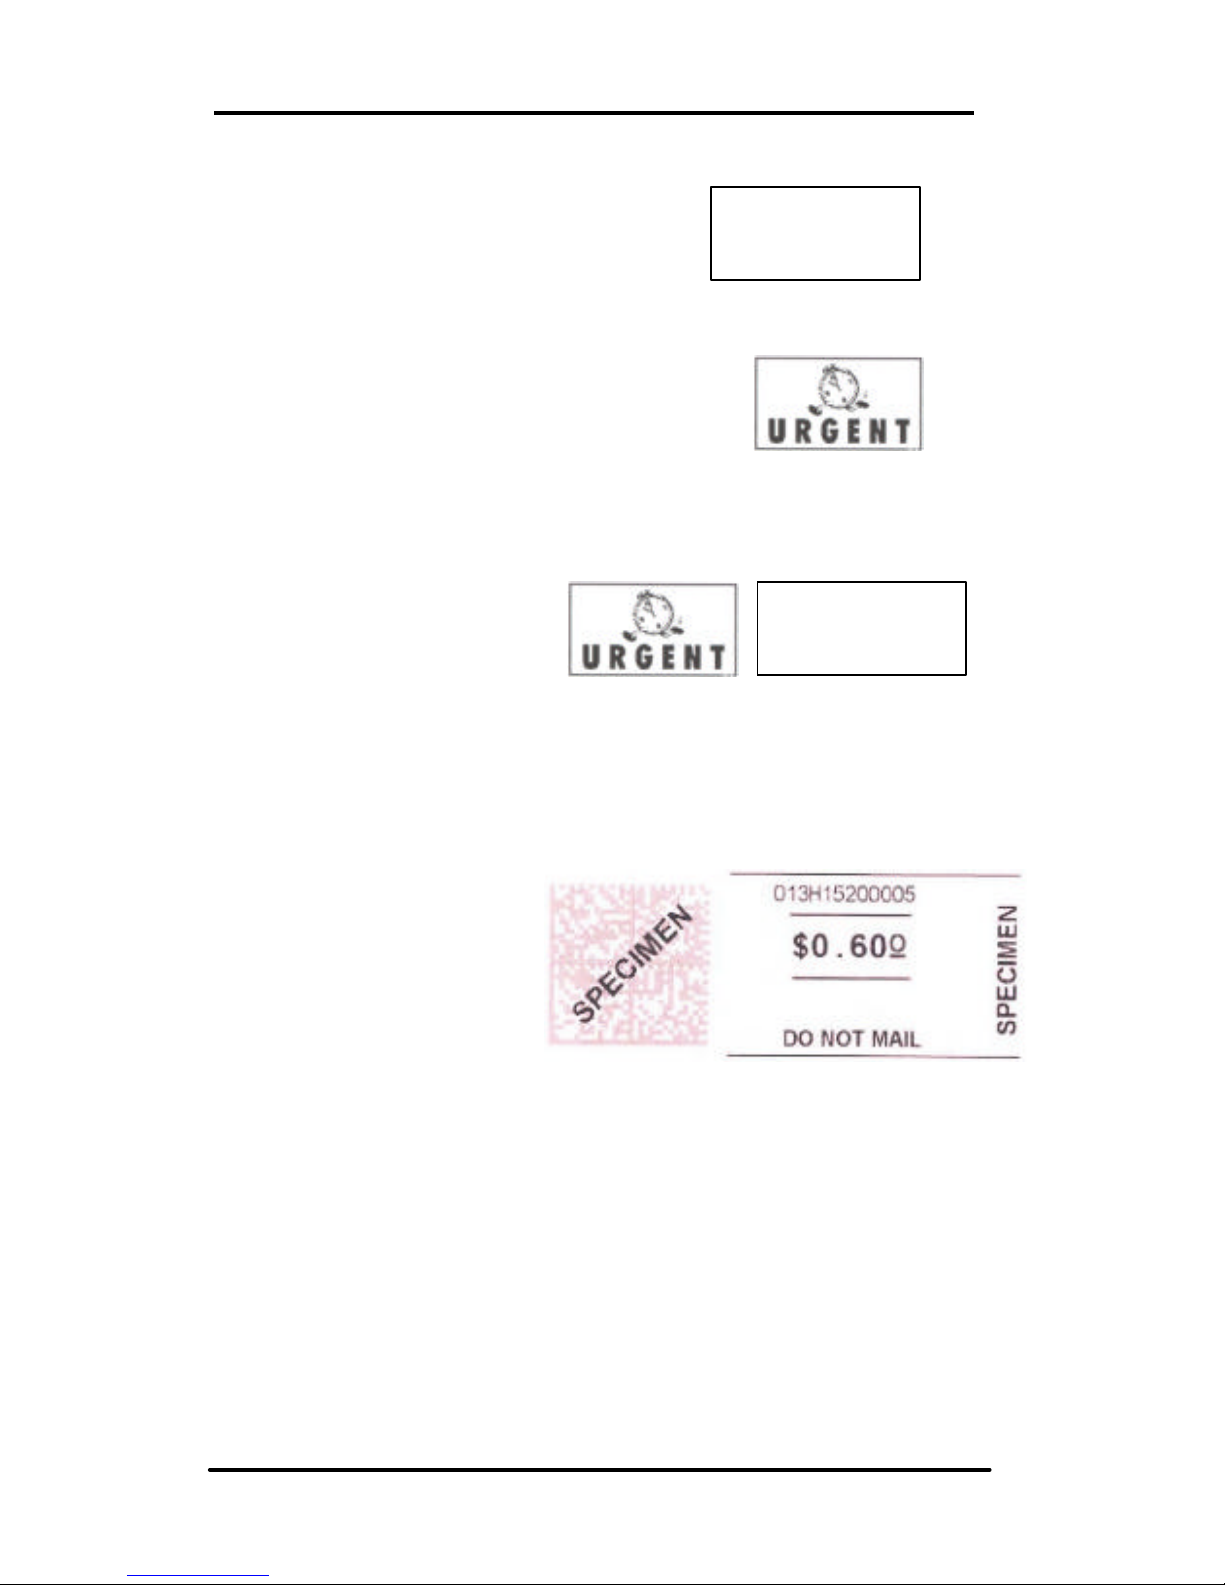
In advert only mode, you may select
and print a message from seven preloaded advertisements or select from
two of your own design.
In advert + date mode,
you may select and print
an advertisements plus
the date received.
Stamp no date mode
is used when
preparing
return envelopes.
HASLER Printing Postage Section 3
06/2003 WJ20 Page 3 - 5
PRINT MODE
< STAMP >
PRINT MODE
< STAMP >
PRINT MODE
< DATE ONLY >
PRINT MODE
< ADVERT ONLY >
PRINT MODE
< ADVERT + DATE >
PRINT MODE
< STAMP:-NO DATE >
Ready $0.00
12/19/02
Ready
ADVERT ONLY
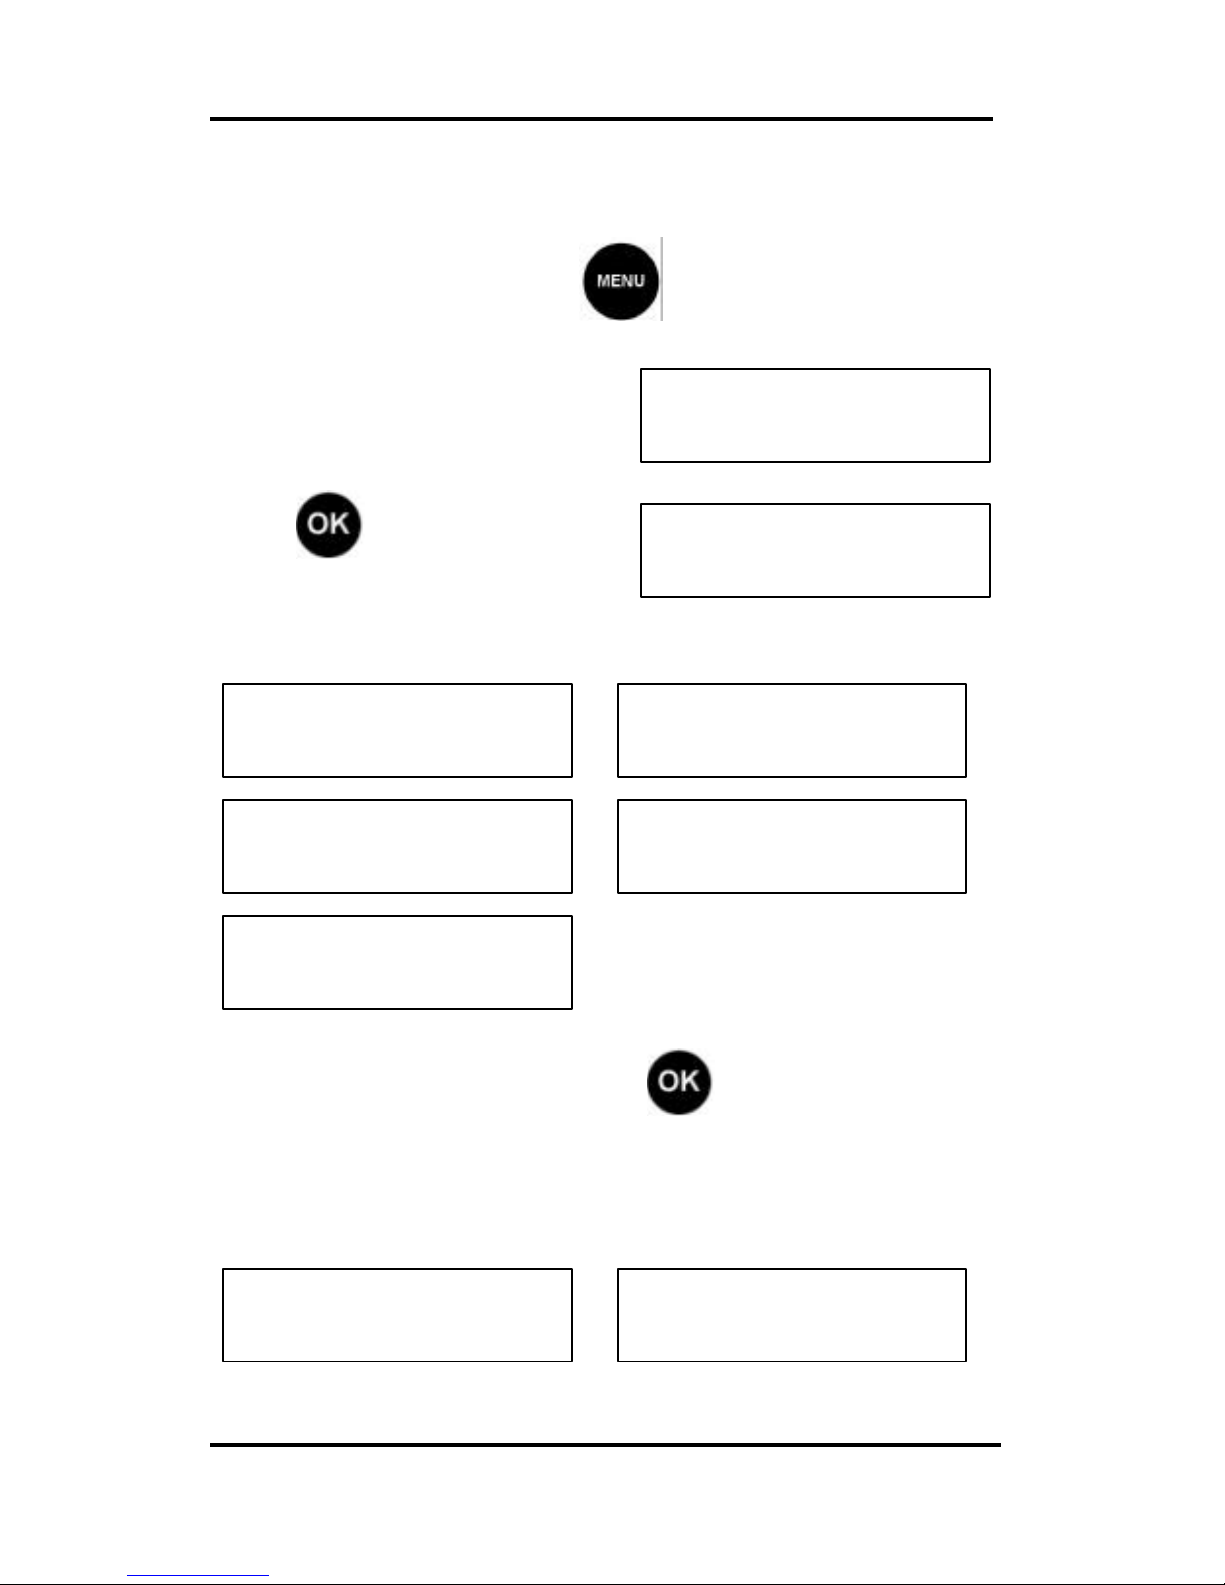
Print Mode Selection
From the Ready Mode press and scroll to the PRINT
Mode display.
Press to lower scroll to
Print Mode selections.
Use the cursors (< >) to select the desired setting:
After making your selection, press to confirm it.
The unit will indicate it is ready.
STAMP selected ADVERT ONLY selected
< PRINT MODE >
STAMP
HASLER Printing Section 3
Page 3 - 6 WJ20 06/2003
< DATE ADVANCE >
12/19/02
< DATE ADVANCE >
12/22/02
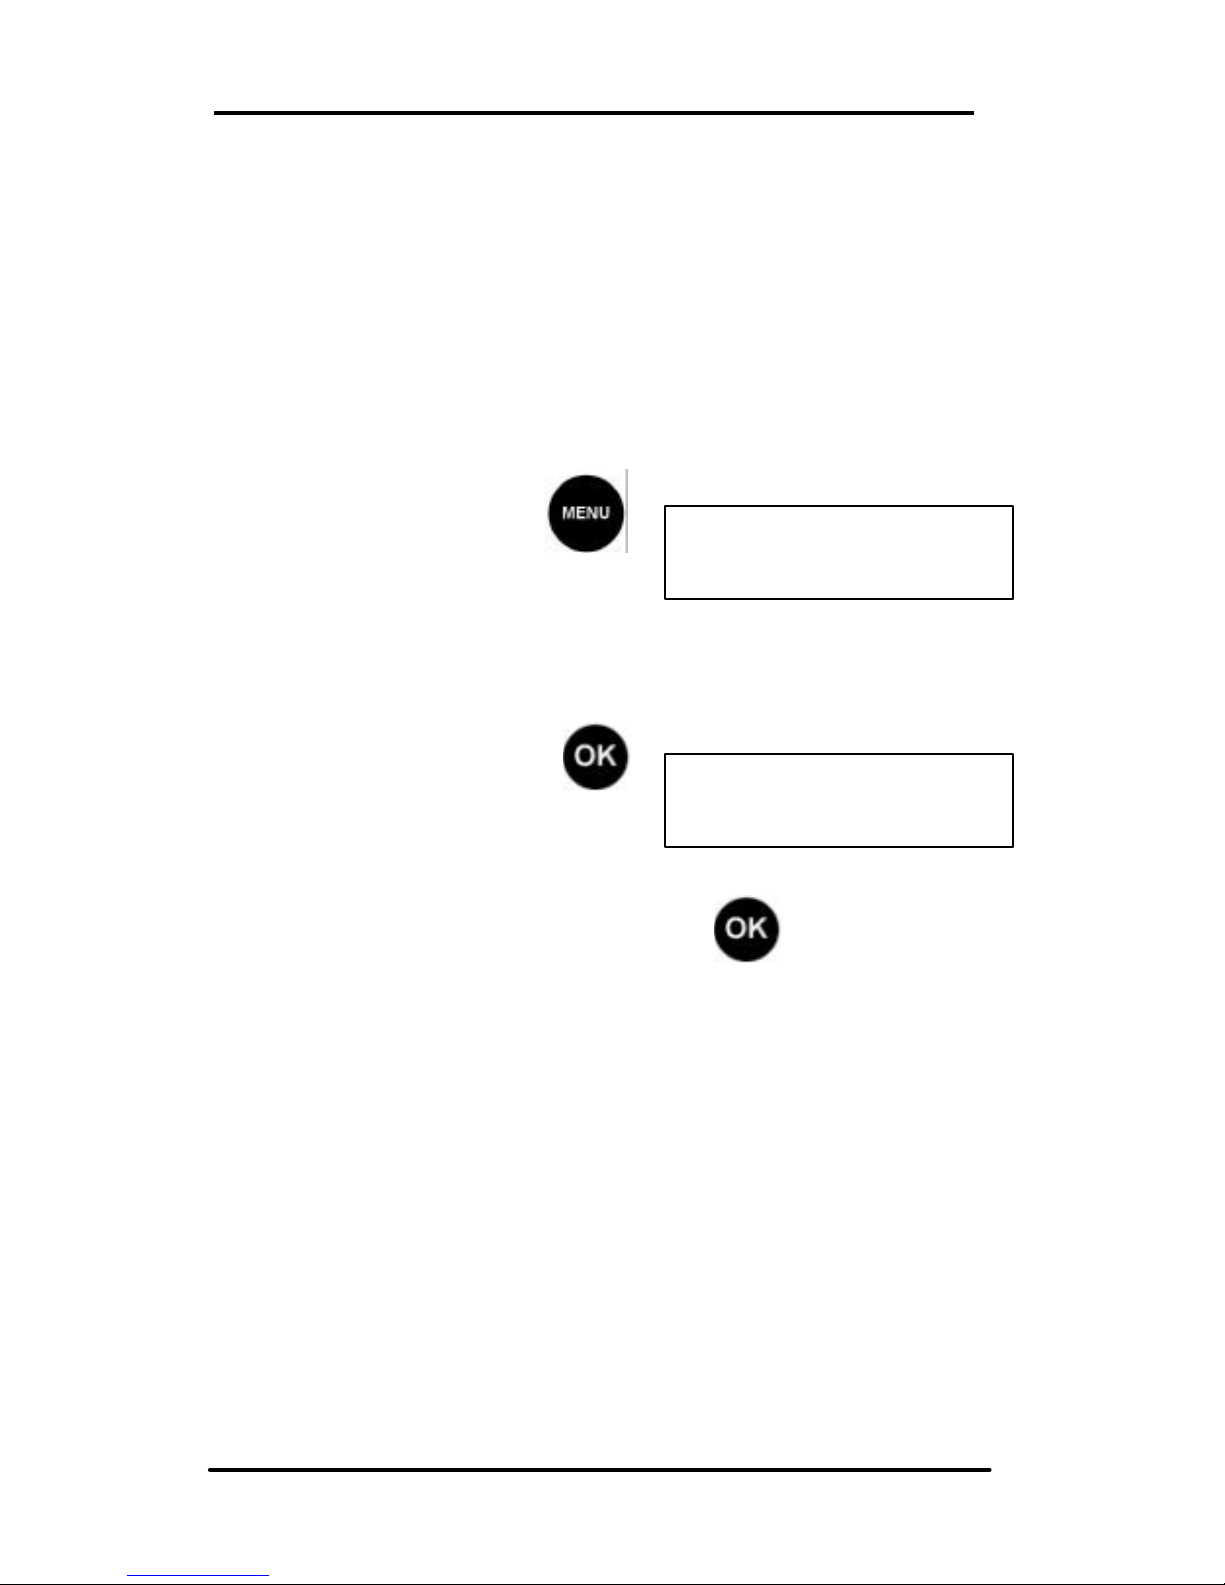
Pre-Dated Mail
Your WJ20 is fitted with its own calendar/clock, therefore the
current date setting is automatic.
If you wish to prepare mail ahead of time it is possible to
advance the posting date by up to seven days.
To prepare your post dated mail proceed as follows:
From Ready mode, press
and scroll to DATE ADVANCE.
Date Advance indicator flashes and the current date is
displayed.
To advance the date, press
and scroll forward (>) to the
required posting date.
Confirm date advance by pressing ,
The WJ20 returns to Ready mode with the advanced
Post Date displayed.
When through running your predated mail, repeat the above
steps except this time scroll back (<) to the current date.
HASLER Printing Postage Section 3
06/2003 WJ20 Page 3 - 7
< ADVERTS >
US FLAG
ADVERTS
< US FLAG >
ADVERTS
< US FLAG >
ADVERTS
< ADVERT OFF >
ADVERTS
< EX MAIL >
ADVERTS
< First Class >
ADVERTS
< Urgent >
ADVERTS
< Priority >
ADVERTS
< Recycle >
ADVERTS
< S. Greetings >
ADVERTS
< Thank You >
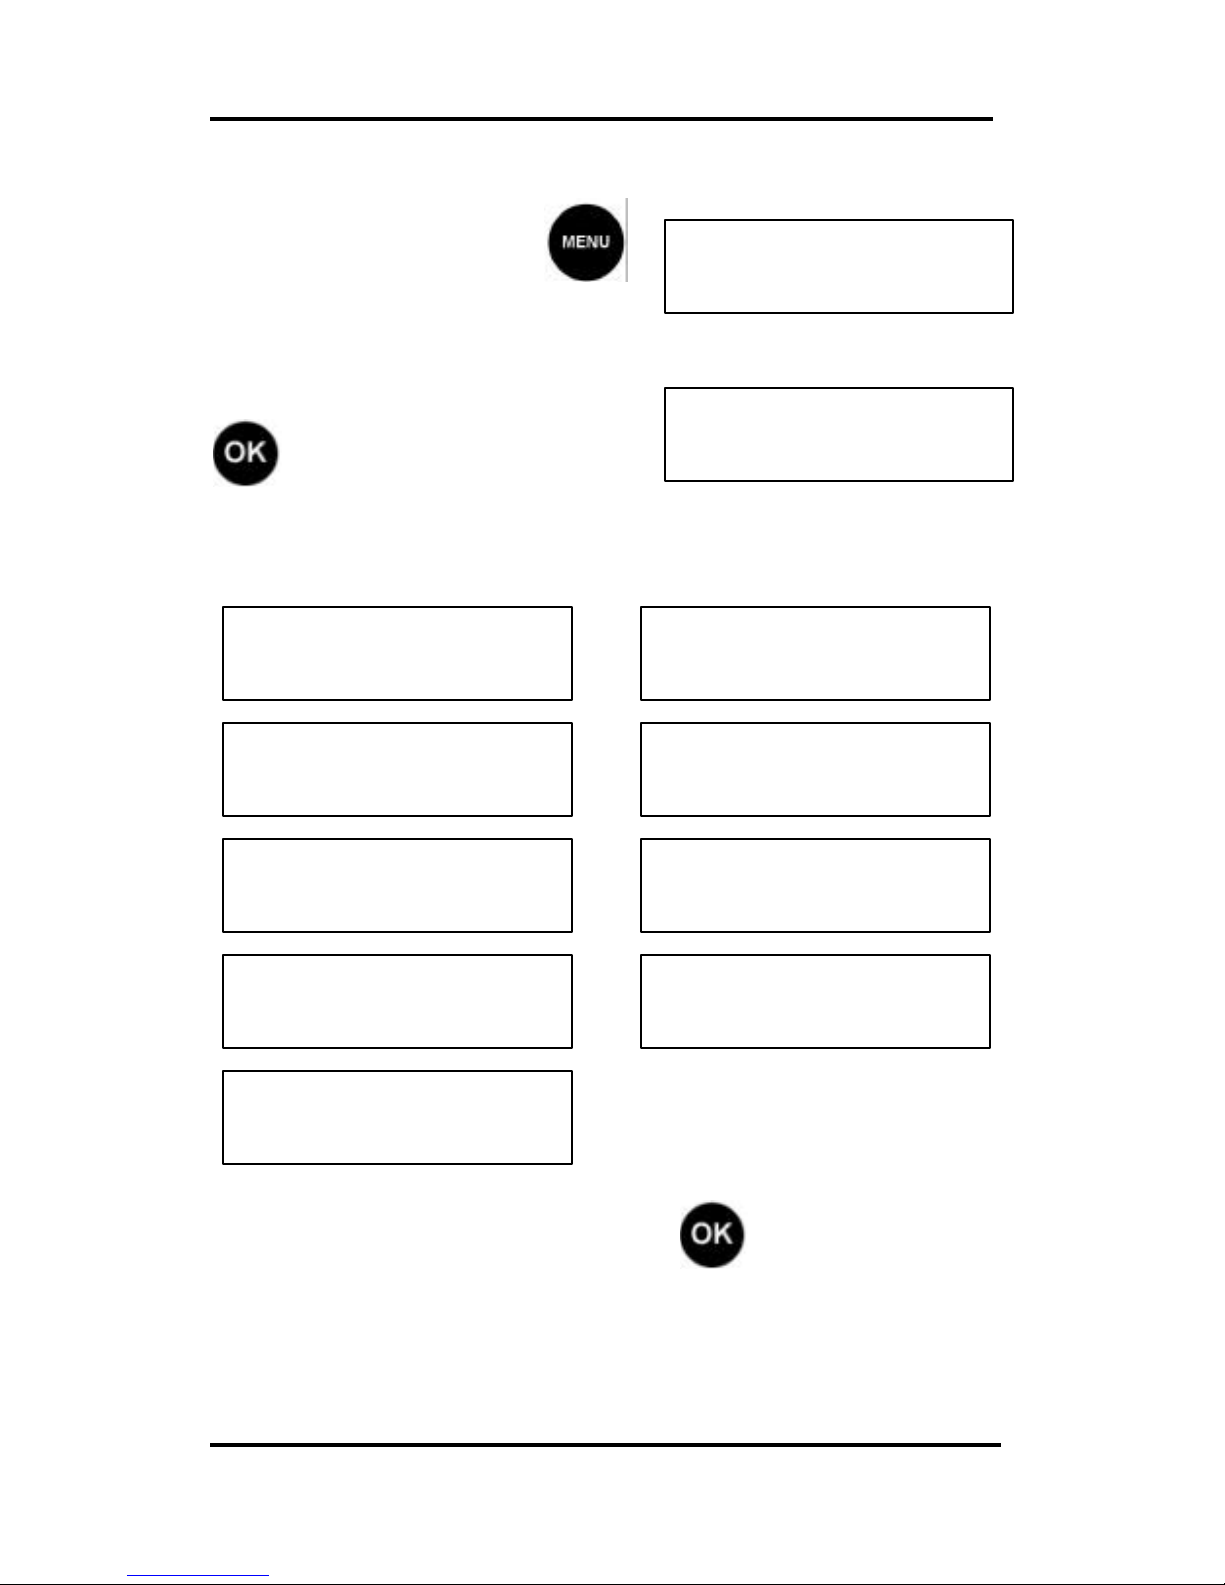
Advertisement Selection
From Ready mode, press
and scroll (< >) to the ADVERTS
display.
To change the Message, press
and scroll (< >) to the
desired Message:
Selections are:
To confirm your selection press , the WJ20 will
return to Ready Mode with the new Advertisement
Message loaded.
It is normal for a Advertisement Message to take a few
seconds to load after you select it.

This page intentionally left blank.
HASLER Memory Settings Section 4
06/2003 WJ20 Page 4-1
Ready $0.37
12/19/02
MEMORY SAVE
< 1 >
MEMORY SAVE
< 2 >
Ready $0.37
12/19/02
Introduction
The WJ20 has the capability to program commonly used print
combinations to help eliminate steps and save time.
Programming A Memory Function 4-1
Recalling A Memory Function 4-2
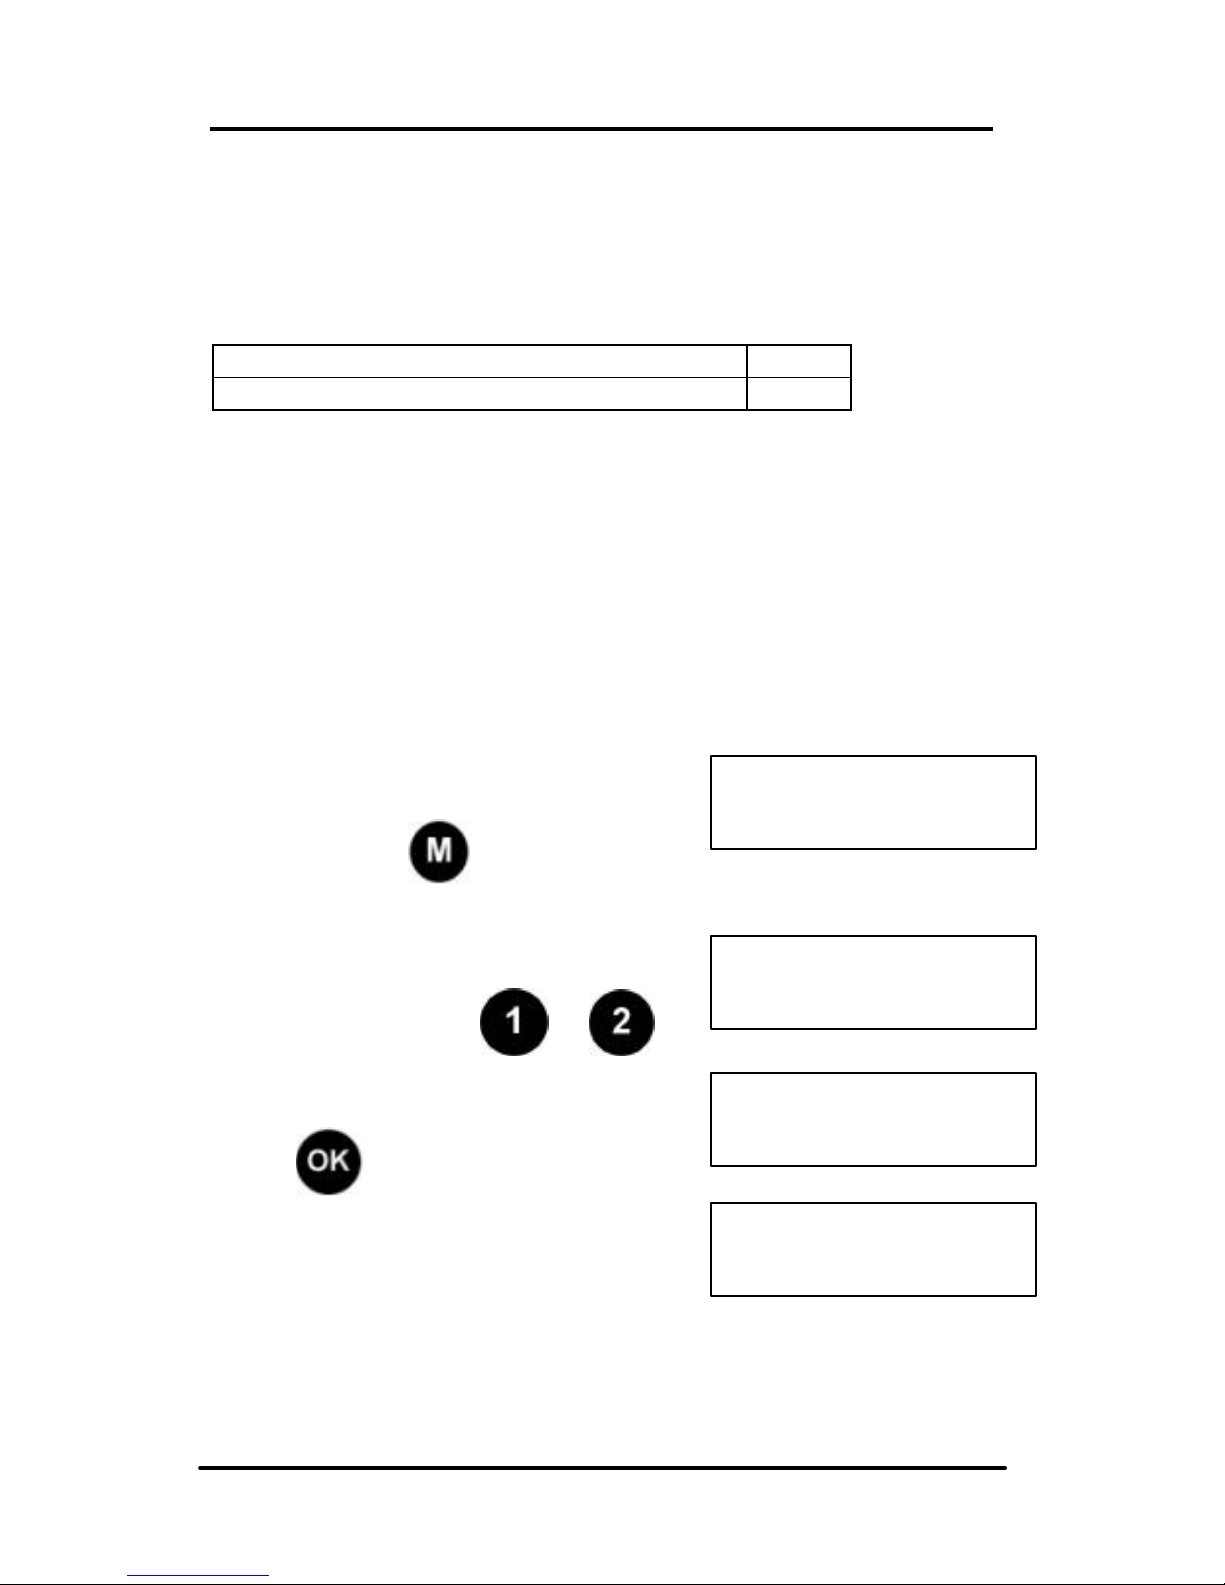
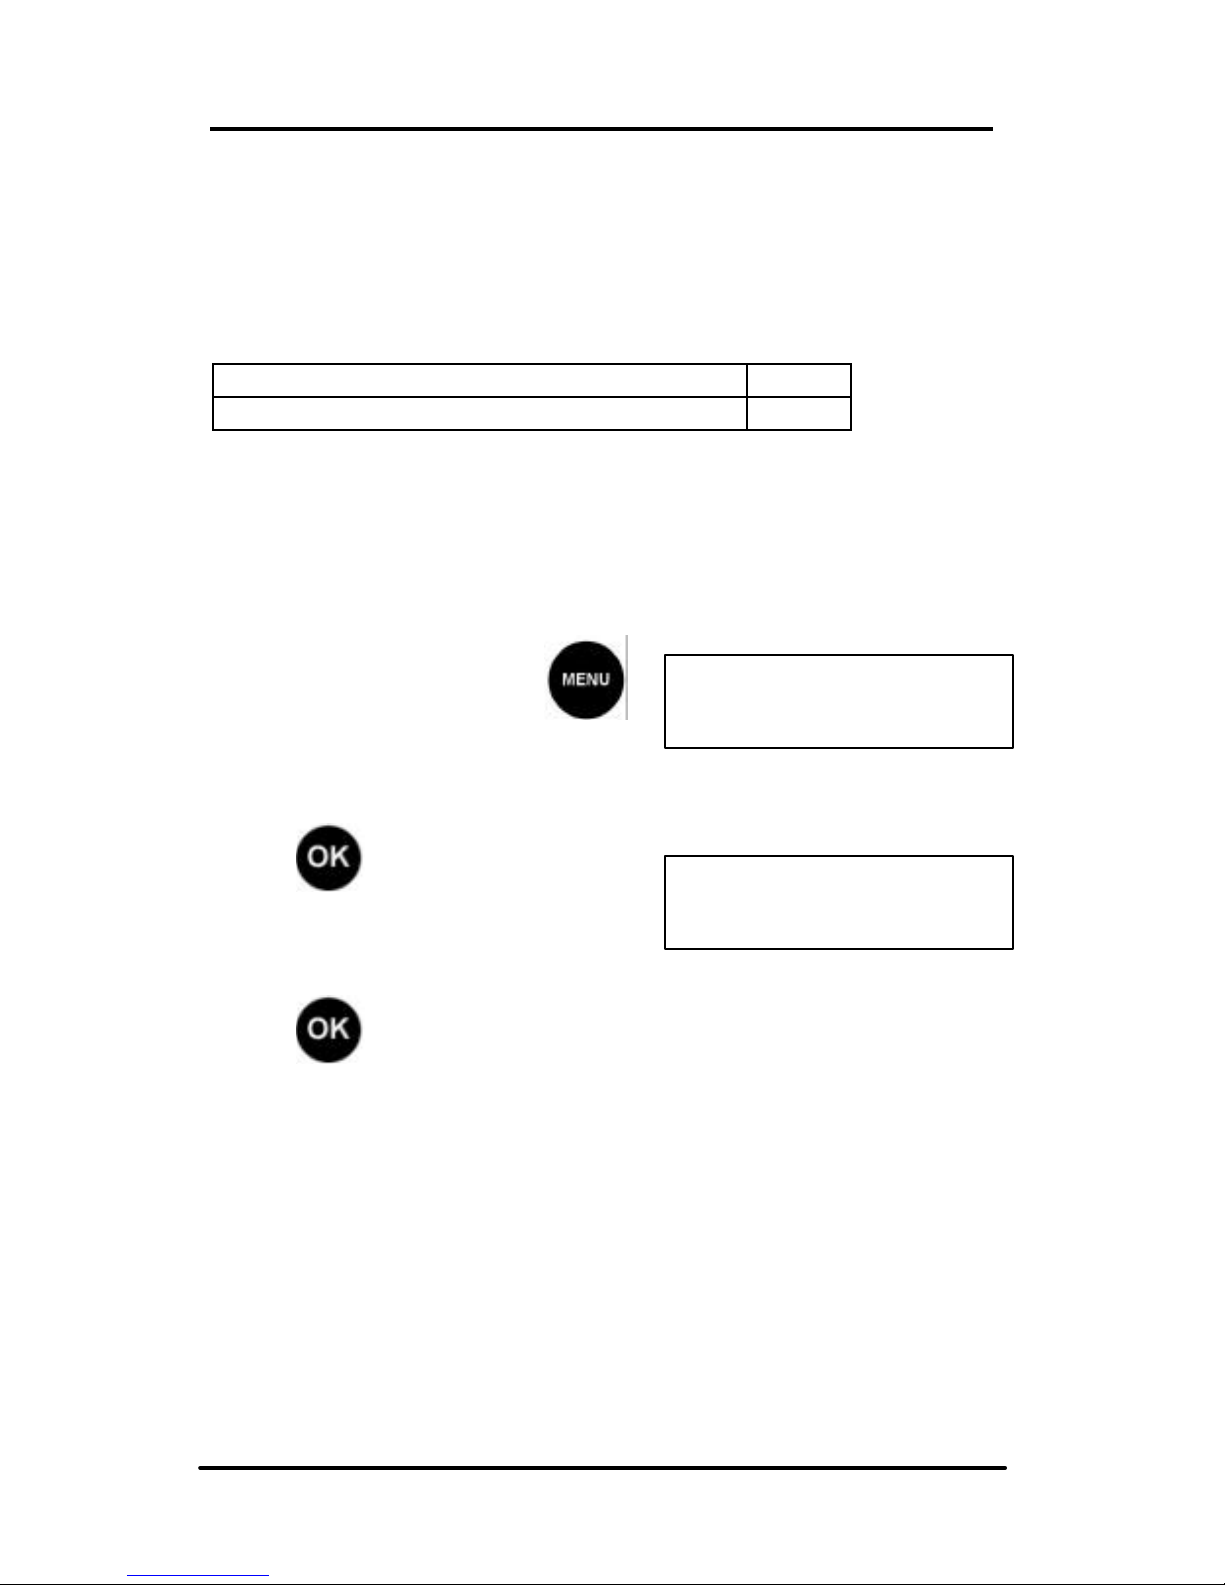
Programming a Memory Function
Choose your preferred print combination:
Example Value 37 cents + Message URGENT
First select the desired Advertising Messages.
Then select postage value.
With preferred print combination set
and the ready screen displayed,
press and hold for at least two
seconds.
Select using the cursors (< >) the
memory location key or
as required.
Press to confirm.
The display will return to the ready
screen.
Continued on the next page.

HASLER Memory Settings Section 4
Page 4 - 2 WJ20 06/2003
REPLACE MEMORY?
2
MEMORY RECALL
< 1 >
If the selected memory location has
a previously programmed function,
the following display will be
observed.
To replace a memory program, press , or press
to exit and start over to select a new location.
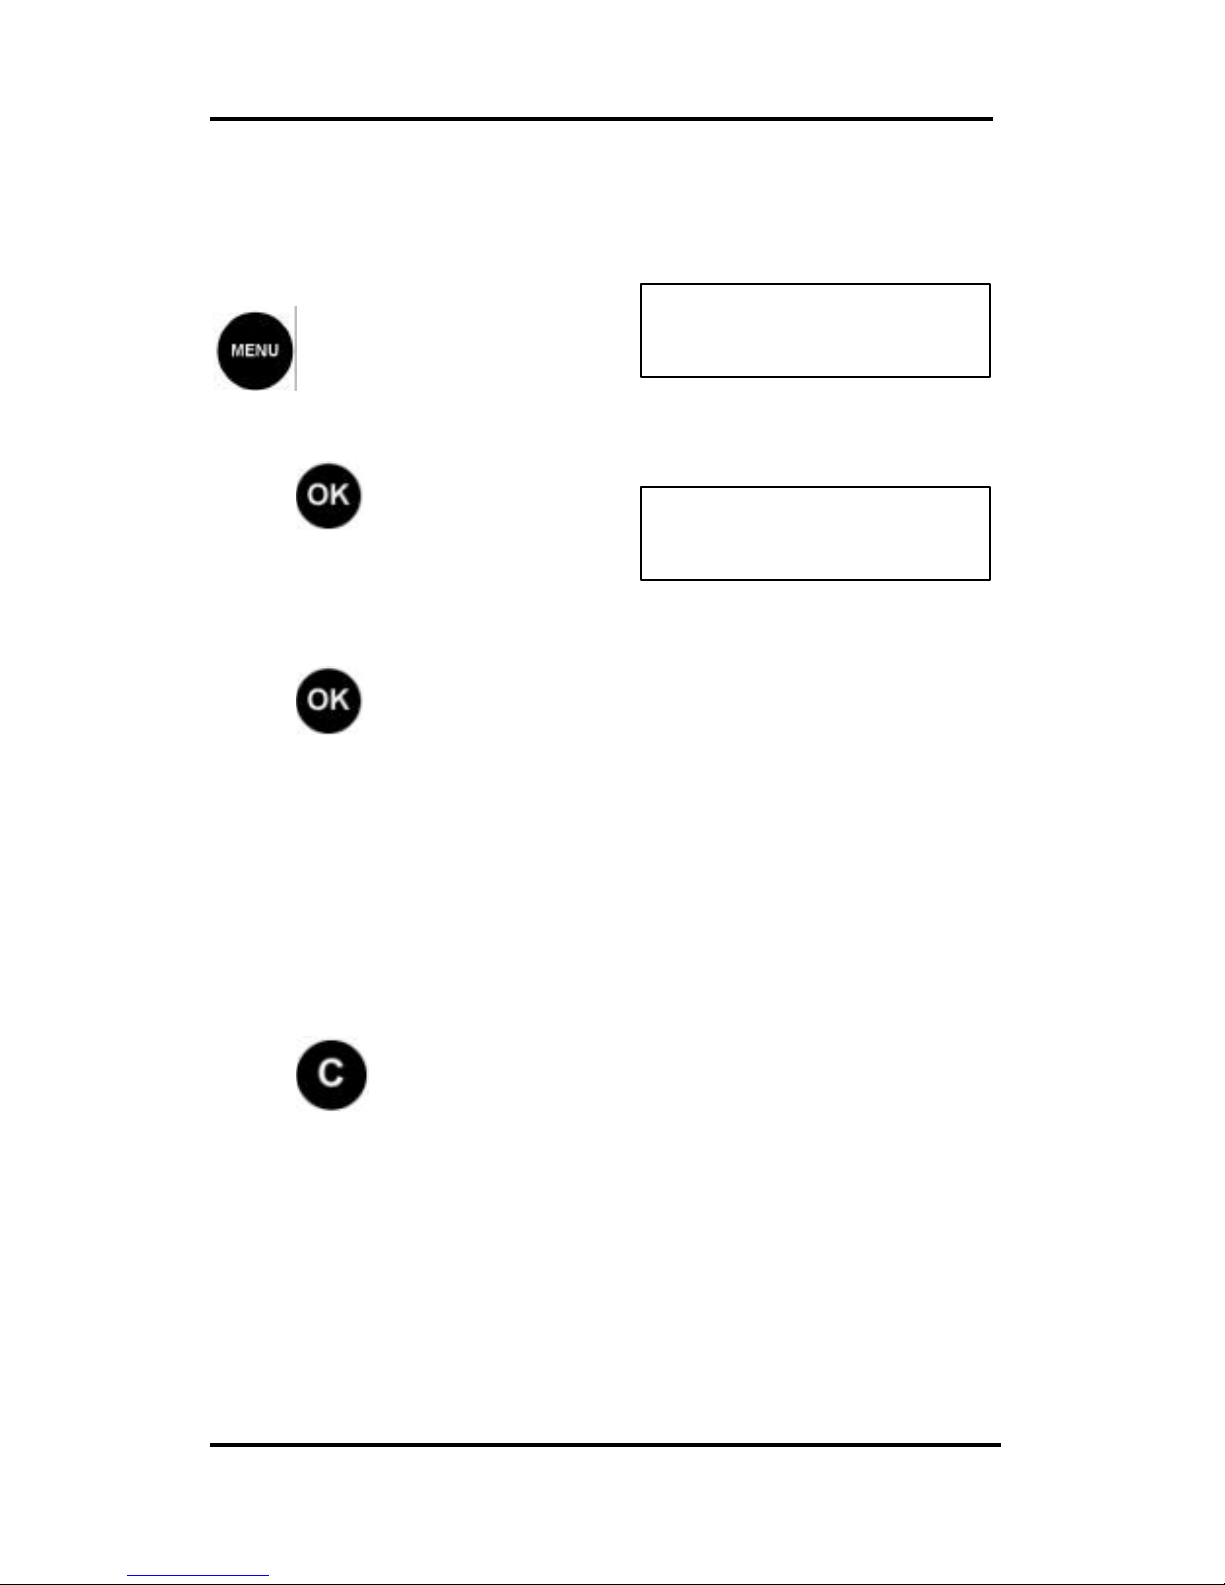
Recalling A Memory Function
To recall a memory function,
press and release , the
following display will be observed.
Select the appropriate memory key or .
Press to confirm.

HASLER Weigh-Scale Section 5
06/2003 WJ20 Page 5-1
Introduction
The WJ20 has the capability to connect to an optional weigh
scale.
Benefits Of Using A Weigh-Scale 5-1
Weigh-Scale Connections 5-2
Weigh-Scale Postage/Rate Selection 5-3
Benefits Of Using The Weigh-Scale
• Used in conjunction with your WJ20, the weigh-scale
will weigh and calculate the correct rate and value for
items up to 4 pounds.
• Set postage values automatically for printing.
• When postal rates change, your machine may be
updated by installing a Rate Card that can be obtained
from your local Hasler dealer.
Rate Card (Memory Card)
Weigh-Scale

HASLER Weigh-Scale Section 5
Page 5 - 2 WJ20 06/2003
< 1st/Pri >
0.5 oz $0.37
Weigh-Scale Connection
Ensure that the weigh-scale platform is clear of any
obstruction.
Connect the weigh-scale to the connector (3) at the back of
the machine.
Connections To The Unit
The WJ20 has 3 connection ports:
1) Power adapter,
2) Modem (phone line)
3) Optional weigh-scale
Go to Ready mode.
Press
The last Mail Rate selected will be displayed.
Note: If the displayed weight is
greater than 0.0 oz., with nothing on
the scale, the scale must be set to
zero.
To Zero the scale press . If NO SCALE! is
displayed, check scale connection and start again.
HASLER Weigh-Scale Section 5
06/2003 WJ20 Page 5 - 3
< 1st/Pri >
0.5 oz $0.37
< Express PO-Adr >
0.5 oz $12.45
< Int Air Letter >
< Canada >
0.5 oz $0.60
< Mexico >
0.5 oz $0.60
< Group 3 >
0.5 oz $0.80
< Group 4 >
0.5 oz $0.80
< Group 5 >
0.5 oz $0.80
Weigh-Scale Postage/Rate Selection
You need to select the desired rate for the object on the scale
so that the correct postage can be calculated.
Scroll (< >) to the desired postage
rate.
Press to accept selection.
For International Air Letter, a secondary selection is
required of Canada, Mexico, Group 3, Group 4, or Group 5.
Use the scroll (< >) keys to select
the desired country selection. The
rate will change to reflect the
selection.
Press to accept selection.

This page intentionally left blank.

HASLER Meter Registers Section 6
06/2003 WJ20 Page 6-1
Introduction
Your postage meter is equipped with a series of electronic
funds registers to monitor postage transactions. All register
values shown here are examples.
Available Registers 6-1
Meter Register Selection 6-2
Postage Available Register 6-2
Postage Used Register 6-2
Total Items Counter 6-2
Low Postage Warning 6-3
Insufficient Postage 6-3
Low Ink 6-3
No Ink 6-3
Available Register Selections
Postage Available Register
Postage Used Register
Total Items Counter
Low Postage Warning
Insufficient Postage
Low Ink
No Ink

HASLER Meter Registers Section 6
Page 6 - 2 WJ20 06/2003
< ADD POSTAGE? >
$9973.35
< POSTAGE AVAIL >
$9973.35
< POSTAGE USED >
$26.65
< TOTAL ITEMS >
50
Meter Register Selection
From Ready Mode press .
Using the scroll (< >) keys, the following registers may be
checked:
Postage Available Register
The Postage Available Register
will display the postage
remaining (How much money I have left).
Postage Used Register
The Postage Used Register will
display the total postage spent
to date (How much money I
have spent on postage to date).
Total Items Counter
The Items Counter will display
the total number of items with a
valid postage amount printed to
date.

HASLER Meter Registers Section 6
06/2003 WJ20 Page 6 - 3
Ready $0.37
12/19/02
LOW POSTAGE
0.55
ADD POSTAGE
Ready $0.37
12/19/02
LOW INK
NO INK
Additional Registers
Low Postage Warning
When machine credit falls
below or equal to the low
postage level, the display
will alternate between
Ready and LOW
POSTAGE.
Insufficient Postage
When the value selected
exceeds the available
postage, printing will be
inhibited and the ADD POSTAGE warning will be
displayed.
Low Ink
When the ink cassette
requires replacing, the
display will alternate
between Ready and LOW
INK.
To allow completion of batch,
an additional 200 printing operations are available, after which
the ink cartridge MUST be changed.
No Ink
When the NO INK display is
observed change the Ink
Cartridge.

This page intentionally left blank.

HASLER Adding Postage Section 7
06/2003 WJ20 Page 7 - 1
Postage may be purchased from the Post Office, using the
Hasler TMS (Tele-Metering-System).
TMS (Tele Meter Setting) permits the loading of postage
funds into the WJ20 over a standard analog telephone line.
Prior to printing indicia tapes, your Hasler WJ20 must be
loaded with funds.
Hasler’s TMS® (Tele Meter Setting) provides the means to
download funds from your TMS® Bank Account. With TMS®,
you maintain a TMS® Bank Account into which you deposit
money for postage by either mailing a check to Hasler or by
automatically debiting an account that you designate. These
funds are deposited into your TMS® Bank Account and are
then available to download at any time into the WJ20.
Modem Connection 7-2
Adding Postage 7-3
Clearing A PO Lockout 7-5
Completing An Interrupted Transaction 7-6
Maintaining Your TMS Account Number 7-7
TMS Account Number 7-7
TMS Account Balance 7-7
TMS Statements 7-8
Post Office Regulations 7-8
PostageNow 7-9
PostageNow ™ TeleFunds™ 7-10
PostageNow OnDemand 7-10
Information whenever you want it online or by phone 7-10
Managing Your Account 7-11
Standard TMS Bank Accounts 7-12
Where To Mail Your TMS Bank Account Deposit 7-13
Contact Information 7-14
HASLER Adding Postage Section 7
Page 7 - 2 WJ20 06/2003
Modem Connection
Connect one end of the telephone link cable to the Modem
Socket ( ) at the rear of the machine and the other end to an
adjacent telephone line outlet. The meter only requires the
connection to the telephone line outlet during the Add Postage
or Clear Lockout transaction. The modem dial-up phone
number is 1-800-446-6029.
Connect the analog phone line to the unit (3). A Fax line is
usually an analog phone line.
The WJ20 has 3 connection ports:
1) Power adapter,
2) Modem (analog phone line)
3) Optional weigh-scale
HASLER Adding Postage Section 7
06/2003 WJ20 Page 7 - 3
< ADD POSTAGE? >
$78.64
ENTER AMOUNT
$0.00
CONFIRM AMOUNT
$500.00
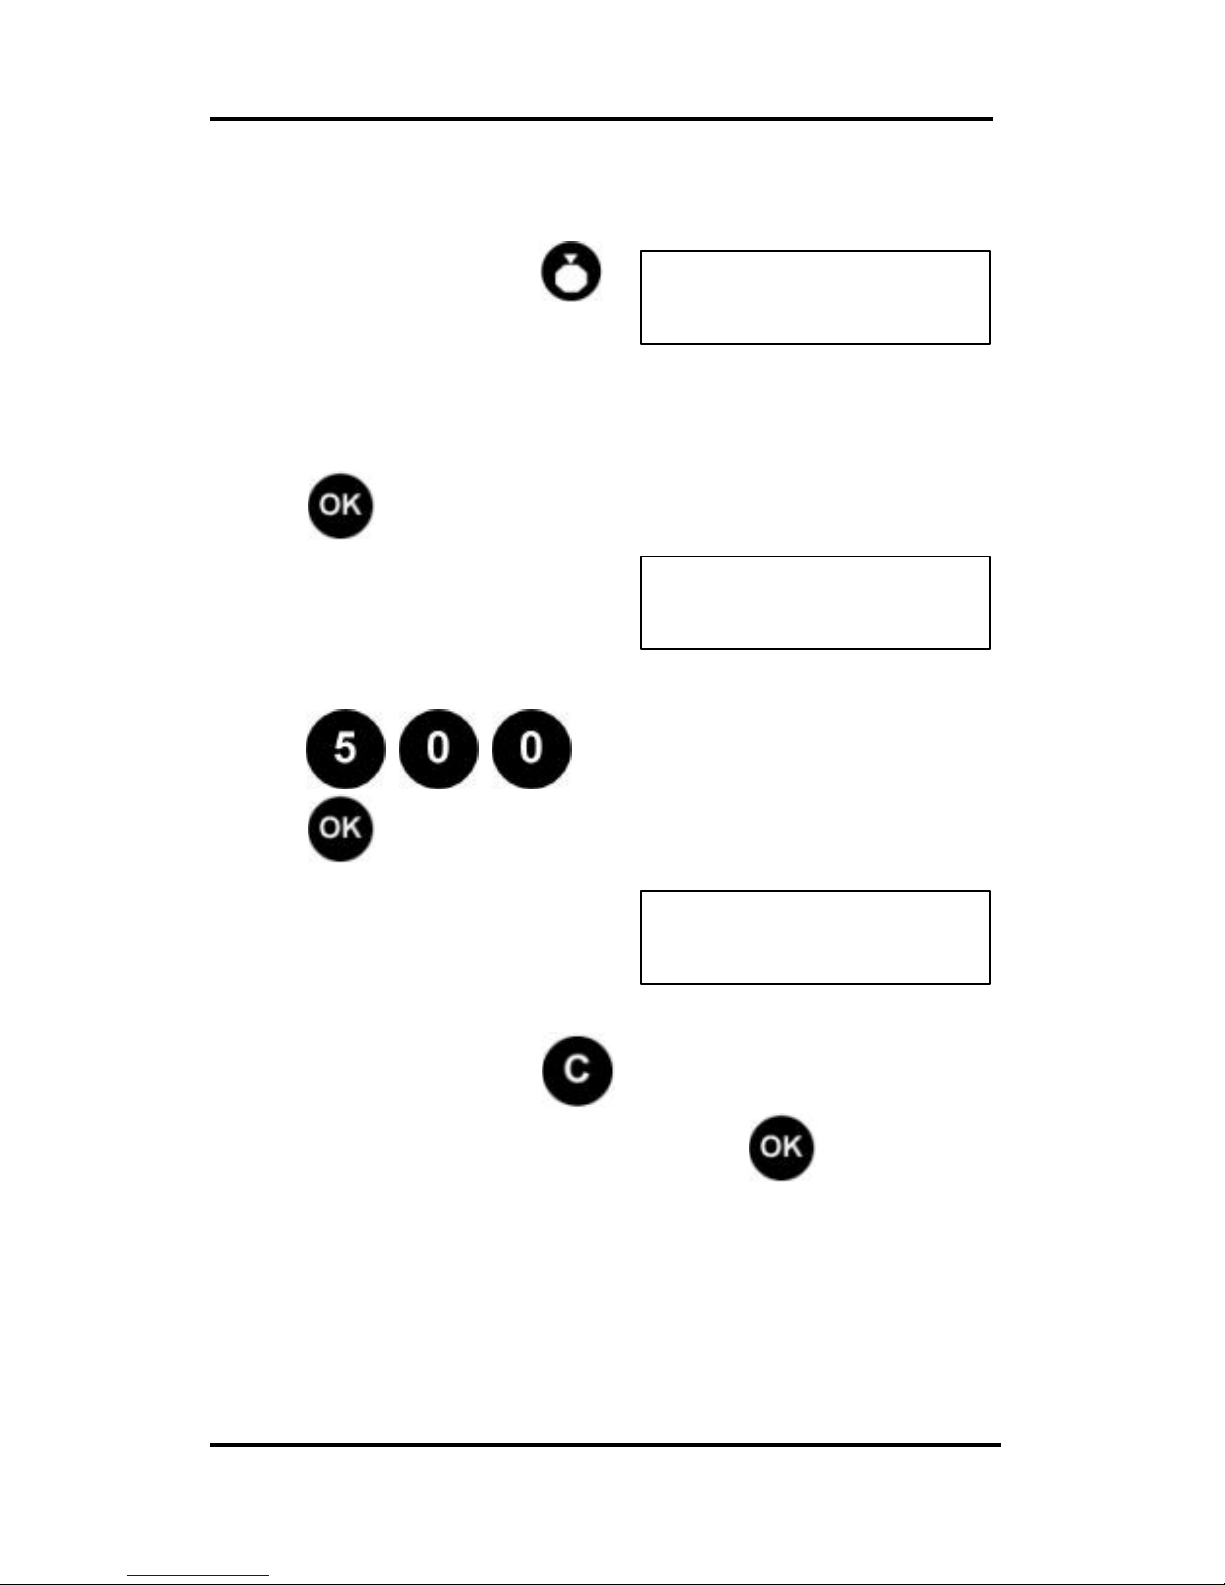
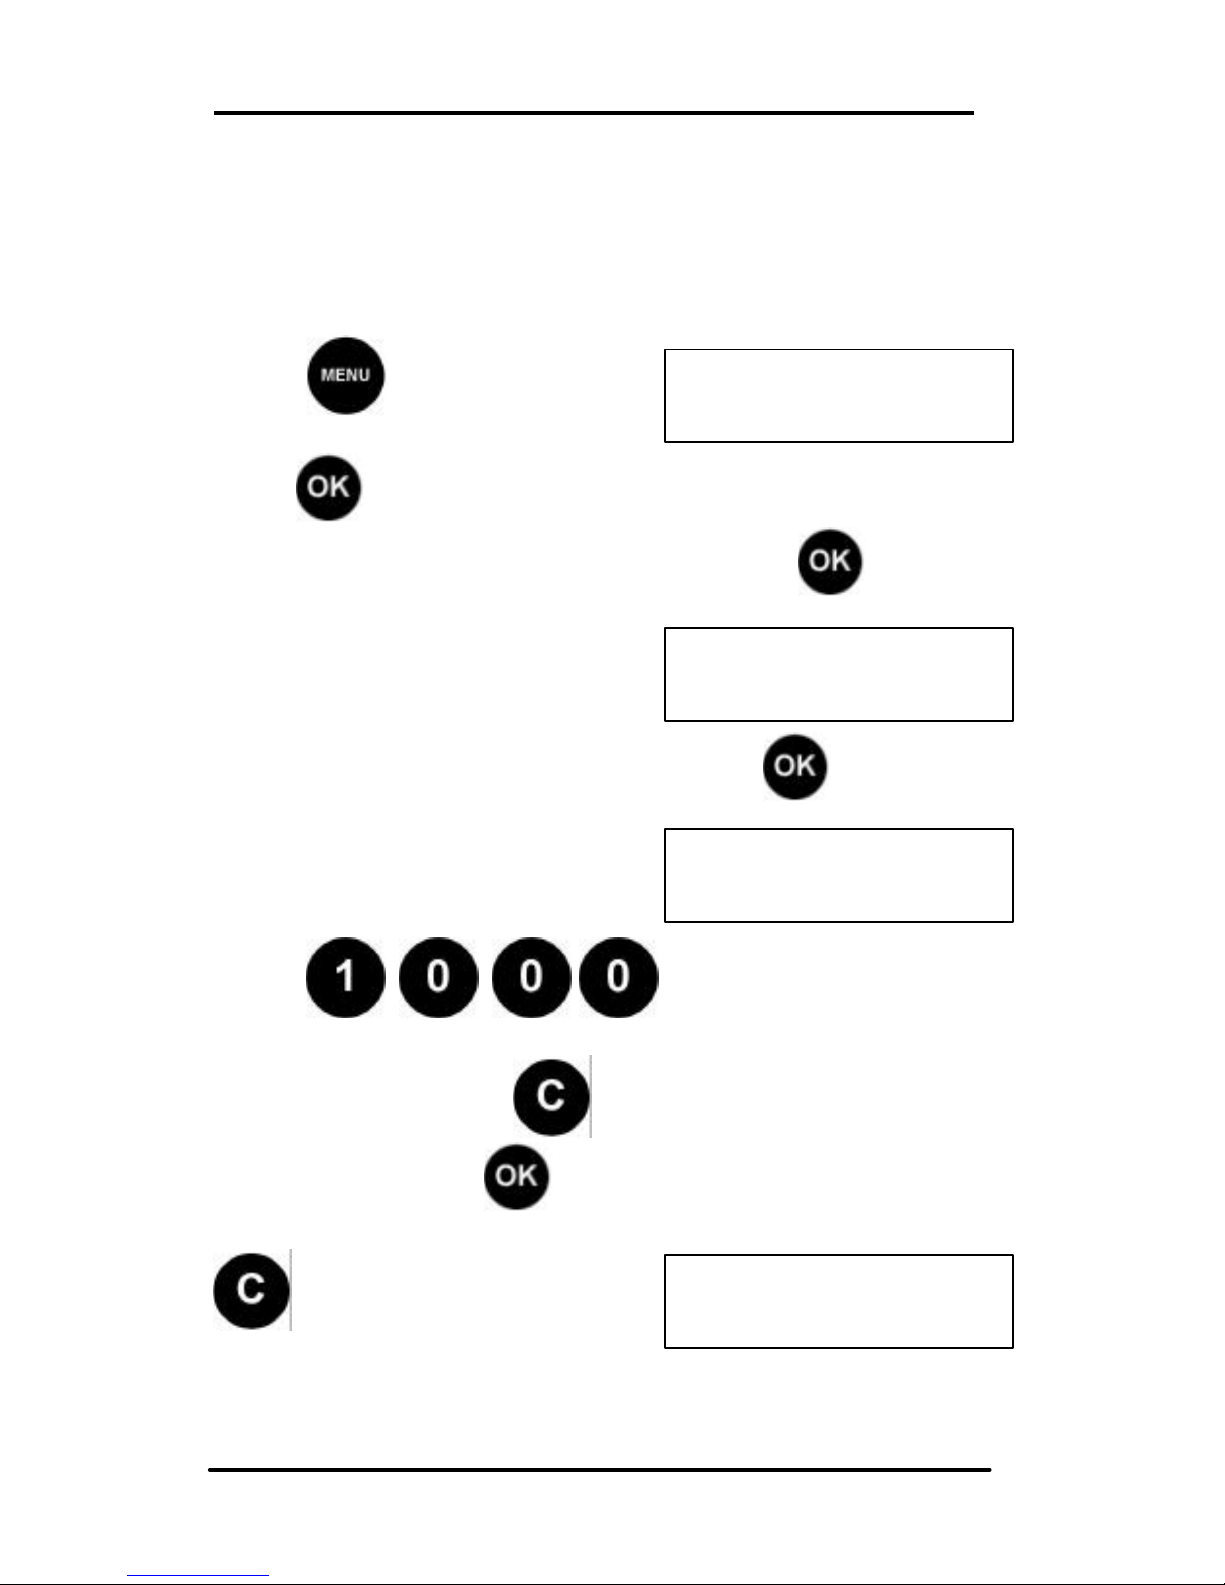
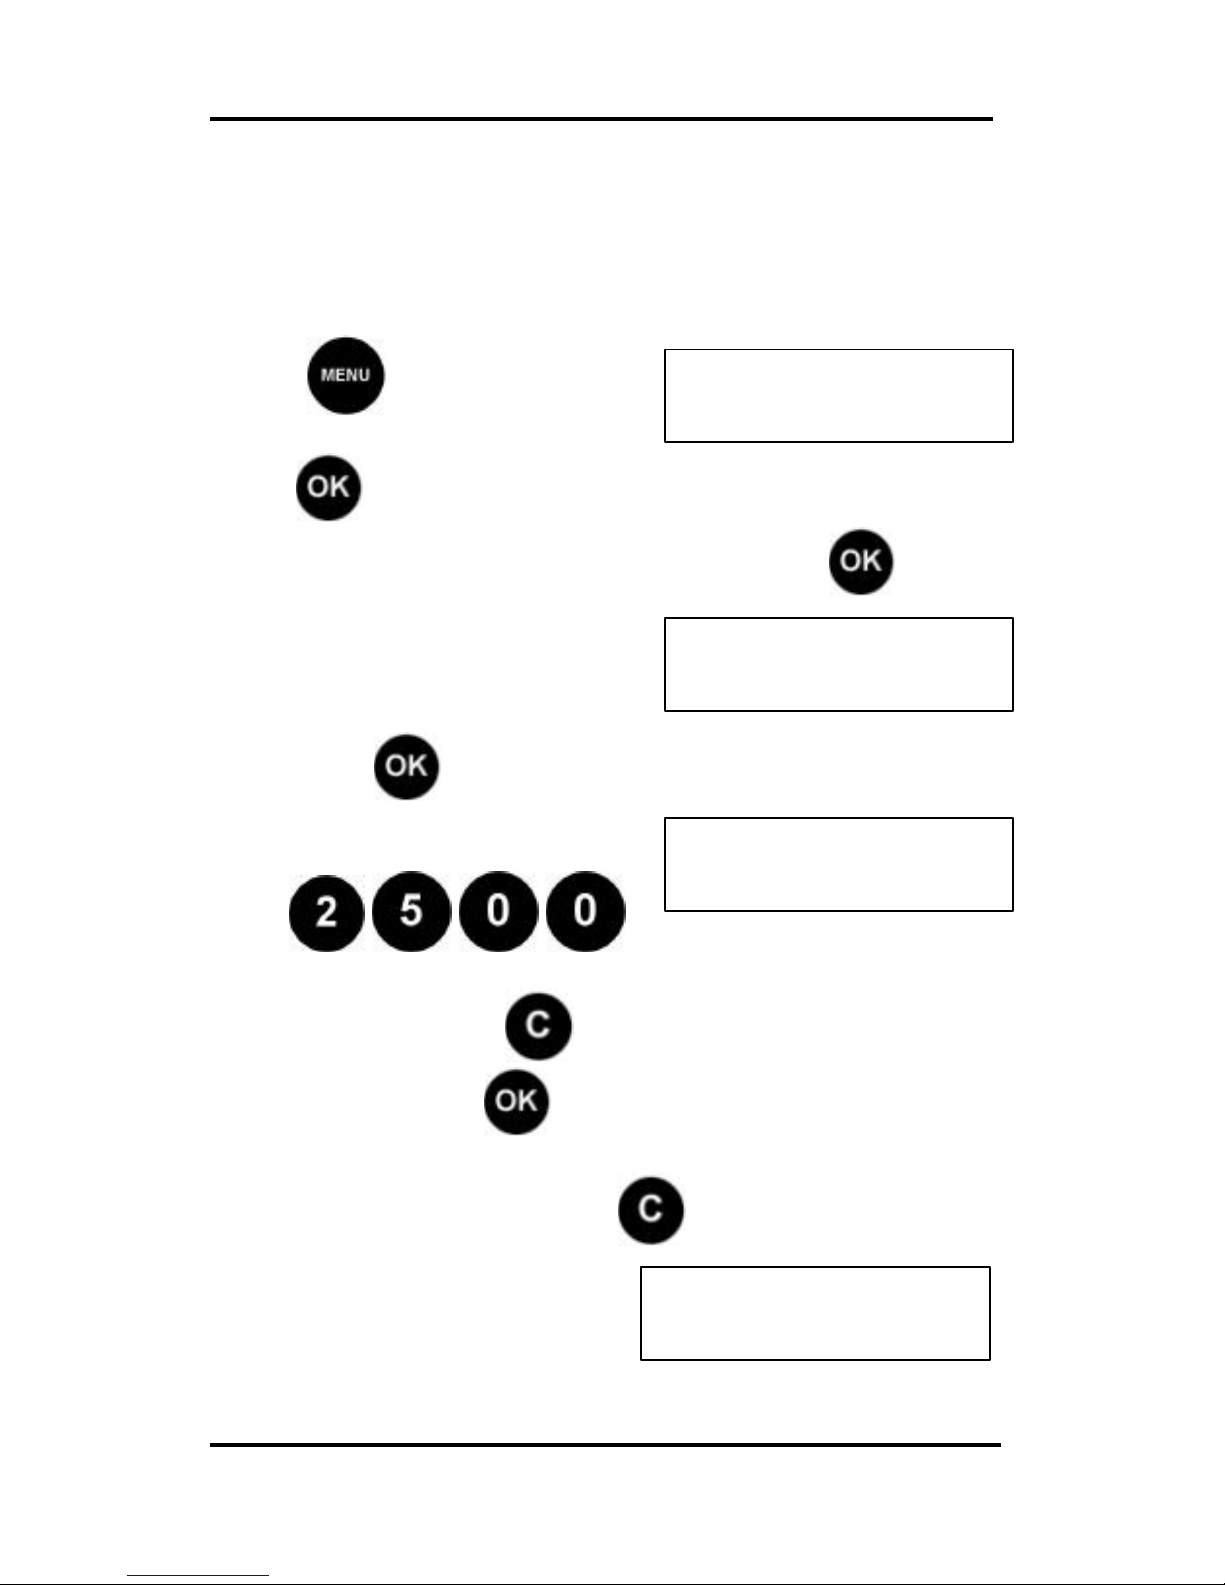
Adding Postage
From Ready Mode, press .
The Add Postage display will be observed. The value
displayed is the current postage available in the meter.
Press to confirm
Enter amount of postage you
want to add (whole dollars
only), Example: 5 0 0
Press:
Press to confirm,
The Confirm Amount display will
be observed:
If amount incorrect, press and enter again.
If amount displayed is correct, press to confirm.
Continued on the next page.

HASLER Adding Postage Section 7
Page 7 - 4 WJ20 06/2003
CONNECTING
PLEASE WAIT
TRANSACTING
PLEASE WAIT
FUNDING DONE
578.64
Ready $0.37
12/19/02
The following displays will be observed during the process:
On completion of the Add
Postage transaction, the
new Postage Available value
is displayed:
Press or to
return to Ready mode.

HASLER Adding Postage Section 7
06/2003 WJ20 Page 7 - 5
< FUNDS LOCKOUT >
< CLEAR LOCKOUT >
CONNECTING
PLEASE WAIT
AUDIT
DONE
TRANSACTING
PLEASE WAIT
Clearing A PO Lockout
USPS regulations require that your meter must be set at least
once every three months. The meter has an internal timer
that tracks your reset activity. After three months without
adding postage, a PO LOCKOUT message is displayed and
postage printing is disabled.
To clear the lockout:
Press and the following
display will appear.
Press to confirm and the following displays will be
observed:
Press twice to return to Ready mode.
When the CLEAR LOCKOUT transaction is completed,
postage printing is enabled for another 3 months.

HASLER Adding Postage Section 7
Page 7 - 6 WJ20 06/2003
WARNING
PENDING CREDIT
Completing An Interrupted Add Postage Transaction
If an Add Postage transaction is
accidentally interrupted before
the transfer has been
completed, the WARNING
PENDING CREDIT display will be observed when returning
from Locked mode.
In this case, press to return to Ready mode.
Press the FUNDS key then select Add Postage to
automatically finish the incomplete transaction.
On completion of the Add Postage transaction, press to
return to Ready mode.
Note: The machine only requires connection to the
telephone line outlet during the Add Postage and Clear
Lock-Out transaction.

HASLER Adding Postage Section 7
06/2003 WJ20 Page 7 - 7
Maintaining Your TMS Account Number
TMS Account Number
After you sign a rental agreement for your meter, you will be
assigned a TMS (Tele Meter Setting) Bank Account
Number. An account confirmation Welcome Letter will be
mailed to you indicating your TMS Bank Account Number
and your Mailer Agreement Number. These numbers should
be kept in a safe place, yet be readily available, because they
are used for all TMS account maintenance transactions.
TMS Account Balance
You can use the Hasler Automated TMS system to check
your bank account status and other important TMS
information. Simply call 1-800-248-8013 and use your
touchtone phone to enter your TMS Bank Account Number
and your Mailer Agreement Number. Then select from the
menu options.
You can also go online to (1) www.infonowonline.com or (2)
www.haslerinc.com and select Postage Accounts (TMS).
You will need to enter TMS Bank Account Number and your
Mailer Agreement Number. Then select from the menu
options.
With either system, you can learn details regarding your
Account Balance (includes the current balance, the available
balance and any unpaid advances). You can also receive
information on holiday schedules, meter operating guides,
licensing forms, payment addresses, and customized TMS
Bank Account statements.

HASLER Adding Postage Section 7
Page 7 - 8 WJ20 06/2003
Statements
You can receive a daily, weekly, monthly, or quarterly
statement of all activity in your TMS Bank Account. To be
setup on Automatic Statements you must make a request by
fax (203-925-5464) or by calling (1-800-248-8013). This
statement includes deposits, remote meter settings,
transaction fees and the ending account balance.
Notes:
a. If there is no account activity you will not receive a
statement.
b. You can request statements to be emailed or faxed
automatically to your location.
You can request statements for customized time periods by
visiting our web site at www.haslerinc.com or
www.infonowonline.com and selecting Postage Account
Quicklink.
Post Office Regulations
United States Postal Service regulations require that your
meter must be audited at regular intervals (currently set at
109 days). For your convenience an audit is automatically
performed each time you add postage or do a "zero" reset
(load $0.00 funds).
If you do not add postage or perform an audit within the 109day period, a “TIME LIMIT REACHED” message is displayed
on the meter and postage printing is disabled.
To clear the lockout, simply press the [C] key to clear the
message and do an "audit" or do a TMS postage load via
modem connection. When the transaction is completed,
postage printing is enabled for another 109 days.

HASLER Adding Postage Section 7
06/2003 WJ20 Page 7 - 9
PostageNow™
Get the postage you need, when you need it, without having to
call ahead of time. PostageNow™, a service of the United
States Postal Service, gives you the option to seamlessly
fund your postage needs simply by setting your postage
meter. TMS fax back form
Postage whenever you need it
With PostageNow ™ TeleFunds™
Last-minute mailings are no longer a problem. Now, you can
have immediate access to additional postage funds simply by
setting your meter! Postage funds will automatically be
debited from your specified corporate bank account, usually
the next business day, but the postage is immediately
provided by the USPS. No pre-funding required.
No processing fees with PostageNow™ TeleFunds™.
Choosing seamless postage funds availability with
PostageNow™ TeleFunds™ means you won’t have to
maintain a minimum balance in your TMS Bank Account.
And, with PostageNow™ TeleFunds™, there’s never a
transfer processing
fee—ever.
To begin using PostageNow™ TeleFunds™, simply fill out the
ACH Customer Authorization and Agreement form, check
the PostageNow™ TeleFunds™ option, and fax the form with
a voided check. There is a one-time, $15 set-up fee for
new accounts.
Control your postage access

HASLER Adding Postage Section 7
Page 7 - 10 WJ20 06/2003
PostageNow™ OnDemand
If you prefer to have more control over your postage, you
may choose instead to call ahead to debit a specified
amount of postage funds from your corporate bank account
with PostageNow™ OnDemand.
The PostageNow™ OnDemand option can only be accessed
during the operating hours of the TMS Center (listed on the
back of this brochure). There will be a $5 processing fee
each time you call to debit funds.
To begin using PostageNow™ OnDemand, simply fill out the
ACH Customer Authorization and Agreement form, check
the PostageNow™ OnDemand option, and fax the form with
a voided check. There is a one-time, $15 set-up fee for
new accounts.
Information Whenever You Want It
Now TMS customers can access all kinds of information
at Hasler’s new TMS website. Simply log on to
www.InfoNowOnline.com for previous business day TMS
bank account balances, holiday schedules, meter operating
guides, licensing forms, and payment addresses.
You may also request a customized TMS bank account
statement from any time period that you can receive by email
or fax, and order payment coupons.
You also have the option to get the same information by
phone, using Hasler’s new easy-to-use, interactive service,
InfoNow®. The number is 1-800-248-8013.
For security purposes, you’ll need to have your TMS bank
account number and your mailer agreement number handy
when using either InfoNow or InfoNow Online.
Automated statements

HASLER Adding Postage Section 7
06/2003 WJ20 Page 7 - 11
Managing Your Account
We’ve made managing your TMS bank account even
easier.
Now you can choose to receive automated statements on a
schedule that works best for your workflow. Daily, weekly,
monthly or quarterly. Choose to receive your statements by
fax or email, whichever is most convenient for you.
In addition, you can always access your account information
At anytime by logging on to the TMS website,
www.infonowonline.com or calling Hasler’s automated
phone service, InfoNow, at 800-248-8013.
Call 800/248-8013 or visit www.InfoNowOnline.com
anytime for information.
What is ACH?

HASLER Adding Postage Section 7
Page 7 - 12 WJ20 06/2003
Standard TMS Bank Accounts
Standard TMS Bank Accounts are pre-funded and require
that money be in your TMS Bank Account to add postage to
your meter. After using the TMS system to add money to
your meter, your account decreases by the amount of the
postage added. Remember to deposit sufficient funds to
cover your planned setting withdrawals.
Upon receipt of the check, your TMS Bank Account will be
credited with your deposit (allow 7 to 10 business days for the
check to be received and posted).
Make your check out to United States Postal Service, and
write your TMS Bank Account on the check.
Always enclose your Coupon with your check. This will
assure the fastest and most accurate bank processing. You
will receive a package of coupons in the mail shortly after
setting up your TMS Bank Account. Replacements are re-
ordered automatically when you submit your 8th coupon with
your check.

HASLER Adding Postage Section 7
06/2003 WJ20 Page 7 - 13
Where To Mail Your TMS Bank Account Deposit
There are three regional USPS Trust Account Lock Boxes to
facilitate faster receipt of your deposit checks: PA -
Pennsylvania, IL - Illinois and CA - California.
USPS Trust Account Regional Remittance Lock Boxes
PA IL CA
Regular Mail Regular Mail Regular Mail
CMRS-TMS CMRS-TMS CMRS-TMS
P.O. Box 7247-0217 P.O. Box 0527 P.O. Box 894757
Philadelphia, PA Carol Stream, IL Los Angeles, CA
19170-0217 60132-0527 90189-4757
Overnight Delivery
Attn:Team One - TMS
Citibank Lockbox #0217
1615 Brett Road
New Castle, DE 19720
Wire Transfers
Citibank, 111 Wall St., New York, NY 10043
ABA Routing # 021000089
CMRS / Hasler
Account # 4067-8617
Detail Payment Field: TMS Bank Account # (include it to ensure
credit for your transfer).
ACH Transfers
Citibank, 111 Wall St., New York, NY 10043
ABA Routing # 021000089
CMRS / Hasler
Account # 4067-8617
Type: CCD/CCD+TMS Bank Account # in positions 40 through 47.

HASLER Adding Postage Section 7
Page 7 - 14 WJ20 06/2003
Contact Information
Hasler®, Inc.
19 Forest Parkway
Shelton, CT 06484-6140
www.haslerinc.com
Customer Service Helpdesk
1-800-243-6275
Call for customer service or for your local dealer telephone
number for technical support. The Customer Service
Helpdesk can also direct you on where to obtain supplies for
your Hasler mailing system.
TMS® Automated Account Information
1-800-248-8013
Call to check Account Balance, or other account information
via touch-tone telephone. You can also talk to a customer
service representative using this number.
TMS® Automated Account Information Online
(1) www.infonowonline.com or (2) www.haslerinc.com and
select Postage Accounts (TMS).
It is an online site that can answer all your details regarding
your Account Balance. You can also receive information on
holiday schedules, meter operating guides, licensing forms,
payment addresses, and customized TMS Bank Account
statements.
TMS® Modem Telephone Number
1-800-446-6029
Modem telephone number set up in meter.
HASLER Memory Card Section 8
06/2003 WJ20 Page 8-1
Introduction
Memory cards are used to load data into the WJ20. Examples
include Advertising Messages (Slogans/Dies), and
software/rate updates.
Load Data Using A Memory Card 8-2
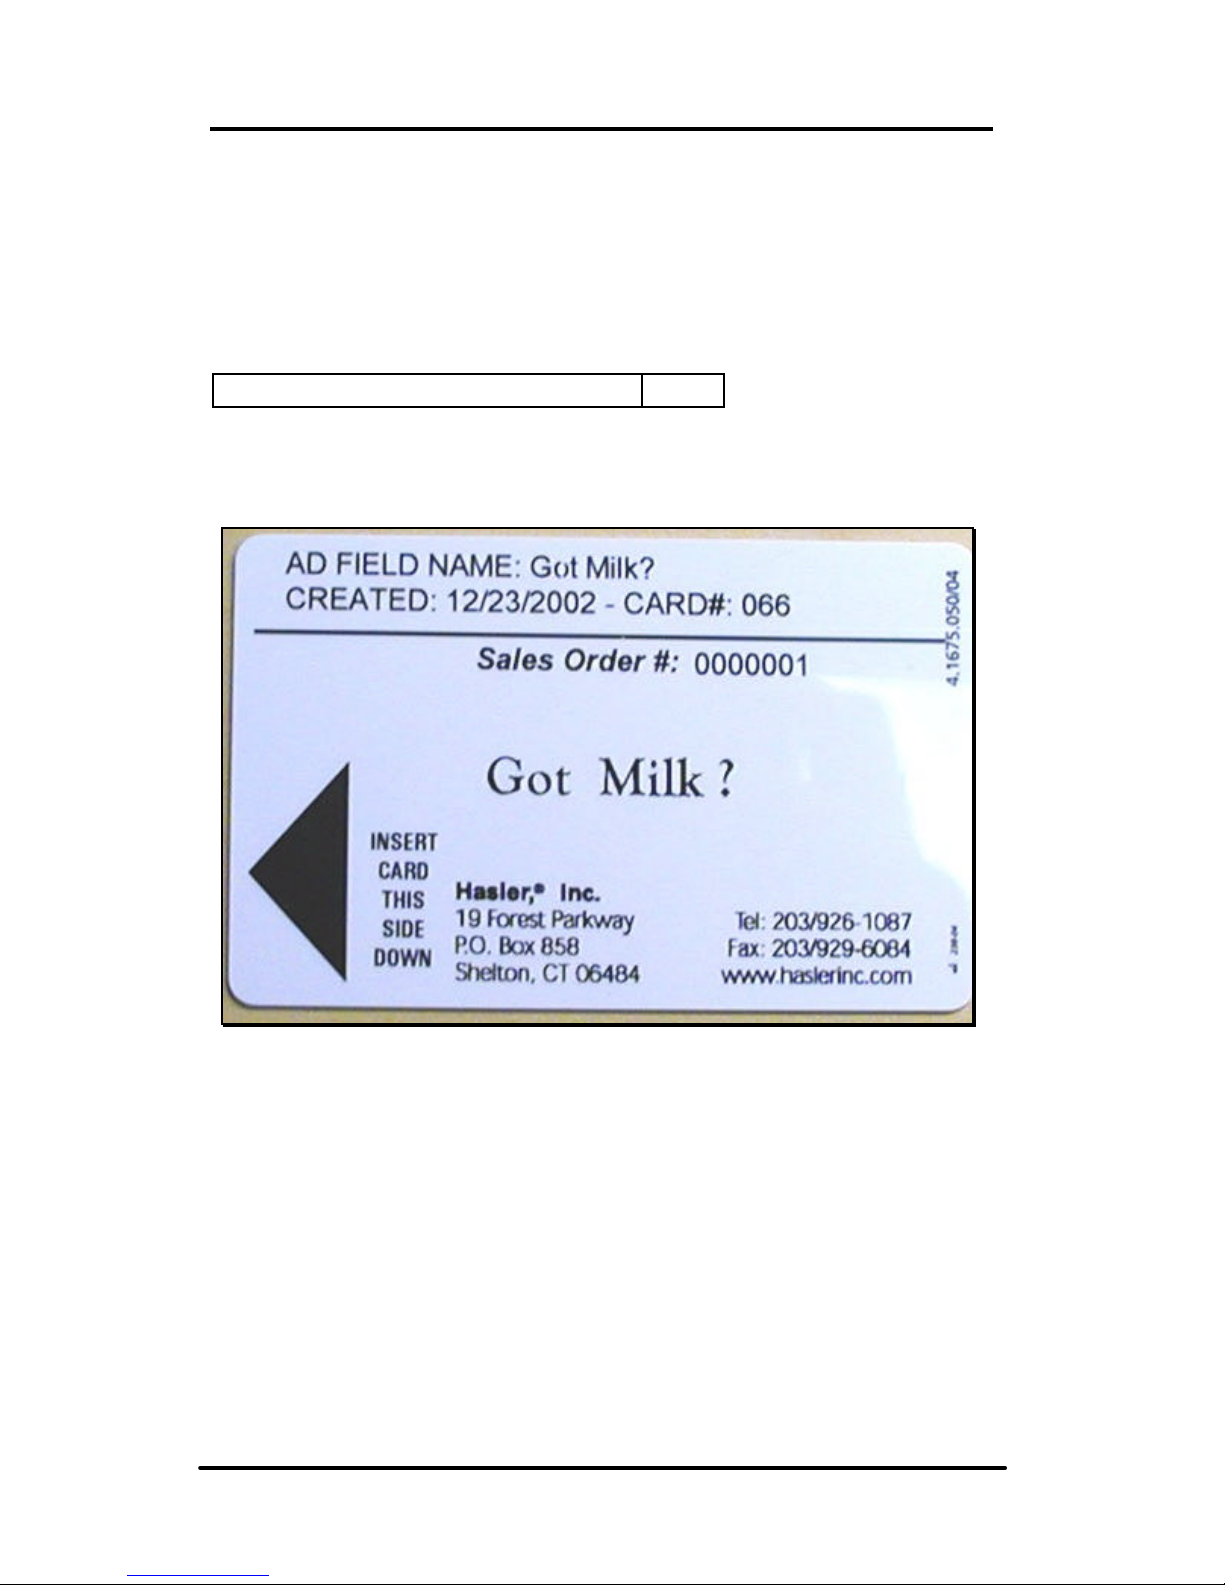
Sample Memory Card – Back View
HASLER Memory Card Section 8
Page 8 - 2 WJ20 06/2003
< MEMORY CARD >
< INSERT CARD >
MEMORY CARD
< message >
LOADING ….
MEMORY CARD
LOAD COMPLETE
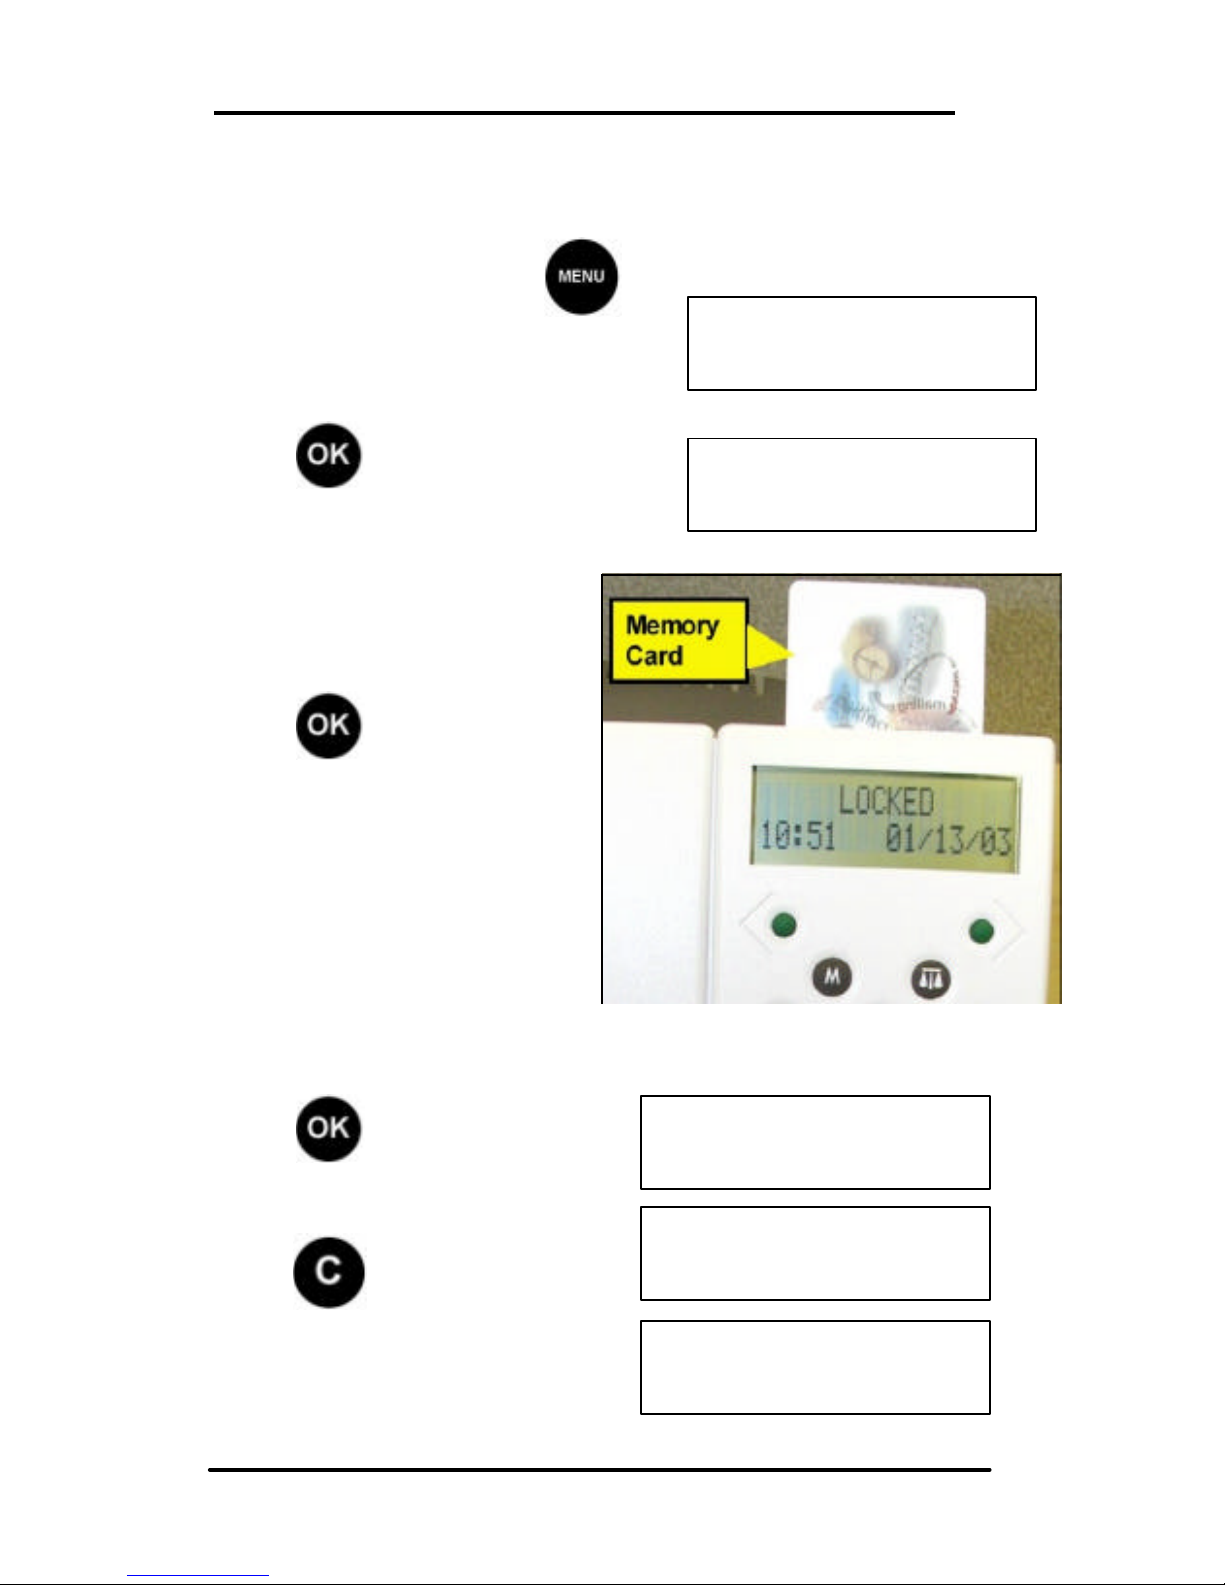
To Load Data Using a Memory Card
From Ready mode, press
and scroll (< >) to the MEMORY
CARD display:
Press to confirm.
Insert the Memory Card as
shown.
Press to confirm.
Next, scroll (< >) to the message or rate option you want to
load on the display:
Press to confirm.
To return to Ready mode,
press .

HASLER Memory Card Section 8
06/2003 WJ20 Page 8 - 3
REPLACE FILE
message
MEMORY CARD
LOAD COMPLETE
Ready $0.37
12/30/02
If loading data for the first time, the REPLACE FILE? display
will not appear and the LOADING COMPLETE display will be
observed.
If data already exists, REPLACE
FILE? will be observed.
If you do not wish to replace the file displayed, scroll (< >) to
another file location or press to return to previous
display.
If you wish to replace the file, press to confirm.
The ERASING FILE../ LOADING
sequence will be initiated followed by
LOADING COMPLETE.
If you wish to enter further data, press to return to
previous display and repeat the procedure.
To return to Ready mode, press .

This page intentionally left blank.
HASLER Print Quality Section 9
06/2003 WJ20 Page 9-1
< CARTRIDGE >
< CARTRIDGE >
CLEAN
Introduction
Under normal operating conditions, your WJ20 postage meter
will produce excellent quality prints. However, if lines are
missing from the stamp imprint, it will be necessary to clean
the print-head or replace the ink cartridge.
To Clean The Print Head 9-1
To Replace The Ink Cartridge 9-3
To Clean The Print Head
From Ready mode, press
and scroll (< >) to the Cartridge
display:
Press to confirm.
Next, scroll (< >) to Clean:
Press to confirm.
The WJ20 will clean the cartridge heads internally. This may
take a few minutes and be accompanied by noise. On
completion of the cleaning process the display will return to
the CARTRIDGE CLEAN display.
Continued on the next page.

HASLER Print Quality Section 9
Page 9 - 2 WJ20 06/2003
CARTRIDGE
< TEST PRINT >
INSERT ITEM
ALIGNMENT
_
Next, scroll (< >) to Test Print:
Press to confirm.
Insert a blank envelope or card
into the machine to make a test
print.
The display prompts to set the
alignment:
Enter the number that provides the straightest vertical line (for
the example above - line 5).
Press to return to Ready mode.
Note: All horizontal lines in the test print must be clear and
present. If horizontal lines are still missing, repeat the
cleaning and test print process a second and/or third time, if
this process fails to restore print quality, fit a new ink
cartridge.

HASLER Print Quality Section 9
06/2003 WJ20 Page 9 - 3
< CARTRIDGE >
CARTRIDGE
< REMOVE >
To Replace The Ink Cartridge
The same process is used to install a new ink cartridge
except there is no "old" ink cartridge to remove.
Notes:
• The ink charging process may take a short while to
complete, during this time the machine may produce
some mechanical sounds, this is normal.
• Once installed, do not open the blue latch again until you
need to fit a new cartridge.
• If the ink cartridge is not installed properly the machine will
not work.
From Ready mode, press
and scroll (< >) to the
Cartridge display:
Press to confirm.
Next, scroll (< >) to Remove:
Continued on the next page.

HASLER Print Quality Section 9
Page 9 - 4 WJ20 06/2003
CARTRIDGE
INSTALL?
Press to confirm.
The following display will be
observed:
Open the
machine top
cover
(to gain access to
the print head).
Open the Blue
Latch
Carefully withdraw
the used cartridge
and discard.
Remove the new cartridge from its packaging and peel off the
Blue tape
seal that
protects the
print head.
Continued on
the next
page.

HASLER Print Quality Section 9
06/2003 WJ20 Page 9 - 5
Place the new
cartridge into its
holder as illustrated
and press gently at
the bottom of the
cartridge with your
thumb until it is fully
inserted.
Close the blue latch
and press gently
until it locks the
cartridge in place.
Close the top cover and press
Continued on the next page.

HASLER Print Quality Section 9
Page 9 - 6 WJ20 06/2003
PLEASE WAIT
INSERT ITEM
ALIGNMENT
_
The following display will now
be observed:
After a short period of time, you
will be prompted to produce a
test print.
Insert a blank envelope or card to make a test print
Remove the envelope or card.
The following display will now
be observed:
Enter the number that corresponds to the straightest vertical
line (for the example above line 5).
Press to return to Ready mode.

HASLER Reports Section 10
06/2003 WJ20 Page 10-1
Introduction
The WJ20 allows reports to be printed on self-adhesive labels
using the postage meter’s own printer.
Meter Summary, Postage Set, and Setup reports can be
printed.
Meter Summary Report 10-1
Postage Set Report 10-1
Setup Report 10-2
Printing A Report 10-3
Meter Summary Report
Provides information relative to current machine status.
Postage Set Report
Provides postage setting information.

HASLER Reports Section 10
Page 10 - 2 WJ20 06/2003
Setup Report
Provides machine setup information, comprises two pages.
HASLER Reports Section 10
06/2003 WJ20 Page 10 - 3
< REPORTS >
POSTAGE SET
< REPORTS >
SETUP
Printing a Report
From Ready mode, press the
key and scroll (< >) to
the REPORTS display:
Press to confirm.
Next, scroll (< >) to the report
required (in this case the SETUP Report).
Press to confirm.
To print a report, feed a label pad into the machine in the
same way as you would feed an envelope.
If the report consists of more than one page e.g. Setup
Report, you will be prompted for each page.
Press to return to Ready mode after printing reports.

This page intentionally left blank.

HASLER Setup Mode Section 11
06/2003 WJ20 Page 11-1
< SETUP >
< HIGH VALUE >
$1.00
Introduction
The WJ20 Setup Mode allows the user to configure the below
functions.
To Enter Setup Mode 11-1
High Value Setting 11-2
Low Postage Setting 11-3
User Pin Setting 11-4
Time Setting 11-5
Time Out (Sleep Mode) Setting 11-6
Key Beep Setting 11-7
Preset Postage Setting 11-8
Modem Telephone Setup 11-9
Help Desk Telephone Setup 11-10
Other Telephone Setup Options (Prefix,
Pause, Tone Detect, Blind Dial)
11-11
Registration Setup 11-15
Withdrawing Meter 11-16
To Enter Setup Mode
Press and scroll (< >) to
SETUP:
Press , the first Set Up
option is displayed.
Scroll (< >) to the option you want
to change.
HASLER Setup Mode Section 10
Page 11 - 2 WJ20 06/2003
< SETUP >
< HIGH VALUE >
$1.00
< HIGH VALUE >
$10.00
Ready $0.00
12/20/02
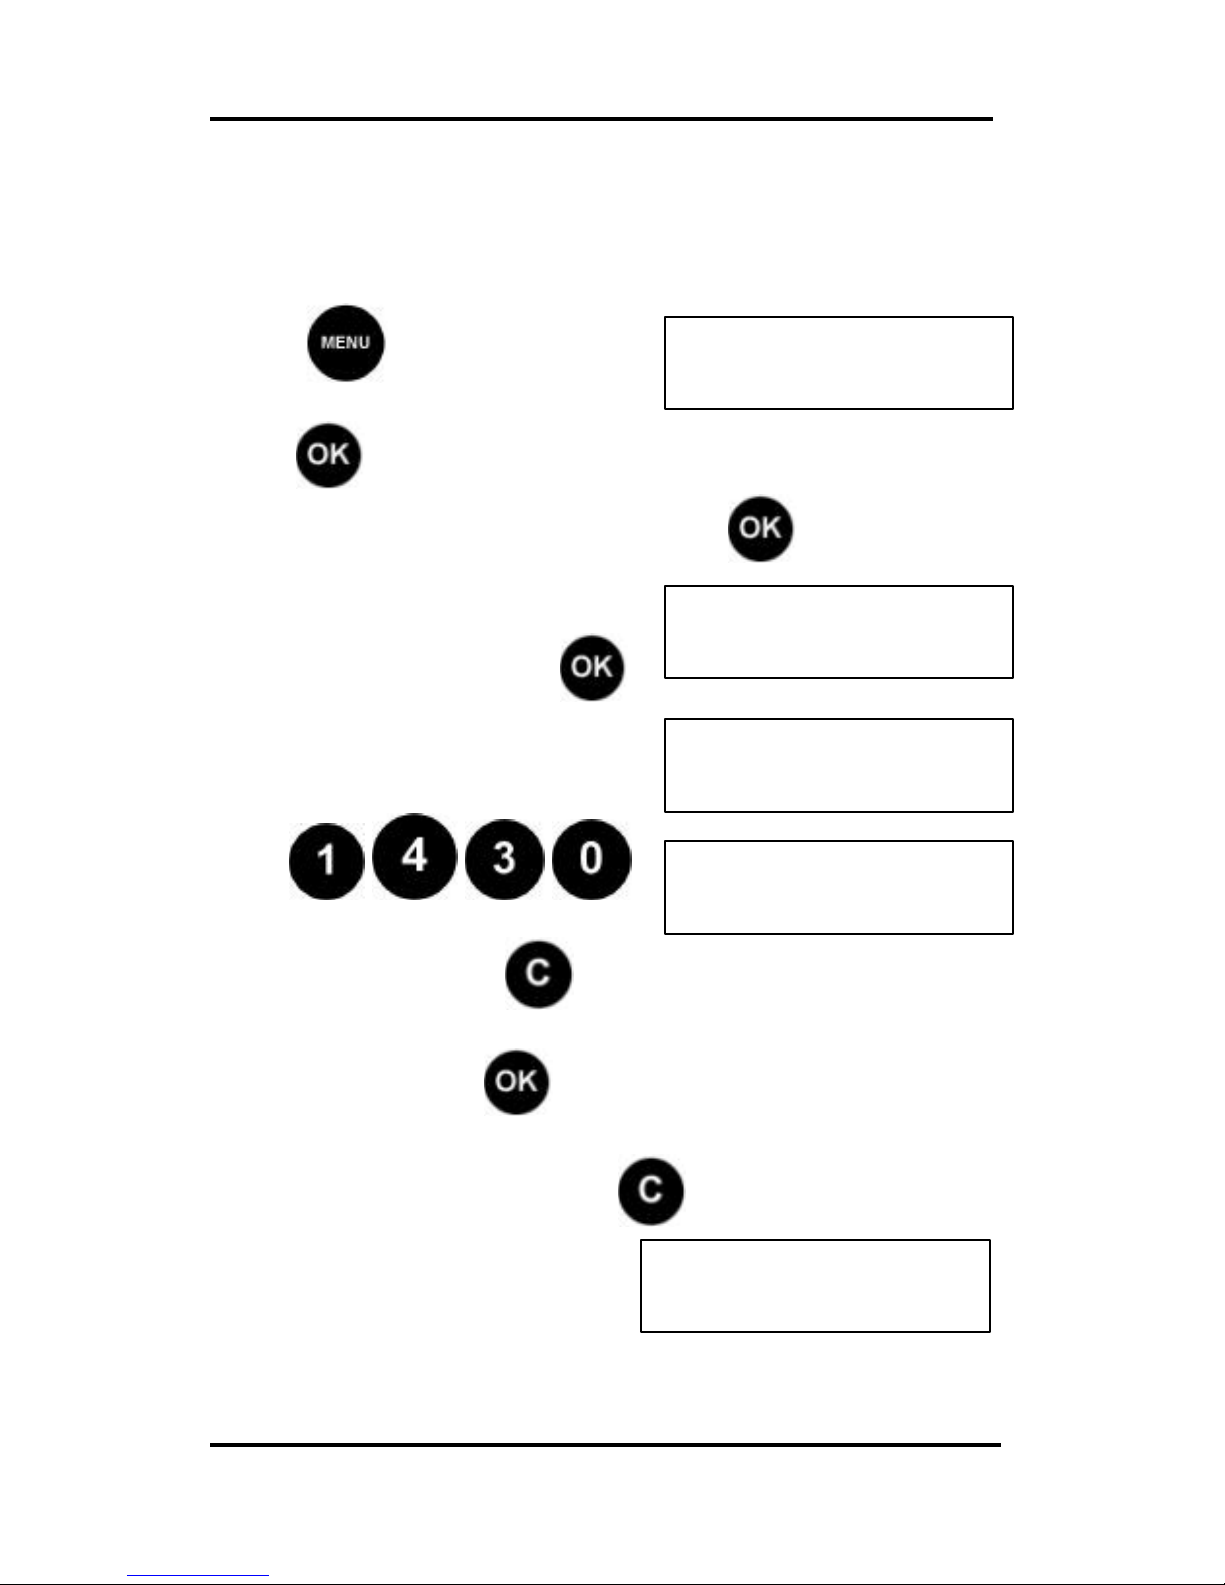
High Value Setting
The High Value setting prevents postage printing mistakes.
Selecting a postage value above the high value threshold
requires user confirmation before printing.
Press and scroll (< >) to
SETUP:
Press , the first Set Up option is displayed.
Scroll (< >) to the High Value option and press .
The current High Value Threshold
is displayed.
To change the High Value Threshold, press .
Select new High Value Threshold
Example: $10.00 dollars.
Press:
If value incorrect press and start again.
If value correct press to confirm.
To return to Ready mode, press
or scroll (< >) to the next
SETUP mode to change.
HASLER Setup Mode Section 10
06/2003 WJ20 Page 11 - 3
< SETUP >
< LOW POSTAGE >
$15.00
Ready $0.00
12/20/02
< LOW POSTAGE >
$25.00
Low Postage Setting
When the postage available in the meter falls below the Low
Postage setting value, the display will flash Low Credit as a
reminder to add postage.
Press and scroll (< >) to
SETUP:
Press , the first Set Up option is displayed.
Scroll (< >) to the Low Postage option and press . The
current low postage level is
displayed.
To change the Low Postage
Level, press .
Select new Low Postage Value.
Example: $25.00 dollars
Press
If value incorrect press and start again.
If value correct press to confirm.
To return to Ready Mode, press or scroll (< >) to the
next SETUP mode to change.

HASLER Setup Mode Section 10
Page 11 - 4 WJ20 06/2003
< SETUP >
< USER PIN >
1 2 3 4
Ready $0.00
12/20/02
USER PIN
5 5 5 5
USER PIN
_ _ _ _
User PIN Setting
User Pin controls access to the postage meter. User PIN
entry is required after power on or returning from Locked
mode.
Press and scroll (< >) to
SETUP:
Press , the first Set Up option is displayed.
Scroll (< >) to the USER PIN option and press . The
current User Pin is displayed.
To change the User Pin, press
.
Enter the new User Pin.
Example: 5555
Press
If value incorrect press and start again.
If value correct press to confirm.
To return to Ready Mode, press or scroll (< >) to the
next SETUP mode to change.
HASLER Setup Mode Section 10
06/2003 WJ20 Page 11 - 5
< SETUP >
< TIME >
14:26
< TIME >
_ _ : _ _
< TIME >
14:30
Ready $0.00
12/20/02
Time Setting
The meter clock can be adjusted 3 hours forward or back.
Time is set and displayed in the 24 hour format, e.g. 13:30 =
1:30 PM.
Press and scroll (< >) to
SETUP:
Press , the first Set Up option is displayed.
Scroll (< >) to the Time option and press . The current
Time is displayed.
To change the Time, press .
Select new Time. Example:
14:30.
Press
If value incorrect press and start again.
If value correct press to confirm.
To return to Ready Mode, press or scroll (< >) to the
next SETUP mode to change.
HASLER Setup Mode Section 10
Page 11 - 6 WJ20 06/2003
< SETUP >
< TIMEOUT (MINS) >
5
TIMEOUT (MINS)
0
Ready $0.00
12/20/02
TIMEOUT (MINS)
10
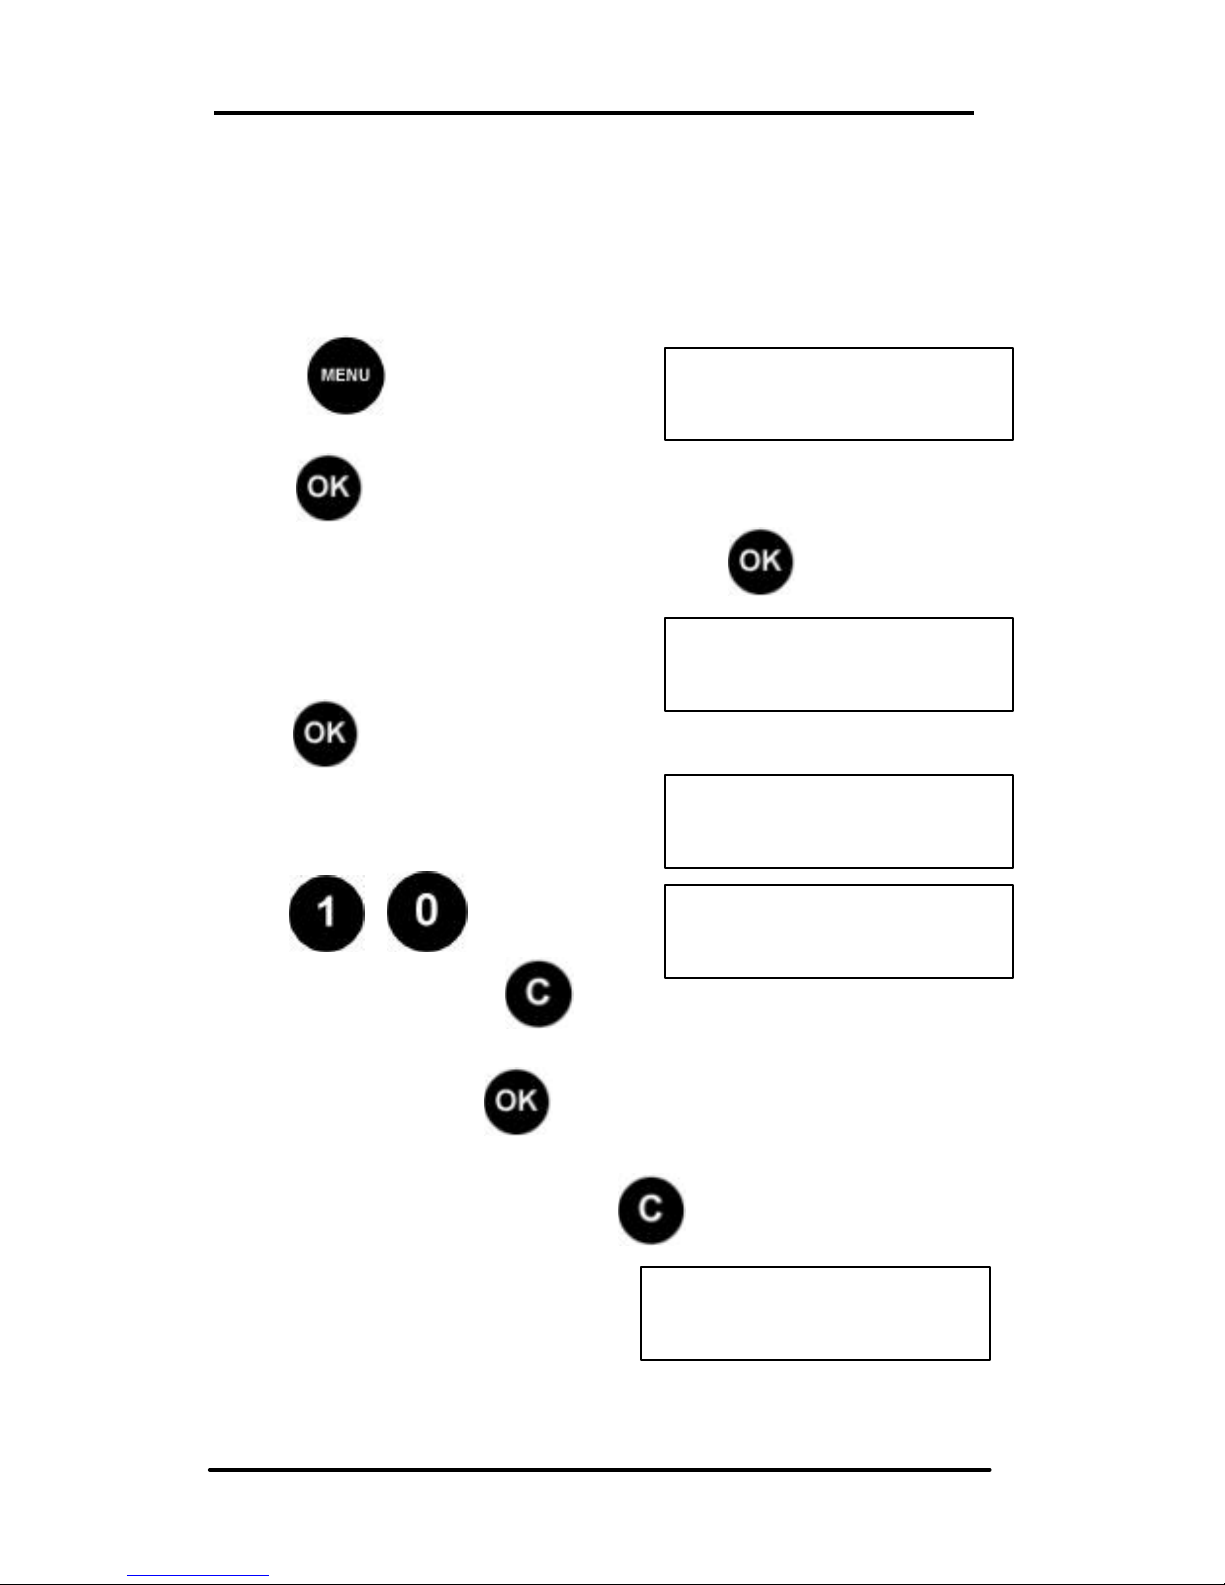
Time Out (Sleep Mode) Setting
Time Out (Mins) is a security setting that determines the
number of minutes the meter will remain in the Ready mode
before it automatically goes into Locked mode.
Press and scroll (< >) to
SETUP:
Press , the first Set Up option is displayed.
Scroll (< >) to the Time option and press . The current
Timeout is displayed.
To change the Timeout,
press .
Select new Time. Example: 10
minutes.
Press
If value incorrect press and
start again.
If value correct press to confirm.
To return to Ready Mode, press or scroll (< >) to the
next SETUP mode to change.
HASLER Setup Mode Section 10
06/2003 WJ20 Page 11 - 7
< SETUP >
< KEY BEEP >
ON
KEY BEEP
< ON >
Ready $0.00
12/20/02
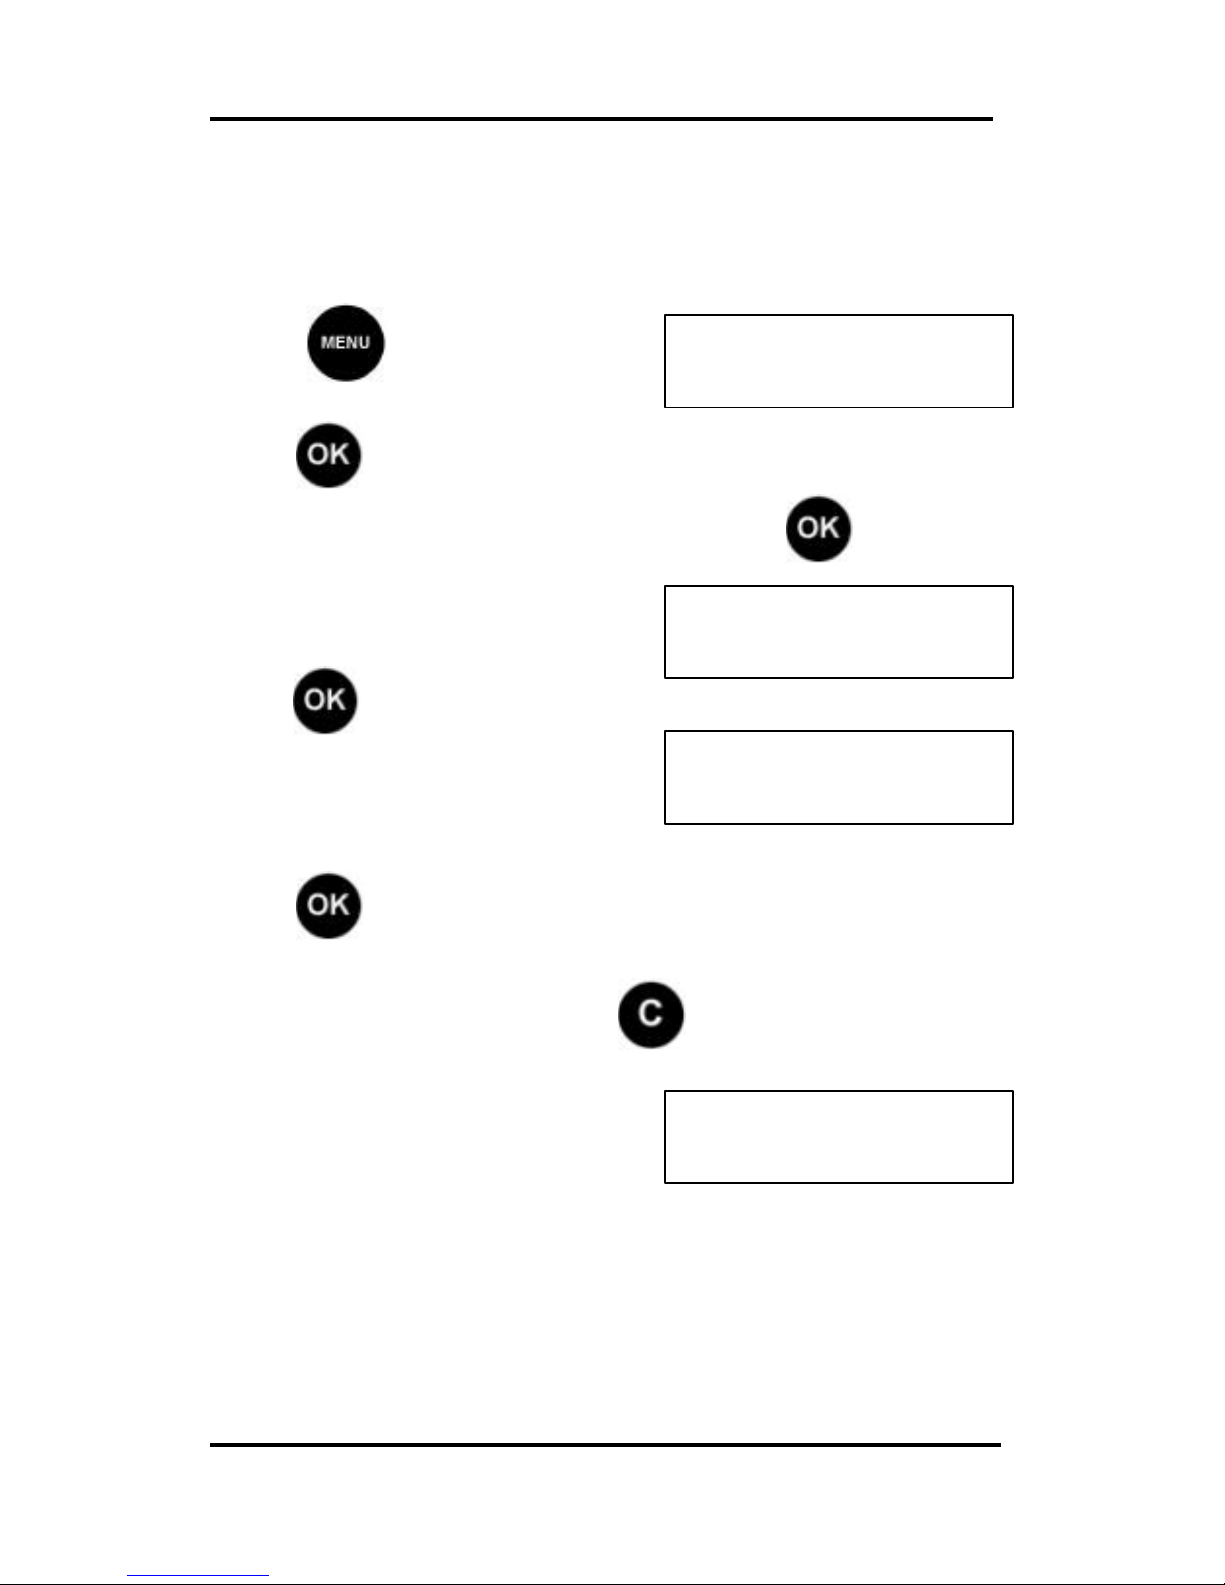
Key Beep Setting
This setting allows the user to turn the sound (beep), that is
made each time a key pressed, on or off.
Press and scroll (< >) to
SETUP:
Press , the first Set Up option is displayed.
Scroll (< >) to the Key Beep option and press . The
current setting is displayed.
To change the Key Beep,
press .
Scroll (<>) to the required setting
(on or off).
Press to confirm.
To return to Ready Mode, press or scroll (< >) to the
next SETUP mode to change.

HASLER Setup Mode Section 10
Page 11 - 8 WJ20 06/2003
< SETUP >
< PRESET POSTAGE >
$0.00
Ready $0.00
12/20/02
PRESET POSTAGE
$0.00
PRESET POSTAGE
$0.37
Preset Postage Setting
Preset Postage setting allows the user to determine the
default postage value that is displayed each time the meter is
powered on or returns from Locked mode.
Press and scroll (< >) to
SETUP:
Press , the first Set Up option is displayed.
Scroll (< >) to the Preset Postage option and press .
The current Timeout is displayed.
To change the Preset Postage,
press .
Enter the new value. Example: 37 cents.
Press
If value incorrect press and
start again.
If value correct press to confirm.
To return to Ready Mode, press or scroll (< >) to the
next SETUP mode to change.

HASLER Setup Mode Section 10
06/2003 WJ20 Page 11 - 9
< SETUP >
< TELEPHONE >
REFILL NO
NONE
REFILL NO:
18004466029
REFILL NO:
18004466029
Modem Telephone Setup
Using the Hasler TMS® re-setting system, postage can be
purchased from the Post Office.
The telephone number of the Hasler re-setting center is
stored in the postage meter. This is used when you want to
purchase postage. If you are advised that this number has
changed, it must be entered as detailed below. See section 7
for more information.
Press and scroll (< >) to
SETUP:
Press , the first Set Up option is displayed.
Scroll (< >) to the Telephone option and press . The
current Telephone number is
displayed.
To change the Telephone
Number, press .
Enter the new the new number
using the numeric keypad.
Press to confirm.
If the number is incorrect press and start again.

HASLER Setup Mode Section 10
Page 11 - 10 WJ20 06/2003
< SETUP >
< HELPDESK NO >
NONE
HELPDESK NO.
NONE
HELPDESK NO:
18002488013
Help Desk Telephone Setup
In the unlikely event of a machine failure requiring Help Desk
action, an Error Number will be displayed along with the Help
Desk telephone number. This should be the number of your
local Hasler Dealer or of the Hasler TMS Call Center.
Press and scroll (< >) to
SETUP:
Press , the first Set Up option is displayed.
Scroll (< >) to the Telephone option and press . The
current Telephone number is
displayed.
To change the Telephone
Number, press .
Enter the new the new number using the numeric keypad.
Press to confirm.
If the number is incorrect press and start again.

HASLER Setup Mode Section 10
06/2003 WJ20 Page 11 - 11
< SETUP >
< PREFIX >
NONE
PREFIX
NONE
PREFIX
9
Other Telephone Setup Options
The WJ20 also allows the user to setup the way the unit dials
… by PREFIX, PAUSE, TONE DETECT, and BLIND DIAL.
Prefix
If your analog telephone line is routed through an internal
system, the telephone number must be prefixed by the
appropriate outside line digit (for most systems this is a 9 or a
0).
Press and scroll (< >) to
SETUP:
Press , the first Set Up option is displayed.
Scroll (< >) to the Prefix option and press . The current
Prefix number is displayed.
To change the Prefix Number, enter the new the new number
using the numeric keypad.
Press to confirm.
If the number is incorrect press and start again.

HASLER Setup Mode Section 10
Page 11 - 12 WJ20 06/2003
< SETUP >
< PAUSE >
0
PAUSE
0
PAUSE
5
Pause
It may be necessary to enter a pause between the outside line
digit and the new telephone number.
Press and scroll (< >) to
SETUP:
Press , the first Set Up option is displayed.
Scroll (< >) to the Pause option and press . The current
Pause number (delay in seconds)
is displayed.
To change the Pause number (delay in seconds), enter the
new the new number using the
numeric keypad.
Press to confirm.
If the number is incorrect press and start again.

HASLER Setup Mode Section 10
06/2003 WJ20 Page 11 - 13
< SETUP >
< TONE DETECT >
ON
TONE DETECT
ON
TONE DETECT
OFF
Tone Detect (Telephone Dialing Mode)
To change the telephone dialing mode from PULSE to TONE
or vice versa, scroll (< >) to the TONE DETECT display and
set accordingly.
Press and scroll (< >) to
SETUP:
Press , the first Set Up option is displayed.
Scroll (< >) to the Tone Detect option and press . The
current Tone Detect setting is
displayed.
Select between on or off.
Press to confirm.
If the setting is incorrect press and start again.

HASLER Setup Mode Section 10
Page 11 - 14 WJ20 06/2003
< SETUP >
< BLIND DIAL >
0
BLIND DIAL
0
TONE DETECT
OFF
BLIND DIAL
5
Blind Dial
A BLIND DIAL facility is available to set a delay before dialing if
there is no dial tone on your phone system.
Press and scroll (< >) to
SETUP:
Press , the first Set Up option is displayed.
Scroll (< >) to the Blind Dial option and press . The
current Blind Dial setting is
displayed.
To change the Blind Dial number (delay in seconds), enter the
new the new number using the
numeric keypad.
Press to confirm.
If the setting is incorrect press and start again.
Press twice to return to the Ready Mode.

HASLER Setup Mode Section 10
06/2003 WJ20 Page 11 - 15
< SETUP >
< REGISTRATION >
Set Up Registration
Changing Address
If you have changed your address, call the Hasler Helpdesk at
1-800-248-8013. A customer service representative will take
your information and guide you through the update procedure.
Audit Transaction
USPS regulations require that your meter must be set at least
once every three months. The WJ20 meter has an internal
timer that tracks your reset activity. After three months
without adding postage, a PO LOCKOUT message is
displayed and can be cleared by performing a Clear Lockout
transaction.
If you wish to avoid a PO LOCKOUT, you can perform an
AUDIT transaction any time prior to the timer expiration.
Press and scroll (< >) to
SETUP:
Press , the first Set Up
option is displayed.
Scroll (< >) to the Registration option and press .
Continued on the next page.

HASLER Setup Mode Section 10
Page 11 - 16 WJ20 06/2003
REGISTRATION
< CHANGE ADDRESS >
REGISTRATION
< AUDIT >
To perform an Audit, scroll (,>) to
AUDIT and press to confirm.
When the Audit transaction is completed, postage printing is
enabled for another 3 months.
Withdrawing Meter
The Withdraw procedure is only required if you are cancelling
your meter contract or if there is a technical problem with your
meter. Call the Hasler Customer Care at 1-800-243-6275
and a customer service representative will take your
information and guide you through the withdraw procedure.
Your meter should always be withdrawn before returning
it to Hasler.

HASLER Q&A Appendix A
06/2003 WJ20 Page A - 1
Contacting Hasler
Hasler, Inc.
19 Forest Parkway
Shelton, CT 06484-6140
www.haslerinc.com
Customer Service Helpdesk 1-800-446-6027
Call for Product Questions and Support
TMS Automated Account Information 1-800-248-8013
Call to check Account Balance, Last Deposit or Last Meter
Resetting via touch-tone telephone
TMS Modem Telephone Number 1-800-446-6029
Modem telephone number set up in meter
Contact Information A-1
How To Perform Common Functions A-2
Troubleshooting Tips A-3
Envelope Specifications
Length 5.5 inches minimum, no maximum
Depth 3.5 inches minimum, no maximum
Thickness .3 inches maximum, use labels for over .3 inches
Size
12.2 inches x 8.3 inches x 7.5 inches (W x D x H)
Speed
20 envelopes per minute
Weight
6.5 lbs.
HASLER Q&A Appendix A
Page A - 2 WJ20 06/2003
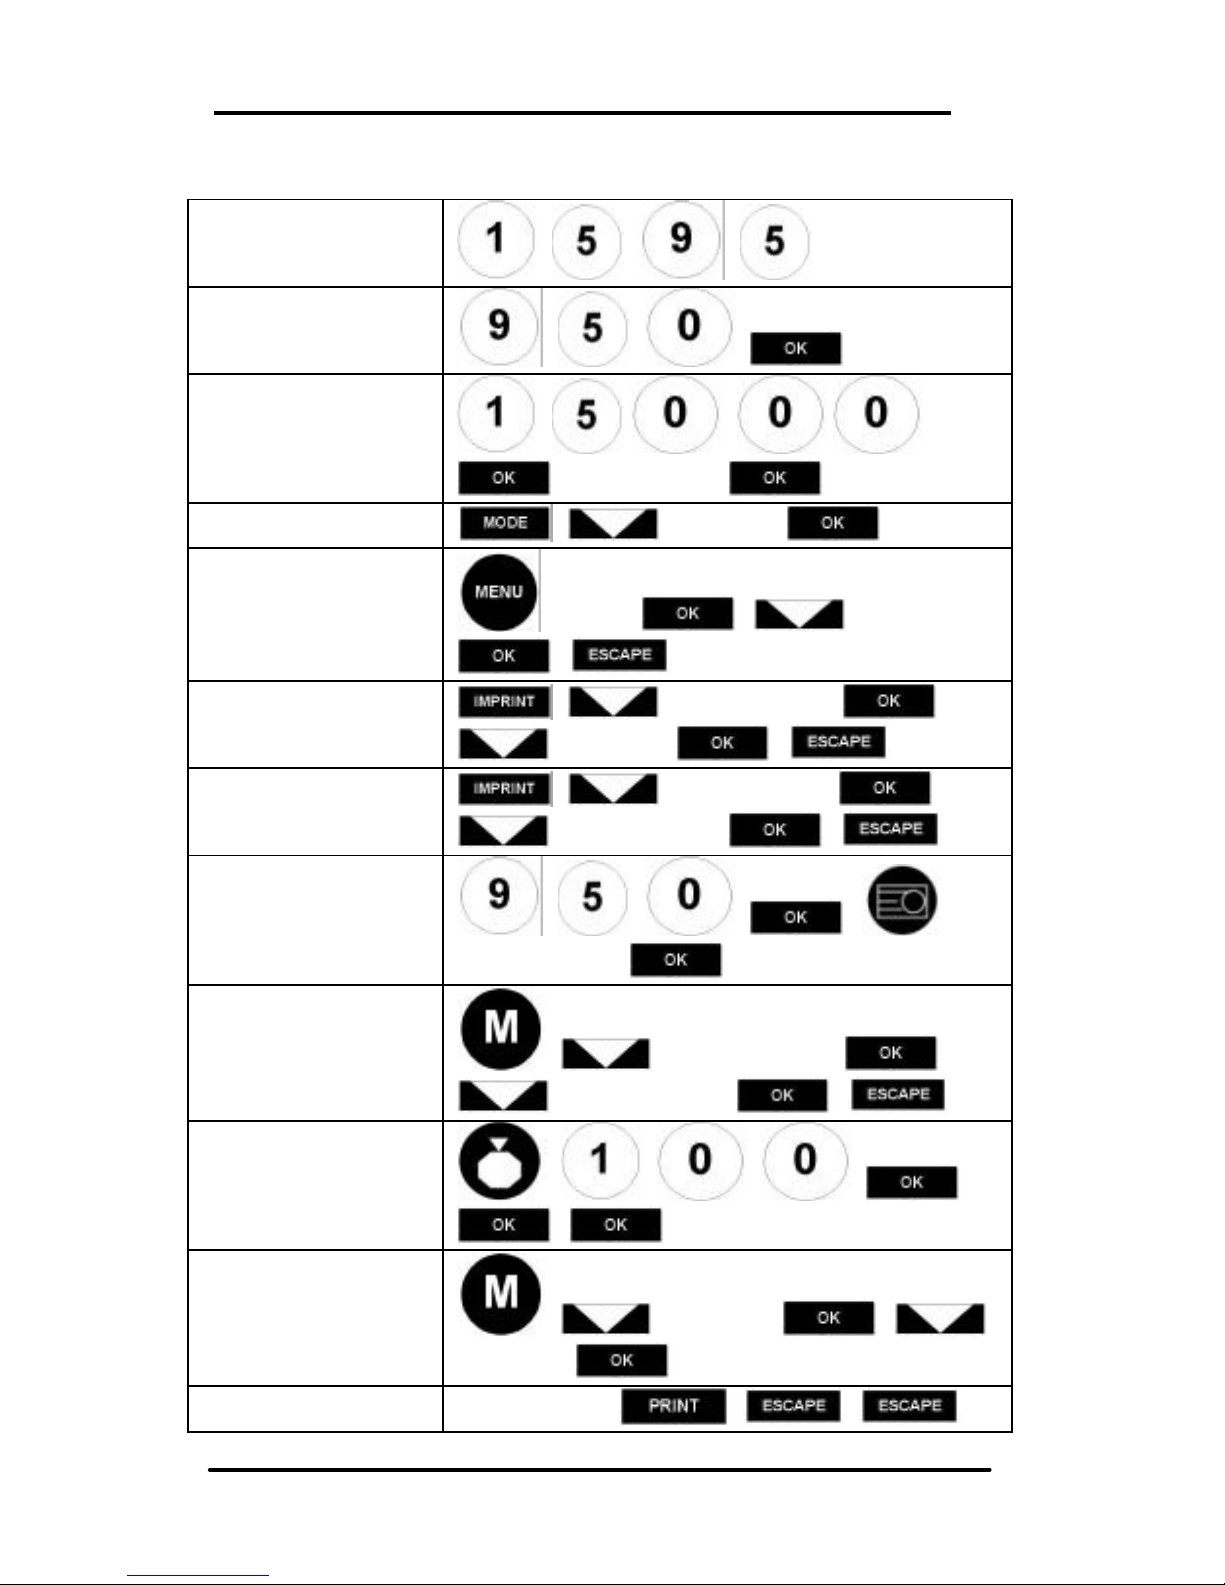
How To
Enter PIN (example
1 5 9 5)
, , ,
Set value (example
95 cents)
, , ,
Confirm High Value
(example:$15.00)
, , , , ,
, Are you sure,
Set Print Mode
, to choice,
Select Slogan
, Advert, , to choice,
,
Select Text
Message
, Text Message, ,
to choice, ,
Advance Date
, Date Advance, ,
Advance Date, ,
Print Label
, , , , ,
Label quantity,
Recall memorized
jobs
, Memory Recall, ,
Memory 1 or 2, ,
Recredit (example
$100.00)
, , , , ,
,
Display Registers
, Registers, ,
to choice,
To print Registers
As Registers, , ,

HASLER Q&A Appendix A
06/2003 WJ20 Page A - 3
Troubleshooting
WJ20 will not start.
• Is the WJ20 connected to the power
supply?
• Is the main power outlet switch set
to ON?
• Is the machine Top Cover properly
closed?
The unit does not
print.
• Check that you have made the
correct Print Mode Selection
• Did you remove the protective tape
from the Ink Cartridge before fitting?
Poor print quality
• Clean the inker
The scale does not
communicate
• Check the scale connection.
See Appendix C for Messages indicating errors.

This page intentionally left blank.

HASLER Country Code Appendix B
06/2003 WJ20 Page B - 1
Country Rate Group
A
Afghanistan
5
Albania 5
Algeria 5
Andorra 3
Angola 5
Anguilla 5
Antigua & Barbuda 5
Argentina 5
Armenia 5
Aruba 5
Ascension 5
Australia 4
Austria 5
Azerbaijan 5
B
Bahamas 5
Bahrain 5
Bangladesh 5
Barbados 5
Belarus 5
Belgium 3
Belize 5
Benin 5
Bermuda 5
Bhutan 5
Bolivia 5
Bosnia-Herzegovina 5
Botswana 5
Brazil 5
British Virgin Islands 5
Brunei Darussalam 5
Bulgaria 5
Burkina Faso 5
Burma (Myanmar) 5
Burundi
5
C
Cambodia 5
Cameroon 5
Canada 1
Cape Verde 5
Country Rate Group
Chad 5
Chile 5
China 5
Colombia 5
Comoros 5
Congo, Democratic Republic of the
5
Congo, Republic of the 5
Costa Rica 5
Cote d’Ivoire (Ivory Coast) 5
Croatia 5
Cuba
5
Cyprus 5
Czech Republic 5
D
Denmark 3
Djibouti 5
Dominica 5
Dominican Republic 5
E
Ecuador 5
Egypt 5
El Salvador 5
Equatorial Guinea 5
Eritrea 5
Estonia 5
Ethiopia 5
F
Falkland Islands 5
Faroe Islands 3
Fiji 5
Finland 3
France 3
French Guiana 5
French Polynesia 5
G
Gabon 5
Gambia 5
Georgia, Republic of 5
Germany 3
Ghana 5
Gibraltar 3

HASLER Country Code Appendix B
Page B - 2 WJ20 06/2003
Country Rate
Group
Great Britain & Northern Ireland 3
Greece 3
Greenland 3
Grenada 5
Guadeloupe 5
Guatemala 5
Guinea 5
Guinea-Bissau
1
5
Guyana 5
H
Haiti 5
Honduras 5
Hong Kong 5
Hungary 5
I
Iceland 3
India 5
Indonesia
5
Iran 5
Iraq 5
Ireland (Eire) 3
Israel 3
Italy 3
J
Jamaica 5
Japan 4
Jordan 5
K
Kazakhstan 5
Kenya 5
Kiribati 5
Korea, Democratic People’s Republic
of (North)
5
Korea, Repub. of (South) 5
Kuwait 5
Kyrgyzstan 5
L
Laos 5
Country Rate Group
Libya 5
Liechtenstein 3
Lithuania 5
Luxembourg 3
M
Macao 5
Macedonia, Republic of 5
Madagascar 5
Malawi 5
Malaysia 5
Maldives 5
Mali 5
Malta 5
Martinique 5
Mauritania 5
Mauritius 5
Mexico 2
Moldova 5
Mongolia 5
Montserrat 5
Morocco 5
Mozambique 5
N
Namibia 5
Nauru 5
Nepal 5
Netherlands 3
Netherlands Antilles 5
New Caledonia 5
New Zealand 4
Nicaragua 5
Niger 5
Nigeria 5
Norway 3
O
Oman 5
P
Pakistan 5
Panama
5

HASLER Country Codes Section B
06/2003 WJ20 Page B - 3
Country Rate
Group
Poland 5
Portugal 3
Q
Qatar 5
R
Reunion 5
Romania 5
Russia 5
Rwanda 5
S
St. Christopher (St. Kitts) & Nevis 5
Saint Helena
5
Saint Lucia 5
Saint Pierre & Miquelon 5
Saint Vincent & Grenadines 5
San Marino 3
Sao Tome & Principe 5
Saudi Arabia 5
Senegal 5
Serbia-Montenegro (Yugoslavia) 5
Seychelles
5
Sierra Leone
5
Singapore 5
Slovak Republic (Slovakia) 5
Slovenia 5
Solomon Islands 5
Somalia
11
5
South Africa 5
Spain 3
Sri Lanka 5
Sudan 5
Suriname 5
Swaziland 5
Sweden 3
Switzerland 3
Syrian Arab Republic (Syria)
5
T
Taiwan
5
Country Rate
Group
Tanzania 5
Thailand 5
Togo 5
Tonga 5
Trinidad & Tobago 5
Tristan da Cunha 5
Tunisia 5
Turkey 5
Turkmenistan 5
Turks & Caicos Islands 5
Tuvalu 5
U
Uganda 5
Ukraine 5
United Arab Emirates 5
Uruguay 5
Uzbekistan 5
V
Vanuatu 5
Vatican City 3
Venezuela 5
Vietnam 5
W
Wallis & Futuna Islands 5
Western Samoa 5
Y
Yemen 5
Z
Zambia 5
Zimbabwe 5

This page intentionally left blank.

HASLER Messages Appendix C
06/2003 WJ20 Page C - 1
In the course of operation, one of the following screen
messages may be displayed. The cause for the message
and the appropriate actions are listed in this section.
Screen Display Cause Remedy
ACCOUNT FIELD TMS Account on
hold.
Call TMS Helpdesk
1-800-248-8013.
ACCOUNT TOO BIG
CHECK FUNDS
Requested reset
(funds load) exceeds
meter limit.
Choose lower value
and retry.
ACCOUNT TOO
SMALL INCREASE
AMOUNT
Requested a zero
value reset.
Choose larger
amount and retry.
BAD CARD Memory card
damaged.
Request a new card.
Call your local Hasler
dealer or Customer
Service Helpdesk at
1-800-446-6027.
BAD STORAGE Loading of the
memory card failed.
Reload memory card.
BUSY TRY LATER TMS Center
(Postage Load) is
busy.
Try again later.
CONFIG MISSING System error. Call your local Hasler
dealer or Customer
Service Helpdesk at
1-800-446-6027.
CONNECTION
ERROR PLEASE
RETRY
Connection to TMS
Center lost.
Check the phone
connection and retry.
CONNECTION LOST Connection to TMS
Center lost.
Check the phone
connection and retry.
Continued on the next page.

HASLER Messages Appendix C
Page C - 2 WJ20 06/2003
Screen Display Cause Remedy
CREDIT ERROR TMS error. Call TMS Helpdesk
1-800-248-8013.
FILE NOT VALID Memory card
damaged.
Call your local Hasler
dealer or Customer
Service Helpdesk at
1-800-446-6027 and
request a new
memory card.
FONT MISSING System error. Call your local Hasler
dealer or Customer
Service Helpdesk at
1-800-446-6027.
INK EXPIRED Ink cartridge older
than 9 months.
Replace ink
cartridge.
INK UNKNOWN Wrong ink installed. Replace ink
cartridge.
INSERT CARD Memory card not
installed.
Insert card and press
OK.
NO ACCOUNT No TMS Account set
up.
Call TMS Helpdesk
1-800-248-8013.
NO ANSWER
CHECK TELNO.
Wrong telephone
number dialed.
Check telephone
number setup in unit.
TMS Modem
Telephone Number
1-800-446-6029.
NO DIAL TONE
CHECK
CONNECTION
Unit not connected to
telephone line.
Connect to telephone
jack. Check
telephone number
setup.
NO RATES No valid rate table
available.
Call your local Hasler
dealer or Customer
Service Helpdesk at
1-800-446-6027 and
request a rate
update.
Continued on the next page.

HASLER Messages Appendix C
06/2003 WJ20 Page C - 3
Screen Display Cause Remedy
NO SCALE Scale missing or
damaged.
Check connection.
Call your local Hasler
dealer or Customer
Service Helpdesk at
1-800-446-6027.
REPLACE FILE File exists in unity. Accept ‘Replace File’
… OK.
WARNING DIE
MISSING
System error. Call your local Hasler
dealer or Customer
Service Helpdesk at
1-800-446-6027.
PLOCKOUT PRESS
FUNDS KEY
Inspection timer
expired.
Press Funds key to
clear lockout.
WARNING MAIL
NOT PRESENT
Mail removed during
print.
Place mail firmly into
the unit to complete
the operation.
WARNING PENDING
CREDIT
Add postage
transaction not
completed.
Press funds key and
select add postage
to automatically
finish transaction.
Continued on the next page.

HASLER Messages Appendix C
Page C - 4 WJ20 06/2003
Error Messages
In the event of a malfunction, an error message and a number
will be displayed. Refer to the following chart for appropriate
action.
Error messages generally may be re-set; if error messages
persist after taking the appropriate action and three attempts
at reset have been made, call your local Hasler dealer or
Customer Service Helpdesk at 1-800-446-6027.
Always have your meter serial number and the error number
for the Hasler Helpdesk.
Error Message Remedy
Error 16 Power ON/OFF
Error 17 Power ON/OFF
Error 18 Power ON/OFF
Error 19 Remove & Reinstall Ink Cartridge
Close Blue Latch
Ensure that mail is removed
Power OFF/ON
Error 20 Ensure that mail is removed
Power OFF/ON
Error 21 Remove & Reinstall Ink Cartridge
Close Blue Latch
Ensure that mail is removed
Power OFF/ON
Error 22 Power ON/OFF
Error 23 Power ON/OFF
Error 24 Remove & Reinstall Ink Cartridge
Close Blue Latch
Ensure that mail is removed
Power OFF/ON
Error 25 Power ON/OFF
Continued on the next page.

HASLER Messages Appendix C
06/2003 WJ20 Page C - 5
Error Message Remedy
Error 16 Power ON/OFF
Remove & reinstall ink cartridge
Error 27 Power ON/OFF
Error 28 Power ON/OFF
Error 29 Ensure that mail is removed
Power ON/OFF
Call your local Hasler dealer or Customer
Service Helpdesk at 1-800-446-6027
Error 30 Ensure that mail is removed
Power ON/OFF.
Remove & reinstall ink cartridge.
Error 31 Ensure that mail is removed
Remove and reinstall ink cartridge
Power ON/OFF

This page intentionally left blank.

Hasler Index
06/2003 WJ20 Index - 1
A
Accounts not available
Adding Postage
Adding postage 7-3
Clearing a PO lockout 7-5
Completing an interrupted
transaction 7-6
Contact information 7-14
Mailing TMS deposits 7-13
Maintaining your TMS account
number 7-7
Managing your account 7-11
Modem connection 7-2
Online information 7-10
PostageNow 7-9
PostageNow Telefunds 7-10
PostageNow On-Demand 7-10
Post Office regulations 7-8
Standard TMS bank accounts 7-12
TMS account balance 7-7
TMS account number 7-7
TMS statements 7-8
Advertisement selection 3-7
B
C
Cautions FCC-1
Common Functions A-2
Contact Information 7-14,
A-1
Controls & Features
Control descriptions
2-3
Control locations 2-2
Memory Card 2-1
Menu structure 2-4
Counter, Total Items 6-2
Country Codes
see Appendix B
Customer Comment Card
- front of manual
D
Departments not available
Display Messages
See Appendix C
E
Envelope specifications 3-2
Error Messages
See Appendix C
F
FCC Compliance statement
FCC-1
G
H
Help Desk Telephone Setup
11-10
High Value Setting 11-2

Hasler Index
Index - 2 WJ20 06/2003
I
Ink Cartridge Replacement
9-3
Ink, Low 6-3
Ink, No 6-3
Installation
Installation tips 1-1
Connections to the unit 1-1
Startup & process item 1-2
Installation Safety FCC-2
Insufficient Postage 6-3
J
K
Key Beep Setting 11-7
L
Labels 3-2
Loading Funds
see Adding Postage
Low ink 6-3
Low Postage Setting 11-3
Low postage warning 6-3
M
Memory Card
Memory card 2-1
Load data using a memory card
8-2
Memory Function
Programming a memory function
4-1
Recalling a memory function 4-2
Memory Settings
Programming a memory function
4-1
Recalling a memory function 4-2
Messages see Appendix B
Meter Registers
Available registers 6-1
Insufficient postage
6-3
Low ink 6-3
Low postage warning 6-3
Meter register selection 6-2
No ink 6-3
Postage Available register 6-2
Postage Used register 6-2
Total items counter 6-3
Meter Register Selection
6-2
Meter Summary Report 10-1
Modem Connection
7-2, 11-9
Modem Telephone Setup
11-9
Modem Approval
Requirements FCC-2
N
O

Hasler Index
06/2003 WJ20 Index - 3
P
Password
see User Pin Setting
PO Lockout 7-5
Postage
Adding postage 7-3
Low postage warning 6-3
Postage Available register 6-2
Postage Used register 6-2
Printing postage 3-1
Postage Available Register
6-2
Postage Used Register 6-2
Postage Set Report 10-1
Pre-Dated Mail 3-6
Preset Postage Setting 11-8
Printing Postage
Advertisement selection 3-7
Envelope specifications 3-2
Labels 3-2
Pre-dated mail 3-6
Printing modes 3-3
Print mode selection 3-5
Printing postage 3-1
Printing tips 3-2
Printing Report 10-3
Print Head Cleaning 9-1
Print Quality
To clean the print head 9-1
To replace the ink cartridge 9-3
Proprietary Notice
- front of manual
Publication Notice
- front of manual
Q
R
Registers, Meter
Available registers 6-1
Insufficient postage
6-3
Low ink 6-3
Low postage warning 6-3
Meter register selection 6-2
No ink 6-3
Postage Available register 6-2
Postage Used register 6-2
Total items counter 6-3
Registration Setup 11-15
Reports
Meter Summary report 10-1
Postage Set report 10-1
Printing a report 10-3
Setup report 10-2

Hasler Index
Index - 4 WJ20 06/2003
S
Scale
Benefits of using a weigh-scale
5-1
Weigh-scale connections 5-2
Weigh-scale postage/rate selection
5-3
Setup Mode
Low postage setting
11-3
Help Desk telephone setup 11-10
High value setting 11-2
Key Beep setting 11-7
Modem telephone setup 11-9
Preset Postage setting 11-8
Registration setup 11-15
Sleep mode setting 11-6
Time setting 11-5
Time Out setting 11-6
To enter setup mode 11-1
User Pin setting 11-4
Withdrawing meter 11-16
Setup Report 10-2
Sleep Mode Setting 11-6
Specifications
Envelope 3-2, A-1
Size A-1
Speed A-1
Weight A-1
T
Time Setting 11-5
Time Out Setting 11-6
TMS
see Adding Postage
Total Items Counter 6-3
Troubleshooting Tips A-3
U
User Pin Setting 11-4
V
W
Weigh Scale
Benefits of using a weigh-scale
5-1
Weigh-scale connections 5-2
Weigh-scale postage/rate selection
5-3
Withdrawing Meter 11-16
X
Y
Z
 Loading...