

Page 1

USER'S GUIDE
MAILING SYSTEM
with iMeterTM Postage Meter
IM430
MAILING SYSTEMS
4135502P
Page 2
Table of Contents
1 Read this First 1
1.1 What you will Find in this Manual..............................................3
1.2 Safety Requirements.................................................................5
2 Meet Your Mailing System 9
2.1 System Layout.........................................................................11
2.2 Accessories.............................................................................13
2.3 Control Panel Features ...........................................................14
2.4 Connections ............................................................................17
2.5 Power Management ................................................................19
3 Processing Mail 21
3.1 Choosing a Type of Stamp......................................................23
3.2 Preparing and Starting your Work Session .............................25
3.3 Processing [Standard] Mail .....................................................31
3.4 Printing [Received] for Incoming Mail......................................42
3.5 Running [No Printing] Mail.......................................................45
3.6 Settings Details .......................................................................47
3.7 Advanced Operations..............................................................61
4 Money Operations 63
4.1 Overview .................................................................................65
4.2 Managing Funds......................................................................66
4.3 Unlocking the PSD (Postal Inspection) .................................69
5 Managing Accounts and Assigning Rights 71
5.1 Accounting and Assigning Rights Overview ...........................73
5.2 Selecting an 'Account Mode'...................................................74
5.3 Guidelines to Setup an Account..............................................75
5.4 Selecting an 'Account Mode'...................................................80
5.5 Managing Accounts.................................................................81
5.6 Managing Operators................................................................88
6 Reports 93
6.1 Reports Overview....................................................................95
6.2 Generating a Report................................................................97
6.3 Counter Data ...........................................................................98
6.4 Postage Data.........................................................................100
6.5 Funds Data............................................................................103
6.6 Account Data.........................................................................105
6.7 System Data..........................................................................109
Page 3

7 Online Services 111
7.1 Online Services Overview..................................................... 113
7.2 Connecting to Online Services ............................................. 114
7.3 Uploading Statistics .............................................................. 117
7.4 System Online Services........................................................ 118
7.5 eConfirmation Services........................................................ 119
8 Configuring your Mailing System 125
8.1 Settings Overview................................................................. 127
8.2 Logging in / out as the Supervisor ....................................... 128
8.3 Changing the Display Language .......................................... 130
8.4 Enabling/Disabling Sounds .................................................. 131
8.5 Display Settings ................................................................... 132
8.6 System Time-outs and Settings........................................... 133
8.7 High Value, Low Funds Warnings and PIN Codes............... 136
8.8 Weighing Settings................................................................. 138
8.9 Postage Imprint Default Settings .......................................... 145
8.10 Imprint Memories .................................................................. 149
8.11 Connection Settings.............................................................. 151
8.12 Time and Date Management ................................................ 153
9 Options and Updates 155
9.1 Options and Updates Process.............................................. 157
9.2 Using the Mailbox ................................................................. 158
9.3 Managing Options................................................................. 160
9.4 Managing Custom Text Messages....................................... 162
9.5 Managing Ad Die ................................................................. 164
9.6 Managing Postal Rates......................................................... 166
9.7 Updating System Software ................................................... 168
10 Maintaining your Mailing System 171
10.1 Maintaining the Ink Cartridge ............................................... 173
10.2 Cleaning the Mail Path.......................................................... 179
10.3 Maintenance Processes ...................................................... 180
11 Troubleshooting 183
11.1 Paper Jamming .................................................................... 185
11.2 Label Jamming...................................................................... 186
11.3 Weighing Problems............................................................... 187
11.4 Diagnostics and System Data .............................................. 189
12 Specifications 193
12.1 Mail Specifications ................................................................ 195
12.2 Recommended Operating Conditions .................................. 196
12.3 General Specifications ......................................................... 197
12.4 Operating Specifications....................................................... 198
Index 199
Page 4

Read this First
1 Read this First
This section contains important information about safety precautions and environmental recommendations to operate your equipment in the best possible conditions.
1.1 What you will Find in this Manual..........................................3
1.2 Safety Requirements ..............................................................5
How to Disconnect your Mailing System........................................................................... 8
Page 5

1
Read this First
2
Page 6
What you will Find in this Manual
1.1 What you will Find in this Manual
Section 1: Read this First
Make sure your have read and fully understood the safety requirements in
this section. This section also includes a list of acronyms and symbols used
in the manual.
Section 2: Meet Your Mailing System
System features, reference descriptions of elements and controls, mail format and how to power your Mailing System off.
Section 3: Processing Mail
Processing mail using the mailing system: choosing a type of task, weighing,
selecting a rate, sealing your mail, running batches, etc.
Section 4: Money Operations
Loading postage funds.
1
Read this First
Section 5: Managing Accounts and Assigning Rights
How you can change accounts as a user, or set up accounts and control
access to the Mailing System as the supervisor.
Section 6: Reports
How you can generate and print out reports for the Mailing System usage,
funds usage, account usage, etc.
Section 7: Online Services
Using your Mailing System to access Online Services and connect your system for upgrades.
Section 8: Configuring your Mailing System
All the specifications of your Mailing System you can set up as a user (temporary settings) or supervisor (default settings).
Section 9: Options and Updates
How to update/upgrade your system and modify the stamp (custom texts
and ad dies, rates...).
Section 10: Maintaining your Mailing System
Changing the ink cartridge and maintaining other system components.
Section 11: Troubleshooting
What to do when a problem occurs: jamming, bad sealing, poor printing etc.
Section 12: Specifications
Detailed specifications of your Mailing System.
3
Page 7
1
Symbols
This manual uses the symbols listed below.
This symbol...
Indicates...
Read this First
Glossary
This manual uses the acronyms listed below.
Acronym Description
WARNING : indicates a human safety hazard.
ATTENTION : brings to your attention a risk for equipment or
mail that could result from an action you may perform.
NOTE : remark that explains different scenarios or situations.
TIP : advice to help save you time when processing your mail.
SUPERVISOR : indicates that you have to log in as the supervisor (using the supervisor PIN) to perform the procedure. Postage functions of the Mailing System are not accessible in this
mode.
ALD Automatic Label Dispenser
Ascending Total postage used
Descending Postage amount available
ID IDentification
LAN Local Area Network: link between computers
MAS Mail Accounting Software: allows you to remotely manage mailing
accounts and associated reports.
PC Personal Computer
PIN Personal Identification Number
PSD Postal Security Device (Meter)
USPS United States Postal Services
WP Weighing Platform
4
Page 8
Safety Requirements
1.2 Safety Requirements
Power Connection
1
Before connection, check whether the Mailing System is suitable for the local AC
power voltage; refer to the type plates at the back of each system component.
THIS SYSTEM MUST BE GROUNDED
• Only connect the power plug to an outlet provided with a pro-
tective ground contact.
• To reduce the risk of fire, use only the power cord supplied with
the Mailing System.
• Do not use ground adaptors.
• Do not use this product on a wet floor or near water.
• In case of liquid spillage, disconnect the power cord from the
outlet and proceed with cleaning.
• Use an outlet located near the system that is easily accessible. As the power
supply cord is the system disconnecting device, do not route the power cord
between pieces of furniture or over sharp edges.
• Avoid using outlets controlled by wall switches or shared by other equipment.
• Make sure there is no strain on the power supply cord.
Read this First
5
Page 9
Compliance
1
Energy Star compliance
Read this First
Your mailing machine is Energy Star compliant: it helps you to save energy and
money while protecting the environment.
Environmental compliance
A program is implemented for the recycling of worn mailing machines and machines
at the end of their lifetime. Contribute in a responsible way to the environmental protection by consulting your retailer internet site, or by contacting him. He will inform you
of the collection and treatment processes of these machines.
General Safety
• Before using your Mailing System, thoroughly read the operating instructions.
• To reduce the risk of fire, electric shock and injury to persons, follow normal and
basic safety precautions for office equipment when using your Mailing System.
• To avoid damage, only use approved supplies (ink, tape, cleaners...).
The Mailing System contains moving parts. Keep fingers, long
hair, jewellery, neck ties, loose clothing away from the mail path at
all times.
Follow the additional safety precautions below:
• Do not place lit candles, cigarettes, cigars, etc. on the Mailing System.
• When removing jammed material, avoid using too much force to prevent personal
injury and damaging components.
• When lifting covers, wait for all parts to stop moving before placing hands near the
feeder path or printhead.
• To prevent overheating do not block the ventilation openings or try to stop the
power supply fans.
• Do not remove bolted covers as they enclose potentially hazardous parts that
should only be accessed by a Service Representative.
6
Page 10
Telephone and LAN Connections
Your Mailing System uses the telephone network to connect to the Postal Services
and to your customer online services.
You may also use a LAN (high speed internet connection) to connect to your
customer Online Services and to a mail accounting software (MAS), located on a
separate PC.
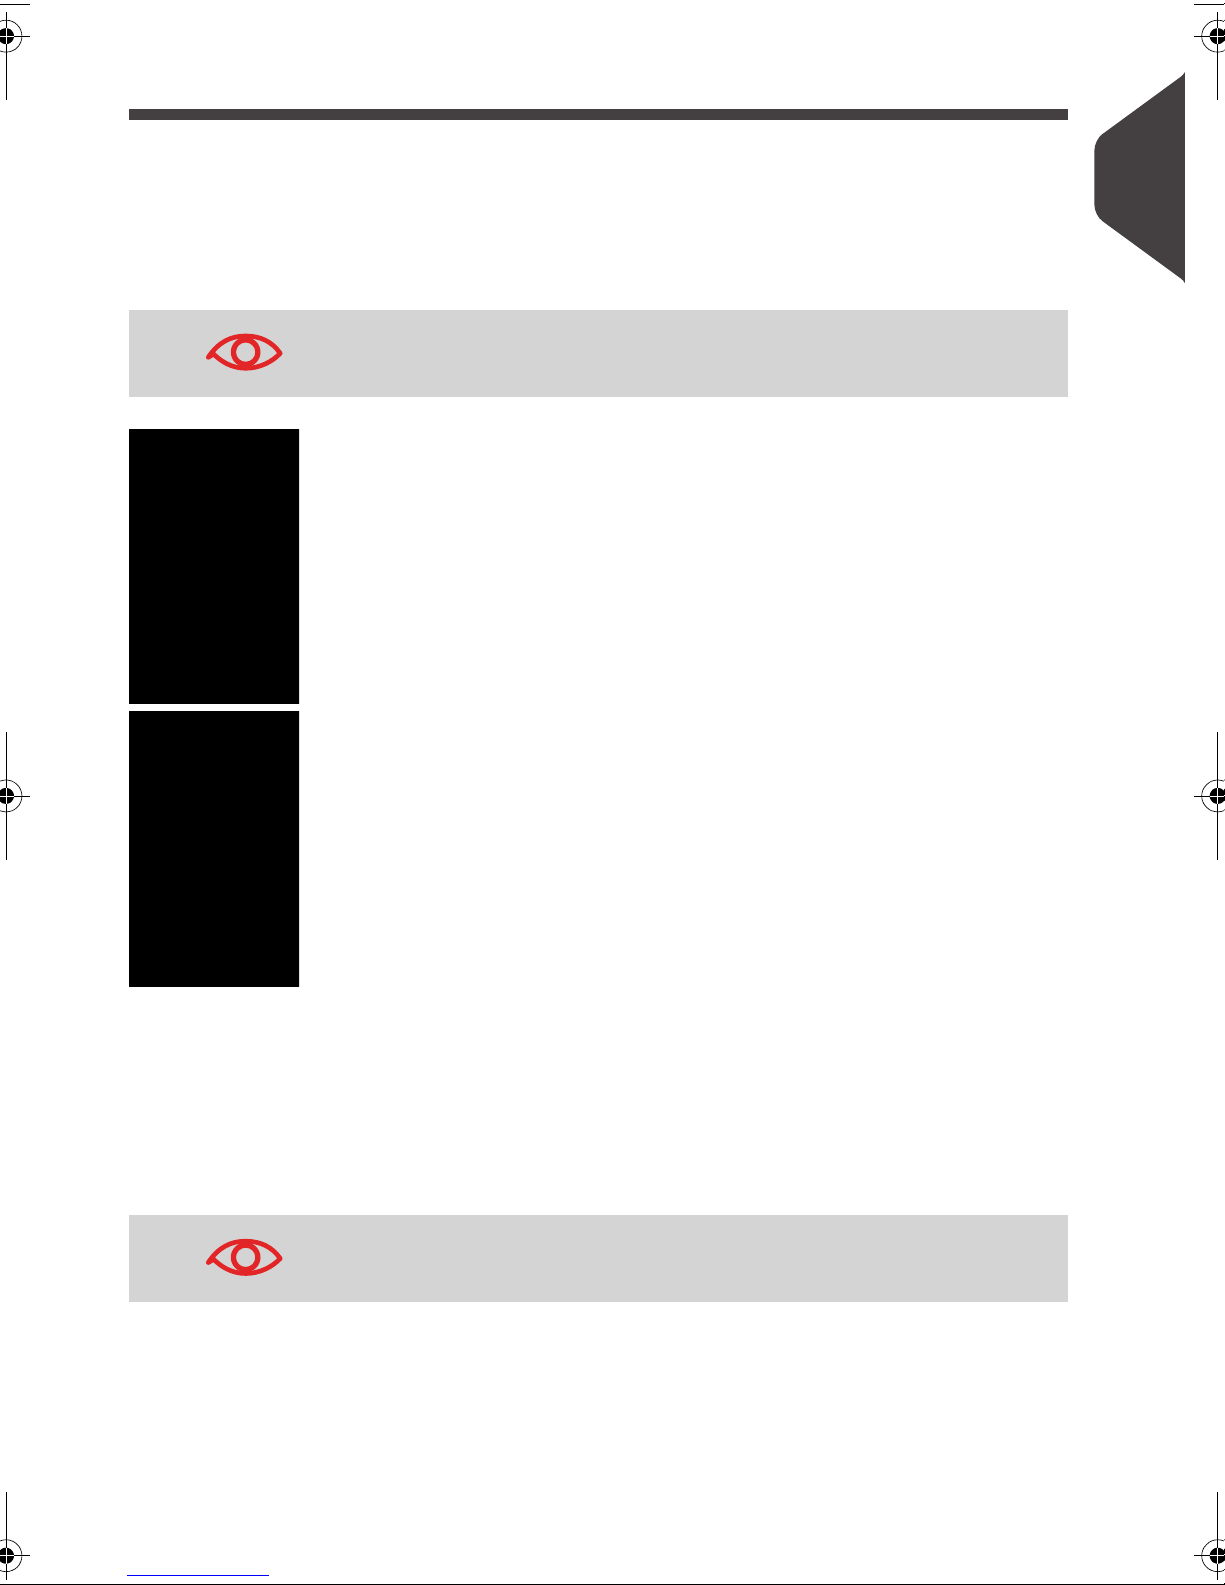
To prevent damage to equipment, do not confuse telephone jacks
that connect to the modem and LAN connectors that are bigger:
1
Read this First
Analog phone (4 wires)
Network/PC LAN (8 wires)
Follow the additional precautions below:
• Avoid using your system during an electrical storm; as there may be a risk of elec-
trical shock from lightning.
• Do not install telephone jacks or LAN connectors in a wet location.
• Disconnect the telephone or LAN cable from the wall before moving your system.
To reduce the risk of fire, only connect the modem to the telephone line using the supplied cable (see
Specifications
p.193 ).
7
Page 11
1
Disconnecting your Mailing System
How to Disconnect your Mailing System
How to
Disconnect your
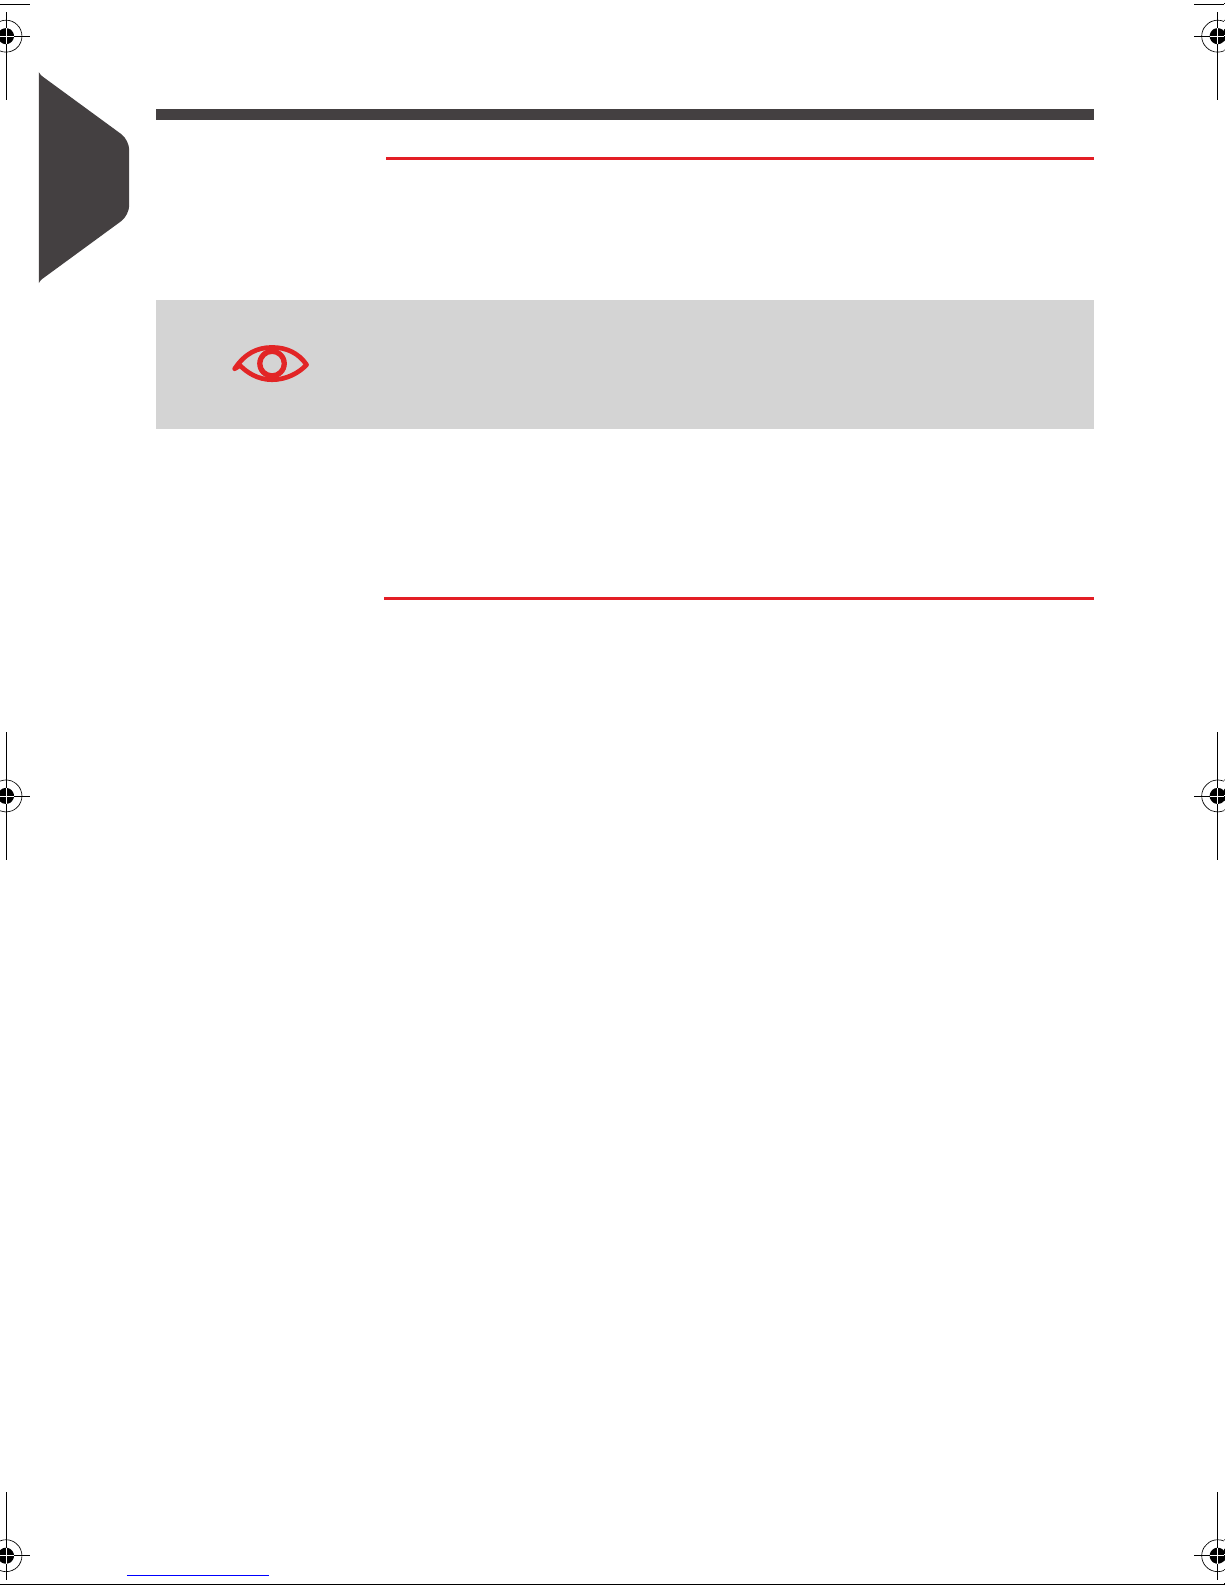
1 First switch your Mailing System to
Turn the Mailing System to OFF Mode
OFF
mode (see
p.20 ).
How to
Read this First
Mailing System
Only unplug the power cord when the Mailing System is in
mode or
unprotected position where the ink may dry out and become
unusable.
Sleep
mode to avoid keeping the ink cartridge in an
OFF
2 Unplug the power cord from the wall outlet.
3 Unplug the LAN cable and the telephone cord from their
sockets as they may still be energized.
8
Page 12

Meet Your Maili ng System
2 Meet Your Mailing
System
Get to know your Mailing System in this section.
2.1 System Layout ....................................................................... 11
2.2 Accessories........................................................................... 13
2.3 Control Panel Features......................................................... 14
2.4 Connections...........................................................................17
2.5 Power Management ............................................................ 19
How to Turn the Mailing System to Sleep Mode............................................................. 19
How to Turn the Mailing System to OFF Mode............................................................... 20
Page 13

2
Meet Your Mailing System
10
Page 14
System Layout
2.1 System Layout
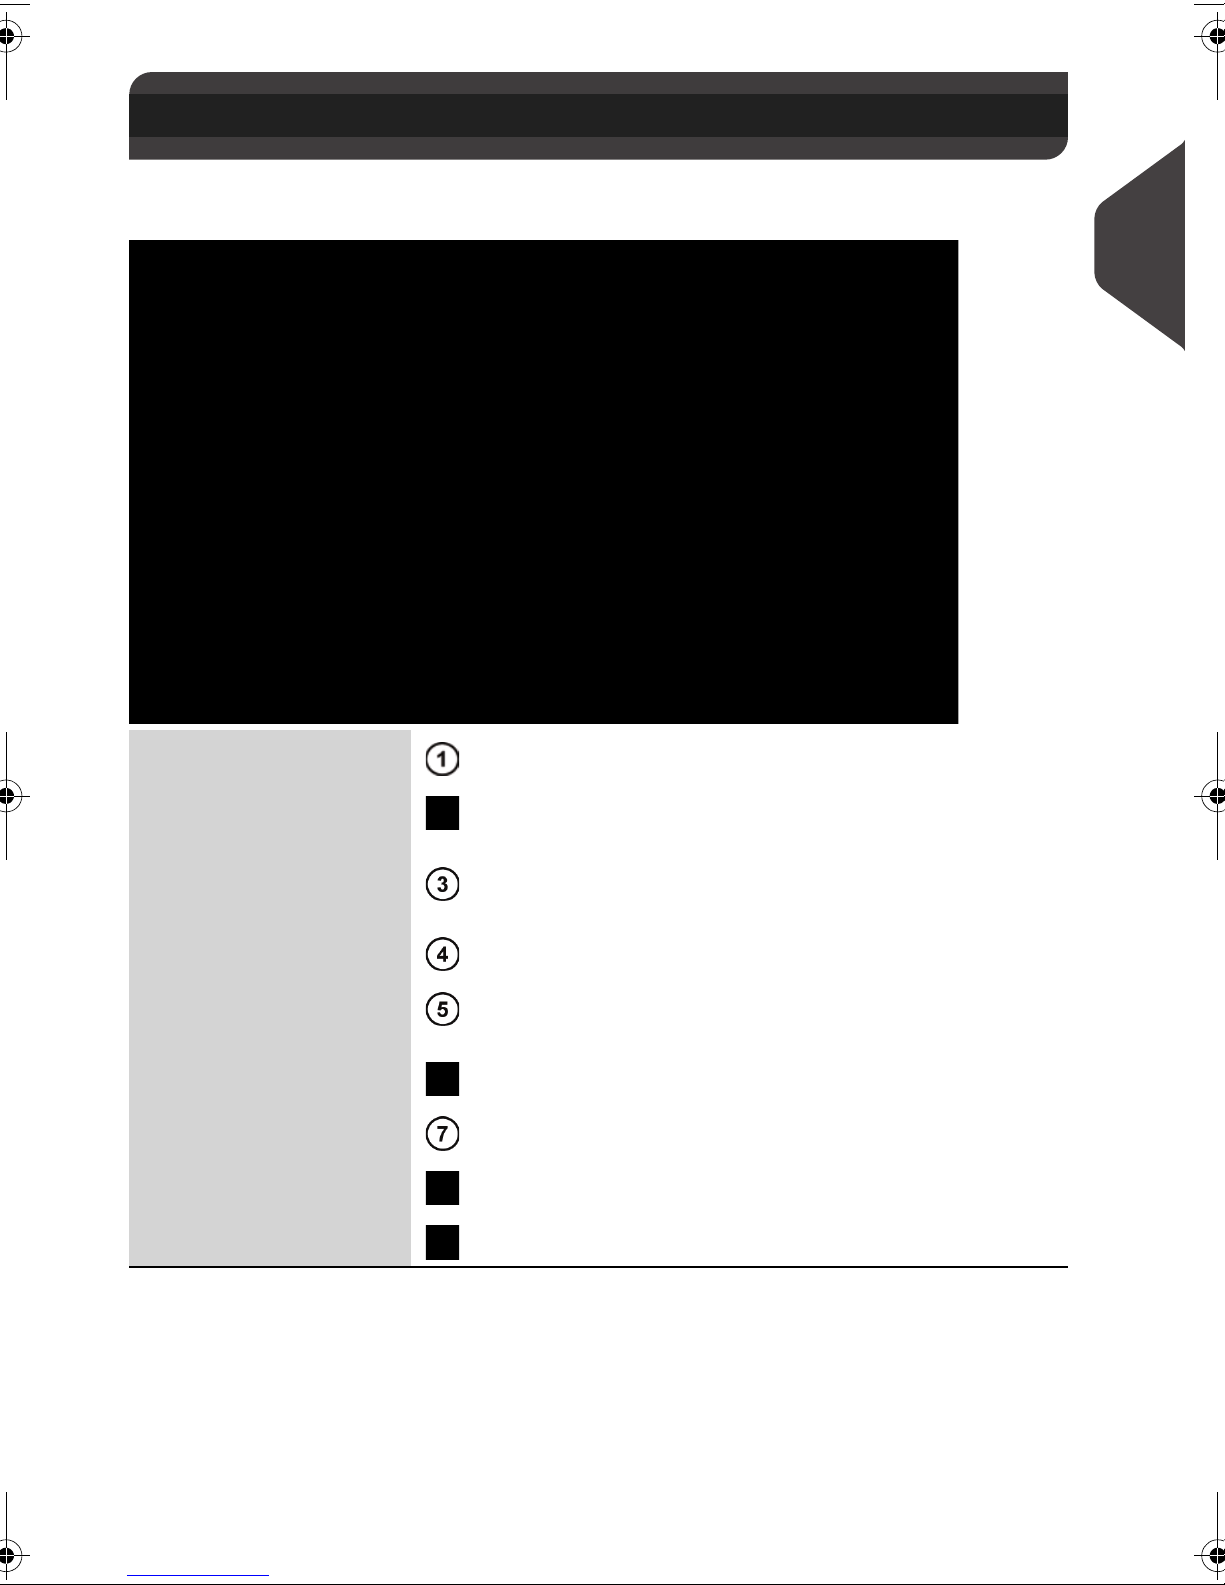
Mailing system with feed-table
2
Meet Your Mailing System
Weighing Platform Measures the weight of mail pieces.
Automatic Label
Dispenser
System Base Prints envelopes (or labels) and controls the Mailing
Control Panel Allows you to control the Mailing System.
Label Storage
User Guide Receptacle
Catch Tray Receives mail pieces after processing.
Jam Release Handle Allows you to remove jammed envelopes or labels.
Feed Table Beginning of the mail transport path.
Moistener Seals envelopes.
Contains labels to be printed.
System.
Use this slot to store extra labels horizontally.
11
Page 15
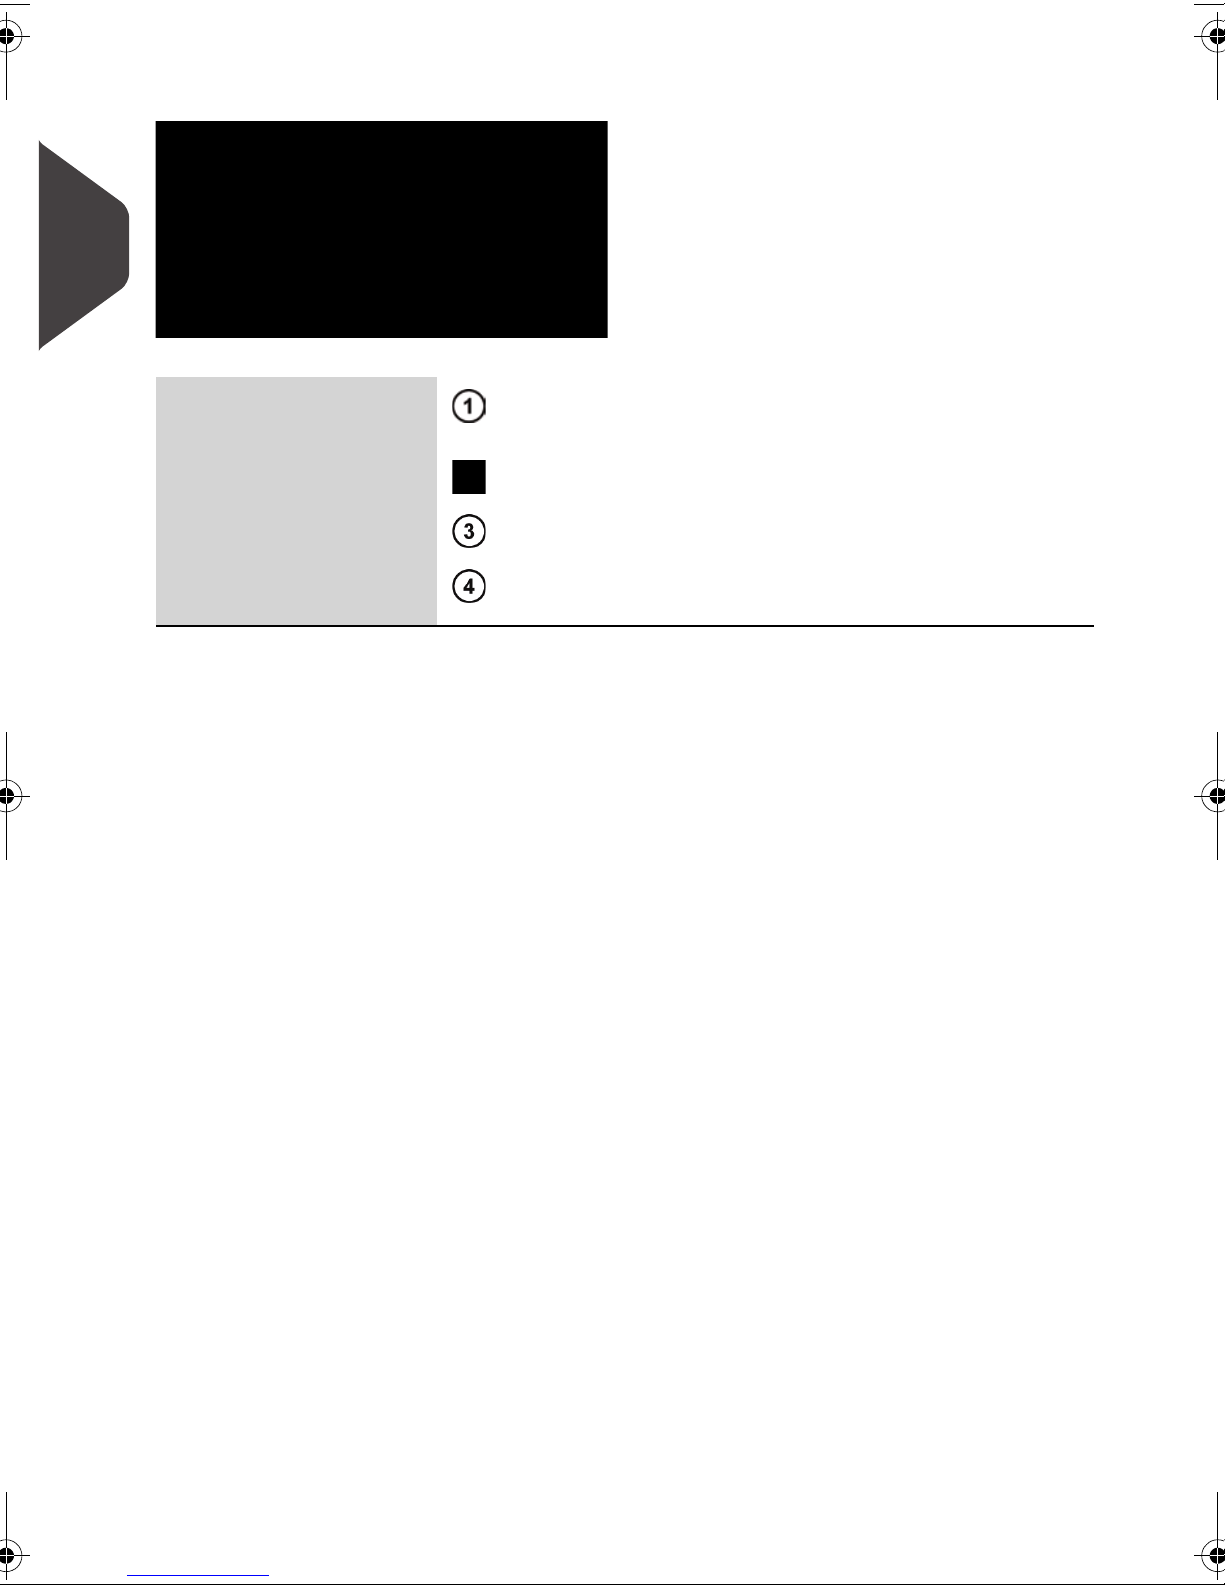
2
Inside the system base
Meet Your Mailing System
Sealer Bottle
(if installed)
Cover Lift by front side to open.
Ink Cartridge Prints the postal imprint on envelopes.
Postal Security Device
(PSD)
Automatically seals mail when the function is activated.
Postage meter. Stores postage funds and tracks postage usage.
12
Page 16
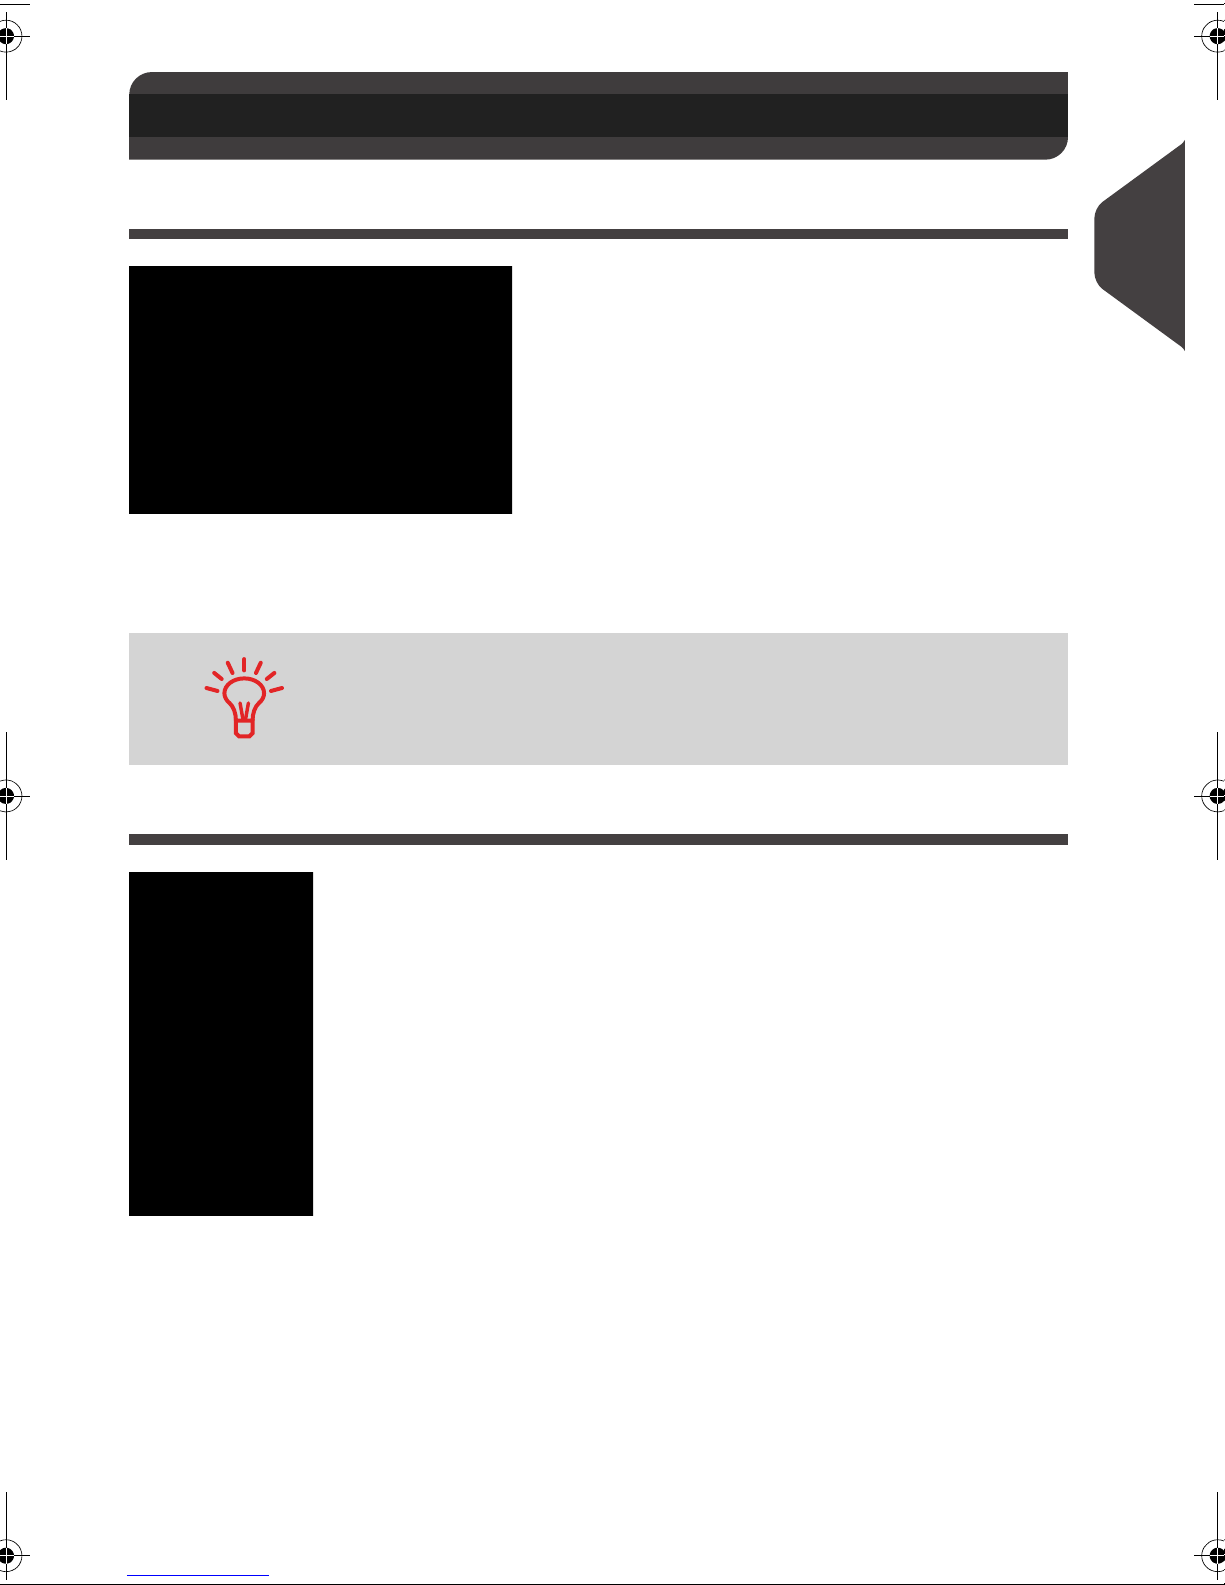
Accessories
2.2 Accessories
Report Printer (option)
A USB printer can be directly connected to the mailing system for printing mailingrelated reports.
2
Meet Your Mailing System
For more information about compatible printers that can connect
to your mailing system, please contact technical support.
Barcode Scanner (option)
This scanner is used:
• to identify accounts through barcodes
• to scan tracking numbers on mails and send them to postal server
13
Page 17
Control Panel Features
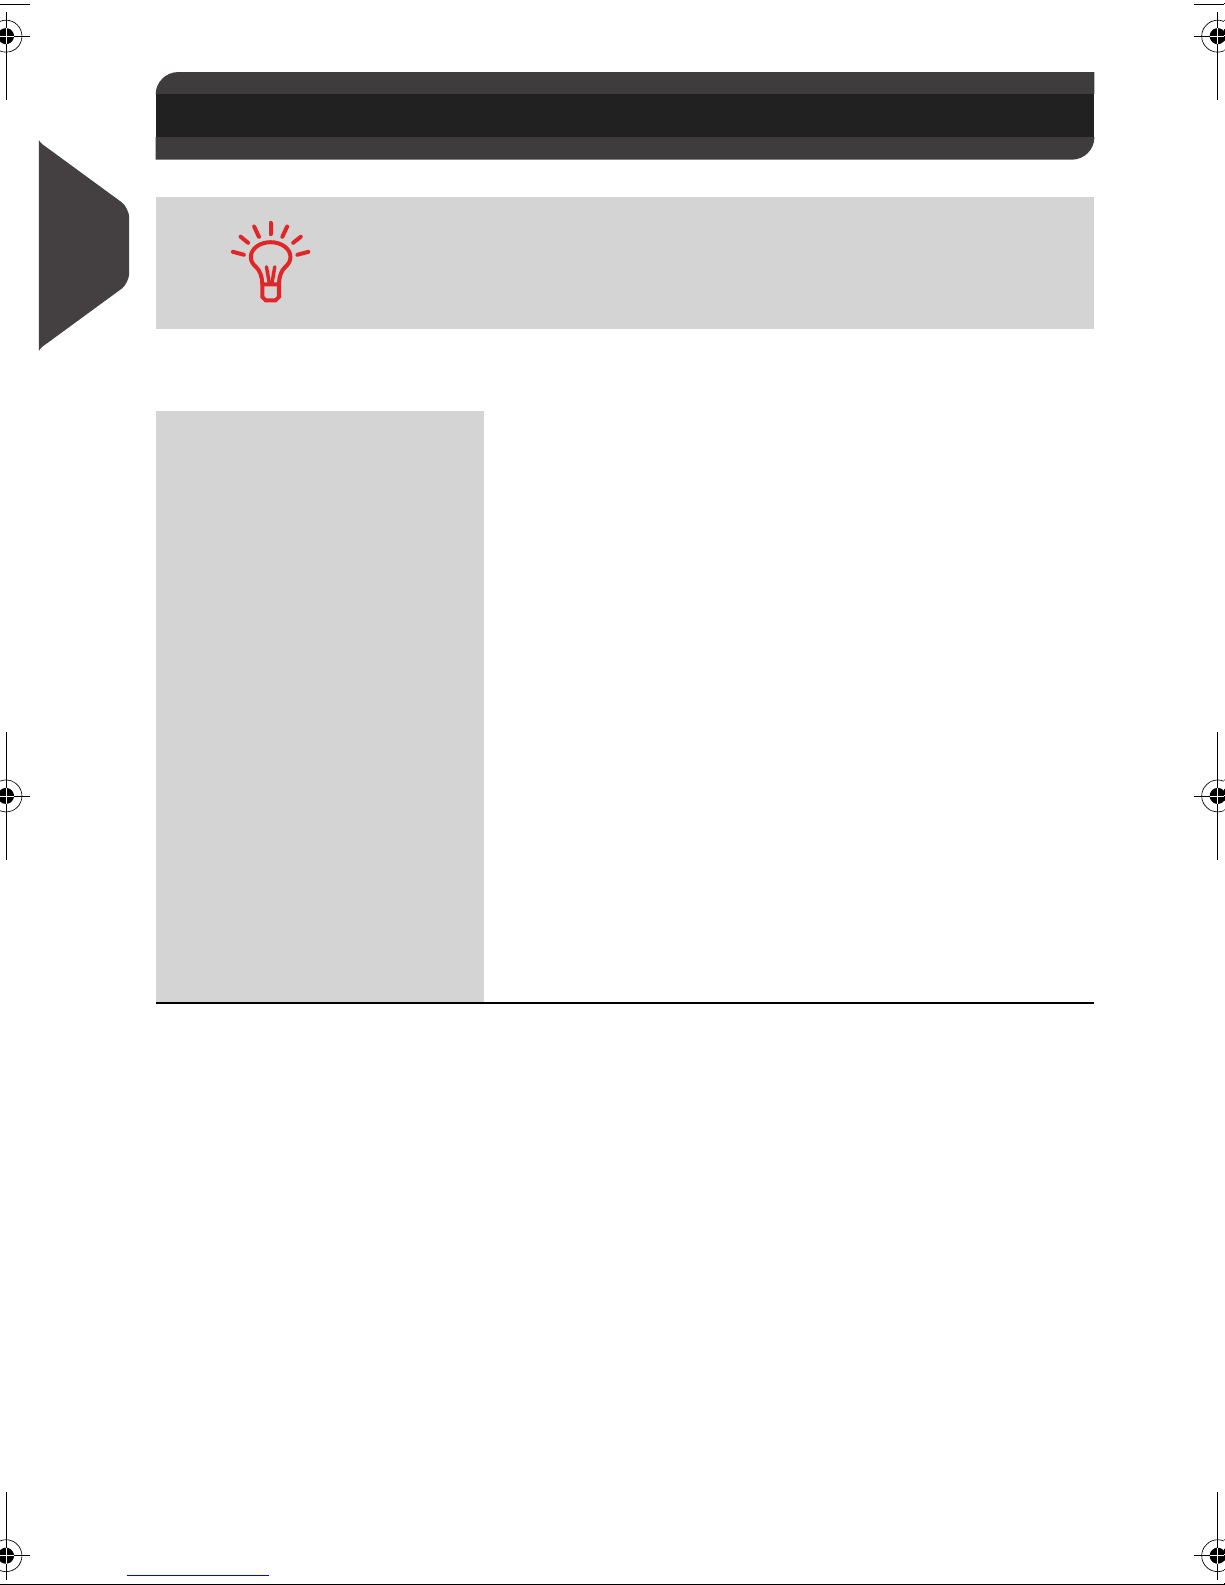
2.3 Control Panel Features
2
See control panel and screen layout on the flap of the manual
cover.
Meet Your Mailing System
Display Areas
Account Displays account currently selected.
Ad die Indicates that an ad die (slogan) will be printed.
Date Displays the date that will be printed.
Imprint Memory Displays selected imprint memory when applicable.
Mailbox Indicates unread messages in message box.
Postage Indicates the amount to be printed on the envelope.
Print Offset Indicates the printing offset status (stamp position shift-
Rate and Services Indicates the current rate and services selected.
Reset item counter Resets the item counter to zero. This is the starting
ing for thick envelopes).
point for batch data reports.
Tex t Indicates that a text will be printed on the envelope.
Weighing Mode Current weighing method.
Weight Current weight used to calculate postage amount.
14
Page 18
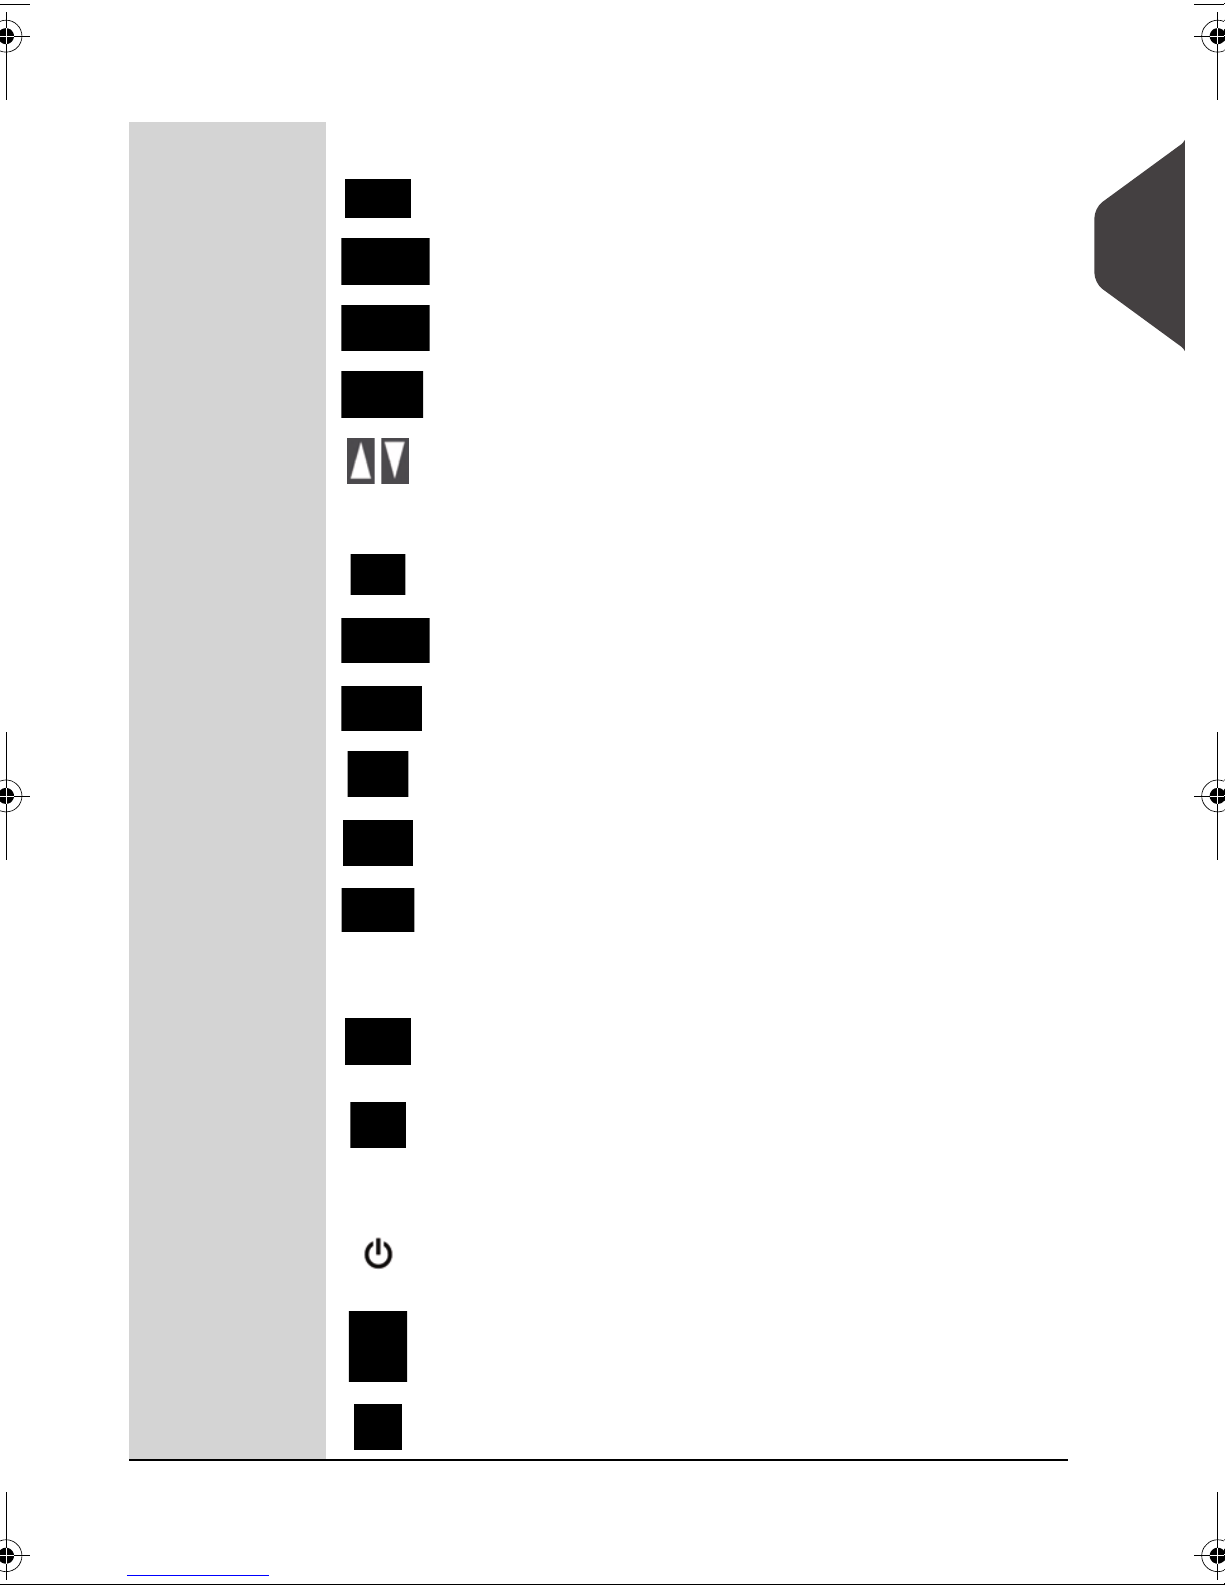
Keys and Shortcuts
NAVIGATION KEYS
Return Goes back to the previous screen.
Home Screen Returns the system to the Home screen.
Menu Accesses the menu settings.
OK Validates a selection.
Navigation
Arrows
Funds Accesses funds management (including adding funds).
Imprint Memories
Print Labels Switches to label printing (instead of envelopes).
Rate Selection Displays the rate selection screen.
Stamp Configuration
Navigate up or down in lists or menus.
SHORTCUT KEYS
Accesses preset stamp and account memories. These
presets are managed by the supervisor.
Accesses stamp selection and stamp set up screens.
2
Meet Your Mailing System
Weighing Mode Opens the weighing mode selection menu (Standard
Weighing, Differential Weighing, Manual weight entry...)
KEYPAD
Alphanumeric
Keys
Clear / Reset
Rate
Sleep/Wake
Start Starts printing process.
Stop
Allows the entry of alpha or numeric values (accounts or
other set up information). Press a key several times to
display all possible characters.
Clears keypad entries and existing data in entry fields or,
from the home screen, resets rate to default.
START / STOP KEYS
Wakes the Mailing System up or turns it to 'Sleep' mode.
The light indicates the system state (green = awake,
amber = asleep).
Stops printing and all mechanical activity (motors) in the
Mailing System.
15
Page 19
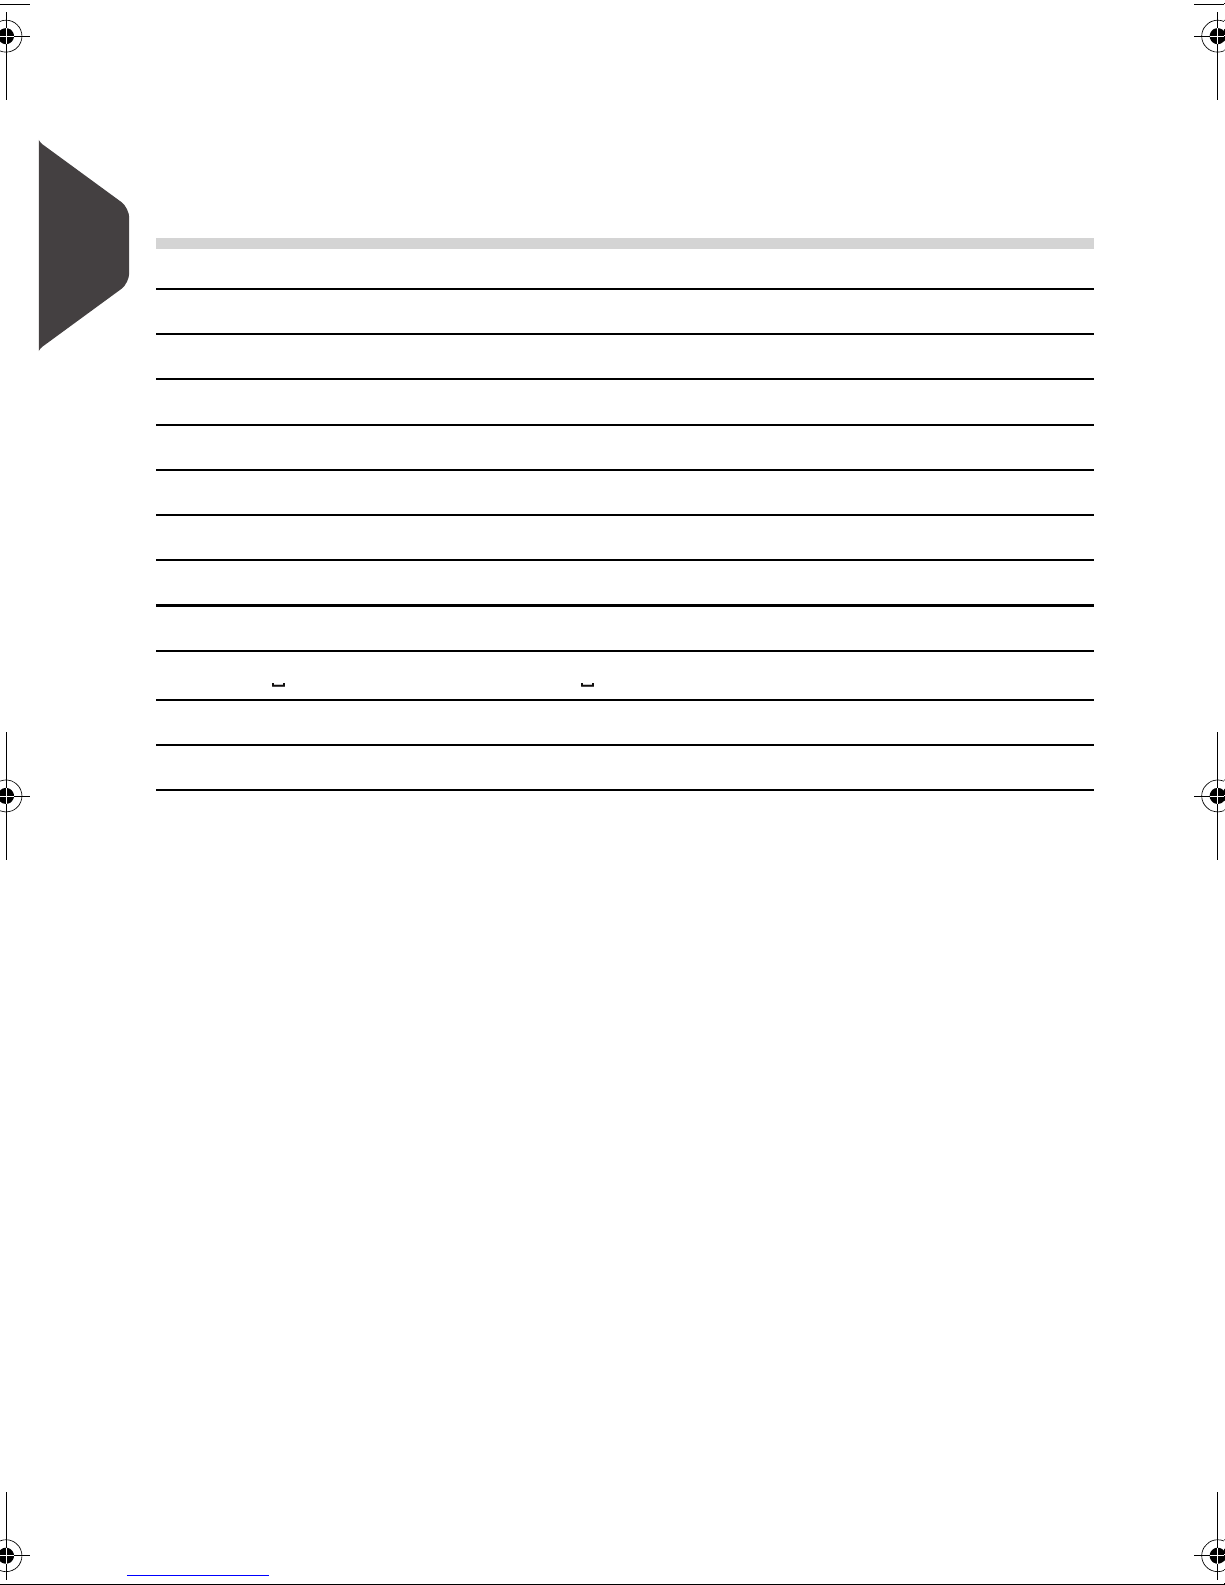
Keypad Use
For different contexts, the table below indicates the successive characters you may
obtain by pressing keys several times in a row.
Key Alpha-numeric Custom text Modem settings
2
Meet Your Mailing System
11 1 1
2 2ABCabc 2 2ABC
3 3DEFdef DEF3 3D
4 4GHIghi GHI4 4
5 5JKLjkl JKL5 5
6 6MNOmno MNO6 6
7 7PQRSpqrs PQRS7 7
8 8TUVtuv TUV8 8
9 9WXYZwxyz WXYZ9 9W
0
. , # / : @ * ? & ! - + \ . , # * +
C 'Clear' function 'Clear' function 'Clear' function
0 0
0
16
Page 20
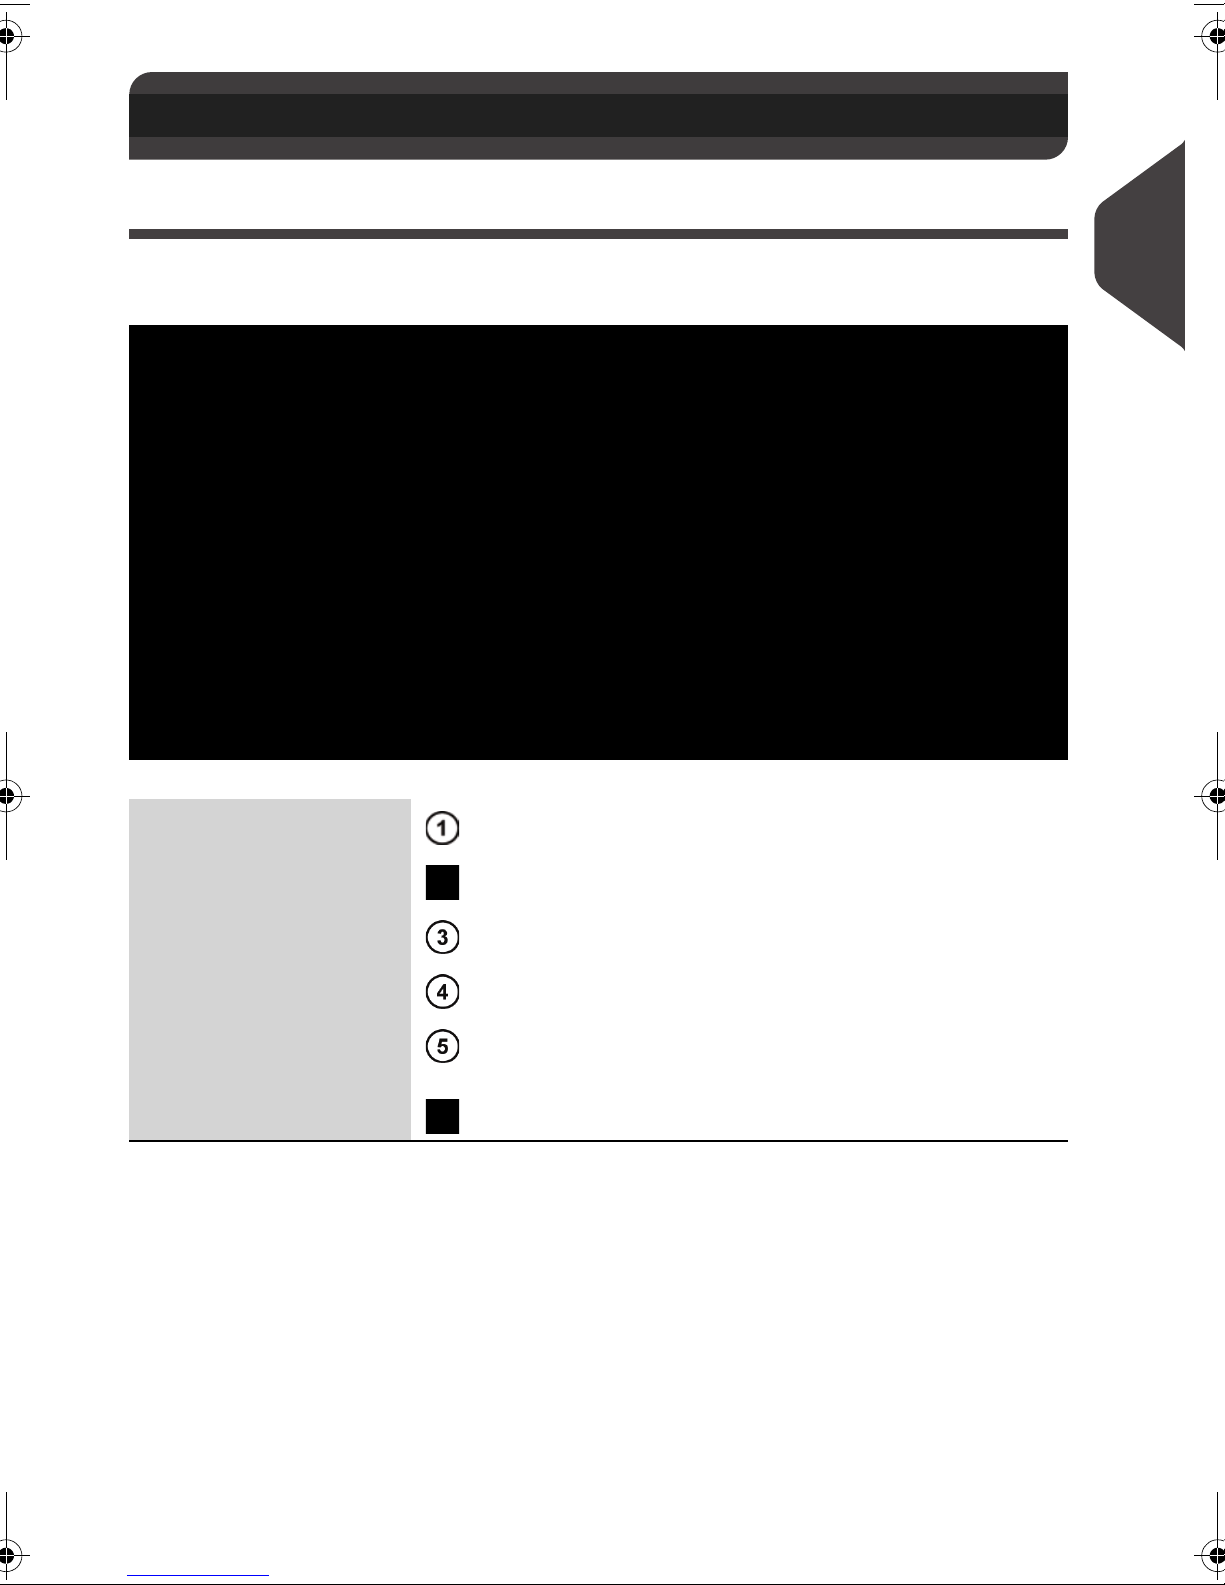
Connections
2.4 Connections
Connectors
Your Mailing System has an Universal Serial Bus (USB) port that allows you to
connect to a modem, printer or other USB memory key.
2
Meet Your Mailing System
Power Connector To wall socket
COM4 Future use
COM2/3 To Weighing Platform(s)
COM1 Not used
LAN Port To customer services and/or software applications on
a PC (option)
USB Ports To modem, memory device or printer
17
Page 21
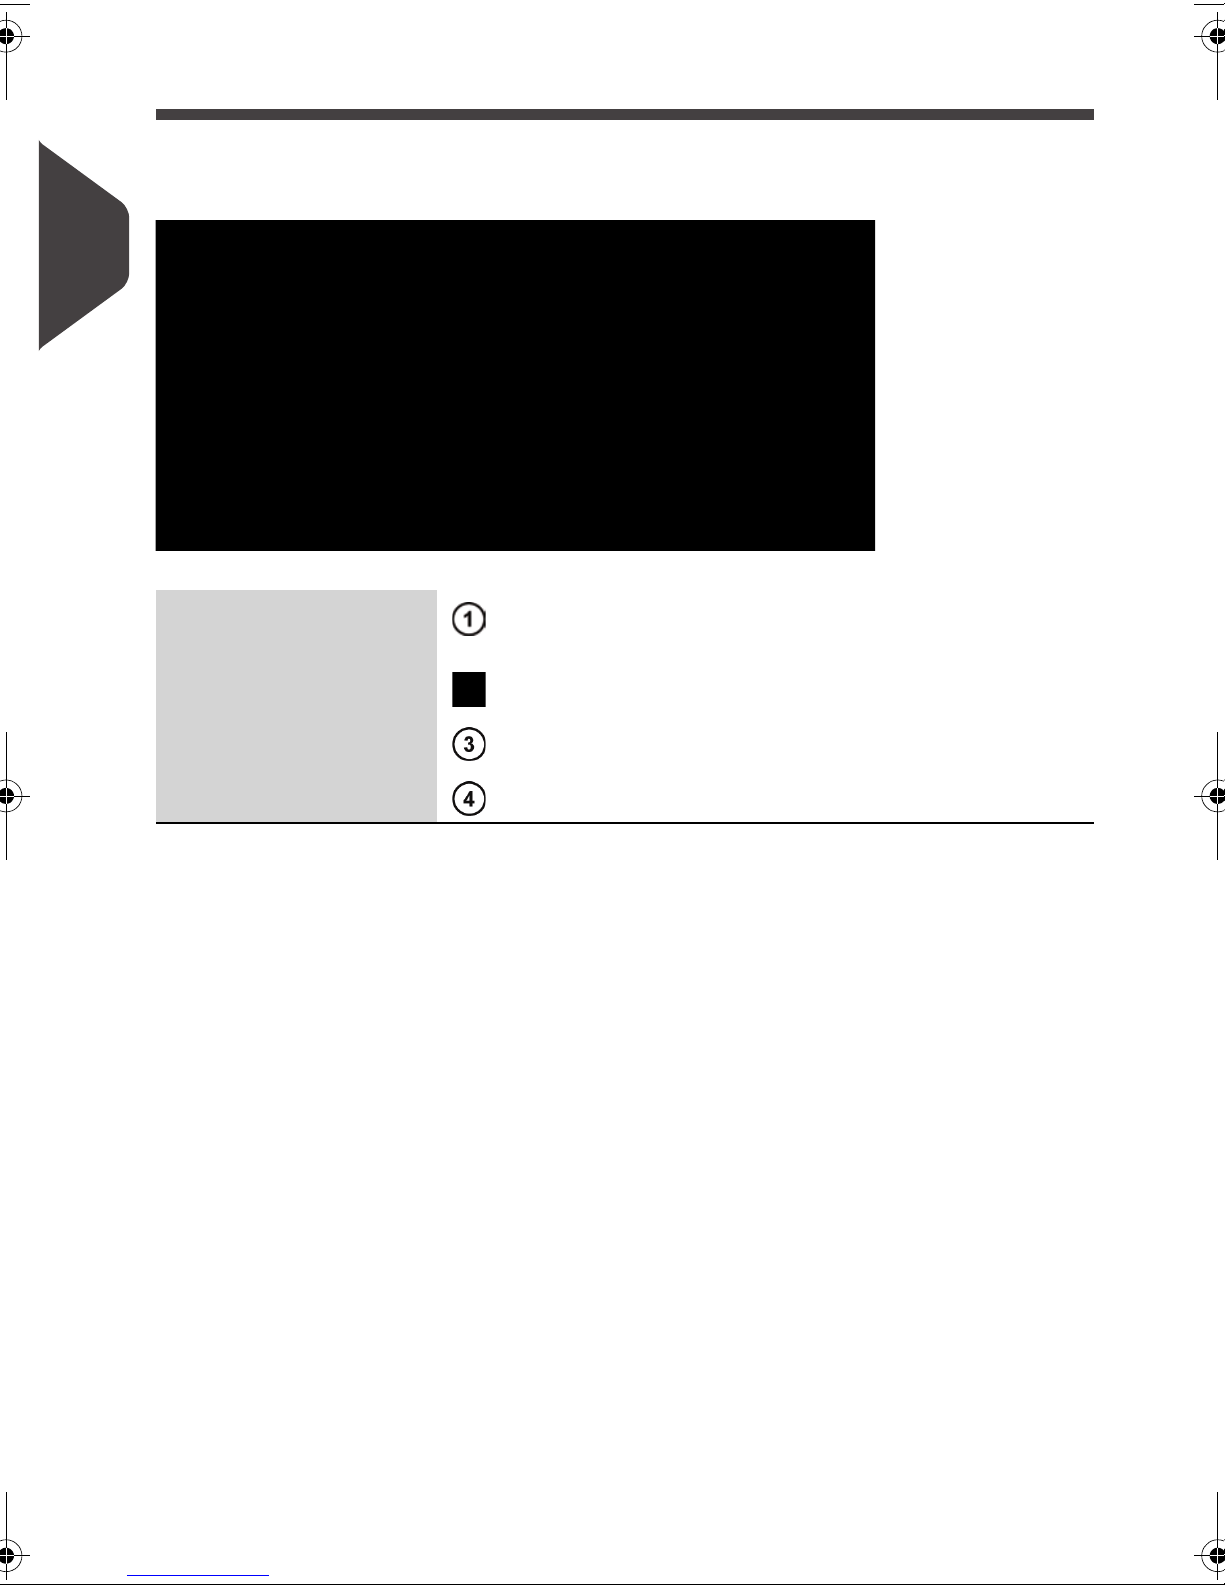
Connection Diagram
View
2
Meet Your Mailing System
LAN Port To customer services and/or software applications on
a PC (option)
USB Modem To telephone network
Telephone cable To wall socket (analog telephone line case)
Wall Socket Power Source
Power connectors
Nota: Power connectors are shown in section
Connectors
p.17.
18
Page 22
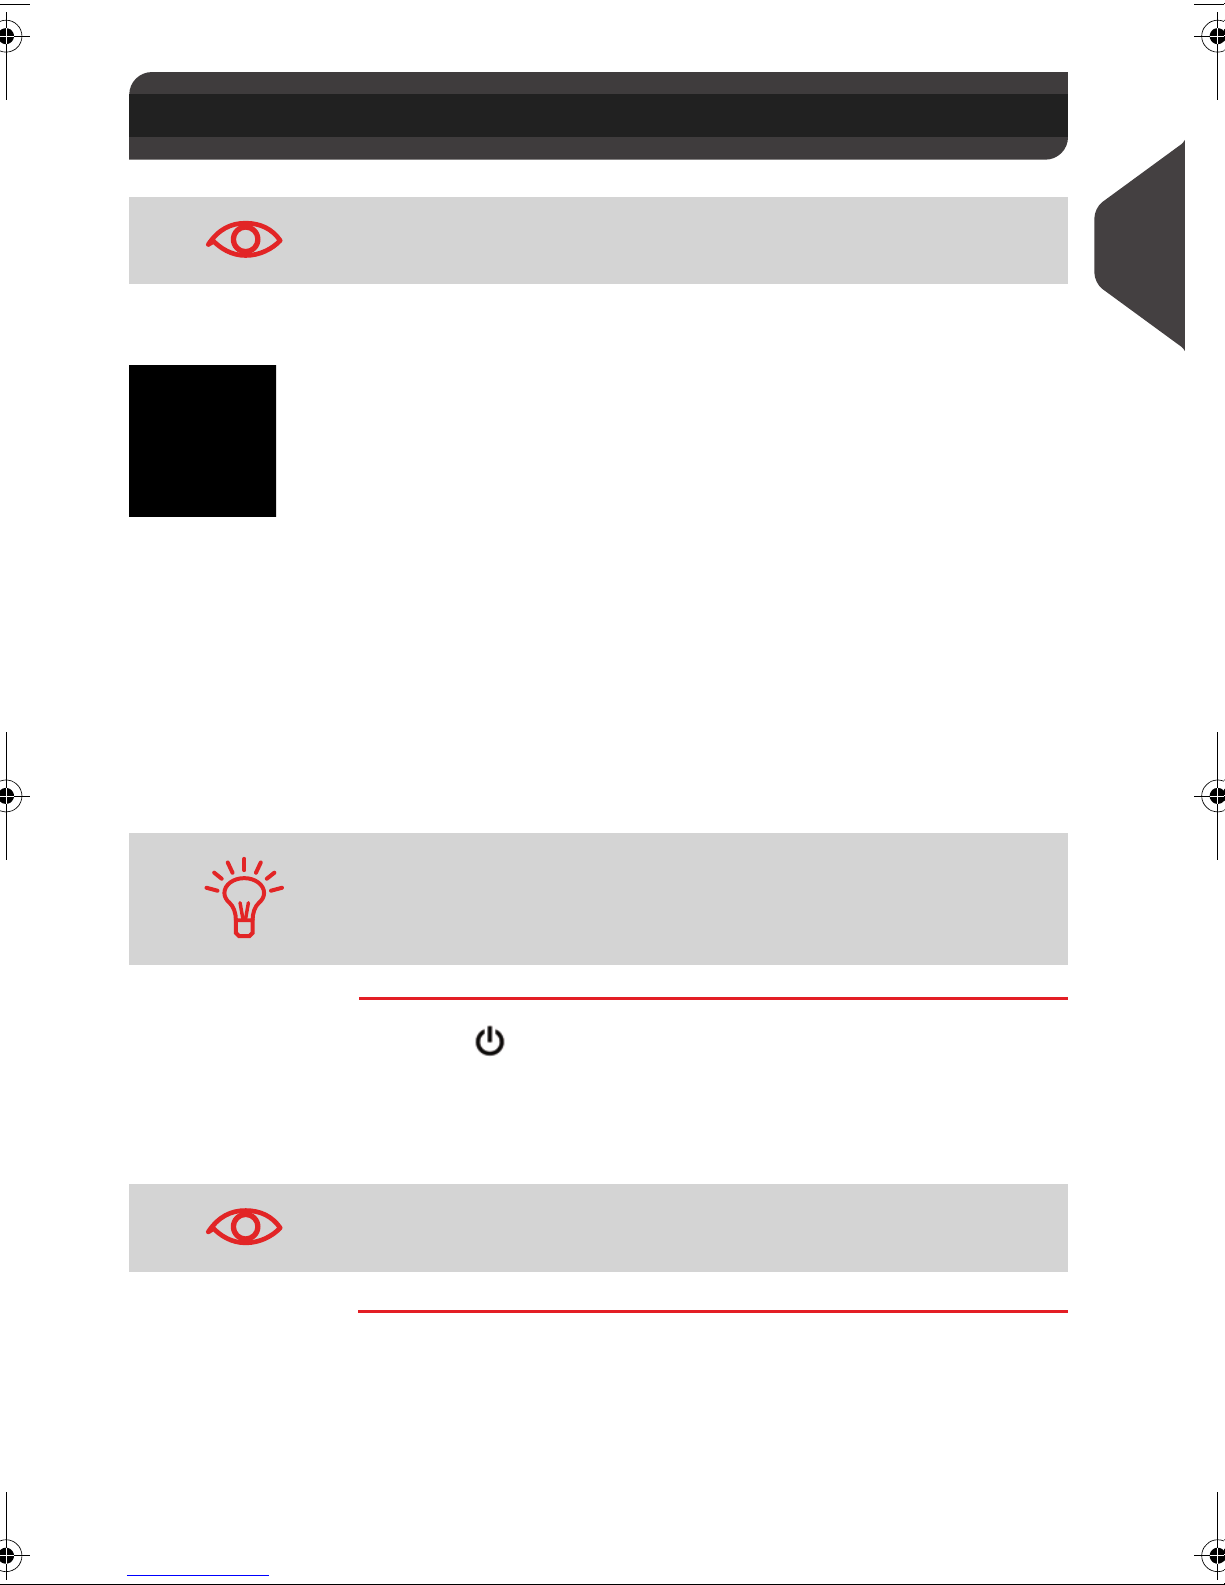
Power Managemen t
2.5 Power Management
The System can only use the LAN if the LAN cable is connected
BEFORE the power chord is plugged in.
Energy Star® Compliance
Office equipment is generally powered on 24 hours a day, so power management
features are important for saving energy and reducing air pollution.
Your Mailing System is an Energy Star
goes into a low-power 'Sleep' mode after a period of inactivity.
Spending a large portion of time in low-power mode not only saves energy but helps
your equipment run cooler and last longer.
®
qualified Mailing System that automatically
2
Meet Your Mailing System
Sleep Mode
You can also turn the Mailing System to Sleep mode manually.
To change the period of time after which the Mailing System
How to Turn the Mailing System to Sleep Mode
How to Turn the
Mailing System
to Sleep Mode
switches to 'Sleep' mode, see
p.135 .
1 Press (at the top right corner of the control panel).
The light located next to the key indicates:
Green : the Mailing System is awake and ready for use.
Amber : the Mailing System is in
To avoid weighing errors, make sure the weighing device platform
is clear when starting the machine.
How to Change System Time-Outs
Sleep
mode.
19
Page 23
OFF Mode
If you want to turn OFF your system you can use the ON/OFF button located on the
right side of the Base.
How to Turn the Mailing System to OFF Mode
How to Turn the
1 Turn your system to 'Sleep' Mode (see
2
Mailing System
to OFF Mode
Meet Your Mailing System
2 Be sure that the light located next to the key (at the top
3
How to Turn the
Mailing System to Sleep Mode
right corner of the control panel) is Amber meaning that the
Mailing System is in
Turn Off your Mailing
System. The circle (or O)
indicates the system is
OFF.
Sleep
p.19 )
mode
20
Page 24

Processing Mail
3 Processing Mail
This section describes how you can run mail: choose a type of stamp, select a rate
and weighing method, activate sealing and so on, depending on the type of process
you need to apply to your mail.
3.1 Choosing a Type of Stamp...................................................23
3.2 Preparing and Starting your Work Session..........................25
How to Sort Mail.............................................................................................................. 26
How to Log in and Start a Work Session ........................................................................ 27
How to Change the Current 'Type of Stamp' .................................................................. 29
3.3 Processing [Standard] Mail.................................................. 31
How to Apply Standard Postage (Settings)..................................................................... 32
How to Apply Standard Postage (Running Mail)............................................................. 35
How to Re-Date Mail (Settings)....................................................................................... 39
How to Re-Date Mail (Running Mail)............................................................................... 41
3.4 Printing [Received] for Incoming Mail ..................................42
How to Process Incoming Mail (Settings) ....................................................................... 42
How to Process Received Mail (Running Mail)............................................................... 44
3.5 Running [No Printing] Mail ...................................................45
How to Process Mail without Printing (Settings) ............................................................. 45
How to Process Mail without Printing (Running Mail) ..................................................... 46
3.6 Settings Details.....................................................................47
How to Change Accounts................................................................................................ 47
How to Select a Rate....................................................................................................... 48
How to Enter Postage Manually...................................................................................... 50
How to Change the Weighing Type ................................................................................ 53
How to Enter the Weight Manually.................................................................................. 54
How to Change the Date ................................................................................................ 56
How to Add (or Cancel) a Text on the Stamp ................................................................. 57
How to Add (or Cancel) an Ad Die on the Stamp ........................................................... 58
How to Move the Stamp (Print Offset) ............................................................................ 59
How to Use an Imprint Memory....................................................................................... 60
3.7 Advanced Operations .......................................................... 61
How to Enable an Emergency Stop ................................................................................ 61
How to Reset Batch Counters......................................................................................... 61
How to Count Mail pieces by Weighing .......................................................................... 62
How to Fill the Automatic Label Dispenser ..................................................................... 62
Page 25

3
Processing Mail
22
Page 26
Choosing a Type of Stamp
3.1 Choosing a Type of Stamp
Customizing Your Stamp
When processing mail you will be required to select the'Type of stamp ' you need. For
example, you can select “Standard” to print postage, or “Received” to print the date
on incoming mail, or “No printing” for seal only applications.
For each 'Type of stamp' you select, the Mailing System displays all the specifications
- and only those specifications - for the type of process you will use.
Home Screen and Configuration Menu
Each type of stamp is associated to:
• A specific Home Screen that displays current stamp configuration (weight,
postage...)
• A specific Imprint Configuration Menu that allows you to set stamp parameters.
3
Processing Mail
To directly gain access to the Configuration Menu of the Type of
stamp, press Shortcut Key on the Control Panel.
Your system has six Shortcut Keys for direct access to save time.
You can eliminate key strokes for rate selection, imprint memories, label printing, add or check funds, weighing mode selection
and to customize the stamp.
23
Page 27
Type of Process and Type of Stamp
The table below indicates the 'Type of stamp' to choose, depending on the type of
process you want to apply to each set of mail.
The column on the right indicates, for each Type of stamp, the options available for
each type of Stamp.
If you do not set any parameter, the Mailing System uses default values.
3
Type of process
Applying postage to outgoing mail
Processing Mail
Printing 'Received' or the
date on incoming mail:
Counting by feeding:
(using optional feeder)
Counting by weighing: n.a. Specific application (see p.62 ).
The system selects [Standard ] type of stamp at start up by
default.
'Type of stamp'
[Standard ]
(p.31 )
[Received ]
(p.42 )
[No printing ]
(p.45 )
Available Stamp options
• Rate
• Weight
• Date format
• Text (optional)
• Ad die (optional)
• Print offset (optional)
•
Print date and/or 'Received'
• Print offset (optional)
•
Counter reset
• Turn sealer off (if installed)
See also
• To set default values as supervisor: see
Configuring your Mailing System
p.125 .
24
Page 28

Preparing and Starting your Work Session
3.2 Preparing and Starting your Work
Session
Preparation steps
Performing these steps is recommended to help you to run your mail efficiently.
Mail preparation involves:
• Sorting mail by type and task , to make processing faster (p.26 )
• Logging into the system to start a work session (p.27 )
• Selecting the Type of stamp that corresponds to your mail (p.29 )
• Checking additional issues concerning your Mailing System: ink level, funds...
(p.30 ).
3
Processing Mail
25
Page 29

Sorting Mail by Type and Task
To save time, sort your mail in groups that have similar characteristics.
This will prevent you having to change the stamp parameters too often and allow you
to fully benefit from the automatic features of your Mailing System, particularly Differential Weighing that allows you to process mail much quicker.
Follow the steps below to sort your mail into different stacks.
3
How to Sort Mail
How to Sort Mail
Processing Mail
Put the mail in different stacks according to the characteristics
and in the order that follows:
1 Mail Type
See table p.24
Outgoing mail with different postage types
Standard postage
Date to correct
Amount to correct
Incoming mail
Mail to seal only .
2 Separate envelopes into two groups: those that require
sealing and those that do not.
3 Accounts to allocate costs to (only if you have to select an
account at log in, see
p.47 )
4 Rates to apply and services to add
5 Physical characteristics
Separate mail pieces that exceed the weight, size or
thickness allowed in the system mail path (see p.195 ).
6 Finally, sort each stack by item size .
26
Page 30
Turning On Your System and Starting a Work Session
Turning the system on automatically starts a work session on the Mailing System.
At start-up, depending on specific supervisor settings:
• The access to the system may be open
• You may have to enter a PIN code
• You may have to select an account.
Your work session ends when the system returns to a 'Sleep' mode.
How to Log in and Start a Work Ses sion
3
How to Log in
and Start a Work
Session
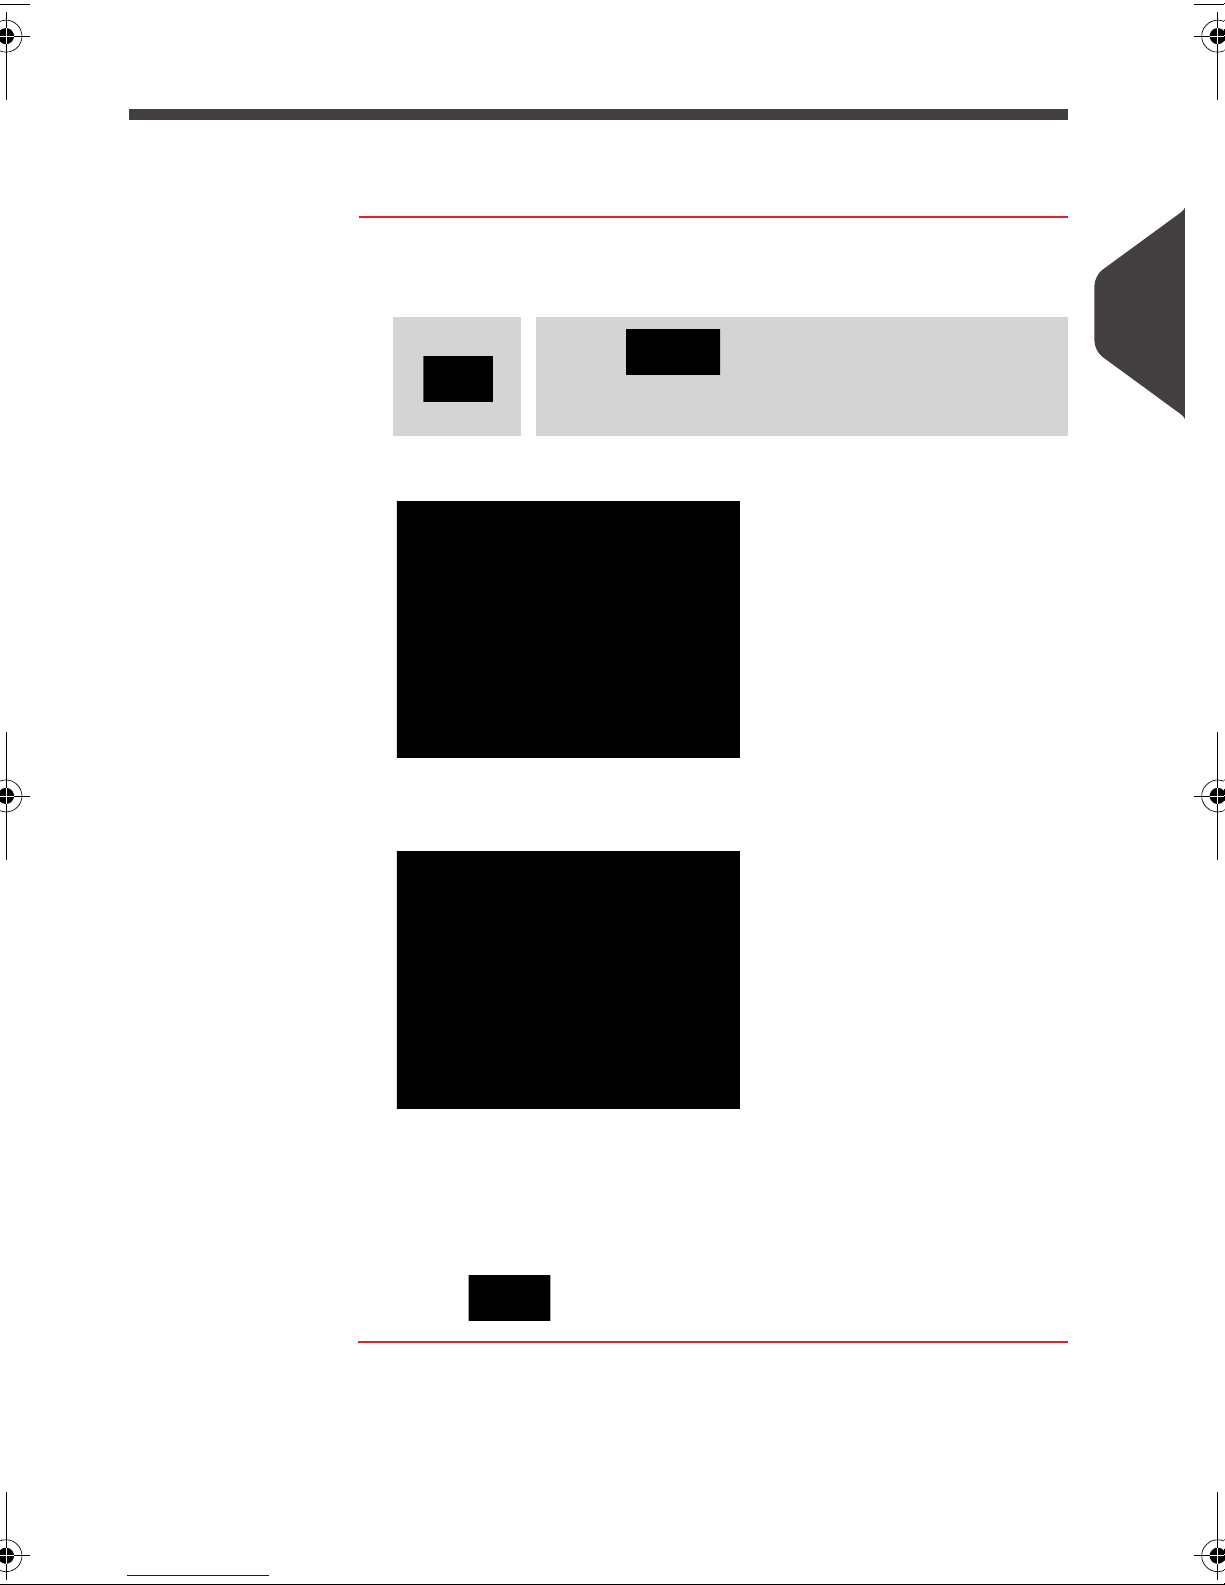
To log in as a user:
1 Press to wake-up the system.
The system may display one of the following screens:
Home Screen [Standard]
Login
Screen
.
Processing Mail
Account
Screen
27
Page 31
3
Processing Mail
Home Screen [Standard]
other step is required to navigate through the system.
Login
operator PIN code
Account
your account as follows.
Use up and down arrows and press [OK] to validate.
You can also use a barcode scanner to select your account.
Find your account quicker: instead of using up and down arrows,
type the account number or use a barcode scanner.
To type letters instead of figures using the keypad, press the corresponding key several times in a row like a cell phone.
(Example : To have “N” press twice the key “6").
Screen: If the Login Screen is displayed, enter your
Screen: If the Account Screen is displayed, select
: If this screen is displayed, no
Additional information
• To change allocating accounts when a session is already opened, see
the Current Account
• To choose security level for accounts and access control as the Supervisor, see
Managing Accounts and Assigning Rights
•
How to Turn the Mailing System to Sleep Mode
p.47 .
p.71 .
p.19 .
Changing
28
Page 32
Selecting the Type of Stamp
For each stack of mail you have sorted (see p.26 ), select the type of stamp you need
to process your mail as follows.
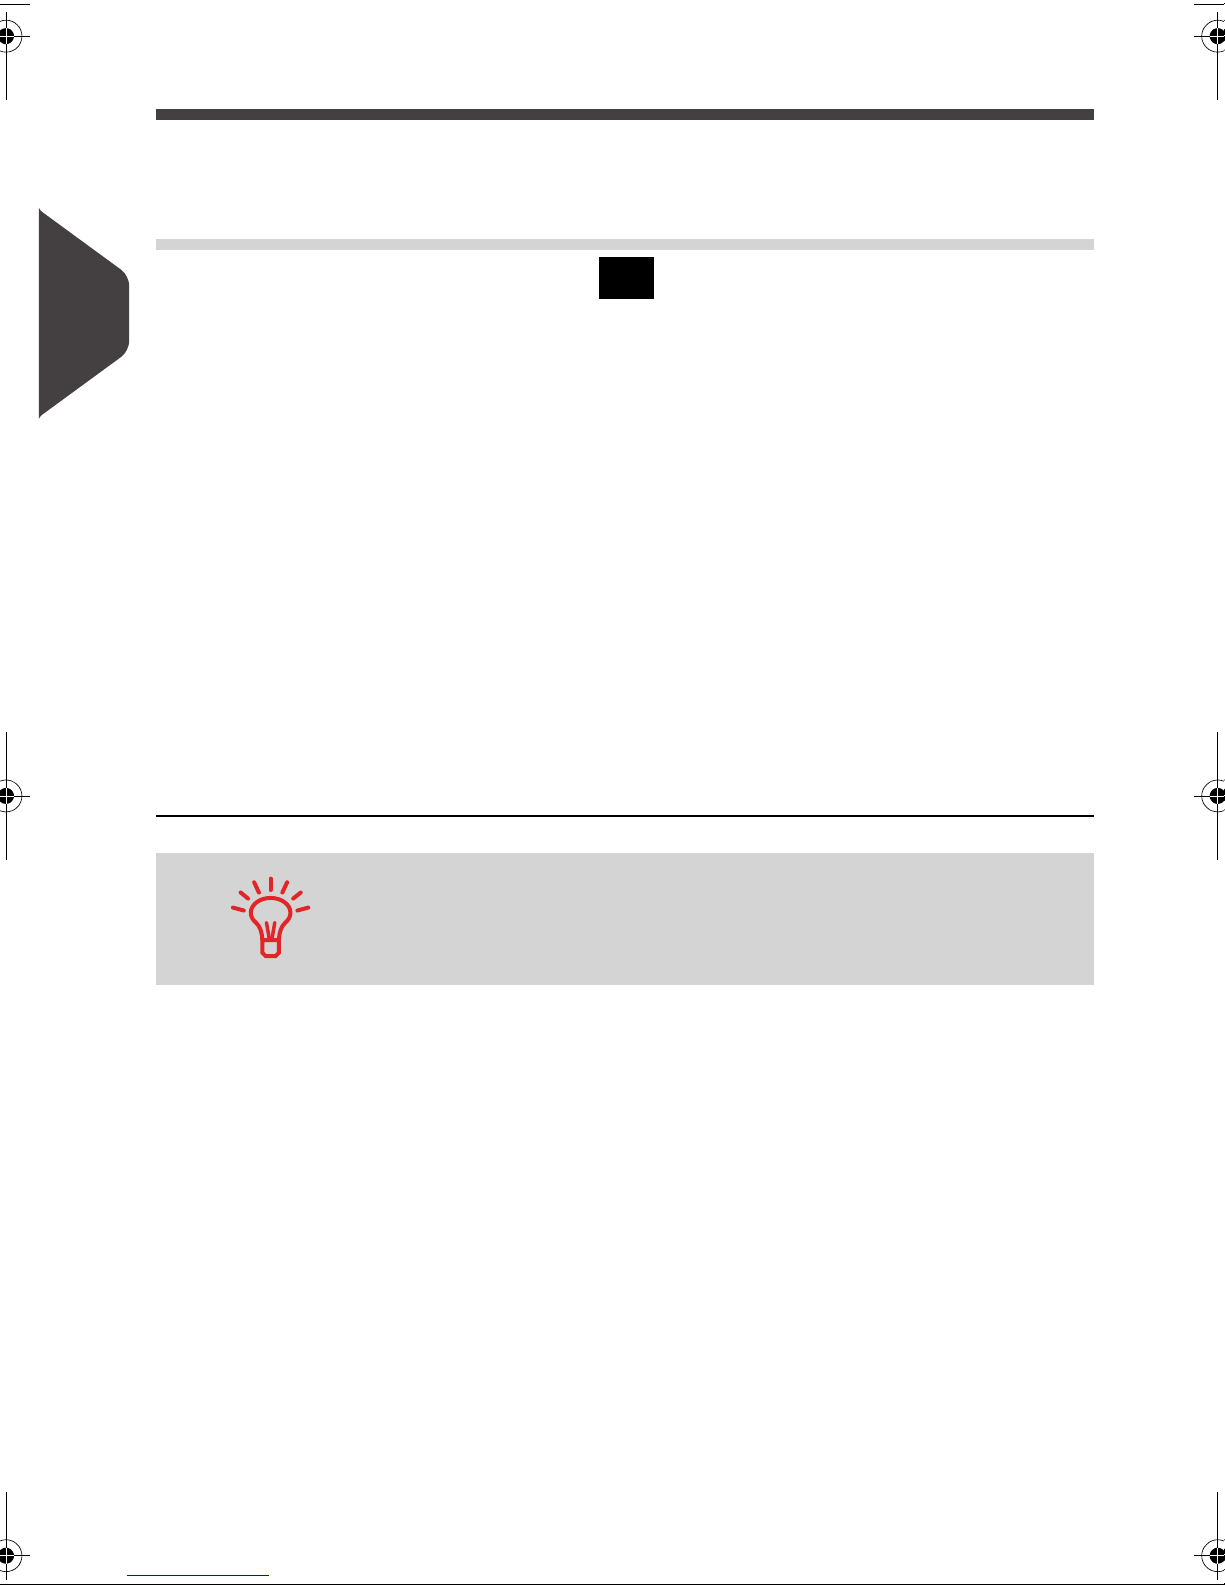
How to Change the Current 'Type o f Stamp'
How to Change
the Current 'Type
of Stamp'
Once you are logged in as user:
1 Either:
Press
or
The
Customize stamp
Press and type 1
> Customize stamp
screen is displayed.
2 Select > Stamp type .
The
Type of stamp
screen is displayed.
3
Processing Mail
3 Select the type of stamp in the list and press [OK] .
The
menu items that allow you to modify the stamp options.
4 Press to return to the home screen.
Customize stamp
screen is updated and displays the
29
Page 33
Frequently Asked Questions
System check list:
Question...
Do I have enough postage?
3
Do I need to clear the Batch
Processing Mail
Counter ?
Is the Weighing Platform
properly zeroed or tared?
Are labels in place in the ALD ?
(if you plan to print on tape)
Is there enough ink
in the cartridge ?
Answer
Press and enter
ance.
To add funds, see
(Meter)
Clear batch counters if you intend to issue a report
on the mail run you are about to start (see
Data Report
See
Before laying envelope(s) on the Weighing Platform, your Home Screen should display
0.0 oz
'rezero' of the WP.
See
See
p.62 .
To display the level of ink in the printing headset,
see
p.174 .
1 to check your funds bal-
How to Add Funds to the PSD
p.67 .
Batch
p.98 ).
How to Reset Batch Counters
. If
__lb _._oz
How to Rezero the Weighing Platform
How to Fill the Automatic Label Dispenser
How to Display Ink Level and Cartridge Data
is displayed, perform a
p.61 .
00 lb
p.141 .
You can be warned when the available funds gets below a preset
value (see
How to Set the Low-Funds Threshold
p.136 ).
30
Page 34

Processing [Standard] Mail
3.3 Processing [Standard] Mail
In this Section
This section describes how to process [Standard] Mail:
• Applying postage using different rates
• Re-dating mail
See also
• About the use of the Type of stamp, see
Choosing a Type of Stamp
3
p.23 .
Processing Mail
31
Page 35
Applying Standard Postage
Setting the Postage
The procedure below outlines steps in a recommended sequence to process your
mail.
• As mail requirements differ from day to day, some of the settings may not be nec-
3
essary, or their order may vary.
• You must begin with selecting the Type of stamp to gain access to the additional
options and be able to run your mail (standard is default).
Processing Mail
How to Apply Standard Postage (Set tings)
Make sure you have already completed the preparation steps
mentioned in
Preparing and Starting your Work Session
p.25 .
How to Apply
Standard
Postage
(Settings)
Required settings:
1 Make sure you are on the home screen of the [Standard]
type of stamp . The home screen indicates weight, postage
amount and the currently selected rate as illustrated below.
2 Check or change the type of stamp (if you are not in
[Standard] mode .
Press to access the
Customize stamp
screen:
32
To change the type of stamp , select
select [Standard] in the
details, see
.
How to Change the Current 'Type of Stamp'
Type of stamp
Stamp type
screen. For more
and then
p.29
Page 36
Additionally, you can configure stamp elements from the
Customize stamp
screen as follows:
3
Check or change the Ad die selection :
Select
die list
an Ad Die on the Stamp
Check or change the Text selection :
Select
screen. For more details, see
on the Stamp
Check or change the Date or Date Format :
Select
advance
date. For more details, see
Press to return to the home screen.
To select an option in the screen , use related keys located on
right hand side of display.
Ad die
screen. For more details, see
Text
Date
and then select an Ad die (or
p.58 .
and then select a text (or
How to Add (or Cancel) a Text
p.57 .
and then select a date option in the
screen. Select
Today's date
How to Change the Date
None
How to Add (or Cancel)
None
) in the
for printing today's
) in the
Text list
p.56 .
Processing Mail
Ad
Date
3 Select a rate and add services .
Press to open the
Type a rate number to select a rate or display new rate
options
Press 8 to select the
in lists (includes rates not shown on
Rate selection
Rate wizard
screen.
and choose rate options
rate selection
screen).
33
Page 37
For more details, see
You may also enter the postage amount manually : on the home
screen, type directly the amount using the keypad.
Selecting a Rate
p.48 .
3
Processing Mail
4 Select a weighing Mode (if you did not enter any amount)
Depending on the quantity and type of mail you have to
process, you can choose an efficient weighing method that
uses the weighing platform to save time: see
Weighing Type
To change the current weighing mode , press and
select a weighing mode in the
For more details, see
p.53 .
p.51 .
Weighing type
How to Change the Weighing Type
Choosing a
screen.
If the WP automatic selection is activated (see
Automatic Selection
screen, the weighing mode to Standard Weighing (WP) by putting
a mail piece on the Weighing Platform.
You can also apply the optional setting(s):
1 Move the stamp away from the envelope edge for thick en-
velopes: see
You are now ready to print.
Additional information
To set the stamp quickly, consider using imprint memories . The
memories store stamp characteristics together with rates and, if
activated, charged account. See
Weighing Platform
p.139 ), you can change, from the home
How to Move the Stamp (Print Offset) p.59 .
Using Imprint Memories
p.60 .
34
Page 38
Running Mail
The way you will handle mail mainly depends on the weighing method you have
chosen. The weighing method is indicated by the icon in the
the screen.
If you need to change the current account before applying postage (on account-enabled configurations), see
Accounts
How to Apply Standard Postage (Running Mail)
p.47 .
Weighing Type
How to Change
zone of
How to Apply
In mode
Standard Weighing
()
Standard
3
Processing Mail
Postage
(Running Mail)
From the [Standard] home screen, to print postage directly on
mail pieces:
1 Put the mail piece on the Weighing Platform.
The weight of the mail piece is displayed in the
of the screen and the postage amount is updated.
Weight
area
2 Press . The system motors start running.
If the Smart Start function is activated, the motors start automatically when you withdraw the mail piece from the weighing platform. To enable Smart Start, see
Smart Start
p.135 .
How to Activate / Deactivate
3 Withdraw the envelope from
the WP and insert it into the
mail path against the rearguide wall, with the side to
be printed facing upwards.
If a mail piece is bigger than mail path maximum thickness (see
Mail Specifications
label is printed.
4 The Mailing System prints postage and the mail piece (or
label) is sent to the catch tray.
p.195 ), press to print a label. The
35
Page 39
3
Processing Mail
If you want to print several identical labels :
1 Press and enter the number of labels.
Make sure the labels are available in the label dispenser (see
Filling the Label Dispenser
p.62 ).
2 Press to print the labels.
In optional mode
From the [Standard] home screen, to print postage on mail
pieces:
Differential Weighing
( )
1 Place the stack of mail you want to process on the Weighing
Platform, and then follow the instructions on the screen or the
steps below.
2 Withdraw the first mail piece from the top of the stack. The
Mailing System displays weight and postage on the home
screen and starts motors automatically.
3 To print the stamp, insert the
mail piece into the base
against the rear-guide wall,
with the side to be printed
facing upwards.
If a mail piece is bigger than mail path maximum thickness (see
Mail Specifications
label is printed.
p.195 ), press to print a label. The
4 The Mailing System applies postage and the mail piece (or
label) is sent to the catch tray.
5 Repeat the previous step for each piece of mail.
To quit the process at any time, press .
When you remove the last object from the Weighing Platform, the
Mailing System will ask if you want to print it. You can answer
or No .
36
Yes
Page 40
In optional mode
From the [Standard ] home screen:
Differential Weighing Automatic Label
( )
1 Place the stack of mail you want to process on the weighing
platform, and then follow the instructions on the screen or the
steps below.
2 Withdraw the first mail piece from the top of the stack. The
Mailing System displays weight and postage on the home
screen, starts motors and prints the label automatically.
If you inadvertently remove more than one item from the WP,
replace removed items on WP before weight stabilization to
avoid printing label (about 1.5 seconds).
3 Repeat the previous step for each piece of mail.
To quit the process at any time, press .
When you remove the last object from the Weighing Platform, the
Mailing System will ask if you want to print it. You can answer
or
No
.
Yes
3
Processing Mail
37
Page 41
3
Processing Mail
In other modes (Manual Weight Entry , no weight ...)
From the [Standard] home screen:
1 Press . System motors start running.
2 Insert the mail piece into the
mail path against the rearguide wall, side to be printed
facing upwards.
If a mail piece is bigger than mail path maximum thickness (see
Mail Specifications
label is printed at once.
p.195 ), press to print a label. The
3 The Mailing System applies postage and the mail piece (or
label) is sent to the catch tray.
When sealer is activated, collect the mail stack in the catch tray
and put stack aside to let envelopes dry.
To print several identical labels :
1 Press and enter the number of labels.
Make sure the labels are available in the label dispenser (see
Filling the Label Dispenser
p.62 ).
2 Press to print the labels.
38
Page 42
Re-dating Mail
Set-Up Requirements
The procedure below outlines steps required to re-date mail that has already been
processed.
The sequence is similar to sequence
the following settings:
• Postage must be set to zero and have the date of mailing correct
• You do not have to weigh the mail piece.
• Print the new date on the back of the envelope.
You must begin by selecting the Type of stamp to gain access to the corresponding
parameters and be able to run mail.
Make sure you have already completed the preparation steps
mentioned in
How to Re-Date Mail (Settings)
How to Re-Date
Mail (Settings)
Required settings:
1 Make sure you are on the home screen of the [Standard ]
type of stamp . The type of stamp is indicated at the top of the
home screen as illustrated below.
Applying Standard Postage
Preparing and Starting your Work Session
(p.32 ), except for
p.25 .
3
Processing Mail
2 Check or change the type of stamp .
Press to access the
Customize stamp
screen:
39
Page 43
To change the type of stamp , select
select [Standard] in the
details, see
p.29.
How to Change the Current 'Type of Stamp'
Type of stamp
Stamp type
screen. For more
and then
3
Processing Mail
To change the date or date format from the
stamp
Select
Advance
today's date. For more details, see
p.56 .
Press to return to the home screen.
screen as follows:
Date
and then select a date option in the
Screen. Select
No Date Advance
How to Change the Date
Customize
Date
for printing
3 Set postage to 0 manually , to be sure that it will remain on
zero.
Type
screen and then just press [OK].
To select an option in the screen , use related keys located on
right hand side of display.
You can also apply the optional setting:
0 on the home screen to open the
Manual amount
1 Move the stamp away from the envelope edge for thick en-
velopes: see
You are now ready to print.
How to Move the Stamp (Print Offset) p.59 .
40
Page 44
Running Mail
How to Re-Date Mail (Running Mail)
How to
Re-Date Mail
(Running Mail)
The postage amount 0 is displayed on the home screen. To
print postage directly on to mail pieces:
1 Press . System motors start running.
Insert the mail piece into
2
the mail path against the
rear-guide wall, with the
side to be printed facing
upwards.
The Mailing System
applies postage and the
mail piece (or label) is
sent to the catch tray.
The side that you want to print on should be facing upwards.
If a mail piece is bigger than mail path maximum thickness (see
3
Processing Mail
Mail Specifications
print a label. The label is printed.
Otherwise, if you want to print several identical labels :
p.195 ), press before you press to
1 Press and enter the number of labels.
Make sure the labels are available in the Label Dispenser
(see
Filling the Label Dispenser
p.62 ).
2 Press to print labels.
41
Page 45
3
Printing [Received] for Incoming Mail
3.4 Printing [Received] for Incoming
Mail
In this Section
This section describes how to use the [Received] type of stamp, to:
• Print the date on incoming mail, and/or
• Print 'Received' on incoming mail.
Processing Mail
See also
• About the use of the Type of stamp, see
Set-Up Requirements
The procedure below outlines steps required to stamp incoming mail.
You must begin with selecting the Type of stamp to gain access to the corresponding
parameters and be able to run mail.
How to Process Incoming Mail (Settings)
How to Process
Incoming Mail
(Settings)
Choosing a Type of Stamp
Make sure you have completed the preparation steps mentioned
in
Preparing and Starting your Work Session
Required settings:
p.25 .
p.23 ).
1 Make sure you are on the home screen of the [Received ]
type of stamp .
The type of stamp is indicated at the top of the home screen
as illustrated.
42
Page 46
2 Check or change the type of stamp .
Press to access the
To select an option on the screen , use related keys located on
the right hand side of the display.
To change the type of stamp , select
select [Received] in the
details, see
.
How to Change the Current 'Type of Stamp'
Build stamp
Stamp type
Type of stamp
screen:
and then
screen. For more
p.29
3
Processing Mail
Additionally, you can:
Activate or deactivate printing the date
Activate or deactivate printing 'Received '.
Select the option to change. The buttons indicate the
The screen indicates the current status of the options.
Press to return to the home screen.
You can also apply this optional setting:
1 Move the stamp away from the envelope edge for thick en-
velopes: see
You are now ready to print.
current status of the options.
How to Move the Stamp (Print Offset) p.59 .
43
Page 47
Running Mail
To run mail, follow the procedure below after you have completed the steps in
to Process Incoming Mail (Settings)
How to Process Received Mail (Running Mail)
How to Process
Received Mail
3
(Running Mail)
Processing Mail
How
p.42 .
On the [Received] home screen:
1 Press . System motors start running.
2 Insert the mail piece into the
mail path against the rearguide wall, side to be printed
facing upwards.
The Mailing System applies
the imprint and the mail
piece is sent to the catch
tray.
44
Page 48
Running [No Printing] Mail
3.5 Running [No Printing] Mail
In This Section
This section describes how to use the [No printing] type of stamp, for:
• Sealing envelopes using the auto-feeder sealer (if installed).
• Only conveying mail, for counting or testing purposes.
See also
• About the use of the Type of stamp, see
Set-Up Requirements
The procedure below outlines steps required to process mail.
You must begin with selecting the Type of stamp to gain access to the corresponding
parameters and be able to run mail.
Make sure you have completed the preparation steps mentioned
in
Preparing and Starting your Work Session
Choosing a Type of Stamp
p.25 .
p.23.
3
Processing Mail
How to Process Mail without Printing (Settings)
How to Process
Mail without
Printing
(Settings)
Main setting:
1 Make sure you are on the home screen of the [No printing]
type of stamp .
The type of stamp is indicated at the top of the home screen
as illustrated.
45
Page 49
2 Check or change the type of stamp :
3
Processing Mail
Press to access the
To change the type of stamp , select
select [No printing] in the
details, see
p.29.
Press to return to the home screen.
To select an option in the screen, use related keys located on the
right hand side of the display.
How to Change the Current 'Type of Stamp'
imprint
Type of stamp
screen:
Stamp type
and then
screen. For more
You are now ready to process mail.
Running Mail
How to Process Mail without Printing (Running Mail)
How to Process
Mail without
Printing
(Running Mail)
1 Press . System motors
start running.
2 Insert the mail piece into the
mail path against the rearguide wall, side to be printed
facing upwards.
46
Page 50
Settings Details
3.6 Settings Details
Changing the Current Account
To process a batch of mail pieces using another account (on account-enabled configurations), change the account as follows.
How to Change Accounts
3
How to Change
Accounts
To change accounts:
1 As a user:
Press and type 5 or select the path:
> Account
The list of accounts that are available is displayed.
2 Select the account you want to use and press [OK] .
3 Press to return to the home screen. The current
account number is displayed.
Additional information
The accounts are listed on the screen in the order they were set
up (see
Managing Accounts
Processing Mail
p.81).
A barcode scanner can be used for “One Click” entry of accounts
into your Mailing System.
47
Page 51
3
Selecting a Rate
Selecting a rate allows the Mailing System to calculate the postage amount when the
mail piece weight is available, either from a weighing device or, for big parcels,
entered manually (see
The system provides you several ways to select a rate:
• Using a shortcut list in the rate selection screen
• Using the rate wizard that asks you to choose all the rate parameters (class, des-
tination, format, services...) in complete lists of options.
How to Enter the Weight Manually
p.54 ).
Processing Mail
How to Sele ct a Rate
How to Select
a Rate
On the home screen, press to select the default rate and
refresh weight.
To select a rate:
1 Either:
Press
or
The
Rate Selection
Press and type 4 or select the
path:
> Rate selection
screen is displayed.
2 On that screen, you can:
3 Follow the instructions on screen and, once you have chosen
Postage displayed on the screen is zero as long as the weight is
not known (= zero).
48
Type a rate number 1 to 7 to select a rate or display rate
options
Press 8 to select the
the rate and services, press [OK] to validate your selection.
Rate wizard
.
Page 52
Using the Rate Wizard
The Rate Wizard is an alternative method of selecting rates that will guide you
through the rate selection process of all types of mail.
To select an option on the screen:
• Highlight options using the arrow keys and .
• Use the arrow keys to scroll from screen to screen
• Then press to validate your selection.
Rate Wizard screens
• Selecting a Mail Class
All Rate Mail Classes loaded in the system are displayed in the list
• Selecting a Destination
For Domestic Mail Classes, you may be prompted to enter the destination
postal or zone code . Use the [C] key to delete the existing postal or zone code
(if any) and enter the new destination postal or zone code.
For International Mail Classes, use the arrow keys to highlight Code or Country.
You can select from the alphabetically sorted Country list by entering the
country letters or you can use the Code List to enter the numeric code for the
country if you know it.
• Selecting a Format
Formats describe the mail piece types for the selected mail class.
• Selecting a Service
All the services available, depending on your previous choices, are displayed
in a list (including 'No services').
After you select a service, any additional available service is displayed.
3
Processing Mail
• Wizard Summary Screen
The
If you place an item on the weighing platform, the corresponding postage is dis-
Press [OK] to return to the home screen.
Summary
played.
Screen displays all the selections you have made.
Otherwise, you can press the back key to modify any of the
settings made previously and obtain a new summary.
49
Page 53
Entering Postage Manually
To enter the postage amount manually, follow the procedure below.
How to Enter Postage Manually
How to Enter
Postage
3
Manually
Processing Mail
On the home screen:
1 Type directly the first figure of the amount using the keypad.
The
Manual amount entry
screen appears.
2 Complete the amount.
3 Press [OK] .
The amount is displayed in the
screen.
Postage
area of the home
Additional information
To set the fractional postage for presort mail, see
/ Deactivate Fractional Postage Values
How to Activate
p.148 .
50
Page 54
Choosing a Weighing Type
Depending on the accessories and features on your Mailing System, several
weighing methods are available.
You can also enter the weight manually if you know it: see
Manually
p.54 .
How to Enter the Weight
Weighing modes
Depending on the type of mail you want to process, choose a weighing method according to the recommendations in the table below.
Standard weighing (if available) is activated by default on mailing system start.
For weighing...
Items one by one
Items stacked on the Weighing Platform
Items exceeding WP capacity (see
fications
The
thus the source that provides the weight of the mail piece to the system.
p.193 )
Weighing type
Speci-
The recommendations in the table only apply to items processed
with the same rate.
icon on the screen indicates the weighing method selected and
Select the method...
•
Standard Weighing
•
Differential Weighing
•
Manual Weight Entry
3
Processing Mail
51
Page 55
3
Details on the Weighing Modes
All weighing options listed below may not be available in your
Mailing System. Check with customer service to see how you can
easily add weighing features to your Mailing System via online
services.
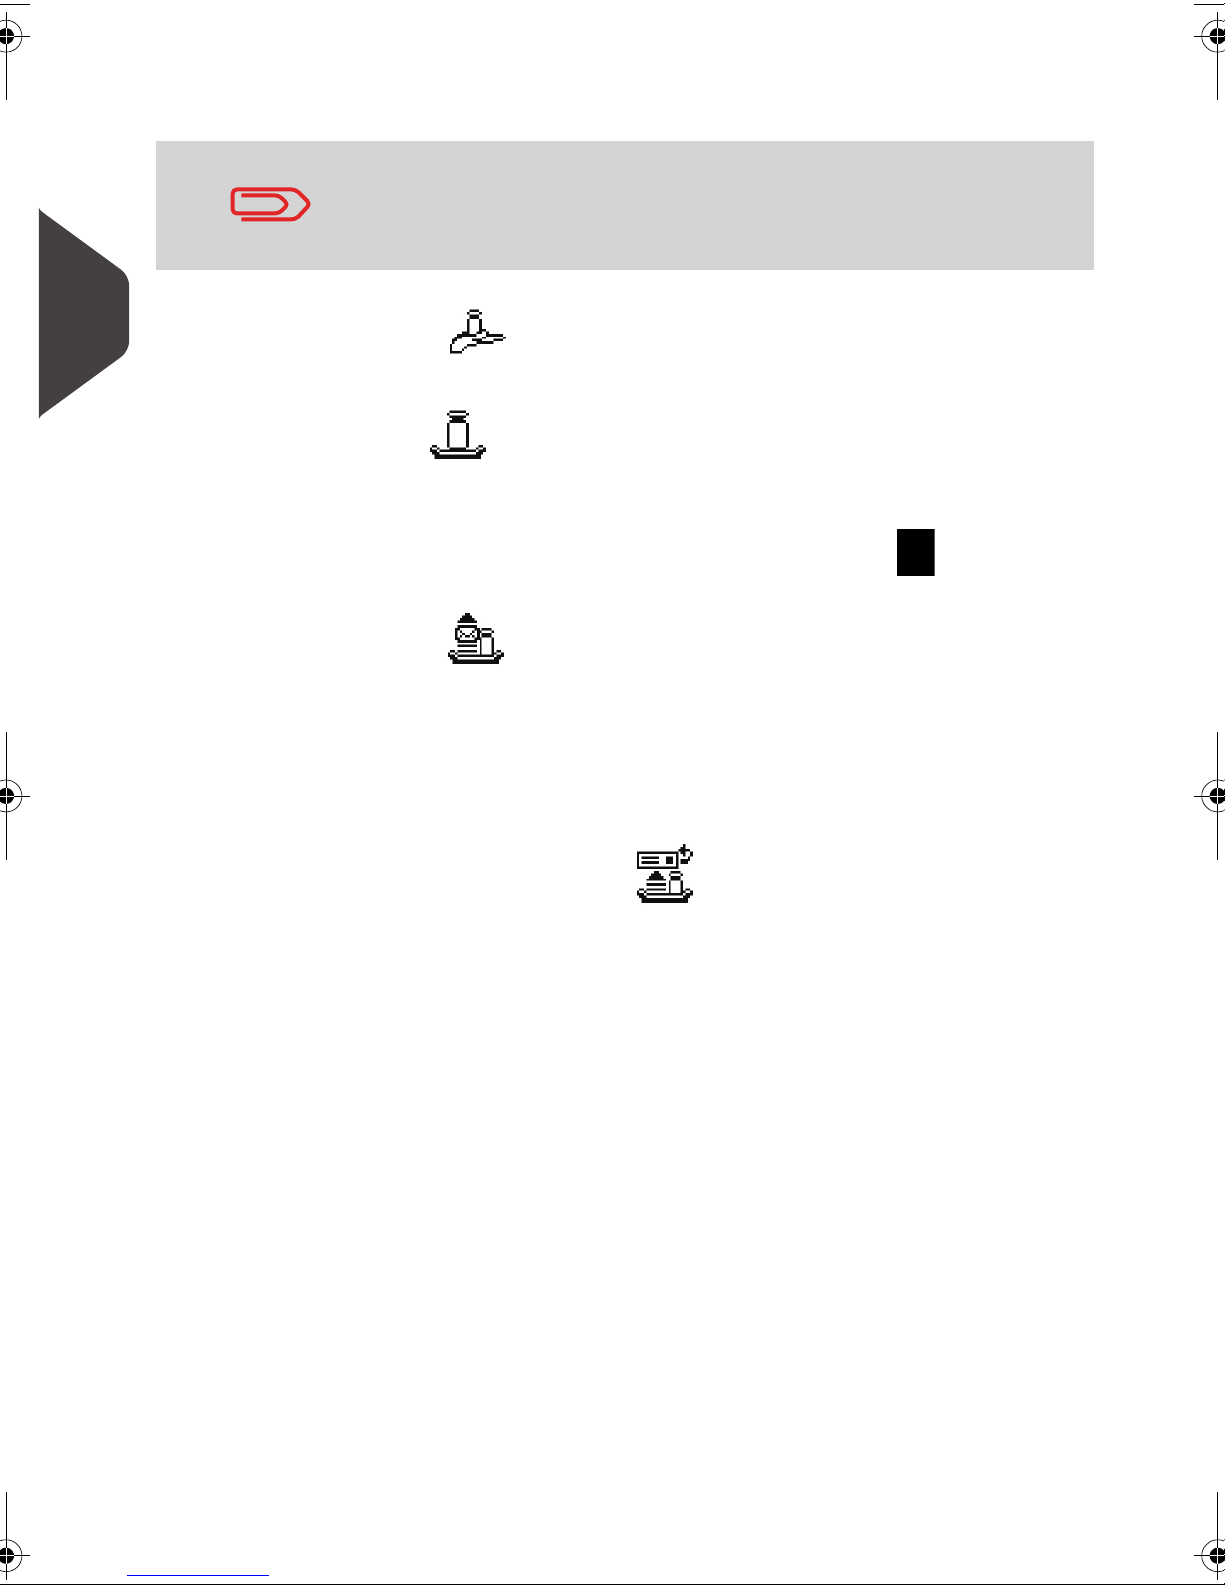
• Manual Weight Entry ( )
In this mode, you enter the weight manually (see p.54 ).
Processing Mail
• Standard Weighing ()
In this mode, each mail piece is manually placed on the Weighing Platform, and
then put into the mail path (or print a label).
If the Smart Start option is activated, you do not have to press at each piece
How to Activate / Deactivate Smart Start
(see
• Differential Weighing ( ) (optional)
This mode speeds up the weighing process and increases your efficiency: all the
mail pieces are stacked together on the Weighing Platform. Remove the pieces
one by one and put them into the mail path. The Mailing System calculates the
postage and prints the mail piece automatically.
You can leave all the mail pieces in a tray on the Weighing Platform: the Mailing
System will ask you to confirm printing for the last item removed (from the tray).
• Differential Weighing Automatic Label ( ) (optional)
This mode is identical to
ically prints the postage on labels.
Differential Weighing
p.135 ).
except that the system automat-
52
Page 56
Changing the Weighing Type
At start-up, the default weighing type is active.
See also
• To change the default weighing mode as supervisor, see
Default Weighing Type
• To change the weighing type according to the type of process you want to run (see
Choosing a Weighing Type
How to Change the Weighing Type
p.138 .
p.51 ), follow the steps outlined below.
How to Change the
3
How to Change
the Weighing
Type
To change the weighing type from the home screen:
1 Either:
Press
or
The
Weighing mode
Press and type 2.2 or select the
path:
> Job settings > Weighing type
screen is displayed.
Processing Mail
The options actually displayed in the screen depend on the
weighing devices that are connected to your Mailing System and
on features that are activated.
2 Select the weighing type.
If you select the option
make sure the Auto-Label Dispenser is properly filled with labels.
See
How to Fill the Automatic Label Dispenser
Differential Weighing Automatic tape
p.62 .
,
53
Page 57
Entering Weight Manually
You can enter the weight manually if a mail piece exceeds the weighing capacity of
all your weighing platform.
If this situation occurs, you will need to print the postage amount on a label to stick
onto the mail piece.
How to Enter the Weight Manually
3
How to Enter the
Weight Manually
Processing Mail
To enter the weight manually from the home screen, you must
first select the postal class:
1 Either:
Press
or
The
Weighing mode
Press and type 2.2 or select the
path:
> Job settings > Weighing type
screen is displayed.
2 Select Manual weight entry.
The
Manual weight entry
screen is displayed.
3 Enter the weight (first lb then oz ) and press [OK] to validate.
4 Press to return to the home screen.
54
The home screen displays the
( ) and the weight entered.
Manual Weight Entry
icon
Page 58
Configuring the Stamp
Depending on the current Type of stamp, you can modify the elements printed on mail
pieces as follows:
• Change printed date
• Add a pre-loaded Ad die to the left of the stamp
• Adding a custom text to the left of the stamp (you must first create it in supervisor
mode)
• Moving the stamp away from the right edge of the envelope.
See also
•
How to Change the Current 'Type of Stamp'
•
Type of Process and Type of Stamp
p.24 .
Navigating in the Stamp Settings
When you have selected the Type of stamp:
• To access the configuration menu of the Type of stamp, press .
p.29
3
Processing Mail
• To return to the Type of stamp home screen, press .
55
Page 59
3
Advancing or Omitting the Date
The Date Advance function allows you to change the date printed on mail pieces.
You can set the date advance feature (from supervisor mode) to
change at a fixed time. This is useful if you process mail after the
last mail pickup for the day. This ensures that the proper date of
How to Change the Date
mailing is printed for the next days mail pickup. See
the Automatic Date Advance Time
p.147 .
How to Set
How to Change
Processing Mail
the Date
To change the date that will be printed:
1 Either:
Press
or
The
Customize stamp
Press and type 1 or select the
path:
> Customize stamp
screen is displayed.
2 Select > Date .
The
Date Advance
3 On the
date as follows:
To cancel the date, select > No date .
To cancel the day in the date, select > No day .
To choose another day, select the corresponding item in the
list.
The icon indicates the current selection.
Date Advance
screen is displayed.
screen, you can configure the printed
The date can be advanced up to 30 days from today's date.
4 Press [OK] to apply changes and return to the configuration
56
menu.
Page 60
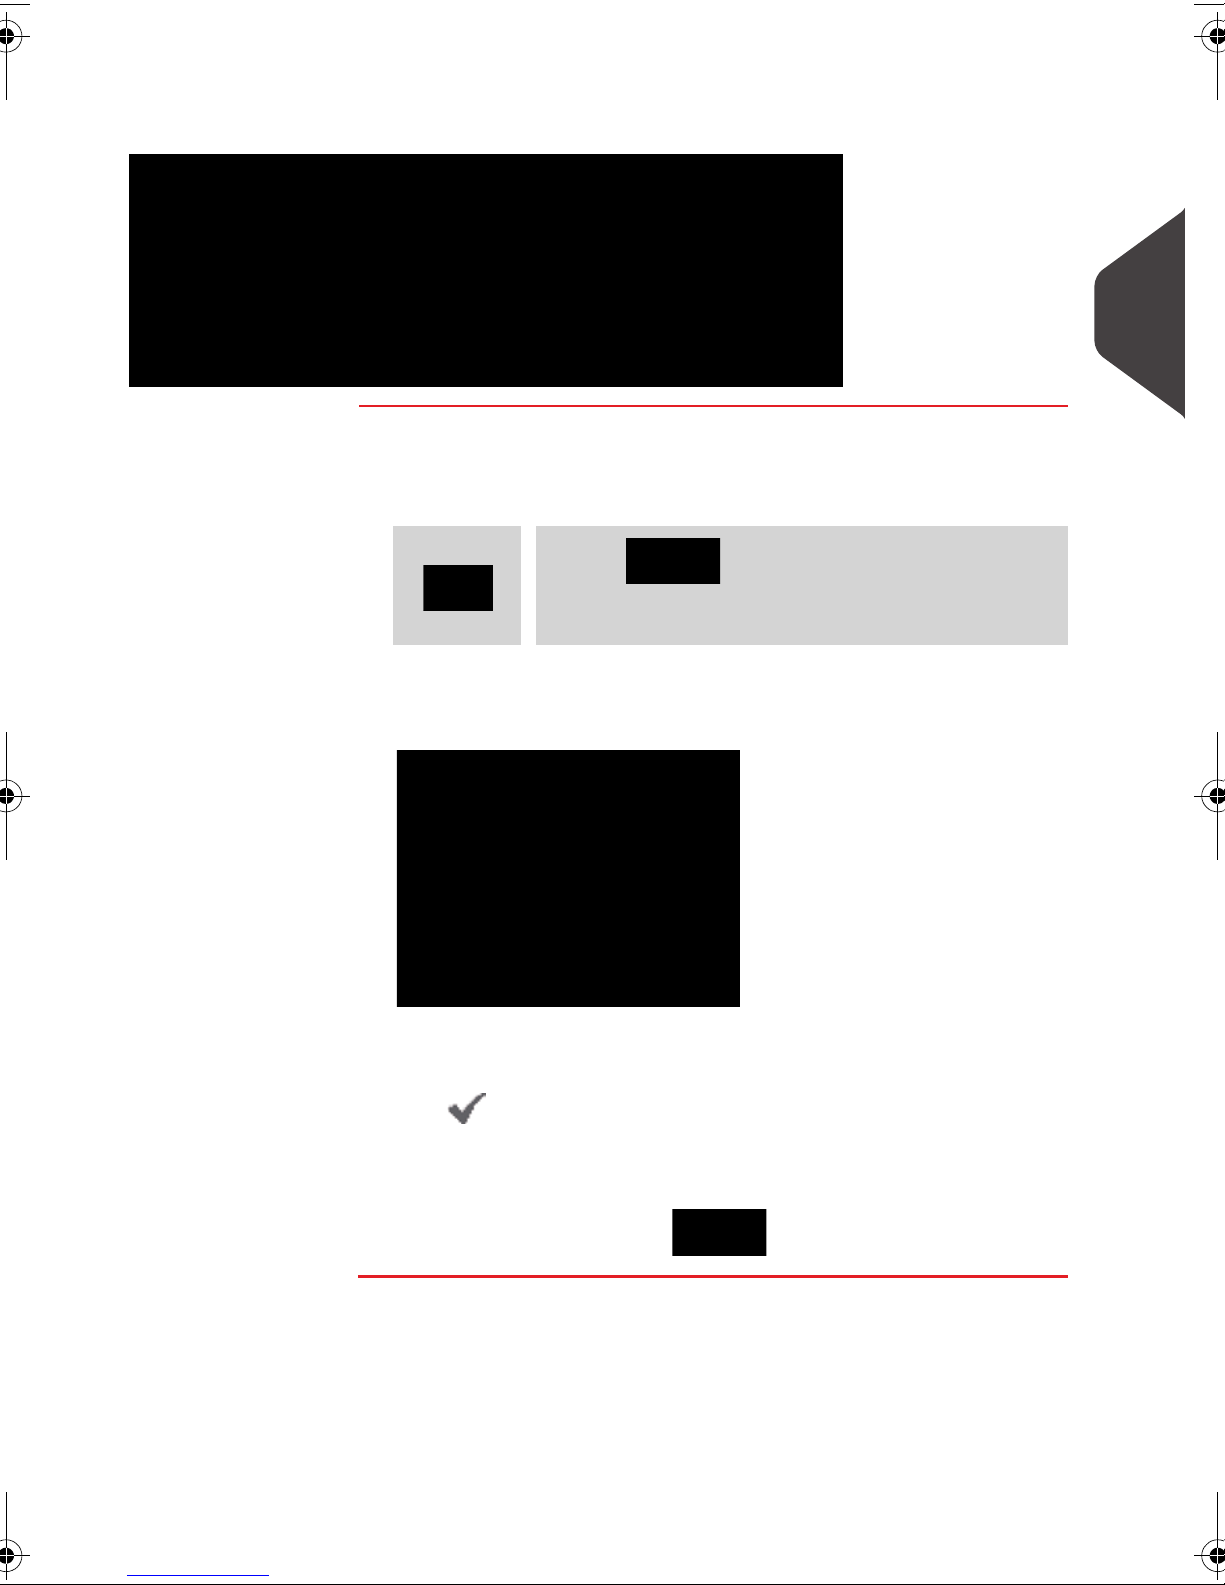
Adding Text and/or Ad Die to the Stamp
You can add a text and/or an ad die to the stamp, as illustrated below.
How to Add (or Cancel) a Text o n the Stamp
How to Add (or
To add a text to the stamp, or to cancel the text:
3
Processing Mail
Cancel) a Text on
1 Either:
the Stamp
2 Select > Text .
3 Select the desired text in the list or select
Press
or
The
Select text
no text.
Press and type 1 or select the
path:
> Customize stamp
screen is displayed.
None
for printing
The icon indicates the current selection.
4 Press [OK] to validate your selection.
The
rameters (home screen: ).
See also
•
Managing Custom Text Messages
•
Managing Ad Die
p.164 .
Customize stamp
p.162
screen is displayed with updated pa-
57
Page 61
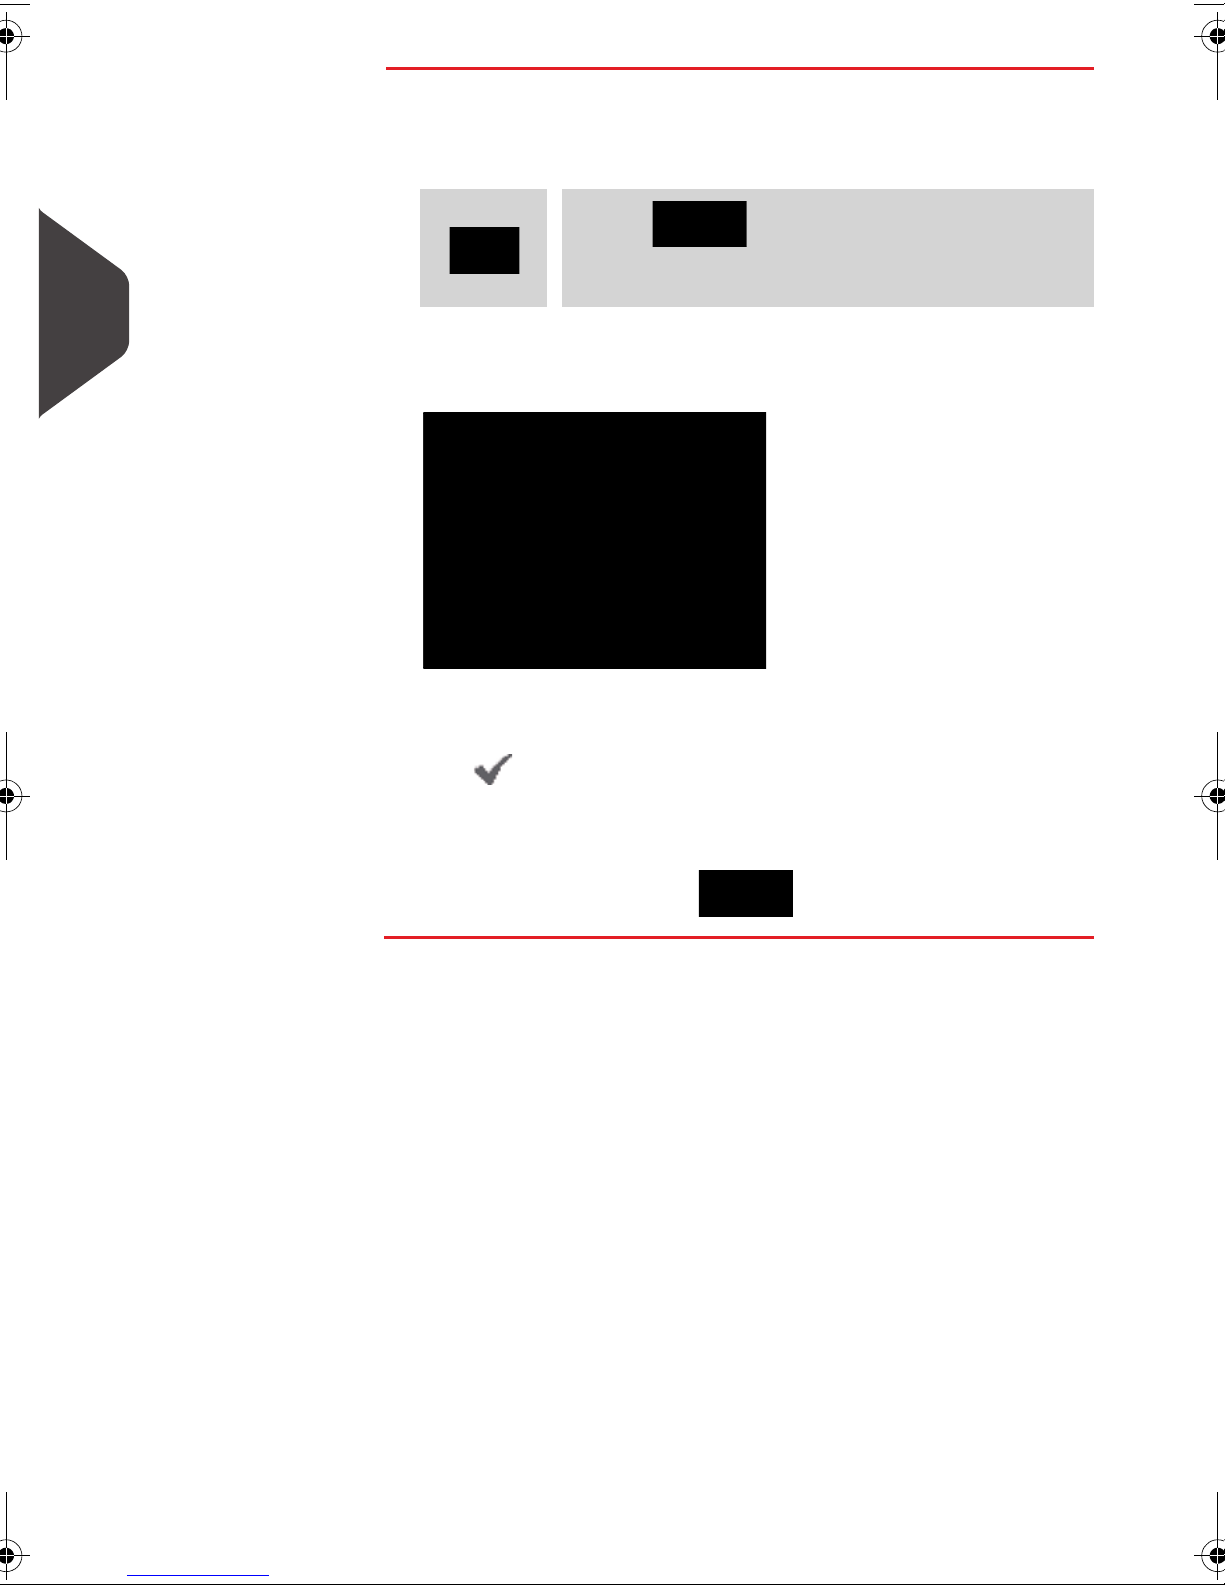
How to Add (or Cancel) an Ad Die on th e Stamp
How to Add (or
Cancel) an Ad
Die on the Stamp
3
Processing Mail
To add an ad die to the stamp or cancel the ad die:
1 Either:
Press
or
Press and type 1 or select the
path:
> Built stamp/imprint
2 Select > Ad die .
The
Select Ad die
screen is displayed.
3 Select the ad die in the list or select
die.
The icon indicates the current selection.
4 Press [OK] to validate your selection.
The
Customize stamp
rameters (home screen: ).
screen is displayed with updated pa-
None
for printing no ad
58
Page 62
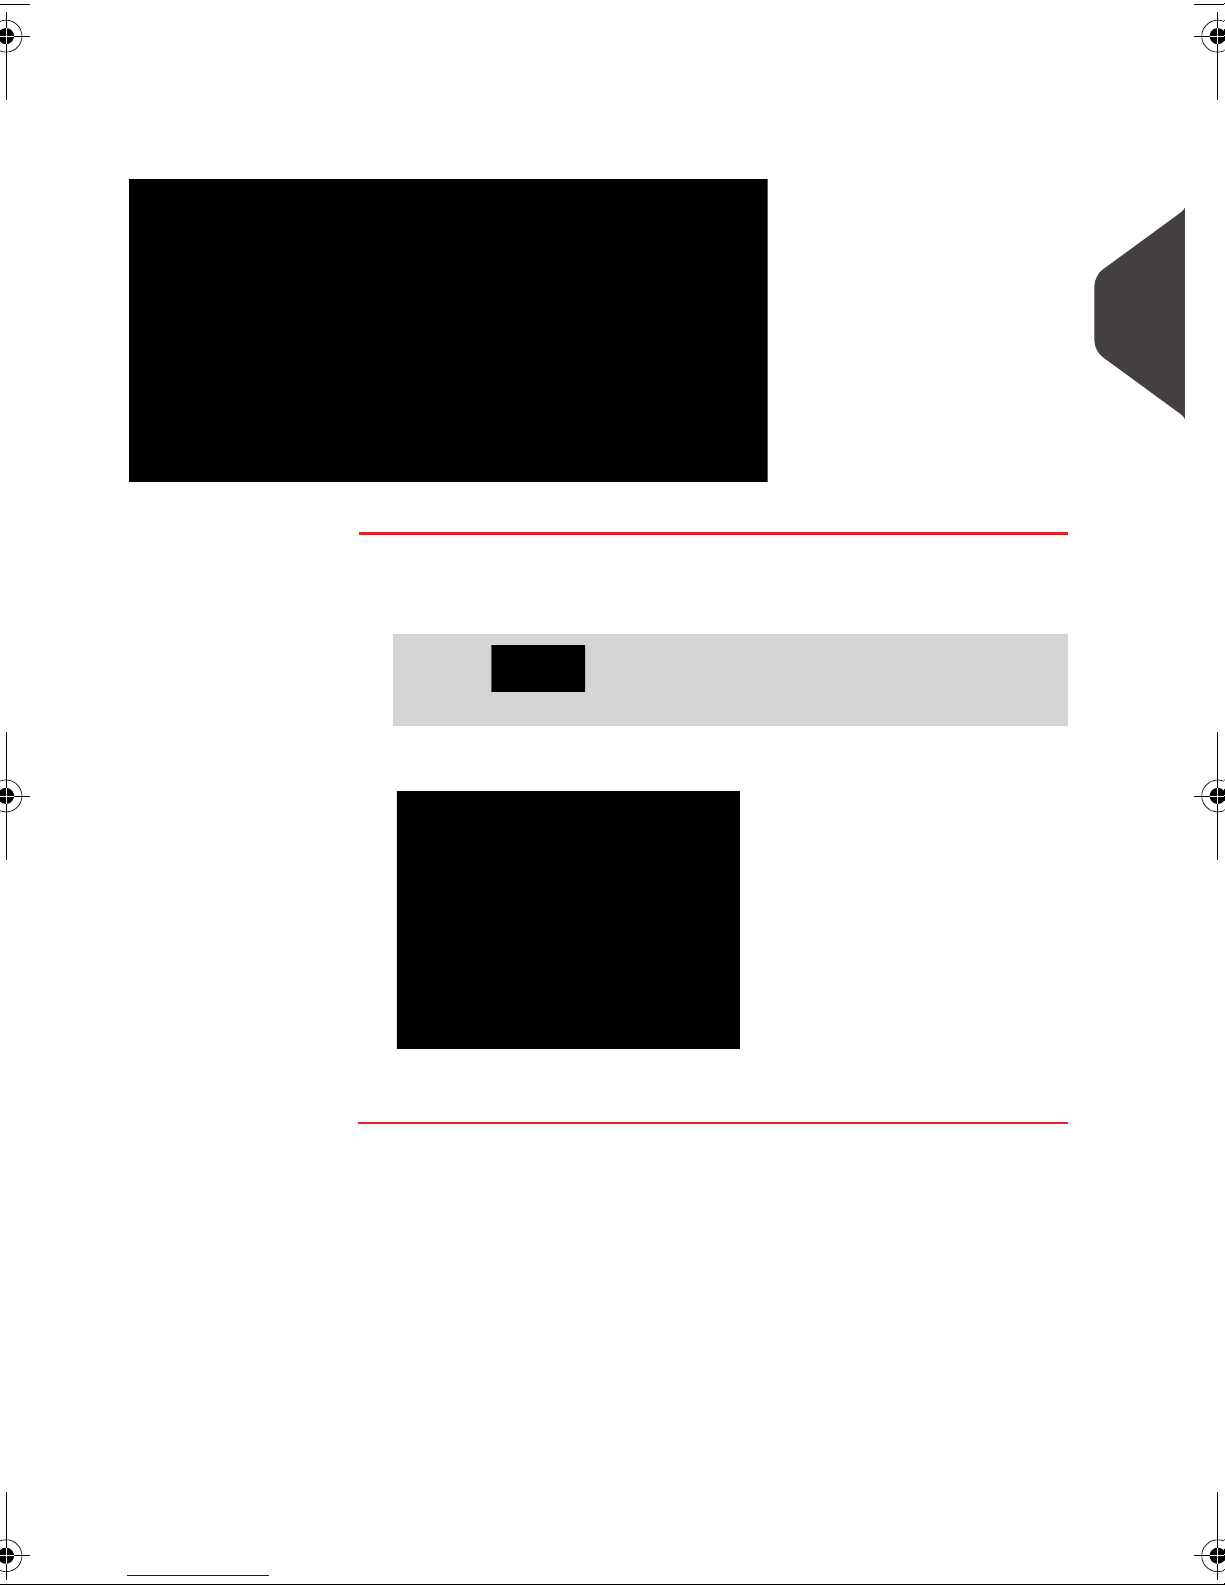
Moving the Stamp (Print Offset)
You can move the stamp away from the edge of the envelope when printing on thick
envelopes with rounded edges.
1 - Imprint printing offset
How to Move the Stamp (Print Offset)
3
Processing Mail
How to Move
the Stamp
(Print Offset)
To add an offset to the stamp position:
1 As a user:
Press and type 2.1 or select the path:
> Job settings > Print position
Print position setting
The
screen is displayed.
2 Select the offset and press [OK] to validate.
59
Page 63
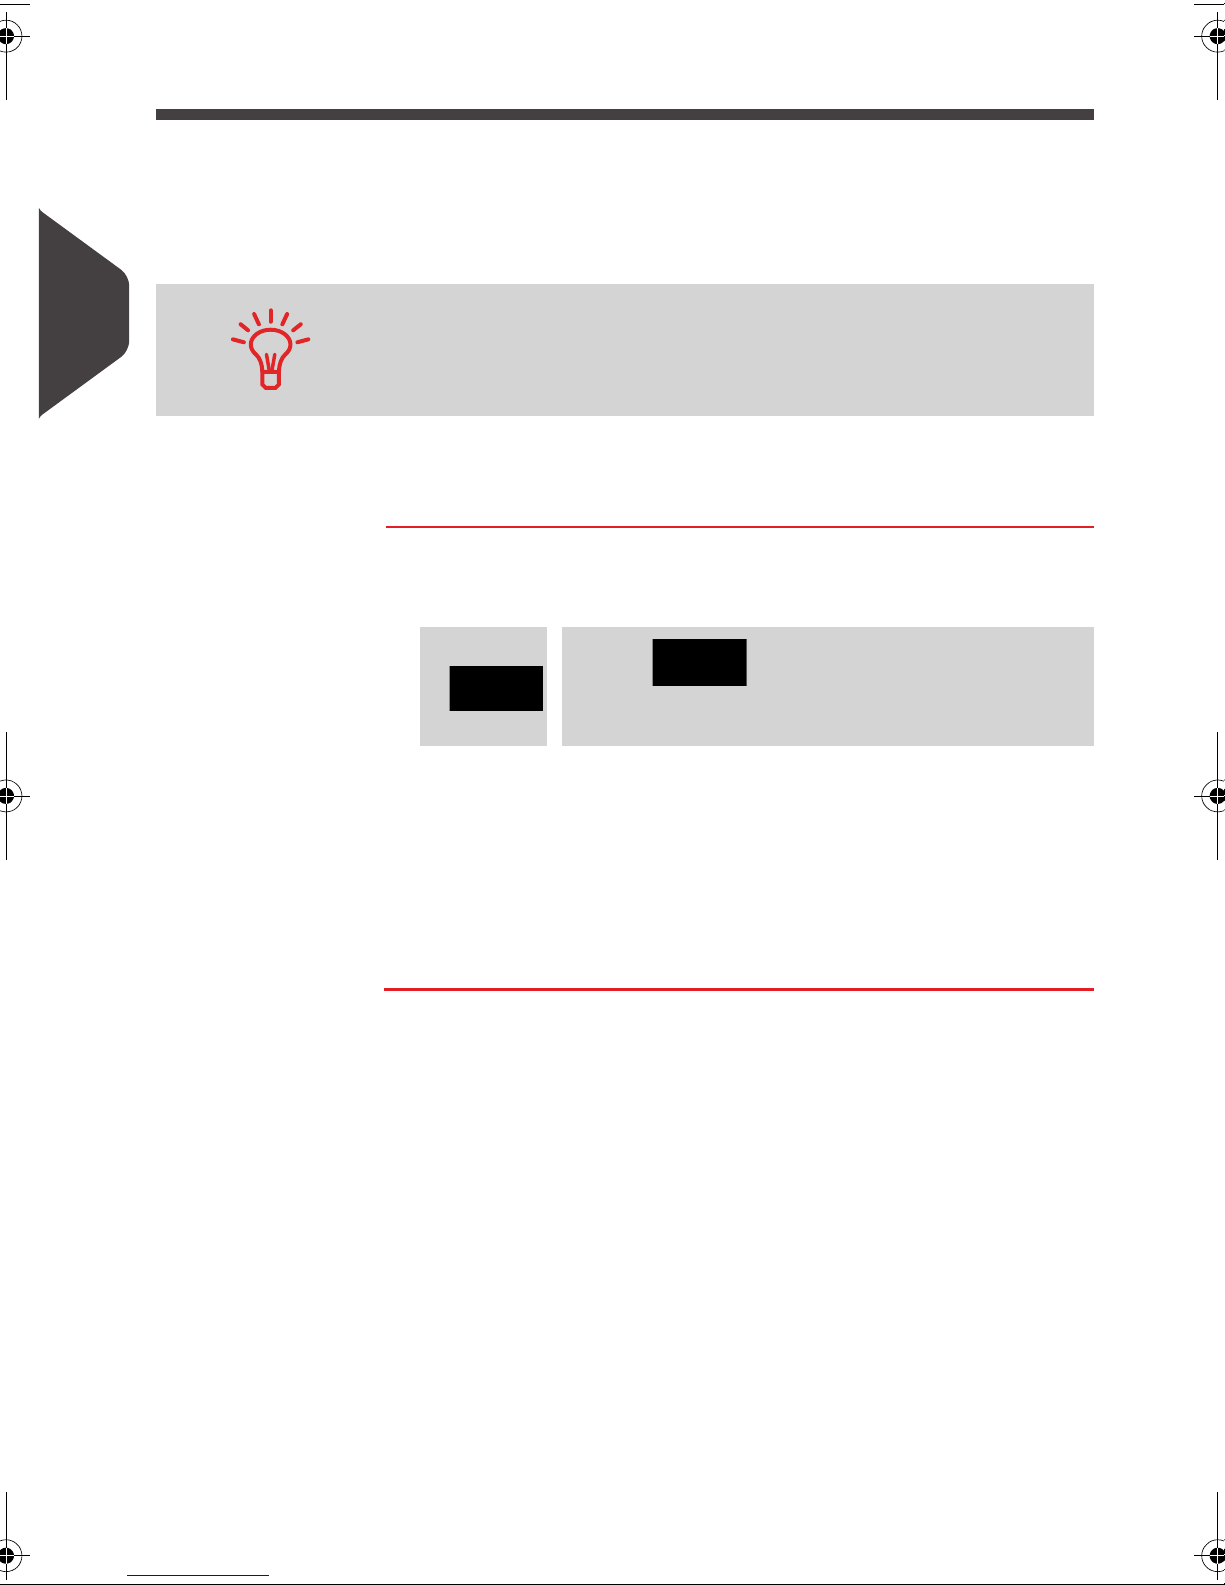
Using Imprint Memories
Imprint Memories allow you to create a preset memory that can include the rate,
custom text, ad die and date mode for the Type of stamp you would like to use.
In account-activated configurations, Imprint Memories allow you assign postage
costs to pre-selectedaccounts .
3
Processing Mail
See also
• To prepare imprint memories as supervisor, see
How to Use an Imprint Memory
How to Use an
Imprint Memory
If your mail requires different settings, then the imprint memories
are the solution: all your settings are stored in a single memory.
Just press the imprint memory key instead of multiple keystrokes
to select all the required elements.
Imprint Memories
To use an imprint memory:
p.149 .
1 Either:
Press
or
The imprint memories list is displayed.
Press and type 3 or select the
path:
> Imprint Memories
2 Select an imprint memory in the list.
3 Press [OK] to validate your selection.
The imprint memory zone (
displays the current imprint memory name.
Mem
) of the home screen
60
Page 64
Advanced Operations
3.7 Advanced Operations
Emergency Stop
If you want to stop the system in the event of an emergency:
How to Enable an Emergency Stop
How to Enable
an Emergency
To stop the run process immediately:
1 Press .
Stop
Using Batch Counters
Batch counters allow you to track and report pieces (items) and postage (value) since
the last counter reset.
How to Reset Batch Counters
How to Reset
Batch Counters
To produce reports associated to counters, see
1 As a user:
Press and type 2.3 or select the path:
> Job settings > Start batch counters
Reports
p.93 .
3
Processing Mail
2 Select the counter you wish to reset and press [OK] .
61
Page 65
Piece Counting
This function uses the Weighing Platform to count a stack of identical mail pieces.
How to Count Mail pieces by Weighing
How to Count
Mail pieces by
3
Weighing
Processing Mail
Filling the Label Dispenser
How to Fill the Automatic Label Dispenser
How to Fill the
Automatic Label
Dispenser
To count mail pieces by weighing:
1 As a user:
Press and type10 or select the path:
> Piece Counting
2 Place 10 items on the Weigh Platform and press [OK] .
3 Put the complete stack of items on the Weigh Platform and
press [OK] .
4 The total number of items is displayed.
To fill the Label Dispenser:
1 Stack the labels and insert them in the dispenser, face to
print on the right-hand side and peel-off tab on the top.
2 Push the block of labels down until you feel the label “click”
into position.
The Label Dispenser can hold up to 40 labels.
62
Page 66

Money Operations
4 Money Operations
This section describes how you can load and manage money in your Mailing System
to allow postage operations.
4.1 Overview ..............................................................................65
4.2 Managing Funds ..................................................................66
How to Check the PSD (Meter) Funds............................................................................ 66
How to Add Funds to the PSD (Meter) ........................................................................... 67
4.3 Unlocking the PSD (Postal Inspection) ...............................69
How to Unlock the PSD................................................................................................... 69
How to Check the Date of the Next Call ......................................................................... 69
Page 67

4
Money Operations
64
Page 68
Overview
4.1 Overview
The Postal Security Device (PSD ) — Postage Meter
The PSD, located in the base, handles the funds (or money) in your Mailing System.
The PSD performs all necessary operations to comply with the postal standards. To
do so, regular connections to the Postal Services are necessary.
Check that your Mailing System is connected to a telephone line
or network (see
properly configured (see
Connections
Connection Settings
p.17 ) and that the connection is
p.151 ).
Managing Funds
As a user, you can carry out the following operations dealing with funds in your
Mailing System:
• Check the available funds in the PSD
• Add funds to the PSD.
The funding operations trigger a connection of the Mailing System to Postal Services
through the telephone line or internet connection.
Tracking Funds
You can generate reports on the use of your postage funds as all Mailing operations
involving your postage are recorded by the Mailing System.
To generate reports, see
Reports
p.93 .
4
Money Operations
65
Page 69
4
Managing Funds
4.2 Managing Funds
Checking Funds
You can check the total postage used and the remaining funds in the PSD at any time.
To check that the funds are available to complete your current task.
Use the following steps to display your available postage funds.
How to Check the PSD (Meter) Funds
Money Operations
How to Check
the PSD (Meter)
Funds
To check available funds:
1 Either:
Press
or
The
Funds
Press and type 7 or select the
path:
> My Funds
Menu is displayed.
2 Select the menu path:
> Funds used / Funds available
The screen displays your postage funds as shown below.
66
(Ascending = funds used. Descending = funds available.)
Page 70
Adding Funds
You can add funds to your Mailing System at any time by complete the steps listed
below.
The Mailing System then connects to the Postal Services and validates the operation.
How to Add Funds to the PSD (Meter)
How to Add
Funds to the PSD
(Meter)
To add funds to the PSD:
1 Either:
Press
or
Press and type 7 or select the
path:
> My Funds
2 Select > Add Funds (or type 2 ).
3 If the system asks for a PIN code, enter the code using the
keypad and press [OK] .
The
Funds
Screen is displayed.
4
Money Operations
By default, the system displays the value of the previous
transaction.
4 Enter the amount of postage to add using the keypad (use C
to clear a digit, press C twice to clear the field).
5 Press [OK] to start the connection to the Postal Server.
If the funding process is successful, the system displays a
successful message.
If funding fails, the system displays a failure message and
the amount that you may actually add, depending on your
postal account balance.
In the case of a communication error, the amount previously
entered cannot be changed. Check connection settings (see
p.151 ).
67
Page 71

4
Money Operations
6 You can open the
check your account balance once the transaction is complete
How to Check the PSD (Meter) Funds
(see
See also
• As supervisor, you can set the Mailing System to ask for a PIN code for crediting.
Funds Used / Funds Available
p.66 ).
screen to
68
Page 72
ing the PSD (Postal Inspection)
4.3 Unlocking the PSD (Postal
Inspection)
Manual Call
The postal service requires your postage meter (PSD) to periodically connect for
postal security regulation. If you have not connected your system after a period your
system will automatically be deactivated.
You have to do a connection within 90 days.
If your system is deactivated, you have to perform a connection to the Postal Services
to unlock the PSD.
You can also use the Audit function to set the Mailing System time
after Daylight Savings Time transitions , as connecting to the
Postal Services sets the Mailing System time and date.
How to Unlock the PSD
4
Money Operations
How to Unlock
the PSD
How to Check the Date of the Next Call
How to Check
To unlock the PSD and manually connect to the Postal Services:
1 Either:
Press
or
Press and type 7 or select the
path:
> My Funds
2 Select > Postal Inspection (or type 3 ).
The system asks for confirmation.
3 Press [OK] to connect to the Postal Services.
If the audit is successful, the system displays a successful
message.
If the audit fails, the system displays a failure message explaining the cause of the error. Try to correct the cause and
retry.
To display the date of the next server call:
the Date of the
1 Either:
Next Call
The date of the next call is displayed on the screen.
Press
or
Press and type 7 or select the
path:
> My Funds
69
Page 73

4
Money Operations
70
Page 74
Managing Accounts and Assigning Rights
5 Managing Accounts and
Assigning Rights
This section describes how you can manage accounts as the supervisor to track
postage funds usage and/or set access rights to a variety of functions on your Mailing
System.
5.1 Accounting and Assigning Rights Overview ........................73
5.2 Selecting an 'Account Mode' ...............................................74
5.3 Guidelines to Setup an Account...........................................75
How to Change a Shared PIN Code ..................................................................... 76
5.4 Selecting an 'Account Mode' ...............................................80
How to Display and Change the 'Account Mode' .................................................. 80
5.5 Managing Accounts............................................................. 81
How to Create an Account .................................................................................... 83
How to View / Edit Account Information ................................................................ 84
How to Activate / Deactivate an Account .............................................................. 85
How to Delete an Account ..................................................................................... 85
How to Export an Account List .............................................................................. 86
How to Import Accounts ........................................................................................ 87
5.6 Managing Operators ...........................................................88
How to Create an Operator ................................................................................... 89
How to Modify an Existing Operator ...................................................................... 90
How to Assign Accounts to an Operator ............................................................... 90
How to Activate / Deactivate an Operator ............................................................. 91
How to Delete an Operator .................................................................................... 91
Page 75
5
Managing Accounts and Assigning Rights
72
Page 76
Accounting and Assigning Rights Overview
5.1 Accounting and Assigning Rights
Overview
Postage Tracking and Access Control
Your Mailing System allows you to track postage by account/department and to add
security to prevent unauthorized use of a variety of functions.
• Track postage expenditures: the Accounts function
• Control user access with PIN code to the machine: the Access Control function.
You can activate one or the other of these functions.
Postage tracking can be done using your Mailing system, on line, or with a MAS.
The Accounts Function
Activating the Accounts Function in the Mailing System is a convenient way to
monitor, track and control postage expenses by, for example, associating accounts
to departments in your organization (Marketing, Sales, etc.) or to different companies,
if the Mailing System is shared.
When the Accounts Function is activated, the currently selected account is charged
each time the user applies postage to mail.
You can then issue reports on each account (for information about reports, see
Reports
p.93 ).
Accounts from the User's Perspective
If the Accounts Function is activated, users of the Mailing System must select an
account when starting their work session.
Afterwards, users can change accounts to allocate postal expenditures as needed.
The Access Control Function
5
Managing Accounts and Assigning Rights
As supervisor, you can set the Mailing System to ask for a PIN code when a user
wakes the machine up to start a session.
This allows you to protect the system and restrict the usage of your funds.
The different access control policies you can implement as the supervisor are:
• No PIN code : unlimited access
• Unique System PIN Code : users enter a PIN code to access the system.
• Operator PIN codes : users enter their own PIN code to access the machine.
In this last mode, the operators use only the accounts you allow them to access to.
73
Page 77
Selecting an 'Account Mode'
5.2 Selecting an 'Account Mode'
Introducing the 'Account Modes'
The 'Account mode' allows you to set up both the Accounts and the Access Control
functions (see
The table below lists the functional access control for each account mode.
Accounting and Assigning Rights Overview
Access Control Function
No Yes
p.73 ).
5
Accounts Function
Managing Accounts and Assigning Rights
* Remote Account Management is reserved for a connection to a PC based mail accounting application and should be set by a service representative.
No 'No account'
Yes 'Accounts'
'Account Modes' table
The table below summarizes the 'Account mode' options available and the function
of each option, on the user and supervisor points of view.
Account mode Function
'No Account' No postage tracking
No access control
'No account with access
control'
'Accounts with access
control'
Remote Account Man-
agement *
Action required to access
the system
Unlimited access to the system
'No Account with
Access Control'
'Accounts' Tracks postage by Account/
'Accounts with
Access Control'
'Remote Account
Management'
No postage tracking
Protects access to the system
Department
Tracks postage by Account/
Department
Controls access to system and to
accounts
Postage tracking and access control managed from the PC
74
Type a PIN code (shared by
all users) to log in
Select the account to charge
postage
Type a PIN code to log in
Select the account to charge
postage
(same as modes with
accounts listed above)
Page 78

Guidelines to S etup an Account
5.3 Guidelines to Setup an Account
See also
•
Selecting an 'Account Mode'
Setting up 'No Account'
The 'No Account' mode provides users with unlimited access to the system (selfservice type).
This is the default mode in your Mailing System.
Implementing “No account”
p.74 .
5
• Follow the procedure
select the 'No Account' mode.
How to Display and Change the 'Account Mode'
'No Account' Management Menu
In
No account
No other setting is necessary for the 'No Account' mode.
mode:
p.80 and
Managing Accounts and Assigning Rights
75
Page 79
Setting up 'No Account with Access Control'
If you want to prevent unauthorized use of the Mailing System and do not want to use
accounts, use the “No Account with Access Control” mode. This provides a single PIN
code for all authorized users.
Implementing “No account with access control”
5
1 Follow the procedure
select the 'No account with access control' mode.
2 Enter the 4 digit shared PIN code the users will have to enter at log in.
'No Account with Access Control' Management Menu
In
No Account with access control
PIN code.
How to Display and Change the 'Account Mode'
mode, the menu allows you to change the shared
Managing Accounts and Assigning Rights
How to Change a Shared PIN Code
How to Change
1 As the supervisor (see
p.80 and
How to Log in as Supervisor
p.128 ):
a Shared PIN
Code
Press and type 5.2 or select the path:
> Account Management > Change PIN code
The
PIN code
screen is displayed.
2 Enter the new PIN code and press [OK] .
76
Page 80
Setting up 'Accounts '
In 'Accounts' Mode, users must select an account before they can process their mail.
The user can change accounts at any time during mail processing.
If only one account is available, the Mailing System automatically
selects it at start up.
Implementing the “Accounts Mode”
1 Follow the steps outlined in
and select the 'Accounts' Mode.
2 Create accounts as indicated in
When you activate the 'Accounts' Mode, the system creates an
account by default.
How to Display and Change the 'Account Mode'
How to Create an Account
'Accounts' Mode Management Menu
In
Accounts
Mode, the menu allows you to manage your accounts.
p.83 .
p.80
5
Managing Accounts and Assigning Rights
See also
• To add, modify or delete accounts, see
Managing Accounts
p.81 .
77
Page 81
Setting up 'Accounts with Access Control '
In the 'Accounts with Access Control' Mode, users must first enter a PIN code and
then select an Account. They can change accounts once they have logged in. The
supervisor can restrict accounts for each user.
If only one account is available, the Mailing System automatically
selects it at start up.
Implementing “account with access control”
1 Select the 'Accounts with Access Control' mode : see
5
Managing Accounts and Assigning Rights
the 'Account Mode'
2 Create the accounts you wish to implement: see
3 Create the Operator PIN codes you wish to implement: see
erator
At the same time, assign accounts to the operators .
p.89 .
p.80 .
As long as your structure is not complete, you may want to create
accounts and operators without activating them. Users can only
use activated accounts or operator PIN codes.
'Accounts with Access Control' Management Menu
In
Accounts with Access Control
mode:
How to Display and Change
How to Create an Account
How to Create an Op-
p.83 .
The menu allows you to manage the Accounts and the Operators.
Creating Operators is the way to create individual user PIN codes
: each Operator will have a unique PIN code.
78
Page 82
Setting up 'Remote Account Management'
'Remote Account Management', allows you to manage accounts and/or operator
PINs from a PC-based software program (MAS).
The PC application provides advanced postal and/or shipping expense management
in order to monitor, track and control your mailing and shipping costs.
You can allow the Mailing System to be used even when not connected to the PC. In
this 'Disconnected Mode', only one account and operator are available (defined in the
PC application).
The application should be setup by an authorized technician.
Implementing 'Remote account management'
To implement the 'Remote account Management' Feature:
1 Connect the PC to the Mailing System and start the Account Management Appli-
cation on the PC : see the diagram in
user guide.
2 On the Mailing System, activate the mode 'Remote Account Management' : see
How to Display and Change the 'Account Mode'
3 From the PC application, configure the required accounts and operators : see the
PC application user guide.
If operators or accounts are already created on the Mailing System they will be deleted when switching to 'Remote account management' Mode.
Connectors
p.80 .
p.17 and the PC application
5
Managing Accounts and Assigning Rights
79
Page 83
Selecting an 'Account Mode'
5.4 Selecting an 'Account Mode'
See also
•
Guidelines to Setup an Account
How to Display and Change the 'Acc ount Mode'
p.75 .
How to Display
and Change the
'Account Mode'
To display and change the 'Account mode':
1 As supervisor (see
Press and type 5.1 or select the path:
> Account Management > Account Mode Selection
5
The
Account Mode Selection
current 'Account Mode' shown.
Managing Accounts and Assigning Rights
2 Select another 'Account mode'.
How to Log in as Supervisor
screen is displayed with the
p.128 ):
3 Press [OK] to confirm.
4 If required, enter the PIN code and press [OK] .
The Mailing System then confirms that the 'Account Mode'
has been changed.
If you have selected the 'Remote account management' Mode, a
connection process to the PC application begins. If the connection fails, the previous account mode remains active.
80
Page 84
Managing Accoun ts
5.5 Managing Accounts
Selecting an Account Mode
You can only manage accounts in the
Before creating accounts , see
Setting up 'Accounts '
Accounts
Mode.
p.77 .
Additional information
Account names must be unique within the system.
Account Information
Number of accounts
The number of accounts you can create is set to 25 by default and can be increased
to 100 if required.
Every account includes the following information, which is displayed on the
account
screen:
Account summary
Add
5
Managing Accounts and Assigning Rights
Account
Item
Number 11 Alphanumeric
Name 32 Alphanumeric
Status Active / Inactive Only active accounts are visible to users.
Format
Characters
Characters
Description
Number of the account. Two accounts cannot have
the same number.
An account number cannot be modified after the
account is created. However, the account can be
deleted.
Name of the account. Two accounts cannot have
the same name.
81
Page 85
Additional information
See also
• About changing the maximum number of accounts, see
• Printing the current account list.
Account level
p.118 .
Account Management
Follow the steps below to create, modify, activate/deactivate or delete accounts.
5
Managing Accounts and Assigning Rights
See also
•
Account Information
You can also import a list of accounts. See
Account Lists
p.81 .
p.86 .
Importing/Exporting
82
Page 86

Creating Accounts
How to Create an Account
How to Create
an Account
To Create an account activate the mode “accounts”. See
Display and Change the 'Account Mode'
1 As supervisor (see
Press and type 5.2.1 or select the path:
> Account management > Manage accounts > Account
list
Account list
The
How to Log in as Supervisor
screen is displayed.
p.80
p.128 ):
2 Select > Add Account .
How to
5
Managing Accounts and Assigning Rights
3 Enter the account
press [OK] . Select the Account Status (the button displays
the current status:
4 Press [OK] to confirm the creation of the account.
Number
and
Name
using the keypad and
Active or Inactive ).
83
Page 87
Editing Accounts
Use the following steps to modify an account name or account status.
The account number cannot be edited once it is created.
How to View / Edit Account Information
How to View /
Edit Account
Information
5
To view or edit an account:
1 As supervisor (see
Press and type 5.2.1 or select the path:
> Account management > Manage accounts > Account
list
The
Account list
screen is displayed.
Managing Accounts and Assigning Rights
2 Select the account (or type the account number) and press
[OK] .
How to Log in as Supervisor
p.128 ):
3 Select Edit / Modify .
The
Edit / Modify
screen appears.
4 Select each parameter and change it using the keypad (use
key [C] to clear characters), and then press [OK] .
The
Account modification summary
screen is displayed.
5 Press [OK] to accept the changes.
84
Page 88
Activating Accounts
This function allows you to create accounts in advance and prevent them being used
before your account structure is complete.
How to Activate / Deactivate an Account
How to Activate
/ Deactivate an
To activate or deactivate an account:
1 Perform procedure
p.84 .
Account
2 Change the account status (the button displays the current
status: active or inactive) and press [OK] .
3 Accept the changes by pressing [OK] on the
fication summary
If an account is deactivated it is no longer visible to the
operator.
Deleting Accounts
You may need to delete an account.
How to Delete an Account
How to Delete
an Account
To delete an Account:
1 Perform procedure
p.84 .
How to View / Edit Account Information
Account modi-
.
How to View / Edit Account Information
5
Managing Accounts and Assigning Rights
2 Perform procedure
p.84 .
3 On the
type
A confirmation of account deletion is displayed.
Account management
2 ) instead of
How to View / Edit Account Information
screen, select > Delete (or
Edit/Modify
.
85
Page 89
Importing/Exporting Account Lists
You can import an account list to or export an account list from your mailing machine
as a CSV file using OLS or a USB memory key.
Imported accounts are created and added to the existing account list as unformatted
accounts.
Using a spreadsheet program or a simple text editor, modify an
exported CSV file to add new accounts to your Mailing System by
re-importing the file.
5
Managing Accounts and Assigning Rights
Exporting an Account List
You can export an account list as a CSV file, for use as back-up or to modify it to
create new accounts.
How to Export an Account List
How to Export
an Account List
To export an account list on a USB memory key:
1 As supervisor (see
Press and type 5.2.4 or select the path:
> Account management > Manage accounts > Export
Account list
2 Insert the USB memory key into the USB port of the base (at
rear left) and press [OK] .
3 Follow the instructions displayed on the screen.
At the end of the process, a message will inform you that you
when you may remove the USB memory key.
How to Log in as Supervisor
p.128 ):
86
Page 90
Importing Account List
To import accounts into your Mailing System, place the CSV file on a USB memory
key.
You can only import CSV files located in the root directory of the
USB memory key.
The CSV file should have the following characteristics:
Name Format is ACS_yyyymmdd_hhmmss.CSV (example:
ACS_20091007_035711.CSV
Field delimiter ; (semi-colon)
Record delimiter New line
To add accounts to your Mailing System, export the current
account list and modify it before re-importing it into the Mailing
System.
See also
• Maximum number of accounts:
How to Import Accounts
How to Import
Accounts
To import accounts from a CSV file:
1 As supervisor (see
Press and type 5.2.3 or select the path:
> Account management > Manage accounts > Import
Account list
Account Information
How to Log in as Supervisor
5
Managing Accounts and Assigning Rights
p.81 .
p.128):
2 Insert your USB memory key into the USB port of the base
(at rear left) and press [OK] .
3 Select the CSV file to import and press [OK] .
4 Follow the instructions displayed on the screen.
At the end of the process, a message will inform you when
you may remove the USB memory key.
87
Page 91
5
Managing Operators
5.6 Managing Operators
In
Account with Access control
erators' that each correspond to a PIN code (see
Overview
p.73 ).
This section only applies to the Account with Access Control
Mode (see
Operator Options
The following options must be specified when creating operators.
Mode and as supervisor, you can create up to 50 'op-
Accounting and Assigning Rights
Accounting and Assigning Rights Overview
p.73 )
Managing Accounts and Assigning Rights
Option
PIN code 4 digit Operator PIN code. Two Operators can-
Name 20 alphanumeric
Status Active/Inactive Users can only log in using active Opera-
List of accounts Accounts that the Operator may use.
Format
characters
Only active accounts are displayed on the User screens.
Description
not have the same PIN code.
Operator name. Two Operators cannot
have the same name.
tor's PIN codes.
88
Page 92
Operator Management
Follow the steps outlined below to create, modify, activate/deactivate or delete operators.
See also
•
Operator Options
• To print the current list of operators, see
Creating Operators
How to Create an Operator
p.88 .
Operator List Report
In order to create an operator you must first set up an “Account
with Access Control” in “Account Mode Management” Mode.
p.108 .
5
How to Create
an Operator
To create an Operator:
1 As supervisor (see
Press and type 5.3 or select the path:
> Account management > Manage operators
The
Manage Operator
How to Log in as Supervisor
screen is displayed.
p.128):
2 Select > Operator List .
The
Operator list
screen is displayed.
3 Select > Add operator .
The
Add operator
screen is displayed.
4 Enter the options you wish to provide for this operator.
You must enter a unique PIN code (4 digit) for each operator.
Managing Accounts and Assigning Rights
5 In the
counts that the operator will be allowed to use. You can
complete this step later: see
Operator
6 Press [OK].
The
7 Press [OK] to create the Operator.
Account List
p.90 .
Operator creation summary
screens, successively select the ac-
How to Assign Accounts to an
screen is displayed.
89
Page 93
Modifying Operators
Follow the steps listed below to modify operator's name, PIN code, status or assigned
accounts.
How to Modify an Existing Operat or
How to Modify
an Existing Operator
To modify an existing Operator:
1 As supervisor (see
Press and type 5.3 or select the path:
> Account management > Manage operators
The
Manage Operator
5
2 Select > Operator List .
3 Select the operator and select Edit / Del. .
Managing Accounts and Assigning Rights
4 Select > Edit / Modify (or type 1 ).
The
Edit / Modify
screen is displayed.
5 Change the operator options as needed and press [OK] to
display the
[C] to clear characters).
Operator modification summary
6 Press [OK] to accept your changes.
How to Log in as Supervisor
Wizard window opens.
screen (Use key
p.128 ):
Assigning Accounts to Operators
You can define the Accounts Access to each operator, by assigning accounts to each
operator.
On user screens, only accounts are displayed.
How to Assign Accounts to an Operator
How to Assign
To create / change the list of Accounts an Operator has access
to:
Accounts to an
Operator
1 Follow the procedure
p.90 until the
Account List
The
Edit modify
screen is displayed.
2 Select Add Account .
The
Account list
screen is displayed.
3 Press to return to the
How to Modify an Existing Operator
screen, and select Account list .
Edit / modify
screen.
4 Press [OK] to accept the changes.
90
Page 94
Activating Operators
The ability to select the status of an operator allows you to create as many operators
as you need in advance. Users cannot use deactivated operator PIN codes for new
operators.
How to Activate / Deactivate an Operator
How to Activate
/ Deactivate an
Operator
To activate or deactivate an Operator:
1 Perform procedure
How to Modify an Existing Operator
2 In the operator options, select the line
deactivate the operator (the button displays the current
status), and then press [OK] .
3 Once the
press [OK] .
Operator modification summary
Deleting Operators
Follow the procedure below in order to delete an operators.
How to Delete an Operator
How to Delete
an Operator
To delete an Operator:
1 Perform procedure
How to Modify an Existing Operator
2 Select > Delete (or type 2) instead of
The
Delete
confirmation screen is displayed.
Status
Edit / Modify
to activate or
screen appears,
.
p.90.
5
Managing Accounts and Assigning Rights
p.90.
3 Press [OK] to delete the operator, otherwise press .
91
Page 95
5
Managing Accounts and Assigning Rights
92
Page 96
Reports
6 Reports
This section explains how you can access and print reports for your Mailing System.
6.1 Reports Overview .................................................................95
6.2 Generating a Report ............................................................97
How to Generate a Report (as a User) ........................................................................... 97
How to Generate a Report (as Supervisor) ........................................................... 97
6.3 Counter Data........................................................................98
6.4 Postage Data...................................................................... 100
6.5 Funds Data ......................................................................... 103
6.6 Account Data...................................................................... 105
How to Generate the Account Report ................................................................. 105
How to Generate the Operator List Report ......................................................... 108
6.7 System Data ....................................................................... 109
Page 97
6
Reports
94
Page 98
Reports Overview
6.1 Reports Overview
As a user or supervisor, you can get a range of reports to regularly view, print or store
information regarding your Mailing System usage, funds usage, account expenditures, etc.
Your Mailing System can also upload basic data that can be viewed online. Enhanced
online postal expense management reporting can be added as an option.
Reports generally require a beginning date and an end date. Typically, the reports are
available on screen and can be printed out on an external USB printer or saved on a
USB memory key.
Your Mailing System also allows you to get reports on mailing activity over the past
two years.
Additional reporting capabilities are available through connection to PC based accounting software solutions (MAS).
The table below lists the available reports.
List of Reports
Output on: L=label (or envelope), S=screen, P=USB printer, F=USB memory key
6
Reports
Report name Report description Output
Devices
COUNTER DATA
Batch Data Batch Counter and corresponding
postage for outgoing mail since the last
reset.
Received Batch
Data
Daily Usage Consumption information (total items
Monthly Usage Total items and total postage value per
Funds Usage Information
Batch Counter for incoming mail
('Received on') since the last reset.
POSTAGE DATA
and total postage value) for each day
of a selected period.
month for a selected period.
FUNDS DATA
Information on the funds usage in the
machine (since the installation of the
machine). Contents is limited to the
history available in the PSD.
SP p.98
SP p.99
SPF p.100
SPF p.101
LSPF p.103
Page
Adding Postage Last refill operations performed on the
machine in a selected period (supervisor only).
SPF p.104
95
Page 99
Report name Report description Output
Devices
ACCOUNT DATA **
Page
Account Report List of accounts in the system (supervi-
Single Account Usage for a specific account selected
Multi Account Usage on all accounts in a selected
Machine Configura-
6
Reports
tion
Base Events
PSD Events
IP Configuration
Report
Proxy Configuration Report
sor only).
in an account list, for a selected period.
period.
SYSTEM DATA
Supervisor settings (imprint default
data, date advance, postal services,
connections, Ink cartridge, weighing
options, modem, etc.)
Events listed for diagnostics with customer service assistance only (supervisor only).
IP configuration settings
Proxy configuration settings
PF p.105
Sp.106
PF p.107
PF p.109
** Only available on the PC if MAS/POSTAL Accountant software is used.
96
Page 100
Generating a Report
6.2 Generating a Report
To generate a report, select the desired report, and choose how you want to display
or record the report:
• On screen
• On an external printer (if any)
• On a label
• On a USB memory key
How to Generate a Report (as a User )
How to Generate
a Report
(as a User)
To generate a Report:
1 As a user:
Press and type 6 or select the path:
> Reports
2 A list of available report types is displayed.
3 Select the report type (see
Table
p.95 ).
4 Depending on the report type, the system may ask for prefe-
rences such as:
- Period of time targeted (begin date, end date)
- Desired account, etc.
- Select or type the required parameters and press [OK] .
- The
Use the [C] key to clear displayed parameter data (from right to
left) and then enter the new parameter data you want.
Output selection
screen is displayed.
6
Reports
5 Select an available output device.
The system will send the report details to the selected output.
How to Generate a Report (as Supe rvisor)
How to Generate
a Report
To generate a Report:
1 As supervisor (see
(as Supervisor)
2 Resume with the steps outlined in
(as a User)
How to Log in as Supervisor
Press and type 2 or select the path:
> Reports
How to Generate a Report
.
p.128 ):
97
 Loading...