

Hase Spezialräder Pino User Manual

P
I
N
O
Owner`s
manual
Contens
S P E Z I A L R Ä D E R
H
A
S
E
PINO
Page 2 As of 12.02
Delivery:
General warning page 4
On receipt of delivery page 5
Items supplied page 5
Assembly page 6-7
Ergonomic adjustments:
Length page 8
Steering page 9
Handlebar page 9
Seat angle page 10
Operating instructions
Safety, health page 11
Carrying luggage page 11
Tyre pressure page 11
Technical appendix:
Frame-No. Page 12
Chain page 13
Brake adjustment page 14-15
Gear adjustment page 16-18
Spokes page 19
Bolt torque settings page 19
Removing handlebar page 20-21
Removing botom bracket page 22-23
Steering rod page 24
Rohloff hub page 25
Technical data page 26
Warranty page 27
S P E Z I A L R Ä D E R
H
A
S
E
PINO
Page 3 As of 12.02
Dear Customer,
By purchasing a Pino you have chosen a unique way of tandem riding.
To ensure prolonged enjoyment of the Pino it must be cared for and
worn parts must be renewed as with any technical equipment.
With these instructions we offer you assistance in ensuring the Pino
remains fun and safe to use over a long period of time.
The Pino is the result of many years of development work. But as with any
product, it is important that it is continually improved. We are therefore
interested in your experiences from normal daily use and from cycling
holidays/tours. Do you have any suggestions for improvement, requests,
complaints, criticism? Talk to us. That way you can help to further improve
the Pino
If you enjoy riding the Pino, recommend us to your friends, who might
also be interested in this special way of tandem cycling
The info pouch
So many customers asked for it, and now it’s finally available: The info
pouch attached to the seat. In it you will find not just the owner’s manual,
but also postcards that you can give to curious “still-pedastrians”. This
way you can avoid lengthy explanations. The postcards can be reordered free of charge at any time.
We recommend that you read these instructions thoroughly.
Have fun!

General warning
S P E Z I A L R Ä D E R
H
A
S
E
PINO
Page 4 As of 12.02
Like any sport, bicycling involves risk of injury and damage.
By choosing to ride a bicycle, you assume the responsibility
for that risk, so you need to know - and to practise - the
rules of safe and responsible riding and of propper use
and maintenance. Proper use and maintenance of your
bike reduces risk of injury.
! Riding a tandem needs time to get used to. Both captain and
stoker have to work together. Aspecialy leaning into corners
needs a bit of comunication between captain and stoker. We
recommend to make the first runns off the trafic. Ones you feel
comfortable, you can start riding in the trafic.
! The Pino comes with very poverfull brakes with excelent
modulation. Besides having excelent modulation, it is still
possible to blokade both wheels. Make yourself comfortable
with the brake setting, befor riding in traffic.
! For your own savety: Allways wear an approved helmet when
riding your bike and follow the helmet manufacturer’s instruction
for fit, use and care of your helmet.
! On the Pino the rider should wear clothing that is close-fitting
enough to make it impossible for garments to get caught in the
wheel or the drive. Watch out also for hanging string/tying cords
for example from jackets or a scarf.
! Due to the recumbent position, the stoker might slip from the
pedal. Aspecaly when the captain stops pedalling sudden.
Make sure that the stoker has enough hold on the pedal. We
recommend to use spd-style Pedals or our Special-pedals with
hooks and straps.
! Allways cycle with lights from dusk til dawn.
! The Pino must be checked by a professional workshop
frequently.
On reciept of delivery
S P E Z I A L R Ä D E R
H
A
S
E
PINO
Page 5 As of 12.02
If your Pino is sent by post, the following must be observed.
On receipt of delivery...
please check the packaging for damage. If you discover anything, have
the delivery person confirm it to you in writing. Damage can occur
anywhere on the journey from Waltrop Germany to the recipient. The
parcel service is liable in case of damage.
Items supplied:
For better handling during shipping, we took a few parts off the Pino and
split it in two boxes.
Please check the contents of both boxes.
In the big box you should find the Pino with dismounted stem and
handlebar.
In the small box you should find:
! Owner’s manual (you’ve found it already)
! Brake manufacturer’s instructions
! Two pairs of pedals
! Five Hase-straps
! Two Aluminium tubes for the seat
! Seat mesh for seat and back
! Two seat-grips
! Info bag

Assembly
S P E Z I A L R Ä D E R
H
A
S
E
PINO
Page 6 As of 12.02
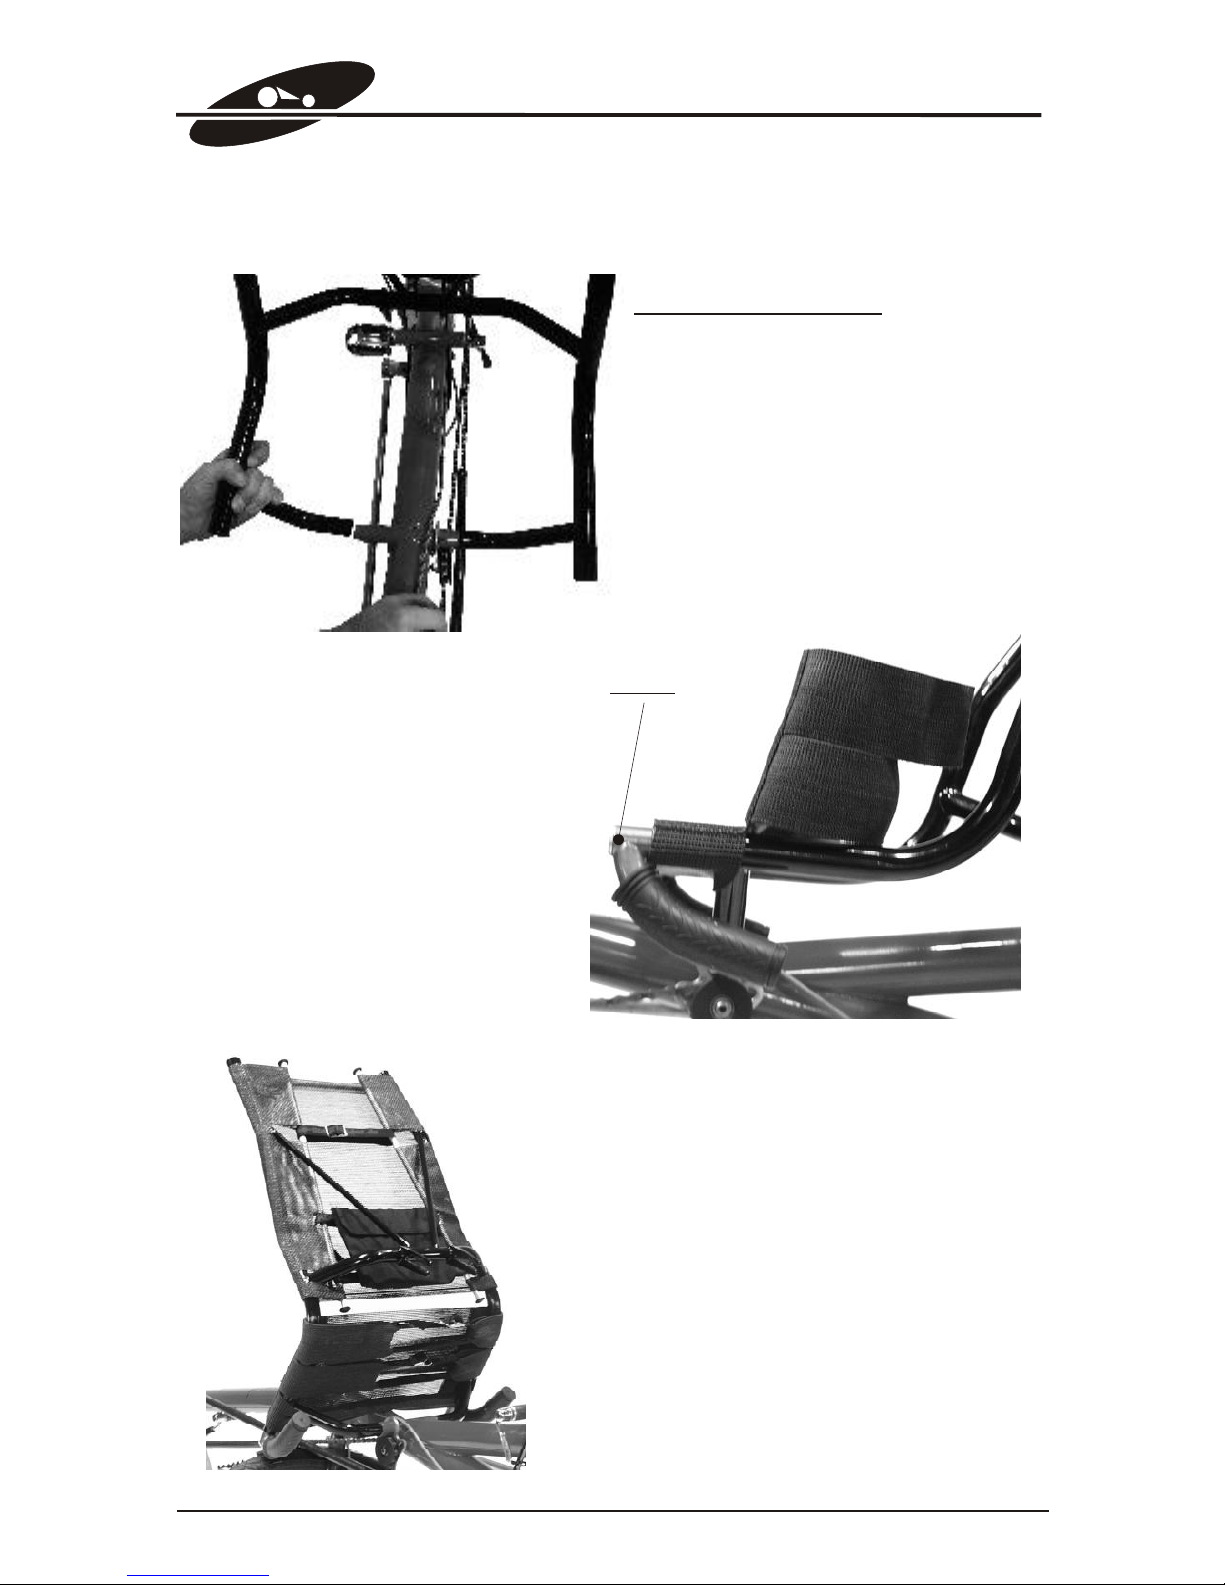
Insert frontboom
At first connect both light-cables then insert the frontboom without
twisting the chain. To prevent damaging the slide-bearing-paper,
disassembly the QR and insert the frontboom from a slightly down angle.
Slide the frontboom into the mainframe, until the mark for maximum
length disappears. Than put on the chain like shown on page 7.
Plug Quick release
Slide bearing foil
Mark for maximum length
Handlebar
Take all screws out of the headset. Then
slide the handlebar on the steerer tube
head like shown on the picture, insert the
four screws and tighten them.
More information about adjusting on
page 8.
Front
Rear
Steerer tube
head
Assembly
S P E Z I A L R Ä D E R
H
A
S
E
PINO
Page 7 As of 12.02
Put on the seat
Slide one side of the seat on the
seat mount of the frame, then pull
the opposite seat tube away from
the frame until you can slide it on
the seat mount.
Now stretch the seat mesh over
the two front tubes of the seat and
use the Hase-straps for tighten it
underneath.
Once the seat mesh is mounted,
you can insert the seat-grips until
the end and tighten the screws
with a 5mm allenkey.
Skrew
Lay the rear seat mesh around the back
of the seat and insert the two aluminium
tubes into the seat mesh. After stretching
the seat mesh they should not touch any
seat tube.
For stretching, run the three Hases-straps
trough the slot of the mesh, around the
aluminium-tubes on both sides and
tighten them.
Fit the info pouch with the velcro straps
between the middle and lower Hasestrap.
Length
S P E Z I A L R Ä D E R
H
A
S
E
PINO
Page 8 As of 12.02
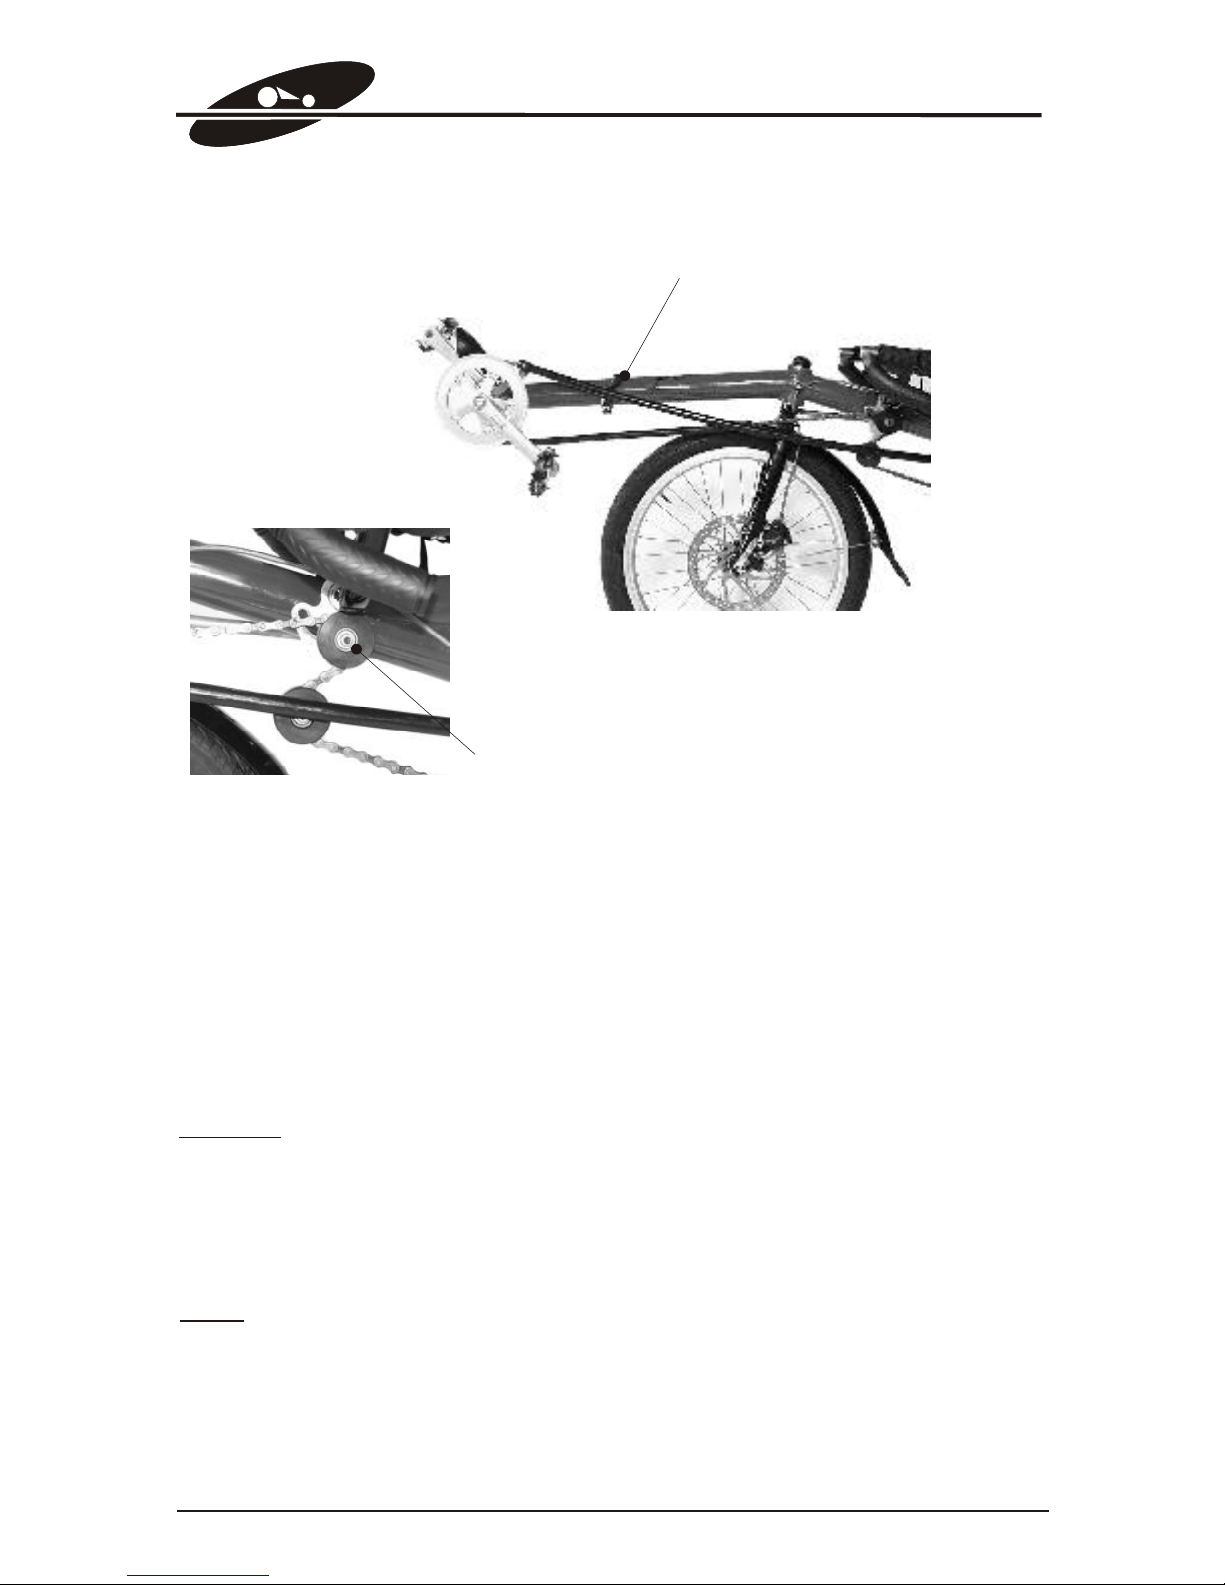
Quick release
For length adjustment open the adjusting screw at the chain tensioner.
Open the quick release, find a comfortable rider position and close the
quick release again. Now turn the chain tensioner clockwise until the
chain is under tension. and tighten the adjusting screw (5mm allen key).
Due to its wide range of adjustment it might be necessary to work on the
chain-length.
Note:
Locking and unlocking the quick release levers is always done either by
levering up or down respectively.
To adjust the locking force, screw the nut at the opposite in or out.
S P E Z I A L R Ä D E R
H
A
S
E
Adjusting screw chain tensioner
Caution:
Don’t extend the frame to far. At maximum length, the mark (grain size
in the front boom) must be hidden in the mainframe.

Steering
Handlebar
S P E Z I A L R Ä D E R
H
A
S
E
PINO
Page 9 As of 12.02
At the captains position at the rear, you can adjust the handlebar in
width, height , length and angle.
To adjust the width or height of the stainless steel handlebar grips, open
screw A and B. Now you can twist the handlebarends to the right length.
To adjust the height, just pull the handlebarends out to a suitable
position. The handlebarends must be insert over the whole black clamp
length, don't exceed this.
The handlebar angle and length can be adjusted to a sporty or relaxed
position. Open all 4 C screws and push the handlebar forward to a
sporty long position or backwards to a short upright and relaxed position.
Once a position is found, tighten all 4 screws firmly.
To adjust the seatgrips for the stoker in front, open screw D and force it
with a plastic hammer into the seat. Now you can turn the grip into a
upright position for short or down for tall people. In the upright position it
also stables the body of the stoker. The grips must be inserted in the seat
S P E Z I A L R Ä D E R
H
A
S
E
Screw A und B
Srew C (x4)
Screw D
 Loading...