

Page 1
A.
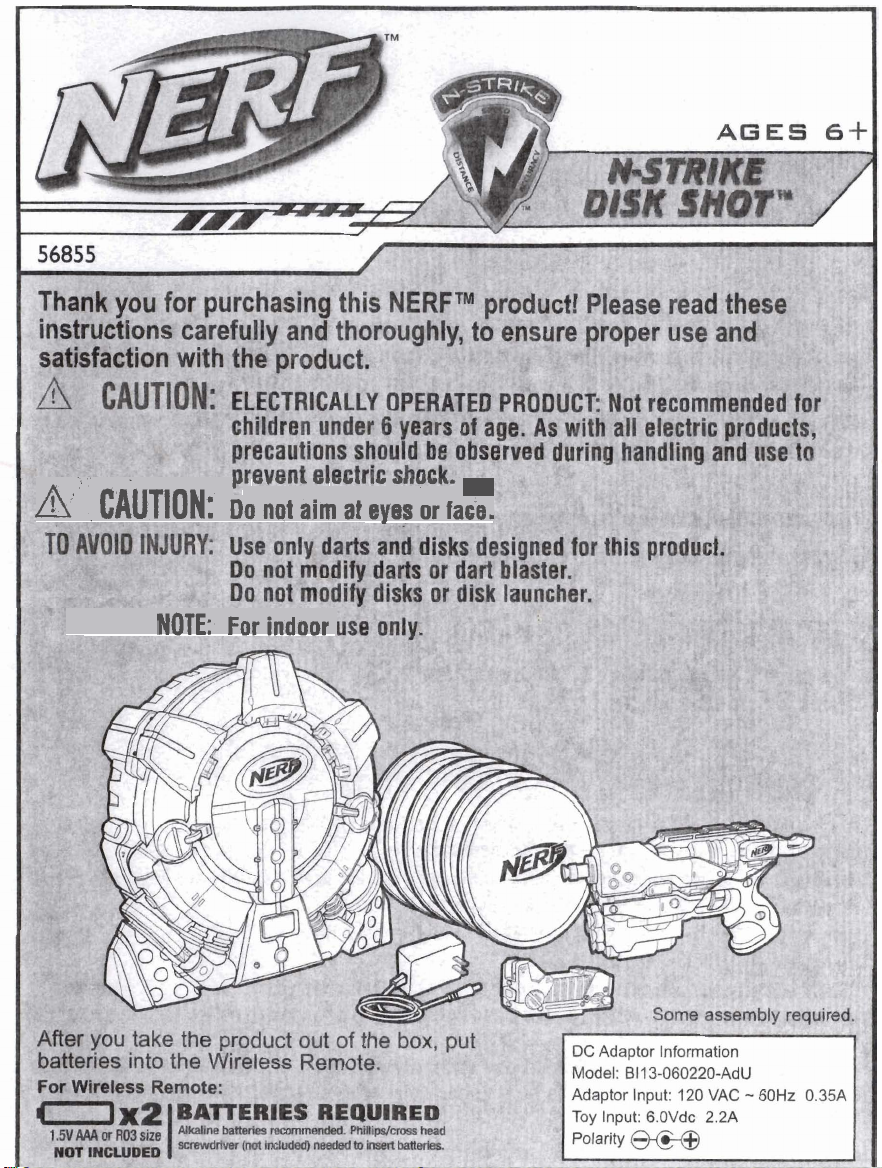
CAUTION:
DO
not
airn
at
my@?
or
~8.
NOTE:
For indoor
Page 2

(I-
Insert
2
Replacer
@'&a&&
sta
r
GV'
cover-and
'AM"
to
cover).
or
RO3
tighten
size
screw.
rker
(not included)
compartment
Famover
battertes.
cover.
mar
A
1.
CAUTION: TO AVOID BATTERY LEAKAGE
As with all small batteries, the batteries used with this toy should be kept away
from small children who still put things In their mouths. If they are swallowed,
promptly sea a doctor and have the, doctor phone (202) 625-3333 collect. In other
countries, have the doctor call your local poison control center.
2. MaRe sure the batteries are inserted correctly and always follow tha toy and battery
manufacturers' instructions.
3. Do not
mix old batteries and new batteries or alkaline, standard (carbon-zinc) or
rechargeable (nickel-cadmium) batteries.
4.
Always remove weak or dead batteries from the product.
IMPORTAN1 BATTERY INFORMATION
Please retain this information for future reference.
Batteries should be replaced by an adult.
CAUTION:
1.
Always follow the instructions carefully. Use only batteries specified and be sure to Insert item
correctly by matching the + and - polarity markings.
2.
Do not mix old batteries and new batteries or standard (carbon-zinc) with alkaline batterles.
3.
Remove exhausted ar $@ad batteries from the product.
4.
Remove Batteries if product is not to be played with for a long time.
5.
Do net short-circuit the cross terminals.
6.
.Should thls product causa, or be affected by, local electrical interference, move it away from other
eleotried equipment. Reset (switching off and back on again or removing and re-inserting batteries)
If necessary.
7.
RECHARGEABLE BATTERIES: Do not mix these wlth any other types of battery. Always remove from
the product before recharging. Recharge batteries under adult supervision. DO NOT RECHARGE
OF
OTHER TYPES
8.
As with all small items, these batterles should be kept away from children. If swallowed, seek
medical attention immediately.
BATTERIES.
Page 3
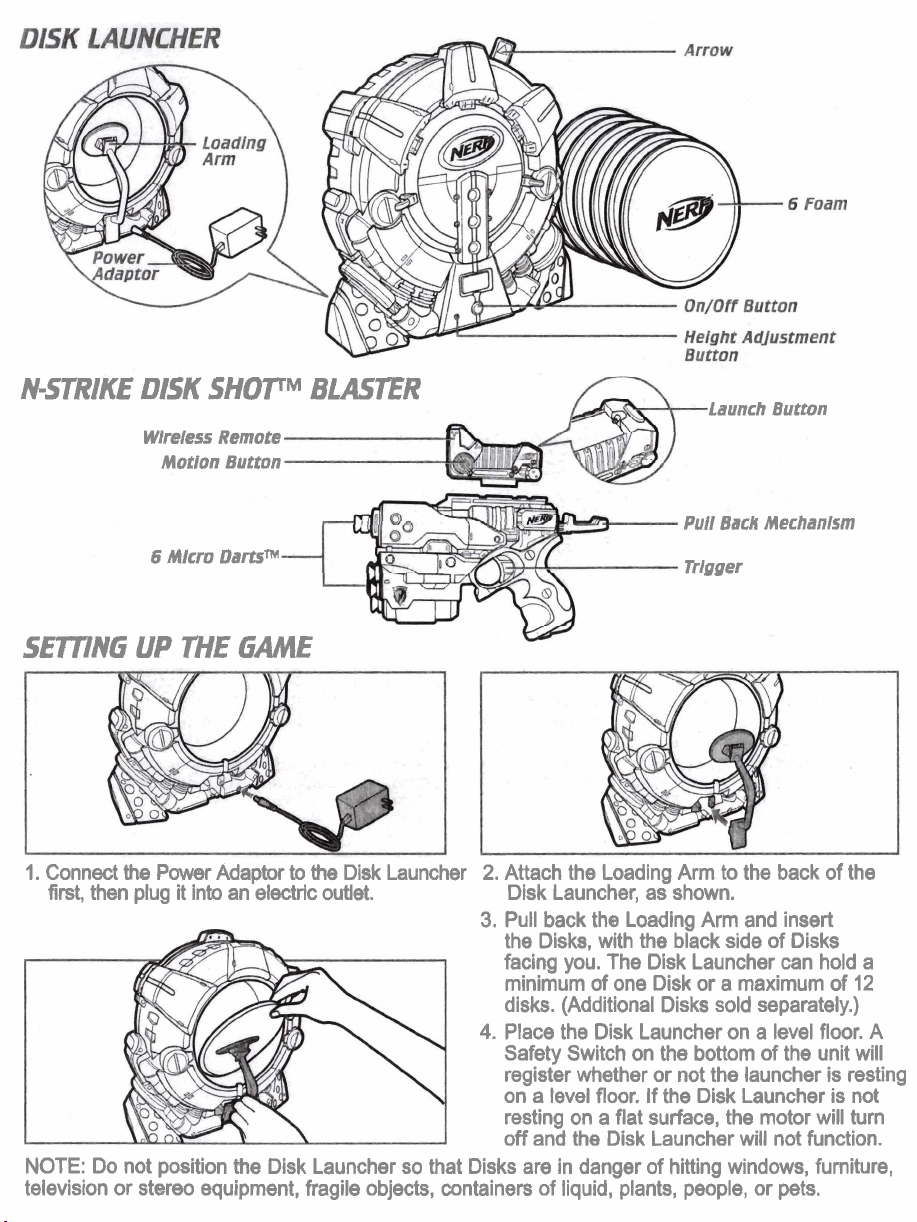
N-S7'RIKE DISK
Wireless
Motton Button
6
Mlcm
SHOTM
Remote
Dartsm
BLAS7ER
Launch Button
Pull Bad Mechanlsm
~rlgger
SETnNG
1.
Conned
first,
NOTE:
television
the
then plug it into an electric outlet. Disk Launcher, as shown.
Do not position the Disk Launcher so that Disks are in danger of hitting windows, furniture,
or
UP
7HE
GAME
Power Adaptor
stereo equipment, fragile objects, containers of liquid, plants, people, or pets.
to
the Disk Launcher
2.
Attach the Loading Arm to the back of the
3.
Pull back the Loading Arm and insert
the Disks, with the black side of Disks
facing you. The Disk Launcher can hold a
minimum of one Disk or a maximum of
disks. (Additional Disks sold separately.)
4.
Place the Disk Launcher on a level floor. A
Safety Switch on the bottom
register whether or not the launcher is resting
on a level
resting on a flat surface, the motor will turn
off and the Disk Launcher will not function.
floor. If the Disk Launcher is not
of
the unit will
12
Page 4

The Wireless Remote, which you can attach any
N-STRIKE5 blaster with a rail system, operates
like the remote
invisible beam,
You must aim the Wireless Remote at the Disk
Launcher in order for it to
Mount the Wireless Remote onto the blaster rail
by sliding and locking
control to your
which activates the Disk Launcher.
it
TV:
function.
into place.
it sends out an
GAME
Turn the Disk Launcher ON. The ON switch is
located
You will hear
the Launcher will light up.
When you play with this
recommended that you stand at least 8 to
feet away from the Disk Launcher.
TO
PLAY
at
the
LOAD
bottom front
a
single tone, and the lights on
WE
of
the Disk Launcher.
product, it is
BLASER
12
The Disk Launcher has two height settings,
to control how high it launches the Disks: the
low
setting is up to 7 feet
high
the
The default setting is low. Take note of the
ceiling height in the room you're playing in,
and set the launch height accordingly.
To change the height setting,
Adjustment
Launcher. The top light indicates
setting;
to
the
setting is
button on the front of the Disk
tha
bottom
default setting,
up
light, the
(2.1
to 9 feet
press
low
press
the button again.
meters); and
(2.7
meters).
the Height
the
high
setting. To
return
1.
Insert a dart into the barrel
of
the blaster.
2.
Pull back the cocking mechanism.
3.
Pull the trigger
4.
Repeat steps I and 2 with darts from the
blaster's storage compartment.
to
fire.
Page 5

Name
Disks Launched Total Hits
Page 6

Name
Disks
Launched
Total
Hits
Page 7

FOR
ALL
GAMES
1.
Aim the blaster at the Disk Launcher.
2.
Press
the Wireless Remote's Launch button. You will see three red lights go on, on the Disk Launcher.
3.
You will hear one long tone, followed by three short tones. This is a countdown to Disk launch. The
three red lights will go off, in sequence and in time with each tone, and then a Disk will launch.
TIP:
Keep your arm straight when firing the
blaster. As the Disk flies into the air, watch
for it to reach its highest point before falling:
firing at the Disk at this moment increases the
likelihood of hitting your target.
If you do not play with this product for more
than approximately three minutes, it will enter
"Sleep Mode." Once the unit enters Sleep
Mode, you will need to turn the unit off and
back on again to start playing again.
HOW
TO
PLAY
NOTE:
ATOW
If, after playing games 2 and
3,
you wish to play game
is back at the center and this will stop the motion.
as
a
hi.
To
launch
another
Disk,
and
press
the
Wireless
1,
push the Motion Button when the
Remote's
you
need
Launch
to
aim your
button
agam.
Page 8

Feel free to make up your own games, as you play with this product!
if
For example,
you are playing with a friend, you could launch six Disks and play "Best of Sixn:
whoever hits the most Disks wins.
If your friend has his or her own N-STRIKEQ blaster (sold separately), one player could launch the
Disks with a Wireless Remote and both players could try to hit them at the same time.
rips
This product is for
natural elements such as wind, rain, or snow. Play in a clear, open indoor area.
Do not use the Disk Launcher or play this game with anything other than N-STRIKEQ blasters.
I'm pressing the Wireless
Remote buttons and nothing
is happening with the Disk
Launcher.
One of the Disks appears
to be stuck.
The three
on the unit are flashing.
A tone is repeating and
will not stop.
FCC
This device complies with part
(1)
This device may not cause harmful interference, and
received, including interference that may cause undesired operation.
Warning: Changes or
compliance could void the user's authority to operate the equipment.
This equipment has been tested and found to comply with the limits for a Class
to part
interference in
energy, and, if not installed and used in accordance with the instructions, may cause harmful interference
to radio
installation.
determined by turning the equipment off and on, the user is encouraged to try to correct the interference by
one or more of the following measures:
(3)
STATEMENT
15 of the FCC Rules. These limits are designed to provide reasonable protection against harmful
communicatbns. However, there is no guarantee that interference will not occur in a particular
If
Reorient or relocate the receiving antenna.
Increase the separation between the equipment and the receiver.
Consult the dealer or an experienced radiom technician for help.
Connect the equipment into an outlet on a circuit different from that to which the receiver is connected.
indoor
LED lights
a
residential installation. This equipment generates, uses and can radiate radio frequency
this equipment does cause harmful interference to radio or television reception, which can be
use
only.
Do not take the Disk Launcher outdoors or expose it to
-
Make sure, when you are pressing the buttons on the Wireless Remote,
that you are aiming the Wireless Remote at the Disk Launcher.
-
The unit may be in Sleep Mode: turn it off and back on.
-
Make sure
Disk
-
Unplug the Disk Launcher and attempt to dislodge the stuck Disk.
-
There are no Disks in the unit, or the Loading Arm is not attached.
-
There is an error with the unit. Turn it off and unplug it. Check to make
sure there are no Disks stuck in the unit. Turn the unit back on again.
15
of the FCC Rules. Operation is subject to the following two conditions:
modifmtions to this unit not expressly approved by the party responsible for
ou have fresh batteries in the Wireless Remote and that the
~aunder is plugged into a working electrical outlet.
(2)
this device must accept any interference
B
digital device, pursuant
Connect the equipment into an outlet on a circuit different from that to which the receiver is connected.
Your Disk Shot and DC adaptor should be periodically examined for potential hazards. If any potential
hazards are found, please contact Hasbro Consumer affairs at 1-800-844-3733 for repair or replacement.
O
2007
Hasbro.
All
8.
TM
U.S.
56855
@
Pat.
denote
Nos.
Rights Resewed.
U.S.
Trademarks.
5611322, 5471967
PIN
6679700000
and
5529050.
Product and
colon
may vary.
 Loading...