

Page 1
7HRHS
7HRHS
BNL
BNL
FCC STATEMENT
This device complies with part 15 of the FCC Rules. Operation is subject to the
following two conditions: (1) This device may not cause harmful interference,
and (2) this device must accept any interference received, including interference
that may cause undesired operation. This equipment has been tested and
found to comply with the limits for a Class B digital device, pursuant to Part 15
of the FCC Rules. These limits are designed to provide reasonable protection
against harmful interference in a residential installation. This equipment
generates, uses and can radiate radio frequency energy, and, if not installed
and used in accordance with the instructions, may cause harmful interference
to radio communications. However, there is no guarantee that interference
will not occur in a particular installation. If this equipment does cause harmful
interference to radio or television reception, which can be determined by
turning the equipment off and on, the user is encouraged to try to correct the
interference by one or more of the following measures:
• Reorient or relocate the receiving antenna.
• Increase the separation between the equipment and the receiver.
• Consult the dealer or an experienced radio/TV technician for help.
®
Creative and the Creative
logo are trademarks or
registered trademarks of
Creative Technology Ltd in
the U.S. and other countries.
© 2007 Hasbro.
All Rights Reserved.
TM & ® denote U.S. Trademarks.
09347 Asst. P/N 6724240000
Warning: Changes or modifications not expressly approved
by the party responsible for compliance could void the user’s
authority to operate the equipment.
Shielded cables must be used with this unit to ensure compliance
with the Class B FCC limits.
If you have any questions, please contact:
Consumer Affairs, Hasbro, Inc.
1027 Newport Avenue
Pawtucket, RI
Tel: 1-800-752-9755
Questions? Call 1-800-PLAYSKL
Made for Me
™
MP3 UNIT
Thank you for choosing this
PLAYSKOOL product!
Please keep this instructions booklet
for future reference, as it contains
important information for using your
MADE FOR ME MP3 UNIT.
™
BIRTH+
09347 Asst.
TIP
In order to function, this
product must be used with
PLAYSKOOL® MADE FOR ME™
products. (Sold separately)
Page 2
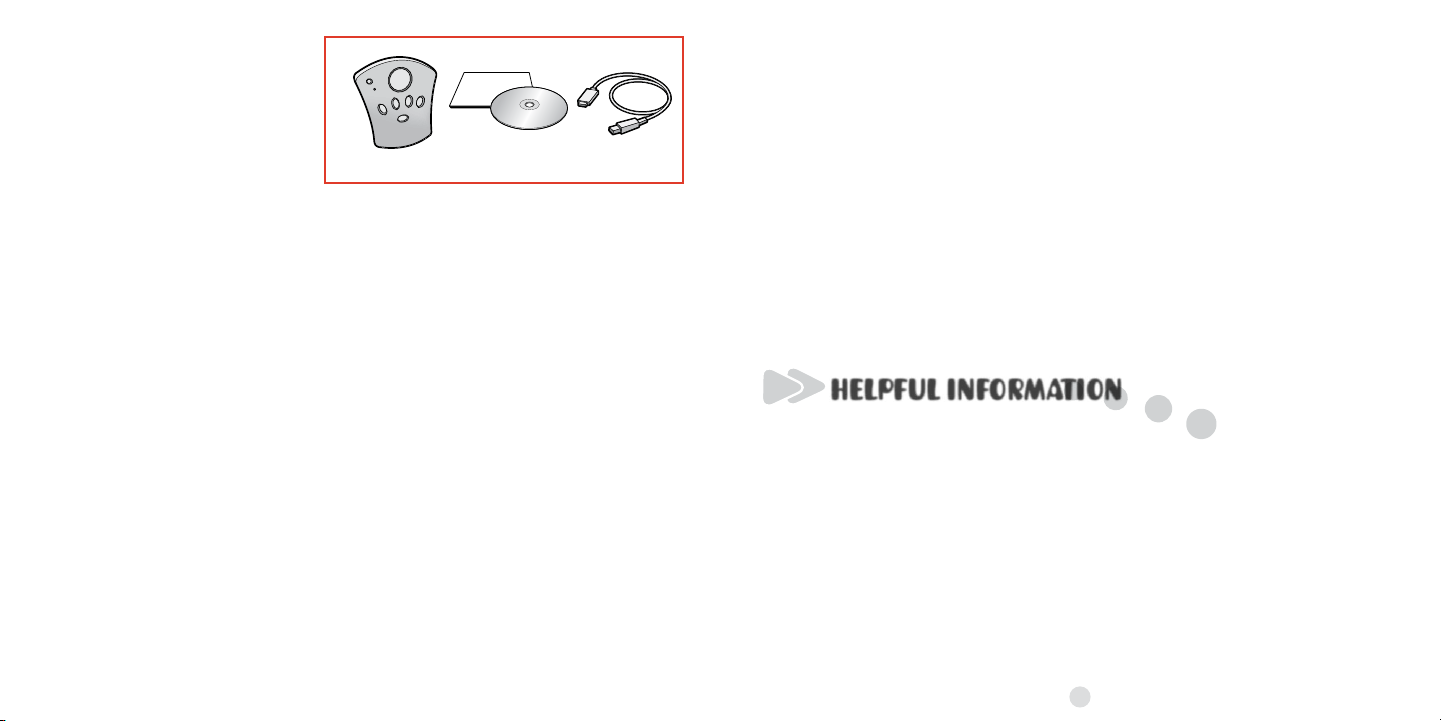
INCLUDES
TABLE OF CONTENTS
Getting Started
MP3 Unit
Using the MP3 Unit
System Requirements ...................................................................................2
Software Installation .......................................................................................2
MADE FOR ME™ Library ..................................................................................3
Loading Pictures ............................................................................................. 5
Creating Your Music Library ........................................................................6
Loading Music.....................................................................................................7
Transferring Music to the MP3 Unit .......................................................10
Understanding the MP3 Unit......................................................................13
Using the MP3 Unit with the MADE FOR ME™
MP3 MUSIC PLAYER (sold separately)..................................................15
Using the MP3 Unit with the MADE FOR ME™
2-IN-1 INFANT GYM (sold separately)....................................................16
Using the MP3 Unit with the MADE FOR ME™
DAY-TO-DREAM SOOTHER™ (sold separately)...............................20
Helpful Information
Online Help ........................................................................................................21
Software
Installation Disc
USB Cable
DAY / NIGHT mode switch
When using the MADE FOR ME MP3 UNIT, you must choose the play
list to accompany your choice of DAY or NIGHT mode. Choose from
“Playtime,” “Soothing,” “Sounds,” or “Favorites.”
The function of all other buttons (Volume, Back/Next, Pause, On/Off,
and the Play Mode switch) remains the same.
HELPFUL INFORMATION
Online Help
For 24-hour online help resources, go to www.playskool.com/madeforme
Also check the MADE FOR ME Web site periodically for updates to
your MADE FOR ME software.
21
Page 3
Using the MP3 Unit with the MADE FOR ME™
DAY-TO-DREAM SOOTHER™ (sold separately)
Enhancing the Play
Insert the MADE FOR ME MP3 UNIT as shown.
Turn the DAY-TO-DREAM SOOTHER power
button on, and press the Play button to turn
the MP3 unit on.
You can now control what your baby hears-
from soothing and energetic songs to stories
and even your own voice! You can also
control the length of music play: 1 song; 15
minutes; or 30 minutes.
GETTING STARTED
Introduction
No one knows your baby better than you do.
MADE FOR ME toys are designed to help you
TIP
For a quick and easy
overview of the
MADE FOR ME Library,
be sure to watch the
tutorial included on the
Software Installation CD!
meet your baby’s unique needs!
The MP3 UNIT allows you to control what your baby hears—from
soothing and energetic songs to stories and even your own voice!
NOTE
The MP3 unit will not work, record voice, or turn on unless it is positioned in another
MADE FOR ME product (sold separately). The MP3 unit is powered by batteries in MADE
FOR ME products, so you never have to worry about charging the MP3 unit!
PLAY button
The PLAY button now operates as another NEXT button: that is, when
music is playing, you may advance to the next song selection by
pressing either the NEXT button or the PLAY button.
Spinning Ball
The Spinning Ball now connects you to your “Favorites” play list.
With each spin of the ball, you are automatically taken to the next
selection on the “Favorites” play list of your MADE FOR ME MP3 UNIT.
• To change play lists, you must make the change using the MP3 unit.
20 1
Once the MP3 unit is positioned in a MADE FOR ME product (sold
separately), you can turn the MP3 unit on by pressing the product’s
Play button. Lights will flash, and there will be a “tick tock” sound
while the MP3 unit powers up. You will then hear a voice prompt
announcing the playlist. If nothing happens after you press the Play
button, make sure the MP3 unit is securely in place, and the MADE
FOR ME product (sold separately) is turned on.
When you position the MP3 unit into a MADE FOR ME product (sold
separately) and turn the product off, the MP3 unit automatically
powers down.
Page 4
USING THE MP3 UNIT
System Requirements
• Microsoft® Windows® 2000/XP
• Intel® Pentium® II 350MHz, AMD® K6-2® 450MHz or
better processor (Pentium III 450 MHz or higher recommended)
• 64MB RAM (128MB recommended)
• USB 1.1 port (USB 2.0 recommended)
• 30MB free hard drive space (more for audio content storage)
• CD-ROM drive with digital audio extraction support
• 1024 x 768 minimum screen resolution
Not Mac OS Compatible.
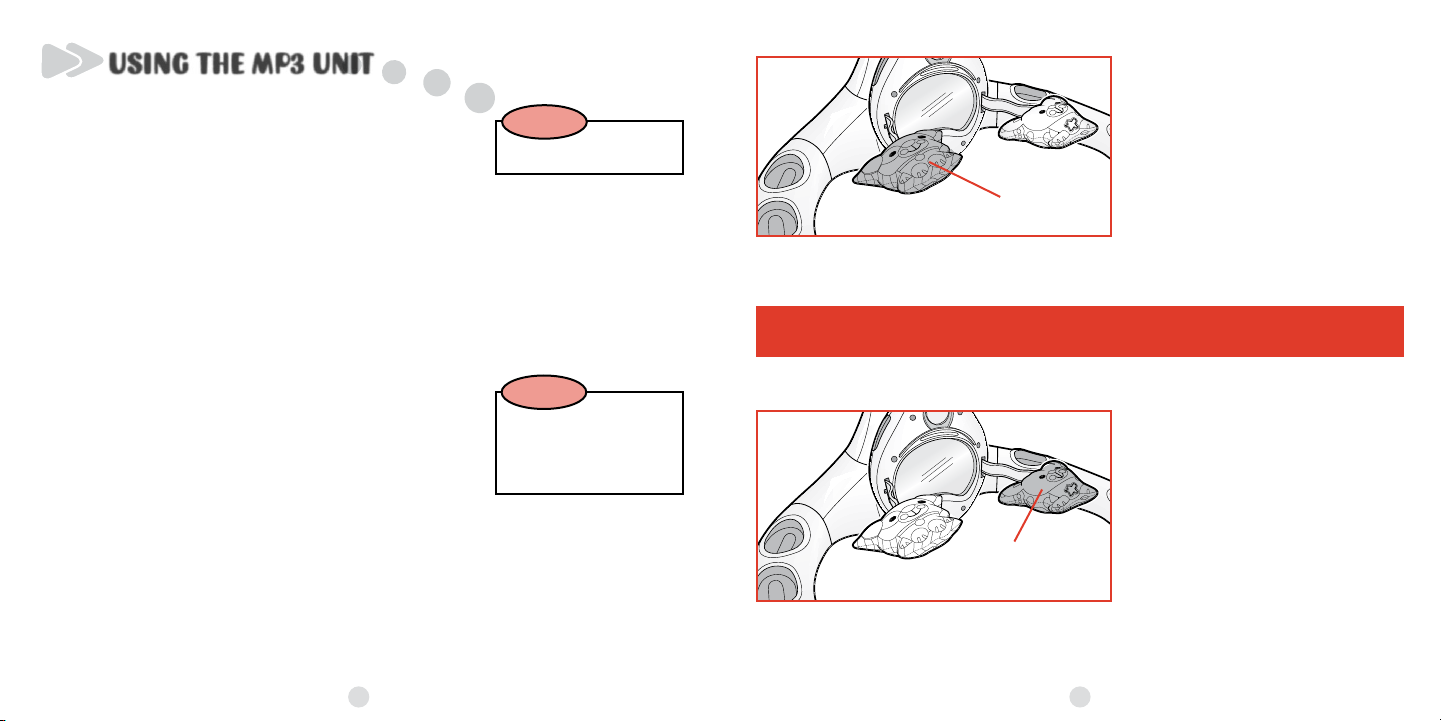
NOTE
When the Neck is in the
down position, the Puppy
toy connects you to your
“Favorites” play list. When
you bat at the Puppy toy,
you are automatically taken
Puppy Toy
to the next selection on the
“Favorites” play list of your
MADE FOR ME MP3 UNIT.
To change play lists, you must make the change using the MADE FOR ME MP3 UNIT.
Software Installation
1. Turn on your computer.
2. Insert the MADE FOR ME Software Installation CD. Your
CD should start automatically. If it does not, follow the
steps below:
• Start Windows Explorer.
• On the left pane, click the MY COMPUTER icon.
• Right-click the CD-ROM/DVD-ROM drive icon, and
then click AUTOPLAY.
3. Follow the instructions on screen.
4. If prompted, restart your computer.
2 19
NOTE
Do not connect the
MP3 unit to your
computer before
setting up the software.
Bunny Toy
When the Neck is in the down
position, and your child bats
at the Bunny toy, he’ll be
rewarded with sound effects!
The song will be interrupted
momentarily to play the
sound, and then the song will
continue.
Page 5

delete
MP3 unit is not detected. Please
insert MP3 unit to transfer files.
MP3 Unit
MADE FOR ME Library
Playtime
delete
ABC Song.mp3.......................................
408.2KB
419.6KB
591.9KB
264.5KB
1.0MB
224.5KB
170.2KB
519.2KB
Alouette.mpe.........................................
Bingo.mp3.............................................
Eensy Weensy Spider.mp3....................
Happy and You Know It.mp3.....................
Hey Diddle Diddle.mp3.........................
Hickory Dikory Dock.mp3.....................
Lavender Blue.mpe..................................
Image Window
Click here
to Add Music
Transfer
Files
Play Audio File
MADE FOR ME Software
File Play Edit View Tools Help
add music
New
Library
MADE FOR ME Library
1. To listen to music, press the
PLAY button.
MADE FOR ME Music Library
For a quick and easy overview of the MADE FOR ME Library, be sure
to watch the tutorial included on the Software Installation CD.
You can find the tutorial by following this path on your computer:
Start | All Programs | Playskool | MADE FOR ME Software | MADE FOR ME Software Tutorial
When you insert the MADE FOR ME MP3 UNIT into this product,
Next PauseBack
Play
Button
2. Use the PAUSE button to pause
the music, and the NEXT and
BACK button to toggle through
the song selections.
the function of some of the buttons changes.
318
Page 6

To get started, launch the MADE FOR ME software. This will take you
Favorites
Playtime
Soothing
Sounds
to the MADE FOR ME Library, which is where you’ll organize and store
songs and audio files you’d like to transfer to the MP3 unit.
NOTE
You must use the MADE FOR ME software to transfer audio files to your MP3 unit.
Other features of the MADE FOR ME Library include:
• A Play button to preview your audio files
• An Image Window, which lets you add your own pictures to the software
Playlists
The MADE FOR ME
Library contains four
playlists for organizing
your audio files. These
playlists are configured
to work with the
MP3 unit.
You can also easily create multiple libraries containing these four
playlists:
1. Click on “File” | “New Library” in the task bar.
2. Name your new library and click “OK.”
3. Your new library will appear in the library list drop-down menu.
To change the name of an existing library, click on “File” | “Save
Library As...” To delete a library, click on “File” | “Delete Library.”
4
ON/OFF switch
Play
Button
MP3 UNIT
17
3. Insert the MP3 UNIT and
close the cover.
4. Turn the product ON
using the ON/OFF switch.
5. Turn the MP3 unit on by
pressing the Play button.
Page 7

Browse...
Remove
OK Cancel
Preview
seconds
Select a picture:
None
Orange Daisy
Soccer Ball
Chess Piece
My Pictures
Slideshow interval:
Play as a slideshow
2
ENHANCING THE PLAY
Using the MP3 Unit with the MADE FOR ME™
2-IN-1 INFANT GYM (sold separately)
Inserting the MP3 UNIT
1. Position the Neck so
that it is facing up,
as shown.
Button
2. Press the button to
open the cover.
Loading Pictures
To add pictures to your MADE FOR
ME Image Window, simply click the
“Image Window” button located in the
upper right part of the screen. This
will open a dialog box that allows you
to browse your computer for images
you’d like to add to the MADE FOR ME
Image Window. This dialog box is also
where you can delete photos you’d
no longer like to include in your MADE
FOR ME Library interface.
NOTE
Supported digital picture formats are: JPG, JPEG, GIF and BMP images.
Images run in a slideshow on your computer. (The slideshow can
be turned off by deselecting the “Play as a Slideshow” check box.)
The arrows in the Image Window box allow you to cycle through the
photos you’ve loaded. If you load only one photo, that is the photo
that will appear on the screen.
516
Page 8

delete
59 MB free
MP3 Unit
MADE FOR ME Library
Playtime
Playtime
delete
ABC Song.mp3.......................................
408.2KB
419.6KB
591.9KB
264.5KB
1.0MB
224.5KB
170.2KB
519.2KB
Alouette.mpe.........................................
Bingo.mp3.............................................
Eensy Weensy Spider.mp3....................
Happy and You Know It.mp3.....................
Hey Diddle Diddle.mp3.........................
Hickory Dikory Dock.mp3.....................
Lavender Blue.mpe..................................
Transferring.....................................................................................50%
MADE FOR ME Software
File Play Edit View Tools Help
add music
Click here
to add
music.
MADE FOR ME Library
Creating Your Music Library
add music
Release
Button
NOTE
Your MP3 unit will accept music downloaded from the Internet, or music ripped from
your CD library (MP3, WMA, WAV files).
Using the MADE FOR ME™ MP3 Unit with the
MADE FOR ME™ MP3 Music Player (sold separately)
The MADE FOR ME Library is where you’ll gather and organize the
music you’ll load onto the MP3 unit for use in your MADE FOR
ME™ products (sold separately).
1. Click on one
of the four
playlists.
2. Click on the
“Add Music”
button, which
brings you to
the Add Music
Wizard.
3. Your music
will be stored
in the playlist
you’ve
selected.
6 15
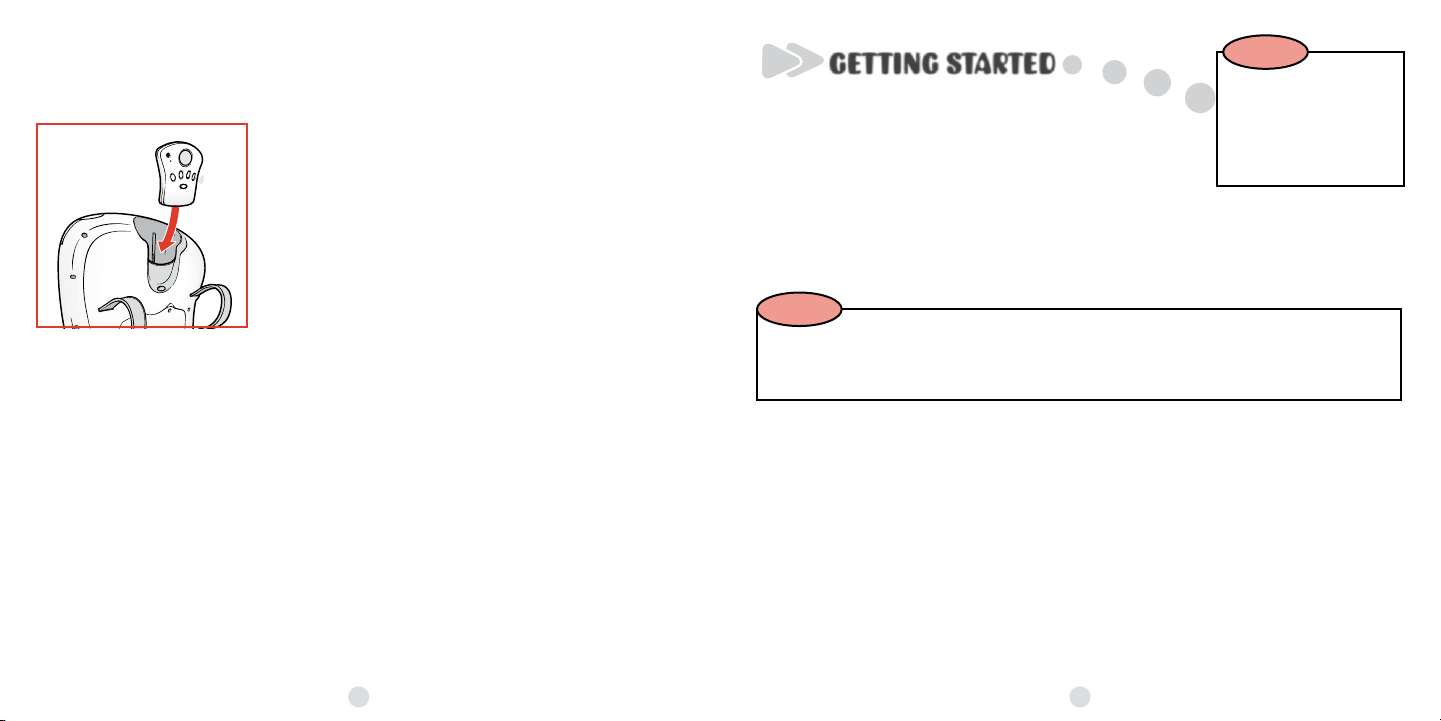
The MP3 unit fits into the back of
your MADE FOR ME MP3 MUSIC
PLAYER (sold separately) and
greatly enhances your Player’s
performance. Slide the MP3 unit
into the back as shown, and then
turn the player on.
To release the MP3 unit, press the
button on the back of the player,
grasp the MP3 unit and pull it out.
Page 9

Add Music Wizard
Welcome to the Add Music Wizard
How would you like to add music to the MADE FOR ME Library?
Select music files from my computer
Rip Audio CD to the MADE FOR ME Library
<Back Next> Cancel
Selecting Playlists and Shuffling
Add Music Wizard
Select Files or Folders
Select the music files or folders to be added into the MADE FOR ME Library.
<Back Next> Cancel
Files and folders on My
Computer
Files to be added to Playtime
My Documents
My Computer
Debugging Tools for Windows
Test
Local Disk (C:)
Desktop
My Music
Always.wma
Angel.mp3
Bad Medicine.wma
Local Disk (E:)
share on ‘ctifs1’ (S:)
Always.wma 3,610 KB
Angel.mp3 2,087 KB
Bad Medicine.wma 2,778 KB
Beds Of Roses.wma 5,965 KB
Best Of My Love.mp3 2,555 KB
Blaze Of Glory.wma 726 KB
Brand New Day.mp3 4,481 KB
Name Size
To toggle between the Playtime, Soothing, Sounds, and Favorites
playlists, or to Shuffle, simply press the large round button on the
MP3 unit. A voice prompt helps you determine which playlist is
about to be queued up in the MP3 unit.
NOTE
Once you’re back in the MADE FOR ME Library interface, you can move a song from
one playlist to another by clicking on the song and dragging it to the desired playlist.
You can also move a song by right-clicking on it and selecting “Move File To.” You then
have the option of selecting one of the four playlists.
The MP3 unit also has a voice recording function. Follow these easy
steps to record your own voice!
1. With the MP3 unit positioned in the MADE
FOR ME toy (sold separately), press and
hold the Record button.
2. Once the red light on the MP3 unit
begins to blink, you can begin!
Red Light
Microphone
3. For best results, speak clearly into
the microphone.
4. Continue to press the Record button
until you are finished your recording.
Voice
Record
5. Once you have finished, the MP3 unit
will play back your recording.
NOTE
• While recording, if the red blinking light changes to a green blinking light, you have
run out of memory.
• While recording, if the red blinking light changes to a solid red light, you have run out
of battery power.
• In both cases, the recording will stop then play back what you recorded.
Your voice file will automatically be stored in your Favorites playlist,
and will be assigned a file name. When you go back into your MADE
FOR ME Library, you will be able to rename the file if you wish.
14
Playlist
Loading Music
The “Add Music” screen gives
you the choice of adding songs
and audio files from your
computer or ripping tracks from
an audio CD. Once you have
made your selection, click the
“Next” button.
Selecting Music Files from
My Computer
From the “Select Files/Folders to
Add” screen, you can browse your
computer for files you’d like to
add to the MADE FOR ME library.
Select the file or folder and click
the “+” button to add.
Plus/Add
7
Minus/Remove
Page 10

Add Music Wizard
Select CD Tracks
<Back Next> Cancel
CD Tracks
Tracks to be added to Playtime
T.J.’s Theme Song 3,610 KB
The Safari Song 2,087 KB
Bibba & Jibba Jam 2,778 KB
Dust Bunny Blast 5,965 KB
Coldybear and the Three Penguins 2,555 KB
The Pirate Song 726 KB
1,410 KB
2,022 KB
1,678 KB
3,265 KB
4,575 KB
1,826 KB
I’m Not Afraid
Be a Hero
The Teeny Tiny Song
Three Little Cookies
The Magic of Sharing
Special Time Together
Name Size
Select the CD Tracks or folders to be added into the MADE FOR ME Library.
You can remove songs from your “Files to be added to Playtime”
window by highlighting the song and clicking on the “-” button. When
you are finished selecting songs, click the “Next” button.
Rip Audio CD
If you selected “Rip Audio CD to Made for Me Library,” and a CD is
in your disk drive, you will be automatically directed to the “Select
CD Tracks” screen and the CD tracks will show up in both your “CD
Tracks” window and in your “Tracks to be added to Playtime” window.
If you don’t want to rip all of the tracks from your CD to your playlist,
use the “–” button to remove unwanted tracks from the “Tracks to be
added to Playtime.” When you are finished, click the “Next” button.
Understanding the MP3 Unit
The MP3 unit has three different play modes. Select your mode by
pressing the button that corresponds to your desired play time
(see diagram below).
NOTE
The MP3 unit will not work, record voice, or turn on unless it is positioned in the
product. If the product is turned off, the MP3 unit automatically powers down.
Green Light
Medium-Play Mode
NOTE
(15 minutes)
If a CD is NOT
in your disk
drive, you will
be prompted
Short-Play Mode
(1 song)
to insert a CD
before moving
to the “Select
CD Tracks”
screen.
NOTE
To preserve battery life, after two minutes of inactivity (following the end of your
mode selection), the product will automatically shut off. The product will turn on
again when the play button is pushed.
8 13
Long-Play Mode
(30 minutes)
Power
Voice Record
Page 11

Add Music Wizard
Completed
The wizard has completed adding music files to the MADE FOR ME Library.
<Back Add More Close
Music files added : 6
No. StatusFile
1 E:\mp3\English\ T.J.’s Theme Song.mp3 Completed
2 E:\mp3\English\The Safari Song.wma Completed
3 E:\mp3\English\Bibba & Jibba Jam_.mp3 Completed
4 E:\mp3\English\Dust Bunny Blast_.wma Completed
5 E:\mp3\English\Coldybear and the Three Penguins.wma Completed
6 E:\mp3\English\The Pirate Song.mp3 Completed
Disconnecting Your MP3 Unit
To close out of your MADE FOR ME software, click the “Close Window”
icon (X) in the upper right side of the window.
You can disconnect your MP3 unit by clicking the “Eject Disk” icon
from the task bar. Select “USB Mass Storage Device” (the MP3 unit)
and click “Stop.” A dialog box will prompt you to remove your device.
Unplug the USB cable from your computer. When the light on the
MP3 unit goes from blinking green to solid yellow, you can unplug
your MP3 unit. When unplugged, the MP3 unit will shut
off automatically.
TIP
Remember, even if you don’t load your own music onto the
MP3 unit, by sliding the unit into your MADE FOR ME product (sold
separately), you get 50 songs and sound effects, categorized into
the four playlists.
Final Steps
The “Completed” screen lists the songs and audio files you have
added to your MADE FOR ME Library. From here, you can add
additional songs by selecting the “Add More” button, or exit by
selecting “Close.”
The songs you have added now appear in the MADE FOR ME Library.
The number of songs and audio files you store in your MADE FOR ME
Library varies according to your computer’s memory capacity.
912
Page 12

Transferring Music to the MP3 Unit
Sound
delete
59 MB free
MP3 Unit
MADE FOR ME Library
Playtime
delete
ABC Song.mp3.......................................
408.2KB
419.6KB
591.9KB
264.5KB
1.0MB
224.5KB
170.2KB
519.2KB
Alouette.mpe.........................................
Bingo.mp3.............................................
Eensy Weensy Spider.mp3....................
Happy and You Know It.mp3.....................
Hey Diddle Diddle.mp3.........................
Hickory Dikory Dock.mp3.....................
Lavender Blue.mpe..................................
transferring.....................................................................................50%
MADE FOR ME Software
File Play Edit View Tools Help
add music
Made For Me Library
Connect the MP3 unit to your computer’s USB
port with the USB cable (included).
Once the unit is connected to your computer,
you should see a green blinking light on
the MP3 Unit and the right side of your
screen becomes active.
From your MADE FOR ME Library (left side), click the playlist tab from
which you want to transfer songs and select songs to transfer. Then,
click the playlist tab on the MP3 unit (right side) where you want to
transfer songs.
blinking
light
TIP
NOTE
Use the Control or Shift keys to select multiple songs or audio files at once.
You can transfer songs into the same playlist on the Player or a different playlist.
The USB cord is not a toy. Intended for use by an adult.
Once you have selected a song to transfer, use the right-pointing
arrow button to transfer the song. When you click on the arrow, the
transfer bar at the top will show the status of the transfer, and you
should see a red blinking light on the MP3 unit.
NOTE
Do not disconnect the MP3 unit from your computer while the red
light is blinking, as it will result in a failed transfer.
You can use the left-pointing arrow to transfer a song from the MP3
Unit to your computer, which is useful if you have made a recording
with the built-in microphone in the MP3 Unit. (See p. 14 for more
information about voice recording.)
The amount of memory remaining on the MP3 Unit is shown in the
memory indicator below the MP3 Unit window.
1110
 Loading...