

Page 1
Welcome to Cranium
IN THE BOX
tunnel segment (3)
door (1)
®
Tw is ty Tunnel
Create fun tunnel spaces...crawl to new places!
GET STARTED!
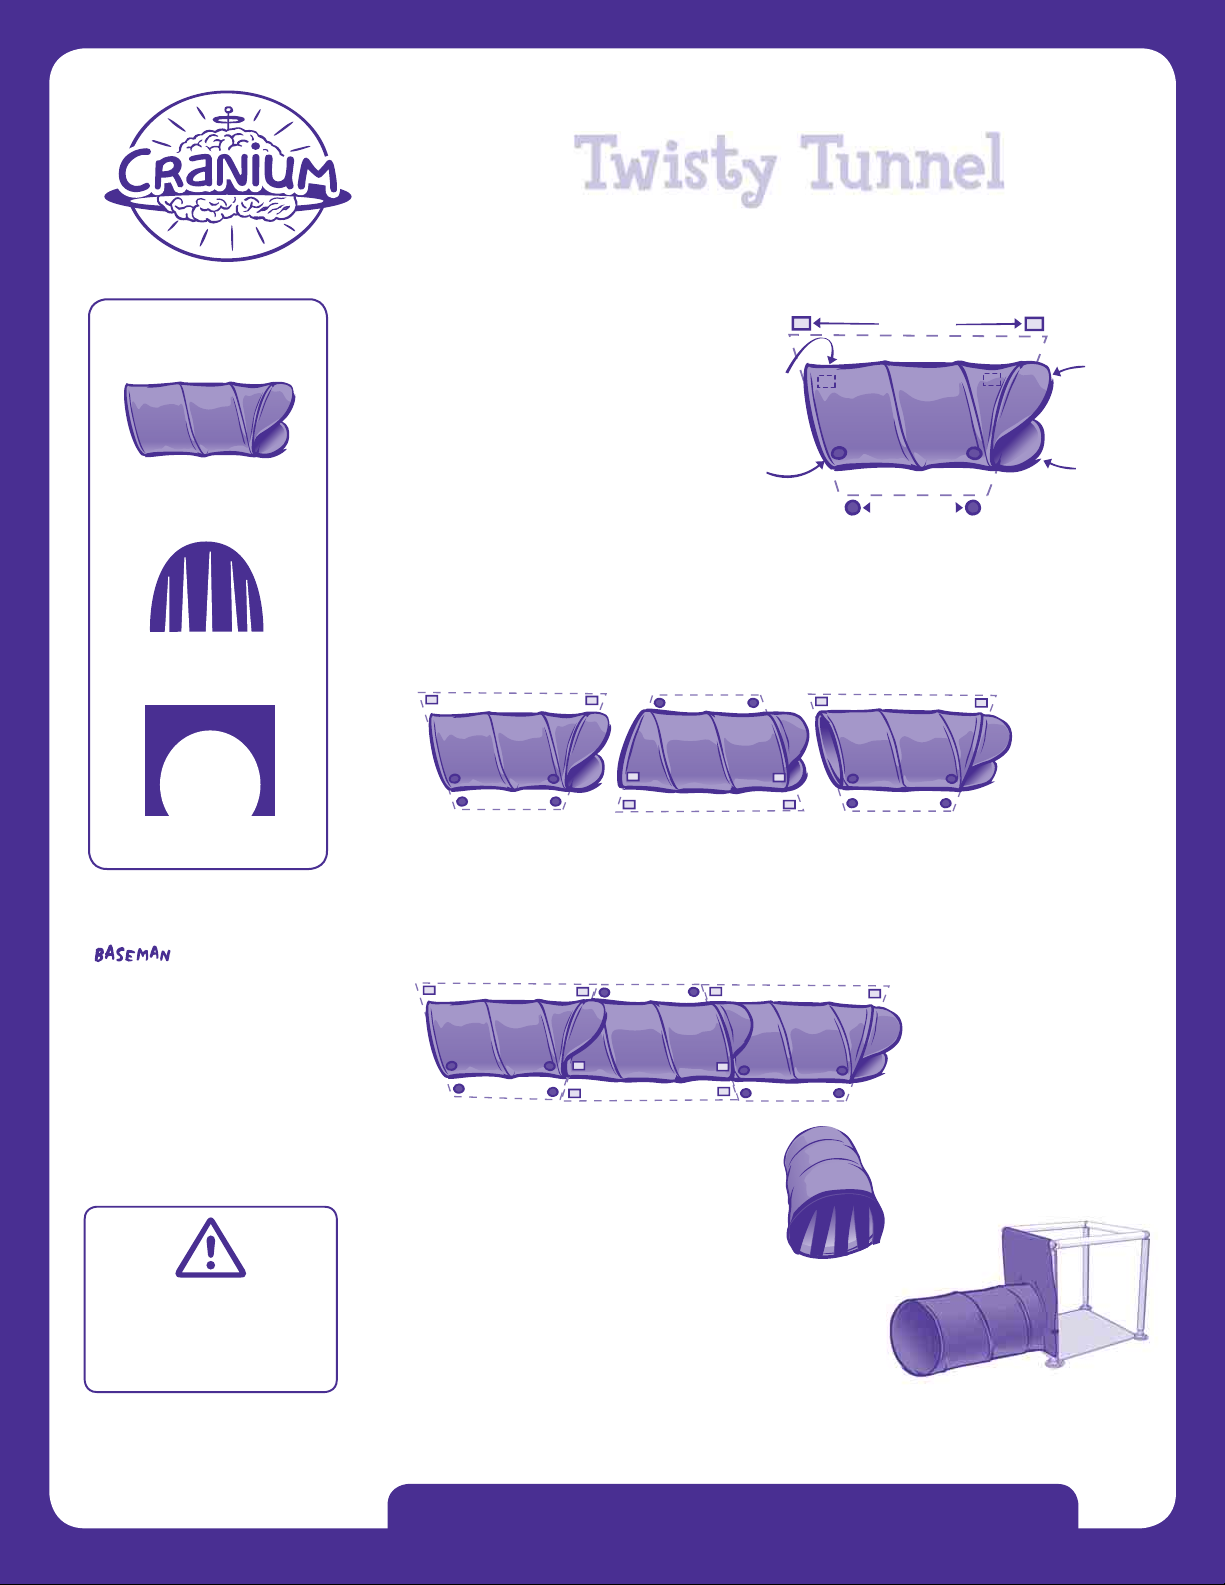
1. Untie each tunnel segment.
rectangle tab
Find the rectangles on the
long side of each segment.
Find the circles on the short
circle tab
side of each segment.
2. To make a straight tunnel, line up the three segments:
•First segment: circle tabs facing you
•Second segment: rectangle tabs facing you
•Third segment: circle tabs facing you
Your tunnel will look like this:
long side
top ap
bottom ap
short side
connector (1)
© 2007 CRAN IUM , INC . ALL RIGHTS
RESERVED. CR ANIUM CH ARACTER
ILLUSTRATIONS © 1998, 2001
ARE TRADEMARKS OR REGISTERED
TRADEMARKS OF CRANIUM,
INC. IN THE U. S. AND/OR OTHER
JURISDICTIONS: CREATIVE CAT,
DATA HEAD, EVERYONE SHINES, STAR
PERF ORMER, SUPER FORT, WORD
WORM, THE CR ANI UM LOGO, AND
THE BR AIN LOGO. WE PACK EV ERY
CRA NIUM TOY WITH A VARIETY OF
OUTRAGEOUS ACTIVITIES. IT’S UP
TO YOU TO US E CAU TION, PL AY IT
SMART, AND HAVE FUN.
This material meets CFR 1610 speci cations for ame resistance. It is not
reproof. This fabric will burn if left in continuous contact with any ame
source. The application of any foreign substance to the fabric may render the
TM
. THE FOLLOWING
KEEP ALL FLAME AND HEAT SOURCES
AWAY FROM THIS FABRIC.
ame-resistant properties ineffective.
NOT MACHINE WASHABLE.
Clean only with a warm, damp cloth.
3. Put the segments together:
• Connect the top and bottom aps of the rst segment to the body of the
second segment.
•Connect the aps of the second segment to the body of the third segment.
Your tunnel will look like this:
4. Attach the door. Your tunnel is done!
5. Connect your tunnel to Super Fort! Wrap the
connector around a tube, then attach the
tunnel ap to the connector.
6. Now climb in and make someone giggle. Have fun!
7. Look on the back of this sheet for more tunnels to make!
For even more fun, visit cranium.com!
Page 2
WOeng 01GR
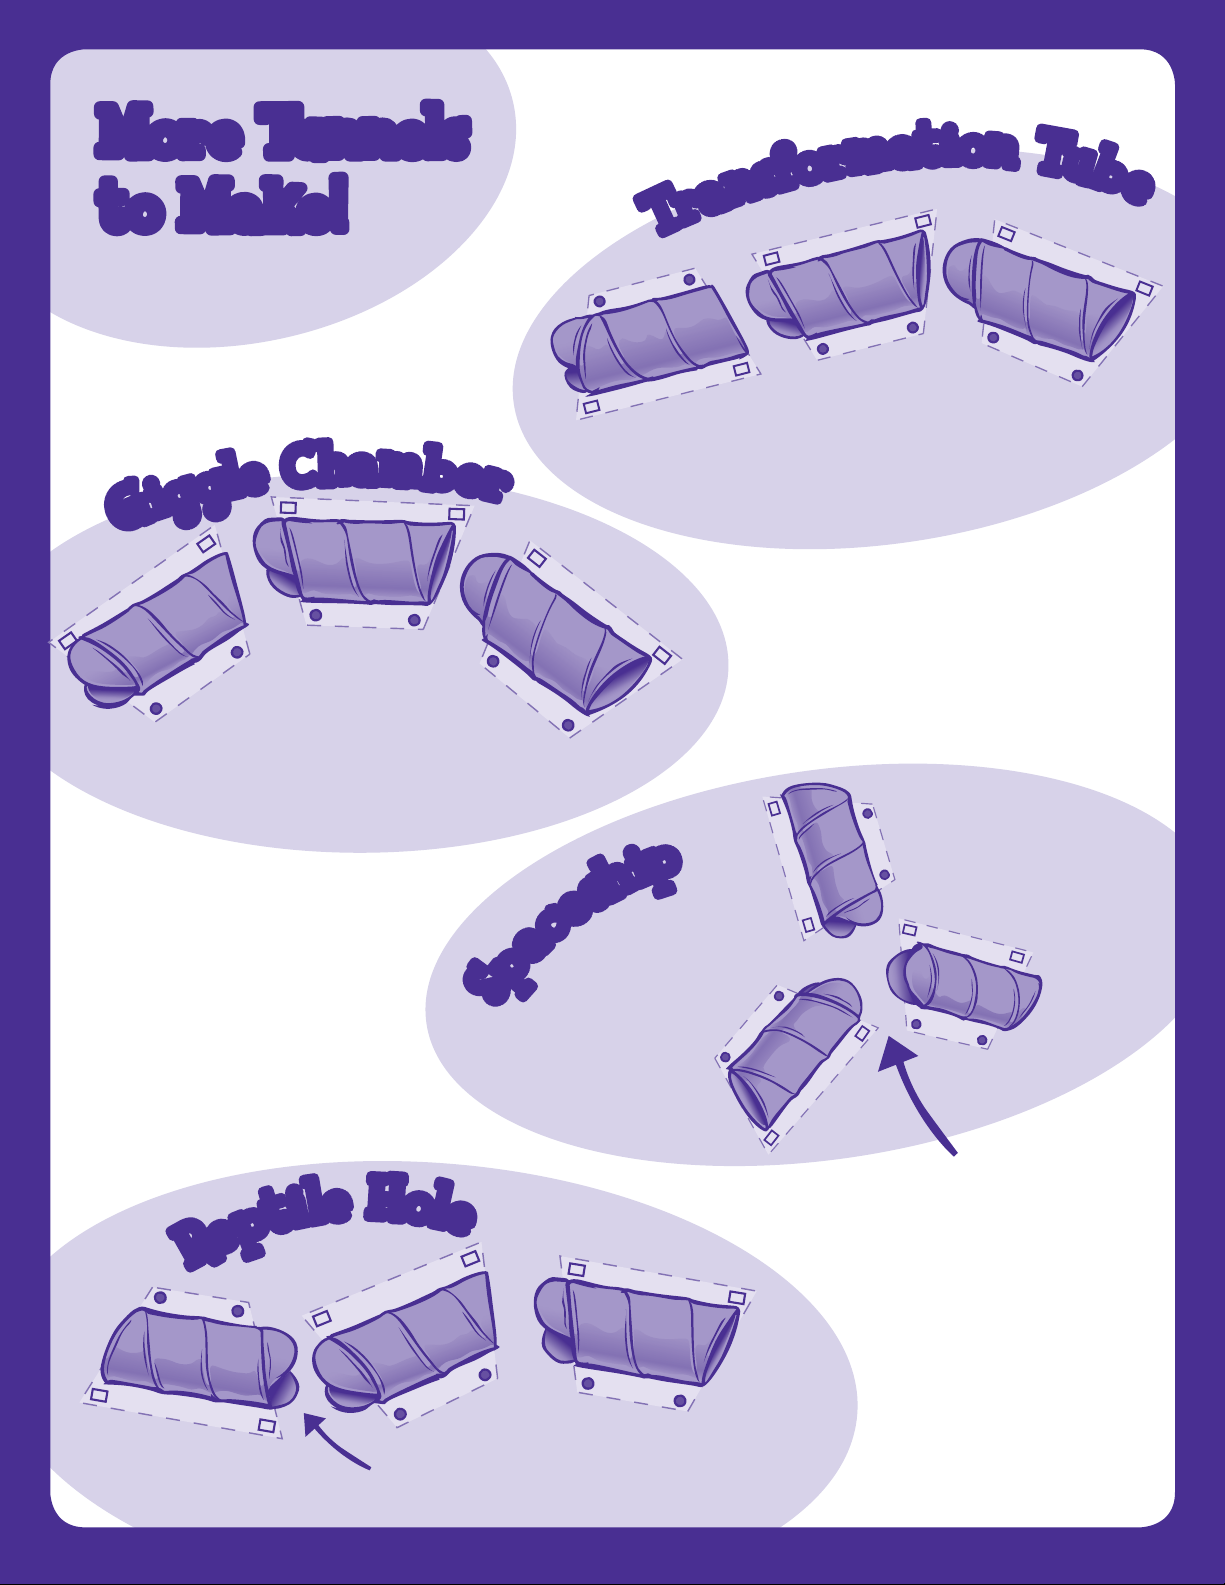
More Tunnels
to Make!
m
a
G
i
g
g
l
e
C
h
2
b
e
r
E
A
S
Y
!
T
1
r
a
n
s
f
o
r
m
2
a
t
i
o
n
3
T
u
b
e
E
X
P
R
1
E
e
M
R
p
T
t
E
i
D
I
U
M
3
D
!
p
i
h
s
e
I
2
F
F
I
3
C
U
L
T
!
c
a
p
S
1
!
Connect
l
e
H
o
l
e
the flaps to
each other!
2
1
Connect the
flaps to each other!
3
 Loading...