

Page 1
EASYBAKE.COM
FOR NEW PRODUCTS AND OFFERS
EASYBAKE.COM
FOR NEW PRODUCTS AND OFFERS
Questions? Call: 1-800-327-8264
WHEN YOU'RE FINISHED USING THE OVEN…
CAUTION: ELECTRIC TOY
This toy has a heating element which can result in burns. Not
recommended for children under 8 years of age. As with all
electric products, precautions should be observed during
handling and use to prevent electric shock.
U
L
®
1PW4
• Unplug the oven. • Hand wash all parts
• Wipe oven with a
damp cloth to clean.
Do not immerse in
water.
in warm, soapy
water. Rinse and
towel dry thoroughly.
FCC STATEMENT
This equipment has been tested and found to comply with the limits for a Class B digital device,
pursuant to part 15 of the FCC Rules. These limits are designed to provide reasonable
protection against harmful interference in a residential installation. This equipment generates,
uses and can radiate radio frequency energy, and, if not installed and used in accordance with
the instructions, may cause harmful interference to radio communications. However, there is no
guarantee that interference will not occur in a particular installation. If this equipment does
cause harmful interference to radio or television reception, which can be determined by turning
the equipment off and on, the user is encouraged to try to correct the interference by one or
more of the following measures:
- Reorient or relocate the receiving antenna.
- Increase the separation between the equipment and the receiver.
- Consult the dealer or an experienced radio/TV technician for help.
Look for other REAL MEAL food mixes!
AGES 8+
65759
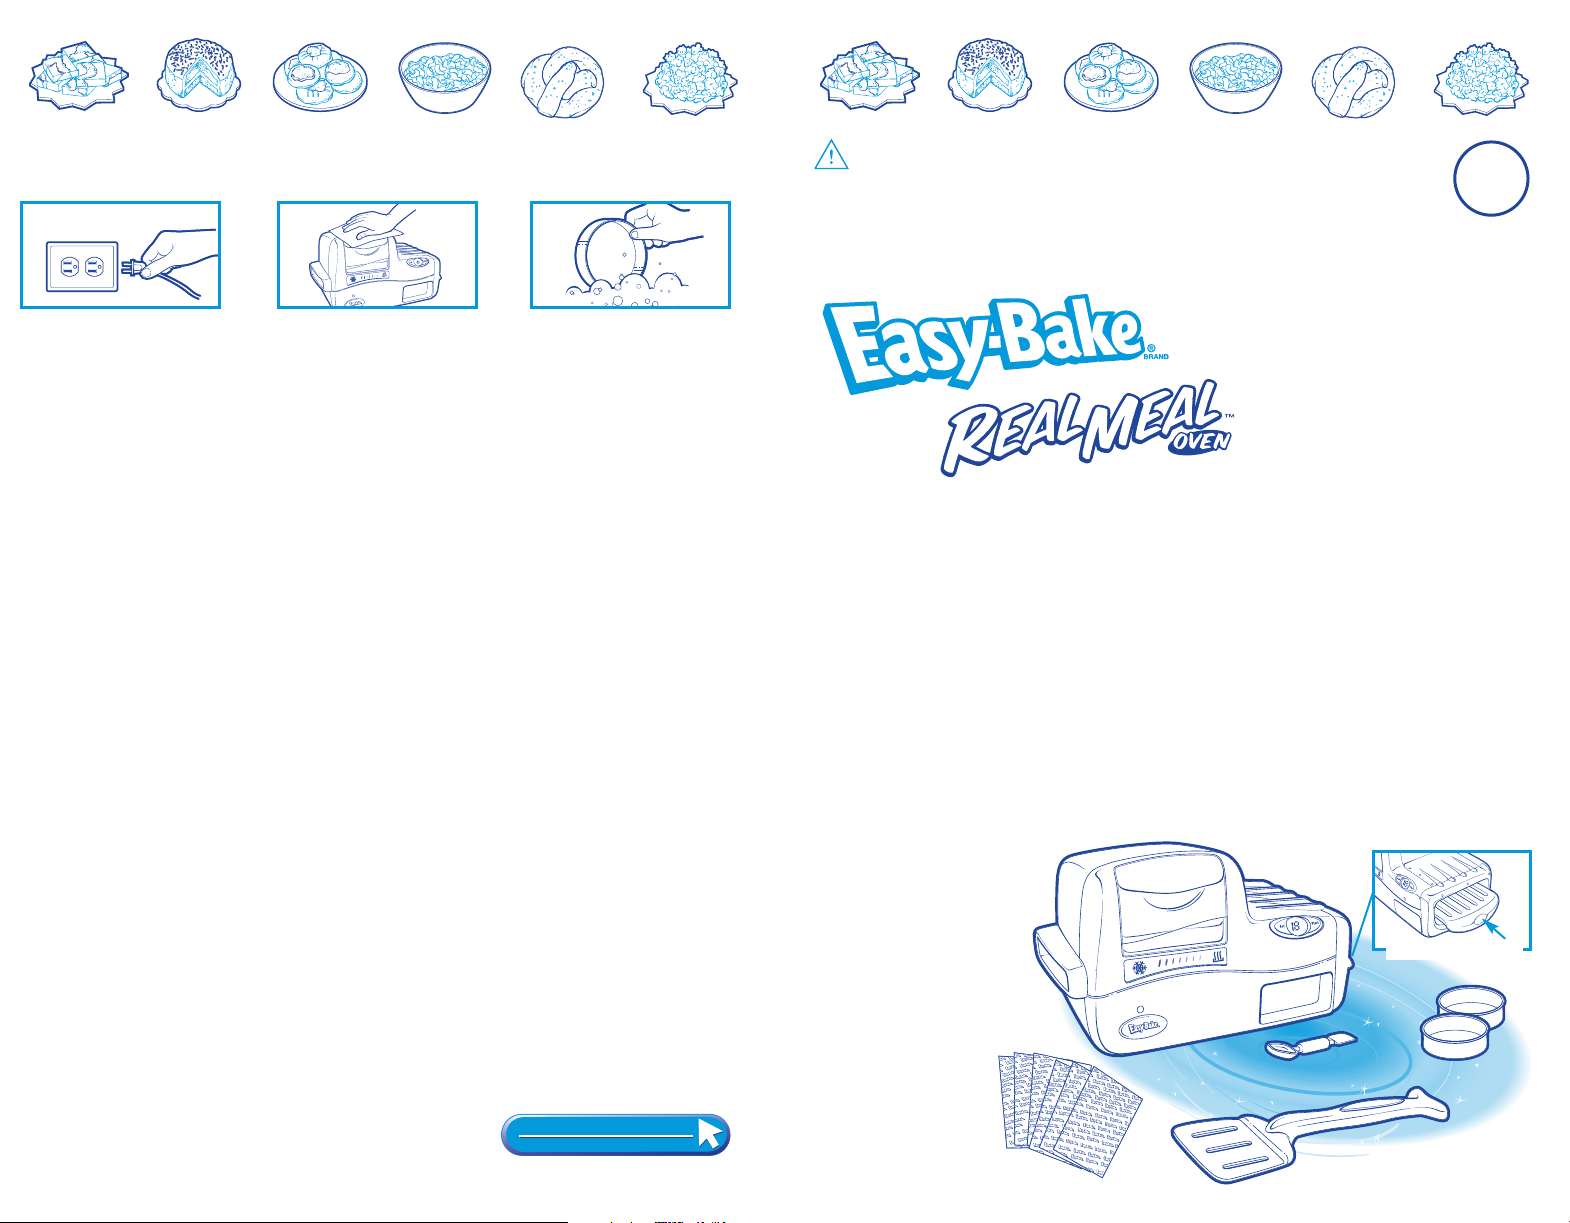
Recipe Book & Instructions
Thank you for purchasing the REAL MEAL Oven!
ADULT SUPERVISION REQUIRED.
Requires 2 "AA" alkaline batteries for timer. Phillips screwdriver (not
included) required for battery installation.
For maximum enjoyment of this product, be sure to follow all instruc-
tions carefully. If you have any questions, comments, or need additional information concerning this product or its parts, please call our
Hasbro Consumer Affairs hotline at 1-800-327-8264, Monday through
Friday during business hours (Eastern time).
This Set Includes: REAL MEAL Oven, 1 packet of macaroni,
1 cheese powder mix, 1 chocolate chip cookie mix, 1 pretzel mix,
1pretzel glaze
mix, 1 packet of
coarse salt, 2
cooking pans, pan
pusher,
spoon/spatula.
COOLING RACK
Food items manufactured for Hasbro, Inc.
© 2003 Hasbro, Pawtucket, RI 02862 USA.
All Rights Reserved.
® denotes Reg. U.S. Pat. & TM Office.
FOOD PACKETS MADE IN THE USA. ALL
OTHER COMPONENTS MADE IN CHINA.
65759 P/N 6209310100
You will also need:
flour, nonstick
cooking spray,
2mixing bowls.
FOOD
PACKETS
Spatula
End
SPOON/SPATULA
PAN PUSHER
BAKING PANS
Handle
End
Page 2
EASYBAKE.COM
FOR NEW PRODUCTS AND OFFERS
EASYBAKE.COM
FOR NEW PRODUCTS AND OFFERS
Questions? Call: 1-800-327-8264
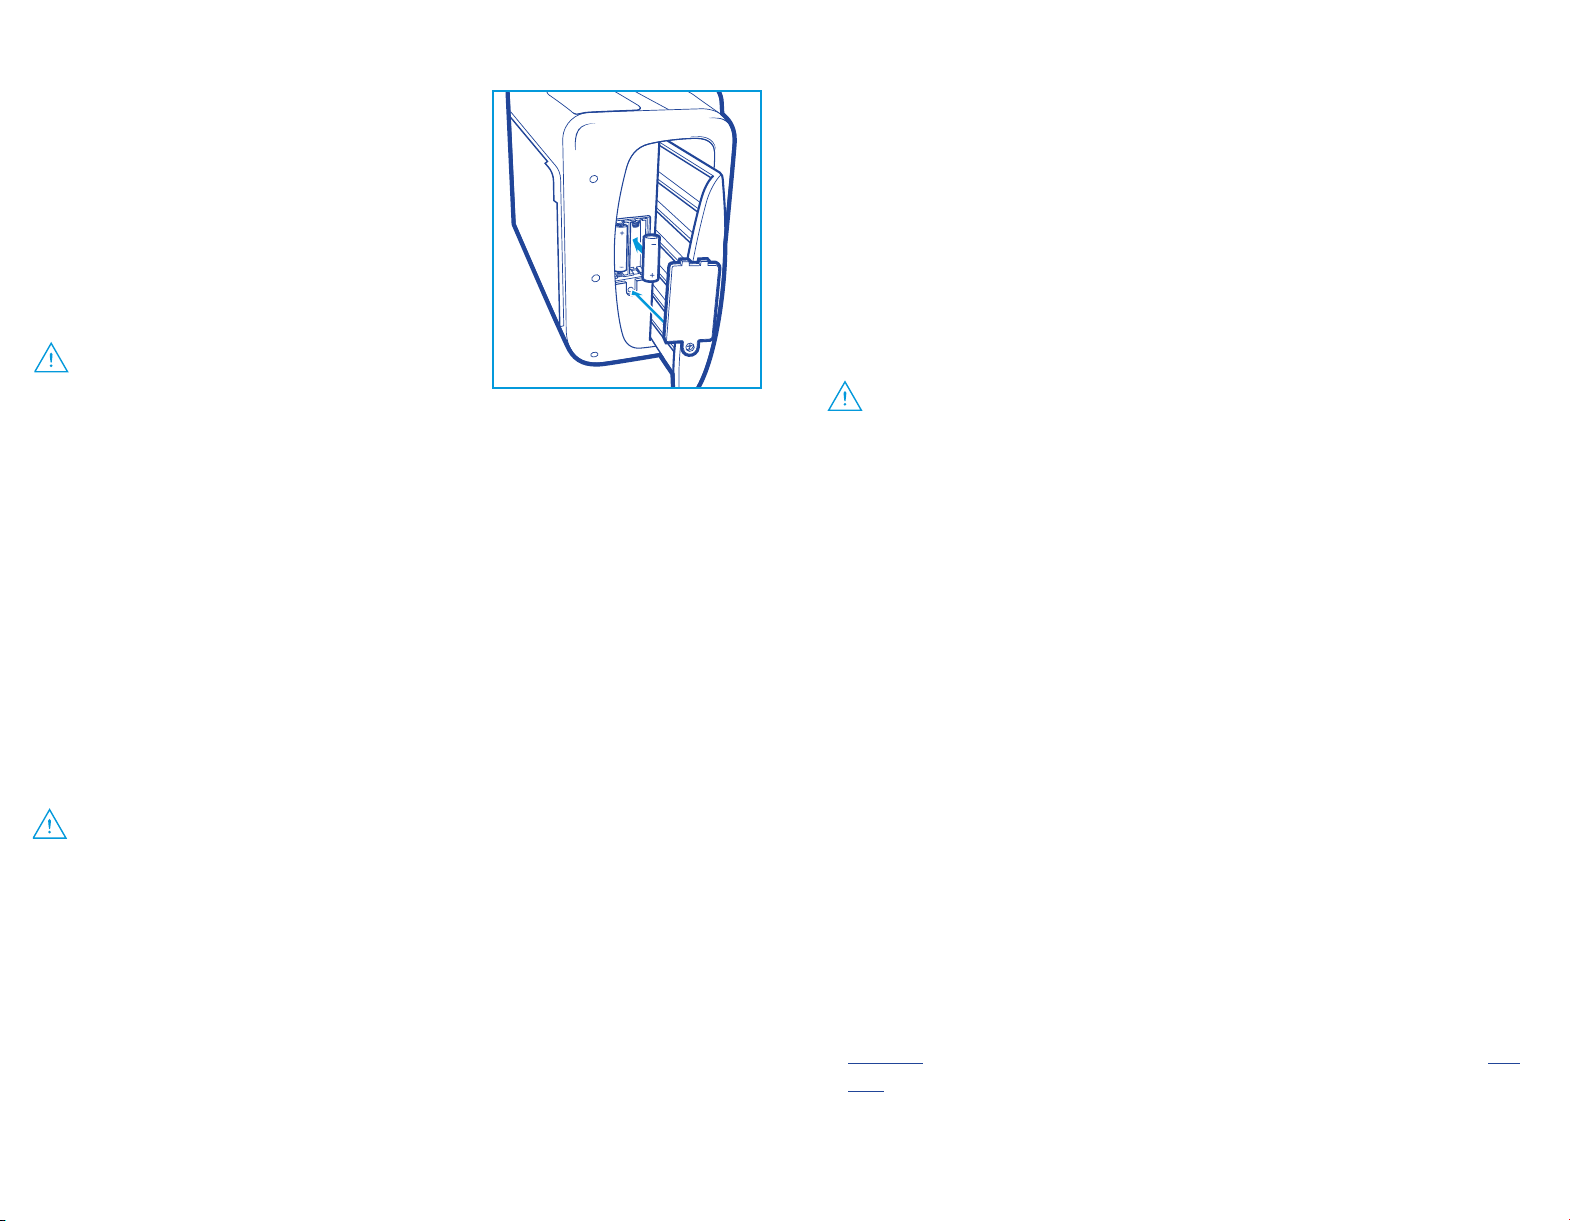
OVEN TIMER BATTERY INSTALLATION
Locate battery compartment cover on
side of oven. Slide out cooling tray.
Using Phillips head screwdriver,
loosen screw in battery compartment
cover (screw stays attached to cover).
Remove cover. Insert 2 fresh "AA"
alkaline batteries. Replace cover and
tighten screw.
CAUTION: TO AVOID BATTERY
NEVER: Use plugged-in oven around water at any time. Never
leave plugged-in oven unattended. Never push pans through oven with
your fingers. Do not leave empty pans or pan pusher in oven.
DANGER: To prevent electric shock, do not immerse oven in water.
Wipe clean with damp cloth. We recommend that you periodically examine
the toy for potential hazards and that any potentially hazardous parts be
repaired or replaced.
120 Volts AC only - 60 Hz
LEAKAGE
1) Be sure to insert the batteries correctly and always follow the toy and
battery manufacturers’ instructions;
2) Do not mix old and new batteries or alkaline, standard (carbon-zinc) or
rechargeable (nickel-cadmium) batteries;
3) Always remove weak or dead batteries from the product.
Hand wash all REAL MEAL Oven cooking
accessories with soap and water and towel
dry thoroughly before first use.
ADULT SUPERVISION REQUIRED
HOT
pans and food. Handle carefully.
HOT oven interior, oven top and oven back. Do not touch.
ALWAYS: Unplug oven when not cooking. Use pan pusher to
move pans through cooking chamber. Allow oven, pans and food to cool
before handling. Wash all pans and utensils before using for the first time.
CAUTION: Adult supervision recommended. Internal metal
edges become hot during use.
PROTECTIVE COATING:
• The pans and metal parts in your oven are coated with a food-grade oil
for protection during transit.
•Wash pans with soap and water and dry thoroughly before first
cooking. Coating is nontoxic, but for the first few times you cook, it
may detract from the taste of the food if not washed.
• The "new" smell the oven gives off the first few minutes is the
protective oil evaporating from the metal parts in the oven. You may
also see a vapor. It is nontoxic and evaporates quickly.
HELPFUL HINTS
• If food is not cooking evenly, look inside the oven to make
sure metal doors inside are closed when cooking or cooling.
• Before sliding pans from cooking chamber into cooling
chamber, be sure cooling rack is fully inserted into oven After
cooling time is up, use spatula end of pan pusher to remove
pan from cooling rack.
• Do not
not tilt or lift oven during use.
reach into the oven with fingers or touch hot pan. Do
Page 3

1. Pour macaroni into cooking
pan. Add 9 teaspoons (or 3
tablespoons) of warm water.
4. When cooking time is complete, use pan
pusher to push cooking pan all the way
through to cooling chamber. Allow to cool
for 10 minutes. Pull out cooling rack, then
use pan pusher to remove pan from rack.
(Do not drain macaroni.)
5. Add contents of cheese powder mix
packet. Stir well with spoon. Let stand one
minute, then enjoy!
2. Place pan in chamber chute, then use pan
pusher to insert pan into cooking chamber.
(Be sure both metal doors inside oven are
closed.)
3. Set oven timer for 10 minutes. Press
“START” button to begin cooking.
Macaroni and
Cheese
1. Pour contents of pretzel mix packet into mixing bowl. Add 5 teaspoons of warm water and stir.
2. Divide dough in half.
7. Place pan in chamber chute, then use handle
end of pan pusher to insert pan into cooking
chamber. Repeat for second pan so that they
are side-by-side in the cooking chamber. (Be
sure both metal doors inside oven are closed.)
3. Prepare a clean surface and sprinkle it with
flour. Also sprinkle your hands with flour. Roll
out 2 strips of dough, each about 10 inches
long. Fold each strip into a pretzel shape as
shown in the picture. Gently place pretzel
shapes into cooking pans.
4 Pour contents of pretzel glaze mix into mixing
bowl. Add 2 teaspoons of water. Stir well.
5. Apply a small amount of the pretzel glaze mixture over the top and sides of the pretzels with
a spoon.
6. Lightly sprinkle coarse salt over the top of the
pretzels.
Soft Pretzels
• Makes 2 pretzels
1. Pour the contents of cookie mix envelope into
a mixing bowl. Add 1/2 teaspoon of water, and
mix with a spoon. Press dough against side of
mixing bowl until it clings together.
4. Set oven timer for 15 minutes. Press “START”
button to begin cooking.
2. Drop dough in small amounts into each of the
2 cooking pans, enough to make 4 cookies
per pan.
Chocolate
Chip Cookies
1. Wash all utensils, pans - and your hands.
2. Spray the cooking pan with nonstick cooking spray.
3. Preheat REAL MEAL Oven for 15 minutes.
4. Be sure cooling rack is fully inserted into oven.
5. REAL MEAL Oven mixes are for use in REAL MEAL Oven only.
NOTE: REAL MEAL Oven not for
use with uncooked dairy or meat
products.
8. Set oven timer for 18 minutes. Press “START”
button to begin cooking.
9. When cooking time is complete, use pan
pusher to push cooking pans all the way
through to the cooling chamber. Allow to cool
for 10 minutes. Pull out cooling rack, then use
pan pusher to remove pans from rack.
Eat and enjoy! (Pretzels taste best when warm.)
5. When cooking time is complete, use pan
pusher to push cooking pans all the way
through to the cooling chamber. Allow to cool
for 10 minutes. Pull out cooling rack, then use
pan pusher to remove pans from rack.
3. Place pan in chamber chute, then use pan
pusher to insert pan into cooking chamber.
Repeat for second pan so that they are sideby-side in the cooking chamber. (Be sure both
metal doors inside oven are closed.)
RECIPES
HOW TO USE YOUR REAL MEAL OVEN
Before making any of these recipes...
When cool remove cookies from pans and share them with friends!
• Makes 8 cookies
• Makes 1 serving
WARMING CHAMBER
Use warming chamber to keep food items warm.
NOTE: Be sure to REMOVE FOOD FROM PAN before placing food
in warming chamber.
DO NOT use warming chamber to cook food.
For best results, oven must be level. Do not lift or tilt oven during use. Note: Oven timer requires
batteries. (See "OVEN TIMER BATTERY INSTALLATION.")
• Place pan in cooking chamber chute. Using handle end
of pan pusher, push pan into cooking chamber until tip
of the arrow on pan pusher lines up with edge of chute.
If you are inserting a second pan into oven, use the pan
pusher to place pans side-by-side in the cooking
chamber. BEFORE COOKING, LOOK INSIDE OVEN TO
MAKE SURE THAT BOTH
METAL DOORS INSIDE
OVEN ARE CLOSED.
• Use the timer to set cooling chamber time to desired
minutes (as noted in recipes). When time is up, pull
out the cooling rack and use spatula end of pan pusher to remove pan from rack.
Note: The timer will not
shut the oven off when the
cooking and cooling time has elapsed. The oven must
be unplugged to stop heating.
• First, plug in the cord to preheat the oven. Press
“SET” button to turn on oven timer, then press 15
times for a preheat time of 15 minutes, then press
“START.” When preheat (or cooking) time is complete,
you’ll hear 4 short beeps and 1 long beep.
• At this point, the snowflake image on the thermal
indicator will disappear and the “hot” image will be
fully illuminated, indicating the oven is ready to use.
Note: Indicator light will illuminate whenever oven
cord is plugged in.
• First, be sure cooling rack is fully inserted into oven.
Then, push pan all the way into the cooling chamber
with the handle end of the pan pusher, until pan pusher
can go no further. BE CAREFUL: oven is hot! Do not
reach into the oven with fingers or touch hot pan.
• Press the "SET" button to advance in one-minute
increments to desired cooking time. Then, press the
"START" button to begin timed cooking. Note: If you
decide to change the time while the oven timer is on,
press and hold "SET" and "START" buttons at the
same time to reset the timer.
DO NOT LEAVE PAN PUSHER IN OVEN.
Preheating Oven Setting/Resetting Timer
Inserting Pan
Cooling and Removing Pan
ARROW
PUSH
 Loading...