

Page 1
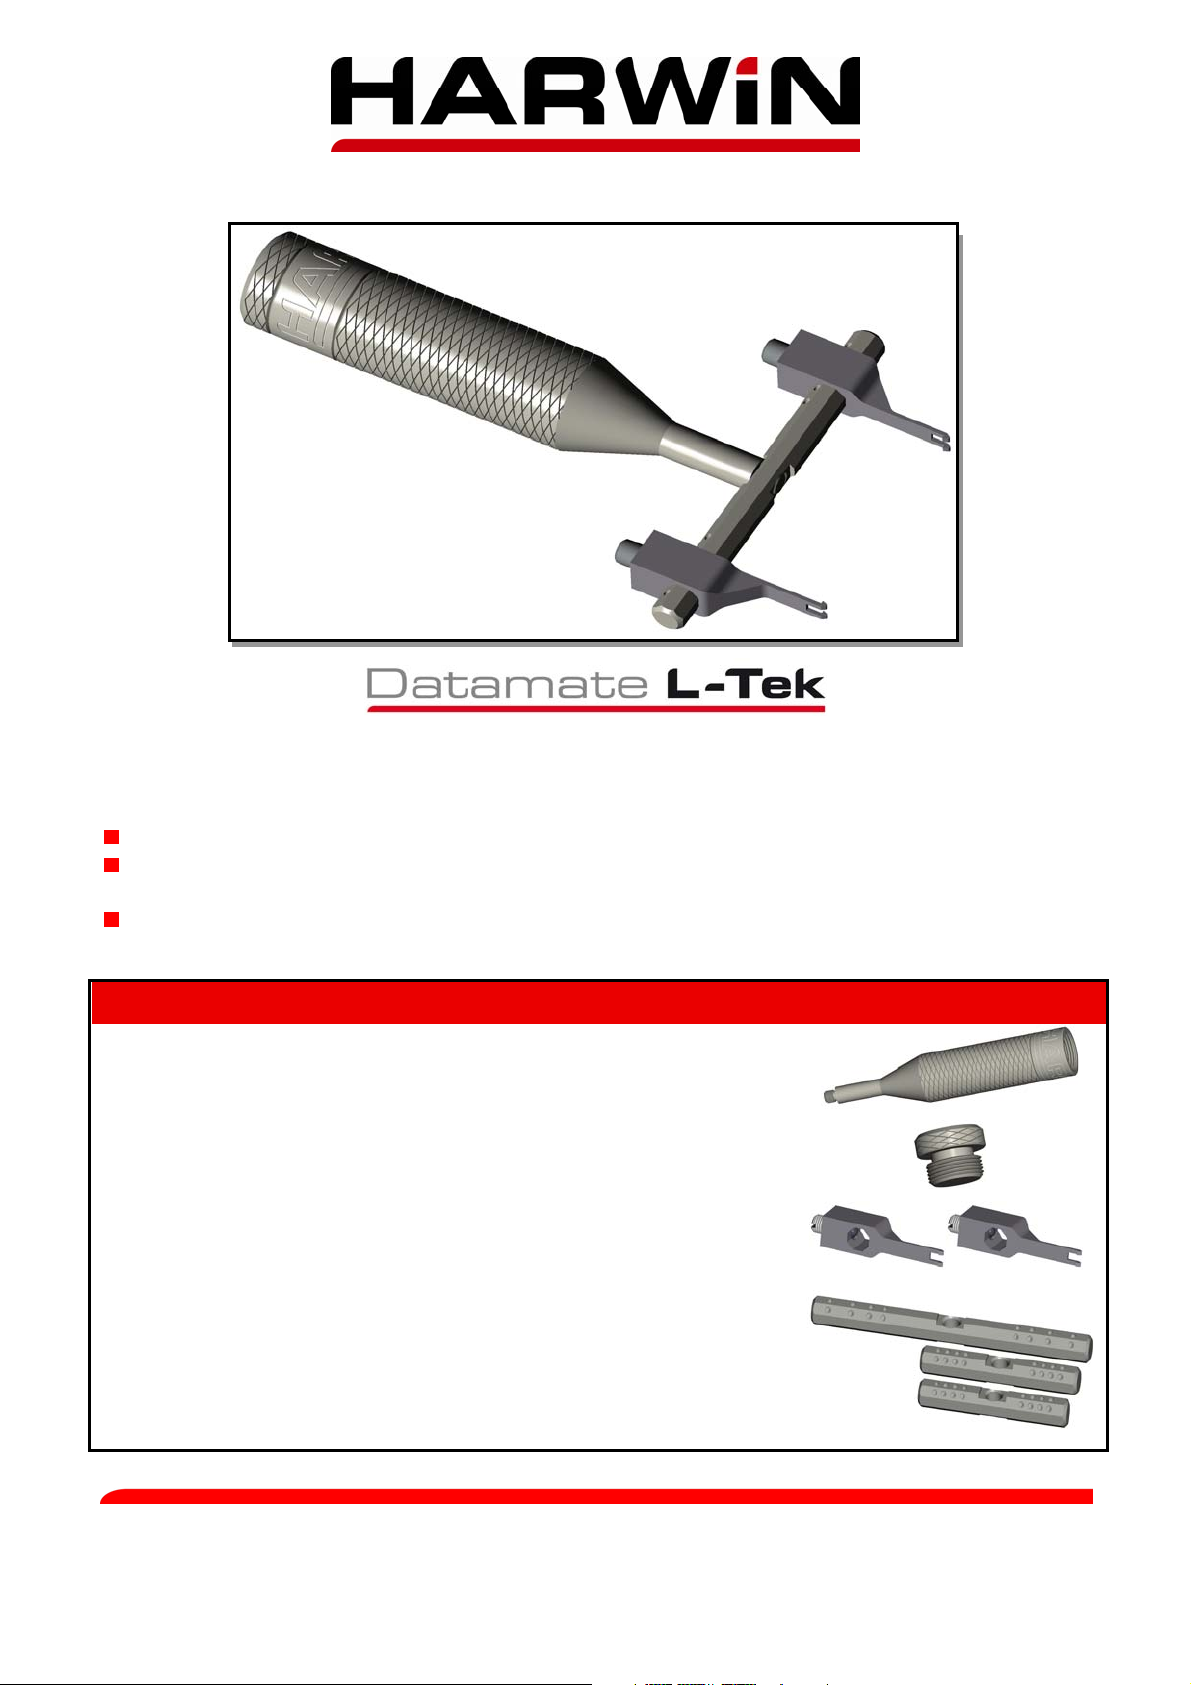
DATAMATE L-TEK DE-LATCHING TOOL Z80-299
This hand tool has been designed for separating mated Female/Male Datamate L-Tek assemblies where
latches have been used to secure a pair of connectors. It can also be used in friction applications if
required.
This hand tool has been designed for use on single row (SIL) and double row (DIL) connectors.
This tool will fit the following Number of contacts for DIL connectors: 04, 06, 08, 10, 12, 14, 16, 18, 20,
26, 34, and 44.
This tool will fit the following number of contacts for SIL connectors: 02, 03, 04, 05, 06, 07, 17, and 22.
This tool comes supplied in a plastic storage box which contains the following items;
Quantity and Description Part number
1 x Handle Z80-2990601
1 x Cap for handle Z80-2990701
2 x Hardened Adjustable Jaw
assemblies (Can be stored in handle)
3 x Stainless Steel multi-positional bars;
Jaw Part No. Z80-2990500
Positional Screw part No.
Z80-2990800
1 x 60mm long
1 x 34mm long
1 x 32mm long
Harwin North America Harwin Europe Harwin Asia
T: +1 603 893 5376 F: +1 603 893 5396 T: +44 (0) 23 9231 4545 F: +44 (0) 23 9231 4590 T: +65 6 779 4909 F: +65 6 779 3868
E: misboston@harwin.com W: www.harwin.com E: mis@harwin.co.uk W: www.harwin.com E: mis@harwin.com.sg W: www.harwin.com.sg
IS-30 Issue: 2 Date: 22.09.10 C/Note: 10949 Page 1 of 4
Z80-2990200
Z80-2990300
Z80-2990400
Page 2
DE-LATCHING TOOL Z80-299
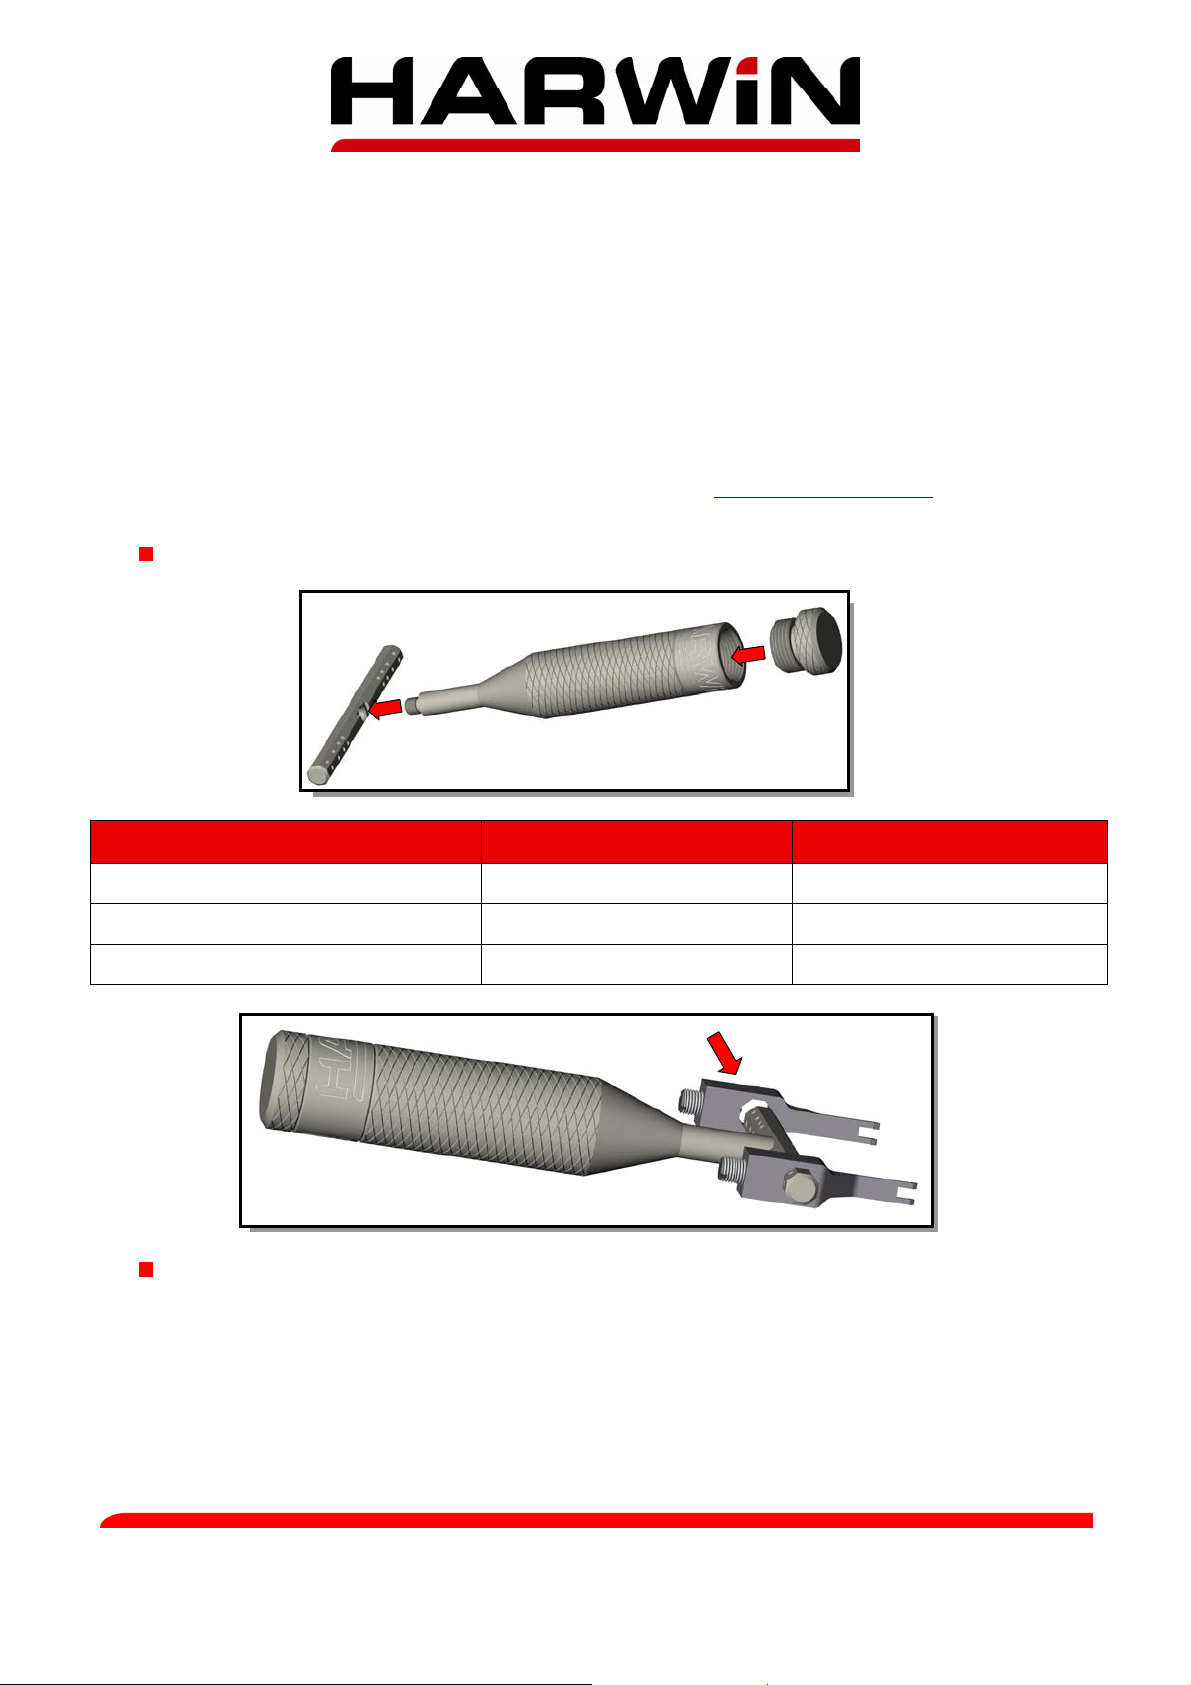
Assembling Tool
Notes:
When assembling tool for operation the following procedures must be observed carefully to prolong
tool life and ensure damage to tool is avoided.
When assembling parts, visually inspect threads to ensure they are clean and undamaged.
Ensure care is taken when screwing components together to prevent cross threading.
Parts should only be tightened by hand, the use of spanners, levers vices and so on is not required,
and could damage tool.
Positional screws in adjustable jaws need not be tampered with or altered.
If in doubt, of replacement parts are required, please contact technical@harwin.co.uk
assistance.
Assemble the cap to the handle (if required) and the handle to the correct multi-positional bar.
for advice and
Description DIL connectors SIL connectors
60mm long multi-positional bar 20, 26, 34, 44 contacts 17, 22 contacts
34mm long multi-positional bar 06, 10, 14, 18 contacts 03, 05, 07 contacts
32mm long multi-positional bar 04, 08, 12, 16 contacts 02, 04, 06 contacts
Assemble adjustable Jaws by orientating the octagonal sections, then slide jaws onto bar as shown
above. Alternatively, the jaws can be assembled at a 45° angle, which may be more convenient for
horizontally mated connectors. The Jaws will “ratchet” along the bar and lock into various positions.
Keep the jaws symmetrical about handle; push the jaws to the correct positions for the size of the
connector.
Harwin North America Harwin Europe Harwin Asia
T: +1 603 893 5376 F: +1 603 893 5396 T: +44 (0) 23 9231 4545 F: +44 (0) 23 9231 4590 T: +65 6 779 4909 F: +65 6 779 3868
E: misboston@harwin.com W: www.harwin.com E: mis@harwin.co.uk W: www.harwin.com E: mis@harwin.com.sg W: www.harwin.com.sg
IS-30 Issue: 2 Date: 22.09.10 C/Note: 10949 Page 2 of 4
Page 3

DE-LATCHING TOOL Z80-299
Separating the Connectors
The pictures below show the 60mm long multi-positional bar being used to separate both vertical
and horizontal DIL connectors. Shown below is a 20 way connector, with the tool in the “Ready”
position, prior to separating the connectors.
Both jaws must be centrally positioned, resting the tool on the two latches.
The multi-positional bar must be kept parallel to the moulding at all times to prevent breaking
the latches.
Square Cut outs in the jaws must be aligned to clear the “Clip” feature of the latches /
mouldings when pushed onto connector.
Square cut outs “Clip” feature
“Ready” position
“Clip” feature Close up
Once correctly positioned the tool can then be pushed on until the hook features of the jaws grip
the female moulding.
The picture on the right shows how the tool should look once engaged
ready to separate mated connectors.
Harwin North America Harwin Europe Harwin Asia
T: +1 603 893 5376 F: +1 603 893 5396 T: +44 (0) 23 9231 4545 F: +44 (0) 23 9231 4590 T: +65 6 779 4909 F: +65 6 779 3868
E: misboston@harwin.com W: www.harwin.com E: mis@harwin.co.uk W: www.harwin.com E: mis@harwin.com.sg W: www.harwin.com.sg
IS-30 Issue: 2 Date: 22.09.10 C/Note: 10949 Page 3 of 4
Page 4

DE-LATCHING TOOL Z80-299
With the de-latching tool engaged with the female moulding, the connectors are now ready to be
separated.
Ensure a steady pulling force is applied to the tool; perpendicular to the PCB for vertical
connectors and parallel to the PCB for horizontal connectors.
Ensure the multi-positional bar is kept parallel to the moulding at all times to prevent
breaking the latches.
The connectors will de-latch, and the female moulding will
remain between adjustable jaws of tool as shown.
To remove female connector from the adjustable jaws they
will need to be separated by hand. Only one jaw will need to
be moved to release the female connector as shown below.
Important Notes
It is strongly recommended that any latched connectors are only de-latched a maximum of 3 times,
exceeding this recommendation may result in poor retaining security between connectors.
Connector and/or latches may require replacement if this recommendation is exceeded.
Harwin PLC accepts no responsibility for any damages caused as a result of using this tool.
This tool is used at your own risk.
When the tool is not in use it is recommended that the jaws are stored in the handle or case.
All information in this document is to be read carefully prior to using tool. If in any doubt or
replacement parts are required please contact technical@harwin.com
for advice and assistance.
Harwin North America Harwin Europe Harwin Asia
T: +1 603 893 5376 F: +1 603 893 5396 T: +44 (0) 23 9231 4545 F: +44 (0) 23 9231 4590 T: +65 6 779 4909 F: +65 6 779 3868
E: misboston@harwin.com W: www.harwin.com E: mis@harwin.co.uk W: www.harwin.com E: mis@harwin.com.sg W: www.harwin.com.sg
IS-30 Issue: 2 Date: 22.09.10 C/Note: 10949 Page 4 of 4
 Loading...