

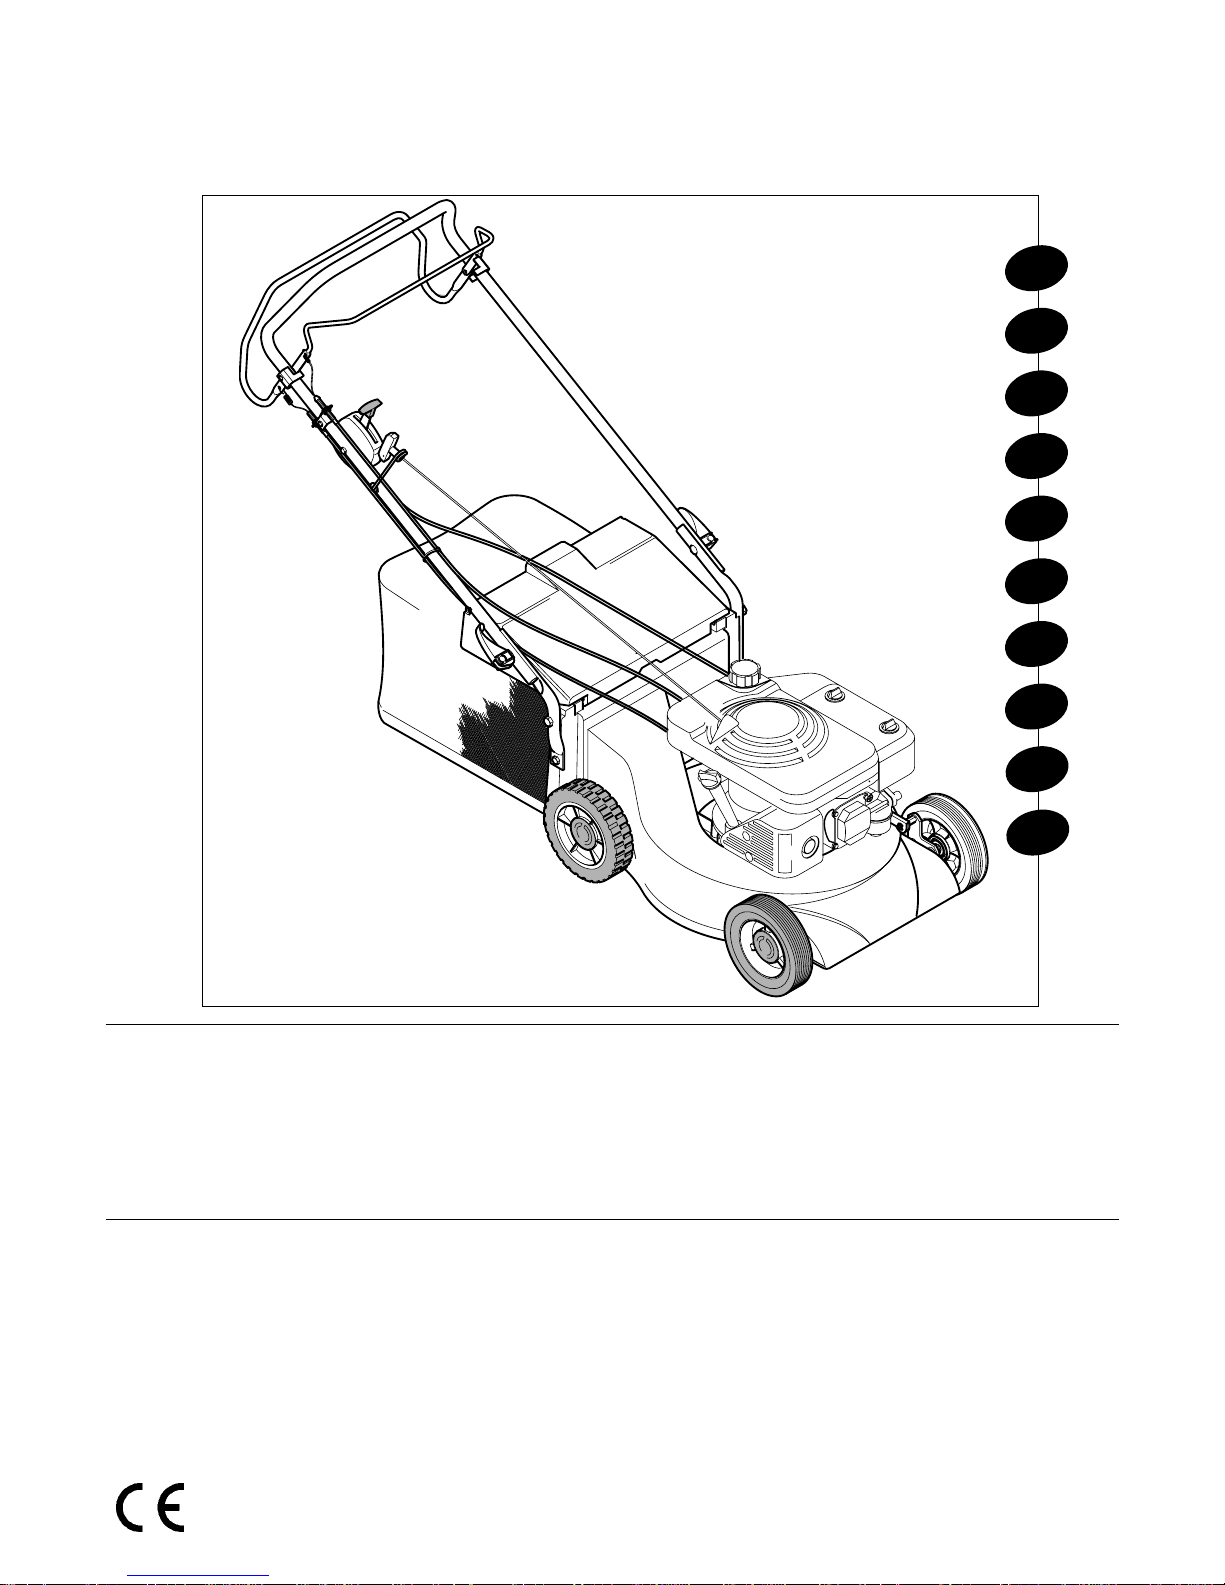
HARRY
Rasaerba - Walk behind mowers - Tondeuses - Rasenmäher - Cortacesped - Gazonmaaier -
Græsslåmaskiner - Cortador de grama - Ruohonleikkuri - Clookoptikhv mhcanhv
HARRY
I
UK
F
D
ES
DK
P
FIN
NL
Gebruiks - en onderhoudshandleiding
Bruger og vedligeholdelsesmanual
Manual de Instruções para o uso e a manutenção
Käyttö- ja huolto-opas
Odhgive
ςς
ςς
ς
crhvsh
ςς
ςς
ς
Manuale di istruzioni per l'uso e la manutenzione
Safety and operation instruction
Manuel d'instructions et de mise en route
Bedienungsanleitung
Manual de instrucciónes y de mantenimiento
GR


HARRY
3
ITALIANO ................................................... pag. 8
ENGLAND .................................................. pag. 13
FRANCE ..................................................... pag. 18
DEUTSCHLAND ........................................... pag. 23
ESPAÑA ..................................................... pag. 28
THANK YOU for buying a HARRY product!
Your HARRY mower has been carefully designed, engineered and manufactured to give good and satisfactory performance. Review this Manual to
familiarize yourself with the unit, its features, its operation.
Pay particular attention to the European secutiry rules. The symbols you find here in this manual indicate particular dangerous points and help you
to prevent accidents.
Nous vous félicitons d'avoir choisi une tondeuse HARRY.
Les tondeuses HARRY ont été conçues et réalisées pour offrir des performances de travail exceptionelles.
Nous vous recommandons de lire attentivement ce manuel d'instructions pour prendre connaissance des caractéristiques d'utilisation de votre tondeuse.
Lisez attentivement les conseils de sécutité conformes aux normes Européenes avant d'utiliser la tondeuse.
Les symbols mentionés dans ce manuel indiquent un particulier danger et vous aident de prévenir des accidents.
Wir danken Ihren für den Kauf eines HARRY Rasenmähers.
Der HARRY Rasenmäher ist für sicheren und zuverlassigen Betrieb konstruiert, wenn er gemäß der Betriebsanleitung bedient wird.
Lesen Sie zum Verständnis dieses Handbuch durch bevor Sie den Rasenmäher in Betrieb nehmen
Lesen Sie sich diese Bedienungsanleitung der Europäischen Sicherheitsvorschiften sorgfältig durch.
Achten Sie auf die Symbole in dieser Anleitung. Die Symbole weisen auf die gefährlichsten Punkte hin und sind zu befolgen, um Unfälle zu vermeiden.
Gracias por comprar un producto HARRY.
Su cortacésped HARRY ha sido cuidadosamente diseñado, motorizado y montado para proporcionar un rendimiento óptimo. Revise este manual
para familiarizarse con este aparato
Ponga especial atencion en las normas de seguridad europeas. Los simbolos que aparecen en este manual le indican los puntos especialmente
peligrosos y le ayudan a evitar accidentes.
U heeft een HARRY gazonmaaier gekozen; wij feliciteren u daarmee. Wij weten dat u een veeleisende gebruiker bent, die geïnteresseerd is in de
betrouwbaarheid en de stevigheid, in het vermogen en de duur van het materiaal waarmee u werkt.
De handleiding met de Europese veiligheidsvoorschriften aandachtig doorlezen. Neem vooral de symbolen van deze handleiding goed in acht. Zij
duiden op gevaar en helpen ongelukken te voorkomen.
UK
F
D
ES
NL
DK
P
NEDERLAND ............................................... pag. 33
DANMARK ................................................. pag. 38
PORTUGAL ................................................. pag. 43
FINLAND .................................................... pag. 48
GREECE ...................................................... pag. 53
FIN
Obrigado por ter comprado um cortador de grama HARRY!
Os cortadores de grama foram projetados e construídos para oferecer ótimos desempenhos. Leia com atenção este manual para poder compreender
as características e o uso correto do Seu cortador de grama.
Particular atenção deve ser dada às informações a respeito do uso correto segundo os requisitos essenciais de segurança exigidos pelas Diretrizes Européias
em vigor. Prestar atenção aos símbolos que serão encontrados lendo o manual, indicam pontos de particular perigo e ajudam a prevenir acidentes.
Tak fordi De har købt en af vore HARRY græsslåmaskiner.
Græsslåmaskinerne af mærket HARRY er blevet udviklet og udformet til at levere optimal ydelse. Læs denne manual meget nøje for at blive fortrolig
med græsslåmaskinens egenskaber og med hvordan den skal bruges korrekt.
Det er særlig vigtigt at De læser informationerne som vedrører korrekt brug i overensstemmelse med de sikkerhedskrav, som er gældende i EU.
Vær opmærksom på symbolerne De støder på, når De læser manualen. Disse indikerer specielt farlige punkter og hjælper med at forhindre alle former for ulykker.
KIITOS, että olette hankkineet HARRY ruohonleikkurin!
HARRY ruohonleikkurit on suunniteltu ja valmistettu siten, että niiden suorituskyky on paras mahdollinen. Lukekaa huolellisesti tämä ohjekirjanen,
jotta opitte tuntemaan ruohonleikkurinne ominaisuudet ja oikeat käyttötavat.
Erityistä huomiota tulee kiinnittää oikeata käyttöä koskeviin tietoihin, jotka ovat voimassa olevien EU:n direktiivien turvavaatimusten mukaisia.
Kiinnittäkää huomiota merkkeihin, joita näette opasta lukiessanne, koska ne osoittavat erityisen vaaralliset kohdat ja auttavat välttämään onnettomuudet.
GRAZIE per aver acquistato un rasaerba HARRY!
I rasaerba HARRY sono stati progettati e costruiti in modo da offrire ottime prestazioni. Leggete attentamente questo manuale per poter capire le
caratteristiche ed il corretto uso del Vostro rasaerba.
Particolare attenzione va prestata alle informazioni circa l'uso corretto in conformità ai requisiti essenziali di sicurezza richiesti dalle vigenti Direttive Europee.
Fate attenzione ai simboli che incontrerete leggendo il manuale, stanno ad indicare punti particolarmente pericolosi ed aiutano a prevenire qualsiasi incidente.
I
GR
Saς eucaristouvme pou epilevxate evna proiovn tou ergostasivou HARRY.
H clookoptikhv mhcanhv HARRY evcei scediasteiv me frontivda kai kataskeuasteiv evtsi wvste na exasfalivzei thn kaluvterh dunathv apovdosh.
Parakalouvme diabavste prosektikav tiς parouvseς odhgiveς crhvshς. VOpou sunantavte ta parakavtw suvmbola, epishmaivnoun idiaivterouς kinduvnou
ς
kai saς bohqouvn na apofuvgete ta atuchvmata.
HARRY
4
1
2
2
HARRY
3
7
5
4
12
2
1
8
6
9
15
13
10
11
14
16
17
Mod. 314-411-481-R49
C48-C49-C50-C53-C54-R53
Mod. 313-322-424-471
S48-S49-S52-S53
P48-P49-P54
Fig.01
Mod. C48-C49-C50-S48
S49 C53-C54-S52-S53
P48-P54
Fig.02 Fig.03
Mod. 313
Fig.05
Fig.04

HARRY
5
17
5
Fig.06
3
7
4
5
7
4
4
3
mod. 471-C50-C54-P54
Fig.07
Fig.08
Fig.09
Fig.10
Mod. 313
HARRY
6
70 mm
max
mod. 313-322-424
471-S48-S49-S52-S53
P48-P49-P54
mod. C48-C49-C50-314
411-481-C53-C54-R53
Fig.11
20 mm
min.
Limite d’usura
Wear limit
Limite d’usure
Verschleissgrenze
Limite de desgaste
Slytagegrens
Slidgrænse
Limite desgastada
Äyttöraja
vOrio fqorav
ς
Lama nuova
New blade
Nouvelle lame
Neues messer
Hoia nueva
Nieuwe plaat
Nyt skæreblad
Lâmina nova
Usi terä
Nevo macaivri
Pericoloso
Dangerous
Dangereux
Gefährlich
Peligroso
Gevaarlyk
Farligt
Perigosov
Vaarallinen
Epikivnduno
B
B
A
A
C
C
HARRY
1
Fig.12
Fig.13
Fig.14
Max 25 mm
R49-R53
Fig.16
III
II
I
Fig.15
HARRY
7
Fig.19 Fig.20
Fig.21
Fig.22
H48-H49-H53-P49
MULCHING
NORMALNORMAL
Fig.17
Fig.18
Fig.24
Fig.23

HARRY
8
ITALIANO
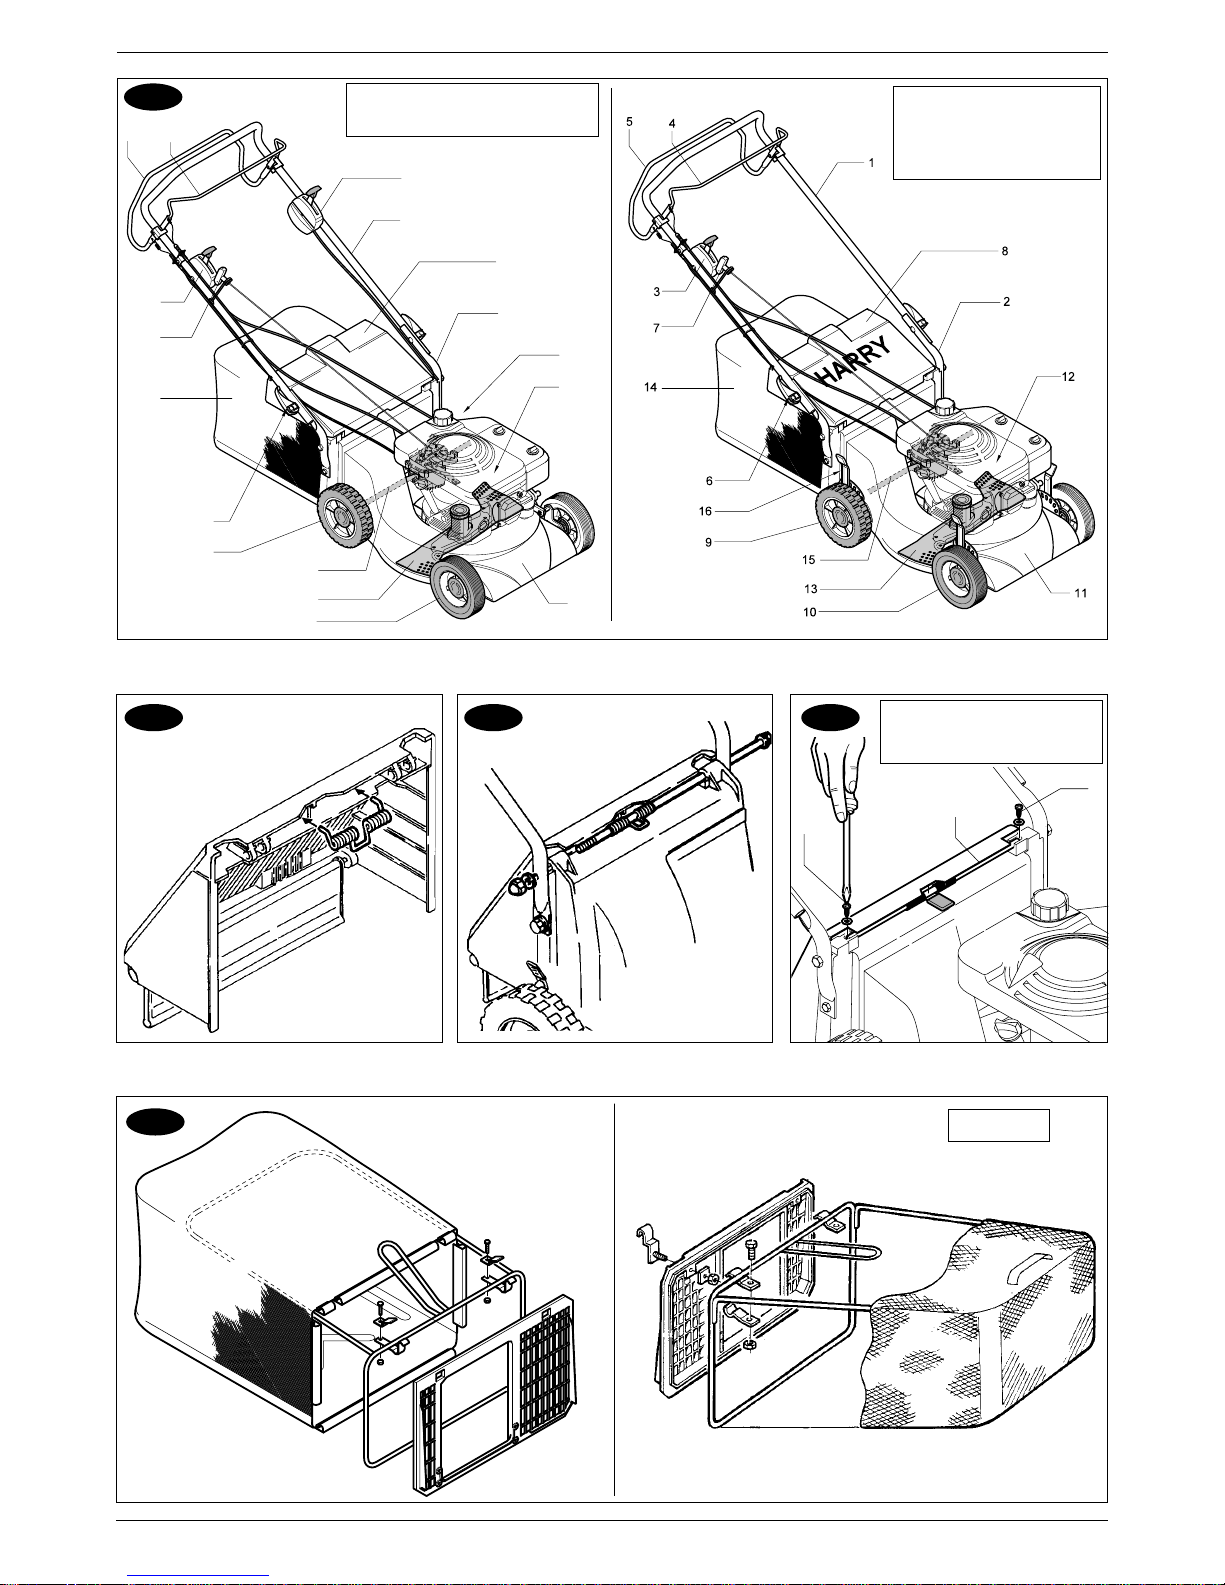
1) DESCRIZIONE DELLE PARTI (Fig. 01)
1 Manubrio superiore
2 Manubrio inferiore
3 Comando gas
4 Maniglia freno
5Maniglia semovenza
6 Maniglia fissaggio manico
7 Maniglia avviamento
8 Deflettore
Leggere attentamente questo manuale prima della messa in funzione
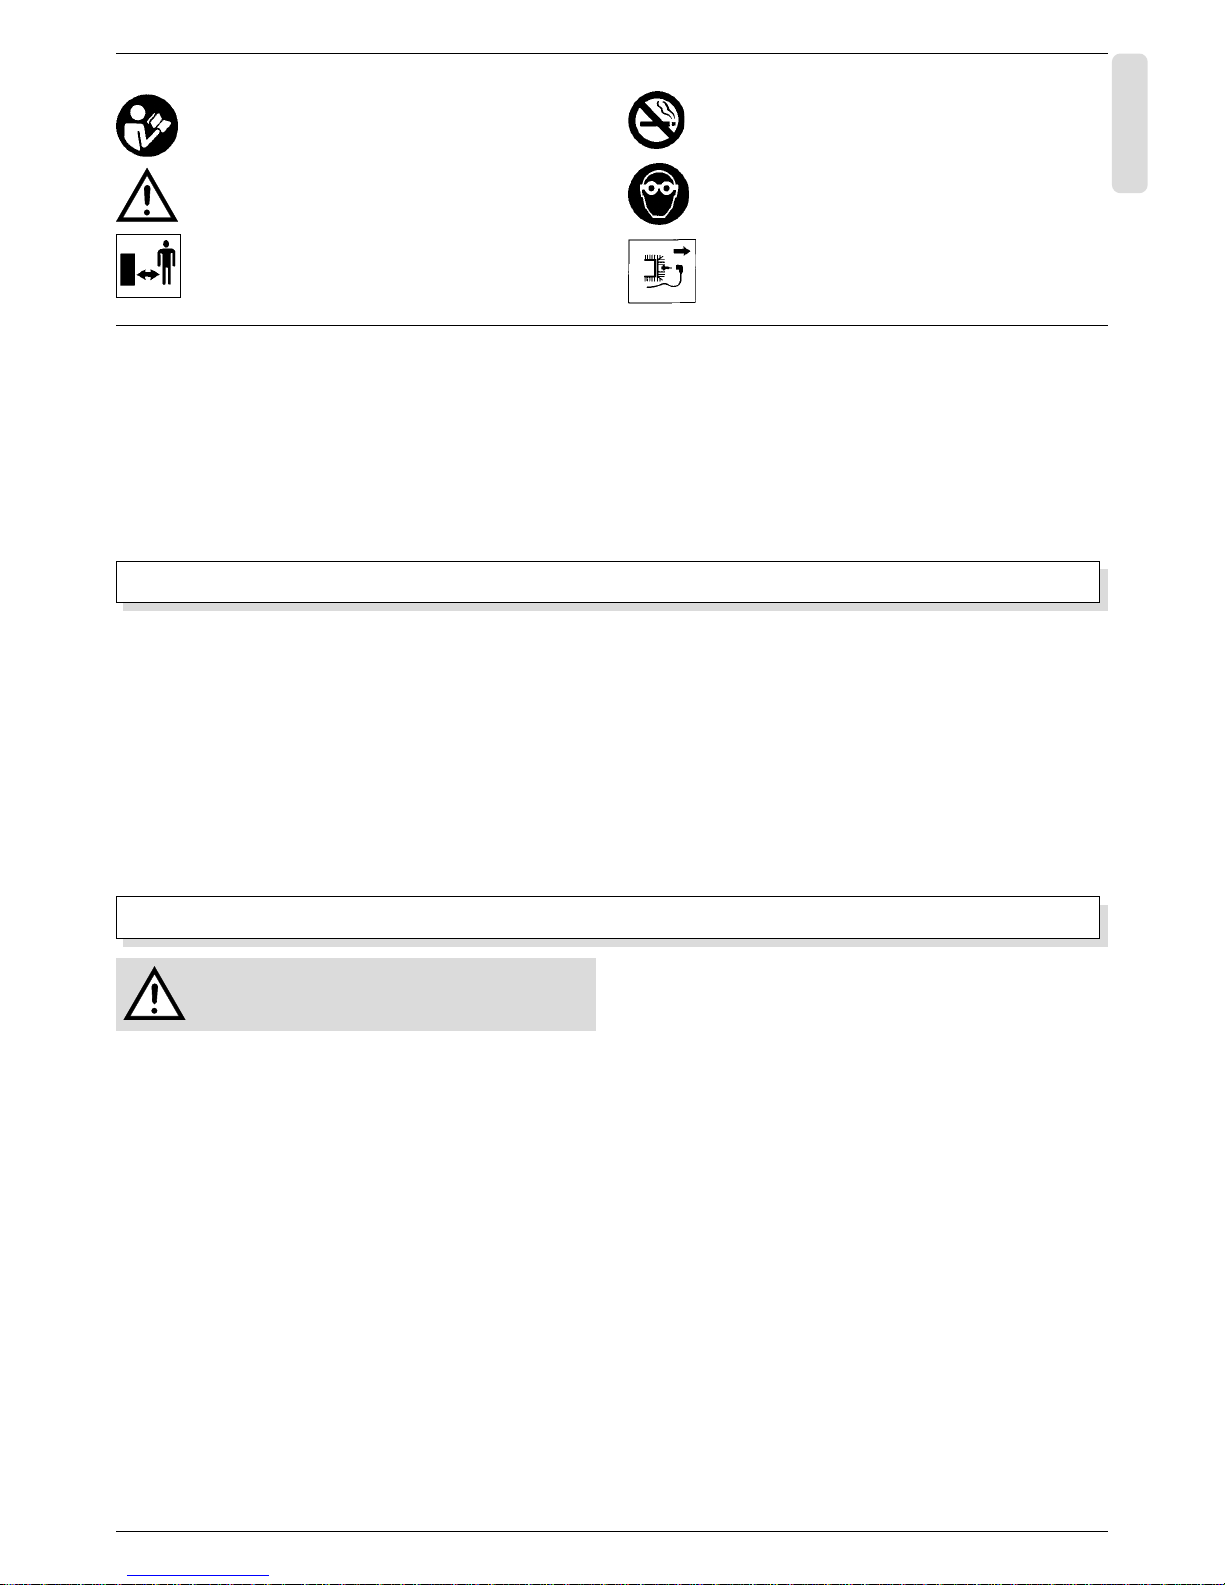
ATTENZIONE!
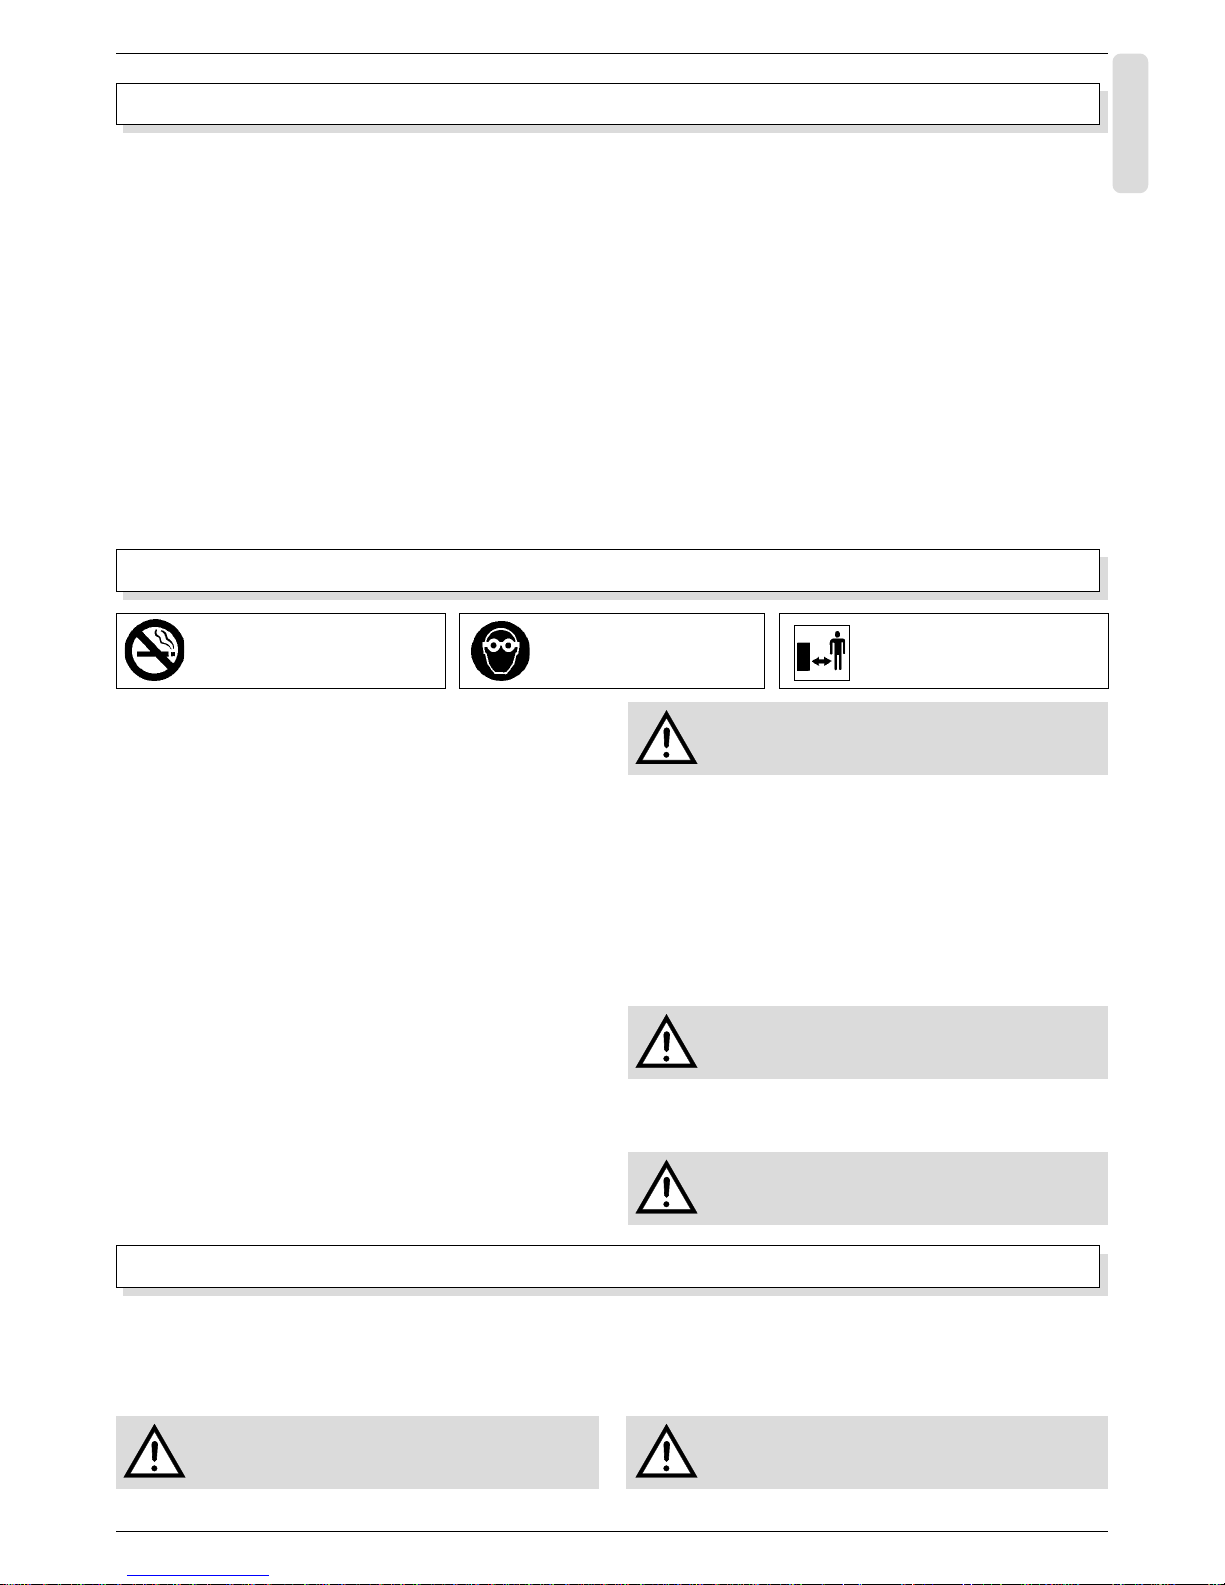
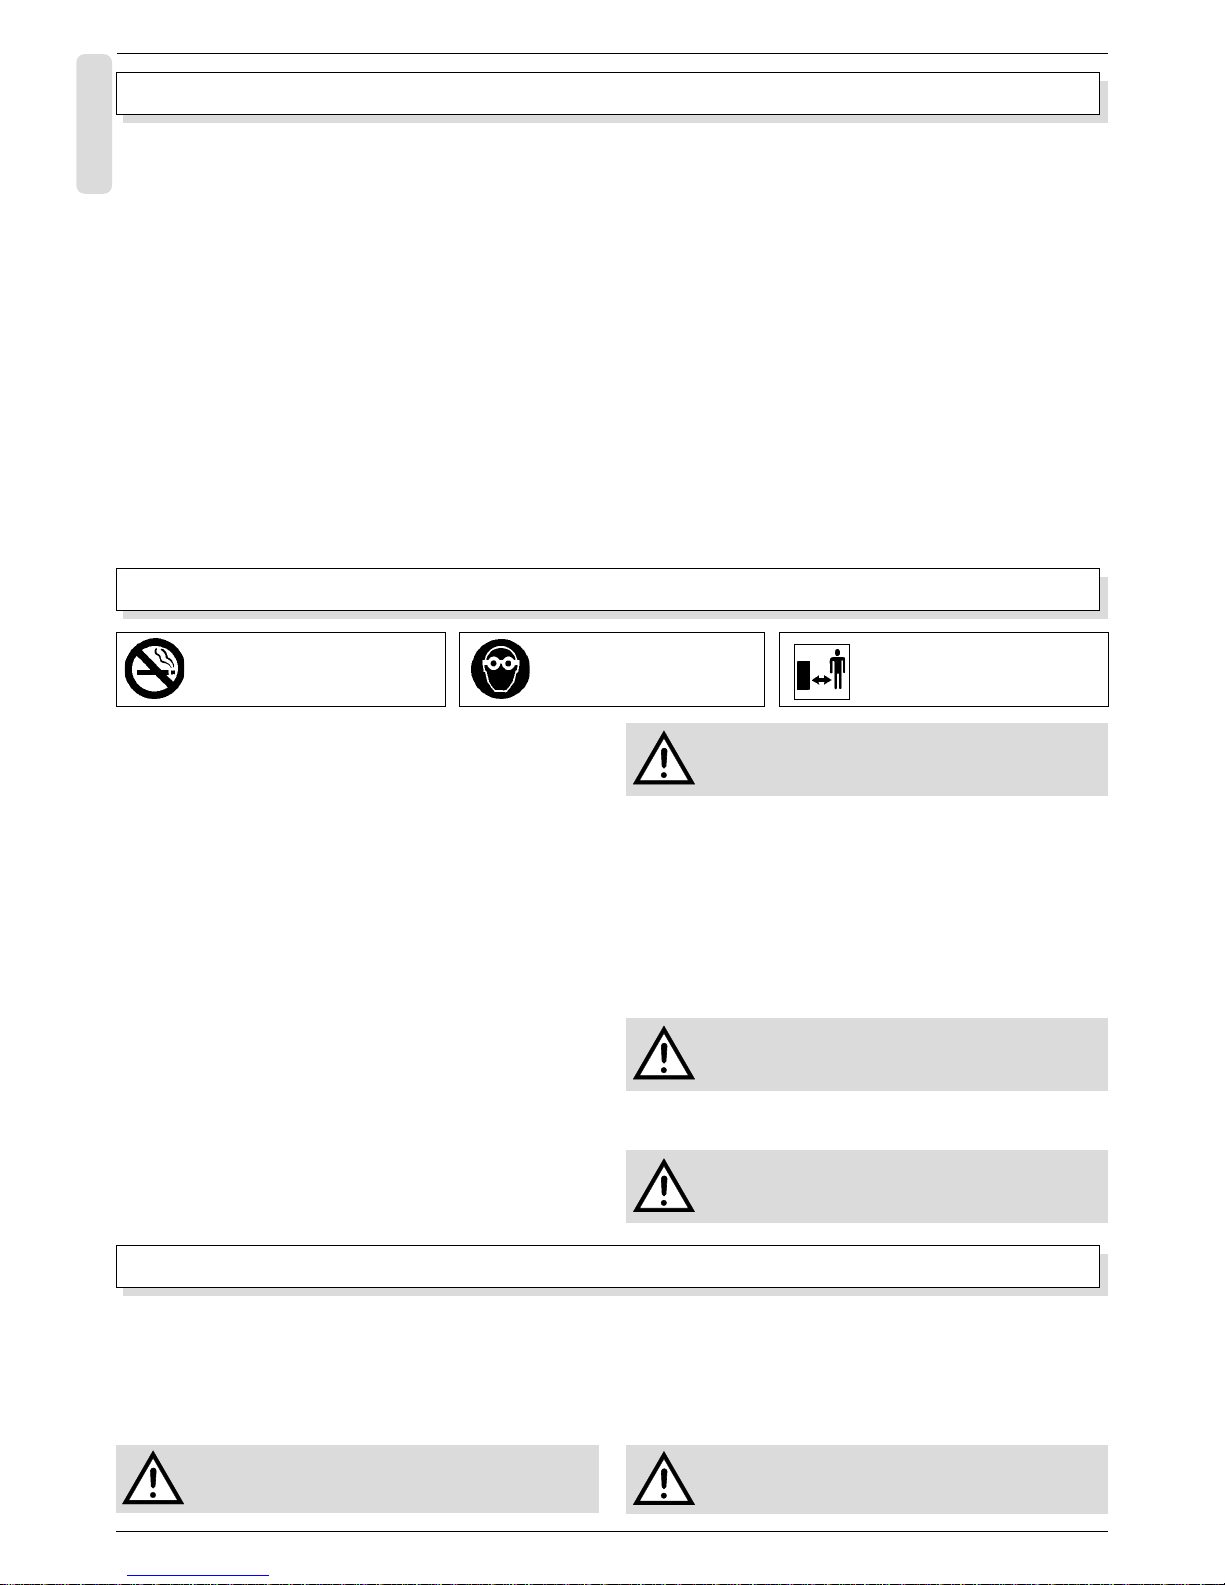
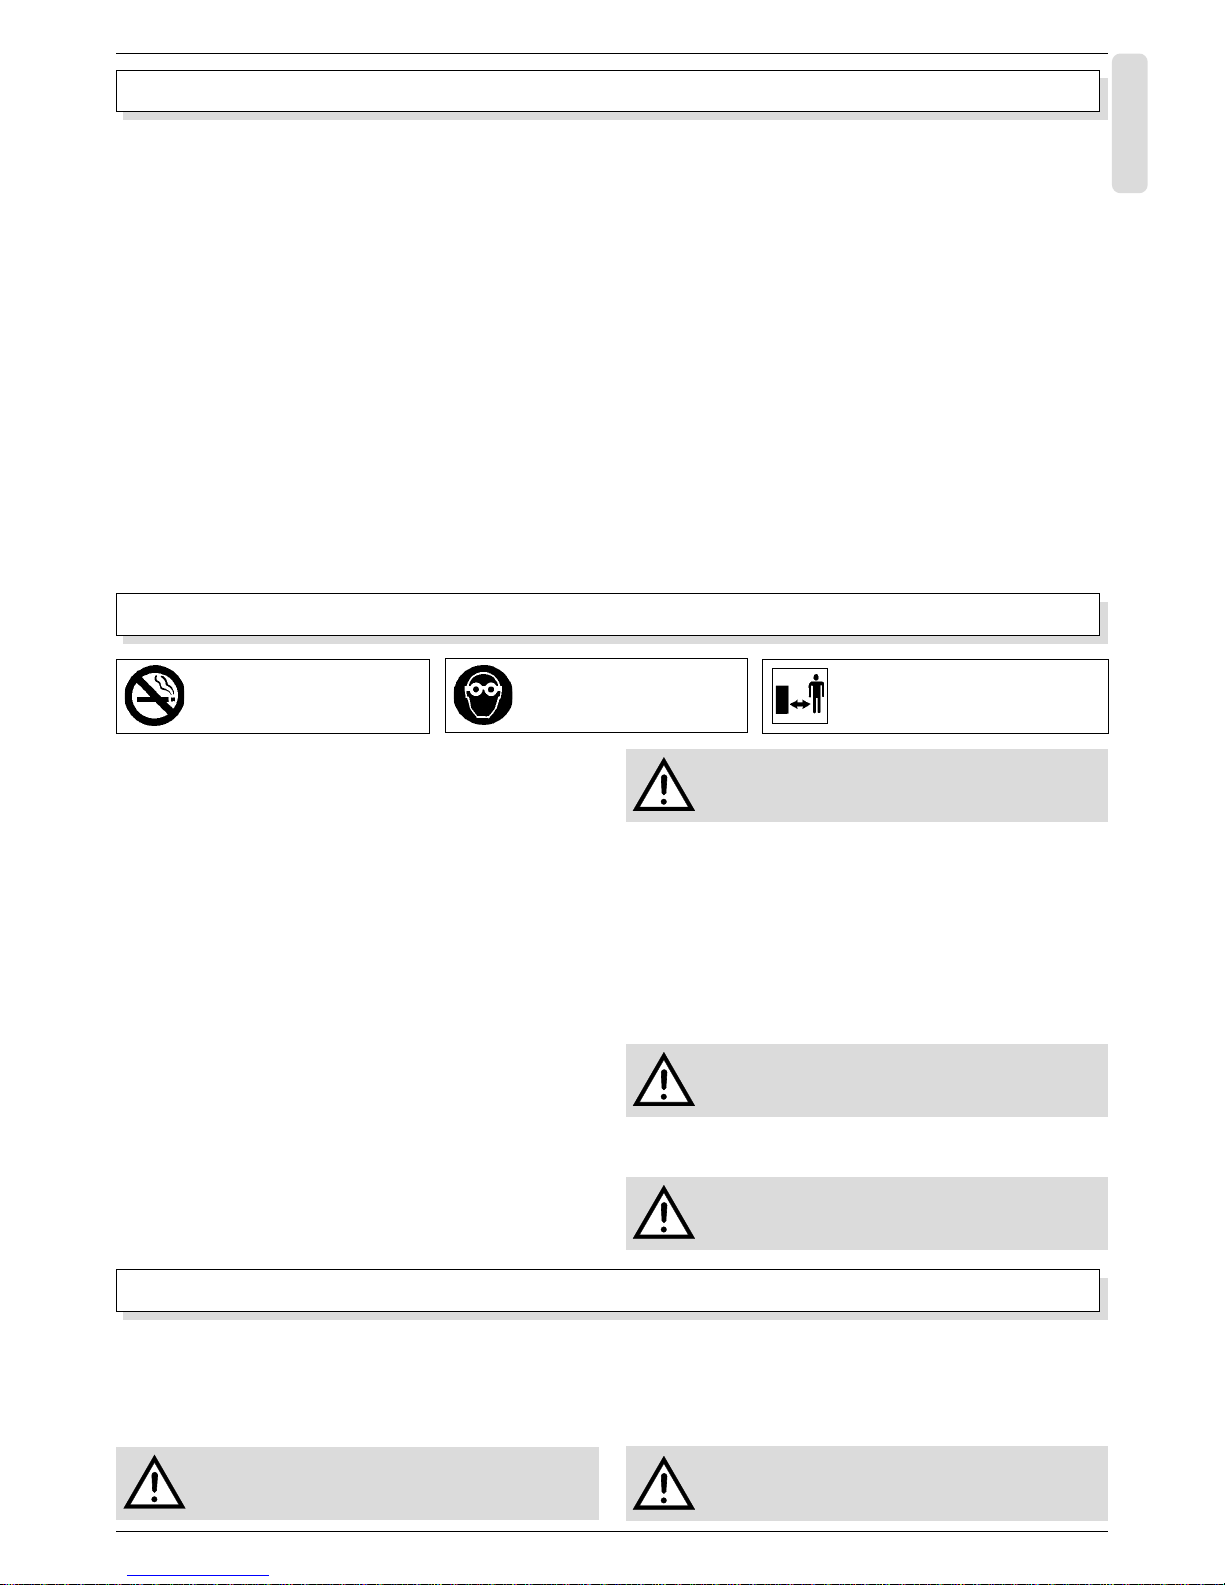
Mantenere alla distanza di sicurezza le persone estranee.
Per ogni intervento di manutenzione, ricordatevi di
spegnere il motore e di staccare il connettore della
candela
Utilizzate occhiali di sicurezza
Non fumare durante il rifornimento di carburante
INDICE:
1) Descrizione delle parti:
2) Norme di sicurezza
3) Montaggio del rasaerba
4) Messa in funzione
5) Regolazione dell'altezza di taglio
6) Manutenzione
7) Controlli e regolazioni
8) Immagazzinamento invernale
9) Mulching
10) Sistema davviamento Touch-N-Mow
9 Ruota posteriore
10 Ruota anteriore
11 Carter
12 Motore
13 Lama
14 Cestello raccoglierba
15Trasmissione
16 Leva regolazione altezza taglio
17Leva velocità avanzamento
ATTENZIONE!
a- Si raccomanda di leggere attentamente e di comprendere appieno il
contenuto di questo manuale prima dell'utilizzo del rasaerba.
b- L'uso del rasaerba è proibito alle persone con meno di 16 anni.
c- L'operatore è responsabile verso terzi nella zona di lavoro.Assicurarsi
che non ci siano bambini o animali domestici nella zona di lavoro.
d- Prima di iniziare il lavoro è indispensabile ispezionare l'area che
deve essere lavorata e rimuovere tutti i sassi, le eventuali lattine od
ogni altro oggetto estraneo che si trova in quella zona.Controllate
inoltre dove sono sistemati eventuali irrigatori o ogni altro ostacolo
nascosto che potrebbe creare situazioni di pericolo durante il taglio
e- Utilizzate delle robuste scarpe chiuse durante il taglio; non usare
sandali e non tagliate a piedi nudi. Usate scarpe abbiano una buo-
na aderenza anche quando il terreno è bagnato; usate inoltre guan-
ti da lavoro per avere una presa più sicura.
f- Assicurarsi prima di iniziare la falciatura che la lama sia ben fissata
e le protezioni di sicurezza siano montate.Non utilizzare il rasaerba
senza che il raccoglierba o il deflettore siano montati.Qualora ven-
gano riscontrati dei difetti, provvedete alla sostituzione o alla ripa-
razione.
g- Non aggiungete carburante quando vi trovate in un locale chiuso, quando
il motore è ancora in moto o quando il motore è ancora caldo. Non
fumate durante le operazioni di rifornimento del carburante.
h- Non fate funzionare il rasaerba in ambienti chiusi.I gas di scarico
emessi dal motore in funzione sono velenosi se respirati, possono
essere asfissianti e quindi mortali.
i- Non regolate l'altezza di taglio quando il motore è in funzione.
l- ATTENZIONE! Quando il motore è acceso, non metter le mani o i
piedi sotto il rasaerba o nel condotto di scarico, la lama è in movi-
mento quando il motore è in funzione.
m- Tagliate il prato solo quando le condizioni di luce sono buone.
n- Non correte. Non fatevi influenzare dalla premura di finire il lavoro;
tenete un'andatura adatta al tipo di lavoro che dovete svolgere.
o- Non usate il rasaerba quando non è in buone condizioni. Provvede-
te alla riparazione prima dell'uso.
p- Non permettete l'uso del vostro rasaerba ad alcuna persona se pri-
ma non gli avete fornito delle precise istruzioni e non gli avete fatto
leggere questo manuale
q- Non spingete mai il rasaerba all'indietro (verso l'operatore)
r- Quando dovete tagliare su terreni in pendenza procedete di traver-
so mai dall'alto verso il basso o viceversa. Prestate particolare atten-
zione quando cambiate direzione . Non tagliate su terreni molto
scoscesi.
s- Spegnete sempre il motore quando non tagliate o quando dovete
attraversare un marciapiede, un viale o una strada.
t- Nel caso urtiate un ostacolo, arrestate il motore, staccate il cavo
candela e controllate se si sia verificato qualche danno.Riparate
l'eventuale danno prima di usare nuovamente il rasaerba; qualora il
danno fosse grave rivolgetevi al più vicino rivenditore HARRY.
2) NORME DI SICUREZZA
HARRY
9
ITALIANO
Utilizzate occhiali di sicurezza
Non fumare durante il rifornimento
di carburante
Mantenere alla distanza di sicurezza le persone estranee.
4) MESSA IN FUNZIONE
Controlli prima dell'avviamento
Prima di ogni accensione controllate i seguenti punti e se necessario provvedete alla manutenzione richiesta.
l Controllate che il cestello e il deflettore siano ben fissati e pronti all'uso.
l Controllate il livello dell'olio nel motore, se necessario provvedete al-
l'aggiunta facendo attenzione a non superare il livello indicato(vedere
il libretto istruzioni del motore stesso).
l Controllate l'altezza di taglio impostata e regolatela come desiderato
(vedere il capitolo seguente "Regolazione altezza di taglio")
Avviamento del motore (Fig. 07 - Fig. 08 - Fig. 09)
Effettuate le operazioni di messa a punto, si proceda all'avviamento del
motore nel seguente modo:
a- Azionare la maniglia freno (4) per permettere l'avviamento del motore.
b- Per motori con sistema PRIMER:
premere 3-4 volte la pompetta di arricchimento posta sul carburatore.
Posizionare la leva acceleratore (3) nella posizione MAX.
Per motori con sistema CHOKE:
posizionare la leva acceleratore (3) nella posizione START.
c- Avviare il motore: impugnare la maniglia dell'avviamento (7) e tirare
la fune senza sforzo sino ad avvertire la resistenza provocata dalla
compressione, rilasciare la maniglia stessa e dare quindi uno strappo
energico.
Mantenere premuta la maniglia (4) durante il funzionamento, al rilascio
della stessa, il motore si ferma. Per ulteriori chiarimenti si raccomanda la
consultazione del libretto di istruzioni del motore stesso.
Per innestare la trazione,
, spingete la maniglia (5)
verso il manubrio; per arrestare l'avanzamento è sufficiente lasciare la
maniglia. Il rasaerba può essere spinto avanti e indietro quando la trazione non è inserita.
Per il modello 471-C50-C54-P54 è possibile variare la velocità di
avanzamento agendo sulla leva (Fig.10 -pos.17) .
Montaggio del cestello in tela (Fig. 05)
1) Fate scivolare il telaio nel sacco di tela, tenete l'impugnatura al-
l'esterno della stoffa.L'impugnatura e la maniglia del cestello in tela
devono essere entrambe nella parte alta del cestello. Il foglio di plastica sarà in basso.
2) Fissate i 4 lati del sacco in tela al telaio rettangolare, facendo scivo-
lare la guaina di plastica del sacco sopra il telaio metallico. Lasciate
libera la parte alta sinistra e destra del sacco.
Montaggio del manubrio - mod. 313 (Fig. 06)
1) Inserire le stegole inferiori del manubrio nelle apposite sedi ricavate
sui due mozzi laterali ed avvitare le due manopole laterali.
3) MONTAGGIO DEL RASAERBA
Attrezzi
Per montare un rasaerba HARRY occorrono:
- un cacciavite
- due piccole chiavi regolabili
Montaggio del deflettore (Fig. 02 - Fig. 03 - Fig. 04)
1) Mettere la molla nei due fori del deflettore, inserire il tirante (1), posi-
zionare il deflettore assemblato sul carter e fissarlo con le 2 viti (2).
3) Posizionate la rete sui due ganci del cestello. Sulla rete sono indicati
il lato rasaerba e il lato cestello.
4) Posizionate le piastre metalliche sui ganci saldati al telaio del cestello
e stringete i dadi. Assicuratevi che la rete non cada quando la stessa è alzata in posizione di apertura totale durante l'operazione di
svuotamento dell'erba.Fate scivolare la guaina in plastica dalla parte
alta destra e sinistra del sacco sopra il telaio.
5) Montate il tegolo nella parte inferiore destra della rete con 4 viti e
dadi. Avvitate con il cacciavite e con la chiave.
6) Per montare il cestello sul rasaerba mettetevi sul lato destro del
rasaerba, alzate il deflettore con la mano destra e con la sinistra
agganciate il cestello al tirante.
ATTENZIONE! La lama entra in funzione quando si mette in funzione il motore.
Arresto del motore
Il motore e la lama si arrestano rilasciando la maniglia freno.
ATTENZIONE! Lintervento per variare la velocità di avan-
zamento, deve essere eseguita solo a motore funzio-
nante.
ATTENZIONE! La lama girerà ancora per max 3 secondi.
Non utilizzare il rasaerba senza che il cestello raccoglierba
o il deflettore siano montati
Per regolare laltezza di taglio su macchine con comando centralizzato,
è necessario impugnare la leva, sollevare il cannotto scorrevole e portarla in una delle 7 posizioni predisposte.
Vedere la figura per le altezze di taglio disponibili.
Fermate sempre il motore e attendete che la lama sia completamente arrestata.
5) REGOLAZIONE DELL'ALTEZZA DI TAGLIO
Procedure per il taglio
Adattate la velocità alle condizioni dell'erba. Regolate la velocità del motore
al massimo quando l'erba è alta e fitta oppure al minimo quando è bassa.
Regolazione altezza di taglio (Fig. 11)
HARRY
10
ITALIANO
Consigli per il taglio
I risultati migliori si ottengono quando non più di un terzo dell'altezza
dell'erba è tagliata.
Quando l'erba è alta, usate la posizione di taglio più alta per il primo
taglio.
Se volete tagliare l'erba più bassa, ripassate con una posizione di taglio
più bassa. Se tagliate ad un livello troppo basso l'erba, dovrà impegnare
più energie per lo sviluppo di nuove foglie invece di irrobustirsi, e sarà più
soggetta alla possibilità di bruciare in caso di siccità.
Se lasciate che l'erba cresca troppo, la parte inferiore si indebolirà e ingiallirà. L'erba lasciata a terra forma uno strato che impedisce la crescita
dell'erba; la raccolta dell'erba tagliata è sempre raccomandata.
Tutti i rasaerba HARRY, sono studiati per un immediato cambio di funzioni:
taglio e raccolta contemporaneamente o solo taglio (raccomandato quando l'erba è molto alta).
Svuotamento del cestello (Fig. 12)
Il sistema brevettato di svuotamento del cestello permette di effettuare
questa operazione in due diversi modi:
A Sollevate il deflettore e staccate il cestello dalla macchina utilizzando
la maniglia posta al centro del cestello.Sollevate quindi la parte posteriore dello stesso per permettere la fuoriuscita dell'erba.
B Prendete la parte posteriore del cestello e ruotatelo verso l'alto: l'erba
cadrà sul terreno (sistema brevettato).
Per prolungare la vita del cestello bisogna svuotarlo ogni volta che si
finisce il taglio e prima dell'immagazzinamento invernale. Controllate
frequentemente il cestello; se difettoso procedete alla sostituzione con
parti di ricambio originali.
ATTENZIONE!
Per ogni intervento di manutenzione, ricordatevi di
spegnere il motore e di staccare il connettore della
candela di accensione.
1 Controllate a intervalli frequenti le lame e le viti che fissano il motore.
2 Controllate che tutti i dadi e le viti siano strette in modo da avere il
rasaerba sempre in condizioni ottimali di lavoro.
3 Controllate frequentemente lo stato del cestello di raccolta
dell'erba.Sostituite il cestello con un cestello nuovo qualora si riscontrino dei difetti. Usate solo parti di ricambio originali.
4 Non immagazzinate il rasaerba in un luogo chiuso con il serbatoio
pieno di benzina. Lasciate raffreddare il motore dopo l'uso in un luogo aperto.
6) MANUTENZIONE
5 Per ridurre il pericolo di incendio, fate in modo che il motore sia pulito
dall'erba, dalle foglie o da eventuale grasso di olio
6 Ricordate che la benzina è infiammabile. Tenete la benzina in una
tanica metallica lontano dal calore o da fiamme libere.
7 Fate revisionare dal rivenditore HARRY il vostro rasaerba al termine
di ogni stagione. Questo vi permetterà di avere il vostro rasaerba in
perfetta efficienza all'inizio della stagione successiva.
8 Accertatevi che nelle riparazioni vengano usate parti di ricambio origi-
nali HARRY, questo Vi permetterà di mantenere la qualità del vostro
rasaerba allo stesso livello di quando l'avete acquistato.
ATTENZIONE!
Per ogni intervento di manutenzione, ricordatevi di
spegnere il motore e di staccare il connettore della
candela di accensione.
7) CONTROLLI E REGOLAZIONI
ATTENZIONE!: l'usura eccessiva della lama può portare
alla formazione di profonde crepe ed al distacco di alcuni
pezzi della stessa che possono creare serio pericolo all'operatore stesso ed ai presenti nella zona di lavoro.
Controllo - Smontaggio e affilatura della lama (Fig. 13 Fig. 14)
- Fermate il motore. Staccate il cavo della candela per evitare avviamenti improvvisi e non voluti del motore.
- Piegate il rasaerba sul lato sinistro oppure sul lato opposto alla candela per evitare problemi di ingolfamento.
- Controllo: esaminate con cura il grado di affilatura e di usura della
lama, specialmente in corrispondenza delle pieghe.
- Poiché la sabbia o altro materiale possono essere causa di usura, si
consiglia di controllare frequentemente la lama. Se si notano delle anomalie, si deve provvedere alla sostituzione della lama.
- Smontaggio: impugnate energicamente un terminale della lama,
per evitare tagli si consiglia di indossare un guanto; svitate il bullone,
togliete la rondella e quindi la lama.
- Affilatura: affilate la lama se i taglienti sono deteriorati ma la lama
è in buone condizioni. Utilizzate una mola per l'affilatura; controllate
che, dopo questa operazione la lama sia ancora bilanciata. Se non
fosse bilanciata, si avranno delle vibrazioni eccessive. Prestate particolare attenzione per evitare di tagliarvi!
- Montate la lama centrandola sul supporto e stringete il bullone.
LUBRIFICAZIONE
Motore: cambiate l'olio dopo le prime due ore di lavoro. Successiva-
mente ogni 25 ore come indicato nel manuale di manutenzione del motore. Prima di ogni utilizzo del rasaerba, controllate il livello dell'olio.
Per la lubrificazione delle parti in movimento: occasionalmente, mettere
alcune gocce di grasso sui componenti in movimento (quali cuscinetti,leve
di regolazione dell'altezza delle ruote ecc.).
REGOLAZIONE CAVO SEMOVENZA (Fig. 15)
Il cavo innesto semovenza deve essere registrato solo se, con motore in
funzione, azionando la maniglia semovenza le ruote non rispondono
prontamente e danno la sensazione che la frizione slitti.
La regolazione si realizza sbloccando i 2 dadi (pos.1), ruotando due giri
il dado superiore in senso antiorario e bloccandolo con il controdado, se
loperazione non risultasse efficace la si può ripetere.
ATTENZIONE!
Un eccessivo carico sul cavo può provocare la rottura della
trasmissione.
Dopo la registrazione verificare sempre che, a motore spento, tirando la
macchina allindietro senza azionare la maniglia semovenza, le ruote
posteriori ruotino liberamente.
HARRY
11
ITALIANO
1) Per poter tagliare lerba nella modalità Mulching, bisogna verificare
che laltezza dellerba non sia superiore a 10 cm., viceversa, è necessario togliere la chiusura Mulching e montare il sacco raccoglierba.
2) Qualora si stia procedendo nella modalità Mulching è necessario
accertarsi che lerba sia asciutta e la lama ben affilata per evitare
che lerba tagliata non si accumuli sotto la chiocciola della scocca.
3) Funzionamento:
a- Posizionare la chiusura Mulching nel vano di espulsione deller-
ba
9) MULCHING
Accertarsi che il motore sia spento ed il cappuccio della candela staccato.
b- Portare la leva di regolazione dellaltezza di taglio, in una delle
3 posizionicorrispondenti alla targhetta Mulching (vedi fig. 17).
Per modelli H48-H49-P49 posizionare laltezza di taglio non inferiore a 50mm.
c- Avviare il motore e procedere al normale taglio dellerba.
4) Dopo il funzionamento nella modalità Mulching è buona norma pro-
cedere ad una accurata pulizia per rimuovere i residui del taglio dellerba.
Per questa operazione, togliere la chiusura Mulching, come indicato
in fig. 16 .
Svitare il pomello e spingere la chiusura verso linterno, come indicato in fig. 18 .
DESCRIZIONE DEL PRODOTTO
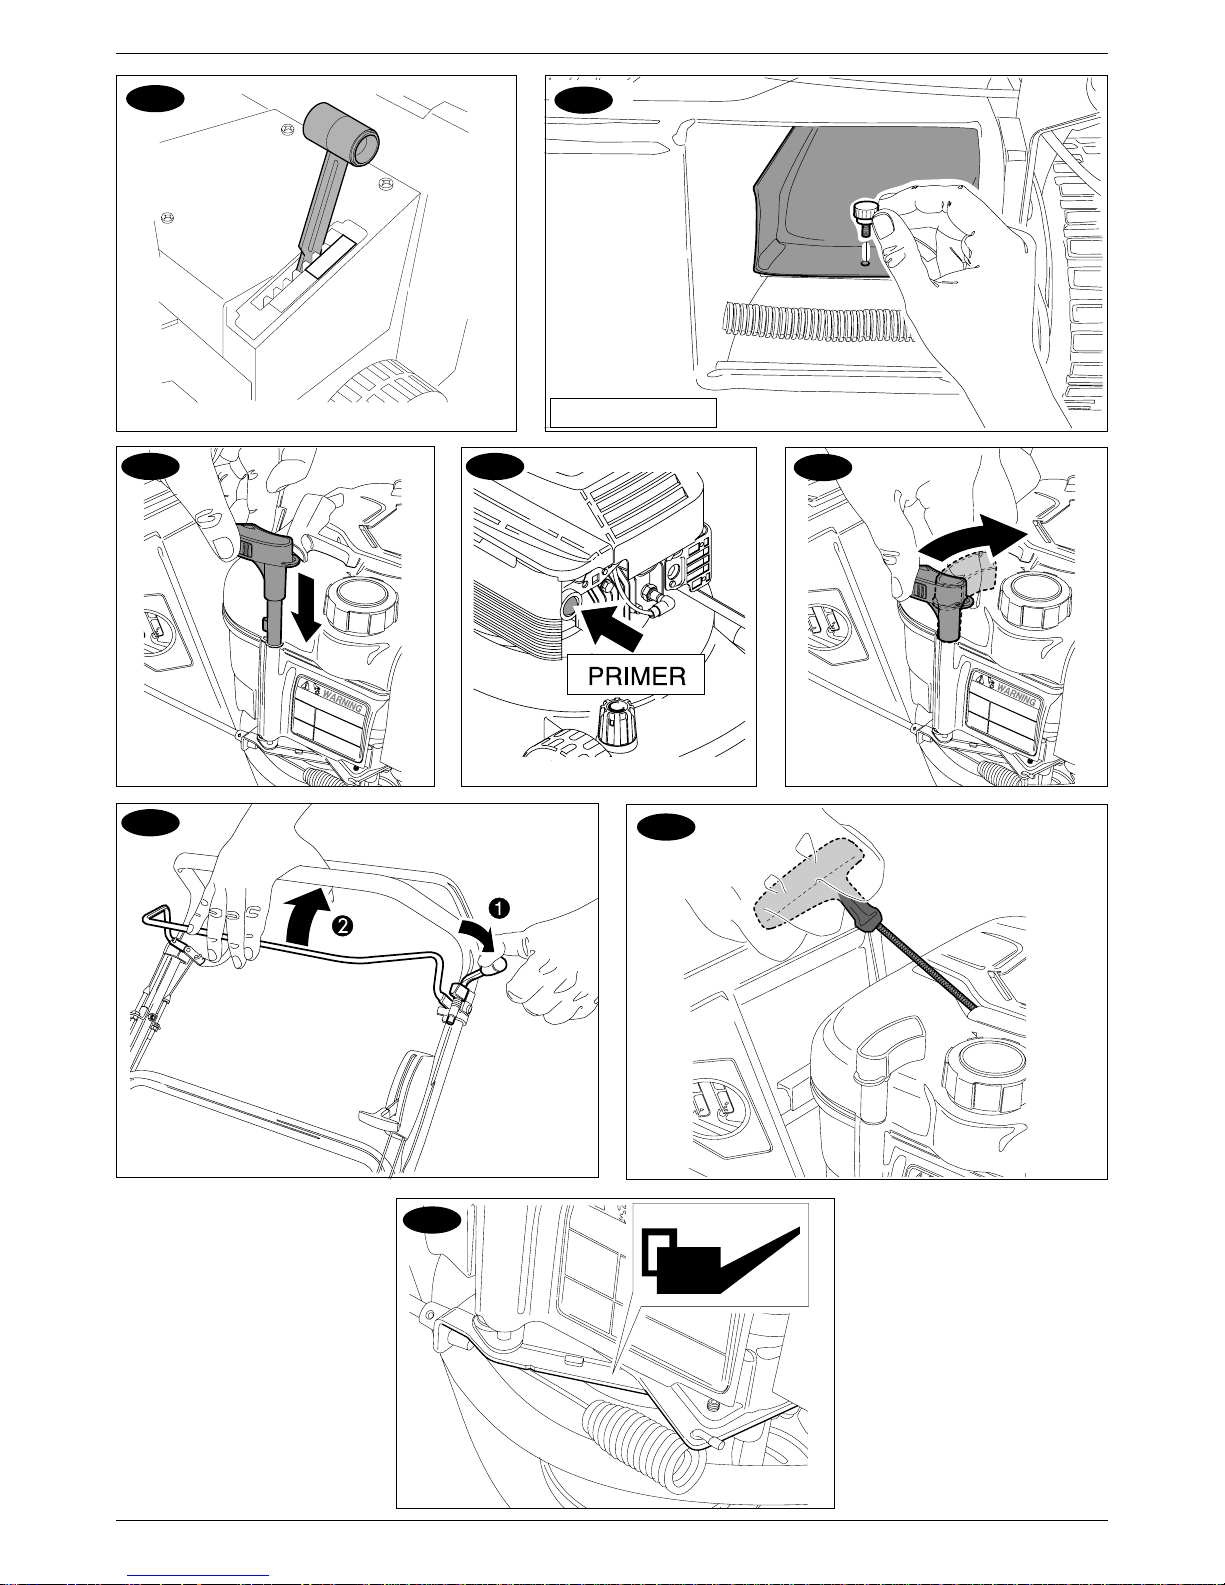
Il sistema davviamento Touch-n-mow, brevettato da Briggs & Stratton, è
un nuovo prodotto che permette di avviare il rasaerba tirando semplicemente la barra di sicurezza, senza lausilio di batterie, cavi elettrici, interruttori e corde da tirare.
FUNZIONAMENTO
Caricare il sistema davviamento Touch-N-Mow - Per motivi
di sicurezza il sistema viene fornito disattivato dalla fabbrica produttrice.
Anche in seguito ogni qual volta il sistema di avviamento venisse disattivato
appositamente per motivi di sicurezza, il Touch-N-Mow avrà poi bisogno
di essere caricato per essere pronto alluso.
Per caricare il sistema davviamento, si deve avviare il motore usando
lavviamento manuale (fune davviamento) seguendo i passi di seguito
riportati:
1. Controllare il livello della benzina e dellolio motore
2. Collegare il cavo candela
3. Premere il primer del motore tre volte (fig.20).
4. Inserire la chiave di sicurezza (fig. 19). Ruotarla in senso orario
sulla posizione RUN (fig.21).
5. Liberare la barra di sicurezza ruotando la maniglia del dispositivo
Touch-N-Mow (fig. 22).
6. Accendere il motore con lavviamento a mano tirando la corda (fig
23). Se il motore non parte al secondo tentativo, verificare di aver
eseguito correttamente i passaggi precedenti.
7. Lasciare che il motore raggiunga la velocità operativa.
8. Rilasciare la barra in modo appropriato.
NOTA: al primo avvio della rasaerba, o comunque dopo un periodo di
rimessaggio lubrificare il punto di snodo indicato (fig. 24) e lasciare
acceso il motore per cinque minuti prima di usare la macchina.
Quando la barra viene rilasciata la molla di ritorno spinge il Touch-NMow a contatto con il volano.
Lenergia darresto (inerzia) che proviene dal volano permette il
caricamento autonomo del Touch-N-Mow stesso.
Il meccanismo autocaricante del dente di arresto mantiene la molla nella
posizione di carica.
10) SISTEMA DAVVIAMENTO TOUCH-N-MOW
Arrestare il motore
Rilasciare la barra di sicurezza in modo appropriato.
NOTA: Nel momento in cui si ferma il motore, sentirete il rumore del
sistema di avviamento che si ricarica. Questo rumore causato dallalta
velocità del dente darresto è normale.
Il Touch-N-Mow è un sistema brevettato che funziona sia da sistema di
avviamento quando si tira la barra di sicurezza, che da freno motore
quando si lascia appropriatamente la barra di sicurezza.
Girando la chiave di sicurezza di 1/4 di giro in senso antiorario (posizione LOCK&REMOVE ), il Touch-N-Mow si blocca. Togliere SEMPRE la
chiave di sicurezza e metterla in un posto sicuro. Il motore non partirà
senza chiave di sicurezza o con la chiave nella posizione LOCK&REMOVE.
NOTA: Se il motore rimane senza benzina o se il motore si ferma a
causa di erba troppo alta o per altre ragioni meccaniche, lavviamento
Touch-N-Mow non si ricaricherà automaticamente e sarà necessario ripetere i punti elencati nel paragrafo: Caricare il sistema davviamento
Touch-N-Mow.
Avviare il motore utilizzando il sistema Touch-N-Mow
1. Controllare lolio motore.
2. Collegare il cavo candela.
3. Premere il primer per tre volte.
4. Inserire la chiave di sicurezza. Girare in senso orario sulla posizione RUN.
5. Rimuovere la sicurezza della barra.
6. Tirare la barra per avviare il motore.
NOTE: Se il motore non parte significa che il Touch-N-Mow si è scaricato. In tal caso provvedere al caricamento.
Staccate il cavo della candela, girate il rasaerba e pulite la parte inferiore del carter.Eliminate ogni accumulo d'erba con un cacciavite quindi
lavate con getto d'acqua. Pulite le superfici del rasaerba e lasciate asciugare. Controllate che il cestello per la raccolta dell'erba sia vuoto; lavate
lo stesso lasciandolo però asciugare. Immagazzinate il rasaerba in un
luogo asciutto e protetto dalle intemperie.
Procedure per l'immagazzinamento invernale
Seguite le seguenti istruzioni per la preparazione del vostro rasaerba per
l'immagazzinamento a fine stagione.
Per quanto riguarda il motore, seguite le istruzioni fornite dal costruttore
del motore.
8) IMMAGAZZINAMENTO INVERNALE

HARRY
12
ITALIANO
SUGGERIMENTI PER LA RICERCA GUASTI
Se il motore non riesce a partire:
1. Controllare il livello della benzina.
2. Assicurarsi che la candela sia collegata correttamente
3. Ricaricare il sistema davviamento seguendo i punti elencati nel paragrafo caricare il sistema davviamento Touch-N-Mow.
4. Verificare di aver tirato la barra di avviamento dopo aver sbloccato
la leva di sicurezza.
5. Assicurarsi che la chiave di sicurezza sia nella posizione RUN.
6. Verificare che il cavo di avviamento funzioni correttamente per attivare e ricaricare il Touch-N-Mow.
7. Assicurarsi che linterruttore STOP sia correttamente fissato sul TouchN-Mow.
AVVERTENZE E PRECAUZIONI
Come per ogni prodotto nuovo ci sono importanti considerazioni da fare
sulla sicurezza del Touch-N-Mow. In particolare é necessario tener conto
che questo sistema basa il proprio funzionamento su una molla mantenuta in carica dal volano. Un intervento inconsapevole o maldestro nei pressi
della molla può causarne limprovviso rilascio con conseguenze che possono essere estremamente pericolose per sé stessi e le persone vicine.
Quindi se le istruzioni che seguono non vengono rispettate
cè il rischio di traumatiche amputazioni o lacerazioni!
- Scollegare SEMPRE la candela, scaricare e bloccare il Touch-N-Mow
rimuovendo la chiave di sicurezza PRIMA di effettuare QUALSIASI
assistenza al motore o al rasaerba.
- Assicurarsi che il Touch-N-Mow sia scarico e bloccato PRIMA di
trasportarlo o maneggiarlo.
- NON mettere le mani o i piedi sotto il rasaerba quando il sistema
davviamento è in carica
- MAI presupporre che il sistema sia scarico anche se la
chiave è nella posizione LOCK&REMOVE o se è stata
rimossa dal motore.
- NON mettere le mani sul volano mentre il sistema si scarica.
- NON trasportare o sollevare il motore dal convogliatore vicino al
volano.
- Maneggiare SEMPRE il sistema di avviamento Touch-N-Mow, se
smontato dal motore, dallinvolucro in ferro della molla.
- NON sollevare lo starter mettendo le vostre dita ove vi sono le parti
in movimento del sistema stesso.
- NON tentare di manutenzionare o riparare lavviatore
Touch-N-Mow.
- Bloccare e rimuovere SEMPRE la chiave di sicurezza e riporla in un
posto sicuro fino al prossimo utilizzo. La chiave di sicurezza è stata
disegnata e pensata apposta per essere rimossa dal motore quando
non è in uso. Rimuovendo la chiave si prevengono avviamenti
incontrollati o inaspettati in presenza di bambini o adulti non informati. La chiave di sicurezza deve essere nella posizione di blocco
del sistema (posizione LOCK&REMOVE) prima che possa essere rimossa.
- Verificare SEMPRE che il cavo di STOP sia attaccato e fissato correttamente allinterruttore di STOP. Il mancato funzionamento dellinterruttore di STOP (contatto a massa) può danneggiare lavviatore
Touch-N-Mow.
Chiudere e rimuovere SEMPRE la chiave di sicurezza e riporla in un
posto sicuro fino al prossimo uso.
La chiave di sicurezza è stata disegnata e pensata per essere rimossa dal motore quando non è in funzione.
Togliere la chiave per prevenire avviamenti accidentali del rasaerba in
presenza di bambini o adulti incauti.
La chiave di sicurezza deve essere nella posizione LOCK&REMOVE prima che possa essere rimossa.
SCARICARE E BLOCCARE SEMPRE IL TOUCH-N-MOW PRIMA DI:
- rimuovere erba o altri detriti dal rasaerba
- cambiare il filtro dellaria, dellolio o la candela
- rimuovere la lama per la manutenzione
- effettuare qualsiasi altra manutenzione al motore o al rasaerba
- trasportare il rasaerba
SUGGERIMENTI PER LASSISTENZA
Il Touch-N-Mow è fissato al motore con viti Torx T 30.
Il Touch-N-Mow fa girare il motore per 2 secondi a 1000 RPM. Un avvia-
mento a corda a 600 RPM, e un avviamento elettrico a 450 RPM.
Se il motore non parte, caricare il Touch-N-Mow manualmente (fune di
avviamento).
Se il serbatoio è stato rimosso dal motore ASSICURARSI che la chiave di
sicurezza del sistema Touch-N-Mow sia nella posizione LOCK & REMOVE
prima di installare nuovamente il serbatoio.
Non usare la chiave di sicurezza prima di installare il serbatoio in quanto
possono verificarsi operazioni non sicure.
Se avete qualche dubbio sulle condizioni di carica del Touch-N-Mow,
scaricate il sistema davviamento.
SCARICARE IL SISTEMA DI AVVIAMENTO
Prima di pulire il rasaerba, effettuare manutenzione o trasportare il
rasaerba SI DEVE scaricare il sistema davviamento Touch-N-Mow.
Per scaricare il sistema:
1. Scollegare il cavo candela.
2. Azionare il sistema di avviamento e fare una falsa partenza.
3. Girare la chiave di sicurezza di 1/4 in senso antiorario nella posizione LOCK&REMOVE.
4. Togliere la chiave di sicurezza.
NOTA: Se la chiave di sicurezza non si porta nella posizione di
bloccaggio, tirare leggermente la corda autoavvolgente per rilasciare la
tensione nel sistema davviamento.
GARANZIA
Il meccanismo di avviamento Touch-N-Mow è un unico sistema e NON è
composto da parti ricambiabili singolarmente. Qualsiasi segno di manomissione invaliderà la garanzia del costruttore.
* Se il Touch-N-Mow non si disattiva
1. Tentare di caricare lavviatore. Aspettare il click del dente darresto e provare a scaricarlo ancora tirando la barra di sicurezza.
2. Se loperazione al punto 1 NON ha scaricato lavviatore, tirare la
barra di sicurezza, picchiate leggermente con un martelletto di gomma
lesterno del convogliatore a molla e sul braccio dinnesto del sistema, provando a farlo innestare.
3. Se le operazioni ai punti 1 e 2 non riescono a scaricare lavviatore,
bloccare e togliere la chiave di sicurezza dal sistema , e rimuoverlo
attentamente dal motore. Contrassegnare il sistema rimosso come
completamente carico e inviarlo alla casa produttrice Briggs &
Stratton.
* Se il pignone davviamento è bloccato nel volano
1. Cercare di caricare lavviatore usando la fune autoavvolgente. Aspettare il click del dente di arresto e provare ancora a scaricarlo.
* Se lavviatore non si blocca con la chiave di sicurezza
1. Se lavviatore è scarico tirare leggermente la fune davviamento cercando di far fare una rotazione al volano e provare a portare la
chiave di sicurezza nella posizione di blocco, (LOCK POSITION).
2. Se lavviatore è carico, scaricarlo e cercare di bloccarlo con la chiave di sicurezza. Se lavviatore non si blocca, ripetere loperazione al
punto 1.
* Se il sistema davviamento continua a ricaricarsi dopo la
partenza del motore
1. Controllare le connessioni dellinterruttore darresto e la massa. Un
sovraccaricamento della molla DANNEGGERA il sistema Touch-NMow.
Problemi di avviamento o di fermata del motore possono essere collegati
alla barra davviamento, al dispositivo di regolazione del cavo o al
leveraggio.
E MOLTO IMPORTANTE che questo dispositivo di regolazione permetta di attivare correttamente sia il sistema davviamento Touch-NMow che il blocco motore.
ENGLAND
HARRY
13
Before using the machine, read the instruction manual.
ATTENTION!
Keep persons, who do not know the safety rules away
from the mower.
Stop the engine and disconnect the spark plug wire
before reparing
Wear safety glasses to protect your eyes
Never smoke while filling the gasoline tank
CONTENTS:
1) Description of the parts
2) General safety precautions
3) Assembly
4) Operation
5) Mowing procedure
6) Maintenance
7) Inspection and maintenance
8) Storage procedure
9) Mulching
10) Touch-N-Mow starting system
1) DESCRIPTION OF THE PARTS (Fig.01)
1 Upper handle
2 Lower handle
3 Throttle
4 Cable
5Handle driving
6 Handle rod
7 Handle
8 Deflector
9 Back wheel
10 Front wheel
11 Deck
12 Engine
13 Blade
14 Grasscatcher
15Gearbox
16 Adjusting levers for cutting height
17Variable speed
2) GENERAL SAFETY PRECAUTIONS
ATTENTION!
a) Read the operating and service instruction manual carefully before
using the mowers
b) Person under 16 years of age must not use the lawn mower.
c) The operator is responsable for the safety of other people in the working
area.Keep children and domestic animals at a safe distance when the
lawn mower is in use.
d) Thoroughly inspect the area where the mower has to be used, remove
all sticks, stones, wires cans and other foreign objects from the area to
be mowed.Also note the location of holes, stumps, and other possible
hazards.
e) Wear only solid shoes when mowing. Do not operate mower when
barefoot, or wearing open sandals.Wear sensible clothing-long-pants,
boots or heavy shoes that will grip even in wet weather, and gloves
(like golfers) for a sure grip. Also, don't wear anything that's so loose
that it might get caught on something.
f) Check the blade bolts for proper tightness. Never use the lawn mower
without either grasscatcher or deflector.
g) Do not fill the gasoline tank indoors, when engine is running or while
the engine is still hot.Never smoke during the filling of the gasoline
tank.
h) Do not start the engine indoors. Exhaust gases coming fom the engine
can be poison when repired, and can therefore be suffocating and
mortal.
i) Never attempt to make a wheel height adjustment while the engine is
running.Adjust the cutting height while the mower is on a level, firm
surface.
l) CAUTIONDO NOT put hands or feet under mower or in the discharge
chute, nor make any adjustment.
m) Mow only in daylight or good artificial light.
n) DO NOT run with the mower.Do not allow hurry or panic to influence your
better judgement. Take time to do job in the safest manner.Always be sure
of your footing; keep a firm hold on the handle and walk; never run.
o) DO NOT use damaged mower. Always have damage repaired before
mowing.
p) Do not allow anyone to operate your lawn mower without proper
instructions and have them to read these safety instructions
q) Never pull mower towards you, always follow mower to cut grass
r) Mow across the face of slopes; never up and down. Exercise extreme
caution when changing direction on slopes.Do not mow excessively
steep slopes
s) Always stop engine or blade when not cutting grass or when crossing
gravel drive, sidewalk, or roadway.
t) After striking a foreign object, stop the engine, remove the wire from the
spark plug, thoroughly inspect the mower for any damage, and repair
the damage before restarting the engine and operating the mower.
ENGLAND
HARRY
14
3) ASSEMBLY
Tools:
To assemble the HARRY mower you will need:
- One straight head screwdriver;
- Two small adjustable wrenches.
Deflector-plate assembly (Fig. 02 - Fig. 03 - Fig. 04)
1) Position the spring into the two holes of the deflector plate, insert the
rod (1), position the assembled baffle plate on the casing, securing it
with the 2 screws (2).
Assembly of handlebar mod. 313 (Fig. 06)
1) Insert the lower plough tails of the handlebar into the relative
slots on the two lateral hubs and tighten the two knobs.
3) Place grille over the two hooks of the catcher. Be sure grille flanges
face mower. Mower side and catcher side are indicated on grille.
4) Place metal plates on frame brackets, just aft of each hook. Secure to
bracket with flat head bolts, nuts and washer. The other end of clip
should now cover the top of the grille, just aft the hook... thus preventing
the grille from falling off when the grille is raised to full open position
at time of emptying grass cuttings.Slip bag top left and right plastic
ends over the metal frame.
5) Attach spoon to lower right from side of grille with 4 straight head
screws and nuts. Tighten with screwdriver and small adjustable wrench.
6) To attach grasscatcher to mower stand on right side of mower lift
deflector with right hand, and with left hand hook catcher onto two
open areas of handle rod.
Assembly of fabric grasscatcher (Fig. 05)
1) Slip the wire frame into the fabric bag, keep the metal handle outside
of the fabric. The metal handle and fabric bag cloth handle will both
be at top side of the catcher. The plastic sheet will be on the bottom .
2) Secure the 4 sides of fabric bag to rectangular frame opening by
slipping plastic ends of bag over the metal frame. Leave top left and
right of bag off.
Wear safety glasses to protect
your eyes
Never smoke while filling the gasoline
tank
Keep persons, who do not know the
safety rules away from the mower.
4) OPERATION
Keep the handle (4) pressed during machine operation. When the handle
is released, the engine stops. For further information and explanations,
read carefully the user instruction manual of the engine. Squeeze adjusting
lever towards wheel and move it to the position desired.
assure pin on adjusting lever (5) engages notch in
housing. Refer to figure for the approximate cutting height afforded by
each of the different positions.
For model 471-C50-C54-P54 it is possible to alter the advance speed
by means of the lever (17) (Fig. 10).
Pre-start inspections
before each start-up, check the following and, if necessary, perform the
service specified.
l CHECK deflector, grasscatcher to make sure they are in proper position
and tightened.
l CHECK oil level in engine and, if necessary, add oil up to, but not
over, full mark.
l CHECK cutting heights and adjust (see paragraph "cutting height
adjustment").
Engine startup (Fig. 07 - Fig. 08 - Fig. 09)
Once the machine has been set up properly, start the engine as follows:
a- Operate the brake handle (4) to enable engine startup.
b- Engine with PRIMER system: Press the fuel-enrichment pump located
on carburettor 3 or 4 times.If the model is equipped with an accelerator
position the accelerator lever (3) on MAX.
Engine with CHOKE system: If the model is equipped with an
accelerator, when the engine is cold, position the accelerator lever (3)
on START.
c- Start engine: Grip the starting handle (7) and pull the starter rope
gently until you feel the resistance caused by compression. Then give
the starter rope a sharp tug.
ATTENTION! The blade starts turning as soon as the engine
is started.
ATTENTION! The blade will continue turning for max. 3
more seconds after the engine has been stopped.
Engine stop:
The engine and the blade stop when the handle is released.
ATTENTION! Undertake the operation only with the engine
running
5) MOWING PROCEDURE
Mowing procedure:
Vary speed to suit grass conditions. Set the engine speed to the maximum
for tall and thick grass or lower for short and thin grass. On self propelled
models squeeze control bar towards handle to engage the transmission;
to stop forward motion release the control bar. The mower can be hand
pushed with the control released.
Cutting height adjustment (Fig. 11)
To adjust the cutting height on machines with centralized control it is
necessary to grip the lever, lift the sliding sleeve and position to one of the
7 set positions.
Always stop the engine and wait until the mower blade goes
to a complete halt.
Never use the lawn mower without either grasscatcher or
deflector.
ENGLAND
HARRY
15
LUBRICATION SERVICES
Engine: Change oil after the first two hours of operation and subsequently
after every 25 hours as specified in engine manual. Check the oil level
each time you use your mower.
For lubrication of moving parts: occasionally pour a few drops of grease
onto the moving parts (such as bearings, wheel height adjustment levers
etc).
Emptying grasscatcher (Fig. 12)
When the bag becomes full, stop engine and wait for all parts to stop.
The patented HARRY grass collection system gives you two ways to empty
grasscatcher:
A Lift deflector and simply unhook the bag. Grasping handle at middle
and rear of bag, gradually tip bag forward to empty clippings and
shake bag until all clippings have fallen out;
B Grasp handle at rear and just tip bag; clippings will fall out on the
ground (patented);
To extend the life of the basket it is necessary to empty it each time the cut
is terminated and before the winter storage. Check the basket frequently;
if it is defective proceed to replace it with original spare parts.
Mowing tips:
Best results are achieved when no more than 1/3 of the height of the
grass is cut off. The cutting deck should be level under all conditions; if
long grass must be cut, use highest cutting height for first mowing. If you
want the grass shorter, then recut to the lower height. If cut too short, the
grass will expend more energy for development of new leaves and less
for root strengthening and will be more subjected to burning. On the
other hand, if allowed to grow too long, the lower part will be shaded
and will discolor.
Dispersed clippings mat to form thatch which prevents proper growth; to
prevent grass disease from thatch, bagging is always recommended. All
HARRY mowers are designed to allow immediate change of function:
cutting and bagging at the same time or cutting only (this is recommended
only when grass is high).
6) MAINTENANCE
1 Check the blade and the engine mounting bolts at frequent intervals
for proper tightness.
2 Keep all nuts, bolts and screws tight to be sure the equipment is in safe
working conditions.
3 When the grasscatcher is used on your mower, check the catcher often
for damage.Use only recommended catcher.Replace with new bag if
loose seams or tears are evident.
4 Never store the equipment with gasoline in the tank inside a building
where fumes may reach an open flame or spark.Allow the engine to
cool before storing in any enclosure.
ATTENTION!
Stop the engine and disconnect the spark plug wire
before reparing.
5 To reduce fire hazard, keep the engine free of grass, leaves, or excessive
grease.
6 Remember that gasoline is flammable. Store your reserve supply
carefully in a metal container and away from heat and fire.
7 Have your mower inspected and serviced each year by an authorized
HARRY dealer.Determine if any additional devices are available which
might upgrade the safety of your mower.
8 Factory specified HARRY replacement parts must be used to assure
adequate protection against injury.
7) INSPECTING
Inspecting-removing sharpening-blade (Fig. 13 - Fig. 14)
- Stop engine. CAUTION: before checking or doing any work on the
blade,disconnect the spark plug wire and secure it away from the plug
to prevent unintentional starting.
- Tip mower on its left side or opposite side from spark plug, so plug will
not be fouled (which causes starting problems).
- INSPECTING BLADE: Carefully examine blade for sharpness and
wear, especially where flat and curved parts meet . Since sand and
abrasive material can wear away the metal that connects the flat surface
to the upturned lift, check blade before using the mower. If a slot or
wear is noticed replace blade. Replace blade if badly chipped, bent
or out of balance.
ATTENTION!
Stop the engine and disconnect the spark plug wire
before reparing.
- DISMANTLING: Firmly grip an edge of the blade, to avoid the risk
of cuts it advisable to wear gloves; unscrew the bolt, remove the washer
and then the blade.
- SHARPENING BLADE: Sharpen blade when the cutting edges
become dull if the blade is in otherwise good condition. For best results,
remove the blade and sharpen it on grinding wheel.Check blade after
sharpening to determine that it is still balanced. It will cause excessive
vibration if unbalanced.Be careful to avoid cutting yourself on sharp
blade!
- Assemble the blade centering it on the support and tighten the bolt.
ATTENTION! If blade is allowed to wear, a slot may form
near the sail. Eventually a piece of blade may break off
resulting in serious injury to yourself or a bystander.
TRANSPORTER CABLE REGULATION (Fig. 15)
The transporter engagement cable must only be regulated in the event
that, with engine running, on handle operation the wheels fail to provide
a prompt response and it seems that the clutch is slipping.
Regulation is undertaken by loosening the 2 nuts (1), turning the upper
nuts twice in anti-clockwise direction, and then re-tightening it with the
counter-nut, should the operation not be effective it can be repeated.
After regulation always check that, with engine off, and pulling back the
machine without operating the transporter handle, that the rear wheels
rotate freely.
ATTENTION!
Excessive pressure on the cable may result in the breakage
of the transmission.

ENGLAND
HARRY
16
8) ISTORAGE PROCEDURE
Storage procedure:
Take the following steps to prepare your mower for storage at the end of
the mowing season. Refer to the engine manual for directions for preserving
the engine. With the spark plug wire disconnected from plug, turn the
mower on its side and thoroughly clean underside of deck. Scrape away
accumulation of grass with putty knife and/or wire brush first, then wash
down with water from a hose.
CAUTION: Avoid spraying water into exhaust or air intake while washing
deck - tape openings closed to prevent this. Clean external surfaces of
mower and allow to dry, then lubricate all exposed metal surfaces with a
light coating of oil to prevent corrosion. The grass catcher may be washed
in detergent; allow to dry thoroughly after washing. Store mower during
off season in a storage shed or dry area protected from weather.
1) For grass cutting in Mulching mode, it is necessary to check that the
grass height does not exceed 10 cm, viceversa it is necessary to
remove the Mulching closure element and mount the grass collection
sack.
2) When working in the Mulching mode, make sure that the grass is
dry and that the blade is well sharpened in order to ensure that the
cut grass does not accumulate underneath the volute of the casing.
3) Function:
a- Position the Mulching closure element in the grass expulsion
compartment.
9) MULCHING
b- Position the cutting height regulation lever to one of the three
positions on the Mulching plate (see fig. 17)
For H48-H49-P49 models the cutting height shall be set not lower
than 50 mm.
c- Start up the motor and proceed with normal grass cutting.
4) After operation in the Mulching mode it is advisable to undertake
thorough cleaning to remove any cut grass residue. For this operation
remove the Mulching closure element, as indicated in fig. 16
Loosen the knob and push the closing towards inside as shown in
figure 18 .
Make sure that the motor is off and that the spark-plug cover
is detached.
10) TOUCH-N-MOW STARTING SYSTEM
PRODUCT DESCRIPTION
The Touch-n-Mow starting system, patented by Briggs & Stratton, is a
new mechanical starting system for the lawn mower which operates by
simply pulling the motor bar, without requiring batteries, electric cables,
switches or strings to pull.
OPERATION
Loading the Touch-n-Mow starting system. For safety reasons,
the system is off when supplied by the manufacturer. Also afterwards,
whenever the starting system is turned off on purpose for safety reasons,
the Touch-n-Mow will require to be loaded in order to be ready for use.
To load the starting system, the motor must be started by means of the
manual starting (starting string), following the steps below:
1. Check gasoline and motor oil levels.
2. Connect spark plug cable.
3. Press motor primer three times (Fig.20).
4. Insert safety key (Fig.19). Rotate it clockwise to RUN position
(Fig.21).
5. Release motor bar by rotating Touch-n-Mow safety lever (Fig.22).
6. Manually start the motor by pulling the string (Fig.23). If the motor
does not start at the second attempt, make sure the previous steps
have been properly executed.
7. Let the motor reach the operating speed.
8. Properly release the bar.
NOTE: at the first start up of the lawn mower or after any period of non
use, lubricate the articulation point shown (Fig. 24) and leave the motor
on for five minutes before using the machine.
When the bar is released the return spring pushes the Touch-n-Mow device
until this touches the flywheel.
The stopping energy (inertia) generated by the flywheel allows the Touchn-Mow starting system self-loading.
The self-loading mechanism of the pawl keeps the spring in the loading
position.
Stopping the motor
Properly release the motor bar.
NOTE: when the motor stops, you will hear the starting system re-loading
noise. This noise caused by the high speed of the pawl is normal.
The Touch-n-Mow device is a patented system working both as starting
system when the motor bar is pulled, and as motor brake when the motor
bar is properly released.
By turning the safety key by _ anticlockwise (LOCK&REMOVE position),
the Touch-n-Mow device locks. ALWAYS remove the safety key and put it
in a safe place. The motor will not start without safety key or with the key
in LOCK&REMOVE position.
NOTE: If the motor remains without gasoline or if it stops due to excessively
high grass or because of other mechanical reasons, the Touch-n-Mow
starting system will not automatically reload and it will be necessary to
repeat the steps listed in the section Loading the Touch-n-Mow starting
system.
Starting the motor by means of the Touch-n-Mow system
1. Check motor oil.
2. Connect spark plug cable.
3. Press primer three times.
4. Insert safety key. Rotate clockwise to RUN position.
5. Activate motor bar safety lever.
6. Pull motor bar to start engine.
NOTE: if the motor does not start it means that the Touch-n-Mow device
is unloaded. Proceed to load it .

ENGLAND
HARRY
17
- ALWAYS disconnect the spark plug, unload and lock the Touch-n-
Mow device by removing the safety key BEFORE carrying out any
assistance intervention on the motor or the lawn mower.
- Make sure the Touch-n-Mow device is unloaded and locked BEFORE
transporting or handling it.
- DO NOT put your hands or feet below the lawn mower when the
starting system is loaded.
- NEVER suppose that the system is unloaded even if the key is in the
LOCK&REMOVE position or it has been removed from the motor.
- DO NOT put your hands on the flywheel while the system is being
reloaded or released .
- DO NOT transport or lift the motor from the conveyor near the
flywheel.
- ALWAYS handle the Touch-n-Mow starting system, if disassembled
from the motor, from the spring iron case.
- DO NOT lift the starter putting your fingers where there are the
moving parts of the system.
- DO NOT try to carry out maintenance or repair interventions on the
Touch-n-Mow starter.
- ALWAYS lock and remove the safety key and put it in a safe place
until the following use. The safety key has been designed and
manufactured to be removed from the motor when not in use. By
removing the key there is no risk of uncontrolled or unexpected
startings in the presence of children or unaware adults.
The safety key must always be in the system lock position
(LOCK&REMOVE position) prior to its removal.
- ALWAYS make sure that the STOP cable is correctly attached and
fixed to the STOP switch.The non operation of the STOP switch (ground
contact) may damage the Touch-n-Mow starter.
ALWAYS close and remove the safety key and put it in a safe place
until the following use.
The safety key must be in the LOCK&REMOVE position prior to its
removal.
ALWAYS UNLOAD AND LOCK THE TOUCH-N-MOW BEFORE:
- Removing grass or other waste material from the lawn mower.
- Changing air filter, oil filter or spark plug.
- Removing blade for maintenance.
- Carrying out any other maintenance operation to the motor or the
machine.
- Transporting the lawn mower.
TROUBLESHOOTING TIPS
If the motor does not start:
1. Check gasoline level.
2. Make sure spark plug is correctly connected.
3. Reload the starting system by following the points of section loading
the Touch-n-Mow starting system.
4. Make sure the starting motor bar has been pulled after releasing the
safety lever.
5. Make sure the safety key is in RUN position.
6. Check the proper operation of the starting cable to turn on and reload
the Touch-n-Mow.
7. Make sure the STOP switch is properly fixed to the Touch-n-Mow device.
WARNINGS & PRECAUTIONS
As for any new product, some important comments must be made on the
Touch-n-Mow safety. In particular it is necessary to consider that the
operation of this system is based on a spring kept under load by the
flywheel.
Any unaware or inexperienced intervention near the spring may cause its
sudden release with consequences which may be extremely dangerous
for the operator and any nearby person.
SAFETY WARNING: it is imperative that all the safety
instructions below are strictly complied with, otherwise
traumatic amputations and injuries may take place!
UNLOADING THE STARTING SYSTEM
Before cleaning the lawn mower, carrying out maintenance or transporting
the machine, IT IS NECESSARY to unload the Touch-n-Mow starting system.
To unload the system:
1. Disconnect spark plug cable.
2. Act on the starting system and make a false starting.
3. Rotate safety key by _ anticlockwise to LOCK&REMOVE position.
4. Remove safety key.
NOTE: if the safety key does not reach the locking position, slightly pull
the self-winding string to release the tension in the starting system.
GUARANTEE
The Touch-n-Mow starting mechanism is a single-block system and DOES
NOT include individually changeable parts. Any tampering will nullify
the manufacturers guarantee.
ASSISTANCE TIPS
The Touch-n-Mow device is fixed to the motor by means of Torx T 30
screws.
The Touch-n-Mow starting system makes the motor run for 2 seconds at
1000 RPM compared with a string starting at 600 RPM and an electric
starting at 450 RPM.
If the motor does not start, manually load the Touch-n-Mow device (starting
string). If the tank has been removed from the motor, MAKE SURE that
the safety key of the Touch-N-Mow system is in lock position
(LOCK&REMOVE) before installing the tank again.
Do not use the safety key before installing the tank as unsafe operations
may take place.
In case of doubt on the loading conditions of the Touch-n-Mow device,
unload the starting system.
* If the Touch-n-Mow starting system does not turn off
1. Try to load the starter. Wait for the click of the pawl and try to
unload it again by pulling the safety bar.
2. If the operation in item 1 has NOT unloaded the starter, pull the
engine bar, slightly hit with a small rubber hammer on the outside of
the spring conveyor and the coupling arm of the system, trying to
engage it.
3. If the operations in items 1 and 2 cannot unload the starter, stop and
remove the safety key from the system and carefully remove it from
the motor. Mark the removed system as fully loaded and send it to
the manufacturer Briggs & Stratton.
* If the starting pinion is locked in the flywheel
1. Try to load the starter by means of the self-winding string. Wait for
the click of the pawl and try to unload it again.
* If the starter does not lock with the safety key
1. If the starter is unloaded, slightly pull the starting string trying to
make the flywheel rotate and try to move the safety key to LOCK
POSITION.
2. If the starter is loaded, unload it and try to lock it with the safety key.
If the starter does not lock, repeat operation described in item 1.
* If the starting system continues to reload after the motor
starting:
1. Check the connections of the stop switch and the ground. Any overload
of the spring WILL DAMAGE the Touch-n-Mow system.
Motor starting or stopping problems may be related to the engine bar,
the cable adjusting device, or the leverage.
IT IS VERY IMPORTANT that this adjusting device enables to correctly
operate both the Touch-n-Mow starting system and the motor lock.
.

FRANCE
HARRY
18
i) Effectuez le réglage de la hauteur de coupe sur une surface plane et
avec la moteur à l'arrêt.
l) ATTENTION!: Il ne faut jamais toucher les parties travaillantes sous le
capot de la tondeuse ou l'intérieur du tunnel d'éjection lorsque le moteur
tourne, car la lame de coupe est en rotation lorsque le moteur est en
marche.
m) Ne tondez l'herbe que de jour ou avec un éclairage suffisant.
n) Ne courez pas. Prenez votre temps et tenez solidement votre tondeuse.
Gardez toujours une démarche stable.
o) Ne vous servez de la tondeuse que lorsqu'elle est en bon état. Faites-
la réparer si nécessaire. Souvenez-vous qu'une tondeuse qui vibre
trop, doit être examinée au plus vite par votre Revendeur car les
vibrations sont signe d'un dommage.
p) Ne permettez pas l'usage de votre tondeuse à gazon à personne , si
vous n'avez lui pas donné préalablement des instructions précises et
il n'à pas lu ce manuel.
q) Ne tirez jamais la tondeuse en arrière.
r) Quand vous devez tondre en pente, il faut travailler en sens oblique,
jamais de haut en bas, ou inversement. Soyez particulièrement vigilant
en changeant de direction sur les talus. Ne tondez pas sur des pentes
trop raides.
s) Arrétez toujours le moteur quand vous devez traverser une surface
autre que du gazon (trottoir, rue, allée).
t) En cas de choc avec obstacle, il faut arrêter le moteur, détacher le
câble de la bougie et contrôler s'il y a des dommages. Il faut réparer
les dégâts éventuels avant réutilisation. Si le dommage est important,
veuillez vous adresser au Revendeur HARRY le plus proche.
Avant d'utiliser la machine, lire attentivement la notice
d'instructions
ATTENTION!
Ne laissez jamais une personne n'ayant pas de
connaissance des instructions de sécurité, utiliser votre
tondeuse.
Eteigner le moteur et détacher le câble de la bougie
avant de procéder au nettoyage.
Utilisez des lunettes de sécurité pour protéger vos yeux.
Ne fumez pas pendant que vous ajoutez du carburant.
SOMMAIRE:
1) Description des pièces:
2) Norme de sécurité
3) Montage
4) Fonctionnement
5) Réglage du coupe
6) Maintenance
7) Contrôles et reglages
8) Remisage hivernal
9) Mulching
10)
System de demarrage Touch-N-Mow
10 Roue
11 Chassis
12 Moteur
13 Lame
14 Bac en toile
15Transmission
16 Manette de réglage de hauteur de coupe
17Variateur de vitesse
1) DESCRIPTION DES PIÈCES (Fig. 01)
1 Mancheron supérieur
2 Mancheron inférieur
3 Accélérateur
4 Poignée du frein
5Poignée autotracté
6 Poignée
7 Câble
8 Deflecteur
9 Roue
2) NORME DE SECURITE
ATTENTION!
a) Lisez attentivement ce manuel avant d'utiliser votre tondeuse et assurez
vous de bien connaître les précaution de sécurité.
b) Ne laissez jamais un enfant de moins de 16 ans utiliser votre tondeuse.
c) L'opérateur est responsable vis-à-vis des tiers dans la zone de travail.
Eloigner les enfants et les animaux domestiques lorsque la machine
est en marche.
d) Inspectez scrupuleusement la surface à tondre. Enlevez tous corps
étrangés: batons, pierres, etc.Repérez les obstacles tels que arrosoirs,
trous et autres éléments susceptibles d'endommager la tondeuse au
travail.
e) Utilisez des chaussures robustes ayant une bonne adhérence même
par temps humide. Ne mettez pas de sandales et surtout ne tondez
jamais pieds nus.L'emploi de gants de travail permet une prise plus
sûre.
f) Assurez-vous que la lame soit bien fixée. N'utilisez jamais la tondeuse
sans le bac ou le deflecteur. Assurez-vous que toutes les précautions
de sécurité sont respectées.En cas de défaillance, réparez ou remplacez
immédiatement la piece incriminée.
g) Ne jamais ajouter d'essence dans le réservoir lorsque la tondeuse est
en marche ou lorsque le moteur est encore chaud.Ne fumez pas pendant
que vous ajouter du carburant.
h) Ne jamais allumer la tondeuse dans des entroits mal ventilés. Le gaz
d'échappement du moteur peut être suffoquant et mortal.
FRANCE
HARRY
19
3) MONTAGE
Outils:
Pour monter la tondeuse HARRY, il vous faut:
- tournevis;
- clés (plate ou à pipe de 8).
Montage de la chicane (Fig. 02 - Fig. 03 - Fig. 04)
Mettre le ressort dans les deux trous du déflecteur, insérer le tirant (1),
mettre en place le déflecteur assemblé sur le carter et le fixer avec les 2
vis (2)
Montage du sac de ramassage (Fig. 05)
1) Glisser le châssis métallique dans la toile du sac en laissant la poignée
à l'extérieur. La poignée et la toile seront au-dessus du sac et le plastique
en-dessous .
2) Fixer les 4 côtés de la toile sur le châssis rectangulaire en faisant
glisser les manchons plastiques du sac sur les tiges métalliques du
châssis. Ne pas fixer encore les parties supérieures droites et gauches.
3) Fixer la grille sur le 2 crochets du sac. Vérifier que la grille soit bien en
face de la tondeuse. Le côté "tondeuse" et le côté "bac" sont indiqués
sur la grille.
Montage du guidon - mod. 313 (Fig. 06)
1) Insérer les mancherons inférieurs du guidon dans les sièges prévus à
cet effet sur les deux moyeux latéraux et visser les deux poignées.
4) Placer les petites plaques métalliques sur les supports prévus à cet effet
sur le cadre. Les fixer avec vis, rondelles et écrous. L'autre extrémité
des attaches doit recouvrir le haut de la grille, juste derrière le crochet,
afin d'eviter que celle-ci ne tombe lors du vidage du bac, quand elle
est ouverte au maximum. Faire glisser les pièces plastiques supérieures
droites et gauches sur les tiges du châssis.
5) Fixer la plaque protectrice sur la partie droite inférieure de la grille
par les 4 vis et les 4 écrous. Reserrer au moyen du tournevis et de la
clé.
6) Pour mettre le sac en place sur la tondeuse, se placer du côté droit de
la machine, lever le déflecteur de la main droite et, avec la main
gauche accrocher le bac sur la tringle fixant le mancheron à la tondeuse.
Si vous souhaitez récolter l'herbe directement dans un sac poubelle,
placer le sac de ramassage sur le sol avec la grille vers le haut, introduire
le sac en plastique en prenant soin de le laisser dépasser de tous côté
pour le coincer en abaissant la grille. Accrocher le bac sur la tondeuse
et lorsque le sac poubelle est plein, le retirer et le remplacer par un
autre.
Contrôles avant mise en route:
Avant de mettre toute en marche, contrôlez les points suivants et, si
nécessaire, procédez à la mise au point adéquate.
l Contrôlez l'accrochage du bac et du déflecteur.
l Vérifiez le niveau d'huile dans le moteur. En rajouter si nécessaire en
veillant à ne pas dépasser le niveau indiqué (voir instructions pour le
moteur).
l Contrôlez et réglez la hauteur de coupe selon votre désir (voir
paragraphe "réglage de la hauteur de coupe").
Démarrage du moteur:
Après avoir effectué les opérations de mise au point, procéder au
démarrage du moteur de la manière suivante:
a- Agir sur la poignée du frein (4) pour permettre le démarrage du moteur.
b- Moteur avec système PRIMER: Appuyer 3-4 fois sur la petite pompe
d'enrichissement située sur le carburateur. Pour les modèles équipés
d'accélérateur positioner le levier d'accélérateur (3) sur MAX.
Moteur avec système CHOKE: Pour les modèles équipés d'accélérateur,
en cas de moteur froid, positioner le levier d'accélérateur (3) sur START.
c- Mettre en marche le moteur: Saisir la poignée de démarrage (7) et
tirer le lanceur sans effort, jusqu'à percevoir la résistance entrainée
par la compression, puis donner un coup sec.
Utilisez des lunettes de sécurité
pour protéger vos yeux.
Ne fumez pas pendant que vous
ajoutez du carburant.
4) FONCTIONNEMENT
Ne laissez jamais une personne n'ayant
pas de connaissance des instructions de
sécurité, utiliser votre tondeuse.
Pendant le fonctionnement, maintenir appuyée la poignée (4). Dès qu'on
la relâche, le moteur s'arrête. Pour tous renseignements supplémentaires,
voir la notice d'entretien du moteur.
Pour actioner la transmission
, sur les modèles
autotractés poussez la poignée (5) vers le mancheron. Pour arrêter
l'avancement il suffit de lâcher la poignée. La tondeuse peut être poussée
ou tirée lorsque la transmission n'est pas enclenchée.
Sur le modèle 471-C50-C54-P54, il est possible de faire varier la
vitesse davancement en actionnant le levier (17 - Fig.10).
ATTENTION! La lame est entrainée en rotation dès le
démarrage du moteur.
ATTENTION! Exécuter lopération uniquement si le moteur
est en marche.
Arrêt du moteur:
Le moteur et la lame s'arrêtént dès que la poignée est relachée.
ATTENTION! La lame continuera à tourner pendant max.
3 secondes après I'arrêt du moteur.
5) RÉGLAGE DU COUPE
La tonte:
Ajustez la vitesse en rapport avec la hauteur de l'herbe. Réglez le régime
du moteur au maximum si l'herbe est dense, au minimum si l'herbe est
basse.
Réglage de la hauteur de coupe (Fig.11)
Pour régler la hauteur de coupe sur une machine avec commande
centralisée, il faut empoigner le levier, soulever le fourreau coulissant et
le positionner sur lun des 7 emplacements prévus.
N'utilisez jamais la tondeuse sans le bac ou le déflecteur.
Arrêtez le moteur et attendez que la lame soit completement
immobile.

FRANCE
HARRY
20
REGLAGE DU CABLE DE LAUTOTRACTION (Fig. 15)
Le câble dembrayage de lautotraction doit être réglé seulement si, moteur
en fonctionnement et agissant sur la poignée de lautotraction, les roues
ne répondent pas rapidement et donnent la sensation que lembrayage
patine.
Le réglage seffectue en débloquant les 2 écrous (1), en tournant de deux
tours lécrou supérieur en sens contraire des aiguilles dune montre et en
le bloquant à laide du contre-écrou.
Répéter lopération si elle se révèle inefficace.
LUBRIFICATION
Moteur:
Changez l'huile après les deux premières heures de travail, ensuite toutes
les 25 heures de travail, comme indiqué dans le manuel du moteur.
Contrôlez, néanmoins, le niveau avant chaque emploi.
Pour lubrifier les organes en mouvement : de temps en temps, mettre
quelques gouttes de lubrifiant sur les organes en mouvement (tels que les
roulements, le levier de réglage de la hauteur des roues, etc.).
Vidange du bac (Fig. 12)
Le système breveté de vidange du bac prévoit deux possibilités:
A Soulevez le déflecteur et détachez le bac de la tondeuse en utilisant la
poignée qui se trouve au centre du bac. Ensuite, soulevez la partie
arrière du bac pour permettre l'éjection de l'herbe.
B Prenez la partie arrière du bac et basculez le vers le haut: I'herbe
tombera sur le terrain
Pour prolonger la vie du bac, il faut lui vider chaque fois la coupe est
terminée et avant le remisage hivernal.
Contrôler souvent le bac, si vous constater des défauts, remplacez-le par
un bac HARRY.
CONSEILS DE TONTE:
En herbe haute, on obtient les meilleurs résultats en coupant I'herbe aux
2/3 de sa hauteur. Dans ce cas, utilisez la position de tonte la plus haute
pour la première coupe. Si vous voulez tondre à ras, effectuez un deuxième
passage en position basse. Cependant, si vous coupez le gazon trop
court, il devra employer toute son énergie pour développer ses feuilles au
détrimer des racines et risquera d'être brûlé en cas de sécheresse.
D'un autre côté, si votre herbe devient trop longue, la partie inférieure
s'affaiblit et jaunit. Le ramassage du gazon tondu est toujours recommandé
car I'herbe laissée sur le terrain forme un tapis qui étouffe le gazon.
Toutes les tondeuse HARRY sont conçues pour permettre la coupe et le
ramassage simultané ou séparément. Notez que une seule coupe n'est
pas recommandée pour l'herbe très haute.
6) MAINTENANCE
ATTENTION!
Eteigner le moteur et détacher le câble de la bougie
avant de procéder au nettoyage.
1 Contrôlez fréquemment la lame et les vis de fixation du moteur.
2 Vérifiez le serrage de tous les écrous.
3 Contrôlez l'état du bac de ramassage. Si vous constatez des défauts
sur le bac, remplacez-le par un bac HARRY.
4 Après le travail, laissez refroidir le moteur à l'air libre. Ne remisez jamais
le tondeuse dans un endroit clos avec le réservoir à essence plein.
5 Après avoir vidé le réservoir, le cas échéant, souvenez-vous que
l'essence est inflammable.
6 Pour écarter tout risque d'incendie, il faut débarasser le moteur de tout
corps étranger susceptible de s'enflammer (herbes, feuilles mortes,
graisses).
7 Faites réviser votre tondeuse, à la fin de chaque saison, par un
Revendeur HARRY.Votre tondeuse restera ainsi en parfait état pour la
saison suivante.
8 N'utilisez que des pièces de rechange HARRY pour vos réparations.
Elles seules vous permettrons de conserver la qualité et la fiabilité de
votre tondeuse HARRY.
CONTROLE - DEMONTAGE ET AFFUTAGE DE LA LAME (Fig.13Fig.14)
- Stoppez le moteur. Détachez le câble de la bougie.
- Penchez la tondeuse du côté opposé à la bougie pour éviter un
engorgement qui pourrait empêcher le démarrage.
- Contrôle: Examinez soigneusement le degré d'affûtage ou d'usure
de la lame, en particulier au niveau des plis .
- Du sable ou des pièrres peuvent être la cause d'une usure. Nous vous
conseillons de vérifier fréquemment l'état de votre lame. Si vous relevez
des anomalies, il faut la remplacer .
ATTENTION!
Eteigner le moteur et détacher le câble de la bougie
avant de procéder au nettoyage.
7) CONTROLES ET REGLAGES
- Démontage : empoignez énergiquement une extrêmité de la lame
- pour éviter de se couper, il est conseillé de porter des gants - dévissez
le boulon, enlevez la rondelle puis la lame.
- Affûtage: Affûtez la lame si les tranchants sont usés. Utilisez une
meule (èmeri).Après l'affûtage contrôlez impérativement l'équilibrage
de la lame. Si la lame est déséquilibrée, des vibrations excessives
apparaîtraient en marche. Prenez toutes les précautions pour ne pas
vous couper.
- Montez la lame en la centrant sur le support et serrez le boulon.
ATTENTION! L'usure excessive de la lame peut entraîner
des fêlures profondes, voires des projections de morceaux
de couteau, constituant un danger sérieux pour l'opérateur
et les personnes présentes dans l'entourage.
Après le réglage, toujours vérifier que, moteur éteint et tirant la machine
en arrière sans actionner la poignée de lautotraction, les roues arrières
tournent librement.
ATTENTION!
Un effort excessif sur le câble peut provoquer la rupture de la
transmission.

FRANCE
HARRY
21
8) ENTRETIEN ET REMISAGE HIVERNAL
Suivez les instructions ci-dessous pour le remisage en fin de saison de votre tondeuse.
Pour le moteur: voir le manuel du fabricant.
Pour le carter: détachez le câble de la bougie, tournez la tondeuse et nettoyez la partie inférieure du chassis. Eliminez toute accumulation d'herbe à
l'aide d'un tournevis et rincez à l'eau.
De facon générale, nettoyez régulierement l'ensemble de la tondeuse et laissez sécher. Videz le bac de ramassage, avec chaque remisage. Se besoin,
le laver et le sècher soigneusement. La tondeuse doit être rangée dans un endroit sec et abrité.
1) Pour tondre la pelouse (pour couper lherbe) selon le mode Mulching,
il faut dabord contrôler que la hauteur du gazon (de lherbe) ne
dépasse pas 10 cm., vice-versa il faut enlever larrêt Mulching et
démonter le sac de ramassage.
2) En procédant selon le mode Mulching, il faut sassurer que le gazon
(lherbe) ne soit pas sec (sèche), et que la lame soit correctement affûtée
pour éviter que lherbe coupée ne saccumule sous la vis dArchimède
de la coque.
3) Fonctionnement :
a- Placer larrêt Mulching dans le compartiment dexpulsion du
gazon (de lherbe).
9) MULCHING
b- Placer le levier de réglage de la hauteur de tonte (de coupe) dans
lune des 3 positions correspondantes à la plaquette Mulching (voir
fig. 17)
Pour les modèles H48-H49-P49 la hauteur de coupe ne devra
pas être inférieure à 50mm.
c- Mettre en marche le moteur et commencer à tondre le gazon (à
couper lherbe).
4) Après le fonctionnement en mode Mulching, nettoyer lappareil afin
denlever tous les déchets de tonte (de coupe); pour cela ôter larrêt
Mulching comme indiqué sur les fig. 16 .
Dévisser la poignée et pousser la fermeture vers lintérieur, comme
indiqué en figure 18 .
Vérifier si le moteur est éteint et le capuchon de la bougie
déconnecté.
10) SYSTEME DE DEMARRAGE TOUCH-N-MOW
DESCRIPTION DU PRODUIT
Le système de démarrage Tuch-n-Mow, breveté par Briggs & Stratton, est
un nouveau produit qui permet de démarrer la tondeuse tout simplement
en tirant la barre de sécurité, sans nécessité de batteries, câbles électriques,
interrupteurs et cordes à tirer.
FONCTIONNEMENT
Charger le système de démarrage Touch-N-Mow Pour des
raisons de sécurité le système est fourni désactivé par le fabricant. De la
même façon ensuite, chaque fois que le système de démarrage est désactivé
exprès pour des raisons de sécurité, le Touch-N-Mow aura ensuite besoin
dêtre chargé pour être prêt à lemploi.
Pour charger le système de démarrage, il faut démarrer le moteur au moyen
du démarrage manuel (câble de démarrage), selon la procédure ci-dessous:
1. Contrôler le niveau de lessence et de lhuile du moteur
2. Brancher le câble bougie
3. Presser le primer du moteur trois fois (fig.20)
4. Insérer la clé de sécurité (fig.19). Tourner la clé dans le sens des
aiguilles dune montre en position RUN (fig.21).
5. Libérer la barre de sécurité en tournant la poignée du dispositif Touch-
N-Mow (fig.22).
6. Mettre le contact au moyen du démarrage manuel en tirant la corde
(fig.23). Si le moteur ne part pas au deuxième essai, vérifier davoir
effectué correctement les passages précédents.
7. Laisser que le moteur arrive à la vitesse de fonctionnement.
8. Relâcher la barre de la façon appropriée.
NOTE: au premier démarrage de la tondeuse, ou de toute façon après
une période de garage, lubrifier le point darticulation indiqué (fig.24) et
laisser le moteur en fonction pour cinq minutes avant demployer la machine.
Quand la barre est relâchée, le ressort de retour pousse le Touch-N-Mow
en contact avec le volant.
Lénergie darrêt (inertie) provenant du volant permet le chargement autonome du Touch-N-Mow même.
Le mécanisme auto-chargeant du dent darrêt maintient le ressort dans la
position de charge.
Arrêter le moteur
Relâcher la barre de sécurité de la façon appropriée.
NOTE: Quand le moteur sarrête, vous entendrez le bruit du système de
démarrage qui est en train de se recharger. Ce bruit causé par la vitesse
élevée du dent darrêt est normal.
Le Touch-N-Mow est un système breveté qui fonctionne comme système
de démarrage quand la barre de sécurité est tirée, aussi bien que comme
frein moteur quand la barre de sécurité est dûment relâchée.
Tourner la clé de sécurité de 1/4 de tour dans le sens invers des aiguilles
dune montre (position LOCK&REMOVE); le Touch-N-Mow va se bloquer.
Enlever TOUJOURS la clé de sécurité et la placer dans un endroit sûr. Le
moteur ne va pas partir sans la clé de sécurité ou avec la clé en position
LOCK&REMOVE.
NOTE: Si le moteur reste sans essence ou si le moteur sarrête à cause
dherbe trop haute ou pour dautres raisons mécaniques, le démarrage
Touch-N-Mow ne va pas se recharger automatiquement et il sera
nécessaire de répéter les points indiqués dans le paragraphe «Charger le
système de démarrage Touch-N-Mow».
Démarrer le moteur au moyen du système Touch-N-Mow
1. Contrôler lhuile du moteur.
2. Brancher le câble bougie.
3. Presser le primer trois fois.
4. Insérer la clé de sécurité. Tourner dans le sens des aiguilles dune
montre sur la position RUN.
5. Enlever la sécurité de la barre.
6. Tirer la barre pour démarrer le moteur.
NOTE: si le moteur ne va pas partir il signifie que le Touch-N-Mow est
déchargé. Dans ce cas procéder au chargement.

FRANCE
HARRY
22
SUGGESTIONS POUR LE DIAGNOSTIC
Si le moteur a du mal à partir:
1. Contrôler le niveau de lessence.
2. Sassurer que la bougie soit branchée correctement.
3. Recharger le système de démarrage selon les points indiqués dans le
paragraphe charger le système de démarrage Touch-N-Mow.
4. Vérifier davoir tiré la barre de démarrage après avoir débloqué le
levier de sécurité.
5. Sassurer que la clé de sécurité se trouve en position RUN.
6. Vérifier que le câble de démarrage fonctionne correctement pour
activer et recharger le Touch-N-Mow.
7. Sassurer que linterrupteur STOP soit correctement fixé sur le TouchN-Mow.
AVERTISSEMENTS ET PRECAUTIONS
Comme pour tous les produits nouveaux il y a des considérations
importantes concernant la sécurité du Touch-N-Mow. En particulier il est
nécessaire de tenir compte que ce système base son fonctionnement sur
un ressort tenu en charge par le volant.Toute intervention inconsciente ou
maladroite près du ressort pourrait en causer le soudain relâchement
avec des conséquences qui peuvent être très dangereuses pour soi-même
aussi bien que pour les autres.
Par conséquent si les instructions suivantes ne sont pas
respectées il y a le risque damputations ou lacérations
traumatiques.
- Débrancher TOUJOURS la bougie, décharger et bloquer le TouchN-Mow en enlevant la clé de sécurité AVANT deffectuer NIMPORTE
QUELLE assistance au moteur ou à la machine.
- Sassurer que le Touch-N-Mow soit déchargé et bloqué AVANT de
le transporter ou le manipuler.
- NE PAS mettre les mains ou les pieds sous la machine quand le
système de démarrage est en charge.
- JAMAIS supposer que le système soit déchargé même
si la clé est en position LOCK&REMOVE ou bien si elle a
été enlevée du moteur.
- NE PAS mettre les mains sur le volant quand le système est en train
de se décharger.
- NE PAS transporter ou soulever le moteur du convoyeur près du
volant.
- Manipuler TOUJOURS le système de démarrage Touch-N-Mow, si
démonté du moteur, de lenveloppe en fer du ressort.
- NE PAS soulever le starter en mettant vos doigts où il y a les parties
en mouvement du système.
- NE PAS essayer deffectuer des opérations dentretien
ou de réparation du starter Touch-N-Mow.
- Bloquer et enlever TOUJOURS la clé de sécurité et la mettre dans un
endroit sûr jusquà la prochaine utilisation.La clé de sécurité a été
conçue exprès pour être enlevée du moteur quand celui-ci nest pas
en fonction. En enlevant la clé on previent tout mouvement incontrôlé
ou inattendu en présence denfants ou dadultes non informés.
La clé de sécurité doit toujours être dans la position de bloc du système
(position LOCK&REMOVE) avant quelle puisse être enlevée.
- Vérifier TOUJOURS que le câble de STOP soit branché et fixé
correctement à linterrupteur de STOP. Le non-fonctionnement de
linterrupteur de STOP (contact à masse) peut endommager le starter
Touch-N-Mow.
Fermer et enlever TOUJOURS la clé de sécurité et la mettre dans un
endroit sûr jusquà la prochaine utilisation. La clé de sécurité a été conçue
exprès pour être enlevée du moteur quand celui-ci nest pas en fonction.
En enlevant la clé on previent tout démarrage accidentel en présence
denfants ou dadultes non informés.
La clé de sécurité doit être dans la position LOCK&REMOVE avant quelle
puisse être enlevée.
DECHARGER ET BLOQUER TOUJOURS LE TOUCH-N-MOW
AVANT DE:
- Enlever lherbe ou tout autre déchet de la tondeuse
- Remplacer le filtre de lair, de lhuile ou la bougie
- Enlever la lame pour lentretien
- Effectuer tout autre entretien au moteur ou à la machine
- Transporter la machine
DECHARGER LE SYSTEME DE DEMARRAGE
Avant de nettoyer la machine, effectuer entretien ou transporter la machine,
IL EST NECESSAIRE de décharger le système de démarrage Touch-NMow.
Pour décharger le système:
1. Débrancher le câble bougie
2. Actionner le système de démarrage et faire un faux départ.
3. Tourner la clé de sécurité de 1 /4 dans le sens invers des aiguilles
dune montre dans la position LOCK&REMOVE.
4. Enlever la clé de sécurité.
NOTE: si la clé de sécurité ne se porte dans la position de blocage, tirer
légèrement la corde auto-enroulante pour relâcher la tension dans le
système de démarrage.
GARANTIE
Le mécanisme de démarrage Touch-N-Mow est un système unique et il
NEST PAS composé par des parties individuellement rechangeables. Toute
trace de violation annulera la garantie du fabricant.
SUGGESTIONS POUR LA GARANTIE
Le Touch-N-Mow est fixé au moteur au moyen de vis Torx T 30.
Le Touch-N-Mow fait tourner le moteur pour 2 secondes à 1000 tr/min.
Un démarrage à la corde à 600 tr/min. et un démarrage électrique à
450 tr/min.
Si le moteur ne part pas, charger le Touch-N-Mow à la main (corde de
démarrage).
Si le réservoir a été enlevé du moteur VERIFIER que la clé de sécurité du
Touch-N-Mow soit en position de blocage (LOCK&REMOVE) avant de
réinstaller le réservoir.
Ne pas employer la clé de sécurité avant dinstaller le réservoir car des
opérations non sûres peuvent avoir lieu.
En cas de doute sur les conditions de charge du Touch-N-Mow, décharger
le système de démarrage.
* Si le Touch-N-Mow ne va pas sactiver
1. Essayer de charger le starter. Attendre le «clic» du dent darrêt et
essayer de le décharger à nouveau en tirant la barre de sécurité.
2. Si lopération au point 1 a déchargé le starter, tirer la barre de
sécurité, battre légèrement au moyen dun petit marteau en caoutchouc
la partie extérieure du convoyeur à ressort et sur le bras dembrayage
du système, en essayant de le faire embrayer.
3. Si les opérations aux points 1 et 2 narrivent pas à décharger le
starter, bloquer et enlever la clé de sécurité du système et lenlever
soigneusement du moteur. Marquer le système enlevé comme «
entièrement chargé» et lenvoyer au fabricant Briggs & Stratton.
* Si le pignon de démarrage est bloqué dans le volant
1. Essayer de charger le starter au moyen de la corde auto-enroulante.
Attendre le «clic» du dent darrêt et essayer de le décharger à
nouveau.
* Si le starter ne se bloque pas avec la clé de sécurité
1. Si le starter est déchargé tirer légèrement la corde de démarrage en
essayant de faire tourner le volant et essayer de mettre la clé de
sécurité en position de bloc (LOCK POSITION).
2. Si le starter est chargé, décharger celui-ci et essayer de le bloquer
avec la clé de sécurité. Si le starter ne se bloque pas, répéter
lopération au point 1.
* Si le système de démarrage continue à se récharger après
le départ du moteur
1. Contrôler les connexions de linterrupteur darrêt et la masse. Une
surcharge du ressort VA ENDOMMAGER le système Touch-N-Mow.
Problèmes de démarrage et darrêt du moteur peuvent être reliés à la
barre de démarrage, au dispositif de réglage du câble ou au système de
leviers.
IL EST TRES IMPORTANT que ce dispositif de réglage soit en mesure
dactiver correctement le système de démarrage Touch-N-Mow aussi bien
que le bloc moteur.

DEUTSCHLAND
HARRY
23
Vor Inbetriebnahme die Bedienungsanleitung lesen
ACHTUNG!
Dritte aus dem Gefahrenbereich fernhaltern
Vor Arbeiten am Schneidwerk, Motor abschalten und
Zündkerzenstecker abziehen.
Tragen Sie eine Schutzbrille oder einen Augenschutz.
Rauchen Sie nicht beim Benzin nachfüllen.
INHALTSVERZEICHNIS:
1) Teilebeschreibung:
2) Sicherheitshinweise
3) Montage
4) Arbeiten mit dem Rasenmäher
5) Regulierung der Schnitthöhe
1) TEILEBESCHREIBUNG (Abb. 01)
1 Bügeloberteil
2 Bügelunterleil
3 Gasbowdenzug
4 Hebel
5Hebel
6 Hebel
7 Bügelteil
8 Deflektor
9 Rad
10 Rad
11 Gehäuse
12 Motor
13 Messer
14 Grasfangsack
15Getriebe
16 Einstellhebel für Schnitthöhe
17Variomatik
6) Wartung und pflege
7) Kontrolle und Regulierung
8) Vorbereitung Winterlagerung
9) Mulching
10) Touch-N-Mow
Sartsystem
i) Die Schnitthöhe niemals bei laufenden Motor einstellen.
l) Achten Sie darauf, daß Sie unter keinen Umständen mit der Hand
oder mit der Fußspitze unter dem Rand des Gehäuses kommen.
m) Mähen Sie den Rasen nur bei Tageslicht.
n) Nehmen Sie sich die Zeit, die Sie zum Rasenmähen brauchen.
o) Kontrollieren Sie vor jedem Gebrauch Ihren Rasenmäher. Verwenden
Sie nur Original HARRY Ersatzteillen.
p) Gestatten Sie keiner Person den Gebrauch Ihres Gerätes, bevor Sie
es ihn nicht erklärt haben oder ihn die Gebrauchsanleitung zu lesen
gegeben haben.
q) Mähen Sie immer vorwärts, nicht rückwärts.
r) Mähen Sie immer von rechts nach links und nicht von unter nach
oben.
s) Schalten Sie immer den Motor ab, wenn Sie einen Gehsteig oder
eine Straße überqueren müssen.
t) Wenn Sie auf ein Hindernis gestoßen sind, schatten Sie sofort den
Motor aus. Ziehen Sie den Zündkerzenstecker ab un kontrollieren
Sie ob ein Defekt vorliegt.Wenn ein Defekt vorliegt empfielt sich ein
sofortiger Originalwechsel.
2) SICHERHEITSHINWEISE
ACHTUNG!
a) Lesen Sie vor der Benutzung des Rasenmähers die
Bedienungsanleitung sorgfältig durch.
b) Jugendliche unter 16 Jahren dürfen den Rasenmäher nicht bedienen.
c) Der Benutzer ist im Arbeitsbereich des Rasenmähers gegenüber
Dritten verantwortlich. Kinder und Haustiere fernhalten).
d) Vor dem Mähen müssen Steine und andere Fremdkörper vom Rasen
entfernt werden.
e) Achten Sie darauf, daß Sie beim Rasenmähen festes Schuhwerk
tragen.Die Schuhe sollten ein gutes Profil haben, damit Sie auch bei
nassem Gras einen festen Stand haben.
f) Kontrollieren Sie den festen Sitz der Messerschauben sowie alle
anderen Befestigungen wie Schrauben, Bolzen. Mutter.Beachten Sie
die Sicherheitsvorschiften vor dem Gebrauch des
Rasenmähers.Benutzen Sie den Rasenmäher nie ohne Fangsack oder
Deflektor.
g) Achten Sie darauf, daß Sie das Benzin erst dann nachfüllen, denn
der Motor kalt ist.Benzin darf nur im Freien aufgefüllt werden und
Rauchen ist dabei zu unterlassen.
h) Den Motor wegen der Vergiftungsgefahr nicht in geschlossenen
Räumen laufen lassen.

DEUTSCHLAND
HARRY
24
Montage des Fangsackes (Abb. 05)
1) Schieben Sie das Eisengestelle in den Sack. Der Griff muß sich
außerhalb des Sackes befinden. Die Plastikfläche muß nach unten
montiert werden.
2) Befestigen Sie die 4 Seiten des Sackes am Gestelle. Ziehen Sie die
Plastikhülle über die Stäbe des Gestelles. Lassen Sie die linke und die
rechte obere Seite frei.
Montage des Lenkers - Mod. 313 (Abb. 06)
1) Untere Sterzstangen des Lenkers in den Sitz an den beiden seitlichen
Naben führen und die beiden Griffe festschrauben.
3) MONTAGE
Werkzeug:
Zum Zusammenbauen eines Harry Rasenmähers benötigt man:
- einen Schraubenzieher;
- zwei Schraubenschlüssel
Zusammenbau des Deflektors (Abb. 02 - Abb. 03 - Abb. 04)
Feder in die beiden Deflektor-Öffnungen einfügen, Zugstange (1) einfügen,
zusammengebauten Deflektor auf Carter positionieren und mit den beiden
Schrauben (2) befestigen.
3) Richten Sie das Gitter auf die zwei Bügel des Fangsackes.Am Gitter ist
die Seite des Rasenmähers abgezeigt, die andere Seite richten Sie auf
den Fangsack.
4) Legen Sie die zwei Bügel auf die vorgeschweißten Halterungen und
schrauben Sie sie zusammen.Kontrollieren Sie beim Anheben des
Gestelles ob das Gitter richtig angebracht würde.Nur so ist die
Entleerung des Grases möglich.Ziehen Sie die rechte und die linke
Seite über das Gestell.
5) Montieren Sie das Leitblech mit 4 Schrauben an das Gitter fest. Benützen
Sie dazu den Schraubenzieher und den Schraubenschlüssel.
6) Um den Fangsack einzuhängen stellen Sie sich auf die rechte Seite
des Rasenmähers.Heben Sie den Deflektor an und hängen Sie den
Fangsack an der Befestigungsstange ein.
Kontrolle vor dem start:
Vor dem Start überprüfen Sie alle vorgegebene Punkte.
Überprüfen Sie ob alle Punkte übereinstimmen.
Dann Start frei.
l Kontrollieren Sie ob der Fangsack und der Deflektor richtig befestigt sind.
l Kontrollieren Sie den Ölstand. Falls Öl fehlt, nachfüllen. Beachten Sie
das vorgegebene Maß. (lesen Sie die Anleitung des Motors).
l Kontrollieren Sie die Schnitthöhe und stellen Sie diese nach dem
Diagramm ein.
Start des motors (Abb. 07 - Abb. 08 - Abb. 09)
Nachdem die Einstellungen vorgenommen würden, kann der Motor wie
folgt gestartet werden:
a- Startergriff (4) betätigen, damit der Start erfolgen kann.
b- Für Motoren mit PRIMER-System: Die Anreicherungspumpe auf dem
Vergaser 3-4 drücken. Bei Modellen mit Beschleuniger, der
Beschleunigerhebel (3) in die Position MAX stellen.
Für Motoren mit CHOKE-System: Bei Modellen mit Beschleuniger, im
Falle von kaltem Motor, den Beschleunigerhebel (3) in die Position
START stellen.
c- Motor starten: Den Startergriff (7) anfassen und das Seil ohne
Kraftanwendung anziehen, bis leichter Widerstand durch die
Kompression fühlbar wird. Den danach kräftig ziehen.
Tragen Sie eine Schutzbrille oder
einen Augenschutz
Rauchen Sie nicht beim Benzin
nachfüllen.
Dritte aus dem Gefahrenbereich
fernhaltern
4) ARBEITEN MIT DEM RASENMÄHER
ACHTUNG! Bei Inbetriebnahme des Motors beginnt das
Schneidwerkzeug zu drehen.
Den Startergriff (4) während des Betriebs gedrückt halten. Beim Loslassen
des Griffs stellt sich der Motor ab.
Für weitere Erläuterungen wird auf die Betriebsanleitung des Motors
verwiesen.
Um den Gang einzulegen schieben Sie die Kupplung Richtung Holm
Um den Gang auszukuppeln, reicht es wenn Sie den
wieder loslassen. Wenn der Gang ausgekuppelt ist, können Sie den
Rasenmäher vorwärts und rückwärts bewegen.
Bei Modell 471-C50-C54-P54 kann Vorschubgeschwindigkeit an Hebel
(17- Abb. 10) geregelt werden.
Stop:
Der Motor und das Messer stoppen nachdem den Hendel losgelassen würde.
ACHTUNG! Das Messer dreht noch max. 3 Sekunden nach
der Ausschaltung des Motors.
ACHTUNG! Arbeiten nur bei laufendem Motor vornehmen
5) REGULIERUNG DER SCHNITTHÖHE
Vorgang des Mähers:
Regulieren Sie die Geschwindigkeit nach der Höhe des Grases. Regulieren
Sie die Höhstdrehzahl des Motors wenn das Gras hoch ist oder stellen Sie
diese auf Gas wenn das Gras niedrig ist. Schieben Sie den Rasenmäher
gleichmäßig, so erhalten Sie einen einwandfreien Schnitt.
Regulierung der Schnitthöhe (Abb. 11)
Bei Regeln der Schnitthöhe an Geräten mit zentralisierter Steuerung Hebel
in die Hand nehmen, verstellbare Hülse anheben und in eine der 7
vorgesehenen Positionen setzen.
Schalten Sie immer den Motor ab und warten Sie den
Stillstand des Messers ab.
Benutzen Sie den Rasenmäher nie ohne Fangsack oder
Deflektor.

DEUTSCHLAND
HARRY
25
ENTLEERUNG DES FANGSACKES (Abb. 12)
Die Entleerung des Fangsackes sind auf zwei Arten möglich:
A Heben Sie den Defektor an um den Fangsack auszuhängen. Benutzen
Sie den Griff der sich in der Mitte des Fangsackes befindet. Heben Sie
das Sackende nach oben. Das ist eine Möglichkeit der Entleerung.
B Heben Sie den Fangsack am hinteren Ende nach oben, so fällt das
Gras zu Boden.
Um die Lebensdauer des Fangsackes zu verlängern, sollten Sie nach jedem
Mähen den Sack ausleeren. Bevor Sie Ihr Gerät ins Winterlager geben,
sollten Sie vorher den Fangsack nochmals gründlich reinigen.
Kontrollieren Sie often den Sack. Wenn ein Defekt vorliegt, empfielt sich
ein sofortiger Originalwechsel.
RATSCHLAG ZUM MÄHEN:
Das beste Resultat erhällt man wenn man 3/4 der Höhe des Grases
abmäht. Wenn das Gras hoch ist, stellen Sie den Mäher für den ersten
Schnitt auf Höchststellung. Wenn Sie Ihren Rasen niedriger haben möchten,
so mähen Sie mit einer tieferen Stellung nach. Wenn Sie das Gras zu
kurz abmähen, braucht der Rasen langer um sich zu regenerieren. Dadurch
besteht bei Trockenheit die Gefahr, daß Ihr Rasen verbrennt. Lassen Sie
Ihr Gras zu hoch wachsen, wird die untere Seite gelb und verliert an
Festigkeit. Es wird empfohlen das Gras aufzurechen, weil sich sonst eine
Restschnicht auf den Rasen bildet, welche verhindert, daß das Gras weiter
wachsen kann.
Alle HARRY Rasenmäher sind zu 2 Arbeitsweisen verwentbar:
Mit Aufnahme des Grases oder ohne Aufnahme (also nur Mähen).
6) WARTUNG UND PFLEGE
1 Kontrollieren Sie die Festigkeit der Schrauben des Messers und die
Festigkeit des Motors (wenn locker nachziehen)
2 Kontrollieren Sie alte Schrauben, ziehen Sie alle fest nach, so haben
Sie Ihr Gerät immer Einsatzbereit.
3 Kontrollieren Sie öften den Zustand des Fangsackes. Wenn ein Defekt
vorliegt empfielt sich ein sofortiger Orginalwechsel.
4 Lagern Sie Ihren Rasenmäher auf keinem Fall in einem geschlossenem
Raum, solange er noch warm ist und Benzin enthällt. Lassen Sie den
Motor in einem offenem Raum abkühlen.
ACHTUNG!
Vor Arbeiten am Schneidwerk, Motor abschalten
und Zündkerzenstecker abziehen.
5 Um ein Feuer zu vermeiden, ist es wichtig, daß Sie den Motor reinigen.
(angetrockendes Gras vom Motor entfernen). Freihalten des Motors
von Schmierstoffe und Öle.
6 Denken Sie daran, daß Benzin leicht brennen kann, deshalb heben
Sie das Benzin in einem zugelassenem Behälter auf.
7 Lassen Sie Ihren HARRY Rasenmäher nach Saisonende von Ihrem
HARRY Fachhändler überprufen.So haben Sie für die kommende Saison
einen perfekten Rasenmäher.
8 Falls Sie einen normalen Fachhandel aufsuchen, kontrollieren Sie, daß
bei der Reparatur Original Harry Ersatzteile verwendet werden.Denn
nur so kann die gleiche Qualität gewährleistet werden die Sie vorher
gekauft haben.
7) ARBEITEN MIT DEM RASENMÄHER
ACHTUNG!
Vor Arbeiten am Schneidwerk, Motor abschalten
und Zündkerzenstecker abziehen.
BEWEGLICHE TEILE (Abb. 13 - Abb. 14)
- Fetten Sie die beweglichen Teile ab und zu ein. Zum Beispiel
Radverstellung, Kupplung, Gashebel usw.
- Kontrollieren Sie Verschraubung und Schärfe des Messers.
- Stoppen Sie den Motor, nehmen Sie den Zündkerzenstecker ab um
ein eventuelles Anlassen des Motors zu vermeiden.
- Legen Sie den Rasenmäher auf die linke oder rechte Seite, um ein
Ertrinken der Zündkerzen zu vermeiden.
- Überprüfen Sie daß das Messer für den weiteren Gebrauch, noch
scharf genug ist oder bereits stumpf.
- Kontrollieren Sie öfters Ihr Messer denn es möglich ist, daß dies
durch Sand oder andere Materialen stumpf wird.Wenn sich das Messer
verändert ist ein Ersatz des Messers notwendig.
ACHTUNG! Bei eingerissenen Messern ist es möglich, daß
sich einzelne Teile lösen und so eine Gefahr für die Person,
welche das Gerät bedient darstellt. Aber auch für andere
Personen ist die Gefahr vorhanden.
- Zerlegung: Ein Messerende fest umgreifen - um Verletzungen zu
vermeiden wird die Benutzung von Handschuhen empfohlen Schraubenbolzen herausschrauben, erst Unterlegscheibe und dann
Messer herausnehmen.
- Messer montieren, indem dieses auf Halterung zentriert wird und
Schraubenbolzen festziehen.
WARTUNG:
Motor: Wechseln Sie das Öl, nachdem Sie zwei Stunden gearbeitet
haben. Danach genügt es, wenn Sie alle 25 Arbeitsstunden das Öl
erneuern, so wie es in der Motorwartung vorgeschrieben ist.
Kontrollieren Sie vor jedem Gebrauch des Rasenmähers der ÖIstand.
Schmierung der beweglichen Teile: gelegentlich einige Tropfen Fett auf
die beweglichen Teile geben (Lager, Einstellhebel für die Reifen-Höhe
usw.)
EINSTELLEN DES SELBSTFAHRENDEN KABELS (Abb. 15)
Das Kabel zum Einschalten des Selbstfahrbetriebs darf nur bei laufendem
Motor eingestellt werden; wenn der selbstfahrende Griff betätigt wird,
fahren die Räder nicht sofort an; die Kupplung scheint zu schleudern.
Das Einstellen erfolgt durch Lockern der beiden Muttern (1); die obere
Mutter zweimal in Gegenuhrzeigersinn drehen und mit Gegenmutter
blockieren. Sollte das nicht genügen Handhabung wiederholen.
ACHTUNG!
Durch eine zu starke Belastung des Kabels kann Antriebswelle
kaputt gehen.
Nach erfolgter Einstellung kontrollieren, ob sich die hinteren Räder frei
drehen können. Dies soll bei ausgeschaltetem Motor erfolgen. Gerät ohne
Bedienen des selbstfahrenden Griffes zurücksetzen.

DEUTSCHLAND
HARRY
26
9) MULCHING
8) VORBEREITUNG WINTERLAGERUNG
Beachten Sie die vorgeschriebenen Regeln zur Einwinterung Ihres Rasenmähers am Ende der Saison. Beachten Sie die Richtlinien des Herstellers.
Ziehen Sie den Zündkerzenstecker ab und drehen Sie den Rasenmäher um. So können Sie Ihr Gerät auch an der unteren Seite reinigen. Entfernen Sie
alle Grasreste mit einem Schraubenzieher und waschen Sie anschließend das Gehäuse mit dem Gartenschlauch aus. Reinigen Sie den oberen Teil des
Gerätes und lassen Sie den Mäher anschließend trocknen. Kontrollieren Sie den Fangsack, ob sich in diesem noch Gras befindet. Waschen Sie den
Sack aus und lassen Sie ihn trocknen. Lagern Sie den Rasenmäher in einem trocknen Ort.
1) Bei Mäharbeiten mit dem Mulchingsystem darauf achten, dass das
Gras nicht höher als 10 cm ist; andernfalls muss Mulching-Verschluss
geschlossen und Grasfangsack eingesetzt werden.
2) Bei Mäharbeiten mit dem Mulchingsystem darauf achten, dass das
Gras trocken und Messer scharf geschliffen sind, damit sich dieses
nicht unter die Kastenschnecke häufen kann.
3) Betrieb:
a - Mulching-Verschluss in den Grasauswurfraum legen;
Kontrollieren, dass Motor ausgeschaltet und Zündkerzenkappe
abgezogen wurde.
b - Schnitthöhenhebel in eine der 3 Positionen des
Mulchingschildchens schalten (vgl. Abb. 17).
Bei den Modellen H48-H49-P49 die Schnitthöhe nicht auf weniger
als 50mm einstellen.
c - Motor starten und ganz normal mit Rasenmähen beginnen.
4) Nach den Arbeit mit dem Mulchingsystem ist es wichtig, dass Gerät
gründlich gereinigt und Grasrückstände sorgfältig entfernt werden.
Hierfür muss der Mulching-Verschluss wie aus Abb.16
abgenommen werden .
Den Kugelgriff aufdrehen und die Öffnung nach innen drücken, wie
es auf der Abb. 18 gezeigt wird.
10) TOUCH-N-MOW STARTSYSTEM
PRODUKTBESCHREIBUNG
Das Startsystem Touch-N-Mow, patentiert von Briggs & Stratton, ist ein
neues Produkt, mit dem der Rasenmäher durch einfaches Ziehen des
Sicherheitsbügels gestartet wird, ohne Batterien, ohne elektrische Leitungen
oder Schalter und ohne Ziehen von Seilen.
ARBEITSWEISE
Das Startsystem Touch-N-Mow laden. Aus Sicherheitsgründen
wird das System von der Herstellerfirma deaktiviert geliefert. Wird das
System später ebenfalls aus Sicherheitsgründen deaktiviert, muss das
Touch-N-Mow wieder aufgeladen werden, damit es funktionsfähig ist.
Um das Startsystem aufzuladen, muss der Motor von Hand gestartet werden
(Starterseil). Gehen Sie dabei wie folgt vor:
1. Treibstoff- und Ölstand des Motors überprüfen.
2. Das Kerzenkabel anschließen.
3. Den Primer des Motors dreimal drücken (Abb.20).
4. Den Sicherheitsschlüssel einstecken (Abb.19). Im Uhrzeigersinn auf
die Position RUN drehen (Abb.21).
5. Den Sicherheitsbügel durch Drehen des Griffs der Touch-N-Mow-
Vorrichtung entriegeln (Abb.22).
6. Den Motor von Hand durch Ziehen des Seils starten (Abb.23).
Schaltet sich der Motor auch beim zweiten Versuch nicht ein,
versichern Sie sich, dass die vorherigen Schritte korrekt ausgeführt
worden sind.
7. Warten Sie, bis der Motor die Betriebsgeschwindigkeit erreicht hat.
8. Den Bügel langsam loslassen.
ANMERKUNG: Beim ersten Einschalten des Rasenmähers, sowie nach
einer längeren Ruhezeit, muss das Gelenk eingefettet werden (Abb.24)
und der Motor fünf Minuten laufen, bevor die Maschine benutzt wird.
Beim Loslassen des Bügels, drückt die Rückzugfeder den Touch-N-Mow
auf das Schwungrad.
Durch die Sperrenergie (Trägheit) des Schwungrads, wird der Touch-NMow automatisch aufgeladen.
Der selbstladende Mechanismus des Sperrzahns hält die Feder in der
Ladeposition.
Den Motor anhalten
Den Bügel langsam loslassen.
ANMERKUNG: Wenn sich der Motor ausschaltet, können Sie hören,
wie sich das Startsystem aufladet. Dieses Geräusch, verursacht durch die
Geschwindigkeit des Sperrzahns, ist normal.
Das Touch-N-Mow ist ein patentiertes System, das sowohl als Startsystem
funktioniert, wenn der Sicherheitsbügel gezogen wird, als auch als
Motorbremse, wenn der Sicherheitsbügel fälschlicherweise losgelassen wird.
Wird der Sicherheitsschlüssel um ¼ Drehung gegen den Uhrzeigersinn
gedreht (Position LOCK&REMOVE), blockiert sich das Touch-N-MowSystem. Den Sicherheitsschlüssel IMMER abziehen und an einem sicheren
Ort aufbewahren. Der Motor kann ohne den Schlüssel - oder mit dem
Schlüssel auf Position LOCK&REMOVE - nicht eingeschaltet werden.
ANMERKUNG: Hat der Motor keinen Treibstoff mehr oder bleibt stehen,
weil das Gras zu hoch ist oder wegen anderen mechanischen Gründen,
ladet sich das Touch-N-Mow Startsystem nicht automatisch auf und die
Schritte von Paragraph: Das Startsystem Touch-N-Mow laden müssen
erneut durchgeführt werden.
Den Motor mit dem Touch-N-Mow Startsystem starten
1. Das Motoröl kontrollieren.
2. Das Kerzenkabel anschließen.
3. Den Primer dreimal drücken.
4. Den Sicherheitsschlüssel einstecken. Im Uhrzeigersinn auf die Position
RUN drehen.
5. Den Sicherheitsriegel des Bügels lösen.
6. Den Bügel ziehen und den Motor einschalten.
ANMERKUNG: Springt der Motor nicht an, ist das ein Zeichen dafür,
dass das Touch-N-Mow nicht geladen ist. Laden Sie das System wieder
auf.

DEUTSCHLAND
HARRY
27
PROBLEMLÖSUNGEN
Wenn der Motor nicht anspringt:
1. Überprüfen Sie den Treibstoffstand.
2. Überzeugen Sie sich, dass die Kerze korrekt angeschlossen ist.
3. Das Startsystem neu aufladen, die Schritte von Paragraph: Das
Startsystem Touch-N-Mow laden befolgen.
4. Überzeugen Sie sich, dass der Einschaltbügel gezogen wurde,
nachdem der Sicherheitshebel entsperrt worden ist.
5. Versichern Sie sich, dass der Sicherheitsschlüssel auf Position RUN
steht.
6. Überprüfen Sie das Einschaltkabel für Start und Aufladen des TouchN-Mow.
7. Versichern Sie sich, dass der Schalter STOP korrekt auf dem TouchN-Mow angebracht ist.
HINWEISE UND VORSICHTSMASSNAHMEN
Wie für alle neuen Produkte, sind auch für Touch-N-Mow wichtige
Erwägungen zur Sicherheit zu machen. Besonders ist zu bemerken, dass
die Arbeitsweise dieses Systems auf eine Feder basiert, die durch ein
Schwungrad gespannt wird. Durch einen unbewussten oder ungeschickten
Eingriff in der Nähe der Feder kann sie plötzliches losgelassen werden,
was zu äußerst gefährlichen Konsequenzen für sich selbst und andere
Personen führen kann.
Deshalb Vorsicht! Wenn die Anweisungen nicht genau befolgt werden,
besteht die Gefahr von traumatischen Amputationen und schweren
Verletzungen.
- BEVOR am Motor oder am Rasenmäher IRGENDEIN Eingriff
vorgenommen wird, IMMER die Kerze abtrennen und das TouchN-Mow Startsystem mit dem Sicherheitsschlüssel entladen und
verriegeln.
- Vergewissern Sie sich, dass das Touch-N-Mow entladen und verriegelt
ist, BEVOR Sie es umstellen oder transportieren.
- Achten Sie darauf, dass Hände oder Füße NICHT unter den
Rasenmäher gelangen, wenn das Startsystem geladen ist.
- Verlassen Sie sich NICHT darauf, dass das System
entladen ist, nur weil der Schlüssel auf Position
LOCK&REMOVE steht oder vom Motor abgenommen
worden ist.
- Das Schwungrad NICHT mit den Händen berühren, wenn sich das
System entladet.
- NIEMALS den Motor aus seinem Platz neben dem Schwungrad
entfernen.
- Ist das Startsystem vom Motor getrennt, nehmen Sie es IMMER an
der Seite der Metallhülle der Feder in die Hand.
- Wenn Sie den Starter herausziehen, achten Sie darauf, keine
beweglichen Teile des Systems zu berühren.
- Führen Sie selbst KEINE Wartungsarbeiten oder
Reparaturen am Touch-N-Mow Startsystem aus.
- Verriegeln Sie IMMER mit dem Schlüssel, ziehen ihn ab und bewahren
Sie ihn an einem sicheren Ort auf, bis er wieder gebraucht wird.
Der Sicherheitsschlüssel wurde so entworfen und erdacht, dass er
abgenommen werden kann, wenn der Motor nicht in Gebrauch ist.
Bei abgezogenem Schlüssel, ist es für Kinder und nicht autorisierte
Erwachsen nicht möglich, das System einzuschalten.
- Der Sicherheitsschlüssel muss auf Systemverriegelung (Position
LOCK&REMOVE) stehen, bevor er ausgesteckt werden kann.
- Überprüfen Sie IMMER, dass das Kabel STOP mit dem Schalter STOP
korrekt verbunden und befestigt ist. Ist der Schalter STOP nicht
funktionstüchtig (Erdkontakt), kann der Starter des Touch-N-Mow
beschädigt werden.
IMMER abschließen und den Sicherheitsschlüssel bis zum nächsten
Gebrauch an einem sicheren Ort aufbewahren.
Der Sicherheitsschlüssel wurde so entworfen und erdacht, dass er
abgenommen werden kann, wenn der Motor nicht in Gebrauch ist.
Den Schlüssel abnehmen, damit ungewolltes Einschalten des Rasenmähers
im Beisein von Kindern oder unvorsichtigen Erwachsenen vermieden wird.
Der Schlüssel muss auf Position LOCK&REMOVE stehen, bevor er
ausgesteckt werden kann.
DAS TOUCH-N-MOW IMMER ENTLADEN UND VERRIEGELN VOR:
- Entfernen von Gras oder andere Rückstände;
- Austausch von Luft- und Ölfilter oder der Kerze;
- Entfernen der Klinge für Wartungsarbeiten;
- irgendwelchen Wartungsarbeiten am Motor oder am Rasenmäher;
- dem Transport des Rasenmähers.
ENTLADUNG DES STARTSYSTEMS
Bevor der Rasenmäher gereinigt wird oder Wartungsarbeiten ausgeführt
werden und bevor der Rasenmäher transportiert wird, MUSS das TouchN-Mow Startsystem entladen werden.
Entladung des Startsystems:
1. Das Kerzenkabel abtrennen.
2. Das Startsystem einschalten und einen falschen Start ausführen.
3. Den Sicherheitsschlüssel um ¼ Drehung gegen den Uhrzeigersinn
auf die Position LOCK&REMOVE) drehen.
4. Den Sicherheitsschlüssel abziehen,
ANMERKUNG: Lässt sich der Sicherheitsschlüssel nicht auf Position
Verriegelung stellen, ziehen Sie leicht am selbstaufspulenden Seil, damit
die Spannung aus dem Startsystem genommen wird.
GARANTIE
Der Mechanismus der Touch-N-Mow Startsystems besteht aus einem
einzigen Block und ist NICHT aus austauschbaren Einzelteilen
zusammengesetzt. Die Garantieanspruch erlischt, wenn zu ersehen ist,
dass versucht wurde, den Block aufzubrechen.
HINWEISE FÜR DIE ASSISTENZ
Das Touch-N-Mow ist am Motor mit Schrauben Torx T 30 befestigt.
Das Touch-N-Mow Startsystem lässt den Motor 2 Sekunden lang bei 1000
RPM drehen, gleich einem Start mit Seilzug von 600 RPM und einem
elektrischen Start von 450 RPM.
Startet der Motor nicht, laden Sie das Touch-N-Mow mit der Hand
(Startseil).
Wurde der Tank vom Motor entfernt, VERSICHERN Sie sich, dass der
Sicherheitsschlüssel des Startsystems auf Position LOCK&REMOVE steht,
bevor Sie den Tank wieder anbringen.
Benutzen Sie den Sicherheitsschlüssel nicht, bevor der Tank angebracht
ist; das könnte Gefahren mit sich bringen.
Haben Sie Zweifel über den Zustand der Ladung des Touch-N-Mow,
entladen Sie das Startsystem.
* Wenn sich das Touch-N-Mow nicht ausschaltet
1. Versuchen Sie den Starter zu laden. Warten Sie das Klicken des
Sperrzahns ab und ziehen Sie den Sicherheitsbügels für die Entladung
erneut.
2. Entladet sich der Starter durch die Vorgehensweise von Punkt 1
NICHT, ziehen Sie den Holmbügel, schlagen Sie leicht mit einem
Gummihammer auf das Federgestell und auf den Kupplungsarm des
Systems und versuchen ihn einzukuppeln.
3. Wenn durch die Vorgehensweisen von Punkt 1 und 2 den Starter
NICHT entladen werden kann, verriegeln Sie mit dem
Sicherheitsschlüssel und nehmen Sie ihn vorsichtig vom Motor ab.
Kennzeichnen Sie das abgenommene System mit vollkommen
geladen und senden Sie es an die Herstellerfirma Briggs&Stratton.
*Wenn das Anlassritzel im Schwungrad blockiert ist
1. Versuchen Sie das Startsystem mit dem Seil zu laden. Warten Sie
das Klicken des Sperrzahns ab und versuchen Sie durch Ziehen
des Sicherheitsbügels erneut zu entladen.
2. Ist der Starter geladen, entladen Sie ihn und versuchen ihn mit dem
Sicherheitsschlüssel zu verriegeln. Verriegelt sich der Starter nicht,
wiederholen Sie Schritte von Punkt 1.
*Wenn das Startsystem sich auch nach dem Start des Motors
noch aufladet
1. Überprüfen Sie Anschlüsse des Stopschalters und die Erdung. Eine
Überladung der Feder wird das Touch-N-Mow Startsystem
BESCHÄDIGEN.
Probleme beim Start oder bei Ausschalten des Motors können mit dem
Startbügel, der Einstellvorrichtung des Kabels oder mit der Hebelkraft
zusammenhängen.
BEACHTEN SIE BITTE, dass diese Einstellvorrichtung sowohl das TouchN-Mow Startsystem als auch den Motorblock einschalten kann.

HARRY
28
ESPAÑA
1) DESCRIPCION DE LAS PARTES (Fig. 01)
1 Manillar superior
2 Manillar inferior
3 Acelerador
4 Freno
5Manillar de avance
6 Manilla del manillar
7 Manillar
8 Deflector
9 Rueda trasera
Antes de accionar la máquina, leer el manual de
instrucciones
ATENCION!
Mantenga alejadas de la maquina a todas aquellas
personas que no conocen las normas de seguridad.
Pare el motor y desconecte la bujia antes de reparar
Use gafas protectoras
No fume mientras llene el deposito de gasolina.
CONTENIDO:
1) Descripcion de las partes
2) Condiciones de seguridad
3) Montaje
4) Funcionamiento
10 Rueda delantera
11 Carter
12 Motor
13 Cuchilla
14 Saco recogedor
15Transmisión
16 Palanca regulación altura de corte
17Variator de velocidad
5) Regulacion de la altura de corte
6) Mantenimiento
7) Inspeccion y mantenimiento
8) Procedimiento de almacenaje
9) Mulching
10) Sistema de arranque Touch-N-Mow
i) No intente hacer el ajuste de altura de la rueda mientras el motor está
funcionando. Realice el ajuste manteniendo el cortacésped a nivel
sobre una superficie estable.
l) NO PONGA ni las manos ni los pies bajo el cortacésped, ni en el
túnel de descarga, ni haga ningún ajuste.Asegúrese de que la tracción
no está funcionando al arrancar.
m) Trabaje sólo de dia o con una buena luz artificial.
n) NO CORRA con el cortacésped. No trabaje ni con prisa, ni con un
miedo que pueda afectar su juicio. Tómese el tiempo que necesite
para hacer el trabajo de la manera más segura posible. Esté siempre
seguro de sus pies; mantenga firme el manillar y no corra bajo ningún
concepto.
o) No utilice un cortacésped defectuoso. Repárelo siempre antes de volver
a usarlo.
p) Manténgalo siempre con el túnel de descarga limpio.
q) No permita que nadie utilice su cortacésped sin las instrucciones
pertinentes y sin que haya leido este manual.
r) Nunca tire del cortacésped hacia usted, vaya siempre detrás del
cortacésped al cortar.
s) Siegue siempre a lo largo de la ladera, nunca de arriba hacia abajo.
Extreme los cuidados cuando cambie de dirección en las laderas. No
siegue laderas con escalones demasiado pronunciados.
t) Si golpea algún objeto extraño, pare el motor, quite el cable de la
bujla, inspeccione el daño del cortacésped y repare el posible daño
antes de volverlo a poner en funcionamiento.
2) CONDICIONES DE SEGURIDAD
ATENCION!
a) Lea el libro de instrucciones detenidamente antes de usar el
cortacesped.
b) Inspeccione la zona a segar antes de usar la maquina: quite los palos,
latas, piedras, cables y otros objetos extraños antes de empezar.
c) El operador es responsable hacia terceros en la zona de trabajo.
Evitar que se acerquen niños y animales domésticos cuando el
cortacésped está en marcha.
d) Marque la situación de agujeros, bordes, y otros posibles accidentes
del terreno.
NO PERMITA la presencia de niños ni mascotas en la zona de corte.
e) Lleve calzado fuerte cuando corte. No trabaje con los cortacésped
descalzo o con sandalias. Lleve pantalón largo, botas o calzado resistente que evite resbalones y guantes (como los de los jugadores de
golf). No lleve prendas que puedan engancharse (tirantes, cordones...).
f) Revise los tornillos de la cuchilla y compruebe que estan bien apretados.
No use nunca el aparato sin saco o sin el deflector.Inspeccione estos
mecanismos antes de la utilizaciòn del aparato: si no funciona alguno,
repárelo.
g) No eche gasolina en sitios cerrados, cuando el motor está funcionando
o mientras el motor esté caliente.No fume mientras llena el deposito
de gasolina.
h) No arranque el motor en lugares cerrados. Los gases pueden ser
venenosos y su inhalacion puede ser mortal.
HARRY
29
ESPAÑA
3) MONTAJE
Herramientas:
Para ensamblar el cortacésped HARRY, usted necesitará:
- Un destornillador normal.
- Una llave inglesa pequeña.
Montaje del deflector (Fig. 02 - Fig. 03 - Fig. 04)
1) Poner el muelle en los dos agujeros del deflector, introducir el tirante
(1), colocar el deflector ensamblado sobre el cárter y fijarlo con los
2 tornillos (2).
Montaje del saco de recogida (Fig. 05)
1) Meta la red dentro del armazón metalico, manteniendo fuera el
manillar. Este conjunto se colocará en la parte de atrás del manillar,
poniendo la red en la parte superior del recogedor. La zona de
plástico sin agujeros sera la parte de abajo .
2) Asegurarse los cuatro lados del saco en el armazón con cintas,
dejando fuera las esquinas derecha e izquierda de la parte superior.
Montaje del manubrio mod. 313 (Fig. 06)
1) Introducir las manceras inferiores del manubrio en las sedes
correspondientes, obtenidas sobre dos cubos laterales, y atornillar
las dos manoplas.
3) Coloque la rejilla sobre los dos ganchos del recogedor, asegurándose
que las dos pestañas de la rejilla encajan con el cortacésped. El lado
del cortacésped y el lado del recogedor vienen indicados en la rejilla.
4) Coloque las abrazaderas sobre cada gancho. Asegure cada ;
abrazadera con su tomillo, su pasador y su tuerca.
5) Ajuste la cuchara a la parte de abajo a la derecha (visto desde la
rejilla), con los cuatro tomillos.
6) Para enganchar el recogedor al cortacésped, situese a la derecha
del aparato, levante el deflector con la mano derecha, y con la
izquierda enganche los dos ganchos del recogedor en las dos zonas
abiertas de la varilla del manillar.
Inspeccion previa:
Antes de cada arranque, compruebe y si es necesarIo, repare, lo siguiente:
l Compruebe el DEFLECTOR, y que el recogedor está bien colocado y
agarrado.
l Compruebe el NIVEL DE ACEITE y, si hace falta, rellene el depósito,
no sobrepasando el máximo.
l Compruebe la ALTURA DE CORTE y ajústela a sus necesidades (ver el
párrafo correspondiente
Arranque del motor (Fig. 07 - Fig. 08 - Fig. 09)
Una vez efectuadas las operaciones de puesta a punto arrancar el motor
de la forma siguiente:
a- Accionar la manilla del freno (4) para poder arrancar el motor.
b- Para motores con sistema PRIMER:
Apretar 3 o 4 veces la bomba de cebado situada en el carburador.Para
modelos con acelerador colocar la palanca del acelerador (3) en
posicion MAX.
Para motores con sistema CHOKE:
Para modelos con acelerador, en caso de motor frio, colocar la palanca
del acelerador (3) en posicion START.
c- Arrancar el motor: Empuñar la manilla de arranque (7) y tirar del
cable sin esfuerzo hasta notar la resistencia provocada por la
compresion luego dar un tiron enèrgico.
Use gafas protectoras
No fume mientras llene el deposito
de gasolina.
Mantenga alejadas de la maquina
a todas aquellas personas que no
conocen las normas de seguridad.
4) FUNCIONAMENTO
ATENCION!: La cuchilla comienza a girar cuando se pone
en marcha el motor.
Mantener apretada la manilla (4) durante el funcionamiento, al soltarla
el motor se pararà.
En los modelos autopropulsados
, apriete la barra del
embrague hacia el manillar (5) para enganchar la transmisión; para
parar el avance, suelte la barra. El cortacésped puede funcionar como si
fuera de empujar si se mantiene suelta la barra
ATENCION!: Efectuar la operación sólo con el motor en
funcionamiento.
ATENCION!:La cuchilla gira como màximo durante 3
segundos despues de parar el motor.
Para los modelos 471-C50-C54-P54 es posible modificar la velocidad
de avance actuando sobre la palanca (17 - Fig.10).
Parada del motor:
El motor y la hoia se paran librando la manija de freno.
5) REGULACION DE LA ALTURA DE CORTE
Velocidad de avance:
Ajuste la velocidad de avance a las condiciones de la hierba. Para hierbas
altas y espesas, ponga la velocidad máxima. Para hierbas cortas y finas,
ponga la mínima.
Ajuste de la altura de corte (Fig. 11)
Para ajustar la altura de corte en máquinas con mando centralizado, es
necesario empuñar la palanca, levantar el manguito corredizo y llevarla
a una de las 7 posiciones predispuestas.
No use nunca el aparato sin saco o sin el deflector.
Siempre que vaya a hacer este ajuste, pare el motor y espere
a que la cuchilla esté completamente parada.
HARRY
30
ESPAÑA
ENGRASE:
Motor: Cambie el aceite tras las dos primeras horas de funcionamiento
y, posteriormente, después de cada 25 horas, tal y como indica el manual.
Revise el nivel cada vez que vaya a utilizarlo.
Para la lubricación de las piezas en movimiento: ocasionalmente, poner
algunas gotas de grasa sobre los componentes en movimiento (como
cojinetes, palanca de ajuste de la altura de las ruedas, etc.).
VACIADO DEL RECOGEDOR (Fig. 12)
Cuando se llena la bolsa, pare el motor y espere a que se pare la cuchilla.
El sistema patentado de recogida de HARRY le permite vaciar el recogedor
de dos maneras:
A Levante el deflector y desenganche el saco. Coja el saco por la parte
de atrás y vaya vaciandolo poco a poco, dando golpecitos hasta que
esté vacio.
B Coja el manillar por la parte de atrás y levante el saco: la hierba
cortada saldrá sóla (patentado).
Para prorrogar la duración del cesto es preciso vaciarlo cada vez el corte
es terminado y antes del almacenamiento invernal.
Verificar frecuentemente el cesto; si està defectuoso proceder a la
sustitución con repuestos originales.
6) MANTENIMIENTO
CONSEJOS DE SIEGA:
Los mejores resultados se consiguen cuando se corta menos de 1/3 de la
altura de la hierba.
Si se ha de cortar hierba muy alta, es recomendable dar dos pasadas.
Si se corta demasiado, la planta gasta más energia en desarrollar nuevas
hojas que en raices (lo que la hace más vulnerable).
Si se corta poco, la zona próxima a la raiz al tener poca luz, amarilleará.
SE RECOMIENDA RECOGER LA HIERBA (para evitar enfermedades del
césped).
ATENCION!
Pare el motor y desconecte la bujia antes de reparar
1 Revise las tuercas de la cuchilla y el motor frecuentemente, para
asegurarse que ajustan correctamente.
2 Mantenga todas las tuercas, tomillos y palometas suficientemente
ajustadas para asegurarse de que todo el equipo funciona de manera
segura.
3 Cuando utilice recogedor, revíselo a menudo. Utilice sólo recogedores
recomendados. Reemplace la bolsa si las pérdidas son evidentes.
4 No guarde el cortacésped con gasolina en el tanque dentro de un
almacén donde humos o llamas puedan alcanzarle. Deje enfriar el
motor antes de almacenar el aparato.
5 Para evitar el riesgo de fuego, mantenga el motor limpio de hierbas,
hojas y grasa excesivas.
6 Recuerde que la gasolina es inflamable. Mantenga su suministro de
gasolina en un recipiente metálico alejado del calor y del fuego.
7 Haga una revisión anual del aparato en su distribuidor autorizado de
HARRY. Determine si hay disponible algún dispositivo de seguridad
adicional que pueda aumentar la seguridad de su cortacésped.
8 Para asegurarse que no haya daños en el aparato, deben utilizarse
los repuestos recomendados por el fabricante.
7) INSPECCION Y MANTENIMINETO
Inspeccion y afilado de la cuchilla de corte (Fig. 13 - Fig. 14)
- Pare el motor.Atencion: Antes de hacer ningún tipo de comprobación,
desconecte la bujía.
- Vuelque el cortacésped hacia la izquierda (hacia el lado opuesto a la
bujia) para evitar problemas en el arranque.
- Revise la cuchilla: Examine cuidadosamente la cuchilla, y su filo,
especialmente en el pliegue.
- Como quiera que la arena y los materiales abrasivos atacan este
pliegue, repare, incluso cambie la cuchilla si fuera necesario. Hágalo
también si la cuchilla está rota o descompensada.
ATENCION!
Pare el motor y desconecte la bujia antes de reparar
- Desmontaje: empuñar enérgicamente un extremo de la cuchilla;
para evitar cortes se aconseja vestir un guante; destornillar el bulón,
quitar la arandela y entonces la cuchilla.
- Afilar la cuchilla: Afile la cuchilla, cuando el filo esté romo o no
corte a su gusto. La mejor manera de hacerlo es en una máquina de
afilar, con una piedra adecuada.Compruebe que la cuchilla está
compensada. Si no fuera asi, provocará molestas vibraciones: Tenga
cuidado al afilar, pues puede cortarse.
- Montar la cuchilla centrándola en el soporte y apretar el bulón.
ATENCION! El precio de una cuchilla nueva es insignificante al lado del daño que puede causarle una cuchilla rota.
NO TRATE DE AHORRAR EN SU SEGURIDAD.
AJUSTE DEL CABLE SEMOVIENTE (Fig. 15)
El cable de embrague semoviente debe ser ajustado solamente si, con el
motor en marcha y accionando la manija semoviente, las ruedas no
responden inmediatamente y dan la sensación de que el embrague patine.
El ajuste se realiza desbloqueando las 2 tuercas (1) girando dos vueltas
la tuerca superior en sentido contrario a las agujas del reloj y bloqueándola
con la contratuerca; si la operación no resultara eficaz, se la puede repetir.
ATENCIÓN!
Una carga excesiva sobre el cable puede provocar la rotura
de la transmisión.
Después del ajuste, controlar siempre que, con el motor apagado, tirando la máquina hacia atrás sin accionar la manija semoviente, las ruedas
posteriores giren libremente.

HARRY
31
ESPAÑA
8) PROCEDIMIENTO DE ALMACENAJE
Siga los siguientes pasos para preparar su cortacésped para guardarlo al final de la campaña: quite el cable de la bujía; limpie el cortacésped de
hierba, utilizando un cuchillo si fuera necesario y una manguera; dejelo secar; engrase las partes móviles (rodamientos, cuchilla, ...) y las partes
metálicas para evitar la corrosion; guarde el aparato en un lugar seco y aislado del frío excesivo.
9) MULCHING
1) Para poder cortar en la modalidad Mulching, hay que comprobar
que la hierba no supere una altura de 10 cm, viceversa, es necesario
extraer el cierre Mulching y montar el saco recogedor de hierba.
2) En el caso que se esté procediendo en la modalidad Mulching, es
necesario asegurarse de que la hierba esté seca y la cuchilla bien
afilada, para evitar que la hierba cortada no se acumule debajo del
tornillo patrón de la carrocería.
3) Funcionamiento:
a - Colocar el cierre Mulching en el espacio de expulsión de la
hierba
b - Llevar la palanca de regulación de la altura de corte a una de
las 3 posiciones correspondientes a la tarjeta Mulching (véase fig.
17)
Para los modelos H48-H49-P49 posicionen la altura de corte no
por debajo de 50 mm
c - Poner el motor en marcha y cortar normalmente la hierba.
4) Después del funcionamiento en la modalidad Mulching es buena
costumbre limpiar prolijamente para retirar los residuos del corte de
la hierba. Para esta operación, extraer el cierre Mulching como
indicado en la fig. 16 .
Destornillen el botón esférico y empujen el cierre hacia el interior,
como indicado en la figura 18 .
Asegurarse de que el motor esté apagado y el capuchón de
la bujía esté extraído.
10) SISTEMA DE ARRANQUE TOUCH-N-MOW
DESCRIPCIÓN DEL PRODUCTO
El sistema de arranque Touch-N-Mow, patentado por Briggs&Stratton,
es un nuevo producto que permite poner en marcha el cortacésped
simplemente tirando la barra de seguridad, sin necesidad de baterías,
cables eléctricos, interruptores y cuerdas por tirar.
FUNCIONAMIENTO
Carga del sistema de arranque Touch-N-Mow Debido a
razones de seguridad, la fábrica productora vinde el sistema desactivado.
Además, cada vez que el sistema de arranque se desactiva, debido a
razones de seguridad, Touch-N-Mow tiene que cargarse otra vez para
poderlo utilizar.
Para cargar el sistema de arranque, es necesario poner en marcha el
motor utilizando la opción manual (cuerda de arranque), cumpliendo
con lo descrito a continuación:
1. Controlen el nivel de gasolina y del aceite motor.
2. Conecten el cable de la bujía.
3. Pulsen el primer del motor tres veces (fig. 20)
4. Introduzcan la llave de seguridad (fig. 19). La giren en sentido
horario en la posición RUN (fig. 21).
5. Liberen la barra de seguridad girando el mango del dispositivo Touch-
N-Mow (fig. 22)
6. Enciendan el motor por medio del arranque manual tirando la cuerda
(fig. 23). Si el motor no se pone en marcha la segunda vez,
comprueben que hayan ejecutado correctamente las operaciones
anteriores.
7. Dejen que el motor alcance la velocidad operativa
8. Suelten la barra de manera adecuada.
NOTA: al encenderse por primera vez el cortacésped o, de todas formas,
tras un largo plazo sin utilizarlo, lubriquen el punto de articulación indicado
(fig. 24) y dejen encendido el motor durante cinco minutos antes de
utilizar la máquina.
Al soltar la barra, el muelle de regreso empuja el sistema Touch-N-Mow
hasta que llegue a contacto con el volante.
La energía de parada (inercia) del volante permite que el mismo sistema
Touch-N-Mow se cargue autónomamente.
El mecanismo de autocarga del engranaje de parada mantiene el muelle
en la posición de carga.
Parada del motor
Suelten la barra de seguridad de manera apropiada.
NOTA: En el momento en que se para el motor, van a oir el ruido del
sistema de arranque que se recarga. Dicho ruido depende de la elevada
velocidad del engranaje de parada y hay que considerarlo normal.
El sistema Touch-N-Mow es un sistema patentado que trabaja bien como
sistema de puesta en marcha, al tirarse la barra de seguridad, bien como
freno motor cuando se suelta de manera apropiada la barra de seguridad.
Girando la llave de segurida por un cuarto de giro en sentido antihorario
(posición LOCK&REMOVE), el sistema Touch-N-Mow se bloquea. SIEMPRE
quiten la llave de seguridad y la guarden en un lugar seguro. El motor no
se encendará sin llave de seguridad o con la misma en la posición
LOCK&REMOVE.
NOTA: Si el motor queda sin gasolina ó si el motor se para debido a
hierba demasiado alta o por otras razones mecánicas, el arranque del
sistema Touch-N-Mow no se cargará automáticamente y será necesario
repetir los puntos indicados en el párrafo: Carga del sistema de arranque
Touch-N-Mow.
Arranque del motor utilizando el sistema Touch-N-Mow
1. Controlen el aceite motor.
2. Conecten el cable de la bujía.
3. Pulsen el primer tres veces.
4. Introduzcan la llave de seguridad. Giren la misma en sentido horario
en la posición RUN.
5. Quiten la seguridad de la barra.
6. Tiren la barra para poner en marcha el motor
NOTAS: Si el motor no parte significa que el sistema Touch-N-Mow se
ha descargado. En ese caso tienen que recargarlo.

HARRY
32
ESPAÑA
SUGERENCIAS PARA LA BÚSQUEDA DE AVERÍAS
Si el motor no logra partir:
1. Controlen el nivel de gasolina.
2. Asegúrense de que la bujía esté conectada correctamente.
3. Carguen de nuevo el sistema de arranque según los puntos indicados
en el párrafo carga del sistema de arranque Touch-N-Mow.
4. Controlen que la barra de arranque esté tirada tras bloquear la leva
de seguridad.
5. Asegúrense de que la llave de seguridad esté en la posición RUN.
6. Verifiquen que el cable de arranque funcione correctamente para
activar y cargar de nuevo el sistema Touch-N-Mow.
7. Asegúrense de que el interruptor de STOP está correctamente fijado
en el sistema Touch-N-Mow.
ADVENTENCIAS Y PRECAUCIONES
Como para cualquier producto nuevo hay importantes consideraciones
por hacer sobre la seguridad del sistema Touch-N-Mow. En particular es
necesario considerar que dicho sistema funciona con un muelle que el
volante mantiene en carga. Una intervención accidental o inexperta cerca del muelle puede causar su repentino desenganche con consiguiencias
que pueden resultar muy peligrosas para sí y las personas cercanas.
Por lo tanto, al no respetarse las instrucciones indicadas a continuación,
hay riesgos de traumáticas amputaciones o laceraciones.
- Desconecten SIEMPRE la bujía, descarguen y bloqueen el sistema
Touch-N-Mow, quitando la llave de seguridad ANTES DE efectuar
CUALQUIERA intervención al motor ó al cortacésped.
- Asegúrense que el sistema Touch-N-Mow esté descargado y
bloqueado ANTES DE trasnportarlo o manejarlo.
- NO pongan las manos ó los pies por debajo del cortacésped cuando
el sistema de arranque se está cargando.
- NUNCA presupongan que el sistema esté descargado
aunque la llave se encuentre en la posición
LOCK&REMOVE ó si se ha quitado del motor.
- NO pongan las manos sobre el volante durante la carga del sistema.
- NO transporten o levanten el motor del transportador cerca del volante.
- Manejen SIEMPRE el sistema de arranque Touch-N-Mow sólo si
desmontado del motor y de la carcasa de hierro del muelle.
- NO levanten el estártes poniendo los dedos donde hay las partes en
movimiento del mismo sistema.
- NO hagan manutención o reparaciones al sistema de
arranque Touch-N-Mow.
- Bloqueen y quiten SIEMPRE la llave de seguridad y la guarden en un
lugar segura hasta la siguiente utilización. La llave de seguridad se
ha proyectado y estudiado para que se quitara del motor cuando el
mismo no esté en uso. Quitando la llave se previenen puestas en
marcha incontroladas en presencia de niños ó adultos no informados.
La llave de seguridad tiene que encontrarse en la posición de bloqueo
del sistema (posición LOCK&REMOVE) antes de quitarla.
- SIEMPRE verifiquen que el cable de STOP esté conectado y fijado
correctamente con el interruptor de STOP. La falta de funcionamiento
del interruptor de STOP (contacto en masa) puede causar daños al
sistema de arranque Touch-N-Mow.
SIEMPRE cierren y quiten la llave de seguridad y la guarden en un
lugar seguro hasta la siguiente utilización.
La llave de seguridad se ha proyectado y estudiado para que se
quite del motor cuando el mismo no está en función.
Quiten la llave para prevenir puestas en marcha accidentales del
cortacésped en presencia de niños ó adultos imprudentes.
La llave de seguridad tiene que encontrarse en la posición LOCK&REMOVE
antes de poderla quitar.
SIEMPRE DESCARGUEN Y BLOQUEEN EL SISTEMA TOUCH-N-MOW
ANTES DE:
- eliminar hierba u otro material del cortacésped
- cambiar el filtro del aire, del aceite o la bujía
- quitar la cuchilla segadora para la manutención
- efectuar cualquiera otra operación de manutención al motor ó al
cortacésped
- transportar el cortacésped
CARGA DEL SISTEMA DE ARRANQUE
Antes de limpiar el cortacésped, efectuar su manutención ó transportar el
cortacésped es NECESARIO descargar el sistema de arranque Touch-NMow.
Para descargar el sistema:
1. Desconecten el cable de la bujía.
2. Accionen el sistema de arranque y cumplan una falsa marcha.
3. Giren la llave de seguridad de un cuarto de giro en sentido antihorario
en la posición LOCK&REMOVE.
4. Quiten la llave de seguridad.
NOTA: Si la llave de seguridad no está en la posición de bloqueo, tiren
levemente la cuerda autoenrollante para soltar la tensión en el sistema de
arranque.
GARANTÍA
El mecanismo de arranque Touch-N-Mow es un único sistema y NO está
formado por partes síngulas. Cualquier tipo de violación conlleva la falta
de validez de la garantía del constructor.
SUGERENCIAS PARA LA ASISTENCIA
El sistema Touch-N-Mow está fijado al motor con tornillos Torx T 30.
El Touch-N-Mow hace girar el motor durante 2 segundos a 1.000 RPM.
Una puesta en marcha con cuerda a 600 RPM y una puesta en marcha
eléctrica a 450 RPM.
Si el motor no se enciende, carguen el sistema Touch-N-Mow manualmente (cuerda de arranque).
Si se ha quitado el tanque del motor ASEGÚRENSE de que la llave de
seguridad del sistema Touch-N-Mow se encuentre en la posición correcta
(LOCK&REMOVE) antes de montar de nuevo el tanque.
No utilicen la llave de seguridad antes de montar el tanque, ya que
podrían tener lugar operaciones no seguras.
En caso de dudas acerca de las condiciones de carga del sistema TouchN-Mow, descarguen el sistema de arranque.
* Si el sistema Touch-N-Mow no se desactiva
1. Intenten cargar el arrancador. Esperen el click del engranaje de
parada e intenten descargarlo otra vez tirando la barra de seguridad.
2. Si la operación indicada en el punto 1. NO ha descargado el
arrancador, tiren la barra de seguridad, golpeen levemente con un
martillito de goma la parte exterior del transportador de muelle y el
brazo de conexión del sistema, tratando hacerlo activar.
3. Si las operaciones indicadas e los puntos 1. y 2. no logran descargar
el arrancador, bloqueen y quiten la llave de seguridad del sistema,ó
del motor, con cuidado. Marquen el sistema cual totalmente
descargado y lo envien a la empresa productora Briggs & Stratton.
* Si el piñon de arranque está bloqueado en el volante
1. Traten cargar el arrancador utilizando la cuerda autoenrollante.
Esperen el click del engranaje de parada e intenten descargarlo
de nuevo.
* Si el arrancador se bloquea con la llave de seguridad
1. Si el arrancador se ha descargado, tiren levemente la cuerda de
arranque tratando girar el volante y tratando llevar la llave de
seguridad en la posición de bloqueo (LOCK POSITION).
2. Si el arrancador está cargado, descarguen el mismo y traten
bloquearlo con la llave de seguridad. Si el arrancador no se bloquea,
repitan la operación indicada en el punto 1.
* Si el sistema de arranque sigue recargándose tras la
puesta en marcha del motor
1. Controlen las conexiones del interruptor de parada y la masa. Un
eventual sobrecalentamiento del muelle VA A CAUSAR DAÑOS al
sistema Touch-N-Mow.
Problemas de puesta en marcha del motor pueden depender de la barra
de arranque, del dispositivo de regulación del cable ó del mecanismo de
palancas.
ES MUY IMPORTANTE que dicho dispositivo de regulación permita
activar correctamente tanto el sistema de arranque Touch-N-Mow, como
el bloqueo motor.

HARRY
33
NEDERLAND
Voor gebruik eerst handleiding lezen
LET OP!
Veilige afstand houden van personen
Denk eraan de grasmaaier uit te schakelen en de kabel
van de bougie te verwijderen voor u met het onderhoud
begint
Draag een veiligheidsbril om de ogen te beschermen
Niet roken tijdens het bijvullen van de benzinetank
INHOUD:
1) Beschrijving van de onderdelen
2) Veiligheidsvoorschriften
3) Montage
4) Werken met de maaimachine
5) Afstellen van de snijhoogte
9 Achterwiel
10 Voorwiel
11 Maaidek
12 Motor
13 Mes
14 Gasvangzak
15Transmissie
16 Afstelhendels snijhoogte
17Variatorhendel
6) Onderhoud
7) Controle en voorbereiding
8) Winteropslag
9) Mulching
10) Touch-N-Mow aanloopsysteem
1) BESCHRIJVING VAN DE ONDERDELEN
1 Bovenste stuurboom
2 Onderste stuurboom
3 Gashendel
4 Motorstop
5Aandrijfhendel
6 Trekstang
7 Starterhandgreep
8 Deflector
2) VEILIGHEIDSVOORSCHRIFTEN
LET OP!
a) Deze handleiding aandachtig doorlezen.
b) De machine nooit door kinderen onder 16 jaar laten bedienen.
c) De gebruiker is binnen zijn werkzone verantwoordelijk voor derden.
Houd kinderen en huisdieren op afstand tijdens het gebruik van de
maaimachine.
d) Het te maaien oppervlak goed inspecteren. Alle rondslingerende
voorwerpen zoals stenen, blikjes, enz.verwijderen.Obstakels, zoals
sproeiplateaus, gaten e.d., die de maaier tijdens het werk zouden
kunnen beschadigen, goed individualiseren.
e) Goedpassende, stevige schoenen aantrekken, ook op vochtig gras.
Nooit sandalen of op blote voeten werken.Het gebruik van
werkhandschoenen verzekert een betere greep.
f) De staat van de messen controleren en uzelf ervan verzekeren dat u
alle veiligheidsmaatregelen in acht neemt. De machine nooit zonder
vangzak of deflector gebruiken.In geval van gebreken, de onderdelen
repareren of vervangen.Altijd originele onderdelen gebruiken.
g) Nooit benzine in de tank bijgieten als de motor loopt of nog warm is;
de motor af laten koelen alvorens benzine toe te voegen.Niet roken
tijdens het bijvullen van de benzinetank.
h) De maaier nooit in gesloten ruimte starten. De motoruitlaatgassen
kunnen bij inademing giftig zijn en kunnen daardoor verstikkend en
dodelijk zijn.
i) De maaihoogte afstellen als de machine op een vlakke ondergrond
staat en als de motor uit is.
l) Voordat de motor gestart wordt, controleren of de aandrijving van de
achterwielen ontkoppeld is.
m) Alleen maar bij daglicht of goed kunstlicht maaien.
n) Nooit rennen maar voetstaps lopen. Niet angstig zijn tijdens het werken
en de machine onder controle houden.
o) De maaier enkel gebruiken als deze in goede staat is en, indien nodig,
deze laten repareren.
p) De maaier nooit aan personen toevertrouwen die de
veilighcidsvoorschiften van deze handleiding niet kennen.
q) Altijd voorwaarts maaien, nooit achterwaarts.
r) Tijdens het maaien op hellingen altijd transversaal werken, nooit op
hellingen op en af werken; uiterst voorzichtig zijn tijdens het keren.
s) De motor uitschakelen als u terreinen, die niet met gras begroeit zijn
(bijv. wegen, trottoirs enz.) moet oversteken.
t) Indien de machine een voorwerp raakt is het noodzakelijk de motor te
stoppen, de kabel van de bougie te verwijderen en een controle op
eventuele beschadigingen uit te voeren.Schades moeten gerepareerd
worden, voordat er weer met werken begonnen wordt.Indien de schade
relevant is, adviseren wij u de HARRY vakman in te schakelen.

HARRY
34
NEDERLAND
Montage van de grasvangzak (Fig. 05)
De deflector aan het onderste gedeelte van de opening van het
vangzakframe vastmaken met behulp van de vier schroeven borgringen
en moeren; vervolgens de twee metalen platen in verticale positie
vastmaken met de schroeven, borgringen en moeren.
Montage van het stuur - model 313 (Fig. 06)
1) Plaats de onderste stangen van het stuur op hun plaatsen op de twee
naven aan de zijkanten en draai de twee knoppen aan.
3) MONTAGE
Gereedschap:
Om de maaier in elkaar te zetten heeft u nodig:
- schroevedraaier;
- kleine regelbare sleutels.
Montage van de afbuiginrichting (Fig. 02 - Fig. 03 - Fig. 04)
Plaats de veer in de 2 openingen van de afbuiginrichting, plaats de
trekstang (1) en plaats dan de gemonteerde afbuiginrichting op het carter.
Bevestig hem met de 2 schroeven (2).
Dit alles blokkeren met sleutel en schroevedraaier.
Om.de vangzak op de maaier te monteren kunt u het best aan de
rechterkant van de maaier staan; de deflector met de rechterhand optillen
en de vangzak aan de trekstang van de stuurboom hangen, terwijl u de
vangzak met de linkerhand optilt.
Het is mogelijk het gras direct in een vuilniszak op te vangen; daarvoor
moet u de vangzak met het rooster naar boven plaatsen, als u het rooster
omhoog doet kunt u de vuilniszak in de vangzak plaatsen.
Het is belangrijk dat u de rand van de vuilniszak om de opening van de
vangzak plaatst, zodat, als u het rooster sluit, deze de zak vastzet in de
vangzak.
Draag een veiligheidsbril om de
ogen te beschermen
Niet roken tijdens het bijvullen van
de benzinetank
Veilige afstand houden van
personen
4) WERKEN MET DE MAAIMACHINE
LET OP: zodra de motor gestart wordt gaat het mes draaien.
CONTROLES VOOR U MET DE WERKZAAMHEDEN BEGINT:
Voordat u met het maaien begint, wordt het aanbevolen de volgende
punten te controleren en eventueel de nodige maatregelen te treffen.
l De ophang van de vangzak en deflector controleren.
l De gewenste maaihoogte controleren en aanpassen (zie regeling van
de maaihoogte).
l Controleer het olieniveau. Bij gebrek de nodige hoeveelheid toevoegen.
STARTEN VAN DE MOTOR (Fig. 07 - Fig. 08 - Fig. 09)
Na de voorbereiding kan de motor op de volgende manier gestart worden:
a- Het remhandvat (4) indukken om de motor te kunnen starten.
b- Voor motoren met PRIMER-systeem: De primerknop op de carburator
3 of 4 keer indrukken.Voor modellen met gashendel, de gashendel
(3) op MAX zetten.
Voor motoren met CHOKE-systeem: Voor modellen met gashendel,
bij koude motor, de gashendel (3) op START zetten.
c- Motor starten: Grijp de starterhandgreep (7) vast en trek langzaam
aan het koord tot er compressie onstaat.Laat de starterhandgreep los
en trek vervolgens met een snelle krachtige beweging.
Houd de handgreep ingedrukt tijdens het gebruik, bij het loslaten ervan
stopt de motor.
Voor nadere aanwijzingen is het raadzaam het instructieboekje van de
motor te raadplegen.
Voor het inschakelen van de aandrijving,
, de hendel (5) naar het
stuur duwen; laat de hendel los om de vooruitgang te laten stoppen. De
grasmaaier kan vooruit en achteruit geduwd worden wanneer de aandrijving
niet is ingeschakeld.
Bij het model 471-C50-C54-P54 kan de vooruitgangssnelheid
veranderd worden door middel van de hendel (17 - Fig.10).
LET OP! Voer de handeling alleen uit met draaiende motor
HET STOPZETTEN VAN DE MOTOR
De motor en het mes stoppen wanneer u de hendel loslaat.
LET OP! Het mes blijft nog 3 sekonden doordraaien nadat
de motor is gestopt.
5) AFSTELLEN VAN DE SNIJHOOGTE
Knip procedure
Pas de snelheid aan de conditie van het gras aan. Zet de motorsnelheid
op het maximum als het gras hoog en dik is of op een minimum als het
kort is. Duw de grasmaaier vooruit met de juiste snelheid om het gras
perfect geknipt te houden. Op de gemotoriseerde modellen, om de
motorkracht over te brengen op de wielen, duw de onderste hendel naar
het stuur; om de vooruitgang te stoppen is het voldoende om deze hendel
weer los te laten. De grasmaaier kan naar voren en achteren geduwd
worden als de motorkracht niet in werking is.
Aanbrengen van de kniphoogte
Stop altyd de motor en wacht tot de plaat volledig tot stilstand
is gekomen.
Om de snijhoogte af te stellen op machines met gecentraliseerde
aansturing, moet u de hendel vastpakken, de schuifbus opheffen en hem
in één van de 7 mogelijke standen zetten.
De machine nooit zonder vangzak of deflector gebruiken.

HARRY
35
NEDERLAND
HET LEGEN VAN DE VANGZAK (Fig. 12)
Nadat de motor stop gezet is, kunt u op een van de volgende manieren,
de vangzak legen:
A U kunt de vangzak eraf halen:De deflector opbeuren en de vangzak
afhaken met behulp van de daarvoor bestemde centrale hendel; als
de vangzak eenmaal van de machine af is, het achterste gedeelte van
de vangzak opbeuren; het gras zal nu gemakkelijk vallen waar u
wenst.
B Het legen op de grond:De achterste hendel van de vangzak vastpakken
en naar boven tillen; het gras zal nu op de grond vallen.
Om de levensduur van de bak te verlengen is het noodzakelyk de bak na
elke knipbeurt te ledigen en voor de winterstop. Controleer de bak
regelmatig en als er iets aan kapot is, herstel did dan met originele
vervangende onderdelen.
Knip Adviezen
De beste resultaten worden verkregen als niet meer dan een derde van
de grashoogte wordt geknipt. Als het gras hoog is, gebruik dan de hoogste
knippositie voor de eerste knipbeurt. Als U het gras korter wilt knippen,
ga er dan nog een keer overheen in de lagere knippositie. Als U het gras
tekort knipt, zal het meer energie nodig hebben om nieuwe blaadjes te
ontwikkelen in plaats van sterker te groeien en zal het eerder verbranden
wanneer er sprake is van droogte. Als U het gras teveel laat groien, zal
het onderste gedeelte zwak en geel woeden. Gras dat op de grond blyft
liggen vormt een laag die, het nieuwe gras ervan weerhoudt om te groeien;
het is daarom sterk aan te raden het gemaaide gras op te ruimen.
Alle HARRY grasmaaiers zyn ontworpen voor een onmiddelyke
functieverandering: gelyktydig knippen en verzamelen of alleen knippen
(dit wordt aanbevolen wanneek het gras erg hoog is).
6) ONDERHOUD:
1 Regelmatig de staat van de messen en de bevestigingsschroeven van
de motor controleren.
2 Controleren of de schroefbouten goed aangedraaid zijn.
3 De staat van de grasvangzak controleren en, indien beschadigd, met
een niewe vervangen.
4 Na het gebruik de motor laten afkoelen in de open lucht.
5 De maaier nooit in een afgesloten ruimte zetten als de tank nog vol
benzine is.
6 De brandstof moet alleen bewaard worden in de daarvoor bestemde
benzinekan.
7 Om brandgevaar uit te sluiten, brandbare voorwerpen, zoals droog
gras en droge bladeren, van de maaier verwijderen.
8 De grasmaaier aan het eind van elk seizoen door uw HARRY vakman
laten nakijken; zo is de machine in perfecte staat aan het begin van
het volgende seizoen.
9 Alleen originele HARRY onderdelen gebruiken; deze alleen garanderen
de betrouwbaarheid van uw grasmaaier.
LET OP!
Denk eraan de grasmaaier uit te schakelen en de
kabel van de bougie te verwijderen voor u met het
onderhoud begint
7) CONTROLE EN VOORBEREIDING
LUBRIFICATIE VAN DE MOTOR:
De instructies van de motorfabricant opvolgen.
De dop eraf nemen en het peil elke 25 werkuren controleren. Indien de
olie niet aan de onderste rand van het gat komt, een kleine hoeveelheid
olie SHELL DONAX TD toevoegen. .
Voor het smeren van de bewegende delen: breng af en toe enkele druppels
vet aan op de bewegende onderdelen (zoals b.v. lagers, hendels voor
het afstellen van de hoogte van de wielen enz.).
DE CONTROLE EN HET SLIJPEN VAN DE MESSEN (Fig.13Fig.14
- De motor stopzetten en de kabel van de bougie verwijderen.
- De maaier op een zijkant leggen, zodat de carburateur zich aan de
bovenkant bevindt om verzuiping, die het starten daarna wel eens
moeilijk kan maken, tegen te gaan.
- Het mes op scherpte en slijtage controleren; zand en steen kunnen
gevaarlijke slijtages van het mes tot gevolg hebben .Het is belangrijk
om regelmatig de slijtage van het mes te controleren; en, indien u
afwijkingen vindt, is het noodzakelijk het mes te vervangen.
LET OP!
Denk eraan de grasmaaier uit te schakelen en de
kabel van de bougie te verwijderen voor u met het
onderhoud begint
LET OP! Excessieve slijtage kan het barsten of adbreken
van stukjes metaal tot gevolg hebben, die buiten het maaidek
terecht kunnen komen wat gevaar kan op brengen voor de
persoon die de maaier bedient of personen in zijn nabijheid.
- Demontage: pak stevig een uiteinde van het mes vast (gebruik hierbij
een handschoen om verwondingen te vermijden); draai de bout los,
verwijder het ringetje en vervolgens het mes.
- Vervolgens met een slijpschijf de twee uiteinden van het mes slijpen.Na
het slijpen is het noodzakelijk om de balans van de messen te
controleren, om trillingen van de machine tijdens het werken tegen te
gaan.
- Monteer het mes door het op het support te centreren en draai de bout
vast.
AFSTELLING KABEL VOOR ZELFAANDRIJVING (Fig.15)
De kabel voor het inschakelen van de zelfaandrijving moet alleen worden
afgesteld als de wielen met draaiende motor niet goed reageren op de
hendel voor de zelfaandrijving en het lijkt of de koppeling slipt.
Voor het afstellen moet u de 2 moeren (1) deblokkeren, de bovenste 2
slagen tegen de klok in draaien en hem dan met de tegenmoer blokkeren.
Als deze procedure niet doeltreffend mocht zijn kunt u het herhalen.
Controleer altijd na de kabel afgesteld te hebben of, met uitgeschakelde
motor, de achterwielen vrij draaien wanneer de machine achteruit
getrokken wordt zonder dat de hendel voor de zelfaandrijving geactiveerd
is.
LET OP!
Door een te grote belasting op de kabel kan de transmissie
kapot gaan.

HARRY
36
NEDERLAND
1) Om het gras op de Mulching wijze te kunnen maaien moet u
controleren of het gras niet langer dan 10 cm. is, anders moet de
Mulching sluiting verwijderd worden en moet de graszak gemonteerd
worden.
2) Als u op de Mulching wijze bezig bent, moet u controleren of het
gras droog is en of het mes goed scherp is om te vermijden dat het
gemaaide gras zich onder de worm van het frame ophoopt.
3) Werking:
a- Plaats de Mulching sluiting in de ruimte waar het gras terecht
komt.
8) WINTEROPSLAG
Wij raden u aan de volgende instructies op te volgen voor de winteropslag.
Voor de motor de instructies van de motorfabricant opvolgen.
Maaidek: eerst de kabel van de bougie verwijderen en dan de maaier op een zijkant leggen en de onderkant van het maaidek schoonmaken door het
opgehoopte gras te verwijderen met behulp van een schroevedraaier en, indien nodig, met een harde waterstraal.
De machine moet geheel schoon en, indien nodig, droog zijn.
De grasopvangzak moet geheel leeg zijn, zoals elke keer als u de machine gebruikt hebt; indien nodig de zak wassen en laten drogen.
De maaier in een droge en beschermde hoek zetten.
b- Zet de hendel voor de maaihoogte in één van de 3 standen
overeenkomstig het Mulching plaatje (zie fig. 17).
Plaats de hoogte voor de snede niet lager dan 50 mm voor de
modellen H48-H49-P49.
c- Start de motor en maai het gras op de normale wijze.
4) Na de werking in de Mulching modaliteit kunt u het beste een
zorgvuldige reiniging uitvoeren om de grasresten te verwijderen.
Verwijder hiertoe de Mulching sluiting, zoals aangegeven in fig. 16
Schroef de knop los en duw de sluiting naar de binnenkant, zoals
aangegeven in figuur 18 .
Verzeker u ervan dat de motor uit is en dat het kapje van de
bougie los is.
9) MULCHING
10) TOUCH-N-MOW AANLOOPSYSTEEM
Beschrijving van het product
Het Touch-N-Mow aanloopsysteem, gepatenteerd door Briggs & Stratton,
is een nieuw product dat het starten toestaat van de grasmaaier door
eenvoudig de veiligheidsstaaf te trekken zonder de hulp van batterijen,
elektrische kabels, schakelaars en touwen.
WERKING
Oplading van het Touch-N-Mow aanloopsysteem
Uit veiligheidsredenen wordt het systeem in uitgeschakelde toestand door
de fabrikant geleverd. Indien het aanloopsysteem nadien uit
veiligheidsredenen uitgeschakeld wordt, moet het Touch-N-Mow systeem
iedere keer voor het gebruik terug opgeladen worden.
Om het aanloopsysteem op te laden dient de motor gestart te worden
d.m.v. een manuele start (startkoord) volgens de volgende stappen:
1. Controleer het benzine - en olieniveau van de motor
2. Verbind de bougiekabel
3. Druk de motor primer drie keer (fig. 20)
4. Voeg de veiligheidssleutel in (fig. 19). Draai hem met de wijzers
van de klok in positie RUN (fig. 21)
5. Laat de veiligheidsstaaf los door de hendel van het toestel Touch-N-
Mow te draaien (fig. 22).
6. Schakel de motor met de handstart in door aan de koord te trekken
(fig. 23). Indien de motor niet bij de tweede poging start, controleer
de correcte uitvoering van de voorafgaande bewerkingen.
7. Wacht tot de motor de arbeidssnelheid bereikt heeft.
8. Laat de staaf op de juiste manier terug los.
NOTA: bij de eerste start van de grasmaaier en in ieder geval na een
periode van stalling dient het aangegeven buigpunt gesmeerd te worden
(fig. 24) en moet de motor gedurende 5 minuten ingeschakeld blijven,
vooraleer de machine in gebruik te nemen.
Wanneer de staaf losgelaten wordt, duwt de terugdrukveer de Touch-NMow in contact met het vliegwiel.
De afsluitenergie (inertie) die van het vliegwiel komt staat de onafhankelijke
oplading van de Touch-N-Mow toe.
Het zelfladend mechanisme van de afsluittand houdt de veer in de
laadpositie.
Stilstand van de motor
Laat de veiligheidsstaaf op de juiste manier los.
NOTA: Wanneer de motor stopt, ontstaat er een geluid van het
aanloopsysteem, dat zich herlaadt. Dit geluid, dat veroorzaakt wordt
door de hoge snelheid van de afsluittand is normaal.
De Touch-N-Mow is een gepatenteerd systeem, dat functioneert zowel
met het aanloopsysteem wanneer de veiligheidsstaaf getrokken wordt als
met motorrem wanneer de veiligheidsstaaf passend losgelaten wordt.
Door de veiligheidssleutel ¼ links te draaien (LOCK&REMOVE positie)
blokkeert zich de Touch-N-Mow. Verwijder STEEDS de veiligheidssleutel
en leg hem op een veilige plaats. De motor start niet zonder
veiligheidssleutel of met de sleutel in de positie LOCK&REMOVE.
NOTA: Indien de motor zonder benzine blijft of indien de motor stopt
wegens te hoog gras of wegens andere mechanische redenen, zal het
Touch-N-Mow aanloopsysteem zich niet automatisch herladen en dienen
de punten uit paragraaf opladen van het Touch-N-Mow aanloopsysteem
herhaald te worden.
De motor starten d.m.v. het Touch-N-Mow aanloopsysteem
1. Controleer de motorolie
2. Verbind de bougiekabel
3. Druk de primer drie keer
4. Voeg de veiligheidssleutel in. Draai hem met de wijzers van de klok
in de RUN positie
5. Verwijder de staafveiligheid
6. Trek aan de staaf voor het starten van de motor.
NOTA: Indien de motor niet start, betekent dit dat het Touch-N-Mow
toestel leeg is. Vervolgens in de oplading voorzien.

HARRY
37
NEDERLAND
ONTLADEN VAN HET AANLOOPSYSTEEM
Vooraleer de grasmaaier te reinigen, het onderhoud uit te voeren of de
grasmaaier te transporteren, MOET HET Touch-N-Mow aanloopsysteem
ontladen worden.
Om het systeem te ontladen:
1. Koppel de bougiekabel los.
2. Activeer het aanloopsysteem en voer een onechte start uit.
3. Draai de veiligheidssleutel ¼ naar links in de LOCK&REMOVE positie.
4. Verwijder de veiligheidssleutel.
NOTA: Indien de veiligheidssleutel niet in de blokkeringpositie gebracht
wordt, trek lichtjes aan de zelfoprollende koord om de spanning in het
aanloopsysteem vrij te laten.
GARANTIE
Het Touch-N-Mow aanloopmechanisme is een enkel systeem en bestaat
NIET uit enkele afzonderlijke uitwisselbare onderdelen. Iedere aanwijzing
van geknoei zal de garantie van de constructeur ongeldig maken.
SUGGESTIES VOOR DE SERVICE
Het Touch-N-Mow aanloopsysteem is bevestigd aan de motor met Torx T
30 schroeven.
Het Touch-N-Mow aanloopsysteem laat de motor gedurende 2 seconden
aan 1000 RPM draaien, een aanzetkoord aan 600 RPM en een elektrische
start aan 450 RPM.
Indien de motor niet start, laad de Touch-N-Mow handmatig op
(aanzetkoord)
Indien de tank van de motor verwijderd werd, controleer dat de
veiligheidssleutel van het Touch-N-Mow systeem zich in de
LOCK&REMOVE positie bevindt vooraleer de tank opnieuw te installeren.
Gebruik de veiligheidssleutel niet vooraleer de tank geïnstalleerd is, dit
om onzekere bewerkingen te vermijden.
Indien er enkele twijfels betreffende de oplaadcondities van het Touch-NMow aanloopsysteem bestaan, ontlaad het.
*Indien het Touch-N-Mow aanloopsysteem zich niet
uitschakelt
1. Probeer de starter te op te laden. Wacht de klik van de afsluittand
af en probeer hem nog eens te ontladen door de veiligheidsstaaf te
trekken.
2. Indien met bewerking onder punt 1 de starter NIET ontlaadt werd,
trek de veiligheidsstaaf, slaag lichtjes met een rubberen hamertje
aan de buitenkant van de veertransportband en op de koppelingsarm
van het systeem en probeer hem aan te koppelen.
3. Indien met bewerkingen onder de punten 1 en 2 de starter niet
ontlaadt wordt, blokkeer en verwijder de veiligheidssleutel van het
systeem en verwijder hem zorgvuldig van de motor. Kenmerk het
verwijderde systeem als volledig opgeladen en zend het aan de
fabrikant Briggs & Stratton.
*Indien het startrondsel geblokkeerd is in het vliegwiel.
1. Probeer de starter te op laden d.m.v. de zelfoprollende koord. Wacht
de klik af van de afsluittand en probeer nog eens hem te ontladen.
*Indien de starter zich niet met de veiligheidssleutel
blokkeert
1. Indien de starter leeg is, trek lichtjes aan de startkoord, laat het
vliegwiel een rotatie maken en probeer de veiligheidssleutel in de
blokkeringpositie te brengen. (LOCK POSITION).
2. Indien de starter opgeladen is, ontlaad hem en probeer hem te
blokkeren met de veiligheidssleutel. Indien de starter zich niet
blokkeert, herhaal de bewerking onder punt 1.
*Indien het aanloopsysteem zich steeds weer herlaadt na
de motorstart.
1. Controleer de verbindingen van de afsluitschakelaar en de massa.
Een overlading van de veer BESCHADIGT het Touch-N-Mow systeem.
De start- of stilstandproblemen van de motor kunnen betrekking hebben
op de startstaaf, het afstellingtoestel van de kabel of de hendels.
HET IS UITERST BELANGRIJK dat dit afstellingtoestel een correcte
inschakeling van het Touch-N-Mow aanloopsysteem toestaat en ook de
motor blokkeert.
SUGGESTIES VOOR HET OPZOEKEN VAN DEFECTEN
Indien de motor niet start:
1. Controleer het benzinepeil.
2. Controleer de correcte verbinding van de bougie.
3. Laad het aanloopsysteem terug op volgens de punten uit paragraaf
Opladen van het aanloopsysteem Touch-N_Mow.
4. Controleer dat de aanzetstaaf getrokken is nadat de veiligheidshendel
deblokkeert werd.
5. Controleer dat de veiligheidssleutel zich in RUN positie bevindt.
6. Controleer dat de aanzetkabel correct werkt voor het inschakelen en
opladen van het Touch-N-Mow aanloopsysteem.
7. Controleer dat de STOP schakelaar correct op het Touch-N-Mow
aanloopsysteem bevestigd is.
VOORZORGSMAATREGELEN.
Zoals voor ieder nieuw product zijn er belangrijke overwegingen te maken
m.b.t. de veiligheid van het Touch-N-Mow aanloopsysteem. In het
bijzonder is het noodzakelijk er rekening mee te houden, dat dit systeem
zijn werking op een drijfveer baseert, die door het vliegwiel onder lading
wordt gehouden. Een onbewuste of onhandige interventie in de nabijheid
van de drijfveer kan een onverwacht loslaten veroorzaken met gevolgen
die uiterst gevaarlijk voor zichzelf en de personen in de omgeving kunnen
zijn.
Indien de navolgende instructies niet nauwkeurig
opgevolgd worden, bestaat er het risico van traumatische
amputaties of laceraties.
- Koppel STEEDS de bougie los, ontlaad en blokkeer het Touch-NMow aanloopsysteem door de veiligheidssleutel te verwijderen,
VOORALEER EEN BEWERKING aan de motor of aan de grasmaaier
uit te voeren.
- Controleer dat het Touch-N-Mow aanloopsysteem ontladen en
geblokkeerd is, VOORALEER het te transporteren of te hanteren.
- Plaats handen of voeten NIET onder de grasmaaier, wanneer het
aanloopsysteem zich in oplading bevindt.
- NOOIT veronderstellen dat het systeem ontladen is, ook
wanneer de sleutel zich in de LOCK&REMOVE positie
bevindt of van de motor verwijderd is.
- Leg de handen NIET op het vliegwiel terwijl het systeem zich ontlaadt.
- Transporteer of hef de motor NIET van de transportband in de
nabijheid van het vliegwiel.
- Hanteer STEEDS het Touch-N-Mow aanloopsysteem indien
gedemonteerd van de motor, van het ijzeren veeromhulsel.
- Hef de starter NIET door de vingers te plaatsen waar zich de
bewegende onderdelen van het systeem bevinden.
- Probeer NIET de Touch-N-Mow starter te onderhouden
of te repareren.
- Blokkeer en verwijder STEEDS de veiligheidssleutel en leg hem op een
veilige plaats tot het volgende gebruik. De veiligheidssleutel is express
ontworpen om van de motor verwijderd te worden, wanneer hij niet in
gebruik is. Door de sleutel te verwijderen worden ongecontroleerde of
onverwachte aanlopen voorkomen in aanwezigheid van kinderen of
niet geïnformeerde volwassenen. De veiligheidssleutel moet zich in
blokkeerpositie van het systeem bevinden (LOCK&REMOVE positie)
vooraleer hij verwijderd kan worden.
- Controleer STEEDS dat de STOPKABEL correct aan de
STOPSCHAKELAAR aangesloten en bevestigd is. De ontbrekende
werking van de STOPSCHAKELAAR (aardcontact) kan de Touch-NMow starter beschadigen.
- Sluit en verwijder STEEDS de veiligheidssleutel en leg hem op een
veilige plaats tot het volgende gebruik.
- De veiligheidssleutel is ontworpen om van de motor verwijderd te
worden, wanneer niet in gebruik.
Verwijder de sleutel om onverwachts starten van de grasmaaier te beletten
in aanwezigheid van kinderen of onvoorzichtige volwassenen.
De veiligheidssleutel moet zich in de LOCK&REMOVE positie bevinden
vooraleer verwijderd te worden.
ONTLAAD EN BLOKKEER STEEDS HET TOUCH-N-MOW
AANLOOPSYSTEEM VOORALEER:
- Het gras of andere afvallen van de grasmaaier te verwijderen.
- De luchtfilter, oliefilter of de bougie uit te wisselen
- Het mes voor het onderhoud te verwijderen
- Ieder ander onderhoud aan de motor of aan de grasmaaier uit te
voeren.
- De grasmaaier te transporteren.

HARRY
38
DANMARK
1) BESKRIVELSE AF DELENE (Fig.01)
1 Øvre håndtag
2 Nedre håndtag
3 Gashåndtag
4 Bremsehåndtag
5Selvkøringshåndtag
6 Skaftets fastholdelseshåndtag
7 Starthåndtag
8 Ventilationsrude
læs denne manual grundigt før maskinen sætte igang
ADVARSEL !
Hold uvedkommende personer på afstand
Husk at slukke motoren og frakoble forbindelsen til
tændrøret før enhver form for vedligeholdelse
Brug sikkerhedsbriller
Ryg ikke under brændstofpåfyldning
INDHOLDSFORTEGNELSE:
1) Beskrivelse af delene:
2) Sikkerhedsregler
3) Montering af græsslåmaskinen
4) Klargøring
5) Regulering af skærehøjden
6) Vedligeholdelse
7) Kontrol og justering
8) Vinteropmagasinering
9) Mulching
10) Touch-N-Mow starter system
9 Baghjul
10 Forhjul
11 Kædekasse
12 Motor
13 Skæreblad
14 Græsopsamlingsmagasin
15Kædetransmission
16 Skærehøjdereguleringshåndtag
17Fremkøringshastighedshåndtag
ADVARSEL!
a- Det anbefales at læse denne manual grundigt og forstå den fuldt ud
før græsslåmaskinen tages i brug.
b- Det er ikke tilladt for børn under 16 år at benytte græsslåmaskinen
c- Brugeren af græsslåmaskinen har ansvaret for eventuelle personer,
som måtte befinde sig i arbejdsområdet. Sørg for at der ikke befinder
sig børn eller husdyr i arbejdsområdet.
d- Før arbejdet påbegyndes er det nødvendigt at gennemse området, som
skal klippes og fjerne alle sten, eventuelle dåser eller andre genstande,
som måtte befinde sig i dette område. Undersøg desuden hvor eventuelle
havesprinklere eller andre skjulte forhindringer er placeret, da disse vil
kunne forårsage farlige situationer under græsslåningen.
e- Brug nogle solide og lukkede sko under græsslåningen; brug ikke
sandaler og slå aldrig græsset barfodet. Brug sko som har god kontakt
til jorden også selvom den skulle være våd; brug desuden
arbejdshandsker for at have et sikrere greb om håndtaget.
f- Undersøg om kniven sidder korrekt fast og at sikkerhedsskærmene
er påmonterede før græsslåningen påbegyndes. Brug ikke
græsslåmaskinen hvis ikke græsopsamlingsmagasinet eller
ventilationsruden er påmonterede. Hvis nogen af delene er
beskadigede, skal de udskiftes eller repareres.
g- Påfyldning af brændstof må ikke foretages i lukkede rum, mens
motoren stadig kører eller hvis motoren endnu er varm. Der må ikke
ryges under brændstofpåfyldning.
h- Tænd ikke græsslåmaskinen i lukkede rum. Udstødningsgasserne fra
den kørende motor er giftige at indånde, de kan være kvælende og
derfor dødelige.
i- Juster ikke skærehøjden mens motoren kører.
l- ADVARSEL! Placer ikke hænder eller fødder under græsslåmaskinen
eller i udstødningsrøret når motoren er tændt, da skærekniven er i
bevægelse, når motoren kører.
m- Klip kun græs når lysforholdene er gode.
n- Løb ikke. Undlad at blive påvirket af, at arbejdet ønskes hurtigt
overstået; hold en gangart som passer til den type arbejde som skal
udføres.
o- Brug ikke græsslåmaskinen, hvis den ikke er i god stand. Sørg for at
få den repareret, inden den skal bruges.
p- Lad ikke andre personer bruge græsslåmaskinen uden først at have
givet disse præcise oplysninger om brugen og ladet dem læse denne
manual.
q- Skub aldrig græsslåmaskinen bagud (mod brugeren)
r- Hvis der skal arbejdes på skråninger, skal der arbejdes på tværs
aldrig oppefra og nedefter eller omvendt. Vær specielt opmærksom,
når der ændres retning. Undlad at klippe græs på meget stejle
skråninger.
s- Sluk altid motoren, når der ikke klippes græs eller hvis
græsslåmaskinen skal køres over et fortov, en havegang eller en vej.
t- Hvis græsslåmaskinen støder mod en forhindring slukkes motoren
og tændrørskablet trækkes ud. Kontroller om maskinen er blevet
beskadiget. Reparer en eventuel skade før græsslåmaskinen bruges
igen; hvis der er tale om en større skade, kontaktes den nærmeste
forhandler af HARRY græsslåmaskiner.
2) SIKKERHEDSREGLER

HARRY
39
DANMARK
Brug sikkerhedsbriller
Ryg ikke under påfyldning af
brændstof
Hold uvedkommende personer væk
4) KLARGØRING
Kontrol før opstart
Før enhver form for start af maskinen skal følgende punkter kontrolleres
og hvis det er nødvendigt foretages den nødvendige vedligeholdelse.
●●
●●
● Kontroller om magasinet og ventilationsruden og korrekt fastgjort og
klar til brug.
●●
●●
● Kontroller olieniveauet i motoren, sørg om nødvendigt for efterfyldning
uden dog at overstige det angivne niveau (se instruktionshåndbogen
for selve motoren).
●●
●●
● Kontroller den indstillede skærehøjde og juster den som ønsket (se
følgende kapitel Justering af skærehøjden)
Igangsætning af motoren (Fig. 07 - Fig. 08 - Fig. 09)
Når klargøringen er udført sættes motoren igang på følgende måde:
a- Træk i bremsehåndtaget (4) for at gøre igangsættelse af motoren
mulig.
b- For motorer med PRIMER system: Tryk 3-4 gange på
berigelsespumpen på karburatoren. Placer acceleratorhåndtaget (3)
i MAX positionen.
For motorer med CHOKE system: Sæt acceleratorhåndtaget (3) i
START position.
c- Start motoren: Grib fat om starthåndtaget (7) og træk let i kablet
indtil der mærkes en modstand som forårsages af trykket. Løsn selve
håndtaget og træk derefter kraftigt i det.
Hold håndtaget (4) nede under arbejdet. Når håndtaget slippes, vil
motoren stoppe. For yderligere oplysninger anbefales det at læse i
instruktionshåndbogen for selve motoren.
For at tilkoble trækket,
, skubbes håndtaget (5) mod
styret; for at standse fremdriften er det nok at slippe håndtaget.
Græsslåmaskinen kan skubbes frem og tilbage når trækket ikke er tilkoblet.
På model 471-C50-C54-P54 er det muligt at variere
fremdrifthastigheden ved at aktivere håndtaget (17-fig.10).
Montering af stofposen (fig. 05)
1) Skub stellet ind i stofposen, grebet skal være på den udvendige side
af stoffet. Grebet og posens stofhåndtag skal begge befinde sig på
den øverste del af stofposen. Plastikdelen skal være på undersiden.
2) Fastgør stofposens 4 sider til det rektangulære stel, idet posens
plastikhylster trækkes henover metalstellet. Lad den øverste venstre
og højre del af posen være fri.
Montering af håndtaget - mod. 313 (Fig. 06)
1) Sæt skaftets nederste ender på deres plads i de to nav på siderne og
skru de to sidehåndtag fast.
3) MONTERING AF GRÆSSLÅMASKINEN
Udstyr
For at montere en HARRY græsslåmaskine har du brug for:
- en skruetrækker
- to små justerbare nøgler
Montering af ventilationsruden (Fig. 02 - Fig. 03 - Fig. 04)
1) Sæt fjederen i ventilationsrudens to huller, sæt stangtrækket i (1),
sæt den samlede ventilationsrude på kædekassen og fastgør den
med de to skruer (2).
3) Placer nettet på magasinets to kroge. På nettet angives siden mod
græsslåmaskinen og siden mod magasinet.
4) Placer metalpladerne på de kroge som er svejset på magasinet og
stram møtrikkerne. Sørg for at nettet ikke falder ned, når det er i den
fulde åbningsposition, når magasinet tømmes for græs. Lad
platikhylstret glide fra øverste højre og venstre del af posen henover
stellet.
5) Monter transportøren i den nederste højre del af nettet med 4 skruer
og møtrikker. Skru skruerne fast med skruetrækkeren og nøglen.
6) For at montere magasinet på græsslåmaskinen skal man stå på den
højre side af maskinen. Løft ventilationsruden med højre hånd og
med venstre fastgøres magasinet til styrestangen.
ADVARSEL! Kniven begynder at rotere når motoren sættes
igang.
Standsning af motoren
Motoren og skærebladet standses ved at slippe grebet om
bremsehåndtaget.
ADVARSEL! Ændring af fremdrifthastigheden må kun
foretages mens motoren kører
ADVARSEL! Kniven drejer endnu i max. 3 sekunder.
Brug ikke græsslåmaskinen uden at græsopsamlingsmagasinet
eller ventilationsruden er påmonteret.
For at justere skærehøjden på maskiner med centraliseret styring, er det
nødvendigt at gribe fat om håndtaget og hæve gliderøret og sætter det i
én af de 7 mulige positioner.
Se figuren på siden for mulige skærehøjder.
Sluk altid motoren og vent til skærebladet er standset
fuldstændig. For
5) JUSTERING AF SKÆREHØJDEN
Græsslåning
Tilpas hastigheden til græssets forhold. Indstil motorhastigheden på højeste
hastighed, hvis græsset er højt eller tæt og til laveste hastighed, hvis græsset
er kort.
Justering af skærehøjde (Fig. 11)

HARRY
40
DANMARK
Råd til græsslåning
Det bedste græsslåningsresultat opnås, når der ikke skæres mere end én
tredjedel af græshøjden.
Hvis græsset er højt bruges den højeste skæreposition ved første
græsslåning. Hvis græsset ønskes kortere gentages slåningen, men
dennegang med en lavere skærepostion. Hvis der slås med et for lavt
skæreniveau, skal græsset bruge mere energi på at danne nye blade i
stedet for at blive kraftigere, og det vil være mere udsat for at tørre ud
under varme og tørre vejrforhold. Hvis græsset får lov til at gro for meget,
vil den nederste del af hvert græsstrå blive tyndt og guldne.
Afklippet græs som få lov til at ligge danner et lag, som forhindrer græsset
nedenunder i at gro; derfor anbefales det altid at opsamle det afskårne
græs. Alle HARRY græsslåmaskiner er udviklet så de hurtigt kan skifte
funktion: Græsslåning og opsamling på samme tid eller kun græsslåning
(anbefales hvis græsset er meget højt).
Tømning af græsopsamlingsmagasinet (Fig.12)
Det patenterede tømningssystem af magasinet gør det muligt at foretage
tømningen på to forskellige måder:
A Løft ventilationsruden op og tag magasinet af maskinen ved at bruge
det håndtag, som befinder sig midt på magasinet. Løft derefter
magasinets bageste del for at tømme græsset ud.
B Tag fat om den bageste del af græsmagasinet og drej den opad:
Græsset vil falde ned på jorden (det patenterede system).
For at forlænge græsmagasinets levetid bør det tømmes hver gang man
er færdig med at slå græsset og før græsslåmaskinen opmagasineres for
vinteren. Kontroller magasinet ofte; hvis det er beskadiget skal de
beskadigede dele udskiftes med originale reservedele.
ADVARSEL!
Husk at slukke motoren og frakoble forbindelsen til
tændrøret før enhver form for vedligeholdelse
1 Kontoller med jævne mellemrum knivene og skruerne som holder
motoren på plads.
2 Kontroller at alle møtrikker og skruer er strammet korrekt, så
græsslåmaskinen altid er i bedst mulig stand.
3 Kontroller ofte græsopsamlingsmagasinet stand. Udskift magasinet
med et nyt, hvis det er blevet beskadiget. Brug kun originale
reservedele.
4 Opmagasiner ikke græsslåmaskinen i et lukket rum hvis tanken er
fuld af benzin. Lad motoren køle af efter at den er blevet brugt ude.
6) VEDLIGEHOLDELSE
5 Sørg for for at mindske brandfaren at motoren er ren og fri af græs,
blade eller eventuel oliefedt.
6 Husk at benzin er brændbart. Opbevar benzin i en metaldunk langt
fra varmkilder eller åben ild.
7 Få græsslåmaskinen efterset hos Deres HARRY forhandler efter hver
sæson. Dette gør det muligt at have græsslåmaskinen i perfekt stand
og klar til brug i begyndelsen af den efterfølgende sæson.
8 Sørg for at der ved reparationer benyttes originale HARRY
reservedele. Dette gør det muligt at bibeholde kvaliteten af Deres
græsslåmaskine på samme niveau som da De købte den.
ADVARSEL!
Husk at slukke motoren og frakoble forbindelsen til
tændrøret før enhver form for vedligeholdelse
7) KONTROL OG JUSTERINGER
ADVARSEL!: Uforholdsmæssigt stort slid på skærebladet kan
forårsage dybe revner i det og hvis metalstykker fra bladet
løsner sig, kan de være yderst farlige for brugeren eller andre
personer, som befinder sig i arbejdsområdet.
Kontrol Afmontering og slibning af skærebladet (Fig.13Fig. 14)
- Stop motoren. Træk kablet fra tændrøret ud for at undgå at motoren
pludselig går igang.
- Bøj græsslåmaskinen på venstre side eller på siden overfor tændrøret
for at undgå problemer med drukning.
- Kontrol: undersøg omhyggeligt skærebladets skarphed og slid især ved folderne.
- Eftersom sand og andet materiale kan forårsage slid, anbefales det
at efterse skærebladet ofte. Hvis der findes fejl på det, skal det
udskiftes.
- Afmontering: Tag godt fat om én af knivens ender, for at undgå
at skære sig anbefales det at bruge en handske; skru bolten løs, fjern
skiven og derefter kniven.
- Slibning: Slib skærebladet hvis skærende er ødelagt men bladet
ellers er i god stand. Brug en slibeskive til slibningen; kontroller at
bladet efter slibningen stadig er i balance. Hvis dette ikke er tilfældet,
vil der forekomme for store vibrationer. Udvis størst mulig forsigtighed
for ikke at skære Dem!
- Påmonter bladet i midten af støtten og stram bolten.
SMØRING
Motor: Skift olien efter de 2 første drifttimer. Derefter skiftes olien efter
hver 25 drifttimer som angivet i vedligeholdelsesmanualen for motoren.
Før græsslåmaskinen bruges, skal olieniveauet kontrolleres hver gang.
Til smøring af de bevægelige dele: Smør af og til de bevægelige dele (så
som kuglelejer, stængerne til justering af hjulhøjde o.s.v.) med et par
dråber fedt.
JUSTERING AF KABEL TIL SELVKØRENDE FUNKTION (Fig. 15)
Kablet til selvkørerfunktionen må kun justeres hvis hjulene, mens motoren
kører, ikke reagerer med det samme når der selvkøringshåndtaget
aktiveres og de giver indtryk af koblingen glider. Justeringen foretages
ved at løsne de to møtrikker (pos.1), ved at dreje den øverste møtrik to
omgange mod uret og stramme den med kontramøtrikken. Hvis justeringen
viser sig ikke at være effektiv, kan den gentages.
ADVARSEL!
En for stor belastning på kablet kan medføre ødelæggelse af
transmissionssystemet.
Kontroller altid efter justeringen at baghjulene, med slukket motor, drejer
frit når maskinen trækkes bagud og uden at selvkøringshåndtaget trykkes
ned.

HARRY
41
DANMARK
1) For at slå græsset med Mulching funktionen, må man sikre sig, at
græssets højde ikke overstiger 10 cm., ellers er det nødvendigt at
fjerne Mulchinglukningen og påmontere græsopsamlingssækken.
2) Hvis græsset skal slås ved brug af Mulchingfunktionen, er det nødvendigt
at man sikrer sig, at græsset er tørt og at skærebladet er meget skarpt for
at undgå at det afklippede græs samler sig under sneglen på chassiset.
3) Arbejdsgang:
a - Placer Mulchinglukningen i rummet hvorfra græsset slynges ud.
9) MULCHING
Sørg for at motoren er slukket og at tændrørshætten er taget
af.
b - Sæt skærehøjdereguleringshåndtaget i én af de tre positioner
som vises på Mulchingpladen (se fig. 17). For modellerne H48-
H49-P49 sættes skærehøjden ikke under 50 mm.
c - Start motoren og gå frem som ved almindelig græsslåning.
4) Efter at have slået græs med Mulchingfunktionen er det god skik og
brug at sørge for at rengøre maskinen grundigt for at fjerne rester
fra græsslåningen. For at gøre dette fjernes Mulchinglukningen som
vist i fig.16 .
Skrug knappen løs og skub lukningen indad som vist i figuren 18
10) TOUCH-N-MOW STARTER SYSTEM
Træk tændrørskablet ud, vend græsslåmaskinen og rengør underste del
af kædekassen.
Fjern ophobninger af græs med en skruetrækker og skyl derefter med
vandspuling.
Rengør græsslåmaskinens overflader og lad dem tørre. Kontroller at
græsopsamlingsmagasinet er tomt; vask det og lad det tørre. Opmagasiner
græsslåmaskinen på et tørt sted hvor den er beskyttet mod dårligt vejr.
Fremgangsmåde for vinteropmagasinering
Følg denne vejledning for at klargøre Deres græsslåmaskine til
opmagasinering efter endt sæson.
For oplysninger omkring motoren bedes De følge vejledningen som er
givet af producenten.
8) VINTEROPMAGASINERING
BESKRIVELSE AF PRODUKTET
Touch-n-mow startersystemet, som er patenteret af firmaet Briggs &
Stratton, er et nyt produkt som gør det muligt at starte græsslåmaskinen
ved blot at trække i sikkerhedsstangen, uden brug af batterier, el-ledninger,
kontakter eller snore som skal trækkes.
BETJENING
Opspænding af Touch-n-mow startersystem. Af
sikkerhedsmæssige grunde er systemet ikke aktiveret, når græsslåmaskinen
leveres fra fabrikken. Også efterfølgende, når startersystemet er koblet
fra af sikkerhedsmæssige grunde, er det nødvendigt først at opspænde
Touch-n-Mow systemet, før det er klar til brug.
For at opspænde startersystemet skal motoren startes manualt (starterkabel)
ved at følge nedenstående fremgangsmåde:
1. Kontroller benzin- og motorolieniveauet
2. Forbind tændrørskablet
3. Tryk på motortipperen tre gange (fig.20).
4. Sæt sikkerhedsnøglen (fig. 19) i. Drej den med uret til RUN position
(fig. 21).
5. Frigør sikkerhedsstangen fra ved at dreje Touch-n-Mow
sikkerhedshåndtaget (fig. 22).
6. Tænd motoren med manuel start ved at trække i snoren (fig. 23).
Hvis motoren ikke går igang i andet forsøg, kontroller da, om
fremgangsmåden beskrevet i de foregående punkter er blevet fulgt
korrekt.
7. Vent til motoren opnår drifthastigheden.
8. Slip stangen på en passende måde.
BEMÆRK: Første gang græsslåmaskinen tændes, og altid efter en
længere opmagasinering, skal det viste samlingspunkt (fig. 24) smøres
og motoren lades tændt i fem minutter før maskinen bruges.
Når stangen slippes vil returfjederen skubbe Touch-n-Mow anordningen
så den kommer i kontakt med svinghjulet.
Standseenergien (inerti) som skabes af svinghjulet gør at Touch-n-Mow
startersystemet kan opspænde sig selv.
Den spærrehagens selvopspændingsmekanisme fastholder fjederen i
spændt position.
Standsning af motoren
Slip sikkerhedsstangen på en passende måde.
BEMÆRK: I det øjeblik motoren stopper høres støjen fra startersystemet
som genopspændes. Denne støj som forårsages af spærrehagens hastighed
er helt normal.
Touch-n-Mow systemet er patenteret system og det fungerer både som
startersystem, når der trækkes i sikkerhedsstangen og som motorbremse,
når samme stang slippes på en hensigtsmæssig måde.
Når sikkerhedsnøglen drejes ¼ omgang mod uret (LOCK&REMOVE
position), låses Touch-N-Mow anordningen. Tag ALTID sikkerhedsnøglen
ud og opbevar den på et sikkert sted. Motoren kan ikke gå igang uden
sikkerhedsnøglen eller hvis nøglen er sat i LOCK&REMOVE position.
BEMÆRK: Hvis motoren løber tør for benzin eller hvis motoren stopper
pga. at græsset er for højt eller af andre mekaniske grunde, vil Touch-nmow startersystemet ikke automatisk genopspændes og det vil blive
nødvendigt at gentage punkterne i afsnittet: Opspænding af Touch-nmow startersystemet.
Start af motoren med Touch-n-Mow systemet
1. Kontroller motorolien.
2. Forbind tændrørskablet.
3. Tryk på tipperen tre gange.
4. Sæt sikkerhedsnøglen i. Drej den med uret i RUN position.
5. Aktiver håndtaget på sikkerhedsstangen
6. Træk i sikkerhedsstangen for at starte motoren.
Bemærk: Hvis motoren ikke går igang betyder det at Touch-n-Mow er
ikke er opspændt. Sørg i det tilfælde for at det bliver spændt op.

HARRY
42
DANMARK
AFSPÆNDING AF STARTERSYSTEMET
Før græsslåmaskinen skal rengøres, vedligeholdes eller transporteres SKAL
startersystemet Touch-n-Mow afspændes.
For at afspænde systemet:
1. Kobl tændrørskablet fra.
2. Aktiver startersystemet og foretag en falsk start.
3. Drej sikkerhedsnøglen ¼ omgang mod uret til LOCK&REMOVE
position.
4. Tag sikkerhedsnøglen ud.
BEMÆRK: Hvis sikkerhedsnøglen ikke når låsepositionen trækkes let i
den selvoprullende snor for at løsne spændingen i startersystemet.
GARANTI
Touch-n-Mow starter mekanismen er ét samlet system og består IKKE af
dele, som kan udskiftes enkeltvis. Ethvert tegn på ulovlig ændring vil
annullere garantien fra producentens side.
RÅD OM ASSISTANCE
Touch-n-Mow anordningen er fastgjort på maskinen med Torx T 30 skruer.
Touch-n-Mow anordningen får motoren til at dreje i 2 sekunder ved 1000
RPM (omdrejninger/minut). Til sammenligning har start med træksnor
600 RPM og eltrisk start 450 RPM.
Hvis motoren ikke starter, opspændes Touch-N-Mow anordningen manuelt
(startkabel).
SØRG FOR, hvis tanken er blevet fjernet fra motoren, at Touch-n-mow
systemets sikkerhedsnøgle er i låst position (LOCK&REMOVE) før tanken
installeres igen.
Brug ikke sikkerhedsnøglen før tanken installeres, da der kan opstå farlige
situationer.
Hvis De er i tvivl om Touch-n-Mow anordningens spændingsforhold skal
startersystemet afspændes.
*Hvis Touch-N-Mow ikke slår fra
1. Forsøg at opspænde starteren. Afvent klikket fra spærrehagen og
forsøg at afspænde den igen ved at trække i sikkerhedstangen.
2. Hvis fremgangsmåden i punkt 1 IKKE har afspændt starteren trækkes
i sikkerhedsstangen. Bank let med en lille gummihammer på ydersiden
af fjedertransportøren og på systemets koblingsarm, idet De forsøger
at tilkoble den.
3. Hvis det med operationerne i punkt 1 og 2 ikke lykkes at afspænde
starteren, låses nøglen og den tages ud fra sikkerhedssystemet og
fjernes omhyggeligt fra motoren. Afmærk det fjernede system som
fuldstændig opspændt og send det til producenten Briggs & Stratton.
*Hvis startertandhjulet er blokeret i svinghjulet
1. Forsøg at opspænde starteren ved hjælp af det selvoprullende kabel.
Afvent klikket fra spærrehagen og forsøg at afspænde igen.
*Hvis starteren ikke låses med sikkerhedsnøglen
1. Hvis starteren er afspændt trækkes let i starterkablet, idet De forsøger
at få svinghjulet til at rotere og at få sikkerhedsnøglen ind i
låsepositionen (LOCK POSITION).
2. Hvis starteren er opspændt afspændes den og forsøges låst med
sikkerhedsnøglen. Hvis starteren ikke låses gentages fremgangsmåden
beskrevet i punkt 1.
*Hvis startersystemet fortsætter med at genopspændes efter
at motoren er gået igang
1. Kontroller forbindelserne til stopkontakten og jorden. En
overspænding af fjederen VIL BESKADIGE Touch-n-Mow systemet.
Problemer med motorstart eller motorstandsning kan stamme fra
starterstangen, kablets justeringsanordning eller stangmekanismen.
DET ER MEGET VIGTIGT at denne justeringsanordning sørger for at
både Touch-n-Mow startersystemet og motorblokken kan aktiveres korrekt.
RÅD TIL FEJLSØGNING
Hvis motoren ikke vil starte:
1. Kontroller benzinniveauet
2. Sørg for at tændrøret er korrekt forbundet
3. Opspænd startersystemet igen ved at følge punkterne beskrevet i
afsnittet Genopspændning af startersystemet Touch-n-Mow.
4. Kontroller om der er blevet trukket i startstangen efter at
sikkerhedshåndtaget er koblet fra.
5. Sørg for at sikkerhedsnøglen står i RUN position.
6. Kontroller om starterkablet virker korrekt til at starte og genopspænde
Touch-N-Mow.
7. Sørg for at STOP kontakten er korrekt fastgjort på Touch-n-Mow
anordningen.
ADVARSLER OG SIKKERHEDSFORANSTALTNINGER
Som med alle nye produkter skal der tages nogle sikkerhedsforanstaltninger
med Touch-n-Mow systemet. Det er især vigtigt at have for øje, at dette
system virker ved hjælp af en fjeder, som holdes spændt af svinghjulet.
Enhver form for uforsvarlig eller ubehændig indgriben ved fjederen kan
få den til at springe løs, og dette kan være yderst farligt for én selv eller
for personer, som måtte befinde sig i nærheden.
Hvis sikkerhedsforanstaltningerne ikke overholdes er der
derfor risiko for traumatiske amputeringer eller kvæstelser!
- Kobl ALTID tændrøret fra, afspænd Touch-n-Mow og lås anordningen
ved at fjerne sikkerhedsnøglen FØR der foretages NOGEN FORM
FOR service på græsslåmaskinens motor.
- Sørg for at Touch-n-Mow er affspændt og låst fast FØR den
transporteres eller bugseres.
- Placer IKKE hænder eller fødder under græsslåmaskinen, når
startersystemet er afspændt.
- Antag ALDRIG at systemet er afspændt selvom nøglen
er i LOCK&REMOVE position eller hvis den er blevet
fjernet fra motoren.
- Sæt IKKE hænderne på svinghjulet mens systemet afspændes.
- Transporter eller løft IKKE motoren fra transportøren i nærheden af
svinghjulet.
- Håndter ALTID Touch-n-Mow startersystemet, hvis det er afmonteret,
fra motoren fra jernkassen med fjederen
- Løft IKKE starteren ved at sætte fingrene der hvor selve systemets
bevægelige dele befinder sig.
- Forsøg ikke selv at udføre vedligholdelse eller
reparationsarbejde på Touch-n-Mow starteren.
- Lås og fjern ALTID sikkerhedsnøglen og opbevar den på et sikkert
sted, indtil den skal bruges igen. Sikkerhedsnøglen er blevet designet
og udviklet specielt med henblik på at den skal fjernes fra motoren,
når den ikke er i brug. Ved at fjerne nøglen forhindres ukontrolleret
og uventet opstart af maskinen under tilstedeværelse af uvidende
børn eller voksne. Sikkerhedsnøglen skal stå i systemets låseposition
(position LOCK&REMOVE) før den kan fjernes.
- Kontroller ALTID at STOP kablet er korrekt forbundet og fastgjort til
STOP kontakten. Hvis STOP kontakten ikke virker korrekt
(jordforbindelse) kan Touch-n-Mow starteren blive beskadiget. Luk
og fjern ALTID sikkerhedsnøglen og opbevar den på et sikkert sted til
den skal bruges næste gang. Sikkerhedsnøglen er blevet designet og
udviklet med henblik på at den skal fjernes fra motoren, når denne
ikke er i funktion.
Fjern altid nøglen for at forhindre at græsslåmaskinen fejlagtigt går igang,
hvis der er børn eller ubetænksomme voksne tilstede.
Sikkerhedsnøglen skal stå i LOCK&REMOVE positionen før den kan fjernes.
AFSPÆND ALTID TOUCH-N-MOW SYSTEMET OG LÅS DET FØR:
- græs eller andet affald fjernes fra græsslåmaskinen
- luftfiltret, oliefiltret eller tændrøret udskiftes
- bladet fjernes ved vedligeholdelse
- der foretages enhver anden form for vedligeholdelse af motoren eller
græsslåmaskinen
- græsslåmaskinen transporteres

HARRY
43
PORTUGAL
1) DESCRIÇÃO DAS PARTES (Fig. 01)
1 Guidom superior
2 Guidom inferior
3 Comando gás
4 Alça de ferro
5Alça semovente
6 Alça fixação cabo
7 Alça ativação
8 Deflector
Ler com atenção este manual antes da ativação
ATENÇÃO!
Manter na distância de segurança s pessoas estranhas
Para cada intervenção de manutenção, recordar-se
de apagar o motor e desligar o onector da vela.
Utilizar óculos de segurança
Não fumar durante o abastecimento do combustível
Índice
1) Descrição
2) Normas de segurança
3) Montagem do cortador de grama
4) Ativação
5) Regulagem da altura do corte
6) Manutenção
7) Controles e regulagens
8) Armazenagem invernal
9) Mulching
10) Sistema de inicío Touch-N-Mow
9 Roda posterior
10 Roda anterior
11 Cárter
12 Motor
13 Lâmina
14 Cesta para recolher a grama
15Transmissão
16 Alavanca regulagem altura do corte
17Alavanca velocidade avançamento
ATENÇÃO!
a- Recomenda-se ler com atenção e de compreender plenamente o
conteúdo deste manual antes de utilizar o cortador de grama.
b- O uso do cortador de grama é proibido para as pessoas com menos
de 16 anos
c- O operador é responsável por terceiros na área de trabalho. Certificar-
se que não hajam crianças ou animais domésticos na área de trabalho.
d- Antes de iniciar o trabalho é indispensável inspecionar a área que
deve ser trabalhada e remover todas as pedras, as eventuais latinhas
ou qualquer outro objeto estranho que se encontre naquela área.
Controlar também onde estão localizados eventuais irrigadores ou
qualquer obstáculo escondido que poderia criar situações de perigo
durante o corte
e- Utilizar sapatos fechados e resistentes durante o corte; não usar
sandálias e não cortar com os pés desclaços. Usar sapatos que tenham
uma boa aderência também quando o terreno está molhado; usar
também luvas de trabalho para ter uma empunhadura mais segura.
f- Antes de começar certificar-se que a ceifa da lâmina esteja bem
fixada e as proteções de segurança estejam montadas. Não utilizar
o cortador de grama sem que o recolhedor de grama ou o deflector
estejam montados. Caso sejam encontrados defeitos, providenciar
a substituição ou a reparação
g- Não acrescentar combustível quando se está em um lugar fechado,
quando o motor ainda está em funcionamento ou quando o motor
ainda está quente. Não fumar durante as operações de abastecimento
de combustível.
h- Não fazer funcionar o cortador de grama em ambientes fechados.
O gás do escapamento emidito pelo motor em função são venenosos
se respirados, podem ser asfixiantes e portanto mortais.
i- não regular a altura do corte quando o motor está funcionando.
j- ATENÇÃO! Quando o motor está ligado, não colocar as mãos ou
os pés embaixo do cortador de grama ou do conduto do
escapamento, a lâmina está em movimento quando o motor está em
funcionamento.
m- Cortar a relva só quando as condições de luz são boas.
n- Não corra. Não deixe-se influenciar pela pressa de acabar o
trabalho; mantenha um caminhar apropriado ao tipo de trabalho
que se deve desempenhar.
o- Não usar o cortador de grama quando não está em boas condições.
Providenciar ao reparo antes do uso.
p- Não permita que ninguém use o seu cortador de grama a se antes
não lhe tenha fornecido informações precisas e não lhe tenha feito
ler este manual.
q- Nunca empurre o cortador de grama para trás (na direção do
operador)
r- Quando tiver que cortar em terrenos em declive, proceder de travesso,
nunca do alto para baixo ou vice-versa. Preste particular atenção
quando mudar de direção. Não corte em terrenos muito íngremes.
s- Desligar sempre o motor quando não está cortando ou quando se
deve atravessar uma calçada, uma alameda ou uma rua.
t- No caso de colisão com um obstáculo, pare o motor, desligue o
cabo da vela e controle se ocorreu algum dano. Conserte o eventual
dano antes de usar novamente o cortador de grama; caso o dano
fosse grave dirigir-se ao revendedor HARRY mais próximo.
2) NORMAS DE SEGURANÇA

HARRY
44
PORTUGAL
Utilizar óculos de segurança
Não fumar durante o abastecimento
de combustível
Manter na distância de segurança as
pessoas estranhas.
4) ATIVAÇÃO
Controles antes da ativação
Antes de cada acendimento controlar os seguintes pontos e se necessário
providenciar a manutenção requerida.
● Controlar que a cesta e o deflector estejam bem fixados e prontos
para o uso.
● Controlar o nível de óleo no motor, se necessário providenciar o
acréscimo, prestando atenção para não superar o nível indicado
(ver o manual de instruções do próprio motor)
● Controlar a altura programada do corte e regule como desejar (ver
o capítulo seguinte: Regulagem da altura do corte).
Ativação do motor (Fig. 07 - Fig. 08 - Fig. 09)
Efetuar as operações de ativação, procede-se à ativação do motor da
seguinte maneira:
a- Acionar a alça do freio (4), para permitir a ativação do motor.
b- Para motores com sistema PRIMER:
pressionar 3-4 vezes a bombinha de enriquecimento localizada no
carburador .
Posicionar a alavanca acelerador (3) na posição MAX.
Para motores com sistema CHOKE:
posicionar a alavanca acelerador (3) na posição START.
c- Ativar o motor: empunhar a alça de ativação (7) e puxar a corda
sem esforço, até advertir a resistência provocada pela compressão,
soltar a própria alça e dar então um puxão enérgico.
Manter pressionada a alça (4) durante o funcionamento, ao soltar a
mesma, o motor pára. Para ulteriores esclarecimentos aconselha-se consultar o manual de instruções do próprio motor.
Para engrenar a tração
, empurrar a alça (5) em direção
ao guidom; para parar o avançamento é suficiente deixar a alça. O
cortador de grama pode ser empurrado para frente e para trás quando
a tração não está inserida.
Para os modelos 471-C50-C54-P54 é possível variar a velocidade
de avançamento utilizando a alavanca (Fig.10 -pos.17) .
Montagem da cesta em tecido (Fig. 05)
1) Faça deslizar a estrutura no saco de tecido, manter a empunhadura
do lado de fora do tecido. A empunhadura e a alça do cesto de
tecido devem estar ambas na parte alta da cesta. A folha de plástico
estará embaixo.
2) Fixar os 4 lados do saco em tecido à estrutura retangular, fazendo
deslizar o revestimento de plástico do saco sobre a estrutura metálica.
Deixe livre a parte esquerda e direita do saco.
Montagem do guidom - mod. 313 (Fig. 06)
1) Inserir as abas inferiores do guidom nos locais paropriados
localizados nos dois meãos laterais e parafusar os dois botões laterais.
3) MONTAGEM DO CORTADOR DE GRAMA
Ferramentas
Para montar um cortador de grama HARRY são necessárias:
- uma chave de fenda
- duas pequenas chaves de grifa
Montagem do deflector (Fig. 02 - Fig. 03 - Fig. 04)
1) Manter a mola nos dois furos do deflector, inserir o tirante(1),
posicionar o deflector montado no Cárter e fixá-lo com os 2
parafusos (2).
3) Posicionar a rede nos dois ganchos da cesta. Na rede estão indicados
o lado do cortador de grama e o lado da cesta.
4) Posicionar as placas metálicas nos ganchos soldados à estrutura da
cesta e apertar as porcas. Certificar-se de que a rede não caia
quando a mesma é levantada na posição de abertura total durante
a operação de esvaziamento da grama. Faça escorregar o
revestimento de plástico da parte alta direita e esquerda do saco
em cima da estrutura.
5) Montar o aba na parte inferior direita da rede com 4 parafusos e
porcas. Parafusar com a chave de fenda e com a chave de grifa.
6) Para montar a cesta no cortador de grama, fique do lado direito do
cortador de grama, levante o deflector com a mão direita e com a
esquerda enganche a cesta no tirante.
ATENÇÃO! A lâmina entra em função quando se coloca
em função o motor.
Parar o motor
O motor e a lâmina param soltando a alça freio
ATENÇÃO! A intervenção para variar a velocidade de
avançamento deve ser executada só com o motor em
funcionamento.
ATENÇÃO! A lâmina girará ainda por no máximo 3
segundos.
Não utilizar o cortador de grama sem que a cesta recolhedor
de grama ou o deflector estejam montados.
Para regular a altura do corte em máquinas com comando centralizado,
é necessário empunhar a alavanca, levantar o tubo corrediço e levá-la
para uma das 7 posições predispostas.
Ver a figura ao lado para as alturas de corte disponíveis.
Pare sempre o motor e espere que a lâmina esteja completamente parada.
5) REGULAGEM DA ALTURA DO CORTE
Procedimento para o corte
Adaptar a velocidade às condições da grama. Regular a velocidade do
motor no máximo quando a grama está alta e fechada ou no mínimo
quando está baixa.
Regulagem da altura do corte (Fig. 11)

HARRY
45
PORTUGAL
Conselhos para o corte
Os melhores resultados são obtidos quando não mais do que um terço
da altura da grama é cortada.
Quando a grama está alta use a posição de corte mais alta para o primeiro
corte. Se quiser cortar a grama mais baixa, repasse com uma posição de
corte mais baixa.
Se cortada com um nível muito baixo a grama deverá despender mais
energia para o desenvolvimento de novas folhas, ao invés de fortalecerse,e será mais sujeita a possibilidade de queimar-se em caso de seca.
Deixando que a grama cresça demais, a parte inferior enfraquecerá e
amarelará. A grama deixada no chão forma uma camada que impede o
crescimento da grama; aconselha-se de sempre recolher a grama cortada.
Todos os cortadores de grama HARRY são estudados para uma imediata
troca de funções: corte e recolhimento ao mesmo tempo ou só corte
(indicado quando a grama está muito alta).
Esvaziamento da cesta
O sistema patenteado de esvaziamento da cesta permite efetuar esta
operação em duas maneiras diferentes:
A Levantar o deflector e tirar a cesta da máquina usando a alça
localizada no centro da
cesta. Levante então a parte posterior da mesma para permitir a
saída da grama.
B Pegue a parte posterior da cesta e vire-a para cima: a grama cairá
no chão (sistema patenteado)
Para prolongar a vida da cesta é necessário esvaziá-la cada vez que se
acaba o corte e antes da armazenagem invernal. Controlar com
freqüência a cesta; se defeituosa providenciar a substituição com peças
originais para troca .
ATENÇÃO!: Para toda intervenção de
manutenção, recorde-se de apagar o motor e de
desligar o conector da vela de acendimento.
1) Controlar com intervalos freqüentes as lâminas e os parafusos que
fixam o motor.
2) Controlar que todas as porcas e os parafusos estejam bem estreitos
de modo que o cortador esteja na melhor condição de trabalho.
3) Controlar com freqüência o estado da cesta que recolhe a grama.
Substituir a cesta com uma cesta nova caso se encontrem defeitos.
Use só peças originais para troca.
6) MANUTENÇÃO
4) Não armazene o cortador de grama em lugar fechado com o
reservatório cheio de gasolina. Deixe esfriar o motor depois do uso
em um lugar aberto.
5) Para reduzir o perigo de incêndio, faça em modo que o motor esteja
limpo da grama, das folhas ou de eventual gordura de óleo.
6) Recordar que a gasolina é inflamável. Conservar a benzina em um
galão metálico longe do calor ou de chamas livres.
7) Fazer revisar pelo revendedor HARRY o seu cortador de grama ao
final de cada estação. Isto lhe permitirá ter o seu cortador de grama
em perfeita eficiência no início da estação sucessiva.
8) Certificar-se de que nas reparações sejam usadas peças originais
para troca HARRY, isto lhe permitirá manter a qualidade do seu
cortador de grama no mesmo nível de quando foi comprado.
ATENÇÃO!: Para cada intervenção de
manutenção, recordar de apagar o motor e desligar
o conector da vela de acendimento.
7) CONTROLES E REGULAGENS
ATENÇÃO!: o excessivo desgaste da lâmina pode levar a
formação de profundas fendas e à soltura de algumas peças
da própria, que podem criar sério perigo ao próprio
operador e aos presentes na área de trabalho.
Controle Desmontar e afiar a lâmina (Fig. 13 - Fig. 14)
- Parar o motor Desligar o cabo da vela para evitar ativações
imprevistas e não desejadas do motor
- Virar o cortador de grama para o lado esquerdo ou do lado contrário
da vela para evitar problemas de afogamento.
- Controle: examinar com cuidado o grau de afiamento e de desgaste
da lâmina, especialmente em correspondência das pregas.
- Dado que a areia ou outro material podem ser causa de desgaste,
aconselha-se controlar com freqüência a lâmina. Notando-se algumas
anomalias, deve-se providenciar à substituição da lâmina.
- Desmontar: empunhar com força um terminal da lâmina, para
evitar cortes aconselha-se de usa uma luva desparafusar a porca,
tirar a arruela e então a lâmina.
- Afiar: afie a lâmina se os cortadores estão deteriorados, mas a
lâmina está em boas condições. Utilize uma mola para afiar, controle
que depois desta operação a lâmina esteja ainda balanceada. Se
não estiver balanceada, ocorrerão vibrações excessivas. Preste
particular atenção para evitar de cortar-se!
- Monte a lâmina centralizando-a no suporte e aperte a porca.
Lubrificação
Motor: trocar o óleo depois das primeiras duas horas de trabalho. A
seguir a cada 25 horas, como indicado no manual de manutenção do
motor. Antes de cada uso do cortador de grama, controlar o nível do
óleo.
Para a lubrificação das partes em movimento, colocar de vez em quando algumas gotas de graxa nos componentes em movimento ( como
rolamentos, alavancas de regulagem da altura das rodas, etc.)
REGULAGEM CABO SEMOVENTE (Fig. 15)
O cabo semovente de engate deve ser registrado só se, com o motor em
funcionamento, acionando a alça semovente as rodas não respondem
de pronto e dão a sensação que a fricção patine.
A regulagem realiza-se desbloqueando as duas porcas (pos.1), dando 2
giros na porca superior em sentido anti-horário e bloqueando-o com a
arruela, se a operação não for eficaz pode ser repetida.
ATENÇÃO!: Uma excessiva carga do cabo pode provocar
o rompimento da transmissão.
Depois da registração controlar, sempre com o motor apagado, puxando
a máquina para trás, sem acionar a alça semovente , que as rodas
posteriores rodem livres.

HARRY
46
PORTUGAL
1) Para poder cortar a grama na modalidade Mulching, é necessário
controlar que a altura da grama não seja superior a 10 cm; viceversa, é necessário tirar o fecho Mulching e montar o saco recolhedor
de grama
2) Caso se esteja utilizando a modalidade Mulching é necessário certificar-se de que a grama não esteja molhada e a lâmina esteja bem
afiada para evitar que a grama cortada não se acumule embaixo
da cóclea da cobertura metálica.
3) Funcionamento.
a- Posicionar o fecho Mulching no vão de expulsão da grama.
9) MULCHING
Certificar-se de que o motor esteja desligado e a conexão
da vela esteja destacada
b- Levar a alavanca de regulagem da altura de corte, para uma das
três posições correspondentes à plaqueta Mulching (ver fig. 17)
Para os modelos H48-H49-P49 posicionar a altura de corte não
inferior a 50 mm.
c- Ligar o motor e iniciar o corte normal da grama.
4) Depois do funcionamento na modalidade Mulching é uma boa regra
proceder a uma profunda limpeza para remover os resíduos do
corte da grama.
Para esta operação, tirar o fecho Mulching, como indicado nas
fig.16
Desparafusar o botão e empurrar o fecho para dentro, como indicado
na fig. 18 .
DESCRIÇÃO DO PRODUTO
O sistema de ativação Touch-n-mow, patenteado pela Briggs & Stratton,
é um novo produto que permite ativar o cortador de grama puxando
simplesmente a barra de segurança, sem o auxílio de baterias, fios
elétricos, interruptores ou cordas para puxar.
FUNCIONAMENTO
Carregar o sistema de ativação Touch-N-Mow
Por motivos de segurança o sistema é fornecido desativado pela fábrica.
Também depois, todas as vezes que o sistema de ativação for desativado
de modo intencional por motivos de segurança, o Touch-N-Mow deverá
ser iniciado para estar pronto para o uso.
Para iniciar o sistema de ativação, deve-se ligar o motor usando a ativação
manual (corda para ligar) seguindo os seguintes passos
1. Controlar o nível da gasolina e do óleo do motor
2. Ligar o cabo da vela
3. Pressionar três vezes o primer do motor (fig.20).
4. Inserir a chave de segurança (fig.19). Girá-la em sentido horário
na posição RUN (fig.21).
5. Liberar a barra de segurança rodando a alça do dispositivo TouchN-Mow (fig. 22).
6. Ligar o motor com a ativação manual, puxando a corda (fig 23).
Se o motor não liga na segunda tentativa , certificar-se de ter
executado corretamente os passos anteriores.
7. Deixar que o motor alcance a velocidade de funcionamento
8. Soltar a barra em modo apropriado
NOTA: na primeira ativação do cortador de grama, ou de qualquer
forma depois de um período de inatividade, lubrificar o ponto de junção
indicado (fig. 24) e deixar aceso o motor por cinco minutos antes de
usar a máquina
Quando a barra é solta a mola de retorno empurra Touch-N-Mow em
contato com o guidom.
A energia de parada (inércia) que provém do guidom permite a ativação
autônoma do próprio Touch-N-Mow.
O mecanismo de auto ativação do dente de parada mantém a mola na
posição de pressão.
10) SISTEMA DE INÍCIO TOUCH-N-MOW
Parada do motor
Soltar a barra de segurança em modo apropriado.
NOTA: No momento em que o motor pára , se escuta o rumor do
sistema de ativação que se recarrega . Este rumor causado pela alta
velocidade do dente de parada é normal.
O Touch-N-Mow é um sistema patenteado que funciona seja com o sistema de ativação quando se puxa a barra de segurança, que com o freio
do motor quando se solta a barra de segurança em modo apropriado.
Girando a chave de segurança em 1/4 de giro, em sentido antihorário(posição LOCK&REMOVE), o Touch-N-Mow bloqueia-se.
Remover SEMPRE a chave de segurança e colocá-la em um lugar seguro.
O motor não ligará sem a chave de segurança na posição
LOCK&REMOVE.
NOTA: Se o motor fica sem gasolina ou se o motor pára por causa da
grama muito alta ou por outras razões mecânicas, a ativação Touch-NMow não será recarregada de modo automático e será necessário repetir
os pontos descritos no parágrafo Carregar o sistema de ativação TouchN-Mow.
Ligar o motor utilizando o sistema Touch-N-Mow
1. Controlar o óleo do motor
2. Ligar o cabo da vela
3. Pressionar três vezes o primer
4. Inserir a chave de segurança. Girar em sentido horário na posição
RUN.
5. Remover a segurança da barra
6. Puxar a barra para ligar o motor
NOTE: Se o motor não liga significa que o Touch-N-Mow descarregouse. Em tal caso providenciar o carregamento.
Procedimento para a armazenagem invernal
Seguir as seguintes instruções para a preparação do seu cortador de
grama para a armazenagem de final de estação.
Quanto ao que se refere ao motor, seguir a instruções fornecidas pelo
fabricante do motor.
8) ARMAZENAGEM INVERNAL
Desligar o cabo da vela, girar o cortador de grama e limpar a parte
inferior do cárter. Eliminar todo o acúmulo de grama com uma chave de
fenda, então lavar com um jato de água. Limpar as superfícies do cortador
de grama e deixar secar. Controlar que a cesta para recolher a grama
esteja vazia; lavar a mesma, deixá-la porém secar. Armazenar o cortador
de grama em um lugar seco e protegido das intempéries.

HARRY
47
PORTUGAL
SUGESTÕES PARA PROCURAR OS DEFEITOS
Se o motor não consegue ligar:
1. Controlar o nível da gasolina
2. Certificar-se de que a vela esteja ligada de modo correto
3. Reiniciar o sistema de ativação seguindo os pontos descritos no
parágrafo Iniciar o sistema de ativação Touch-N-Mow.
4. Certificar-se de ter puxado a barra de ativação, depois de ter
desbloqueado a alavanca de segurança.
5. Certificar-se de que a chave de segurança esteja na posição RUN.
6. Certificar-se de que o fio de ativação funcione de modo correto
para ativar e reiniciar o Touch-N-Mow
7. Certificar-se de que o interruptor STOP esteja fixado de modo correto
no Touch-N-Mow .
ADVERTÊNCIAS E PRECAUÇÕES
Como para cada produto novo existem considerações importantes a serem
feitas sobre a segurança do Touch-N-Mow. Em particular é necessário
levar em conta que este sistema baseia o próprio funcionamento em uma
mola mantida sob pressão pelo guidom. Uma intervenção inconsciente
ou inábil nas proximidades da mola pode causar o sua improvisa soltura,
com conseqüências que podem ser extremamente perigosas para si e
para as pessoas próximas.
Então, se as instruções a seguir não são respeitadas existe
o risco de amputações traumáticas ou lesões!
- Desligar SEMPRE a vela, descarregar e bloquear o Touch-N-Mow,
removendo a chave de segurança ANTES de efetuar QUALQUER
assistência no motor ou no cortador de grama.
- Certificar-se de que o Touch-N-Mow esteja descarregado e
bloqueado ANTES de
transportá-lo ou manuseá-lo.
- NÃO colocar as mãos e os pés embaixo do cortador de grama
quando o sistema de ativação está carregando.
- NUNCA pressupor que os sistema esteja descarregado
mesmo que a chave esteja na posição LOCK&REMOVE
ou se foi removida do motor. .
- NÃO colocar as mãos no guidom enquanto o sistema está
descarregando.
- Não transportar ou levantar o motor do condutor próximo ao
guidom.
- Manusear SEMPRE o sistema de ativação Touch-N-Mow, se
desmontado do motor, do invólucro em ferro, da mola.
- NÃO levantar o starter colocando os seus dedos onde existam as
partes em movimento do próprio sistema.
- NÃO tentar fazer manutenção ou consertar o ativador
Touch-N-Mow.
- Bloquear e remover SEMPRE a chave de segurança e colocá-la em
um local seguro até o próximo uso. A chave de segurança foi
desenhada e projetada de propósito para ser removida do motor,
quando não está sendo utilizada. Removendo a chave previnem-se
ativações incontroladas ou inesperadas na presença de crianças ou
adultos não informados.
A chave de segurança deve estar na posição de bloqueio do sistema
(posição LOCK&REMOVE) antes que possa ser removida .
- Certificar-se SEMPRE que o fio de STOP esteja ligado e fixado de
modo correto ao interruptor de STOP. A falta de funcionamento do
interruptor de STOP (contato com massa) pode danificar o ativador
Touch-N-Mow.
Fechar e remover SEMPRE a chave se segurança e colocá-la em um
local seguro até o próximo uso. A chave de segurança foi desenhada
e projetada para ser removida do motor, quando não está em
função.
Remover a chave para prevenir ativações acidentais do cortador de grama
na presença de crianças ou adultos imprudentes.
A chave de segurança deve estar na posição LOCK&REMOVE antes que
possa ser removida.
DESCARREGAR E BLOQUEAR SEMPRE O TOUCH-N-MOW ANTES DE:
- remover a grama ou outros detritos do cortador de grama
- trocar o filtro de ar, de óleo ou a vela
- remover a lâmina para a manutenção
- efetuar qualquer outra manutenção no motor ou no cortador de grama
- transportar o cortador de grama
DESCARREGAR O SISTEMA DE ATIVAÇÃO
Antes de limpar o cortador de grama, efetuar a manutenção ou transportar
o cortador de grama DEVE-SE descarregar o sistema de ativação TouchN-Mow.
Para descarregar o sistema:
1. Desligar o cabo da vela.
2. Acionar o sistema de ativação e fazer um falso início
3. Girar a chave de segurança de 1/4 em sentido anti-horário na
posição LOCK&REMOVE.
4. Retirar a chave de segurança
NOTA: Se a chave de segurança não se leva à posição de bloqueio,
puxar ligeiramente a corda que auto enrola-se para soltar a tensão no
sistema de ativação.
GARANTIA
O mecanismo de ativação Touch-N-Mow é um único sistema e NÃO é
composto por partes que possam ser trocadas separadamente. Qualquer
sinal de violação invalidará a garantia do construtor.
SUGESTÕES PARA A ASSISTÊNCIA
O Touch-N-Mow é fixado ao motor com os parafusos Torx T 30.
O Touch-N-Mow faz girar o motor por 2 segundos a 1000 RPM. Uma
ativação com a corda a 600 RPM, e uma ativação elétrica a 450 RPM.
Se o motor não liga, carregar o Touch-N-Mow em modo manual (corda
de ativação)
Se o reservatório foi removido do motor, ASSEGURAR-SE de que a chave
de segurança do sistema Touch-N-Mow esteja na posição
LOCK&REMOVE antes de instalar novamente o reservatório..
Não usar a chave de segurança antes de instalar o reservatório, enquanto
podem verificar-se operações não seguras.
Em caso de alguma dúvida sobre as condições de carga do Touch-NMow, descarregar o sistema de ativação.
* Se o Touch-N-Mow não se desativa
1. Tentar carregar o ativador. Esperar o click do dente de parada e
tentar descarregá-lo puxando a barra de segurança.
2. Se a operação no ponto 1 NÃO descarregou o ativador, puxar a
barra de segurança, bater ligeiramente com um martelo de borracha
o externo do transportador com mola e no braço de engate do sistema, tentando fazê-lo engatar.
3. Se as operações nos pontos 1 e 2 não conseguem descarregar o
ativador, bloquear e tirar a chave de segurança do sistema e removêla do motor com atenção. Sinalizar o sistema removido como completamente carregado e enviá-lo à casa produtora Briggs & Stratton.
* Se o pinhão de ativação está bloqueado no guidom
1. Procurar carregar o ativador usando a corda que auto enrola-se.
Esperar o click do dente de parada e provar descarregá-lo mais
uma vez
* Se o ativador não se bloqueia com a chave de segurança
1. Se o ativador está descarregado, puxar ligeiramente a corda de
ativação, procurando fazer o guidom fazer uma rotação e tentar
levar a chave de segurança na posição de bloqueio , (LOCK
POSITION).
2. Se o ativador está carregado, descarregá-lo e procurar bloqueá-lo
com a chave de segurança. Se o ativador não se bloqueia, repetir a
operação no ponto 1.
* Se o sistema de ativação continua a recarregar-se depois
que motor liga
1. Controlar as conexões do interruptor de parada e a massa. Uma
sobrecarga da mola DANIFICARÁ o sistema Touch-N-Mow.
Problemas de ativação ou parada do motor podem ser ligados à barra
de ativação, ao dispositivo e regulagem do fio ou à alavancagem
E MUITO IMPORTANTE que este tipo de dispositivo de regulagem
permita ativar de modo correto seja o sistema de ativação Touch-NMow, que o bloqueio do motor.

HARRY
48
FINLAND
1) OSIEN KUVAUS (Fig. 01)
1 Ylempi ohjaustanko
2 Alempi ohjaustanko
3 Kaasun säädin
4 Jarrukahva
5Vetovoiman kahva
6 Varren kiinnityskahva
7 Käynnistyskahva
8 Deflektori
Lukekaa huolella tämä opas ennen laitteen
käynnistämistä
VAROITUS!
Pitäkää ympäröivät ihmiset turvallisen välimatkan
päässä.
Ennen jokaista huoltotoimenpidettä muistakaa
sammuttaa moottori ja irrottaa sytytystulpan liitin.
Käyttäkää suojalaseja
Älkää tupakoiko polttoaineen lisäyksen aikana.
SISÄLLYLUETTELO:
1) Osien kuvaus
2) Turvallisuusohjeet
3) Ruohonleikkurin asennus
4) Käynnistys
5) Leikkuukorkeuden säätö
6) Huolto
7) Tarkistukset ja säädöt
8) Varastointi talven ajaksi
9) Mulching
10) Touch-N-Mow Käynnistysjärjestelmä
9 Takapyörä
10 Etupyörä
11 Terän suojus
12 Moottori
13 Terä
14 Ruohon keruukori
15Voimansiirto
16 Leikkuukorkeuden säätövipu
17Etenemisnopeuden säätövipu
VAROITUS!
a- Suositellaan lukemaan huolellisesti tämä opas ja ymmärtämään täysin
sen sisältö ennen ruohonleikkurin käyttöä.
b- Ruohonleikkurin käyttö on kielletty alle 16-vuotiailta henkilöiltä.
c- Käyttäjä on vastuussa kolmansia osapuolia kohtaan
työskentelyalueella. Varmistakaa, että lapsia tai koiria ei ole
työskentelyalueella.
d- Ennen ruohonleikkuun aloittamista tarkistakaa koko työskentelyalue
ja poistakaa kivet, mahdolliset tölkit ja kaikki muut ulkopuoliset esineet,
jotka sijaitsevat kyseisellä alueella. Lisäksi tarkistakaa, missä sijaitsevat
mahdolliset kastelulaitteet tai muut mahdollisesti piilossa olevat esineet,
jotka voivat saada aikaan vaaratilanteita leikkuun aikana.
e- Käyttäkää tukevia kenkiä ruohonleikkuun aikana; älkää käyttäkö
sandaaleja ja älkää leikatko ruohoa paljain jaloin. Käyttäkää kenkiä,
joiden pitävyys on hyvä myös märällä maaperällä; käyttäkää lisäksi
työskentelyhansikkaita tukevamman otteen saamiseksi.
f- Varmistakaa ennen niiton aloittamista, että terä on kunnolla kiinni ja
että turvalaitteet on asennettu. Älkää käyttäkö ruohonleikkuria ilman,
että ruohon keruukori tai deflektori ovat paikoilleen asennettuina.
Mikäli havaitaan vikoja, tulee huolehtia vaihdosta tai korjauksesta.
g- Älkää lisätkö polttoainetta suljetussa tilassa, kun moottori on käynnissä
tai kun moottori on vielä kuuma. Älkää tupakoiko polttoaineen
lisäystoimien aikana.
h- Älkää käynnistäkö ruohonleikkuria suljetussa ympäristössä.
Toiminnassa olevan moottorin poistokaasut ovat myrkyllisiä, jos niitä
hengitetään. Ne voivat olla tukehduttavia ja siten kuolemaanjohtavia.
2) TURVALLISUUSOHJEET
i- Älkää säätäkö leikkauskorkeutta, kun moottori on toiminnassa.
j- VAROITUS! Kun moottori on käynnissä, älkää laittako käsiä tai jalkoja
ruohonleikkurin alle tai tyhjennysputkeen; terä on liikkeessä, kun
moottori on toiminnassa.
k- Leikatkaa ruohoa vain hyvissä valo-olosuhteissa.
l- Älkää juosko. Älkää antako kiireen vaikuttaa työskentelyynne vaan
kävelkää tekemäänne työhön sopivalla nopeudella.
m- Älkää käyttäkö ruohonleikkurianne, mikäli se ei ole hyvässä kunnossa.
Huolehtikaa sen kunnostuksesta ennen käyttöä.
n- Älkää salliko kenenkään käyttää ruohonleikkurianne ennen kuin olette
antaneet tarkat ohjeet ja luetuttanut tämän ohjekirjasen.
o- Älkää koskaan työntäkö ruohonleikkuria taaksepäin (käyttäjää
kohden).
p- Rinnepaikoissa edetkää rinteen mukaisesti, ei koskaan ylhäältä alas
tai alhaalta ylös. Olkaa erityisen varoivainen vaihtaessanne suuntaa.
Älkää leikatko ruohoa erittäin epätasaisella maaperällä.
q- Sammuttakaa moottori aina, kun ette leikkaa ruohoa tai kun joudutte
ylittämään jalkakäytävän, polun tai tien.
r- Mikäli törmäätte johonkin esteeseen, sammuttakaa moottori,
irrottakaa sytytystulpan johto ja tarkistakaa, onko ruohonleikkuri
vahingoittunut. Korjatkaa mahdollinen vika ennen kuin käytätte
ruohonleikkuria uudelleen; mikäli vika on vakava, kääntykää
lähimmän HARRY-jälleenmyyjän puoleen.

HARRY
49
FINLAND
Käyttäkää suojalaseja
Älkää tupakoiko polttoaineen
lisäyksen aikana
Pitäkää ympäröivät ihmiset
turvallisen välimatkan päässä.
4) KÄYNNISTYS
Ennen käynnistystä suoritettavat tarkistukset
Ennen jokaista käynnistystä tarkistakaa seuraavat kohdat ja mikäli
välttämätöntä suorittakaa tarvittava huolto.
● Tarkistakaa, että kori ja deflektori ovat kunnolla kiinnitetyt ja
käyttövalmiit.
● Tarkistakaa öljyn taso moottorissa, tarvittaessa lisätkää öljyä varoen
ylittämästä osoitettua tasoa (katsokaa itse moottorin ohjekirjasta).
● Tarkistakaa asetettu leikkuukorkeus ja säätäkää se halutulle tasolle
(katsokaa seuraavaa kappaletta Leikkuukorkeuden säätö).
Moottorin käynnistys (kuva 07 - kuva 08 - kuva 09)
Hienosäätötoimenpiteiden suorituksen jälkeen edetään moottorin
käynnistykseen seuraavasti:
a- Käsittele jarrukahvaa (4), jotta voidaan käynnistää moottori.
b- PRIMER järjestelmällä varustetut moottorit:
painakaa 3-4 kertaa kaasuttimen rikastuspumppua. Sijoita
kaasuttimen vipu (3) MAX asentoon.
CHOKE järjestelmällä varustetut moottorit:
sijoita kaasuttimen vipu (3) START asentoon.
c- Käynnistä moottori: ota kiinni käynnistyskahvasta (7) ja vedä köydestä
kevyesti kunnes tunnet paineen aiheuttaman vastustuksen, vapauta
itse kahva ja anna siten voimakas nykäisy.
Pitäkää kahvaa (4) painettuna toiminnan aikana, koska sen vapautuessa
moottori pysähtyy. Lisätietoja varten suositellaan katsomaan itse moottorin
ohjekirjasta.
Vedon kytkemiseksi,
, työntäkää kahvaa (5)
ohjaustankoa kohden; etenemisen pysäyttämiseksi riittää, että vapautatte
sen. Ruohonleikkuria voidaan työntää eteenpäin ja taaksepäin, kun veto
ei ole kytkettynä.
Malleille 471-C50-C54P54 on mahdollista säätää etenemisnopeutta
käsitellen vipua (kuva 10 - 17).
Kangaskorin asennus (kuva 05)
1) Työntäkää kehikko kangaspussiin, pitäkää varsi kankaan
ulkopuolella. Kankaskorin varren ja kahvan molempien tulee olla
korin ylemmällä puolella. Muoviliuska on alhaalla.
2) Kiinnittäkää kangaspussin 4 laitaa suorakulmion muotoiseen
kehikkoon liu´uttaen pussin muovinen tiiviste metallisen kehikon päälle.
Jättäkää vapaaksi pussin vasen ja oikea yläosa.
Ohjaustangon asennus - mod. 313 (kuva 06)
1) Työnnä ohjaustangon alempi aisa asiaankuuluviin paikkoihin, jotka
löytyvät laidoilta ja ruuvaa kiinni sivunappulat.
3) RUOHONLEIKKURIN ASENNUS
Työvälineet
HARRY ruohonleikkurin asentamiseksi tarvitaan:
- ruuvimeisseli
- kaksi pientä säädettävää avainta
Deflektorin asennus (kuva 02 - kuva 03 - kuva 04)
1) Laittakaa jousi deflektorin kahteen reikään, työntäkää kiinnitystanko
(1), sijoittakaa koottu deflektori terän suojukselle ja kiinnittäkää se
ruuveilla (2).
3) Sijoittakaa verkko korin kahteen koukkuun. Verkoon on merkitty
ruohonleikkurin puoli ja korin puoli.
4) Sijoittakaa metalliset levyt korin runkoon hitsattuihin koukkuihin ja
kiristäkää mutterit. Varmistakaa, että verkko ei putoa, kun se on
nostettuna täysin aukinaisena ruohon tyhjennystoimenpiteen aikana.
Liu´uttakaa muovitiiviste pussin oikeassa ja vasemmassa yläosassa
kehikon päälle.
5) Asentakaa suojalevy korin oikeaan alaosaan 4 ruuvilla ja mutterilla.
Kiristäkää ruuvimeisselillä ja avaimella.
6) Korin asentamiseksi ruohonleikkuriin menkää ruohonleikkurin oikealle
puolelle, nostakaa deflektoria oikealla kädellä ja vasemmalla kädellä
kytkekää kori kiinnitystankoon.
VAROITUS! Terä käynnistyy samalla hetkellä, kun moottori
laitetaan käyntiin.
Moottorin sammuttaminen
Moottori ja terä pysähtyvät vapauttamalla jarrukahva.
VAROITUS! Nopeuden säätötoimenpide tulee suorittaa
ainoastaan moottori käynnissä.
VAROITUS! Terä pyörii vielä noin 3 sekunnin ajan.
Älkää käyttäkö ruohonleikkuria ilman, että ruohon keruukori
tai deflektori ovat paikoilleen asennettuina.
Leikkukorkeuden säätämiseksi keskusohjattavassa koneessa tulee tarttua
vipuun, nostaa liukuvaa karaa ja viedä se yhteen 7 mahdollisesta
asennosta.
Katso oheista kuvaa käytettävissä olevia leikkuukorkeuksia varten.
Pysäyttäkää aina moottori ja odottakaa, että terä on täysin
pysähtynyt.
5) LEIKKUUKORKEUDEN SÄÄTÖ
Leikkaamistoimenpiteet
Sopeuttakaa nopeuttanne ruohon laadusta riippuen. Säätäkää moottorin nopeus
maksimiin, kun ruoho on tiheää ja korkeaa, tai minimiin, kun ruoho on matalaa.
Leikkuukorkeuden säätö (kuva 11)

HARRY
50
FINLAND
Ohjeita ruohon leikkausta varten
Parhaat tulokset saadaan, kun leikataan korkeintaan yksi kolmannes
ruohon korkeudesta.
Kun ruoho on korkeaa, käyttäkää korkeampaa leikkauskorkeutta
ensimmäiselle leikkaukselle.
Jos haluatte matalamman ruohikon, uusikaa leikkaus matalammalla
leikkauksella. Jos leikkaatte liian matalalla leikkauksella, ruoho joutuu
kuluttamaan enemmän energiaa uusien lehtien kasvattamiseen
vahvistumisen sijasta ja siten ruoho palaa herkemmin kuivuuden
tapauksessa. Jos jätätte ruohon liian korkeaksi, alemmat osat heikentyvät
ja kellastuvat. Maahan jätetty ruoho muodostaa kerroksen, joka estää
ruohon kasvamisen; siten suositellaan ruohon keräämistä aina.
Kaikki HARRY ruohonleikkurit on suunniteltu välittömällä toimintojen
vaihdolla: leikkaus ja keräys samanaikaisesti tai leikkaus ainoastaan
(suositeltava, kun ruoho on erittäin korkeaa).
Korin tyhjennys (kuva 12)
Korin patentoitu tyhjennysjärjestelmä sallii tyhjennyksen suorittamisen
kahdella eri tavalla:
A Nostakaa deflektoria ja irrottakaa kori koneesta käyttäen korin
keskellä olevaa kahvaa. Nostakaa sitten sen taaempaa osaa, jotta
ruoho tulee ulos.
B Ottakaa korin taaempi osa ja kiertäkää se ylöspäin: ruoho putoaa
maahan (patentoitu järjestelmä).
Korin käyttöiän pidentämiseksi tulee se tyhjentää joka kerta, kun lopetetaan
ruohon leikkaus ja ennen talvivarastointia. Tarkistakaa usein korin kunto;
jos havaitsette vikoja, huolehtikaa osien korvaamisesta alkuperäisillä
varaosilla.
VAROITUS!
Ennen jokaista huoltotoimenpidettä muistakaa
sammuttaa moottori ja irrottaa sytytystulpan liitin.
1. Tarkistakaa säännöllisin väliajoin ja usein terät ja ruuvit, jotka
kiinnittävät moottorin.
2. Tarkistakaa, että kaikki ruuvit ja mutterit ovat hyvin kiinnitetyt, jotta
ruohonleikkuri on aina parhaassa mahdollisessa käyttökunnossa.
3. Tarkistakaa usein ruohon keruukorin kunto. Vaihtakaa kori uuteen,
mikäli siinä havaitaan vikoja. Käyttäkää ainoastaan alkuperäisiä
varaosia.
6) HUOLTO
4. Älkää varastoiko ruohonleikkuria suljettuun tilaan polttoainesäiliö
täysinäisenä. Antakaa moottorin jäähtyä käytön jälkeen avoimessa
tilassa.
5. Tulipalovaaran vähentämiseksi pyrkikää pitämään moottori puhtaana
ruohosta, lehdistä ja mahdollisesta öljyn rasvasta.
6. Muistakaa, että bensiini on tulenarkaa. Säilyttäkää polttoaine
metallikanisterissa kaukana lämmönlähteistä tai avotulesta.
7. Tarkistuttakaa ruohonleikkurinne HARRY jälleenmyyjällä jokaisen
käyttökauden päätteeksi. Tämä mahdollistaa sen, että
ruohonleikkurinne on parhaassa mahdollisessa käyttökunnossa uuden
käyttökauden alkaessa.
8. Varmistakaa, että korjauksissa käytetään alkuperäisiä HARRY
varaosia, tämä mahdollistaa ruohonleikkurinne laatutason
säilyttämisen samana kuin se oli ostaessanne.
VAROITUS!
Ennen jokaista huoltotoimenpidettä muistakaa
sammuttaa moottori ja irrottaa sytystulpan liitin.
7) TARKISTUKSET JA SÄÄDÖT
VAROITUS!: terän liiallinen kuluminen voi aikaansaada
syvien halkeamien muodostumista ja siten terästä voi irrota
palasia, jotka voivat aiheuttaa vaaratilanteita käyttäjälle
itselleen tai työskentelualueella oleville henkilöille.
Tarkistus Terän irrotus ja teroitus (kuva 13 - kuva 14)
- Pysäyttäkää moottori. Irrottakaa sytytystulpan kaapeli välttääksenne
moottorin yllättävät ja ei-halutut käynnistykset.
- Kallistakaa ruohonleikkuria vasemmalle kyljelle tai sytytystulpan
vastakkaiselle puolelle välttääksenne kastumisongelmat.
- Tarkistus: tutkikaa tarkasti terän kuluminen ja terävyys, erityisesti
taitekohdista.
- Koska hiekka tai muut materiaalit voivat aiheuttaa terän kulumista,
suositellaan tarkistamaan terä usein. Jos huomataan vikoja, tulee
huolehtia terän vaihtamisesta.
- Irrotus: tarttukaa voimakkaasti terän laitaan, viiltohaavojen
välttämiseksi suositellaan käyttämään hansikasta; ruuvatkaa pultti
irti, poistakaa aluslaatta ja sitten terä.
- Teroitus: teroittakaa terä, jos leikkauspinnat ovat tylsyneet, mutta
terä on hyvässä kunnossa. Käyttäkää teroittamiseen tahkoa;
tarkistakaa, että tämän toimenpiteen jälkeen terä on edelleen
tasapainoinen. Jos se ei ole tasapainossa, voidaan tuntea liiallista
tärinää. Olkaa erityisen varovainen, jotta ette satuta itseänne!
- Asentakaa terä keskittäen se tuelle ja kiristäkää pultti.
VOITELU
Moottori: vaihtakaa öljy kahden ensimmäisen käyttötunnin jälkeen. Sen
jälkeen joka 25 tunnin jälkeen kuten osoitettu moottorin huolto-oppaassa.
Ennen jokaista käyttökertaa tarkistakaa öljyn taso.
Liikkuvien osien voitelemiseksi: silloin tällöin tulee laittaa muutama tippa
voiteluainetta liikkuviin osiin (kuten laakerit, pyörien korkeuden säätövivut
jne.).
VETOVOIMAN KAHVAN KAAPELIN SÄÄTÖ (kuva 15)
Vetovoiman kahvan kytkentäkaapelia tulee säätää vain, mikäli moottorin
ollessa toiminnassa pyörät eivät välittömästi reagoi vetovoiman kahvan
vapauttamiseen vaan antavat tunteen, että kytkin luistaa.
Säätö suoritetaan lukiten 2 mutteria (sij. 1), kiertäen ylempää mutteria
kaksi kierrosta vastapäivään ja lukiten se vastamutterilla; jos toimenpide
ei tuota haluttua tulosta, se voidaan uusia.
VAROITUS!
Kaapelin liiallinen rasitus voi rikkoa voimansiirtomekanismin.
Säätämisen jälkeen tulee aina tarkistaa, että moottori sammutettuna konetta
taaksepäin vedettäessä käsittelemättä vetovoiman kahvaa taaemmat pyörät
liikkuvat vapaasti.

HARRY
51
FINLAND
1) Voidaksenne leikata ruohoa Mulching toiminnolla tulee tarkistaa,
että ruohon korkeus ei ole yli 10 cm. Päinvastaisessa tapauksessa on
välttämätöntä poistaa Mulching sulku ja asentaa ruohon keruukori.
2) Kun käytetään Mulching toimintoa, tulee ehdottomasti varmistaa, että
ruoho on kuivaa ja terä on hyvin teroitettu välttääksenne, että leikattu
ruoho kasaantuu ruohonleikkurin rungon alle.
3) Toiminta:
a - Sijoittakaa Mulching sulku ruohon tyhjennysastian tilaan.
9) MULCHING
Varmistakaa, että moottori on sammutettu ja sytytystulpan
liitin irrotettu.
b - Viekää leikkauskorkeuden säätövipu yhteen 3 asennosta, jotka
vastaavat Mulching laattaa (katsokaa kuvaa 17).
Malleille H48-H49-P49 sijoittakaa leikkuukorkeus vähintään 50
mm:iin.
c - Käynnistäkää moottori ja leikatkaa ruoho kuten tavallisesti.
4) Mulching toiminnolla suoritetun ruohonleikkuun jälkeen on hyvä
suorittaa erittäin tarkka puhdistus ruohojäämien poistamiseksi.
Tätä toimenpidettä varten poistakaa Mulching sulku kuten osoitettu
kuvissa 16 .
Irrottakaa nuppi ja työntäkää sulkua sisään kuten osoitettu kuvassa
18 .
TUOTTEEN KUVAUS
Touch-N-Mow käynnistysjärjestelmä, jonka ovat patentoineet Briggs &
Stratton, on uusi mekaaninen ruohonleikkurien käynnistysjärjestelmä, joka
toimii yksinkertaisesti turvatangosta vetämällä vaatimatta akkua,
sähköjohtoja, kytkimiä tai vetoköysiä.
TOIMINTA
Touch-n-mow käynnistysjärjestelmän lataaminen
Turvallisuussyistä valmistaja toimittaa järjestelmän pois päältä olevana.
Myös myöhemmin joka kerta kun käynnistysjärjestelmä otetaan pois päältä
tarkoituksellisesti turvallisuussyistä, Touch-N-Mow tulee ladata, jotta se
on uudelleen käyttövalmis.
Käynnistysjärjestelmän lataamiseksi tulee käynnistää moottori käyttäen
manuaalikäynnistystä (käynnistinköysi) noudattaen seuraavia
toimintavaiheita:
1. Tarkistakaa polttoaineen ja moottoriöljyn tasot.
2. Liittäkää sytytystulpan kaapeli.
3. Painakaa moottorin ryyppyä (primer) kolme kertaa (kuva 20).
4. Työntäkää turva-avain paikoilleen (kuva 19). Kiertäkää sitä
myötäpäivään RUN asentoon (kuva 21).
5. Vapauttakaa turvatanko kiertäen Touch-N-Mow laitteen kahvaa
(kuva 22).
6. Käynnistäkää moottori vetäen köydestä (kuva 23). Jos moottori ei
käynnisty toisella yrittämällä, tarkistakaa, että olette suorittaneet oikein
edeltävät toimenpiteet.
7. Antakaa moottorin saavuttaa käyttönopeus.
8. Vapauttakaa tanko asianmukaisesti.
HUOMAA: ruohonleikkurin ensimmäisellä käynnistyskerralla tai
pitemmän säilytysajan jälkeen tulee voidella osoitettua liitoskohtaa (kuva
24) ja jättää moottori päälle viideksi minuutiksi ennon ruohonlekkuun
aloittamista.
Kun tanko vapautetaan, palautusjousi työntää Touch-N-Mow laitetta,
kunnes se koskettaa vauhtipyörää.
Vauhtipyörän aikaansaama pysäytysenergia (inertia) mahdollistaa TouchN-Mow käynnistysjärjestelmän automaattisen latautumisen.
Pysäytyshampaan automaattinen latausjärjestelmä pitää jousen
latausasennossa.
10) TOUCH-N-MOW KÄYNNISTYSJÄRJESTELMÄ
Moottorin pysäytys
Vapauttakaa turvatanko asianmukaisesti.
HUOMAA: Sillä hetkellä kun moottori pysähtyy, kuulette latautuvan
käynnistysjärjestelmän aikaansaaman äänen. Tämä ääni, joka aiheutuu
pysäytyshampaan kovasta nopeudesta, on normaali.
Touch-N-Mow on patentoitu järjestelmä, joka toimii sekä
käynnistysjärjestelmänä, kun vedetään turvatangosta, että moottorin
jarruna, kun turvatanko vapautetaan asianmukaisesti.
Kiertäen turva-avainta ¼ kierrosta vastapäivään (asentoon
LOCK&REMOVE), Touch-N-Mow laite lukkiutuu. Poista AINA turva-avain
ja laita se turvalliseen paikkaan. Moottori ei käynnisty ilman turva-avainta
tai avain LOCK&REMOVE-asennossa.
HUOMAA: Jos moottori jää ilman polttoainetta tai moottori pysähtyy
liian korkean ruohon tai muun mekaanisen syyn vuoksi, Touch-N-Mow
käynnistysjärjestelmä ei lataudu automaattisesti ja siten on välttämätöntä
toistaa kappaleessa Touch-N-Mow käynnistysjärjestelmän lataaminen
luetellut toimenpiteet.
Moottorin käynnistys Touch-N-Mow järjestelmää käyttämällä
1. Tarkistakaa moottorin öljy.
2. Liittäkää sytytystulpan kaapeli.
3. Painakaa ryyppyä (primer) kolme kertaa.
4. Työntäkää turva-avain paikoilleen. Kiertäkää sitä myötäpäivään
asentoon RUN.
5. Poistakaa tangon turvavipu.
6. Vetäkää tankoa mooottorin käynnistämiseksi.
HUOMAA: Jos moottori ei käynnisty, tarkoittaa se sitä, että Touch-NMow laite ei ole ladattuna. Siinä tapauksessa suorittakaa sen lataus.
Toimenpiteet talvivarastointia varten
Noudattakaa seuraavia ohjeita valmistellaksenne ruohonleikkurinne
varastointia varten käyttökauden lopuksi.
Mitä tulee moottoriin, noudattakaa moottorin valmistajan toimittamia
ohjeita.
8) VARASTOINTI TALVEN AJAKSI
Irrottakaa sytytystulpan kaapeli, kääntäkää ruohonleikkuri ja puhdistakaa
terän suojuksen alaosa. Poistakaa kaikki ruohon keräymät ruuvimeisselillä
ja lopuksi peskää vesisuihkulla. Puhdistakaa ruohonleikkurin pinnat ja
antakaa sen kuivua. Tarkistakaa, että ruohon keruukori on tyhjä; peskää
se ja antakaa sen kuivua hyvin. Varastoikaa ruohonleikkuri kuivaan ja
suojaisaan paikkaan.

HARRY
52
FINLAND
EHDOTUKSIA VIKOJEN ETSIMISEKSI
Jos moottori ei käynnisty:
1. Tarkistakaa polttoaineen määrä.
2. Varmistakaa, että sytytystulppa on liitetty oikein.
3. Ladatkaa käynnistysjärjestelmä uudelleen noudattaen kappaleen
Touch-n-mow käynnistysjärjestelmän lataaminen toimintaohjeita.
4. Tarkistakaa, että käynnistystankoa on vedetty sen jälkeen, kun
turvavipu on vapautettu.
5. Varmistakaa, että turva-avain on RUN asennossa.
6. Tarkistakaa, että käynnistyskaapeli toimii oikein Touch-N-Mow laitteen
aktivoimiseksi ja lataamiseksi.
7. Varmistakaa, että STOP kytkin on oikein kiinnitetty Touch-N-Mow
laitteeseen.
VAROITUKSIA JA VAROTOIMENPITEITÄ
Kuten kaikien uusien tuotteiden, myös Touch-N-Mow:n, turvallisuudesta
tulee huomioida muutamia tärkeitä seikkoja. Erityisesti tulee huomioida,
että tämä järjestelmä perustaa toimintansa jouseen, joka pidetään
ladattuna vauhtipyörän avulla.
Mikä tahansa asiantuntematon tai kokematon toimenpide jousen
läheisyydessä voi aikaansaada sen yllättävän vapautumisen aiheuttaen
seurauksia, jotka voivat olla äärimmäisen vaarallisia käyttäjälle itselleen
tai lähellä oleville henkilöille.
TURVALLISUUSVAROITUS: Mikäli seuraavia ohjeita ei
noudateta, on olemassa vakava amputoitumis- tai
loukkaantumisvaara!
- Irroita AINA sytytystulppa, vapauta ja lukitse Touch-N-Mow laite
poistaen turva-avain ENNEN MINKÄ TAHANSA huoltotoimenpiteen
suorittamista moottoriin tai ruohonleikkuriin.
- Varmista, että Touch-N-Mow on vapautettu ja lukittu ENNEN
kuljetusta tai käsittelyä.
- ÄLÄ laita käsiä tai jalkoja ruohonleikkurin alle, kun
käynnistysjärjestelmä on ladattuna.
- ÄLÄ KOSKAAN oleta, että järjestelmä ei ole ladattuna,
vaikka avain on LOCK&REMOVE-asennossa tai se on
poistettu moottorista.
- ÄLÄ kosketa vauhtipyörää, kun järjestelmä latautuu tai vapauttaa
lataustaan.
- ÄLÄ kuljeta tai nosta moottoria kuljettimelta vauhtipyörän
läheisyydessä.
- Ota AINA kiinni jousen metallisesta kuoresta, kun käsittelet TouchN-Mow käynnistysjärjestelmää, joka on irrotettu moottorista.
- ÄLÄ nosta käynnistintä laittaen sormiasi paikkoihin, joissa on
järjestelmän liikkuvia osia.
- ÄLÄ suorita mitään huolto- tai korjaustoimenpiteitä
Touch-N-Mow käynnistimeen.
- Lukitse ja poista AINA turva-avain ja laita se turvalliseen paikkaan
odottamaan seuraavaa käyttökertaa. Turva-avain on suunniteltu ja
valmistettu sen vuoksi, että se poistetaan moottorista silloin, kun
ruohonleikkuria ei käytetä. Poistamalla avain vältetään valvomattomat
ja odottamattomat käynnistykset lasten tai asiantuntemattomien
aikuisten läsnäollessa. Turva-avaimen tulee olla järjestelmän
lukitusasennossa (LOCK&REMOVE) ennen kuin se voidaan poistaa.
- Tarkista AINA, että pysäytyskaapeli (STOP) on liitetty ja kiinnitetty
oikein STOP kytkimeen. Tämän kytkimen (maadoitusliitäntä)
puutteellinen toiminta voi vahingoittaa Touch-N-Mow käynnistintä.
Sulje ja poista turva-avain AINA ja vie se turvalliseen paikkaan
seuraavaa käyttöä varten.
Turva-avain on suunniteltu ja valmistettu, jotta se poistetaan
moottorista, kun laitetta ei käytetä.
Poista avain välttääksesi ruohonleikkurin vahingonomaiset käynnistykset
lasten tai varomattomien aikuisten läsnäollessa.
Turva-avaimen tulee aina olla LOCK&REMOVE asennossa ennen kuin se
voidaan poistaa.
POISTA LATAUS JA LUKITSE TOUCH-N-MOW AINA ENNEN:
- ruohon tai muiden jäänteiden poistamista ruohonleikkurista
- ilman- tai öljynsuodattimen tai sytytystulpan vaihtamista
- terän poistamista huoltotoimenpiteitä varten
- minkä tahansa muun huoltotoimenpiteen suorittamista moottoriin
tai ruohonleikkuriin
- ruohonleikkurin kuljettamista.
KÄYNNISTYSJÄRJESTELMÄN LATAUKSEN PURKAMINEN
Ennen ruohonleikkurin puhdistamista, huollon suorittamista tai kuljetusta
TULEE EHDOTTOMASTI purkaa Touch-N-Mow käynnistysjärjestelmän
lataus.
Järjestelmän latauksen purkamiseksi:
1. Irrottakaa sytytystulpan kaapeli.
2. Käsitelkää käynnistysjärjestelmää suorittaen valekäynnistys.
3. Kiertäkää turva-avainta ¼ kierrosta vastapäivään LOCK&REMOVEasentoon.
4. Poistakaa turva-avain.
HUOMAA: Jos turva-avainta ei onnistuta laittamaan lukitusasentoon,
vetäkää kevyesti automaattisesti kelautuvasta köydestä, jotta vapautetaan
jännitettä käynnistysjärjestelmässä.
TAKUU
Touch-N-Mow käynnistysjärjestelmä on kokonaisuus, joka EI koostu
yksittäin vaihdettavista osista. Mikä tahansa käsittelyn jälki mitätöi
valmistajan takuun.
EHDOTUKSIA APUTOIMENPITEIKSI
Touch-N-Mow-laite on kiinnitetty moottoriin Torx T 30 ruuveilla.
Touch-N-Mow käynnistysjärjestelmä pyörittää moottoria 2 sekunnin ajan
1000 kierrosta/min. verrattuna käynnistykseen köydellä 600 kierrosta/
min. ja sähköiseen käynnistykseen 450 kierrosta/min.
Jos moottori ei käynnisty, ladatkaa Touch-N-Mow laite manuaalisesti
(käynnistinköydellä).
Jos tankki on poistettu moottorista, VARMISTAKAA, että Touch-N-Mow
järjestelmän turva-avain on asennossa LOCK&REMOVE ennen tankin
uudelleen asentamista.
Älä käytä turva-avainta ennen kuin tankki on asennettu välttääksesi
vaaralliset toimenpiteet.
Jos teillä on epäilyksiä Touch-N-Mow laitteen tilasta, purkakaa
käynnistyslaitteen lataus.
* Jos Touch-N-Mow käynnistysjärtestelmä ei mene pois
päältä
1. Yrittäkää ladata käynnistyslaite. Odottakaa, kunnes kuulette
pysäytyshampaan äänen (klik) ja yrittäkää poistaa lataus uudelleen
vetäen turvatangosta.
2. Jos kohdan 1 toimenpide ei ole poistanut latausta, vetäkää
turvatangosta ja lyökää kevyesti kumivasaralla jousen kuljettimen
ulkolaitaa ja järjestelmän kytkentävartta yrittäen saada se
kytkeytymään.
3. Jos kohtien 1 ja 2 toimenpiteet eivät ole poistaneet latausta, lukitkaa
järjestelmä ja poistakaa turva-avain ja edelleen irrottakaa varovasti
käynnistysjärjestelmä moottorista. Merkitkää poistettu järjestelmä
täysin ladattu (fully loaded) ja lähettäkää se valmistajalle (Briggs
& Stratton).
* Jos käynnistyksen hammaspyörä on lukkiutunut
vauhtipyörään
1. Yrittäkää ladata käynnistin käyttäen automaattisesti kelautuvaa köyttä.
Odottakaa pysäytyshampaan ääntä (klik) ja yrittäkää uudelleen
poistaa lataus.
* Jos käynnistin ei lukkiudu turva-avaimella
1. Jos käynnistin ei ole ladattu, vetäkää kevyesti käynnistinköydestä
yrittäen saada vauhtipyörä pyörimään ja yrittäen kiertää turva-avain
lukitus-asentoon (LOCK POSITION).
2. Jos käynnistin on ladattu, purkakaa lataus ja yrittäkää lukita se turvaavaimella. Jos käynnistin ei lukkiudu, toistakaa 1. kohdan
toimenpiteet.
* Jos käynnistysjärjestelmä latautuu jatkuvasti moottorin
käynnistymisen jälkeen
1. Tarkistakaa pysäytys- ja maadoituskytkimen liitännät. Jousen
ylijännittyminen VAHINGOITTAA Touch-N-Mow järjestelmää.
Moottorin käynnistys- tai pysäytysongelmat voivat liittyä käynnistystankoon,
kaapelin säätölaitteeseen tai vipulaitteisiin.
ON ERITTÄIN TÄRKEÄÄ, että tämän säätölaitteen avulla voidaan
käyttää ilman ongelmia sekä Touch-N-Mow käynnistysjärjestelmää että
moottorin lukitusta.
HARRY
53
GREECE
1) PERIGRAFH TWN EXARTHMATWN (eik. 01)
1. vAnw ceirolabhv
2. Kavtw ceirolabhv
3. Ceiristhvrio gkaziouv
4. Ceirolabhv parousivaς ceiristhv
5.Ceirolabhv autokivnhshς
6. Sfikthvraς ceirolabhvς
7. Cerouvli skoiniouv
8. Klapev cortosullevkth
PERIECOMENAò
1. Perigrafhv twn exarthmavtwn
2. Genikoiv kanovneς asfaleivaς
3. Sunarmolovghsh
4. Ekkivnhsh
5. Leitourgiva
6. Sunthvrhsh
7. Elegcoς kai sunthvrhsh
8. Apoqhvkeush
9. Mulching
10. Sistema davviamento Touch-N-Mow
9. Pivsw rovda
10. Emproς rovda
11. Plaivsio
12. Kinhthvraς
13. Macaivri
14. Cortosullevkthς
15.Kibwvtio granaziwvn
16 Ruqmisthς uvyouς kophvς
17.Diabavqmish autokivnhshς )
2) GENIKOI KANONES ASFALEIAS
Prin xekinhvsete thn mhcanhv, diabavste to egceirivdio twn
odhgiwvn crhvshς.
PROSOCH!
Apomakruvnete ta avtoma pou den gnwrivzoun touς kanovne
ς
asfaleivaς.
Mhn kapnivzete potev ovtan anefodiavzete ton kinhthvra me
kauvsimo.
Foravte gualiav asfaleivaς.
Prin apov opoiadhvpote ergasiva stamathvste ton kinhthvra kai
aposundevste to kalwvdio tou mpouziv.
PROSOCH!
A) Prin apov opoiadhvpote ergasiva diabavste prosektikav to egceirivdio
twn odhgiwvn crhvshς thς mhcanhς.
B) Den epitrevpetai o ceirismovς thς mhcanhvς apov avtoma kavtw twn 16
etwvn.
G) O ceiristhvς eivnai upeuvqunoς gia thn asfavleia twn atovmwn pou
brivskontai ston cwvro ergasivùaς.
D) Elevgxte prosektikav ton cwvro pou qa ergasteivte kai apomakruvnete
xuvla, pevtreς, kalwvdia, suvrmata, tenekedavkia kai avlla xevna
antikeivmena. Epivshς shmeiwvste ta shmeiva ovpou uparcoun truvpeς,
rivzeς devntrwn hv avlla empovdia.
E) Otan kovbete to grasivdi na foravte pavnta papouvtsia. Mhn
crhsimopoieivte thn mhcanhv me gumnav povdia hv forwvntaς sagionavreς hv
pevdila. Na foravte pavnta papouvtsia pou den glustrouvn sto bregmevno
hv epiklinevς evdafoς. Epivshς mhn foravte rouvca ta opoiva mporouvn na
piastouvn sta kinhtav mevrh thς mhcanhvς.
Z) Elevgxte tiς bivdeς tou kofthvra kai mhn crhsimopoieivte potev thn
clookoptikhv mhcanhv an to prostateutikov klapev hv o cortosullevkthς
den brivskontai swstav topoqethmevna epavnw sth mhcanhv.
H) Potev mhn anefodiavzete me kauvsimo ton kinhthvra se kleistouvς
cwvrouς hv ovtan o kinhthvraς douleuvei hv eivnai akovma zestovς. Mhn
kapnivzete potev ovtan anefodiavzete ton kinhthvra me kauvsimo.
Q) Mhn leitourgeivte ton kinhthvra se kleistov cwvro. Ta aevria thς
exavtmishς eivnai epikuvnduna gia thn ugeiva tou anqrwvpou.
I) Mhn prospaqhvte potev na ruqmivsete to uvyoς kophvς enwv o kinhthvraς
eivnai se leitourgiva. Na to ruqmivzete pavnta enwv brivsketai se epivpedo
staqerov evdafoς.
K) Mhn bavzete potev cevria hv povdia kavtw apov thn mhcanhv hv sthn truvpa
exagwghvς tou sasiv.
L) Na ergavzeste movno thn hmevra hv toulavciston ovtan upavrcei arketovς
fwtismovς.
M) Mhn biavzeste kai mhn trevcete me thn mhcanhv. Na ekteleivte pavnta
thn ergasiva saς me ton asfalevstero trovpo. Bebaiwqeivte gia to pou
patavte. Kratavte gerav thn ceirolabhv thς mhcanhvς.
N) Mhn crhsimopoieivte mhcanhv pou creiavzete epidiovrqwsh.
X) Mhn epitrevpete se kanevnan na crhsimopoieiv thn mhcanhv eavn den
evcei prwvta diabavsei to egceirivdio me tiς odhgiveς crhvshς kai den
gnwrivzei touς kanovneς asfaleivaς.
O) Otan ergavzeste se plagievς na kovbete pavnta to grasivdi me to plavi
kai potev mproς pivsw.
P) Otan crhsimopoieivtai thn mhcanhv mhn thn trabavte proς to mevroς
saς. Pavnta prevpei na thn akolouqeivtai.
R) Na sbhvnete ton kinhthvra ovtan thn metafevrete kai idiaivtera ovtan
pernavte apov drovmo me cwvma hv calivkia.
S) Ean h mhcanhv ctuphvsei se kavpoio xevno antikeivmeno stamathvste
amevswς ton kinhthvra, bgavlte thn pivpa tou mpouziouv, epiqewrhvste
thn mhcanhv leptomerwvς kai koitavxte na episkeuavsete thn zhmiav prin
na qevsete pavli thn mhcanhv se leitourgiva.
HARRY
54
GREECE
Foravte gualiav asfaleivaς
Potev mhn kapnivzete ovtan
anefodiavzete ton kinhthvra me
kauvsimo.
Apomakruvnete ta avtoma pou den
gnwrivzoun touς kanovneς asfaleivaς.
4) Ekkivnhsh
3) SUNARMOLOGHSH
Ergaleivaò
Gia na sunarmologhvsete thn clookoptikhv mhcanhv qa creiasteivteò
- evna staurokatsavbido
- duo mikrav gallikav kleidiav
Sunarmolovghsh tou klapev (eik. 02 - eik. 03 - eik. 04)
1) Topoqethvste to elathvrio stiς duo truvpeς pou upavrcoun sto klapev,
peravste th bevrga (1) mevsa sto elathvrio, topoqethvste ta sto plaivsio
thς mhcanhvς kai asfalivste ta me tiς duo bivdeς (2).
Sunarmolovghsh tou cortosullevkthò (eik. 05)
1) Topoqethvste to siderevnio skeletov mevsa sto uvfasma afhvnontaς
thn metallikhv ceirolabhv apevxw. To plastikov mevroς tou ufavsmatoς
(pavtoς) prevpei na brivsketai sto kavtw mevroς.
2) Asfalivste ta plastikav avkra tou ufavsmatoς epavnw ston skeletov.
3) Peravste thn grivlia, ovpwς faivnetai sthn fwtografiva, epavnw apov
touς duvo gavntzouς tou cortosullevkth.
4) Topoqethvste touς gavntzouς epavnw sthn grivlia, ovpwς faivnetai sthn
fwtografiva, kai asfalivste touς.
5) Topoqethvste thn lamarivna sthn exwterikhv pleurav thς grivliaς
crhsimopoiwvntaς tiς 4 bivdeς me ta paximavdia touς.
6) Gia na topoqethvsete ton cortosullevkth sthn mhcanhv staqeivte
sthn dexiav pleurav thς mhcanhvς, me to dexiv cevri shkwvste to klapev
kai me to aristerov cevri topoqethvste ton cortosullevkth sthn mhcanhv
evtsi wvste ta duvo gantzavkia tou kalaqiouv na mpoun sto anoictov mevroς
thς bevrgaς.
Sunarmolovghsh ceirolabhv
ςς
ςς
ς ( montevlo 313 ) (eik. 06)
1) Peravste thn bevrga tou klapev piavnontaς tautovcrona ta plastikav
avkra thς ceirolabhvς kai to kavtw mevroς th ς ceirolabhvς kai asfalivste
thn me thn plastikhv petalouvda ovpwς faivnetai sthn fwtografiva.
Elegco
ςς
ςς
ς
prin apov thn ekkivnhsh
Prin apov kavqe ekkivnhsh elevgxte ta parakavtw stoiceiva kai an
creiavzete na ta epidiovrqwste.
- Elevgxte to klapev kai ton cortosullevkth kai bebaiwqeivte ovti
brivskontai se kalhv katavstash kai swstav topoqethmevna epavnw
sthn mhcanhv.
- Elevgxte th stavqmh tou ladiouv tou kinhthvra kai an creivazetai
sumplhrwvste mevcri to anwvtero shmeivo pou upavrcei ston deivkth
tou ladiouv. Mhn xepernavte to shmeivo autov.
- Elevgxte to uvyoς kophvς kai ruqmivste anavloga ( diabavste thn
paravgrafo pou anafevretai sthn ruvqmish tou uvyouς kophvς).
Ekkivnhsh kinhthvra (eik. 07 - eik. 08 - eik. 09)
Afouv kavnete ovlouς touς elevgcouς, gia na qevsete se leitourgiva ton
kinhthvra akolouqhvste ta parakavtw bhvmataò
A) Pathvste thn ceirolabhv parousivaς tou ceiristhv (4).
B) Kinhthvraς me suvsthma PRIMERò Pievste thn fouvska
trofodosivaς pou brivsketai sto karmpuratevr 3-4 forevς.
Eavn h mhcanhv saς diaqevtei ceiristhvrio gkaziouv (3)
topoqethvste to sthn qevsh MAX.
Kinhthvreς me suvsthma CHOKEò Eavn h mhcanhv saς diaqevtei
ceiristhvrio gkaziouv ovtan o kinhthvraς eivnai kruvoς
topoqethvste to ceiristhvrio gkaziouv (3) sthn qevsh START.
G) Ekkivnhsh kinhthvraò Trabhvxte elafrav thn ceirolabhv tou
skoiniouv (7) mevcri na niwvsete antivstash kai evpeita
trabhvxte apovtoma.
PROSOCHò To macaivri arcivzei na gurnavei amevsw
ς
me
thn ekkivnhsh tou kinhthvra.
Gia na leitourgeiv o kinhthvraς, h ceirolabhv parousivaς tou ceiristhv
(4) prevpei na eivnai pathmevnh. Movliς afhvsete thn ceirolabhv o
kinhthvraς stamatavei. Gia perissovtereς plhroforiveς diabavste
prosektikav to egceirivdio odhgiwvn crhvshς gia ton kinhthvra.
Montevla
Movliς pathvsete ton moclov thς autokivnhshς
(5) h clookoptikhv mhcanhv arcivzei na kineivtai.
Sta montevla 471-C50-C54-P54 mporeivte na ruqmivsete thn
tacuvthta thς autokivnhshς me ton moclov (17) (eik. 10).
Stamavthma tou kinhthvraò
Movliς afhvsete thn ceirolabhv parousivaς tou ceiristhv sbhvnei o
kinhthvraς kai stamatavei na gurnavei to macaivri.
PROSOCH! Na ruqmivzete thn tacuvthta thς
autokivnhshς movno ovtan leitourgeiv o kinhthvraς.
PROSOCH! To macaivri sunecivzei na gurnavei gia 3
deuterovlepta afovtou evcei sbhvsei o kinhthvraς.
5) KOPH GRASIDIOU (eik. 11)
Ruvqmish uvyou
ςς
ςς
ς kophv
ςς
ςς
ςò
Prin kavnete opoiadhvpote ergasiva sthn clookoptikhv mhcanhv, na
stamatavte ton kinhthvra kai na perimevnete mevcri na stamathvsei
teleivwς to macaivri. Gia na ruqmivsete to uvyoς kophvς, sta montevla
me kentrikhv ruvqmish tou uvyouς kophvς piavste thn ceirolabhv,
trabhvxte to dactulivdi asfavlishς proς ta epavnw, metakinhvste ton
moclov se mia apov tiς eptav qevseiς kophvς, afhvste to dactulivdi
asfavlishς sthn qevsh pou epiqumeivte.
Ergasiva kophvVò
Ruqmivste thn clookoptikhv mhcanhv saς anavloga me tiς sunqhvkeς tou
khvpou saς. Auxhvste tiς strofevς tou kinhthvra eavn ergavzeste se
yhlov kai pacuv covrto. Camhlwvste tiς strofevς tou kinhthvra eavn
ergavzeste se camhlov kai leptov covrto. Sta autokinouvmena montevla
pathvste ton moclov thς autokivnhshς gia na arcivsei na kineivtai h
clookoptikhv mhcanhv. Movliς to afhvsete stamatavei na kineivtai h
mhcanhv. Sta autokinouvmena montevla eavn epiqumeivte mporeivte na
ergavzeste cwrivς na leitourgeiv h autokivnhsh.
Potev mhn crhsimopoieivte thn clookoptikhv mhcanhv cwri
ς
to klapev hv ton cortosullevkth thς.

HARRY
55
GREECE
6) SUNTHRHSH
7) ELEGCOS
Crhvsime
ς ς
ς ς
ς sumboulev
ςς
ςς
ςò
Ta kaluvtera apotelevsmata epitugcavnontai ovtan to covrto pou
kovbetai den uperbaivnei sto uvyoς to 1/3 tou megivstou uvyouς tou. Eavn
to covrto pou kovbete eivnai poluv yhlov, kalov eivnai na crhsimopoieivte
thn pio yhlhv ruvqmish stouς trocouvς gia to prwvto kouvrema. Eavn
qevlete to cortavri pio camhlov epanalavbete to kouvrema se
camhlovterh ruvqmish.
Na qumavste pavnta ovti to kouvrema tou grasidiouv poluv kontov eivnai
kavti pou den sunistavtai giativ to covrto metav creiavzete perissovterh
enevrgeia gia na dhmiourghvsei nevo fuvllwma enwv paravllhla auxavnete
o kivndunoς na kaeiv apov ton hvlio. Antivqeta to poluv yhlov cortavri
sunepavgetai ovti to kavtw mevroς tou qa skiavzete sunevceia cavnontaς
evtsi sigav sigav thn apovcrwshv tou.
Ta upoleivmmata tou cortariouv ovtan mevnoun epavnw sto cortavri
dhmiourgouvn asqevneieς kai den epitrevpoun thn swsthv anaptuxhv tou.
Gia autov ton lovgo protimavte na sullevgete to kommevno cortavri. Oleς
oi clookoptikevς mhcanevς HARRY eivnai scediasmevneς evtsi wvste na
mporeivte avmesa eivte na kovyete kai na mazevyete tautovcrona eivte
na kovyete movno (proteivnetai ovtan to cortavri eivnai poluv yhlov).
vAdeiasma tou cortosullevkth (eik. 12)ò
Otan gemivsei o cortosullevkthς, stamathvste ton kinhthvra kai
perimevnete ewς ovtou stamathvsei teleivwς to macaivri. O
patentarismevnoς cortosullevkthς thς HARRY mporeiv na adeiavsei
me duvo trovpouςò
A) Shkwvste to klapev. Me mia kivnhsh xekremavste ton
cortosullevkth. Kratwvntaς ton cortosullevkth apov to cerouvli pou
brivsketai sto epavnw mevroς tou ton anapodogurivzete proς ta emprovς
evtsi wvste na adeiavsei ovlo to periecovmenov tou.
B) Shkwvste ton cortosullevkth apov thn pivsw ufasmavtinh
ceirolabhv kai cwrivς na ton bgavlete apov thn qevsh tou adeiavste ovlo
to periecovmeno tou sto evdafoς (patentarismevno).
Gia megaluvterh diavrkeia zwhvς tou cortosullevkth eivnai aparaivthto
na ton kaqarivzete scolastikav metav to tevloς thς ergasivaς. Na ton
elevgcete taktikav kai an evcei fqarqeiv na ton antikatasthvsete.
PROSOCH!
Stamathvste ton kinhthvra kai bgavlte thn pivpa
tou mpouziv prin apov opoiadhvpote ergasiva.
1) Elevgcete taktikav to macaivri kai tiς bivdeς sthvrixhς tou kinhthvra
sto plaivsio eavn eivnai swstav sfigmevna.
2) Ecete pavnta ovleς tiς bivdeς kai ta paximavdia sfigmevna kai
bebaiwqeivte ovti h mhcanhv saς eivnai se asfalhv leitourgikhv
katavstash.
3) Eavn crhsimopoieivte thn mhcanhv saς me ton cortosullevkth, na
ton elevgcete sucnav gia fqorevς. Movliς antilhfqeivte fqorav qa prevpei
na ton antikatasthvsete amevswς.
4) Potev mhn apoqhkeuvete thn clookoptikhv mhcanhv saς se kleistov
cwvro hv kontav se flovga an upavrcei kauvsimo sto ntepozitov thς. Na
afhvnete ton kinhthvra na kruwvsei prin thn apoqhkeuvsete.
5) Proς apofughv purkagiavς na evcete thn clookoptikhv mhcanhv pavnta
kaqarhv apov clovh, fuvlla, gravsa, lavdia.
6) Na qumavste pavnta ovti h benzivnh eivnai euvflekth. Gia na
trofodoteivte thn mhcanhv saς me kauvsimo na crhsimopoieivte evna
metallikov doceivo egkekrimevno gia thn metaforav kausivmou kai na
to kratavte makriav apov th zevsth hv th fwtiav.
7) Toulavciston mia forav to crovno na phgaivnete thn mhcanhv gia
sevrbiς se evna apov ta exousiodothmevna sunergeiva. Enhmerwqeivte an
upavrcei kavpoio epiplevon kainouvrgio stoiceivo pou mporeiv na
anabaqmivsei thn asfavleia thς mhcanhv saς.
8) Crhsimopoieivte movno auqentikav antallaktikav tou ergostasivou
HARRY.
PROSOCH!
Stamathvste ton kinhthvra kai bgavlte thn pivpa tou
mpouziv prin apov opoiadhvpote ergasiva.
vElegco
ςς
ςς
ς - allaghv - trovcisma macairiouv (eik. 13 - eik. 14)ò
- Stamathvste ton kinhthvra. PROSOCHò Prin apov opoiadhvpote
ergasiva bgavlte thn pivpa tou mpouziv kai asfalivste thn makriav apov
to mpouziv proς apofughv anepiquvmhthς ekkivnhshς tou kinhthvra.
- Gurivste thn clookoptikhv mhcanhv apov thn pleurav thς exavtmishς
(aristerav).
- ELEGCOS MACAIRIOUò Elevgxte prosektikav to macaivri gia na
bebaiwqeivte ovti den eivnai fqarmevno, idiaivtera sta shmeiva epafhς
twn epipevdwn merwvn me ta kampulwtav. H avmmoV kai to cwvma fqeivrei
epivshς to fterov tou macairiouv. Elevgxte to gia piqanhv fqorav. Eavn
parathrhvsete fqorav, ravgisma, stravbwma tou macairiouv na to
allavxete amevswς.
PROSOCHò Eavn upavrcei fqorav hv ravgisma sto macaivri
autov mporeiv na spavsei xafnikav me apotevlesma na
traumatisteiv o ceiristhvς hv ovsoi ekeivnh th stigmhv brivskontai
kontav.
- LUSIMO MACAIRIOUò Gia na bgavlete to macaivri apov thn
mhcanhv, piavste to macaivri apov thn avkrh tou, forwvntaς opwsdhvpote
contrav gavntia proς apofughv traumatismwvn kai xebidwvste
aristerovstrofa thn kentrikhv bivda.
- TROCISMA MACAIRIOUò Trocivzete to macaivri ovtan blevpete
ovti oi avkreς tou eivnai fagwmevneς kai efovson autov fusikav brivsketai
se kalhv katavstash opovte den suntrevcei lovgoς antikatavstashvς tou.
Gia kaluvtera apotelevsmata trocivste to se eidikov trocistikov
mhcavnhma. Elevgxte to macaivri metav apov kavqe trovcisma gia na
bebaiwqeivte ovti autov eivnai kalav zugismevno giativ diaforetikav mporeiv
na prokalevsei kradasmouς katav thn leitourgiva tou.
- Topoqethvste xanav to macaivri sfivggontaς kalav thn kentrikhv bivda.
LIPANSEIS
Kinhthvra
ςς
ςς
ς
Allavxte to lavdi tiV prwvteς 2 wvreς leitourgivaς kai evpeita kavqe 25
wvreς leitourgivaς ovpwς anafevrete sto egceirivdio twn odhgiwvn crhvshς
tou kataskeuasthv tou kinhthvra. Elevgxte th stavqmh tou ladiouv kavqe
forav pou crhsimopoieivte thn mhcanhv.
Gia na lipaivnete ta kinouvmena mevrhò Kavqe mhvna rivcnete livgeV stagovneς
ladiouv hv gravsou sta kinouvmena mevrh ( ovpwς roulemavn, ruqmisteς uvyouς
kophς k.l.p.)
RUQMISH NTIZAS AUTOKINHSHS (eik. 15)
H ruvqmish thς ntivzaς autokivnhshς prevpei na givnetai movno eavn
parathrhvsete ovti enwv kratavte pathmevnh th ceirolabhv thς
autokivnhshς (5) h clookoptikhv mhcanhv den procwravei hv patinavrei.
Gia na ruqmivsete thn ntivza calarwvste ta duvo paximavdia (1), xebidwvste
to pavnw paximavdi duvo strofeς kai bidwvste to kavtw paximavdi. Eavn
creiavzete xanav epanalavbete thn diadikasiva.
PROSOCH!
Mhn tentwvnete poluv thn ntivza giativ to uperbolikov sfivximo
mporeiv na prokalevsei fqorav sto kibwvtio metavdosh
ς
th
ς
kivnhshς.
Gia na elevgxete thn ruvqmish, me sbhstov kinhthvra kai cwriς na patavte
ton moclov thς autokivnhshς, trabhvxte proV ta pivsw thn clookoptikhv
mhcanhv. Oi pivsw trocoiv qa prevpei na kinouvntai eleuvqera.

HARRY
56
GREECE
9) MULCHING
10) SUSTHMA EKKINHSHS TOUCH-N-MOW
8) APOQHKEUSH THS CLOOKOPTIKHS MHCANHS( GIA MEGALO DIASTHMA)
vOtan provkeitai na apoqhkeuvsete thn clookoptikhv mhcanhv saς gia
diavsthma megaluvtero apov 30 hmevreς akolouqhvste ta parakavtw
bhvmataò
Diabavste apov to egceirivdio twn odhgiwvn crhvshς tou kataskeuasthv
tou kinhthvra gia tiς odhgiveς apoqhvkeushς tou kinhthvra.
Bgavlte thn pivpa tou mpouziv, gurivste thn mhcanhv sto plavi kai
kaqarivste thn scolastikav. Eavn creiavzete xuvste ta covrta pou evcoun
kollhvsei sto plaivsio.
PROSOCHò Mhn rivcnete nerov sthn exavtmish hv sto fivltro aevroς.
Kaqarivste thn mhcanhv kai afhvste thn na stegnwvsei. Lipaivnete kai
grasavrete ta metallikav thς mevrh gia na apofuvgete to skouvriasma.
Pluvnete ton cortosullevkth poluv kalav kai afhvste ton na stegnwvsei
protouv na ton apoqhkeuvsete.
Apoqhkeuvste thn clookoptikhv mhcanhv se stegasmevno cwvro makriav
apov ugrasiveς.
1) Eavn epiqumeivte na crhsimopoihvsete thn clookoptikhv mhcanhv gia
qrummatismov tou grasidiouv, bebaiwqeivte ovti to grasivdi saς den evcei
uvyoς megaluvtero apov 10 ekatostav. Eavn eivnai megaluvtero tovte
crhsimopoieivste ton cortosullevkth gia na sullevxete to grasivdi.
Eavn den eivnai megaluvtero tovte topoqethvste to pwvma thς exagwghvς
tou covrtou.
2) vEcete pavnta to macaivri thV mhcanhvς kalav akonismevno kai
bebaiwqeivte ovti to grasivdi saV den eivnai bregmevno.
3) Leitourgivaò
A) Topoqethvste to pwvma sto plaivsio thV clookoptikhvV mhcanhvV.
Bebaiwqeivte ovti o kinhthvraς eivnai stamathmevnoς kai ovti h
pivpa tou mpouziv eivnai bgalmevnh.
B) Topoqethvste ton moclov ruvqmishς uvyouς kophς se mia apov tiς
treiς qevseiς MULCHING pou upavrcoun (fwtografiva 17).
Gia ta montevla H48-H49-P49 to uvyoς kophς den prevpei na eivnai
camhlovtero apov 5 ekatostav.
G) Xekinhvste thn ergasiva.
4) Metav to tevloς thς ergasivaς kaqarivste to suvsthma kophς apov ta
upoleivmmata tou grasidiouv.
Gia to lovgo autov afairevste to pwvma thς exagwghς ovpwς faivnetai
stiς fwtografiveς 16 .
Sta montevla afairevste thn bivda ovpwς faivnetai sthn
fwtografiva 18.
PERIGRAFH TOU PROIONTOS
To suvsthma ekkivnhshς Touch- N-Mow, katateqeimevno me divplwma
euresitecnivaς gia thn Briggs & Stratton, eivnai evna kainouvrgio
proiovn(suvsthma) pou saς epitrevpei na ekkinhvsete thn clookoptikhv
mhcanhv trabwvntaς aplwvùς thn labhv asfaleivaς, cwrivς thn bohvqeia
mpatariwvn, hlektrikwvn kalwdivwn, diakoptwvn kai scoiniwvn pou
prevpei na trabhvxete.
LEITOURGIA
Fortismovς tou susthvmatoς ekkivnhshς Touch-N-Mow.
Gia lovgouς asfaleivaς, to suvsthma saς promhqeuvetai apov thn
paragwgo etaireiav apenergopoihmevno.Allav akovmh kai metav, kavqe
forav pou to suvsthma ekkivnhshς qa apenergopoihvtai skovpima gia
lovgouς asfaleivaς, to Touch-N-Mow qa evcei anavgkh na fortisteiv
evtsi wvste na eivnai evtoimo gia th crhsimopoivhsh.
Gia na fortivsete to suvsthma ekkivnhshς, qa prevpei na anavyete thn
mhcanhv, crhsimopoiwvntaς thn ekkivnhsh dia ceirovς (skoiniv ekkivnhshς)
akolouqwvntaς ta bhvmata pou saς anafevrontai parakavtwò
1. Elevgxte to epivpedo thς benzivnhς kai tou ladiouv tou kinhthvra.
2. Sundevste to kalwvdio tou mpouziv.
3. Pathvste to PRIMER tou kinhthvra 3 forevς (eik. 20)
4. Bavlte to kleidiv asfaleivaς (eik.19). Strivyte to proς ta dexiav
(forav tou rologiouv) sthn qevsh RUN (eik. 21)
5. Eleuqerwvste thn labhv asfaleivaς peristrevfontaς to povmolo thς
suskeuhvς Touch-N-Mow (eik. 22)
6. Anavyte thn mhcanhv me thn ekkivnhsh dia ceirovς trabwvntaς aplav
to skoiniv (eik. 23). Eavn o kinhthvraς den xekinhvsei kai metav thn
deuvterh prospavqeia, bebaiwqeivte ovti akolouqhvsate swstav ta
prohgouvmena bhvmata
7. Afhvste thn macanhv na ftavsei thn apaitouvmenh gia thn diadikasiva
tacuvthta
8. Afhvste stadiakav kai ovci apovtoma thn labhv.
SHMEIWSHò Katav thn prwvth ekkivnhsh th
ς
clookoptikhvς mhcanhvς hv
kai uvstera apov mia perivodo pou h mhcanhv parevmeine apoqhkeumevnh qa
prevpei na ladwvsete to shmeivo th
ς
avrqrwshς (eik.24) kai na afhvsete
anamevno ton kinhthvra gia pevnte leptav prin na crhsimopoihvsete thn
mhcanhv.
VOtan afhvsete th labhv, to elathvrio epanaforavς sprwvcnei to
suvsthma Touch-N-Mow se epafhv me to bolavn.
H enevrgeia stamathvmatoς (adravneia) pou proevrcetai apov to bolavn
epitrevpei to autovnomo fovrtisma tou susthvmatoς Touch-N-Mow.
O autofortizovmenoς mhcanismovς tou dontiouv diakophvς diathreiv to
elathvrio sth qevsh fovrtishς.
Stamavthma th
ςς
ςς
ς mhcanhv
ςς
ςς
ς
Afhvste stadiakav kai ovci apovtoma th labhv asfaleivaς.
SHMEIWSHò Th stigmhv pou qa stamathvsei o kinhthvraς, qa akouvsete
to qovrubo tou susthvmatoς ekkivnhshς pou epanafortivzetai. O qovruboς
autovς pou proevrcetai apov thn uyhlhv tacuvthta tou dontiouv diakophvς,
eivnai fusiologikovς.
To Touch-N-Mow eivnai evna suvsthma pou evcei katacwrhqeiv me divplwma
euresitecnivaς kai pou mporeiv na leitourghvsei kai san suvsthma
ekkivnhshς thς mhcanhvς ovtan trabhcteiv h labhv asfaleivaς, allav kai
san frevno thς mhcanhvς ovtan afeqeiv me ton katavllhlo trovpo h labhv
asfaleivaς.
Gurivzontaς to kleidiv asfaleivaς katav to 1/4 tou guvrou me forav
aristerhv (antivqeth thς foravς tou rologiouv) sthn qevsh LOCK &
REMOVE to suvsthma Touch-N-Mow mplokavrei. Bgavlte PANTA to
kleidiv asfaleiva
ςς
ςς
ς kai topoqethvste to se evna sivgouro mevro
ςς
ςς
ς. O
kinhthvraς den xekinavei cwrivς to kleidiv asfaleivaς hv ovtan to kleidiv
brivsketai sthn qevsh LOCK & REMOVE.
SHMEIWSHò An h mhcanhv meivnei cwriv
ς
benzivnh hv an stamathvsei epeidhv
to cortavri eivnai poluv yhlov hv gia kavpoiou
ς
avllouς mhcanikouvς lovgouς,
to suvsthma ekkivnhsh
ς
Touch-N-Mow den epanafortivzetai automavtw
ς
kai gia autov einai aparaivthto na epanalavbete ta shmeiva ekeivna pou
anafevrontai sthn paravgrafoò Fortismov
ς
tou susthvmatoς ekkivnhsh
ς
Touch-N-Mow .
Ekkivnhsh th
ςς
ςς
ς mhcanhv
ςς
ςς
ς crhsimopoiwvnta
ςς
ςς
ς to suvsthma Touch-N-
Mow
1. Elevgxte to lavdi sthn mhcanhv
2. Sundevste to kalwvdio tou mpouziv
3. Pathvste to PRIMER 3 forevς
4. Bavlte to kleidiv asfaleivaς. Gurivste to proς ta dexiav (forav
rologiouv) sth qevsh RUN
5. Bgavlte thn asfavleia labhvς
6. Trabhvxte th labhv gia na ekkinhvsete thn mhcanhv
SHMEIWSHò An o kinhthvra
ς
den xekinavei shmaivnei ovti to suvsthma
Touch-N-Mow evcei xefortisteiv. Se authv thn perivptwsh qa prevpei na
problevyete gia ton epanafortismov.

HARRY
57
GREECE
SUMBOULES GIA THN EREUNA BLABWN
An h mhcanhv den mporeiv na xekinhvseiò
1. Elevgxte to epivpedo thς benzivnhς
2. Bebaiwqeivte ovti to mpouziv eivnai swstav sundedemevno
3. Epanafortivste to suvsthma ekkivnhshς akolouqwvntaς ta bhvmata
ovpwς saς anafevrontai sthn paravgrafo Fortismovς tou susthvmatoς
ekkivnhshς Touch-N-Mow
4. Bebaiwqeivte ovti trabhvxate th labhv ekkivnhshς afouv evcete
xemplokavrei to moclov asfaleivaς
5. Bebaiwqeivte ovti to kleidiv asfaleivaς eivnai topoqethmevno sthn
qevsh RUN
6. Sigoureuteivte ovti to kalwvdio ekkivnhshς douleuvei swstav gia na
energopoihvsete kai na epanafortivsete to suvsthma Touch-N-Mow
7. Bebaiwqeivte ovti o diakovpthς STOP eivnai swstav topoqethmevnoς
sto suvsthma Touch-N-Mow
PROEIDOPOIHSEIS KAI PROFULAXEIS
VOpwς sumbaivnei me kavqe kainouvrgio proiovn, upavrcoun shmantikevς
axiologhvseiς pou prevpei na givnoun ovson aforav thn asfavleia tou
susthvmatoς Touch-N-Mow. Idiaivtera eivnai aparaivthto na evcete
upovyh saς ovti autov to suvsthma, basivzei thn leitourgiva tou se evna
elathvrio pou diathreivtai sth qevsh tou apov to bolavn. Mia
opoiadhvpote asuneivdhth hv adevxeia kivnhsh kontav sto elathvrio
mporeiv na to apeleuqerwvsei xafnikav me sunevpeieς pou mporeiv na
eivnai avkrwς epikivnduneς gia esavς touς ivdiouς allav kai gia ta avtoma
pou brivskontai kontav.
VEtsi loipovn eavn den sebasteivte ti
ςς
ςς
ς odhgive
ςς
ςς
ς pou akolouqouvn
upavrcei kivnduno
ςς
ςς
ς sobarwvn traumatismwvn, skisivmata, hv
akrwthriasmoiv!
- Aposundevste PANTA to mpouziv, xefortivste kai mplokavrete to
suvsthma Touch-N-Mow bgavzonta
ςς
ςς
ς to kleidiv asfaleiva
ςς
ςς
ς PRIN
na pragmatopoihvsete opoiadhvpote ergasiva epavnw ston
kinhthvra hv sthn clookoptikhv mhcanhv.
- Bebaiwqeivte ovti to suvsthma Touch-N-Mow eivnai xefortismevno
kai mplokarismevno PRIN na to metafevrete hv na to ceiristivte.
- MHN bavzete ta cevria hv ta povdia kavtw apov thn clookoptikhv mhcanhv
ovtan to suvsthma ekkivnhshς eivnai se leitourgiva.
- POTE na mhn upoqevsete ovti to suvsthma eivnai xefortismevno akovma
kai an to kleidiv eivnai sthn qevsh LOCK & REMOVE hv eivnai bgalmevno
apov ton kinhthvra.
- MHN bavzete ta cevria sto bolavn enwv to suvsthma xefortivzetai.
- MHN metafevrete hv shkwvnete thn mhcanhv apov ton atevrmona pou
eivnai kontav sto bolavn.
- PANTA na metaceirivzeste to suvsthma ekkivnhshς Touch-N-Mow,
eavn eivnai bgalmevno apov thn mhcanhv, apov to siderevnio kavluma tou
elathrivou.
- MHN shkwvnete potev to stavrter (thn hlektrikhv diavtaxh gia thn
ekkivnhsh), bavzontaς ta davctulav saς ovpou upavrcoun ta diavfora mevrh
se kivnhsh tou ivdiou tou susthvmatoς.
- MHN prospaqeivte na episkeuavsete hv na ascolhqeivte me thn
sunthvrhsh tou susthvmato
ςς
ςς
ς ekkivnhsh
ςς
ςς
ς Touch-N-Mow.
- Na mplokavrete kai na bgavzete PANTA to kleidiv thς asfavleiaς
kai na to bavzete se kavpoio sivgouro mevroς mevcri thn epovmenh forav
pou qa to crhsimopoihvsete. To kleidiv asfaleivaς evcei epinohqeiv kai
scediasteiv katav tevtoio trovpo wvste na mporeiv na afaireqeiv apov
ton kinhthvra ovtan autovς den eivnai se leitourgiva. Bgavzontaς to
kleidiv apofeuvgontai xafnikevς hv anexevlegkteς ekkinhvseiς thς
mhcanhvς, kurivwς parousiva paidiwvn hv kai enhlivkwn pou den eivnai
enhmerwmevnoi.To kleidiv thς asfavleiaς prevpei na eivnai sthn qevsh
mplokarivsmatoς (qevsh LOCK & REMOVE) prin na mporeivte na to
bgavlete.
- Sigoureuteivte PANTA ovti to kalwvdio tou STOP eivnai
topoqethmevno kai sundedemevno swstav ston diakovpth tou STOP. H
mh leitourgiva tou STOP (geivwsh) mporeiv na prokalevsei zhmiav sto
suvsthma ekkivnhshς Touch-N-Mow.
Kleivste kai bgavlte PANTA to kleidiv asfaleivaς kai topoqethvste
to se evna sivgouro mevroς mevcri thn epovmenh forav pou qa to
crhsimopoihvsete.
To kleidiv asfaleivaς evcei epinohqeiv kai scediasteiv me tevtoio trovpo
wvste na mporeiv na afaireqeiv apov ton kinhthvra ovtan autovς den eivnai
se leitourgiva.
Bgavlte to kleidiv gia na apofuvgete xafnikevς ekkinhvseiς thς
clookoptikhvς mhcanhvς kai mavlista parousiva paidiwvn hv kai enhlivkwn
pou den to perimevnoun.
To kleidiv thς asfavleiaς prevpei na brivsketai sthn qevsh LOCK &
REMOVE prin na mporeivte na to bgavlete.
XEFORTISTE KAI MPLOKARETE PANTA TO SUSTHMA
TOUCH-N-MOW PRIN NAò
- Bgavlte to cortavri hv avlla upoleivmata apov thn clookoptikhv
mhcanhv
- Allavxte to fivltro tou aevra, tou ladiouv hv to mpouziv
- Bgavlte ta macaivria gia thn sunthvrhsh
- Pragmatopoihvste opoiadhvpote avllh ergasiva sunthvrhsh
ς
sthn clookoptikhv mhcanhv hv ston kinhthvra th
ς
- Metafevrete thn clookoptikhv
XEFORTISMA TOU SUSTHMATOS EKKINHSHS
Prin na kaqarivsete thn clookoptikhv mhcanhv, na akolouqeivsete thn
sunthvrhshv thς hv na metafevrete thn clookoptikhv, PREPEI na
xefortivsete to suvsthma ekkivnhshς Touch-N-Mow.
Gia na xefortivsete to suvsthmaò
1. Aposundevste to kalwvdio tou mpouziv.
2. Energopoihvste to suvsthma ekkivnhshς kai kavnte mia esfalmevnh
ekkivnhsh.
3. Gurivste to kleidiv asfaleivaς katav to 1/4 me forav aristerovceirh
(antivqeth forav apov touς deivkteς tou rologiouv), sthn qevsh LOCK &
REMOVE.
4. Bgavlte to kleidiv thς asfavleiaς.
SHMEIWSHò An to kleidiv thς asfavleiaς den pavei sth qevsh tou
mplokarivsmatoς, trabhvxte elafrav to autoperielissovmeno skoiniv gia
na elattwvsete livgo thn tavsh sto suvsthma ekkivnhshς.
EGGUHSH
O mhcanismovς ekkivnhshς Touch-N-Mow eivnai evna monadikov suvsthma
kai DEN apoteleivtai apov diavfora mevrh pou mporouvn na allactouvn
to kaqevna cwristav. Opoiodhvpote shmavdi pou na apodeiknuvei
exwterikhv epevmbash saς akurwvnei thn egguvhsh tou kataskeuasthv.
SUMBOULES GIA THN TECNIKH UPOSTHRIXH
To suvsthma ekkivnhshς Touch-N-Mow eivnai staqeropoihmevno ston
kinhthvra me bivdeς Torx T 30 .
To suvsthma ekkivnhshς Touch-N-Mow kavnei ton kinhthvra na gurivzei
gia 2 deuterovlepta me 1000 RPM. Mia ekkivnhsh me to skoiniv dia
ceirovς me 600 RPM kai mia hlektrikhv ekkivnhsh me 450 RPM.
An o kinhthvraς den xekinavei, fortivste to suvsthma Touch-N-Mow
dia ceirovς (skoiniv ekkivnhshς).
An to rezerbouavr evcei bgei apov ton kinhthvra BEBAIWQEITE ovti to
kleidiv thς asfavleiaς tou susthvmatoς Touch-N-Mow eivnai sthn qevsh
mplokarivsmatoς (LOCK & REMOVE) prin na epanatopoqeteivsete
to rezerbouavr.
Mhn crhsimopohvsete to kleidiv asfaleivaς prin na topoqethvsete
to rezerbouavr epeidhv eivnai dunatovn na epalhqeutouvn kinhvseiς pou
den eivnai asfaleivς.
An evcete kavpoieς amfiboliveς pou aforouvn tiς sunqhvkeς fortismouv
tou susthvmatoς Touch-N-Mow, xefortivste to suvsthma ekkivnhshς.
* An to suvsthma Touch-N-Mow den apenergopoihvtai
1. Prospaqhvste na fortivsete to suvsthma ekkivnhshς. Perimevnete
na akouvsete to klik apov to dontavki kai metav prospaqhvste na to
fortivsete pavli trabwvntaς thn labhv asfaleivaς.
2. An h diadikasiva tou shmeivou 1 DEN xefovrtise to suvsthma
ekkivnhshς, trabhvxte th labhv asfaleivaς, ctuphvste elafriav me evna
lasticevnio sfuravki to exwterikov tou atevrmona kai sto mpravtso
thς suvndeshς tou susthvmatoς, prospaqwvntaς na tou dwvsete suvndesh.
3. An oi diadikasiveς sta shmeiva 1 kai 2 den katafevrnoun na
xefortivsoun to suvsthma ekkivnhshς, mplokavrete kai bgavlte to
kleidiv thς asfavleiaς tou susthvmatoς kai afairevste to prosektikav
apov ton kinhthvra. Shmeiwvste to suvsthma pou afairevqhke me thn
evndeixh plhvrwς fortismevno kai steivlte to sthn paragwgov
etaireiva Briggs & Stratton.
* An to granavzi tou susthvmato
ςς
ςς
ς ekkivnhsh
ςς
ςς
ς eivnai mplokarismevno
sto bolavn
1. Prospaqhvste na fortivsete to suvsthma ekkivnhshς
crhsimopoiwvntaς to skoiniv.Perimevnete to klik tou dontiouv
mplokarivsmatoς kai prospaqeivste pavli na to xeforteivsete.
* An to suvsthma ekkivnhsh
ςς
ςς
ς den mplokavretai me to kleidiv th
ςς
ςς
ς
asfavleia
ςς
ςς
ς.
1. An to suvsthma ekkivnhshς eivnai fortismevno trabhvxte elafrav to
skoiniv pou to qevtei se ekkivnhsh prospaqwvntaς na petuvcete na kavnei
mia plhvrh strofhv to bolavn kai prospaqhvste na fevrete to kleidiv
thς asfavleiaς sth qevsh tou mplokarivsmatoς (LOCK POSOTION).
2. An to suvsthma ekkivnhshς eivnai fortismevno, xeforteivste to kai
mplokavretev to me to kleidiv thς asfavleiaς. An to suvsthma ekkivnhshς
den mplokavretai, epanalavbete thn diadikasiva sto shmeivo 1.
* An to suvsthma ekkivnhsh
ςς
ςς
ς exakolouqeiv na fortivzetai metav thn
ekkivnhsh tou kinhthvra.
1. Elevgxte tiς sundevseiς tou diakovpth mplokarivsmatoς kai to
suvsthma. Mia piqanhv uperfovrtish tou elathrivou QA PROKALESEI
ZHMIA sto suvsthma Touch-N-Mow.
Problhvmata sthn ekkivnhsh hv sto stamavthma tou kinhthvra mporeiv
na eivnai sundedemevna me thn labhv ekkivnhshς, me to suvsthma ruvqmishς
tou kalwdivou hv me thn iscuv movcleushς.
EINAI POLU SHMANTIKO to ovti autov to suvsthma ruvqmishς
epitrevpei na energopoihvsete swstav kai to suvsthma ekkivnhshς
Touch-N-Mow kai olovklhro to suvsthma tou kinhthvra.


0)44;
Harry S.p.A. - Via Quintino di Vona 91/93 - 20062 - Cassano dAdda - MI
Tel. +39 0363 64888 - Fax +39 0363 65510
www.harry.it - E-mail: harry@harry.it
990.1.0100.0 Ed.B
 Loading...