

Page 1

Mobile Phone CF888
User’s Guide
Visit us on the web at: http://mobile.ericsson.com
ERICSSON Z
Page 2

First edition (August 1998)
This manual is published by Ericsson Inc., without any warranty. Improvements and changes to this manual necessitated by typographical errors, inaccuracies of cur-
rent information, or improvements to programs and/or equipment, may be made by Ericsson Inc. At any time and without notice. Such changes will, however, be in-
corporated into new editions of this manual.
All rights reserved.
© Ericsson Inc., 1998
Publication Number: LZT 123 4459 R1
Printed in the USA.
Page 3
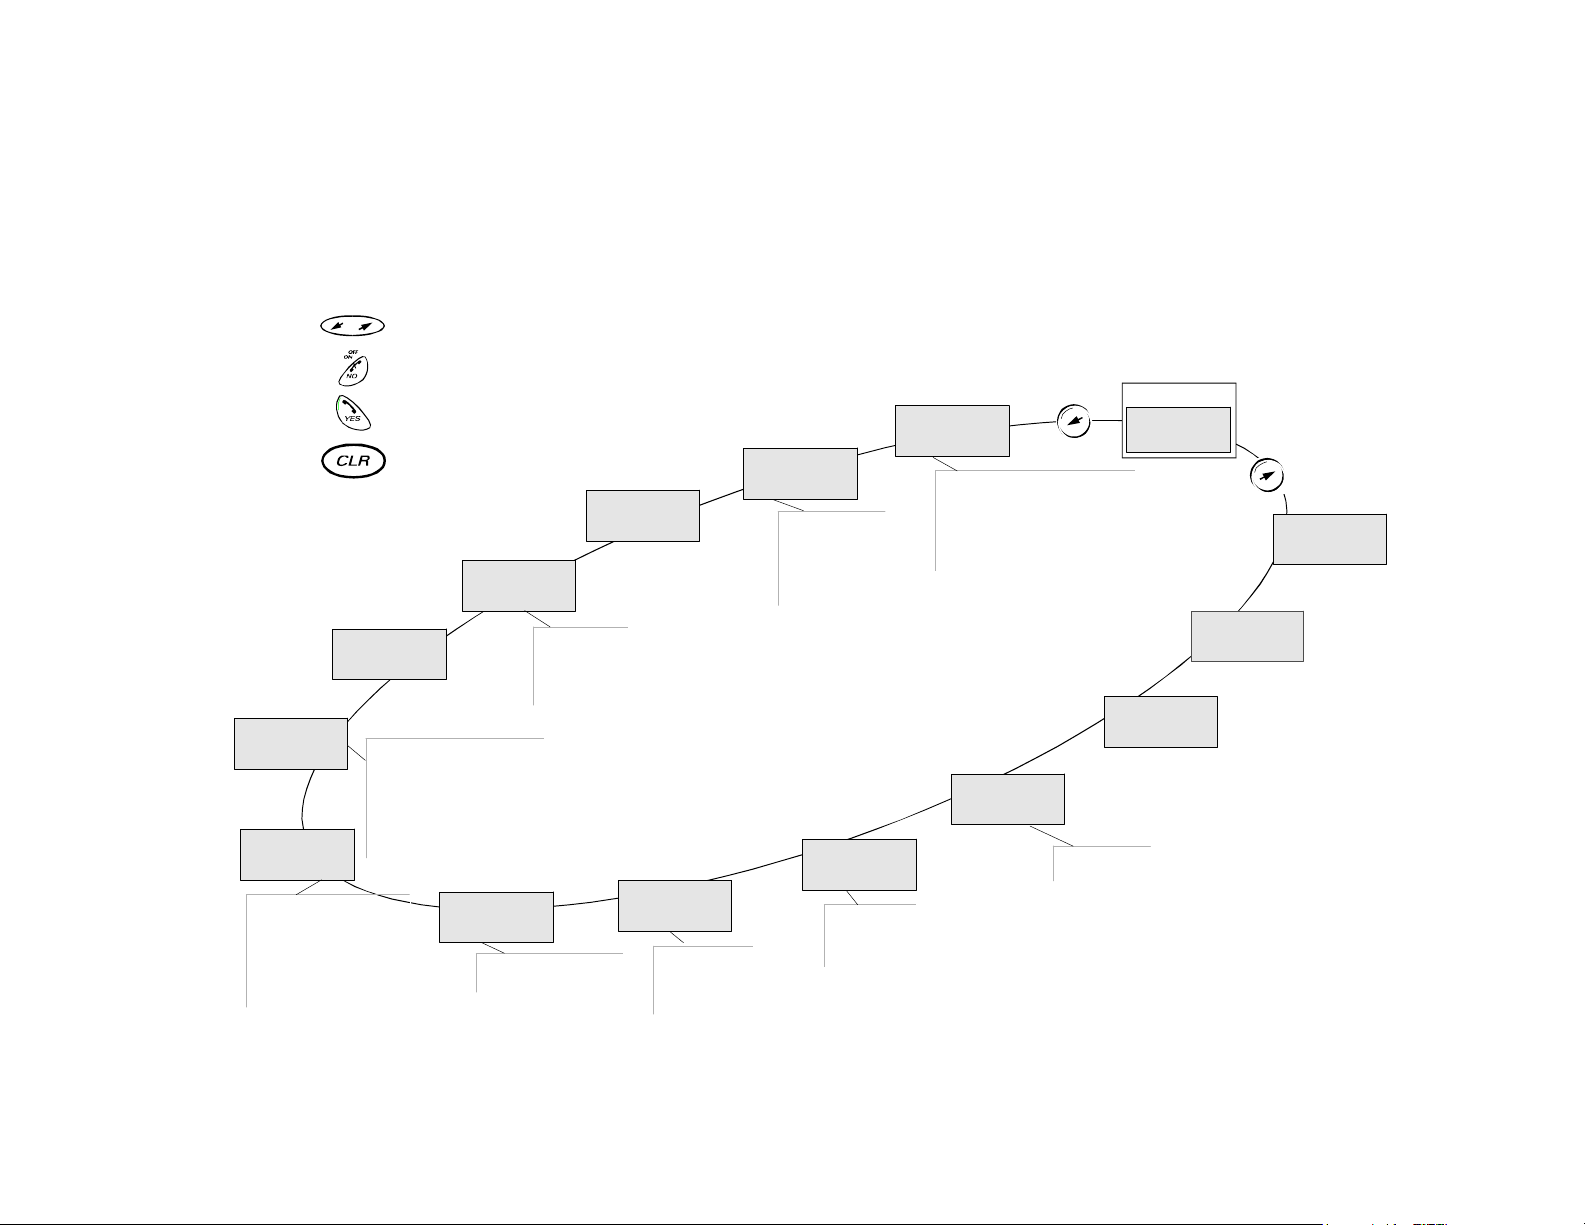
The Menu Sys tem Some menus/features are operator dependent. The Menu Sys tem Some menus/features are operator dependent.
Press .... To...
Move clockwise or counterclockwise
Back up one level in the menus
Start here
MENU
Settings
MENU
Access
Restrict Calls
Fixed Dial
Call Waiting
Lock to this Line
Unlock Card
Change PIN
Code
Change PIN2
Code
Select a menu or function
Return to the standby mode
Clock
MENU
Calculator
Ear Volume
Ring Type
Edit Melody
Mail Alert
Keylock
Key Sound
Light
Min Minder
Call Info
Phone Lock
Phone Lock
Change Code
Call Cards
Security
Answering Mode
Analog Vox
Greeting
Phone No
Language
Data Menus
Line 1 Tag
Master Reset
MENU
Networks
Select Net
Searchmode
Edit List
MENU
Set Alarm
Set Clock
Set Date
Clock Mode
Date Mode
System
Analog Opt
New Search
MENU
Keylock
On?
Forward
Phone Number*
Fax Number*
Data Number*
All Numbers
MENU
MENU
Mail
Voice Mail
Read Messages
Send Messages
Area Info
Area Messages
Set Voice Mail
Missed Calls
MENU
Next
call type
Speech
Fax
Data
MENU
Phone book
Name Recall
Position Recall
Store
Edit
Erase
Erase All from
Phone
Copy All
Info
*
MENU
Copy
Call Card Numbers
Fixed Numbers
Answered calls
Dialed Numbers
Info Recall
Service Recall
Last Call
Tot Calls
*These menus only appear if you
have turned on the data menus.
ERICSSON
12:35
MENU
Change to
LINE 2?
IR Port
MENU
Activate
MENU
Ring level
( )
Page 4
Contents
Some features/menusare operator dependent
Congratulations...
Valuable Information
Operators & Subscription, Dual Band/Dual Mode – GSM 1900 & Analog
800, SIM & PIN
The Phone, Keypad, and Display
Preparing Your Phone for Use
The SIM Card, The Battery
Turning On the Phone
The Antenna, When No Network Name Is Displayed, Turning Off the
Phone, Initial Settings
Making and Receiving Calls
Emergency Calls, Making Domestic Calls, Making International Calls, Receiving aCall, Redialinga Number,Calling SomeoneWho Has CalledYou,
Unanswered Calls, Hiding or Showing Your Number
During a Call
Changing the Earpiece Volume, Muting the Microphone, Using the Display
as a Scratch Pad, Sending Tone Signals
The Menu System
Navigating the Menu System, Display Text and Symbols
The Phone Book
Before YouStart, EnteringCharacters, CreatingYour PersonalPhone Book,
Recalling a Phone Number, Keeping Your PhoneBook Up to Date, Copying
Phone Numbers between Positions and Memories
...................................................................
..............................................................
..........................................
...............................................
............................................................
..................................................
...........................................................................
...................................................................
......................................................................
13
15
16
1
2
4
7
9
Sending and Receiving Text Messages
Two Memories, Setting the Phone for Text Messaging, Composing and
Sending Messages, Reading a Message, Replying to a Message, Embedded
Numbers in SMS, Erasing a Message, Storing a Received Message,
Reading Stored Messages, Calling a Phone Number in a Message, Frequently
Used Messages
Communicating via the Modem
Before you Start, The Data Menus, Installing theInfrared Modem , Connect
ing Using the IR Link, Connecting Using the RS232 Cable, Making Fax and
Data Calls, Receiving Fax and Data Calls
The Mobile Office Suite
Installing the Mobile Office Suite, Uninstalling the Mobile Office Suite
Networks
Search Mode, Selecting a Network, Selecting a System, National Roaming,
List of Preferred Networks
Security
The Card Lock, The Phone Lock, Call Restrict, The Keypad Lock, Fixed
Dialing
.................................................................................
.....................................................................................
Forwarding Incoming Calls
Activating a Call Forward, Checking the Forward Status, Cancelling Certain
Call Forwards
Handling More than One Call
The Call Waiting Service, Receiving a Second Call, Receiving a Third Call,
Making a Second Call, Connecting Two Calls
........................................................
.................................................
............................................
..............................
.........................................
22
28
-
34
36
40
45
47
i
Page 5
Some features/menus are operator dependent
Conference Calls
...................................................................
Initiating a Conference Call, Having a Private Conversation, Releasing One
of the Members, Making a Call while a Conference Call is in Progress,
Ending a Conference Call
Handsfree Calling
.................................................................
Selecting Answering Mode, Other Handsfree Related Settings
Area Information
...................................................................
Turning On the Area Information, Turning the Area Information Off, Area
Information Message Types, The Area Information Message List, Receiving
Area Information
The Two Line Service
.............................................................
Selecting a Line, Receiving a Call on Line 1 or Line 2, Different Settings for
Each Line, Changing the Name of the Two Lines
Other Useful Features
..........................................................
Personalizing Your Phone, The Ring Signal Level, The Answering Service,
Time, Dateand Alarm,The CallTime/Call Cost,Calling orCredit CardCalls,
The Calculator
Guidelines for Safe and Efficient Use
................................
General, Exposureto RadioFrequency Energy,Efficient PhoneOperation,
Tips forEfficient Operation, Driving, Electronic Devices, Aircraft, Children,
Blasting Areas, Potentially explosive atmospheres, Product Care
Index
.........................................................................................
50
52
53
55
56
65
69
ii
Page 6

Congratulations...
Some features/menusare operator dependent
…and thank you for choosing the CF888, a mobile phone
specially suited for the demanding user of communication
tools. Retaining the slim, streamlined size that has become
associated with the Ericsson family of phones, the CF888
sets a new standard for others to follow.
Apart from its unique toughness and extraordinary sound
quality, the CF888 comes packed with features that will help
you stay ahead. Some highlights include:
With the built-in GSM modem, you can forget all about
•
PC Cards. It’s already inside your phone, guaranteeing
you instant access to your PC, laptop or handheld communicator -- wireless if you prefer that, thanks to the infrared capabilities.
Dual band, dual-mode operation extends the potential
•
for efficient network usage, especially so if you frequently
use your phone in urban areas. The dual-band antenna
ensures optimal reception in both frequency bands.
Like the other phones from Ericsson, the CF888 is produced
to meet the highest quality standards.
This guideintroduces you to your CF888 and shows you how
to get the most out of it. Before you start, please read the
“Guidelines for Safe and Efficient Use” in the back of the
manual.
1
Page 7

Some features/menus are operator dependent
Valuable Information
Operators & Subscription
To be able to use your phone, you need to have a subscrip
tion to a network. This is obtained from the network opera
tor. The services included in your subscription depend on
your choice of operator and/or subscription. Therefore,
some of the services and functions described in this manual
may not be accessible to you. If you want a complete list of
the services included in your subscription, please contact
your network operator.
Dual Band/Dual Mode –
GSM 1900 & Analog 800
The Ericsson CF888 is a dual band/dual mode phone, so
you can operate your phone in two different kinds of networks – the GSM 1900 (PCS) and the AMPS 800 systems.
The digital GSM system operates at 1900 MHz, while the
analog system, AMPS, operates at 800 MHz.
A dual band/dual mode phone, such as your CF888, com
bines the two standards and can use both frequencies. You
have the power of the GSM 1900 in your home network
while being able to roam in the widespread analog coverage.
GSM 1900 is sometimes called GSM or PCS.
Analog information/instructions will appear in blue.
-
-
-
SIM & PIN
Together with your subscription you will obtain a 3-volt SIM
(Subscriber Identity Module) card. The SIMmust bea dual
mode SIM cardto operate as a dual modephone. A sin
gle mode SIM will only access GSM 1900 networks.
The SIM card contains a computer chip that keeps track of
your phonenumber, theservices you have ordered from your
network operator and your Phone Book information, among
others.
Your SIM card is supplied with a security code or Personal
Identity Number (PIN), which you need in order to gain access to the network. Your PIN may also be required when
you want to change settings in your phone. Furthermore,
some operators may have services that require a second PIN,
the PIN2. You will find your PIN (and PIN2) inthe information from your operator.
When you turn on your phone youmay be prompted to enter
your PIN if the PIN is activated. If the PIN is entered incor
rectly three times in succession, the SIM card will beblocked.
If this happens you can unlock it by using your Personal Un
blocking Key (PUK) code, which is also obtained from your
operator. See chapter “Security”.
You should be careful with your PIN, since it is your protec
tion against unauthorized use of your phone and subscrip
tion.
-
-
-
-
-
2
Page 8
The Phone, Keypad, and Display
Key Functions
Antenna
Indicator Light
InfraRed (IR) Port
Volume Keys
Earpiece
Display
Microphone
Navigation Key
Keypad
Indicators in the Display
Active Flip
YES
, used to:
•
make calls, answer incoming
calls, put calls on hold and
switch between calls.
confirm selections and inputs.
ON/OFF
andNO, used to:
•
turn the phone on or off.
end calls, reject incoming calls
and cancel selections.
•
NAVIGATION KEY
RIGHT
(or pressand hold)to access and navigate the menu
system.
CLR
(Clear), used to
•
erase digits from the display.
mute the telephone.
•
NUMERIC KEY
the digits 0–9and to enter text.
The 0 key also enters the international prefix (+) if held
down.
•
Signal strength.
4
The more bars that are shown,
2
the higher the signal strength.
•
Battery meter.
7
The fuller the icon, the better
8
the battery charge.
•
The keypad is locked.
•
All incoming calls are for
l
warded to another number.
, press
LEFT
S, used to enter
Some features/menusare operator dependent
STAR
, used to:
•
enter the * character.
enter a pause character (’p’) if held down.
HASH
, used to:
•
enter the characters # or ¤.
recall aphone numberfrom the PhoneBook.
or
-
S
Mm
Tt
B
L1
Roaming
VOLUME KEYS
•
to:
change the earpiece volume during a call.
reject an incoming call.
silently adjust ring type and ring level (must
select from menus).
check date when roaming.
temporarily disables the active flip.
•
FLIP
•
The ring signal is turned off.
•
You have received a text message.
•
You have received a voice mail.
•
The alarm is set.
•
The line currently selected. (Requires that
you have the Two Line Service.)
•
The phone is locked to a network other
than your home network. Analog only.
on the side of the phone, used
answers and ends call when activated.
3
Page 9
Some features/menus are operator dependent
Preparing Your Phone for Use
Preparing Your Phone for Use
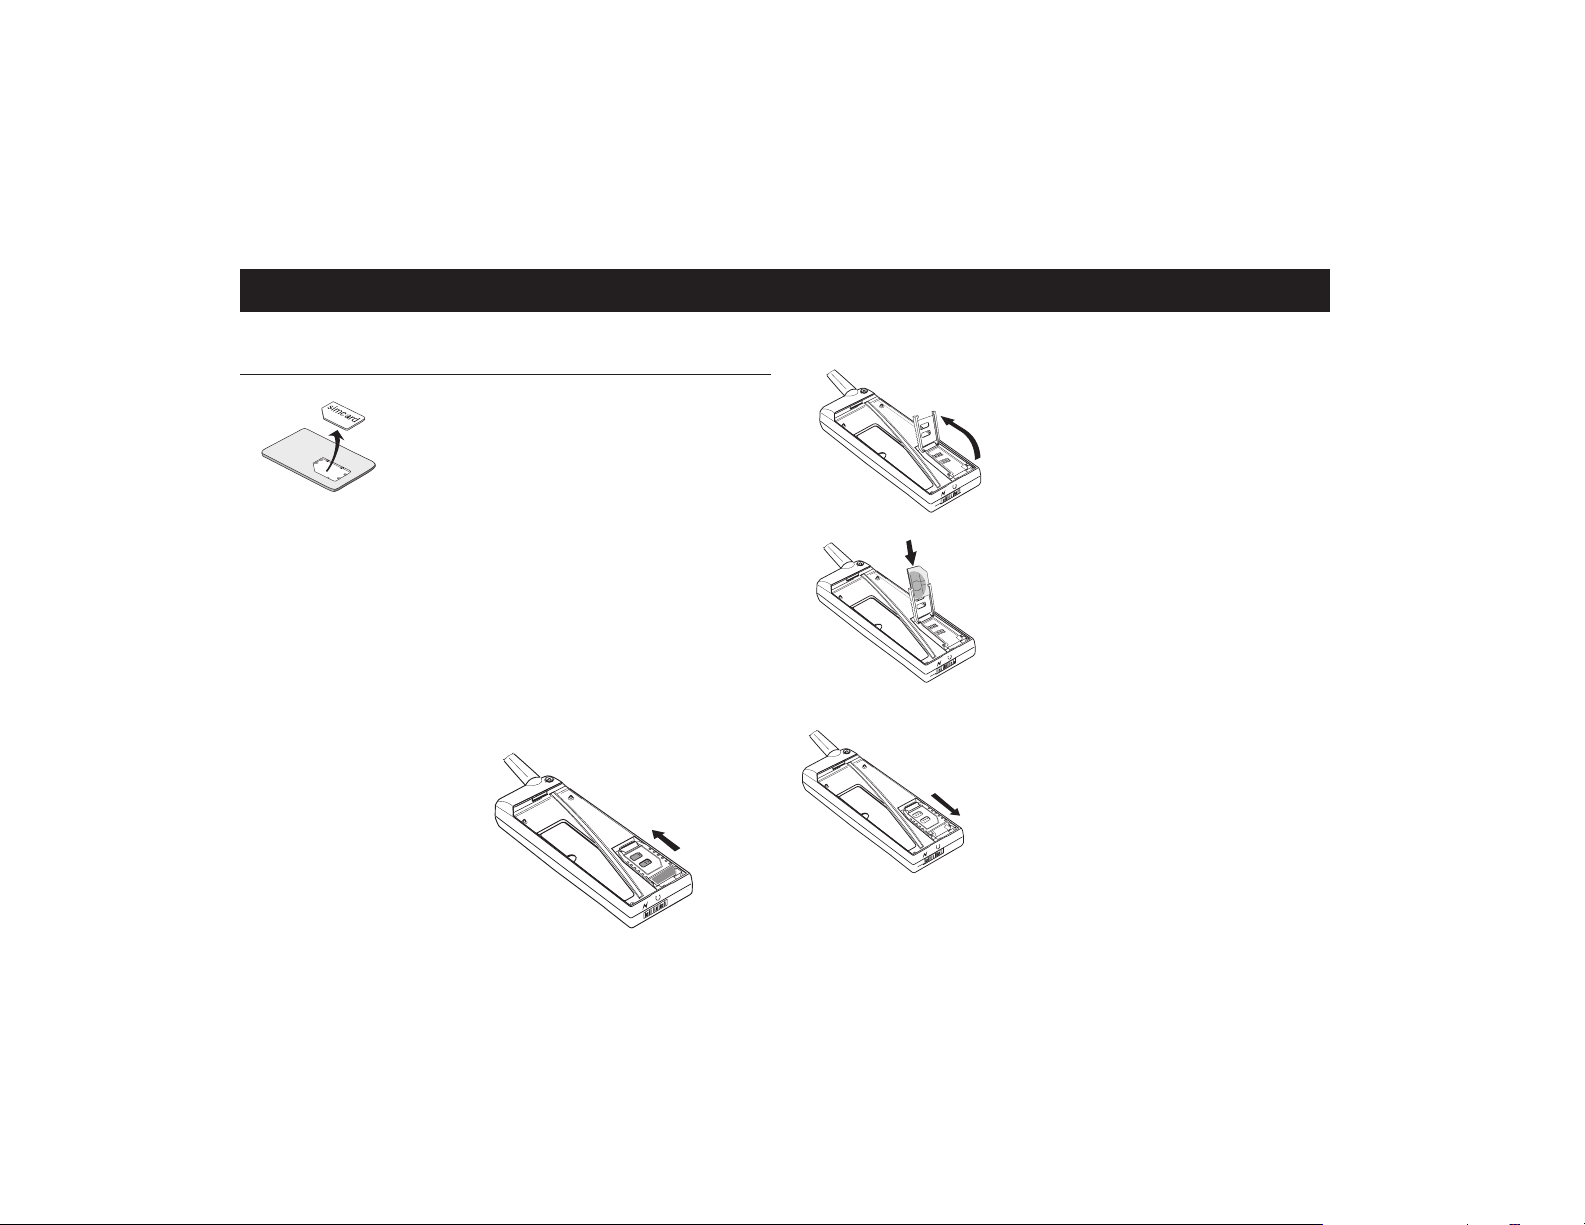
The SIM Card
The SIM Card
When you register as a subscriber with a network operator,
When you register as a subscriber with a network operator,
you obtain a SIM card.
you obtain a SIM card.
SIM cards come in two sizes. One is the size of a credit card,
SIM cards come in two sizes. One is the size of a credit card,
and the other is considerably smaller (about the size of a regu
and the other is considerably smaller (about the size of a regu
lar stamp). The CF888 uses the smaller card. Many operators
lar stamp). The CF888 uses the smaller card. Many operators
deliver credit card size SIM cards where the small size card is
deliver credit card size SIM cards where the small size card is
punched out to be easily removed.
punched out to be easily removed.
Before you can use your phone, you must insert the SIM card into
Before you can use your phone, you must insert the SIM card into
the phone.
the phone.
To Insert the SIM Card
To Insert the SIM Card
To insertthe SIMcard, removethe battery(if attached)and follow
To insertthe SIMcard, removethe battery(if attached)and follow
these steps:
these steps:
Release the SIM card holder by sliding it toward the antenna.
Release the SIM card holder by sliding it toward the antenna.
Fold out the holder.
Fold out the holder.
-
-
Slide the SIM card into the holder. Make
Slide the SIM card into the holder. Make
certain that the angled corner is top right
certain that the angled corner is top right
Fold down the holder.
Fold down the holder.
Lock the holder by pressing it down
Lock the holder by pressing it down
and sliding it toward the bottom of the
and sliding it toward the bottom of the
phone.
phone.
4
Page 10
Some features/menusare operator dependent
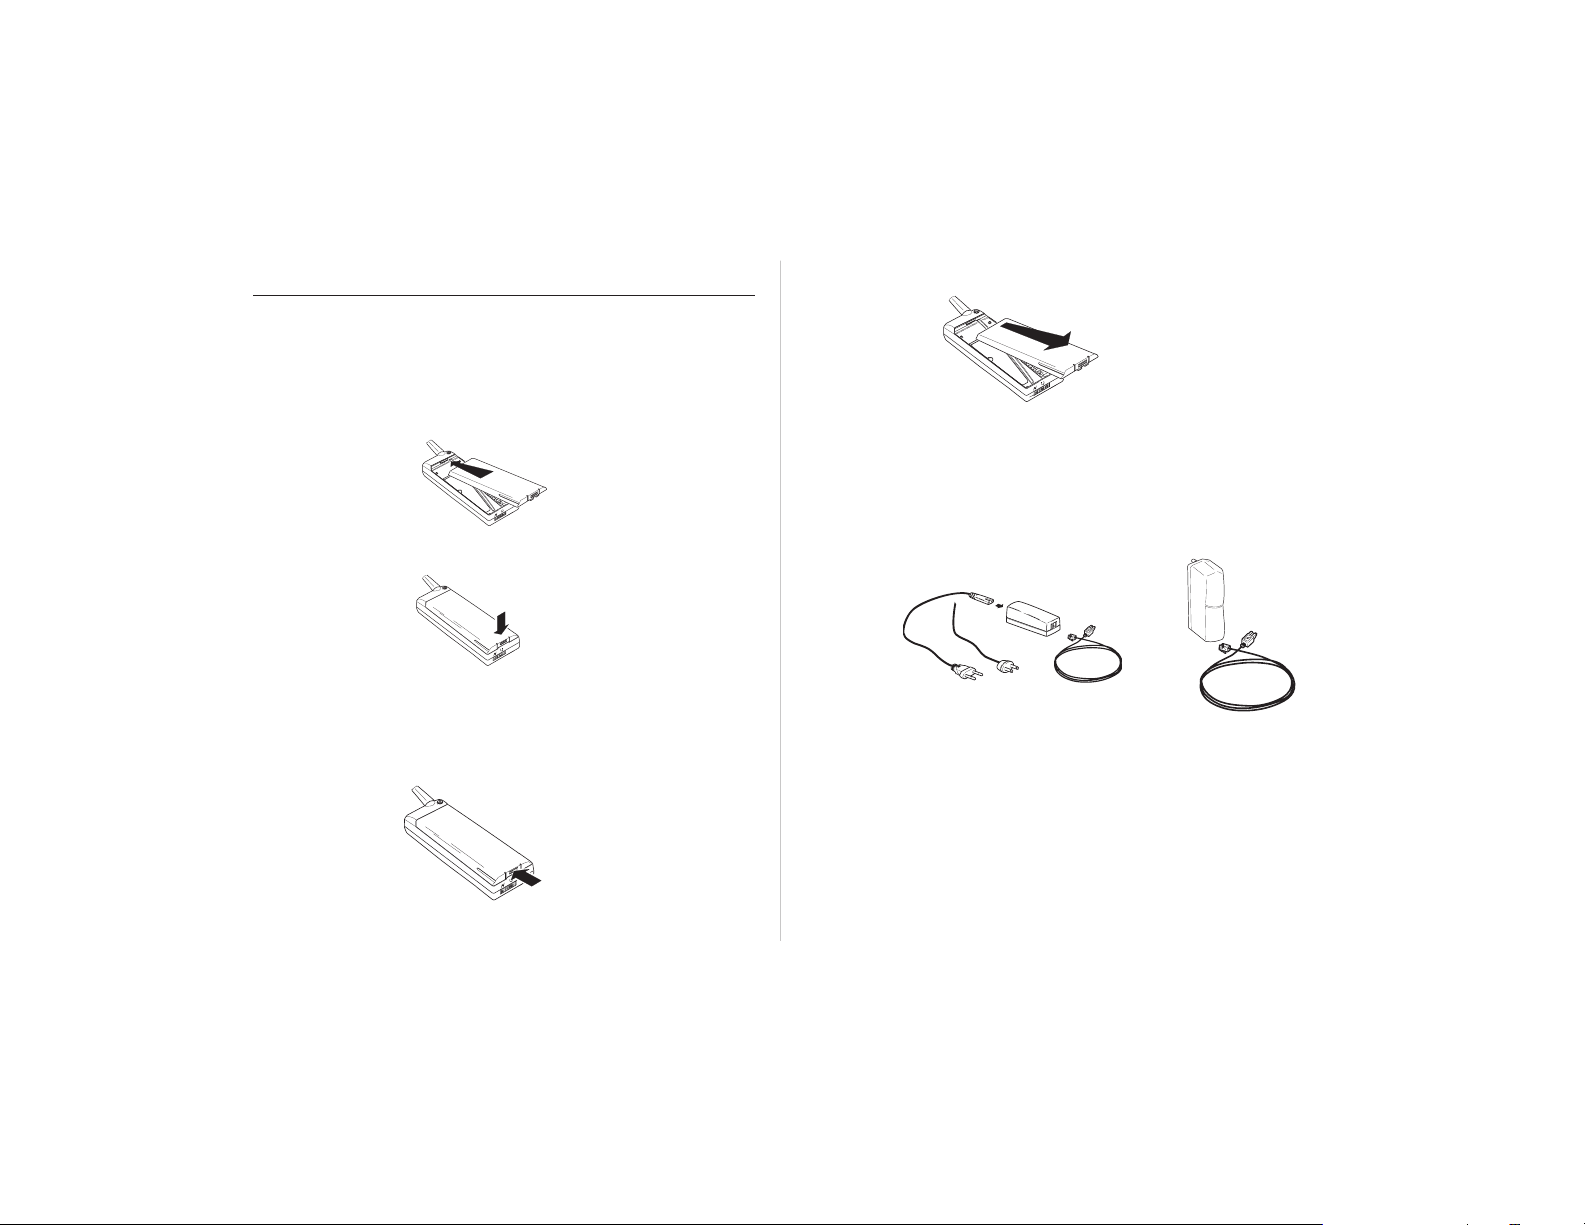
The Battery
Your mobile phone comes with a nickel metal hydride
(NiMH) battery. The battery is not charged when purchased,
but there may be enough power to turn on the phone.
Attaching the Battery to the Phone:
Place the battery on the back of the phone.
Press the battery upwards and
against the phone until you hear
a click.
Removing the Battery
Make sure that the phone is turned off before removing the
battery. Then:
Press the locking catch on
the bottomof thebattery.
Lift the battery up and away from the phone.
Charging the Battery
Make sure that the battery is attached to the phone. Then:
Connect the charger to the outlets. You will receive one
of the chargers pictured below.
A green indicator on the charger lights up. If not, make
sure you have inserted the plug to the charger correctly
(you may have to press hard).
If applicable, connect the clear plastic plug on the
charger cable to the charger. It is correctly inserted
when you hear a click.
5
Page 11

Some features/menus are operator dependent
Connect the other end of the cable to the phone ac
cording to the picture. The flash symbol on the plug
must face upwards. Note that you may have to press
hard.
The phone will automatically start charging thebattery as you
attach the charger. To indicate the charging:
the battery meter in the display is continuously filled and
•
emptied.
• the indicator on top ofthe phone shows a steady red light
(green if the phone is turned on).
When thebattery is fully charged, the battery meter in the display will show full and the indicator on top of the phone will
show a steady green light.
Note! It is possible to use the phone while the battery is being
charged. This will, however, increase the charging time.
Disconnecting the Charger
l Lift the plug connected to
the phone upwards and
pull it out.
When to Charge the Battery
The nickel metal hydride (NiMH) battery that comes with
-
your phone can be charged whenever you wish without los
ing performance. This is not the case with the nickelcadmium
type batteries, often sold as accessories from other suppliers.
For optimal talk and standby time in the long run, we recom
mend that you only use Ericsson original batteries with your
CF888.
As a reminder that the battery needs to be charged or re
placed with a charged one...
an alarm signal (a long beep) sounds and the message
•
Battery low appears for ten seconds in the display.
the indicatorlight ontop ofthe phonestarts blinkingred.
•
Note! If the phone is left turned on,the low battery alarm willbe re-
peated several times and, finally, the phone will turn itself off
when the battery is no longer able to power it satisfactorily.It
might bepossible to turn the phone on again, but youwill not
be able to make or receive any calls. Instead the battery must
be charged or replaced with a charged one.
-
-
-
6
Page 12
Turning On the Phone
Some features/menus are operator dependent
Enter
PIN
****
Press and hold down theNO(
hear a click. The displaywill prompt you to enter your
PIN.
To turn on the phone:
Enter your PIN. The digits appear as stars (*) in the
display. If you make a mistake while entering your PIN,
erase the faulty digit by pressing the
ERICSSON
Press
If you haveentered yourPIN correctly,you will bewelcomed
by your phone. The phone will then search for a network.
Note!
If the PIN is entered incorrectly three times in succession,
the SIM card will be blocked and you willhave to unblock it
using your PUK code. See chapter Security.
When a network is found, the phone beeps three times. The
indicator light on top of the phone flashes green once every
second andyour network operatorsname (in mostcases ab-
breviated) is shown in the display. If you have the charger
connected,the indicatorwill showa steady greenlight instead
of a flashing green light.
You can now make and receive calls. This is called standby
4
NETWORK
28
12:35
7
mode.
Note!
You can disable the need for PIN entry through the Access
menu.
YES
When No Network Name Is Displayed
ON/OFF
) key until you
If the message
Emergency Calls Only
is displayed,
you are within range of a network but you arenot allowed to
use it. However,in anemergency, youcan callthe emergency
number 911(or 112, whereapplicable). See chapterMaking
CLR
key.
.
and Receiving Calls.
If the message
No network
is displayed, thereis no net
-
work within range or the received signal is too weak. You
have to move to obtaina sufficiently strong signal.
Tip!
Check the
Networks
menu to ensure tht your system is
PCS/Analog andyour Analogoptions are set to Athen B, or
B then A, depending on your carriers roaming agreement.
Turning Off the Phone
In standby mode, press and hold theNO(
the display is turned off.
ON/OFF
) key until
7
Page 13
Some features/menus are operator dependent
Initial Settings
The first time you turn on your CF888, you may want to
change the default language setting, and set the clock.
Display Language
Most SIM cards automatically set the display language to the
language of the country where you purchased your SIM card.
If this is not the case, the default language is English.
To change the display language:
Press the navigation key to the LEFT or to the RIGHT re
Press YES to enter the Settings menu.
R
Press the navigation key to the LEFT repeatedly until the
R
Press YES to enter the Language menu.
Press the navigation key repeatedly until you find the
R
Press YES to select the language.
Press CLR to return to the standby mode.
Note! If by accident your phone displays a language you do not un
derstand, you can return to English by entering the sequence
L0000R at any time.
Setting the Time
The time is shown at the bottom of the display. When you
buy the phone, the time is normally not set.
If you want to set the time:
L
L
L
MENU
Settings
SETTINGS
Language
(Auto)
LANGUAGE
English
peatedly until the Settings menu appears.
Language menu appears.
desired language. Your CF888 offers English, French,
Spanish, Portuguese, and Auto Alternative (the SIM
preferred language).
MENU
L
Clock
Press the navigation key to the LEFT repeatedly until
the Clock menu appears.
R
Press YES to enter the Clock menu.
CLOCK
L
Set clock
(11:36)
Press the navigation key to the RIGHT repeatedly until
R
the Set clock menu appears.
Press YES to enter the Set clock function.
SET CLOCK
L
(11:36)
16:45
-
Enter the correct time in hours, minutes and press YES.
R
Press CLR to return to standby mode.
Note! The timeis by default presented in the 12-hourformat. If you
prefer the24-hour format,you can change the default setting.
For moreinformation, seechapter “OtherUseful Features”.
Setting the Ring Signal Level
Press the navigation key to the RIGHT.
MENU
L
Ring level
(
QQQqqq
The text Ring level and a bar representing the
R
)
ring signal level appears in the display.
Press YES to enter the Ring level menu.
Use the navigation key to set the ring signal level.
• Pressing RIGHT increases the volume.
•
Pressing LEFT decreases the volume.
The phone will ring once with the actual setting as you
press the navigation key, except for the Silent and
-
Step settings.
Press YES to save the setting.
Press CLR to return to standby mode.
Tip! Use the side keys to change the ring level silently.
Note! If you have your CF888 connected to external equipment
(e.g. handsfree equipment or a vibrating accessory) the ring
signal levelwill be set for this situation separately. See chapter
“Other Useful Features” for more information.
8
Page 14
Making and Receiving Calls
Some features/menusare operator dependent
The instructions in this chapter assume that you have turned
on your phone and that you are within range of a network.
Emergency Calls
To make an emergency call:
If the phone is not on, turn it on by pressing the NO key
until you hear a click.
Enter 911 (or 112, where applicable).
Press YES. The display shows Attempting
Emergency.
Note! Some operators may require that a SIM card has been in-
serted intothe phoneand thatyou havea validsubscription.
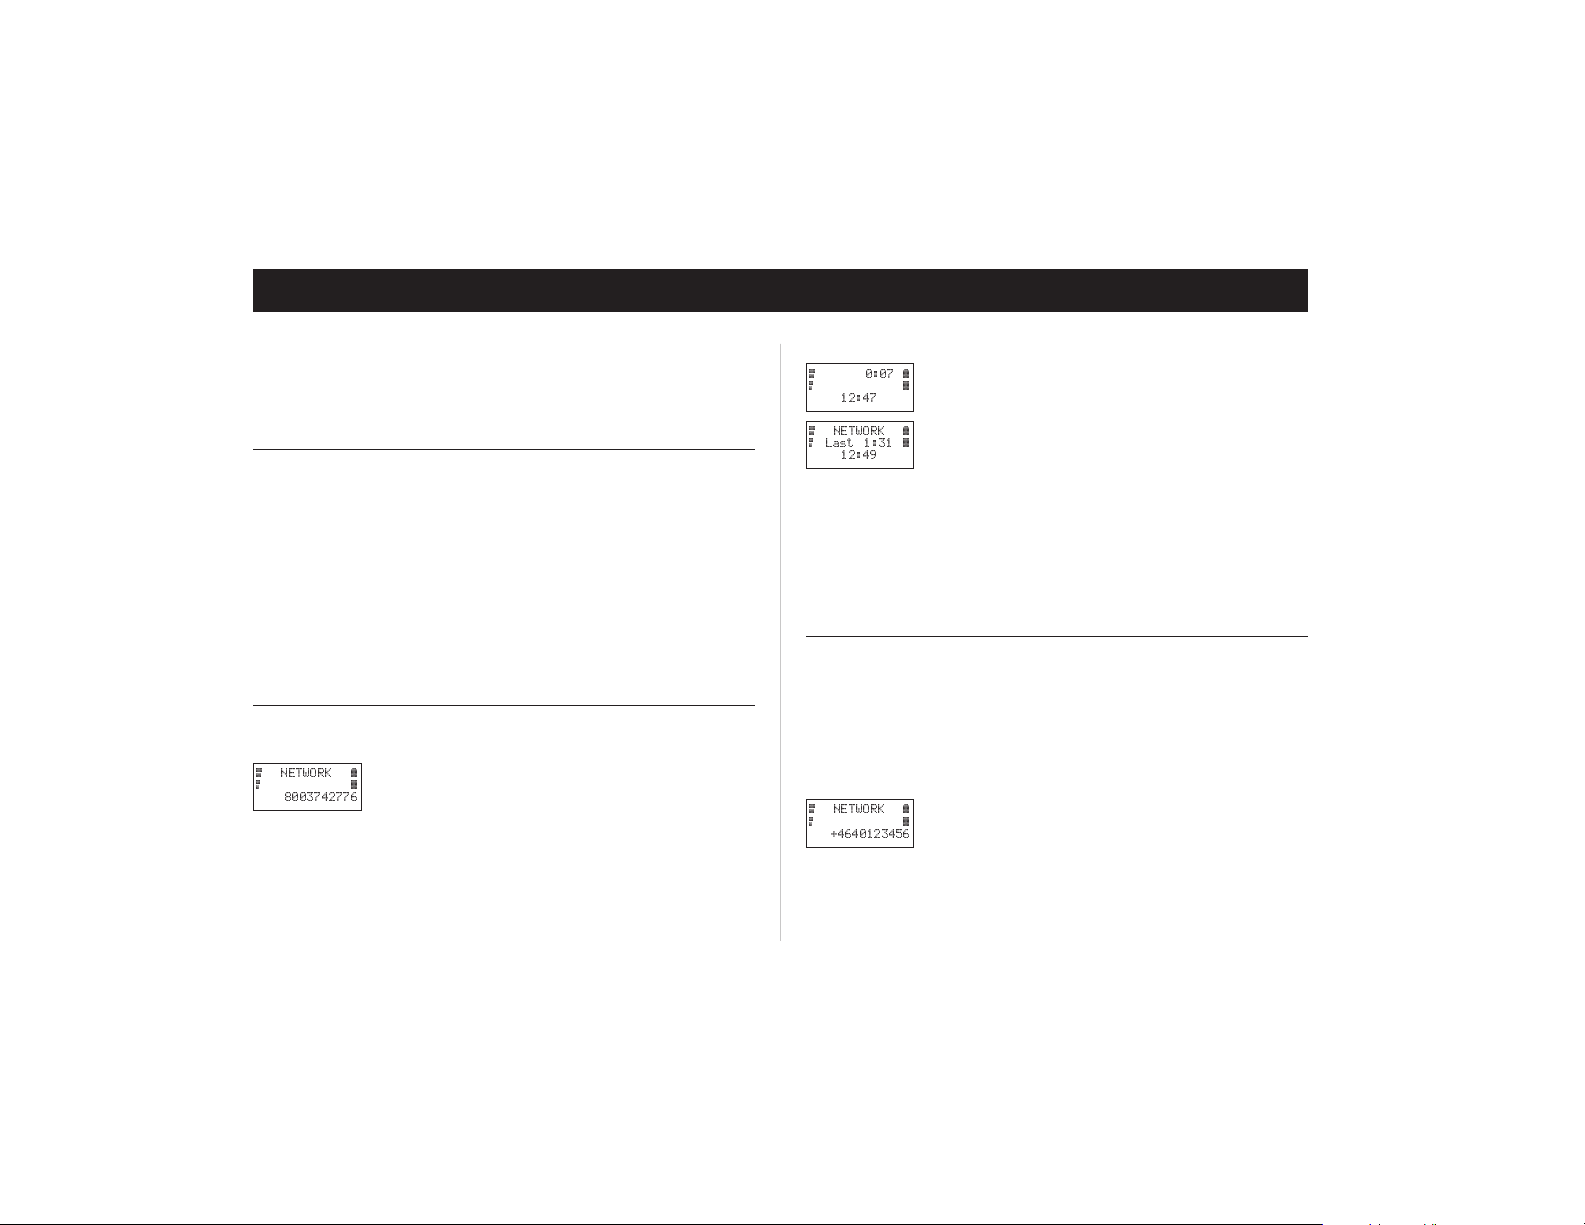
Making Domestic Calls
To make a domestic call:
4
NETWORK
28
8003742776
Enter the area code and phone number. The digits are
7
shown in the display.
•
If you need to erase a digit, press CLR.
•
To erase all digits, press and hold the CLR key until all
digits have been erased or press NO.
Press YES to make the call. The display shows Call
ing, followed by Connecting.
•
When the call is answered, a call time meter in the dis
play shows the elapsed time in minutes and seconds.
If nobodyanswers your call or you cannot get through,
4
0:07
28
12:47
4
NETWORK
2
Last 1:31
12:49
•
7
NO. The number is stored in a memory which
press
makes it easy to repeat the call (see “Redialing the Last
Number” below).
7
8
If the number is busy, it can be redialed automatically
•
(see “Redialing a Number” below).
When you want to end the call, press NO. The Call
Time meter shows the duration of the call for three sec
onds.
Tip! It is possible to check the duration of the call later. See chap-
ter “Other Useful Features”.
-
Making International Calls
To make an international call:
Press and hold the 0 key until the international charac-
ter + is displayed.
The + will automatically be replaced by the interna
tional dialing prefix for the country from which you are
calling.
Enter the country code, the area code (without the lead
4
NETWORK
28
+4640123456
-
-
7
ing zero) and the phone number.
Press YES to make the call.
Note! When you are roaming, your phone will automatically search
for a network. Which networks you can use depends on the
agreements your operator has signed with the operators in
the area you are visiting. See chapter “Networks”.
-
-
9
Page 15

Some features/menus are operator dependent
Note! Some operators may not support international dialing prefix
(+). You may be required to enter a specific code (ex: 011 for
USA).
Receiving a Call
4
Answer?
28
8003742776
When you receive a call, the phone rings and the indicator
7
light on top of the phone rapidly blinks green. The display
shows Answer?.
If yoursubscription includesthe serviceCalling Line Identifi
cation andthe caller’s network sends the number, you will see
the caller’s number on the bottom row of the display. If the
number is stored together with a name in the phone book,
the name will be shown in the display.
Note! The phone must be turned on and within coverage of a net-
work before a call can be received.
The active flip can be temporarily disabled by pressing and
holding the side volume key while opening/closing the flip.
To Answer the Call
Open flip. If already open, press YES.
When the call is finished, press NO, or close flip.
To Reject the Call
There are two ways of rejecting the call:
•
Press the NO key.
•
Press the volume key on the side of the phone twice.
The caller will hear a busy tone if the caller’s network sup
ports this function.
Redialing a Number
-
LAST Dialed
LR
046998877
Note! Should you want to clear the last dialed numbers memory, do
-
If you press NO in Analog mode, the ringer will be muted,
and the phone will return to standby.
Your CF888 has a function that conveniently lets you redial
the last 15 phone numbers you havecalled. It can also rediala
number automatically if the connection failed when you first
called. This may vary depending on your SIM.
To Redial Previously Called Numbers
Press YES. The display now shows Call? together
with the last dialed number.
Press the navigation key to the RIGHT or LEFT until the
number you want to call is shown on the bottom row of
the display.
Press YES to make the call.
the following:
Press the navigation key to the LEFT. The Phone
book menu appears.
Press YES to enter the Phone book menu.
Press the navigation key to the LEFT. The Dialed
numbers function appears.
Press YES to select the Dialed numbers func
tion.
Press and hold the CLR key. The question Erase
all? appears.
Press YES to erase the last dialed numbers from the
memory.
Press CLR to return to standby mode.
-
10
Page 16
Some features/menusare operator dependent
The Automatic Redialing Function
If the connection fails, the display shows Retry? on the
top row and the reason for the failure on the second row.
To automatically redial the number:
YES.
l Press
The number will automatically be redialed untilthe call
•
is answered, or 10 times at the most.
If you press any key or you receive a call, the redialing
•
is interrupted.
If the redialing is successful, the phone beeps and then
•
you hear a ring signal.
NO if you do not want to retry.
l Press
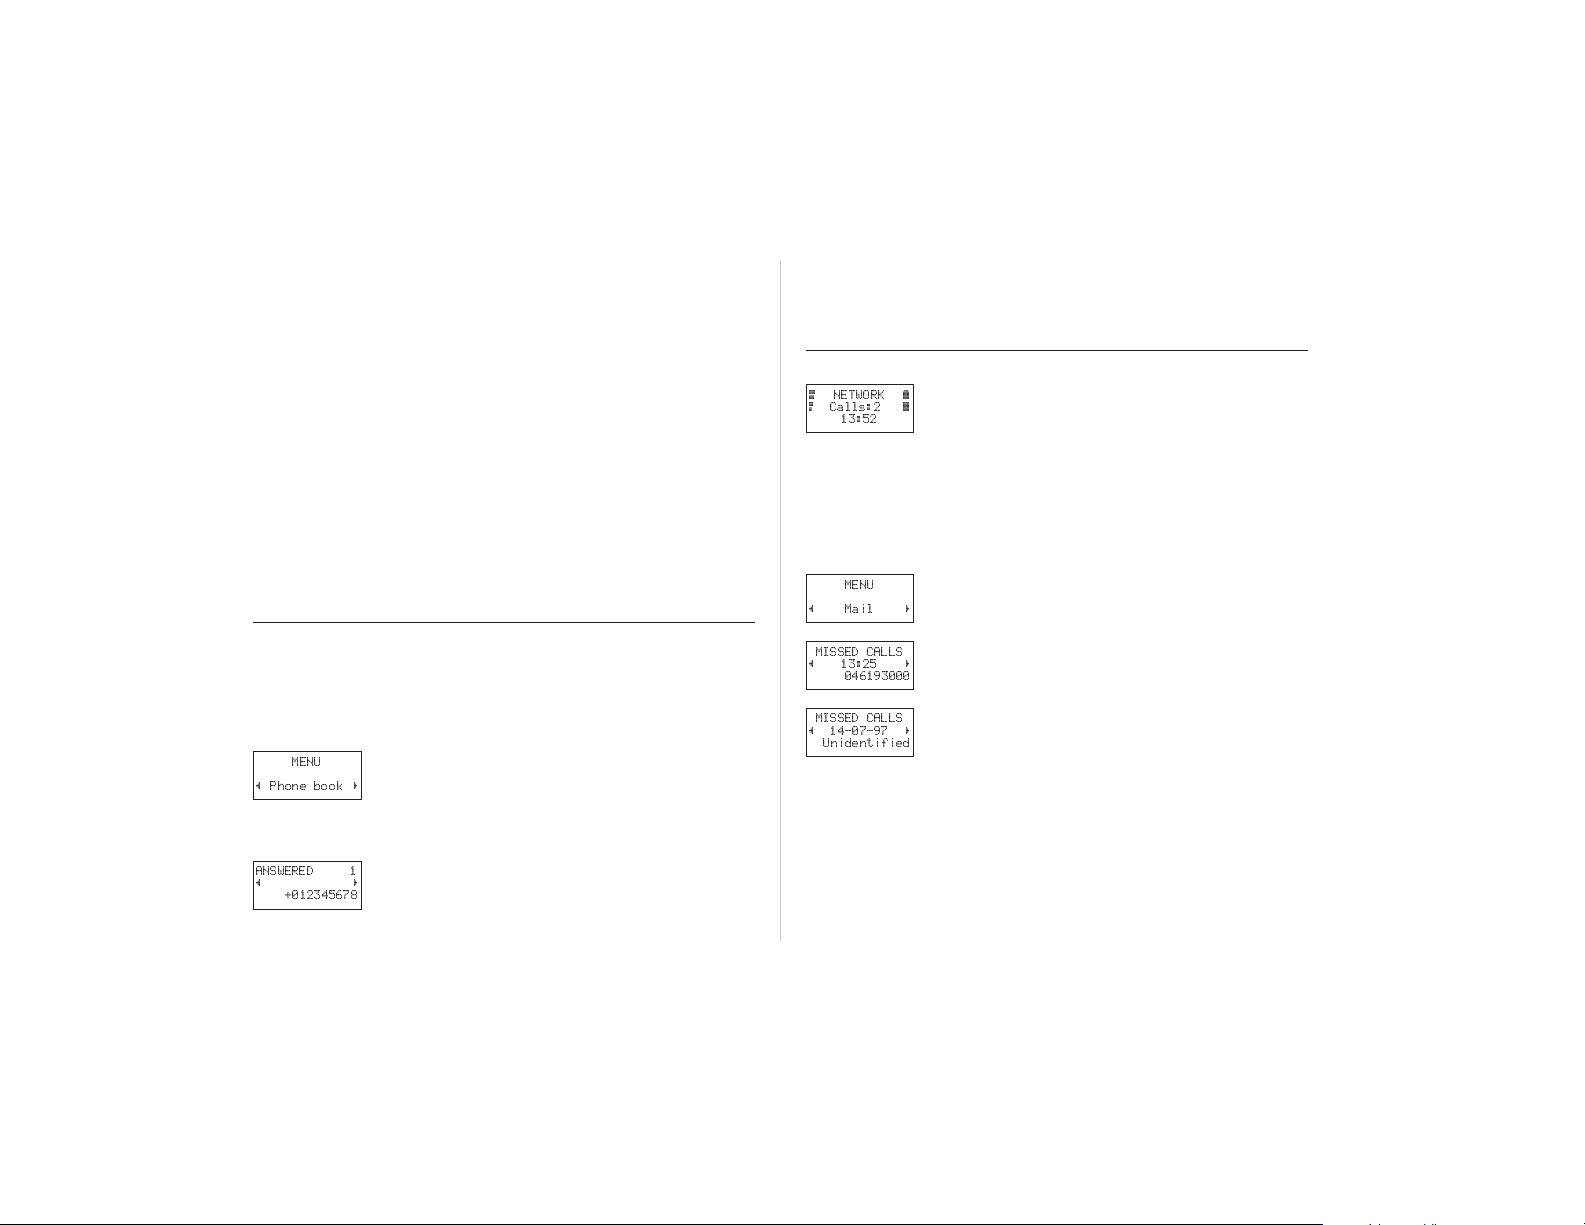
Calling Someone Who Has Called You
If you subscribe to the service Calling Line Identification,
and the caller’s network sends the number, the numbers of
the last ten answered calls are stored in the phone.
To recall one of the last answered numbers:
MENU
L
Phone book
ANSWERED 1
LR
+012345678
Press the navigation key to the LEFT. The Phone
book menu appears.
Press YES to enter the Phone book menu.
R
Press the navigation key LEFT repeatedly until the An
swered calls function appears.
Press YES to select the Answered calls func
tion.
Press the navigation key repeatedly until the required
number is displayed.
Press YES to make the call.
Unanswered Calls
4
NETWORK
2
Calls:2
13:52
MENU
L
Mail
MISSED CALLS
L
13:25
046193000
MISSED CALLS
L
14-07-97
Unidentified
-
-
If youhave received calls but have been unableto answer, the
7
number of unanswered calls will be shownin the display until
8
you press the CLR key.
Information about the ten last missed calls will be saved in
your phone’s memory, which makes it possible for you to
check when the calls were received. If your subscription in
cludes the service Calling Line Identification and the caller’s
network sendsthe number,you canalso findout whocalled.
Finding Out Who Called and When
Press the navigation key to the LEFT repeatedly until the
Mail menu appears.
R
Press YES to enter the Mail menu.
Press the navigation key repeatedly until the Missed
R
calls function appears.
Press YES to enter the Missed calls function.
The last caller’s number (if your subscription includes
R
the Calling Line Identification service) is now shown in
the display together with the time (or date) when the
call was received. If no information about the caller’s
number was received, the display will show one of the
following:
•
Unidentified, which means that no informa
tion was available.
•
Restricted, which means that the caller wanted
to withhold the number.
-
-
11
Page 17

Some features/menus are operator dependent
To see the other unanswered calls, press the navigation
key repeatedly.
Press CLR to return to standby mode.
Note! If you check a missedcall within 24 hours, the time of the call
will be displayed. Otherwise, the time is replaced by the date.
You can toggle between date and time by pressing *.
To Erase a Number from the Missed Calls
Memory
When the information about the call is shown, press
CLR.
Press YES.
Hiding or Showing Your Number
For most common subscriptions, the caller’s number will be
sent when a call is made. This means that the receiver can see
your phone number when you make a call. However, some
operators offer subscriptions where your phone number is
normally hidden.
You can alter the normalsetting (according to your subscrip
tion) for a particular call.
Hiding Your Phone Number for a Particular
Call:
Enter the phone number you wish to call.
Press the navigation key to the RIGHT.
R
The Special functions menu now appears.
Press YES to enter the Special functions
menu.
Special
L
functions
MENU
SPECIAL FUNC
L
Hide Id
046193000
Press the navigation key repeatedly until Hide Id
R
appears.
Press YES to make the call.
Showing Your Number for a Particular Call
Enter the phone number you wish to call.
Press the navigation key to the RIGHT.
R
The Special functions menu now appears.
Special
L
functions
MENU
Press YES to enter the Special functions
SPECIAL FUNC
L
Send Id
046193000
menu.
Press the navigation key repeatedly until Send Id
R
appears.
Press YES to make the call.
Some featuresare notavailable inyour Analogsubscription.
-
12
Page 18
During a Call
Some features/menusare operator dependent
When you are engaged in a call, there are several functions in
your CF888 to help you perform actions you might need dur
ing the conversation.
Changing the Earpiece Volume
If you want to change the earpiece volume during a call:
l Press the volume key on the side of the phone up or
down.
• Pressing UP increases the volume.
• Pressing DOWN decreases the volume.
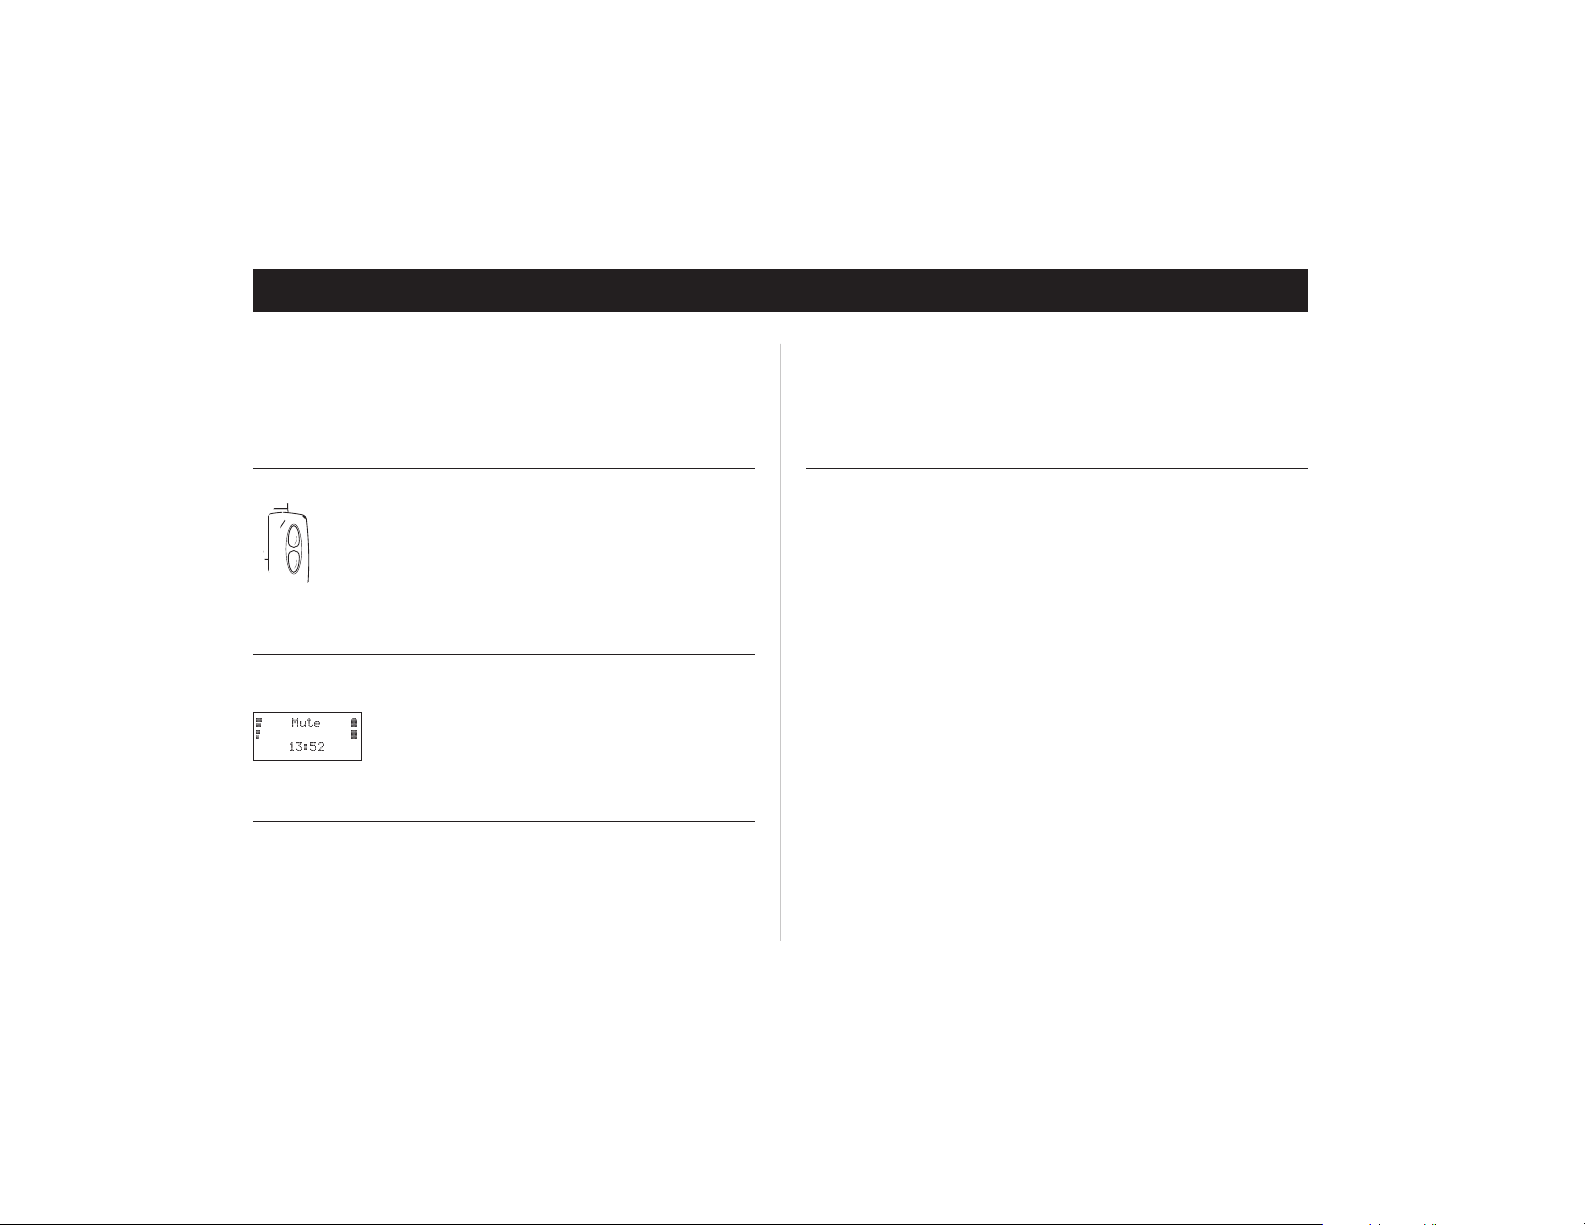
Muting the Microphone
To temporarily mute the microphone during a call:
Press and hold the CLR key. Mute is shown in the dis-
4
Mute
7
28
13:52
play.
To resume conversation, release the CLR key.
Using the Display as a Scratch Pad
If you,during a call, need to write down a phonenumber, you
can use the Scratch Pad function in the CF888. To do this:
l Enter the number using the numeric keys.
-
Sending Tone Signals
Note! A p (pause) is sent by holding down a * key.
When you end the call, the number remains in the display.
You can now call thenumber by pressing
Phone Book (see chapter “The Phone Book”).
In order to, for example, perform banking by phone or con
trol a phone answering machine, you need to use codes.
These codes are sent as tone signals (also called DTMF
tones).
To send tone signals/codes during a call:
l Press the appropriate keys (1-9, * and #).
YES or save it in the
Sending DTMF tones in standby mode:
When dialing a number with pause(s) in standby mode, the
first part of the number is sent as a telephone number. Any
numbers after the p are sent as DTMF. A 3-second pause is
generated for each p sign, but the 3-second timer can be
forced by pressing SEND.
In Analogmode, thedigits between pauses are sent as DTMF
when YES is pressed. If LONG YES is pressed, the digits
between pauses are hookflashed.
-
13
Page 19

Some features/menus are operator dependent
Sending DTMF Tones While on a Call:
Digits entered during an active call are automatically sent as
DTMF. If YES is pressed, the call will be set-up to the
number entered.
This applies to both AMPS and GSM modes.
Sending Digits from Your Phone Book While
on a Call
While on a call, you can recall a phone book entry. A second
call can be placed by pressing and holding the YES key.
In analog mode, press
DTMF.
Tip! You can also enter the code before you make the call or store
it in the Phone Book. See Creating Your Personal Phone Book in
the “Phone Book” chapter on how to do this.
YES to send digits (before pauses) as
14
Page 20
The Menu System
Some fea tures/menus are op era tor dependent
The menu sys tem of your CF888 al lows you to con trol the
phone’s func tions and to cus tom ize it to suit your per sonal
pref er ences.
Each menu is a list of op tions you can choose from. Some of
the op tions con tain sub menus with ad di tional op tions. As a
help for find ing your way among the menus, we rec om mend
that you use the fold- out on the in side of the cover.
Navigating the Menu System
The menus are ar ranged in a con tinu ous loop (see the fold out), which you move through with the YES, NO,
NAVIGATION and CLR keys.
Press…..to…
Move clock wise or coun ter clock wise.
Se lect a menu or func tion.
Back up one level and/or leave a set ting un changed.
Go back to the standby menu.
To se lect a menu or make a set ting:
ΠPress the navi ga tion key to the LEFT or RIGHT un til you
reach the de sired menu or func tion.
• Press YES to en ter the menu or to se lect the func tion.
Ž Press the navi ga tion key to find the de sired sub menu or
to se lect a set ting al ter na tive.
• Press YES to en ter the sub menu or to con firm the set -
ting.
Note! If you have en tered the menu sys tem, but have not pressed
any key for 60 sec onds, the phone will re turn to the standby
dis play.
Tip! In stead of press ing the navi ga tion key re peat edly you can
press and hold it down un til you reach the de sired menu or
sub menu.
Display Text and Symbols
When you navi gate the menu sys tem, there are some in di ca -
SETTINGS
Ear volume
( )
tions in the dis play:
• Up percase let ters are used to in di cate the menu or func -
tion se lected.
• When ~ and • are dis played, there are more op tions you
can scroll through with the navi ga tion key.
• Text within brack ets in di cates the cur rent set ting for the
dis played func tion.
15
Page 21

Some features/menus are operator dependent
The Phone Book
The Phone Book is a function in your CF888 that conven
iently lets you store and recall phone numbers. This means
that you can let the phone remember your important num
bers, instead of you keeping everything in your head or
carrying your address book with you.
The Phone Book also keeps track of your last dialed numbers
and, if you subscribe to the Calling Line Identification serv
ice, the last answered numbers. This feature is convenient if
you have to redial someone.
When you receive a call and the caller’s number is in the
Phone Book, you will see the name in the display.
Tip Together with your CF888 you received the Ericsson Mobile
Office Suite software. When installed on your computer, the
Mobile Office Suite lets you manage your Phone Book from
your computer in a simple and straightforward way.
You will find more information about the Mobile Office
Suite in the chapter “Communicating via the Modem”.
Before You Start
Before you start creating your personal Phone Book, there
are a few things you need to know. In this section, you will
learn about the two different storages and how to store the
numbers with the international prefix.
-
-
We also recommend that you read the section about entering
characters at this stage, even though you might need to go
back tothe section when you follow the instructions later on.
Phone Book Memories
There are two different memories where you can store the
-
phone numbers:
The memory on the SIM card.
•
• The phone memory.
Storing your numbers in the card memory allows you to recall
the numbers stored on the SIM card even when you change
phones, i.e. when you insert your SIM card into another
phone.
On the other hand, by storing your numbers in the phone mem-
ory, your numbers will always be available to you on your
phone, even if you change SIM cards.
The memory positions in the card memory are numbered
from 1 onwards. The actual number of memory positions
available depends on your SIM card.
The phone memory can hold up to 99 phone numbers. The
memory positions are designated ¤1–¤99.
Note! In the Phone book menu, press # to enter the ¤charac
ter. Outside the Phone book menu, you must press and
hold down # to enter the ¤ character.
-
16
Page 22

Some features/menusare operator dependent
Entering Characters
In thephone book you can accompany any number you store
with a name. To enter the characters in the name, follow the
instructions below.
l Press the appropriate key, 1–9, 0 or #, repeatedly until
the desired character appears in the display.
Press… to get…
1 Space -?!,.:;“'<=>()_1
2 ABCЕДЖаЗ2Γ
3 DEFèÉ3ΛΦ
4 GHIì4
5 JKL5Λ
6 MNOÑÖØò6
7 PQRSß7?Σ
8 TUVÜù8
9 WXYZ9
0 +&@/¤%$£¥§¿¡0T ΞΨΩ
* p, Upper/Lower Case
#
For example:
•
To enter an A, press the numeric key 2 once.
•
To enter a B, press the numeric key 2 twice.
Tip! To enter a digit, you can press and hold down the numeric
key.
Note! If there is a pause of more than 60 seconds between entering
characters, the phone will return to the standby menu.
To Enter Lowercase Letters
Enter the letter, for example an ‘A’, and then press *.An
#*
‘a’ appears.
Lowercase letters will now appear until you press * again.
To Check the First Characters
If you enter more characters than can be seen in the display,
the first characters will be replaced by the l symbol. To
check the first characters you have entered:
l Press the navigation key
LEFT.
Creating Your Personal Phone Book
To Store a Phone Number
From the Phone book menu, select Store.
Enter a name to accompany the phone number.
Use the numeric keys as described in the previous section.
STORE 33
Name: John Doe
Enter no: _
STORE 33
Name: John Doe
555-1212
STORE ¤16
Name: John Doe
555-1212
Press the navigation key RIGHT.
Enter the phone number.
You now have four options:
To save the number in the card memory, in the first
empty position (displayed in the top right corner):
•
Press YES.
To save the number in the card memory, in a position
you decide:
•
Press the navigation key RIGHT, enter the position and
then press YES.
To save the number in the phone memory, in the first
empty position:
•
Press the navigation key RIGHT, press the # key twice
and then press YES.
17
Page 23

Some features/menus are operator dependent
STORE 2
Used
Overwrite?
To save the number in the phone memory, in a position
you decide:
Press the navigation key RIGHT, press the # key once,
•
enter the position and then press YES.
Tip! If you have entered a number in the scratch pad during a call,
you canstore itin the Phone Book by selecting Store from
the Phone book menu while you have the number in the
display.
Overwrite Protection
If youtry tostore aphone numberin a position which already
contains a phone number, the message Used Over
write? appears in the display. You then have the two
following options.
To store the number in a different position:
Press NO.
Enter the new position number.
Press YES
To store the number in the selected position,thus erasing the
old number:
YES.
l Press
When the Memories are Full
•
If you try to store a phone number when all the positions
in the card memory are occupied, a position number in the
phone memory will be suggested in the top line of the dis
play.
•
If both memories are full, no position number will be
suggested. If you still wish to store the phone number,
you have to enter the number of an already occupied po
sition, thus erasing the old number.
Storing a Number With a Tone Signal Code
In order to, for example, perform banking by phone or con
trol a phone answering machine, you will need to use codes.
These codes are sent as tone signals (also called DTMF
tones).
Note! Anything entered after a pause is sent as DTMF tones from
the Phone Book.
If you want to save the phone number in the Phone Book to
gether with the codes:
-
-
Follow the instructions on how to store a phone
-
number until entering the number.
After you enter the phone number, press and hold the
STORE 34
e: Bankbyphone
040556677p_
* key until the pause character ‘p’ appears.
Enter the code.
If needed, insert another pause, another code and so on.
Continue following the instructions on how to store a
phone number.
When you make the call, the phone will dial the number, wait
until the call is answered and send the code. If you inserted
another pause and another code, it will pause again, send the
next code and so on.
Recalling a Phone Number
-
-
The Speed Dialing Facility
You can call the phone numbers that you store in the posi
tions1–9 inthecard memory by entering the position number
and then pressing
1 – 9 for important numbers.
YES. Therefore, you should save positions
-
18
Page 24

Some features/menusare operator dependent
NAME
RECALL
Name:Em_
Emma Limetree
L
(7)
9195551212
An example:
If youwant to call John, whose number isstored inposition 3
in the card memory:
Enter the digit 3.
Press YES.
Recalling a Phone Number Using the Name
From the Phone book menu, select Name re
-
call.
Enter the name you want to recall (or the first letters of
it) using the numeric keys as described above.
You do not have to enter the entire name; a few initial
letters will do. The phone will match the letters with existing names in the memory.
Press YES.
The best match between the letters you entered and the
names in the Phone Book will be displayed. You can
R
also see the storage position within brackets.
If the displayed name is not the required one, press the
navigation key repeatedly until you find the correct
name and number.
Press YES to make the call.
Tip! You can also enter the name directly after pressing LEFT
from the empty standby display.
Tip! When recalling by name, both SIM memory and phone book
storage will be listed alphabetically.
Recalling a Phone Number Using the Position
If you know the memory position where you have stored a
certain phone number, you can recall the number using the
position.
From the Phone book menu, select Position
recall.
Enter the position where the number is stored.
POSITION
RECALL
Position: 7
For a position in the card memory, simply enter the
•
number.
For a position in the phone memory, press and hold
•
down the # key until the ‘¤’ character appears and
then enter the number.
Press YES.
Emma Limetree
L
(7)
9195551212
The name and phone number is now displayed.
If you entered the wrong position number, press the
R
navigation key repeatedly until you find the phone
number.
To call the number, press YES.
Tip! You can also enter the position directly in the standbydisplay
and then press the # key to recall the phone number. Do not
forget the ‘¤’ before the position if the number is stored in
the phone memory.
Keeping Your Phone Book Up to Date
As the people you know change jobs, move, marry etc., you
might want to change the names and numbers in your Phone
Book, or perhaps delete some of the entries.
19
Page 25

Some features/menus are operator dependent
EDIT
L
Find pos
Position: 7
EDIT 7
Emma Limetree_
9195551212
To Edit an Entry in the Phone Book
There are two ways of bringing up the Phone Book entry you
wish to edit. You can use either the storage position or the
name.
To edit the entry using the position:
From the Phone book menu, select Edit.
Enter the position number for the entry you wish to
edit.
R
For a position in the card memory, simply enter the
•
number.
• For a position in the phone memory, press and hold
down the # key until the ‘¤’ character appears and
then enter the number.
Press YES to select the entry.
You will now see…
• the name (displayed on the middle row).
• the phone number (displayed on the bottom row).
•
the storage position (displayed on the top row).
Press the navigation key RIGHT to select the row you
wish to edit.
The cursor is positioned to the right on the selected
row.
Edit the row by using…
•
the CLR key to erase.
•
the numeric keys to enter letters or digits.
•
the navigation key to move the cursor left (or right
when it is positioned in a row).
If needed, press the navigation key RIGHT to select an
other row and continue editing.
Press YES to save the changes.
To edit the entry using the name:
From the Phone book menu, select Edit.
Press the navigation key LEFT.
The display now shows Find name in the middle
row.
EDIT
L
Find name
Name: Emma_
Enter the name for the entry you wish to edit, using the
R
numeric keys. The more letters you enter, the better the
match.
Press
YES to select the entry.
You can now continue from point 4 above.
Tip! When youedit using the name, you cannot scrollbetween the
different entries that match the characters you entered. Only
the first match is displayed. In some cases therefore, it might
be easier to recall the number using the name to check the
storage position,and thenuse thisto editusing theposition.
Erasing a Phone Number
To erase a phone number from the Phone Book:
Recall the number using Name recall or
Position recall.
Press and hold CLR. The question Erase? appears.
Press YES to erase the number.
Note! You can also select Erase from the Phone book menu
and then enter the storage position.
Should you want to erase all numbers from the phone mem
ory (notpossible forthe card memory), you can do this as fol
lows:
-
From the Phone book menu, select Erase all
from Phone.
-
-
20
Page 26

Some features/menusare operator dependent
Press YES to erase all phone numbers from the phone
memory.
Copying Phone Numbers between Positions
and Memories
As you fill up the Phone Book memories, you might want to
move entries from one memory to another or between posi
tions in the memories.
COPY ALL
L
CardrPhone
COPY CARD
From start
position: _
Copying All Numbers from Card Memory to
Phone Memory
R
From the Phone book menu, select Copy all.
Scroll to Card->Phone and press YES.
Enter the number of the first position in the card memory
you wish to copy and press YES.
Enter the number of the first position in the phone mem-
ory you wish to copy to and press YES.
Press YES to start the copying.
Copying All Numbers from Phone Memory to
Card Memory
From the Phone book menu, select Copy all.
Scroll to Phone->Card and press YES.
Enter the number of the first position in the phone mem
ory you wish to copy and press YES.
Enter the number of the first position in the card memory
you wish to copy to and press YES.
Press YES to start the copying.
Copying Numbers from Card Memory to
Phone Memory One by One
From the Phone book menu, select Copy.
COPY ALL
L
CardrPhone
Scroll to Card->Phone and press YES.
R
Enter the number of the first position in the card memory
you wish to copy and press YES.
-
COPY CARD
From start
position: _
Eric Woods
Copy to ¤7?
Enter the number of the first position in the phone mem
ory you wish to copy to and press YES.
Press YES to start copying.
12
The starting position in the card memory is displayed and
the next empty position in the phone memory is suggested.
-
For every entry on the card, from the start position on-
COPY PHONE
From start
position: ¤_
COPY ALL
L
PhonerCard
wards, press:
• YES to copy.
• NO to go on to the next position in the card memory.
• CLR to copy to another position in either the card or
phone memory. Enter the number of the position and
YES. To enter a number from the phone memory,
R
press
for example ¤1, press # to enter the ¤ character.
•
CLR twice to interrupt copying.
Copying Numbers from Phone Memory to
Card Memory One by One
From the Phone book menu, select Copy.
Scroll to Phone->Card and press YES.
-
To copyfrom the phone memory to the card memory usethe
YES, NOand CLRkeys in the same way as describedin the pre
vious paragraph.
-
21
Page 27

Some features/menus are operator dependent
Sending and Receiving Text Messages
A very convenient feature of your Ericsson CF888 is the
Short Message Service (SMS). This allows youto send and re
ceive text messages consisting of up to 160 characters.
Using the SMS, you do not have to worry about whether the
person you want to reach checks their answering machines.
The message will be delivered to their phone.
Text messages can be received when the phone is in standby
mode, when the recipient is engaged in a call orwhen incoming calls are forwarded to another phone number. If the recipient’s phone is turned off when a message is sent, a notifying message will be displayed shortly after the phone is
turned on.
Apart from sending standard messages to phones, your Ericsson CF888 is also prepared for sending fax messages
(group 3 and 4), e-mails and telexes, via SMS. This service is
operator dependent.
Tip! Together with your CF888 you received the Mobile Office
Suite software. The Mobile Office Suite makes it possible for
you to write and read SMS messages on your computer. For
more information on how this is done, please see the chapter
“Communicating via the Modem”.
Note! The SMS Mobile Originate may need to be activated.
You cannot send SMS while in Analog mode.
Two Memories
-
The Messages Memory
If you do not want to read an incoming message at once, it is
automatically stored in the Messages memory in the phone,
which allows you to read it later on.
If there are any unread incoming messages in the messages
memory, a letter icon (Mm) is shown to the left at the bottom
of the display.
The Messages memory can hold up to 10 messages. When all
memory positions are occupied, the oldest read message will
be overwritten when a new message is received.
If the Messages memory becomes full with unread messages,
new messages will automatically be stored in the SIM card
memory. If the SIM card memory becomes full, the letter
icon (Mm) starts blinking.
Messages willremain in the Messages memory until you erase
them (see “How to Erase a Message”), until you insert a dif
ferent SIM card, or until the telephone needs the memory
space for storing new messages
The SIM Card Memory
If you receive an important message and want to make sure it
is not erased from the messages memory, you can store it in
memory on your SIM card. This means that you can retrieve
the message regardless of which phone you use. Messages
-
22
Page 28

Some features/menusare operator dependent
that are saved in the SIM card memory will remain thereuntil
you erase them.
Setting the Phone for Text Messaging
If the phone number to your network service center cannot
be retrieved from your SIM card, you must specify the
number yourself. Otherwise you cannot reply to received
messages or send your own messages.
From the Mail menu, select Send messages.
Scroll to Options and press
R
YES.
Scroll toServ cent and press
YES.
If there is no number in the display, enter the number
of the service center, including the international prefix,
and press
YES.
Press CLR to return to standby mode.
Your phone is now ready to send and receive messages.
Note! Some network operators may only allow SMS to be sent
within their own network.
Setting Duration of Message
If your message cannot be delivered due to the recipient not
being within reach of a network, you can instruct your Serv
ice Center to repeat the message for one hour, 12 hours, one
day, one week or the maximum period (determined by your
service provider).
L
MAIL
Send
Messages
From the Mail menu, select Send messages .
New appears.
L
SEND
MESSAGES
Options
Scroll to Options,using the navigation key and
press YES.
R
To select the Valid per option, press YES .
OPTIONS
L
Valid per
(1 day)
Scroll to the desired duration and press YES.
R
Changing Message Types
The phone is prepared for sending other types of messages.
Your network operator’s Service Center may offerthe facility
to convert a text message into a format (fax, telex, voice, etc.)
that suitsthe equipmentthat isgoing toreceive themessage.
Consult your operator for further information about the formats you can use.
From the Mail menu, select Send messages .
Scroll to Options, using the navigation key, and
press YES.
Scroll to the Msg type option and press YES.
OPTIONS
L
Msg type
(Standard)
-
Composing and Sending Messages
Select the required format, using the navigation key, and
R
Note! Standard means an ordinarytext message(SMS) toother
press
YES.
phones. Standard is the default message type.
To Enter Letters
In order to compose your message, you will have to know
how to enter characters using the numeric keys.
23
Page 29

Some features/menus are operator dependent
l Press the appropriate key, 1–9, 0 or #, repeatedly until
the desired character appears in the display.
Press… to get…
1 Space -?!,.:;“'<=>()_1
2 ABCЕДЖаЗ2Γ
3 DEFèÉ3Λ F
4 GHIì4
5 JKL5Λ
6 MNOÑÖØò6
7 PQRSß7?Σ
8 TUVÜù8
9 WXYZ9
0 +&@/¤%$£¥§¿¡0T ΞΨΩ
* p, Upper/Lower Case
#
#*
For example:
•
To enter an A, press the numeric key 2 once.
• To enter a B, press the numeric key 2 twice.
Tip! To enter a digit, you can press and hold down the numeric
key.
To enter lowercase letters:
l Enter the letter, for example an ‘A’, and then press *.
An ‘a’ appears.
Lowercase letters will now appear until you press *
again.
If you enter more characters than can be seen in the display,
the first characters will be replaced by the l symbol. To
check the first characters you have entered…
l press the navigation key
LEFT.
MAIL
Send
L
Messages
Request
reply?
SEND
MESSAGES
L
Enter no:
Note! If there is a pause of more than 60 seconds between entering
characters, the phone will return to the standby menu.
Sending Messages
Sending SMS is not available in Analog mode.
From the Mail menu, select Send messages.
New appears.
R
Press YES. An empty display appears.
Enter your message (see above “How to Enter Let
-
ters”).
You can scroll through the message text with the navi
gation key and erase characters to the left of the cursor
or insert characters in the cursor’s position.
When you have completed your message, press YES.
Request reply? appears.
Reply and Send are not available in Analog mode.
If you want the receiver to reply to the message, press
YES . If not, press NO .
Enter the receiver’s phone number or recall it from the
phone book. To access the Phone book menu
LEFT.
press
R
You now have two options:
•
To send the message now, press YES.
•
To store the message for later use, press NO . The mes
sage is now stored in the messages memory
If youdecide to send the message later, themessage is labeled
Written instead of Sent when you access the message
in the Read messages menu.
Note! The same procedure is used regardless of what type of mes
sage (e-mail, fax, etc.) you are sending.
-
-
-
24
Page 30

Some features/menusare operator dependent
Reading a Message
4
NewMessage
28
Read Now?
4
NETWORK
2
22-Jul-97
Mm
13:23
New
12:54
From:l5551212
12:54
From:l456807
Hi John!
When you receive a message, a signal sounds and the display
7
informs you of it. The indicator light on the top of the phone
blinks rapidly green.
You now have two options:
If you want to read the message at once, press YES .
•
7
If you want to read the message later on, press NO. The
•
8
message will be stored in the Messages memory and a let
ter icon (Mm) is shown to the left at the bottom of the
standby display. Press any key (0-9, *, #) to clear the New
Message message.
If you pressed
R
sage, showing you who the message is from and when it was
received. If the number of the incoming call matches one of
your phone book entries, the name will be presented (6 letters or less). If no name is associated, the numberwill be presented. New stands for a new unread message.
If the message is older than 24 hours, the time will be replaced with the date the message arrived. However, you can
toggle between the date and time by pressing the * key.
•
Press YES to read the first line of the message.
•
Scroll through the message using the navigation key.
RIGHT takes you forward and LEFT takes you backward
R
through the message.
•
To movethree lines forward, press 3. To move three lines
backward, press 1.
•
Press and hold LEFT to return to the beginning of the
message.
YES youwill see the first three lines of the mes-
Goodbye!
L
Reply?
sage. If the caller wants you to reply, the displayed message
will say Reply Requested, Reply?, provided
your network supports this.
In Analogmode, the “From ....” message will notappear with
an SMS.
The message Reply? appears after the last line of the mes
Replying to a Message
-
l If you want to reply to a message, press YES.
Your display now looks like this.
L
New
R
•
l If you do not want to reply, press
Tip! If there is a phone number in the received message, you can
call it by simply pressing
called, the message is considered read and it remains in the
Messages memory.
Embedded Numbers in SMS
Sending an Embedded Number in a
Message
When sending a message to another wireless phone, or when
asking someone to send a message to your Ericsson phone,
you should follow the guidelines listed below to ensure that
the phone retrieves the entire number from the message, dis
plays it, and allows the phone user to dial the number by
pressing
that the Ericsson phone is capable of receiving them, it is
-
To enter your message, press YES and proceed as described in Composing and Sending Messages.
NO .
YES. After the number has been
-
YES. This information does not in any way imply
25
Page 31

Some features/menus are operator dependent
only capable of receiving them if the network operator has
activated the service.
Tip! A phone number enclosed within double quotation marks
has the highest probability of being recognized (e.g.
“919-555-1212”).
Other waysto writethe phonenumber withinmessages are:
(919) 555-1212
•
919-555-1212
•
012-123 45 67
•
12 34 56
•
(02) 11 22 33
•
It is best to include the international dialing code, area
•
code, and area prefix as part of the number to help in
the call back process. The receiver of the message has
the option of editing a number before attempting to
call back.
Note! If the number embedded in the SMS matches a phone book
entry, a name will be associated.
l Press
are multiple numbers in the display, the first number
will be dialed.
Erasing a Message
If you do not want to reply to a message:
Press NO.
Goodbye!
L
Erase?
The message Erase? appears.
To erase the message from the Messages memory, press
YES .
YES to call the embedded name/number. If there
You will now automatically come to the next message in
the message list.
Note! You can press CLR anywhere within the menu that handles
your message to erase it. When the message Erase? ap
pears, press
YES.
Storing a Received Message
All incoming messages are stored temporarily in the mes
sages memory until the memory space is needed for other
purposes, such as new messages. Even so, sometimes you
may receive an important message that you need to store
more safely.This ispreferably donein theSIM cardmemory.
Goodbye!
L
Goodbye!
L
On card
Erase?
Store?
Stored
3(5)
When you reach the end of the message Erase? appears.
Press NO.
The message Store? appears.
To store the message in the SIM card memory, press
YES. The message is automatically erased from the Mes-
sages memory.
The display now shows the position of the message. For ex
ample, if it is the third of five that is possible to store.
If you do not want to store the message in the SIM card
memory, press
Messages memory.
Tip! You can also store messages you have composed yourself on
the SIM card. See the section Sending Messages.
NO. The message will remain in the phone’s
-
-
-
26
Page 32

Some features/menusare operator dependent
Reading Stored Messages
From the Mail menu, select Read messages
and press YES.
Scroll with the navigation key until you find the mes
R
sage you are looking for.
New stands for a new unread message.
•
Old stands for a read message.
•
Sent stands for a sent message.
•
Press YES.
Read the message as described in Reading a Message.
Note! If there is a * in front of the message, this indicates that the
message resides on the SIM card.
L
MAIL
Read
messages
Calling a Phone Number in a Message
If there is a phone number in the received message, you can
call it by simply pressing YES.
YES to call a phone number found in the display
l Press
to call the number directly.
After the number has been called, the message is considered
read and it remains in the Messages memory.
Frequently Used Messages
If you have one or more standard messages you use often,
you can store them on the SIM card, to be reused whenever
you want.
Storing Frequently Used Messages
To make sure your standard messages are not erased when
the messagesmemory becomes full, you should store themin
the SIM card memory. After saving the message in the mes
-
sages memory proceed as follows:
-
From the Mail menu, select Read messages.
The messages saved in your Messages memory appear.
Scroll to the message you wish to store in the SIM card
memory, using the navigation key, and press YES.
Press YES again. Erase? appears.
Press NO, Store? appears.
Press YES. The message is now stored in the SIM card
memory.
Sending Stored Messages
From the Mail menu, select Send messages.
New appears.
Scroll to the message you wish to send, using the navi-
gation key, and press YES. Now you can edit your message, if you wish to do so.
When the message is ready to be sent, press YES.
Request reply? Appears.
Reply is not available in Analog mode.
If you want the receiver to reply to the message, press
YES . If not, press NO .
Enter the receiver’s phone number or recall it from the
SEND
MESSAGES
L
Enter no:
R
phone book. To access the Phone book menu
LEFT.
press
To send the message now, press YES.
27
Page 33

Some features/menus are operator dependent
Communicating via the Modem
A very convenient feature of the CF888 is the built-in mo
dem ( a PC card modem). With this, you can connect a com
puter to your phone in order to send and receive fax and email messages, browse the Internet and much more.
With the CF888 you can choose if you want to connect to
your computer via infrared link (IR) or via cable.
To be able to use various communication services you also
need appropriate software, for example a fax application, an
e-mail application or an Internet browser.
Your CF888 comes with either a CD or a set of diskettes (or
both, dependingon what country you bought your phone in),
containing a modem script and the Ericsson Mobile Office Suite
software, among other things.
The Mobile Office Suite isa phone book manager and a message manager. See chapter “The Mobile Office Suite” for
more information.
You will also find the Microsoft IrDA driver, the Microsoft
Windows CE driver and modem script.
Before you Start
Before you can start using communication applications there
are a few things that need to be taken care of:
•
First, you need to make sure your computer is configured
for infrared communication. Most computers are already
-
-
The Data Menus
configured, but if this is not the case, please see your
computer’s user manual for more detailed information.
Secondly, you need to install the Microsoft IrDA driver
•
and the Ericsson CF888 modem script on your com
puter. These are found on the CD and/or the diskettes
that came with your phone. Detailed instructions are
found in the section ‘Installing the Infrared Modem’ be
low.
• For you to be able to use the above mentioned services
most phone network operators require that you have
separate fax and data subscriptions. This way you never
need to worry about whether an incoming call is a fax,
data or normal speech call. If you do not already have
separate fax and data subscriptions, please contact your
operator.
Note! Do not expose your built-in modem to electrostatic dis-
charge (ESD). The communication link may be lost and
could lead to unintentional loss of data. Should you lose connection, you may need to restart your computer and/or your
mobile phone.
Analog mode does not support the data menus.
Some of the communication features described in this
chapter require that you have the Data menus in your phone
turned on. To turn them on:
-
-
28
Page 34

Some features/menusare operator dependent
SETTINGS
~ Data menus
(On)
In the Settings menu, scroll to Data menus.
The current status (on or off) is now shown on the bot
tom row of the display.
Press YES to change the status if needed (that is from
off to on or vice versa). Then press YES again to con
firm the setting.
Installing the Infrared Modem
Before you start
Make sure that the phone’s IR port is activated.
MENU
Activate
~ IR port
MENU
Deactivate
~ IR port
To activate the IR port:
In the menu system, scroll to Activate IR port
and press YES. (If the IR port is already activated, the
display will read Deactivate IR port instead.
In this case, just press CLR to return to the standby
menu.)
For a few seconds the text IR port activated
appears in the display. The phone then returns to
standby mode.
Place your phone less than one foot from your com
puter (or your H/PC) and make sure that the infrared
ports are aligned (within 30°).
The examples in this manual may differ from your PC. If you
require moreinformation during the installation process than
provided by this User’s Guide, we suggest that you consult
your PC supplier or your computer’s manuals.
-
-
Before installing the infrared modem you also need to check
if the Microsoft Infrared support for Windows version 2.0
has been installed.
Note! It is recommended that you use Windows version 2.0 for op
timal performance.
To do this, and also to check theversion of the existing infra
red support on your computer, do the following:
-
-
Under Settings in the Start menu, select
Step1–Check Infrared Support
Control Panel.
Select Add/Remove Programs.
Check the version of the Infrared Support for Windows
95 in the list under the Install/Uninstall tab.
• Version 2.0
If you have version 2.0 installed you do not need to install the infrared support. Go to section ‘Step 4 – Install
Infrared Modem’ to continue the installation of the infrared modem.
• Version 1.0
-
If you have version 1.0, you need to uninstall this version before installing infrared support version 2.0. Go
to ‘Uninstall Infrared Support’ to continue the installa
-
tion of the infrared modem.
•
No Infrared Support Installed
Go to ‘Step 3 – Install Infrared Support’ to continue the
installation of the infrared modem.
Step 2 – Uninstall Infrared Support
Under Settings in the Start menu, select
Control Panel.
Select Add/Remove Programs.
29
Page 35

Some features/menus are operator dependent
Select the Microsoft Infrared Support for Windows ver
sion 1.0.
Press Add/Remove.
Press OK.
Go to ‘Step 3 – Install Infrared Support’ to continue the in
stallation of the infrared modem.
Step 3 – Install Infrared Support
Insert the CD into your computer’s CD drive or the
diskette containing the Infrared support into the disk
ette drive.
If you are using a diskette or if your CD does not start
automatically, select ‘Run’ in the ‘Start’ menu. Type
A:\setup if you are using diskettes or D:\setup if you
are using a CD (could be another drive). Press OK.
When the Setup dialogue appears on the screen, press
the Install Infrared Support for Windows 95 version 2.0
button.
Follow the instructions given on the screen
When the Add Infrared Device Wizard appears, select
the Built-in infrared port on laptop or desktop and
press Next.
When the next page of the Wizard appears on the
screen, select the COM port enabled for infrared com
munication and press Next.
When the third and last page appears on the screen, ac
cept the default settings by pressing OK.
After the installation you will return to the Setup dialogue
where you can continue the installations with Step 4 – Install
Infrared Modem:
-
Step 4 - Install Infrared Modem
Insert the CD into your computer’s CD drive or insert
the diskette into the diskette drive.
Place the phone with the infrared modem next to your
-
-
PC as in the illustration below. (The infrared port may
be positioned differently on your computer.)
Close the Control Panel if it is open.
Open the Control Panel.
Double press the Infrared Monitor icon.
Select the Options tab and make sure that the check
box ‘Enable infrared communication on:’ is checked. In
most cases the infrared communication is enabled on
COM2 or COM3.
-
-
Tip! To check that the infrared communication is enabled, press
the Status tab. The message One infrared device
is in range should be displayed. Your computer will
now discover the new hardware and a dialogue box will ap
pear.
-
Press Next.
When the next dialogue box appears select the drive
and folder containing the modem script. Select A: if you
30
Page 36

Some features/menusare operator dependent
are using diskettes or D: (could be another drive) if you
are using the CD. Press OK.
Tip! To checkthat the infrared modem has been installedsuccess
fully, go to Control Panel and select Modems. Ericsson
CF888 should appear in the list under the General tab.
Installation – Windows CE
Make sure that you have Microsoft H/PC Explorer or
Windows CE Services installed on your laptop. Also
make sure that communication between your H/PC
and your PC is established.
Insert the CD into your PC’s CD drive or insert the
diskette containing the Infrared support into the diskette drive.
Installing from CD:
When the setup dialogue box appears on the screen,
press the ‘Install Infrared Modem for Windows CE’
button.
Installing from diskette:
Select Run in the Start menu. Press ‘Browse’ and
locate the Windows CE folder on your diskette drive. In
the Windows CE folder, double-click ‘Install’.
The infrared modem will be installed automatically on
your H/PC.
Reset your H/PC. (Usually this is done by pressing a re
set button placed in the backup battery compartment.)
If you installed from the CD, you will return to the set-up
dialogue after the installation, where you can continue by in
stalling the Mobile Office Suite application, for example.
Connecting Using the IR Link
The IR feature of the CF888 allows you to connect to a com
-
-
-
puter without using a cable. This option requires that your
computer has an IR port, and that the operating system sup
ports the IrDA standard for infrared communication (see
above). To enable IR communication:
On your computer, start the infrared application by
double-clicking the icon in the ‘Control Panel’.
Place the phone less than one foot from the computer
and make sure the IR ports are aligned (within 30°).
Your PC will now establish contact with your phone.
This is indicated by the infrared icon in the status bar.
Now you are ready to start infrared communication be-
tween your computer and your phone.
Note! Before disestablishing contact between your PC and your
CF888, makesure that you close any communication application on your PC.
-
-
31
Page 37

Some features/menus are operator dependent
Connecting Using the RS232 Cable
Using the RS232 cable provided is the most power efficient
way to use your CF888 together with a computer. To enable
use of the IrDA protocol, using the RS232 cable:
Connect the cable according to the picture below.
Under the tab ‘Options’ in the Infrared Monitor found
in the Control Panel folder, select the COM port that
you will use with the serial cable.
Making Fax and Data Calls
Fax and Data calling is not available in Analog mode.
Software-Initiated Fax and Data Calls
Fax anddata calls are normally initiated from withinthe com
puter software. Do the following:
Connect your computer to the phone, using the IR port
or the RS232 cable.
Start the appropriate software application on your com
puter and follow the procedure that is appropriate for
the software.
Note! Make sure that you have selected the CF888 modem.
When a fax or data call is in progress, the phone display
shows the call type, Fax or Data.
Receiving Fax and Data Calls
The procedure for receiving fax and data calls depends on
your network and subscription. If you have different num
bers for speech, fax and data calls, this is referred to as multi
numbering. This means that you can have up to three numbers
in your subscription. If you only have one number for all call
types, this is referred to as single numbering.
Receiving Fax and Data Calls –
Multi Numbering
You cannot receive fax or data calls in Analog mode.
If your network and subscription support multi numbering,
the CF888 will display the type of incoming call. There are
four possible types apart from speech calls:
•
Fax calls
• Data calls
•
Speech then fax calls
•
-
-
Answer?
Fax
0123456
Fax then speech calls
The display shows the type of call on the middle row.
To receive a fax or datacall:
Connect your computer to the phone.
Answer the call from within the software application (if
it does not answer automatically).
-
32
Page 38

Receiving Fax and Data Calls –
Single Numbering
If your network and subscription only support single num
bering, the phone does not recognize the type of incoming
call. This means that the calling party has to tell you if you are
going to receive a fax or data call.
Do the following to prepare your phone for a certain type of
call:
In the menu system, scroll to Next call type
(the Data menus must be turned on) and press
YES.
Select the type of call you are going to receive.
If you select Speech, the next call will be handled as
•
a speech call.
• If you select FAX, the next call will be handled as a fax
call.
• If you select Data, the next call will be handled as a
data call.
Receive the call according to the instructions above.
Note! The next call setting remains until you change it. The current
setting, if not a speech call, isshown on the middle row of the
standby display (see picture).
Some features/menusare operator dependent
-
33
Page 39

Some features/menus are operator dependent
The Mobile Office Suite
The Mobile Office Suite is a Phone Book Manager and a Mes
sage Manager. Once installed on your computer,the application
allows you to organize the names and telephone numbers that
you store in your phone book. It also allows you to write and
read SMS messages on your computer.
The Phone Book Manager
The Phone Book Manager allows you to dial other parties, man
age telephone numbers, and names as well as check the status of
the phone. It consists of an Address Book, a Dialer, and a
Phone Status Display.
For instructions on how to use thePhone Book Manager, please
consult the on-line help texts associated with the application.
The Message Manager
The Message Manager makes it possible to create, send, receive
and organize SMS messages.
For instructions on how to use the Message Manager, please
consult the on-line help texts associated with the application.
Installing the Mobile Office Suite
Before you start the installation, make sure you have installed
the modem script according to the instructions given the chap
ter “Communicating Via the Modem”.
Close all applications on your computer.
-
Connect your mobile phone to the computer using the IR
port or the RS232 cable (do not forget to start the ‘Infr
ared monitor’ in the ‘Control Panel).
-
Installation from a Diskette
Under Setting in the Start menu, select Con
trol Panel.
-
Select Add/Remove programs, and press the In
stall button.
Insert the first installation disk.
Follow the instructions given on the screen.
If a modem other than the CF888 modem has beenselected, the
Mobile Office Suite may be unable to detect your phone. If this
is the case, you will need to change to the CF888 modem.
To do this:
-
-
Press Cancel.
Select the CF888 modem from the drop-down list.
You will need to restart your computer before you can start us
ing the Mobile Office Suite. To access the Mobile Office Suite,
double-click its icon on the desktop.
-
Installation from a CD
An installation program will start automatically when you insert
-
the CD into your drive.
Press Install Mobile Office Suite.
Follow the instructions given on the screen.
34
Page 40

Select the Ericsson CF888 modem from the modem
drop-down list if it is not already selected.
You will need to restart your computer before you can start
using the Mobile Office Suite. To access the Mobile Office
Suite, double-click its icon on the desktop.
Uninstalling the Mobile Office Suite
Under Settings in the Start menu, select
Control Panel.
Press Add/Remove Programs.
Select Ericsson Mobile Office Suite from the list of ap-
plications.
Press Add/Remove.
Follow the instructions given on the screen.
Some features/menusare operator dependent
35
Page 41

Some features/menus are operator dependent
Networks
NETWORKS
L
Select net
R
Search Mode
Automatic Search Mode
NETWORKS
L
Searchmode
(Auto)
R
When you turn on the phone, it normally selects its home
network. Ifthis is not within range, for example when you are
traveling, you may use anothernetwork, provided your home
network hasan agreementthat allowsyou to use the network.
This is called roaming.
If you are using yourHome network in Analog mode, Ana
log Home will be displayed. If you are roaming in Analog
mode, the display will show Analog A (or B)
Roaming.
The Networks menu includes a number of functions
which youcan use to determine how the phone searches fora
network. You may also select a network yourself from those
within range.
The automatic search mode means that when you turn on
your phone, it will first search for its home network; if this is
not available the phone will automatically search for another
available network within range.
The automatic search mode is normally the default setting
when you buy your phone. However, should you need to ac
tivate the automatic search mode proceed as follows:
Scroll to the Networks menu, using the navigation
key and press YES.
Scroll to Searchmode .
If (Auto) is visible in the bottomline of the display,
•
your phone is already set to automatic search mode.
If not, press YES.
•
Scroll to Auto (automatic search mode) and press YES.
-
The phone is now set to automatic search mode.
To return to standby mode, press CLR.
Note! The order of preference in which the phone will select a net-
work is determined by a list of preferred networks on your
SIM card, which may be edited by you at any time.
Manual Search Mode
The manual search mode means that when you turn on your
phone, it will first search for the last network used and then
for the home network. If none of these networks are within
range, the question Select network? appears.
To activate the manual search mode, proceed as follows:
From the Networks menu, select Searchmode
and press YES .
Scroll to Manual and press YES.
To return to standby mode, press CLR.
Note! Your SIM may prohibit use of the manual mode. If prohib
-
ited, Not Available will be displayed when trying to
activate the Manual mode.
To select a network proceed as described below.
-
36
Page 42

Some features/menusare operator dependent
Selecting a Network
NETWORKS
L
Select net
From the Networks menu, choose Select
R
net. The message Please wait is displayed
briefly.
If there is more than one network within range, you can
use the navigation key to scroll to the other network(s).
When the network you wish to use is displayed, press
YES to select it.
Note! If thehome networkis withinrange andyou areusing itwhen
you initiate your network selection, the name of the network
is displayed with the message Current.
If you are using another network and your home network is available, the name of the home network is displayed with the message Home.
If the home network is not within range, the name of
another network is displayed with the message Cur-
rent, Preferred, Available or Forbidden.
•
Current means that thenetwork iscurrently used.
•
Preferred means that the name of the network is
included in a list of preferred networks on your SIM
card.
•
Forbidden means that the name of the network is
included in a list of forbidden networks on your SIM
card and that you are not allowed to use it. You can,
however, make emergency calls.
•
Available means that there is a network within
range, which is not on either the forbidden or pre
ferred list on your SIM card. You can make emergency
calls.
If you are in Analog mode, Analog + the network
number (up to 5 digits), and the side of the network (A or
B) will be displayed on the middle line, and one of the fol
-
lowing will be displayed on the bottom line: Home,
Current, Preferred, or Available.
Note! An analognetwork is only available when a dual-modeSIM is
used.
If there is no network within range, the message No net
-
work is displayed.
Starting an Automatic Network Search
NETWORKS
L
New Search
An automatic network search can be started at any time.
R
l From the Networks menu, select New search .
The phone automatically starts searching for a network according to your choices under your networks menu and your
subscription.
Forbidden Networks
The names of the forbidden networks are stored on your
SIM card. If such a forbidden network is within range, it will
be omitted when the phone searches for a network (automat
ic search mode).
If your home network and a forbidden network come to an
agreement that allows you to use the forbidden network, you
can select this network eventhough the message Forbid
den is displayed.
-
-
-
37
Page 43

Some features/menus are operator dependent
Selecting a System
SYSTEM
L
GSM/Analog
SYSTEM
L
GSM only
SYSTEM
L
Analog only
This menu allows you to select your system preference:
R
PCS/Analog *
•
PCS only
•
Analog only
•
* PCS/Analog is the recommended setting.
R
If you select PCS only, the phone will not work in Analog
networks. If you select Analog only, the phone will not work
in PCS networks.
Note! PCS is also called GSM 1900.
From the Networks menu, scroll left and select
System.
Scroll through the list of preferences and press
R
select.
This feature is SIM dependent.
If you are using Analog mode, you have the following options:
• AthenB*
•
BthenA*
•
A only
•
B only
•
Home Only
* Using A then B, or B then A, increases your roaming op
tions.
Note! If this feature is not available on your SIM, the system will
default to A then B, or B then A, depending on your home
system side.
YES to
National Roaming
4
2
NETWORK
Roaming
12:35
7
8
In Analog mode, when roaming on a non-home system, the
national roaming indicator will be displayed. The roaming in
dicator will overwrite your date. To view the date, when in
standby, press any of the volume keys.
List of Preferred Networks
NETWORKS
L
Edit list
EDIT LIST
AA1
L
1
-
This feature is not available in Analog mode.
R
You can create a list that defines in which order your phone
will select a network during automatic network selection,
when your home network is not within range.
The number of networks that can be stored in the list depends on your SIM card.
The Edit list function lets you review the networks in
the list. Apart from rearranging the order of the networks,
you can add new networks to the list as well as delete networks from it.
Reviewing the List of Networks
R
You can scroll through the other networks in the list by
Note! To see a network’s full name, press *.
Adding a Network to the List
From the Networks menu, select Edit list .
•
The message Please wait is displayed briefly.
•
The name of the first network is displayed.
using the navigation key.
From the Networks menu, select Edit list .
-
38
Page 44

EDIT LIST
L
Other?
Scroll to the first free position in the list and press YES.
The question Add net?? appears.
If you scroll to a position that is already occupied, you
must press
YES and then scroll with the navigation key
until Add net?? appears.
Press YES and scroll with the navigation key until you
find the desired network.
If the desired network does not appear, press
question Other? appears. Then enter the 3-digit country
1
number and the 2-digit network number.
R
YES when the
Finally, press YES to add the network to the list.
Erasing a Network from the List
From the Networks menu, select Edit list .
Scroll to the network you wish to erase and press YES.
Scroll until Erase appears.
Press YES to delete the network from the list.
Some features/menusare operator dependent
EDIT LIST
AA1
L
Erase?
EDIT LIST
AA1
L
Move?
Rearranging the List
From the Networks menu, select Edit list .
R
Scroll to the network you wish to move and press YES.
Move is displayed. Press YES and enter the new posi
tion within the list.
R
-
39
Page 45

Some features/menus are operator dependent
Security
The Card Lock
Your SIM card is protected by a card lock. When you pur
chase your SIM card, you obtain a PIN code (Personal Iden
tity Number).
Every time you turn the phone on, you have to enterthe PIN
and then press
If the PIN is entered incorrectly three times in succession,
the SIMcard willbe blocked. This is indicated by the message
Card blocked Unblock? Should this happen, see
If Your SIM Card Is Blocked below.
To Change the PIN Code
Enter the old (current) PIN code and press YES.
Enter the new PIN code and press YES.
At the prompt Repeat new PIN enter the new
The message New PIN confirms that the PIN code has
been changed.
Note! If the message Matching error appears, the new PIN
was entered incorrectly.
If the message Wrong PIN appears, followed by Enter
Old PIN the old PIN was entered incorrectly.
YES.
From the Access menu, select Change PIN
code.
PIN a second time.
Changing the PIN2 Code
-
-
Depending on the network you use, some services require
that you enter a second PIN code, the PIN2 code.
l Select Change PIN2 code from the Access
menu.
Follow the same procedure as described in “To Change the
PIN code”.
Locking the SIM Card
Select Lock card from the Access menu.
Press YES.
Enter your PIN code and press YES.
The message Locked confirms that the card lock is now
activated.
Note! This function only applies if your SIM card allows you to de-
activate the card lock.
Unlocking the SIM Card
Select Unlock card from the Access menu.
Press YES.
Enter your PIN code and press YES.
The message Unlocked confirms that the card lock is
now deactivated.
40
Page 46

Some features/menusare operator dependent
If Your SIM Card is Blocked
To unblock the SIM card if you have entered the wrong PIN
(or PIN2) code three times in succession:
Press YES.
Enter your PUK (or PUK2) code (which you will find
in the information from your network operator).
Enter a new 4-to-8 digit PIN (or PIN2) code.
Press YES.
Reenter the new PIN (or PIN2) code to confirm it.
Press YES.
Warning! If you enter the wrong PUK code ten times in succession,
your card will be permanently blocked. If this happens, you
will have to contact your network operator.
The Phone Lock
The phone lock protects the phone against unauthorized use
in the event of theft. It is not activated when you purchase
the phone. You should, however, activate it as soon as possible and also change the factory-programmed security code of
0000 to any 3-to-8 digit personalized code.
There are two levels of locking the phone:
•
Full Lock
•
Autolock
If the Full Lock is activated, the message Phone
locked is displayed briefly, each time the phone is turned
on. The message is followed by the prompt Enter lock
code. The user then has to enter a security code and press
YES to be able to use the phone.
Call Restrict
Note! This feature is supported by your phone, but it is dependent
Note! This service may not be available on all networks or may re
If the Autolock is activated, the message Phone
locked and the prompt Enter lock code will not
appear until a different SIM card is inserted in the phone. Af
ter the security code has been entered correctly, the phone
can be used with a new SIM card. The user will not be asked
to enter the security code until the original SIM card or a dif
ferent SIM card is inserted.
Changing the Security Code
l From the Access menu, select Phone lock
Change code and follow the same procedure as
when changing the PIN code.
Locking/Unlocking the Phone
From the Access menu, select Phone lock.
The current setting Full lock, Autolock or
Unlocked is shown in brackets.
Select the required setting.
Enter the security code and press YES. Phone Lock
is displayed together with the new setting.
on your network and/or the network you are roaming in.
The Call Restrict service of the cellular network al
lows you to bar different types of outgoing and incoming
calls to restrict the use of your phone.
quire a separate subscription.
The following calls can be restricted:
-
-
-
-
41
Page 47

Some features/menus are operator dependent
All outgoing calls
•
All outgoing international calls
•
All outgoing international calls except to your home
•
country
All incoming calls
•
All incoming calls when you are abroad (when roaming)
•
To ensure that a call bar is not changed by someone else, a
password, which comes with your subscription, is necessary
in order to activate or cancel a call bar.
Restricting Calls
Select Restrict calls from the Access
menu.
The first restricting option is All outgoing
calls. To choose another restricting option use the
navigation key.
Select the required option and press YES.
Select Activate, Get status or Cancel.
Press YES.
Get status is not available in Analog mode.
Enter your password and press YES.
There may be a short delay before the network responds. In
the meantime the message Please wait is displayed.
This isfollowed by a message which informs youwhether the
call bar is activated or not.
Note! If you forward incoming calls (see “How to Forward Incom
ing Calls”) you cannot activate some restricting options.
Likewise, if you bar calls, you cannot activate some call for
ward options.
The Keypad Lock
-
-
Canceling Call Restriction
Select Restrict calls from the Access
menu.
Select Cancel all and press YES.
The message Please wait appears followed by a mes
sage that confirms that all call bars are cancelled.
You can not cancel “Restrictions of All Outgoing Calls”
while in Analog mode.
Changing the Restrict Password
The password for the Restrict service comes with your subscription. You can easily change the password asoften as you
like.
Select Restrict from the Access menu.
Select the Change password option.
Enter the old (current) password and press YES.
Enter the new password and press YES.
Enter the new password a second time and press YES.
The message Please wait appears followed by a message that confirms that the password has been changed.
The Keypad Lock feature helps you to avoid accidental dial
ing, that can happen if you keep your phone in a pocket. You
can choose between manual and automatic key lock.
An icon in the shape of a key in the display informs you that
the keypad is locked.
-
-
42
Page 48

Some features/menusare operator dependent
Note! Calls to the emergency number 911(or 112 where applicable)
can be made when the keypad is locked. If the phone’s alarm
sounds, you can turn it off by pressing any key.
The keypad will remain locked until you:
Answer an incoming call.
•
Replace the battery.
•
Unlock the keypad.
•
Locking the Keypad Manually
Scroll to the Keylock menu, using the navigation
key.
Press YES.
Unlocking the Keypad
l Press LEFT followed by YES.
The Automatic Key Lock
Automatic key lock means that if no keys are pressed in 25
seconds, the keypad will be locked.
To set the automatic key lock:
Select Keylock from the Settings menu.
Choose Auto.
Press YES to confirm your selection.
Note! You can have independent settings when you use the phone
as a handheld unit and when you use it with various hands
free equipment.
Fixed Dialing
-
Fixed dialing is a method of restricting outgoing calls. It re
quires aSIM card that allows fixed numbers tobe stored. The
fixed numbers are protected by the PIN2 code.
The Fixed Dialing function allows calls to be made only to
fixed numbers stored on the SIM card. If an attempt is made
to call other numbers, the message Number not per
mitted appears in the display.
It ispossible to store partial numbers, for example an area
•
code, or an area code followed by the first digits common
to several numbers. Storing 919 472 allows calls to be
made to any numbers inthe 919 area code with a 472 prefix. Here you would have to enter 919 472 xxxx.
• It is also possible to store a number with a wildcard “?”.
To enter a wildcard, press and hold down the # key. Any
digit is allowed in the wildcard position (the wildcard can
be substituted with 0-9, *, or #).
• The Fixed Dialing function does not prohibit calls to the
emergency number 911(or 112 where applicable) and the
Service Center of the cellular network. Network services
such as Call Forward and Call Restrict cannot be used.
•
The maximum fixed numbers that can be stored depends
on your SIM card.
•
Network services such as Call Forward and Restrict Calls
cannot be used. The maximum fixed numbers that can
be stored depends on your SIM card. This feature may
not be available on all networks.
Activating Fixed Dialing
From the Access menu, select Fixed dial.
Enter the PIN2 code and press YES.
-
-
43
Page 49

Some features/menus are operator dependent
Scroll to On with the navigation key and press YES.
Canceling Fixed Dialing
From the Access menu, select Fixed dial.
Enter the PIN2 code and press YES.
Scroll to Off with the navigation key and press YES.
Storing Fixed Numbers
From the Phone book menu, select Fixed num
bers.
Scroll to Store with the navigation key and press
YES.
Enter the PIN2 code and press YES.
Enter the name (optional) and the fixed number in the
same way as when storing an ordinary phone number.
Editing a Stored Fixed Number
From the Phone book menu, select Fixed num-
bers.
Scroll to Edit with the navigation key and press YES.
After you have entered the PIN2 code you can change the
position number, the name or the fixed number in the same
way as with an ordinary phone number.
-
44
Page 50

Forwarding Incoming Calls
Some features/menusare operator dependent
Note! This feature is supported by your phone, but it is dependent
on your network and/or the network you are roaming in.
If youwant to make certain that your incoming calls aretaken
care of when you are unable to answer them, you can use the
Call Forward service to forward them to another phone
number.
The Call Forward service lets you:
Forward calls if you already are engaged in a call.
•
Forward calls that you do not answer in 30 seconds.
•
• Forward calls if your phone is turned off or if you are un-
reachable.
• Forward all calls
You may want to use all three call forwards and you may forward calls to different phone numbers, depending on the
situation.
You may also forward all calls regardless of whether your
phone is turned on or off, or you are unreachable. If this
function is activated the phone will not ring if a call is re
ceived.
If you have chosen to forward all calls, an arrow (l) is shown
in the display.
Note! If you activate the All calls forward, all other forwards
will automatically be cancelled. They will, however, be acti
vated again when you cancel the All calls forward.
Activating a Call Forward
From the Forward menu, scroll to the required for
Note! Fax and Data support Forward All Calls and Forward Unan
swered Calls.
Select the required forward option and press YES.
Press YES to select Activate.
Enter the phone number to which you want your calls
Note! If you have used the forward option on an earlier occasion
and then cancelled it, the phone number to which the calls
were forwarded will be suggested. Press
erase this number and enter a new number.
There may be a short delay before the network corresponds.
-
-
In themeantime, themessage Please wait is displayed.
This is followed by the message On busy/All
calls/ No reply - Forward ON, depending on
which forward option you have chosen. The selected phone
number is also displayed.
When in Analog mode, you must listen for a tone to confirm
your setting. There will not be a written confirmation as in
GSM mode.
ward option with the navigation key. The options are
All calls, On busy, No reply and Un
reachable, depending on your operator.
to be forwarded, including the area code and then press
YES.
CLR if you want to
-
-
-
45
Page 51

Some features/menus are operator dependent
Checking the Forward Status
To Check the Status of a Certain Call Forward
Select the required Call Forward from the Forward
menu.
Press YES and scroll to the Get status option.
Get status is not available in Analog mode.
Press YES and check the status.
The message Please wait appears followed by either
the phone number and Active on if the call forward is
activated, or Active Off if it is not activated.
To Check the Status of All Call Forwards
l From the Forward menu, select Check all.
Check all is not available in Analog mode.
The message Please wait appears followed by information about all call forwards, i.e. whether they are activated
or not.
Cancelling Certain Call Forwards
To Cancel a Certain Call Forward
From the Forward menu, select the required call for
ward .
Press YES and scroll to Cancel.
Press YES to cancel the forward.
The message Please wait appears followed by a mes
sage which informs you that the call forward has been can
celled.
-
-
-
46
Page 52

Handling More than One Call
Some features/menusare operator dependent
Your Ericsson CF888 allows you to handle more than one
call simultaneously. This means that you may hold a call that
is in progress and make or answer a second call, and then
switch between the two calls.
This feature is not available in Analog mode.
The Call Waiting Service
Note! This feature is supported by your phone, but it is dependent
on your network and/or the network you are roaming in.
When in Analog mode, you may need to listen for tones to
confirm your settings.
To Activate the Call Waiting Service
To be able to receive a second call, you must activate the
Call Waiting service.
From the Access menu, select Call Waiting .
Scroll to Activate, using the navigation key.
Press YES to activate the call waiting service.
There may be a short delay before the network responds. In
the meantime, the message Please wait is displayed.
This is followed by the message Call waiting ON.
To Cancel the Call Waiting Service
From the Access menu, select Call Waiting .
Scroll to Cancel, using the navigation key.
Press YES to cancel Call Waiting.
With the Get status option, you can check whether the
call waiting service is activated or not.
Get status is not available in Analog mode.
Receiving a Second Call
If the Call Waiting function is activated, you will hear
a tone in the ear piece when a second call is received and the
message Call wait will appear in the display.
To End Current Call and Accept Waiting Call
Press NO to end the current call. The question Answer? appears.
Press YES to answer the waiting call.
To Put Current Call on Hold and Accept Wait
ing Call
l Press YES to put the current call on hold and to answer
the waiting call. The message 1 on hold appears.
To Reject Waiting Call
l Press ‘0’ followed by YES to reject the waiting call and
continue the current call.
The waiting call is cleared. If the caller’s network supports it,
the caller will hear a busy tone.
-
47
Page 53

Some features/menus are operator dependent
Note! If Forward On busy is activated, the waiting call is for
warded to the number you have specified.
Switching Between Two Calls
l Press YES to switch between the active call and the call
on hold.
Ending the Current Call
Press NO to end the current call. The message Re
trieve held call? appears and a beep sounds.
Press NO to end the held call, or press YES to return to
the held call.
Note! If you do not press YES or NO within three seconds, the mes-
sage Retrieve held call? disappears from the display. The held call is ended automatically.
Receiving a Third Call
Provided your Call Waiting function is activated, you
may receive a third call when you are engaged in one call and
have a second call on hold. You will hear a tone in the ear
piece andthe messageCall Wait appears inthe display.
Accepting the Call
Only one call can be on hold at a time. If you wish to accept
the thirdcall youmust endone ofthe existingcalls orboth.
If you end one of the existing calls:
YES to accept the waiting call.
l Press
If you end both calls:
-
l The phone rings and Answer? is displayed. Press
to answer the waiting call.
YES
Rejecting the Call
l Press ‘0’ followed by YES.
The third call is cleared. Provided the caller’s network sup
ports this function, the caller will hear a busy tone.
-
Note! If Forward On busy is activated, the waiting call is for
warded to the number you have specified.
-
-
Making a Second Call
Clear the display by pressing CLR while the first call is in
progress.
Press YES to put the current call on hold. The message
1 on hold is displayed.
Enter the number you wish to call, or recall it from the
phone book, and press YES.
Another wayof making a second call while one call isin progress is:
Enter the number you wish to call while the first call is
in progress.
Press YES to make the call. The message 1 on hold
is displayed.
Connecting Two Calls
If you have one active call and one on hold, it is possible to
connect the two calls.
48
Page 54

l Press 4 followed by YES.
The two calls are now connected to each other, and you are
disconnected from both calls.
This service may not be available in all networks. Contact
your operatorto findout whetheryour networkssupports it.
Some features/menusare operator dependent
49
Page 55

Some features/menus are operator dependent
Conference Calls
Conference Calls
This feature is not available in Analog mode.
This feature is not available in Analog mode.
This feature is supported by your phone, but it is dependent on
This feature is supported by your phone, but it is dependent on
your network and/or the network you are roaming in.
your network and/or the network you are roaming in.
The Conference Call service allows you to have a joint conversa
The Conference Call service allows you to have a joint conversa
tion with up to five other people. You may put an individual or a
tion with up to five other people. You may put an individual or a
group of conference members on hold while you add other peo
group of conference members on hold while you add other peo
ple to the conference call. You may also put conference members
ple to the conference call. You may also put conference members
on hold while you talk to someone privately.
on hold while you talk to someone privately.
The Conference Call service may not be available in all networks.
The Conference Call service may not be available in all networks.
Contact your operator to find out whether your network supports
Contact your operator to find out whether your network supports
it.
it.
Initiating a Conference Call
Initiating a Conference Call
To initiate a conference call:
To initiate a conference call:
Call the first person you wish to include in the conference
Call the first person you wish to include in the conference
call.
call.
Put this person on hold by pressing YES.
Put this person on hold by pressing YES.
Call the second person you wish to include in the conference
Call the second person you wish to include in the conference
call.
call.
Press 3, followed by YES to include the two persons in the
Press 3, followed by YES to include the two persons in the
conference.
conference.
You can put the conference group on hold and then add a third
You can put the conference group on hold and then add a third
member by repeating steps 2 to 4. It is possible to add up to five
member by repeating steps 2 to 4. It is possible to add up to five
members using the same method.
members using the same method.
In Analog mode, you can only conference a maximum two addi
In Analog mode, you can only conference a maximum two addi
tional people.
tional people.
-
-
Having a Private Conversation
Having a Private Conversation
-
-
Releasing One of the Members
Releasing One of the Members
If you wish to have a private conversation with one of the mem
If you wish to have a private conversation with one of the mem
bers, you can put the other members on hold. To do this:
bers, you can put the other members on hold. To do this:
Press 2.
Press 2.
Press the number of the member you want to have a private
Press the number of the member you want to have a private
conversation with. If you for example wish to talk to mem-
conversation with. If you for example wish to talk to member number three, press 3.
ber number three, press 3.
Press YES.
Press YES.
To join the member to the conference call again:
To join the member to the conference call again:
l Press the number of the member and then
l Press the number of the member and then
To release one of the members in a conference call:
To release one of the members in a conference call:
Press 1.
Press 1.
Press the number of the member you want to release. If you
Press the number of the member you want to release. If you
for example wish to release member number three, press 3.
for example wish to release member number three, press 3.
Press YES to release the member.
Press YES to release the member.
YES.
YES.
-
-
-
-
50
Page 56

Making a Call while a Conference Call is in
Progress
It is possible to make a call while you are participating in a
conference call. To do this:
Enter the number you wish to dial and press YES.
The conference call is put on hold.
To switch between the new call and the conference call,
press YES.
To end the new call and return to the conference call,
press 1 and YES.
See chapter “Handling More Than One Call” for more details.
Ending a Conference Call
•
Press NO to end the conference call.
Some features/menusare operator dependent
51
Page 57

Some features/menus are operator dependent
Handsfree Calling
Using the Ericsson portable or vehicle handsfree solutions,
you can be engaged in a call without having touse your hands
to hold your phone.
Selecting Answering Mode
The submenu Answering mode includes two func
tions: Any key and Auto, which are useful when the
phone is used with handsfree equipment.
• The Any key function:
If the phone is used with handsfree equipment and this
function is turned on, you can answer an incoming call by
pressing any key except the
• The Auto function:
If you choose automatic answering mode, an incoming
call will be answered automatically after one ring signal if
the phone is used with handsfree equipment.
To select Answering Mode:
Select Answering mode from the Settings
menu.
Choose Any key or Auto using the navigation key.
Press YES to change the setting of the function you have
chosen.
Press YES again to confirm your setting.
NO key.
Other Handsfree Related Settings
Apart from the above mentioned settings, you can change
the following settings related to handsfree calling:
Ring level
•
Ear volume
•
Ring type
-
•
Key lock
•
Light
•
Each of these settings can be specified separately for the
situations when you have your CF888 connected to handsfree equipment and when you use the phone as a handheld
unit. This means that if you make one of these settings when
the phone is connected to handsfree equipment, the settings
when it is handheld will not be affected.
To change a setting:
Connect the phone to the handsfree equipment.
Change the setting according to the instructions in the
chapters “Other Useful Features” or “Security” (the
Keylock setting).
Note! The active flip can be temporarily disabled by pressing and
holding the side volume key while opening/closing the flip.
52
Page 58

Area Information
Some features/menusare operator dependent
The ordinary Short Message Service (SMS) can be defined as
a personal service with messages specifically and exclusively
directed toyou. The Area Information is anothertype of text
message which is sent to all subscribers in a certain cell of a
network at the same time.
For example, the information may be a local road report or a
local taxi phone number.
Note! This feature may not be available in all networks.
Turning On the Area Information
From the Mail menu, select Area info.
Press YES.
Scroll to On and press YES.
Area information messages will now be presented in your
display.
Turning the Area Information Off
From the Mail menu, select Area info.
Press YES.
Scroll to Off and press YES.
Area Information Message Types
Each type of Area Information message is identified by a
three digitcode. Atpresent thefollowing messagetypes exist:
Code AI Message Type
000 Index
010 Flashes
020 Hospitals
022 Doctors
024 Pharmacy
030 Long-distance road reports
032 Local road reports
034 Taxis
040 Weather
050 District (base station identity)
052 Network information
054 Operator services
056 Directory enquiries (national)
057 Directory enquiries (international)
058 Customer care (national)
059
Refer to the information supplied by your network operator,
for information about the Area Information services you can
use.
Customer care (international)
53
Page 59

Some features/menus are operator dependent
The Area Information Message List
You can decide which types of area information messages
you wish to receive. The phone’s Area Info list can hold
up to 20 codes.
Inserting an Area Information Code
You canaccess theArea Info list fromthe Mailmenu.
From the Mail menu, select Area info.
Press YES.
Scroll to Edit list and press YES.
The digits to the left indicate the position in the list.
You can scroll forward and backward through the list
with the navigation key.
To insert a code, scroll to the first empty location by us-
ing the navigation key. Press YES.
Enter the new code. (You only need to enter 40 for
040, since the phone will add the leading zero automatically.)
Erasing or Replacing a Code
From the Mail menu, select Area info.
Press YES.
Scroll to Edit list and press YES.
Scroll to the code you wish to erase and press YES.
The message Erase? appears. Press YES.
To replace the code press the navigation key RIGHT
once, followed by YES.
Enter the new code and press YES.
Receiving Area Information
When you receive Area information, the message will be
stored in the phone memory. Please note that the phone will
only store one message per code. This means that the previ
ously stored message in a specific code will be erased.
Provided Area info is turned on, you can read the mes
sages with the Area messages function in the mail
menu.
From the Mail menu, select Area messages.
Scroll from one message to another by using the naviga
tion key.
Press YES to select a message.
-
-
-
54
Page 60

The Two Line Service
Some features/menusare operator dependent
Two voice lines with different phone numbers, Line 1 and
Line 2, may be assigned to your phone. The ability to receive
and send text messages (SMS), is only available on Line 1.
The Two Line service (also called Alternate Line Service,
ALS) may not be available on all networks and may require a
separate subscription.
L1/L2 indicator is not available in Analog mode, but uncon
ditional forwards on respective lines are still indicated.
Selecting a Line
The line currently selected is indicated in the display with the
letter ‘L’ and a digit. If, for example, you have line two selected, you will see ‘L2’ in the display.
To change to the line that is not currently selected:
Scroll to the Change to menu.
To change to the line displayed on the bottom row,
From nowon, all outgoing calls are made on the selectedline.
You can however, be called on both lines.
Note! Instead ofaccessing the menu system, you can press and hold
down the 2 key to change line, provided the phone is in
standby mode. Clear the display first, using the CLR key.
press YES.
Receiving a Call on Line 1 or Line 2
When you are called, the question Answer? Is replaced by
Line1? or Line2? depending on what line you have se
lected.
Note! If you are engaged in a call on one line, you must end that call
first before answering the call on the other line.
-
Different Settings for Each Line
You can have different settings for each line, for example the
tone of the ring signal, call forwards, call bars and waiting
function. The call meters in the Info menu show the call
times (call costs) for the line currently selected.
Changing the Name of the Two Lines
Your CF888 gives you the ability to personalize the names of
the two lines. You might, for example,want to call Line 1‘Pr
ivate’ and Line 2 ‘Work’. To change the name of Line1:
From the Settings menu, select Line 1 Tag and
press YES.
Enter the name (maximum 12 characters), using the nu
meric keys and press YES.
To change the name of Line 2, select Line 2 Tag in
stead.
-
-
-
-
55
Page 61

Some features/menus are operator dependent
Other Useful Features
The Ericsson CF888 is much more than just another mobile
phone. It contains quite a few features that can be helpful to
you in your everyday life.
You can, for example, personalize your phone by composing
your ownring signal,changing the keysound orchanging the
message signal.
Furthermore youcan useyour phoneas analarm clock or as a
calculator.
This chapter contains all the information you need to get that
little extra out of your phone.
Personalizing Your Phone
The Settings menu includes a number of functions
which let you adapt your phone to your own personal needs
in different situations. Note that some of the settings depend
on ifyou haveexternal equipment (e.g. handsfree equipment)
connected to your phone or not.
Changing the Ear Piece Volume
Select Ear volume from the Settings menu.
Use the navigation key or the volume keys at the side of
the phone to adjust the volume.
Press YES when you have reached the desired volume.
Tip! During a call you can use the volume keys at the side of the
phone to adjust the volume.
Note! You can have independent volume settings when you use the
phone as a handheld unit and when you use it with various
handsfree equipment. This means that if you set the ear piece
volume when the phone is connected to the handsfree equip
ment, the volume setting when the phone is handheld will
not be affected and vice versa.
Resetting the Phone
It is possible to reset all menu settings to their default values.
To do this:
Select Master reset from the Settings
menu or enter L73738R.
Enter the phone lock code (the factory programmed
code is 0000).
Press YES.
Displaying Your Phone Number
If your phone number cannot be retrieved from your SIM
card, you can enter it yourself.
Select Phone no from the Settings menu.
Enter the number. Your SIM may restrict you from
changing/accessing this number. If so, contact your op
erator.
Press YES.
Note! If your SIM card allows it, you can also enter your fax and/or
data number.
-
-
56
Page 62

Some features/menusare operator dependent
Changing the Greeting Text
When you turn on your phone, a greeting text appears in the
display. Instead of the default greeting, you can have your
phone displaya welcome greeting that you have writtenyour
self. However, some operators may not allow the greeting
text to be changed.
To enter your own greeting:
Select Greeting from the Settings menu.
Scroll to New text using the navigation key.
Press YES.
Write your new greeting using the numeric keys.
Press YES to confirm your new greeting.
Note! The greetingfunction alsolets youturn thegreeting textoff.
Call Information
With the Call info function in the Settings menu
you can choose to have the call time in the Info menu displayed for all calls, both incoming and outgoing, or for outgoing calls only.
You can also have the call cost displayed, provided you sub
scribe to this feature.
To select what call information you want to be displayed in
the Info menu:
Select Call info from the Settings menu.
Choose between Outgoing, All and Cost.
Confirm your selection by pressing YES.
If you have selected the Cost option, follow the instruc
tions in the “Call Time/Call Cost” section in this chap
ter.
Setting the Minute Minder
This function gives an indication of the time spent during
-
conversation by entering a short beep every minute.
To set the Minute Minder:
Select Min minder from the Settings menu.
Choose between On and Off using the navigation key.
Press YES to confirm your selection.
Changing the Display Light
The display light can be set toautomatic, turned off or turned
on.
In automatic mode, the display light is turned off
automatically 20 seconds after the last key has been pressed.
It will be turned on again when a key is pressed or when a call
or message is received.
To set the display light:
Select Light from the Settings menu.
Choose the desired display light setting using the navi-
-
Note! You can have one setting when the phone is used as a hand
-
-
gation key.
Confirm your selection by pressing YES.
held unit and another setting when the phone is used with a
handsfree kit, powered from an external source. If you, for
example, place the phone in a vehicle handsfree cradle, you
can setthe display light to be turned on always and still haveit
in automatic mode otherwise.
To Select Key Sound
You can choose whether clicks, tones or nothing (silent) will
be heard when you press the keys.
57
Page 63

Some features/menus are operator dependent
Select Key sound from the Settings menu.
Choose key sound using the navigation key.
Confirm your selection by pressing YES.
Note! The onlysound availablefor theside keysis theclick sound.
Changing the Message Signal
You can choose whether clicks, tones or nothing (silent) will
be heard when you receive a text message (SMS).
Select Mail alert from the Settings menu.
Choose the sound you want to hear when you receive a
message, using the navigation key.
Press YES to confirm your selection.
Activating Analog VOX
You have the option, in Analog mode, to turn on your voice
operated transmission (VOX). Using VOX causes your
phone to use less battery power during a call. If VOX is ON,
your phone’s transmitter operates only when you are speaking. If VOX is OFF, the transmitter operates continuously
during a call. VOX should only be turned ON if your network operator supports it.
Changing the Ring Type
You can choose ring type from a list of different sounds and
melodies. You can also compose your own melody by enter
ing tones with the keypad.
To choose one of the pre-programmed ring types:
Select Ring type from the Settings menu.
Scroll with the navigation key until you find the ring sig
nal that you want. If you do not wish to disturb other
Note! If the Data menus are turned on (see chapter “Communicat
-
The Ring Signal Level
-
people, use the volume keys on the side of the phone to
scroll silently.
Press YES when you have reached the desired ring type.
ing via the Modem”) you can set the ring signal type for
speech (the display shows Phone on the middle row), fax
and data calls respectively. If you have the Two Line service,
you can also set different ring types for the two lines.
To compose your own ring signal:
From the Settings menu, select Edit Mel
ody.
-
Clear the display by pressing CLR.
Use the keypad to enter
notes. The keypad now
works as a keyboard (see
picture). Press and hold a
key to enter a long note.
Press YES to confirm the melody you have entered.
The Ring level setting allows you to specify the level for the
following situations:
•
When the phone is handheld.
-
58
Page 64

Some features/menusare operator dependent
When the phone is connected to handsfree equipment.
•
When the phone is connected to a vibrator.
•
To set the ring signal level:
If required, connect the phone to the external equip
ment.
Scroll to the Ring level menu and press YES.
Use the navigation key to set the ring signal level.
Pressing RIGHT increases the volume.
•
Pressing LEFT decreases the volume.
•
The phone will ring once with the actual setting as you
press the navigation key, except for the Silent and
Step settings.
Press YES to save the setting.
Press CLR to return to standby mode.
Tip! Use the side keys to change the ring level silently.
The Answering Service
The Answering service of your network allows callers to
leave a voice message when you cannot or do not wish to an
swer your calls.
Note! This service may not be available in all networks and may re
quire a separate subscription.
The Voice mail function makes it easy to call your an
swering service to listen to recorded voice messages. You
must activate the Voice mail function before using it.
This number may need to be programmed onto your SIM by
your operator.
Some networks will deliver a voice mail indicator (T) noti
fying that you have a voice mail. In most cases, the icon will
not appear when you are roaming.
-
Activating the Voice Mail
Note! You canpress andhold down1 toquickly activatevoice mail.
To activate the Voice Mail function:
-
From the Mail menu, select Set VoiceM .
If the number to your answering service can be retrieved
from your SIM card, the number is displayed in brackets.
(This also applies if you have entered the number yourself at
an earlieroccasion and then turned the Voice mail function off.)
To activate the Voice mail function, press YES .
If no number is displayed, press
YES.
Enter the number to your answering service.
Press YES to activate the function.
Calling the Answering Service
You can call the answering service at any time to listen to
-
-
-
your recorded messages. To do this:
lFrom the Mail menu, select Voice mail and press
YES.
The phone will automatically call your voice mail. Follow the
instructions given to you by your operator’s answering serv
ice.
Further information about the use of the answering service is
found in the operating instructions supplied by your network
operator.
-
59
Page 65

Some features/menus are operator dependent
Changing the Number to the Answering Serv
ice
To change the number to the answering service:
From the Mail menu, select Set VoiceM.
Scroll to New number and press YES.
Enter the new number and press YES.
Turning Off the Voice Mail
From the Mail menu, select Set VoiceM .
Select Off and press YES.
Time, Date and Alarm
The Clock menu lets you set the time and date. It also lets
you activate the alarm function.
The time is shown continuously at the bottom of the display
when the phone is in standby mode.
The Clock
To Change the Time Format:
Select Clock mode from the Clock menu.
Select the required clock mode.
Press YES.
To Set the Clock:
Select Set clock from the Clock menu.
Enter the time in hours and minutes.
Press YES.
-
If you have selected the 12-hour format in the Clock
mode function you can alternate between a.m. and p.m. by
pressing #.
The Date
It is possible to have the current date displayed in the middle
of the display when the phone is in standby mode.
To Set the Date Format:
Select Date mode from the Clock menu.
Scroll to the required date format by using the naviga
tion key.
-
Press YES to select a date format.
To Set the Date:
Select Set date from the Clock menu.
Enter the year (two digits).
Press YES.
Enter the month and day in the same way.
Press YES to confirm your setting.
The Alarm
The phone has an alarm function.When it is activated, an
icon in the shape of a bell (B) is shown in front of the current
time in the display.
The alarm will sound at the set time even if the phone is
turned off. The illumination of the keys and the display will
flash. The volume of the alarm signal depends on the setting
of the ring signal.
The alarm will sound for 60 seconds and will be repeated
every nine minutes if you do not turn it off.
60
Page 66

Some features/menusare operator dependent
To Set the Alarm:
Select Set alarm from the Clock menu.
Scroll to the New time option by using the naviga
tion key.
Press YES.
Enter the time in hours and minutes.
Press YES.
Note! If you have chosen the 12-hour format in the Clock
mode function you can alternate between a.m. and p.m. by
pressing * and #.
To Turn the Alarm Off:
Press any key to turn the alarm off when it sounds.
Press YES if you do not want the alarm to be repeated.
To Turn the Alarm Function Off:
Select Set alarm from the Clock menu.
Scroll to the Off option using the navigation key.
Press YES.
The Call Time/Call Cost
During anoutgoing call,the calltime isshown inthe display.
With the Call info function in the Settings menu
you can have the time displayed for all calls, both incoming
and outgoing, provided you have chosen the Time:All
option.
You canalso havethe call cost or the number of call units dis
played if you select the Cost option, provided your net
work and your SIM card support this feature.
Checking Time or Cost of the Last Call
You can check the time/cost of the last incoming (or outgo
-
ing) call with the Last call option in the Info menu.
-
Select the Info menu.
Press YES.
Depending on the setting in the Call info function in
the Settings menu, you can check:
The elapsed time of the last outgoing call.
•
The elapsed time of the last incoming call provided you
•
have chosen the Time:All option in the Call
info function in the Settings menu.
Checking Total Call Time or Call Cost
Select Tot calls from the Info menu.
Press YES.
Depending on the settings in the Call info function in
the Settings menu, you can check:
• The elapsed time of all outgoing calls.
•
The elapsed time of all incoming and outgoing calls.
• The cost (or the number of call units) of all incoming and
outgoing calls.
Call Cost information is not available in Analog mode.
Resetting the Total Call Time/Cost Meter
From the Info menu, select Tot calls.
Press YES. The message Reset? appears.
-
-
Press YES to reset the meter.
Note! If you have chosen the call cost option you must enter the
PIN2 code to reset the meter.
61
Page 67

Some features/menus are operator dependent
Determining the Call Cost
This function only appears if you have selected the Cost
option in the Call info function in the Settings
menu.
Call Cost information is not available in Analog mode.
Note! This function may not be available on all SIM cards.
l From the Info menu, select Price .
The Home option meansthat the number of call units will be
displayed during a call, and in the Last call and Tot
calls functions.
The Price function lets you enter and vary the price per
call unit. The price entered will be stored on your SIM card.
Entering the Price per Call Unit
From the Settings menu, select Call info.
Scroll to Cost and press YES.
Press CLR to exit to standby mode.
From the Info menu, select Price Units and
press YES. New Price appears.
Press YES.
Enter the code for the desired currency, for example
USD for US Dollar, and press YES.
Enter the price per call unit, for example 0,5, and press
YES.
Enter your PIN 2 code. (The PIN 2 code prompt may
not appear in some networks.)
Reverting to Displaying Call Units
From the Info menu, select Price .
Press YES to select the Home option.
Press YES to revert to displaying call units.
Calling or Credit Card Calls
When making international or long distance calls, you may
not want your operator to charge you for these calls on your
normal account. If you have a credit card or a calling card,
you may want to redirect the charges to one of those ac
counts instead. Your CF888 is all set for making this proce
dure as easy as possible for you.
You can store two separate card numbers in your phone.
These numbers are protected by a 4- to 8-digit security code
that you choose yourself. The default code is 0000.
In order to be able to make Calling card calls, you have to activate this function.
Activating the Calling Card Feature
From the Access menu, select Call cards security
and press YES.
Enter your security code and press YES. The default
code is 0000.
Scroll to Call cards, using the navigation key, and
press YES.
Scroll to ON, using the navigation key, and press YES.
The Callcard function is now activated and thesubmenu Call
card numbers will be visible in the Phone Book menu.
-
-
62
Page 68

Some features/menusare operator dependent
To Change Security Codes
From the ACCESS menu, select Call cards
security and press YES.
Enter your security code and press YES. The default
code is 0000.
Scroll to Change code and press YES.
Enter your new code and press YES. The code can con
sist of four to eight digits.
Confirm your new code, when Repeat new
code appears in the display, and press YES.
Your security code is now changed.
Storing Credit or Calling Card Numbers
Your Ericsson CF888 allows you to store two calling card
numbers in the phone book menu.
This submenu is only visible if the Call card function is activated in the ACCESS menu.
To store a calling card number:
From the PHONE BOOK menu, select Call
card numbers and press YES.
Enter your security code and press YES. The default
code is 0000. To change security codes, see above.
Select card position (Card 1 or Card 2), using the navi
gation key, and press YES.
Enter the Access number to the calling card server. The
numbers are entered in the same way as in the ordinary
Phone book.
Press the navigation key.
Enter the Verification code to your calling card server.
To store the calling card number, press YES.
To change the dialing order, press the navigation key.
Called no will flash in the display. Use the * or #
key to change the order.
Note! Since the dialing order may vary between calling card servers,
that is if you have to dial your verification code before or af
-
ter the number you wish to dial, you can switch the order be
tween them. This is performed with the * or # key, when the
Called no. row flashes.
-
-
Selecting the Card You Want To Use
If you have stored two card numbers, you must select which
card youwish touse before making a Calling/Credit card call.
From the PHONE BOOK menu, select Call
card numbers.
Enter your security code and press yes. The default
code is 0000.
Scroll to the card you wish to use, using the navigation
key and press YES.
Your settings for the card appear.
To select the card, press YES.
Note! If you only use one card number, this selection will not have
-
to be repeated every time you wish to make a Calling/Credit
card call.
Making a Credit or Calling Card Call
Enter the number you wish to dial, or retrieve it from
the Phone book.
To set up the call as a Credit/Calling Card Call, press
and hold YES.
63
Page 69

Some features/menus are operator dependent
The accessnumber tothe callingcard serveris calledand dur
ing the connecting phase, you are prompted to send the
called number and the verification code, in the order chosen
by you (see above).
To send the called number and the verification code during
the connecting phase, press
a few seconds and your Ericsson CF888 will send them auto
matically for your convenience.
The Calculator
The phone’s built-in calculator supports the four rules of
arithmetic as well as percentages.
An example of how to use the calculator:
In this example we are going to divide 134 by 32.
Scroll to the Calculator menu and press YES.
Enter 134.
Scroll with the navigation key to the division sign (/),
Enter 32.
Scroll with the navigation key to the equal sign (=) and
To clear the display, press CLR.
To Enter a Decimal Point
l Press *.
To multiply
l Press * twice.
-
YES at the Send prompts or wait
-
and press YES.
press YES to get the result.
You can also simply press # to get the result.
64
Page 70

Guidelines for Safe and Efficient Use
Some features/menusare operator dependent
General
Since its introduction in the mid 1980s the mobile phone is
one of the most exciting and innovative products ever devel
oped. Your phone can help you to stay in touch withyour of
fice, your home, emergency services and others.
Your mobile phone is a radio transmitter and receiver. When
the phone is turned on it receives and transmits radio frequency (RF) energy. Depending on the type of mobile phone
you have purchased, it operates in different frequency ranges
and employs commonly used modulation techniques. The
system that handles your call when you are using your phone,
controls the power level at which your phone transmits.
Exposure to Radio Frequency Energy
Your wireless handheld portable telephone is a low power radio transmitter and receiver. When it is ON, it receives and
also sends our radio frequency (RF) signals.
In August, 1996, the Federal Communications Commissions
(FCC) adopted RF exposure guidelines with safety levels for
handheld wireless phones. Those guidelines are consistent
with the safety standards previously set by both US andinter
national standards bodies:
•
ANSI C95.1 (1992)*
•
NCRP Report 86 (1986)*
•
ICNIRP (1996)*
Those standards were based on comprehensive and periodic
evaluations of the relevant scientific literature. For example,
-
-
over 120 scientists, engineers, and physicians from universi
ties, government health agencies, and industry reviewed the
available body of research to develop the ANSI Standards
(C95.1).
The design of your phone complies with the FCC guidelines
(and those standards).
* American National Standards Institute: National Council on Radiation Protection and Measurements; International Commission on
Non-Ionizing Radiation Protection.
Efficient Phone Operation
How to use your phone for optimum performance with
minimum power consumption:
•
•
-
Hold the phone as you would any other telephone. While
speaking directly into the mouthpiece, angle the antenna
in a direction up and over your shoulder.
Do nothold the antenna when the phoneis in use. Hold
ing the antenna affects call quality, may cause the phone
to operate at a higher power level than needed and
shorten talk and standby times.
-
-
65
Page 71

Some features/menus are operator dependent
Tips for Efficient Operation
Antenna Care:
placement antenna. Unauthorized antennas, modifications,
or attachments could damage the phone and may violate
FCC regulations.
Phone Operation:
telephone with theantenna pointed up and overyour shoul
der.
Tips on Efficient Operation:
most efficiently:
Do not touch the antenna unnecessarily when the
phone is in use. Contact with the antenna affects call
quality andmay cause thephone to operateat a higher
power level than otherwise needed.
Use only the supplied or an approved re
Hold the phone as you would any other
Driving
Check the laws and regulations on the use of wireless tele-
phones in the areas where you drive. Always obey them.
Also, if using your phone while driving, please:
Give full attention to driving.
Use hands-free operation, if available.
Pull off the road and park before making or answering a
call if driving conditions so require.
For your phone to operate
certain electronic equipment may not beshielded against the
therefore signals from yourwireless phone.
-
-
Pacemakers
The Health Industry Manufacturers Association recom
mends thata minimumseparation ofsix (6) inches be main
tained between a handheld wireless phone and a pacemaker
to avoid potential interference with the pacemaker. These
recommendations are consistent with the independent re
search byand recommendationsof Wireless Technology Re
search.
Persons with pacemakers:
Should ALWAYS keep the phone more than six
inches from their pacemaker whenthe phoneis turned
ON.
Should not carry the phone in a breast pocket.
Should use the ear opposite the pacemaker to mini-
mize the potential for interference.
If you have any reason to suspect that interference is
taking place, turn your phone OFF immediately.
Hearing Aids
Some digital wireless phones may interfere with some hear
ing aids. In the event of such interferences,you may want to
consult your service provider (or call the customer service
line to discuss alternatives).
-
-
-
-
-
Electronic Devices
Most modern electronic equipment, for example equipment
in hospitals and cars, is shielded from RF energy. However,
66
Page 72

Some features/menusare operator dependent
Aircraft
Other Medical Devices
If you use any other personal medical device, consult the
manufacturer of your device to determine if they are ade
quately shielded from external RF energy. Your physician
may be able to assist you in obtaining this information.
Turn your phone OFF in health care facilities when any regu
lations posted in these areas instruct you to do so. Hospitals
or health care facilities may be using equipment that could be
sensitive to external therefore energy.
Vehicles
RF signals may affect improperly installed or inadequately
shielded electronicsystems in motor vehicles. Check with the
manufacturer or its representative regarding your vehicle.
You should also consult the manufacturer of any equipment
that has been added to your vehicle.
Posted Facilities
Turn your phone OFF in any facility where posted notices so
require.
FCC regulations prohibit using your phone while in the air.
Switch OFF your phone before boarding an aircraft.
Children
-
-
Do not allow children to play with your phone since they
could hurt themselves or others or accidentally damage the
phone.
Blasting Areas
To avoidinterfering with blasting operation, turn your phone
OFF when in a “blasting area” or in areas posted: “Turn off
two-way radio.” Obey all signs and instructions.
Potentially explosive atmospheres
Turn your phone OFF when in any area with a potentially explosive atmosphere and obey all signs and instructions.
Sparks insuch areas could cause an explosion orfire resulting
in bodily injury or even death.
Areas with a potentially explosive atmospheres are often, but
not always, clearly marked. They include fueling areas such
as gasoline stations; below deck on boats; fuel or chemical
transfer or storage facilities; vehicles using liquefied petro
leum gas (such as propane or butane); areas where the air
contains chemicals or particles, such as grain, dust, or metal
powders; and any other area where you would normally be
advised to turn off your vehicle engine.
For Vehicles Equipped with an AirBag
An air bag inflates with great force. DO NOT place objects,
including both installed or portable wireless equipment, in
the area over the airbag or in the air bag deployment area. If
-
67
Page 73

Some features/menus are operator dependent
in-vehicle wireless equipment is improperly installed and the
air bag inflates, serious injury could result.
Product Care
Do not expose your mobile phone to moisture or ex
•
treme temperatures.
Do not use any other accessories but Ericsson originals.
•
Failure to do so may result in loss of performance, fire,
electric shock or injury, and will void the warranty.
Do not attempt to disassemble the product. Doing so
•
will void warranty. This product does not contain consumer serviceable components. Service should only be
performed by Authorized Service Centers.
-
68
Page 74

Index
Some features/menusare operator dependent
A
Alarm.....60
Answering Service.....59
Area Information.....53
B
Battery
charging.....5
inserting/removing.....5
C
Calculator.....64
Call Cost/Call Time.....61
Call Time/Call Cost.....61
Call Waiting.....47
Calling Card Calls.....62
Calls
making.....9
making second.....48
receiving.....10
receiving second or third.....47
Charger
connecting/disconnecting.....6
Clock
setting.....8
Credit Card Calls.....62
D
Data calls.....32
Data Menus.....28
Date.....60
Display Indicators.....
Display Light.....57
Domestic Calls.....9
E
Ear Piece Volume.....56
Earpiece Volume.....13
Embedded Numbers.....25
Emergency Calls.....9
F
Fax calls.....32
Fixed Dialing.....43
Forwarding Calls.....45
cancelling forwards.....46
G
Greeting Text.....57
Guidelines.....65
H
Handsfree Calling.....52
Hiding Your Number.....12
I
Icons.....
International Calls.....9
K
Key Sound.....57
L
Language
display.....8
69
Page 75

Some features/menus are operator dependent
M
Menu System.....15
Message Signal.....58
Muting.....13
N
Network
automatic search.....37
forbidden.....37
searchmode.....37
Networks.....36
Numbers
embedded in SMS.....25
P
Phone
keys.....
preparing for use.....4
Phone Book.....16
creating.....17
editing.....20
rearranging numbers.....21
recalling entries.....18
R
Receiving Fax and Data Calls
Multi Numbering.....32
Single Numbering.....33
Redialing.....10
Ring Signal Level.....58
setting.....8
Ring Type.....58
S
Security
call restrict.....41
cardlock.....40
keypad lock.....42
phone lock.....41
Showing Your Number.....12
SIM Card
inserting.....4
SMS
erasing.....26
reading messages.....25
replying to.....25
sending/receiving.....22
storing messages.....26
System
selecting.....38
T
Text Message
erasing.....26
replying to.....25
Text messages
storing.....26
Text Messages
composing.....23
embedded numbers.....25
reading.....25
sending/receiving.....22
Time.....60
Tone Signals.....13
Two Line Service.....55
selecting a line.....55
U
Unanswered Calls.....11
Useful Features.....56
70
 Loading...