

Harris OpenSky P5300 Quick Manual
Quick Guide
MM-008218-001
Rev. D, Apr/11
P5300 Radio Keypad Functions
P5300 Radio Keypad Functions (cont’d)
(P5350 Only) Currently undefined.
(P5350 Only) Toggles Scan mode ON/OFF.
(P5350 Only) Currently undefined.
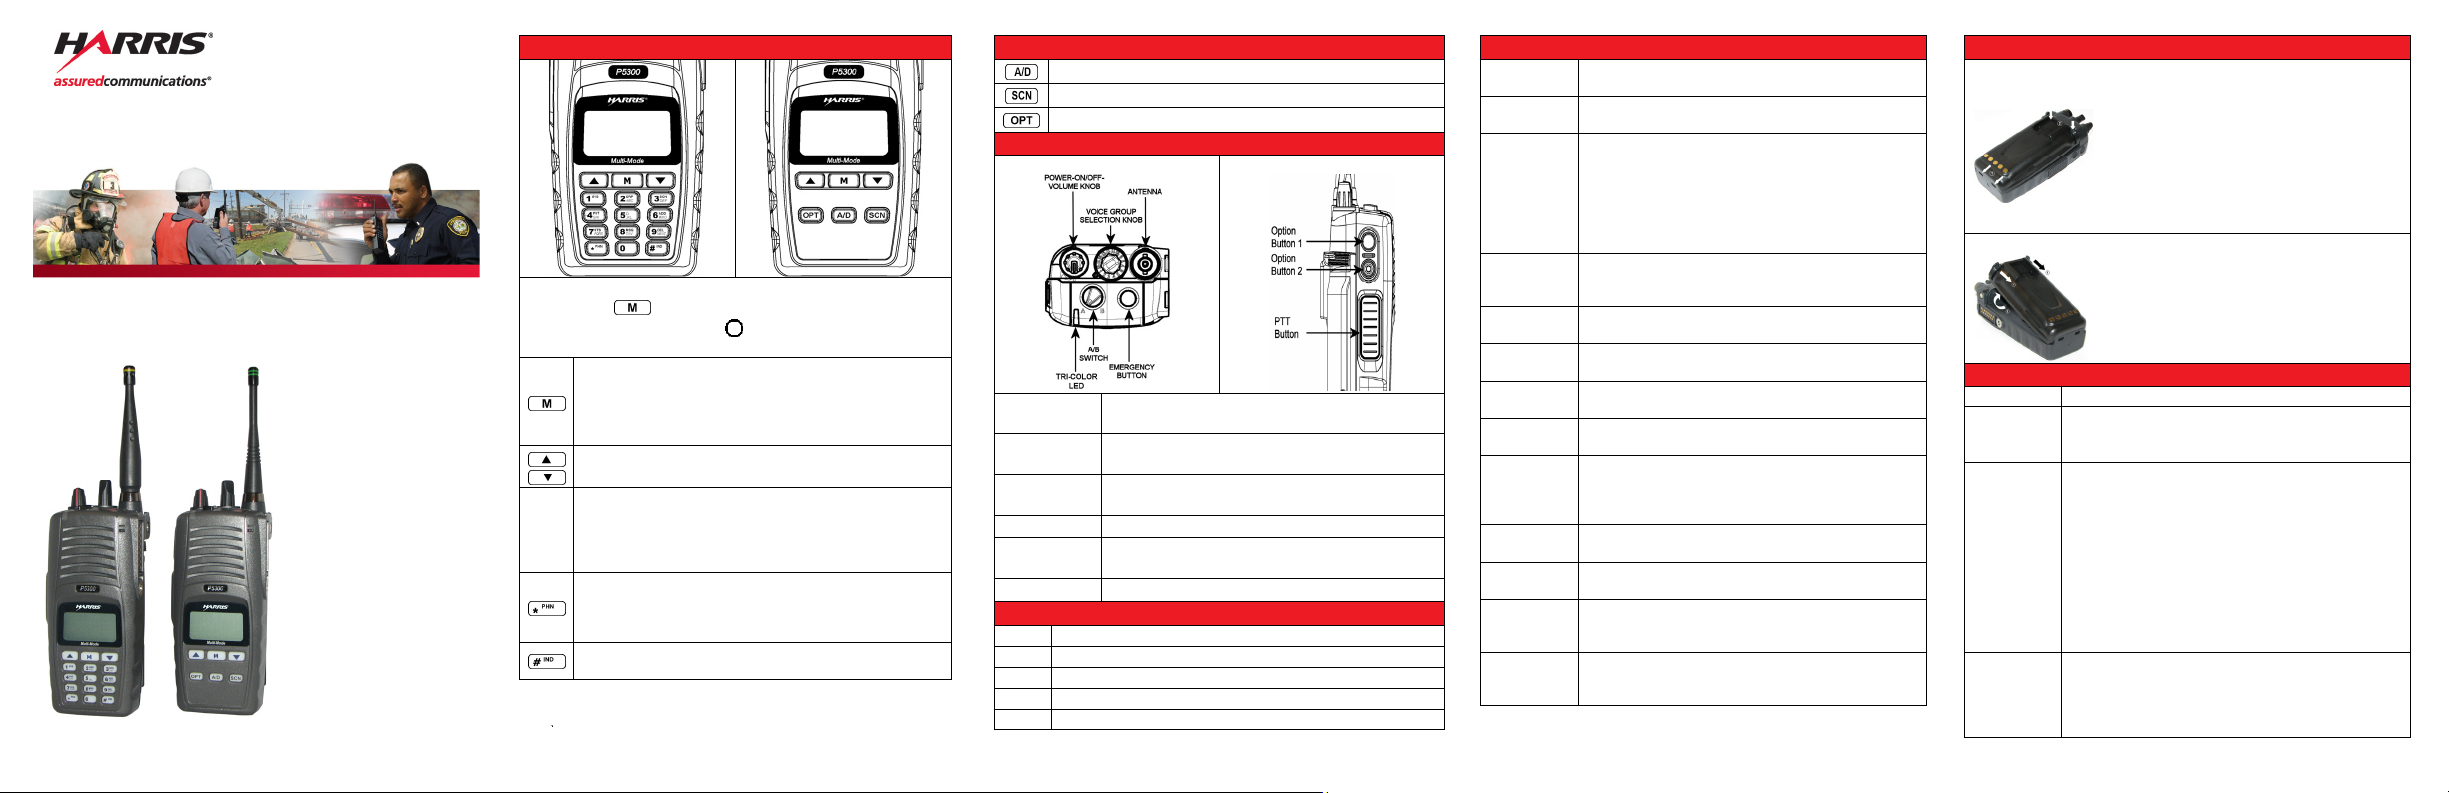
P5300 Radio Controls
Top View Side View
Locking/Unlocking Keypad
1.
Press the button.
2. Within 1 second, press the Option button on the side of the
OpenSky® P5300
Portable Radios
radio.
Activates a selected item within a list, similar to an “Enter”
key.
While in “Dwell Display,” press repeatedly to scroll through
and view status display (on 2
caller, received voice group, and channel.
Scrolls through available menu items.
(P5370 Only) Keys used to place telephone interconnect
and individual (unit-to-unit) calls. Functions as a telephone
keypad. Also used to enter passwords for logging into the
0 – 9
OpenSky network (if not pre-configured for automatic
registration at power-up).
(P5370 Only) * Initiates log in, log out, selective call,
telephone interconnect call, etc. Also acts as an escape
button or a backspace that clears everything, not just the
last digit/character.
(P5370 Only) # Used in conjunction with alpha-numeric
keys for passwords and OpenSky functions.
nd
line) for current profile,
Copyright © 2008-2009, 2011 Harris Corporation. All rights
Power-On/OffVolume Knob
Voice Group
Selection Knob
Emergency
Button
Applies power to the radio and adjusts the volume.
A 16 position rotary knob for selecting voice
groups.
Pre-programmed to declare an emergency.
PTT Button The PTT button is pressed to transmit.
Option Buttons
Navigates through available items within a sub-
menu.
A/B Switch Currently undefined in OpenSky.
Quick Buttons
1# Transition from OTP to ECP mode.
2# Toggle Stealth mode On/Off.
3# Toggle Scan mode On/Off.
4# Toggle Lights/Side Tones On/Off.
6# XCOV and XCOV-TG Attach/Detach.
P5300 Alert Tones
Call Queued
Call Denied
Grant (or GoAhead)
Call Removed
Low Battery
Selective Alert
Received
Emergency
Alert Tone
Emergency
Cleared Tone
Selective Call
Ring Tone
Client Connect
Client
Disconnect
Roam Tone
Out-of-Range
Tone
1 low tone/2 high tones indicate the call is queued for
processing.
3 short tones indicate the radio is out of the coverage
area or the requested voice group is active.
1 short beep is sounded when resources become
available for a call request placed in the queue (if
enabled) upon channel access.
If the radio roams to a second site while transmitting, it
will auto rekey and begin transmitting on the second
tower. The radio sounds a second grant tone to let the
user know they have roamed.
1 long low-pitched tone notifies the user that access to
the channel has been lost (out of coverage area or
preempted by higher-priority call).
1 low-pitched tone/1 short mid-pitched tone. Low
battery.
4 short tones are played once to indicate a selective
alert has been received.
3 short beeps are sounded when an emergency alert is
declared.
1 long low-pitched tone is sounded when an
emergency is cleared.
A ringing tone similar to a telephone. Ringing is
repeated every four seconds until the call is accepted
or rejected by the radio being called or until the
network drops the call if unanswered after one minute.
2 short beeps indicate the radio is connected to the
V-TAC in XCOV or XCOV-TG mode.
2 short lower-toned beeps indicate the radio has
disconnected from the V-TAC.
2 short tones, 1 high-pitched and 1 low-pitched.
Sounds when the radio transitions from one base
station to another.
Configurable. Typical: 3 brief tones “chirps” that repeat
every 15 seconds when the radio does not have
consistent sync.
Battery Packs
Attach Battery Pack
1. Align the tabs at each side on the bottom
of the battery pack with the slots at the
bottom of the battery cavity.
2. Push the top of the battery pack down
until the latches click to attach the battery
to the radio.
3. Tug gently to verify that the latches are
secure and the battery pack is properly
attached to the radio.
Remove Battery Pack
1. Pull both latches on either side of the
battery pack toward the bottom of the
radio simultaneously.
2. Pull the battery away from the radio.
3. Remove the battery pack from the radio.
P5300 Scan Modes
Scan Mode Explanation
Full communications (listen and talk) with the active
No Scan
Normal
Fixed
voice group.
No calls received from other voice groups.
The user can scan all voice groups in the active profile
that are not locked out as long as there is demand on
the site.
Priority (P1 and P2) groups are user selectable.
Receive calls from more than one voice group, if
available from the current site.
Allows dragging of the selected voice group, P1, P2,
and default emergency voice group.
The default emergency voice group, as well as any
emergency-enabled voice groups, is only dragged if it
is in emergency mode.
Functions the same as Normal Scan Mode, except
the priority groups are fixed to the selected profile’s
pre-defined P1 and P2 groups (configured via the
UAS). In this mode, P1 and P2 groups CANNOT be
locked out.
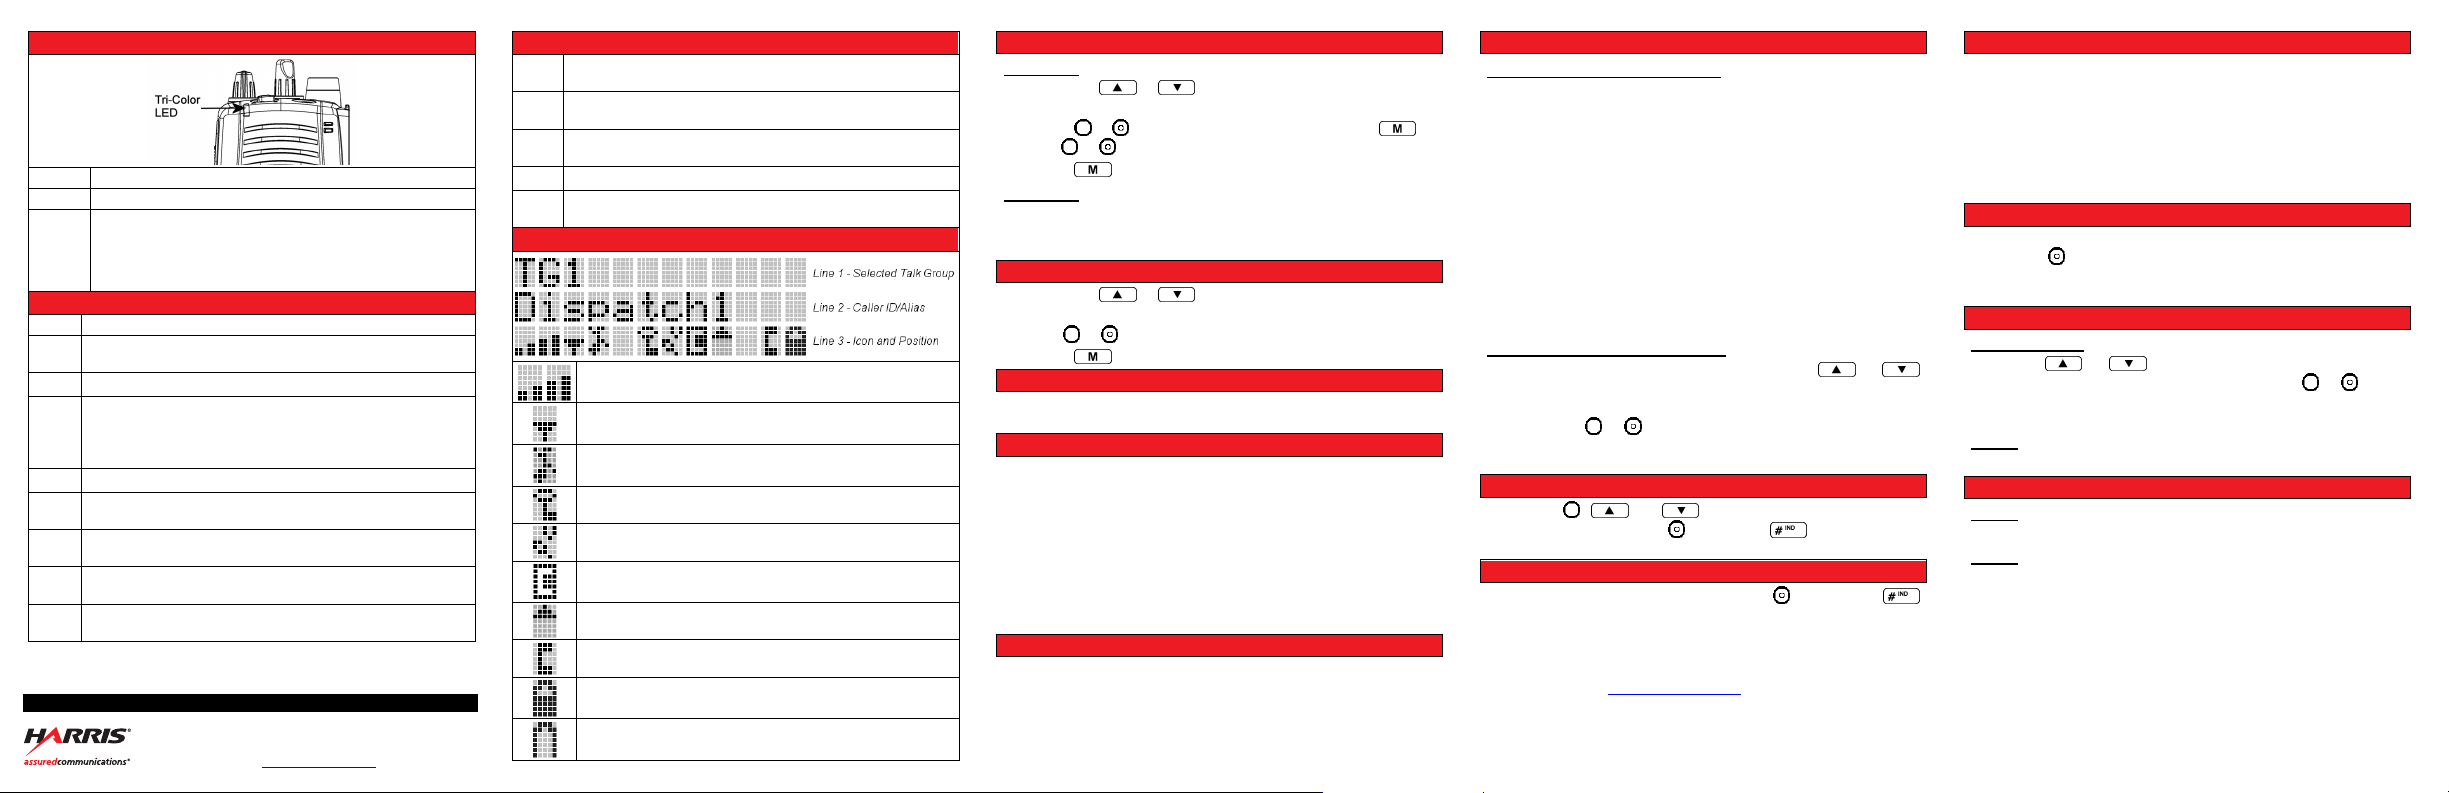
Tri-Color LED
Green
Red
Orange
Receiving
Transmitting
Flashing rapidly, the radio is receiving an emergency call.
Flashing every ½ second, the selected voice group is in the
emergency state (not transmitting). If the selected voice
group is in the emergency state, an asterisk is next to the
voice group name.
P5370 Keypad Functions
*0 Log-off command: *0## (logs the user off the system).
Log-in command: *1<User ID> # <Password> # (required for
*1
encryption).
*2 Status Message: *2 <0...9> #.
Enter Scene of Incident (SOI) Mode: *4#<ccc>#<bb>#
where ccc is the SOI channel number and bb is the number
*4
assigned to each frequency band.
Press *40# to exit SOI mode.
*5 RTT Message: *5 <0...9> #.
Initiate Selective Alert command: *7<Target ID>#[Cho ose
*7
Message]#
Radio-to-Radio Call command: *8<Selective call
*8
number>#(PTT to dial)
Public Switched Telephone Network (PSTN) Call
*9
command: *9 <telephone number>#
Begin Manual Encryption command: *32<Pre-determined
*32
Encryption Key of up to 16 digits>#
221 Jefferson Ridge Parkway | Lynchburg, VA USA 24501
Public Safety and Professional Communications
www.pspc.harris.com | 1-800-528-7711
P5370 Keypad Functions (cont’d)
End Manual Encryption command: *33# Radio displays
*33
“Unsecure” to indicate manual encryption has ended.
Initiate XCOV Mode command: *61# Extended coverage for
*61
individual users.
Initiate XCOV-TG Mode command: *62# Extended coverage
*62
for voice groups.
*63 Initiate XCOV-PROF Mode command: *63#.
Exit XCOV Mode command: *60# Returns to the normal
*60
mode.
P5300 Display & Status Icons
Steady – Received Signal Strength Indicator (RSSI).
Steady – Radio is data registered.
Steady – Stealth mode is enabled (all tones and display
backlight disabled, voice is still heard).
Steady - Radio is transmitting or receiving a manual or
OTAR (Network) encrypted call.
Animated - Indicates the radio is scanning for a VTAC
during XCOV or XCOV-TG mode.
Steady - Indicates the client is connected to a VTAC.
Steady - Displayed when Scan Mode is Normal or Fixed.
Steady - Indicates Selective Call mode.
Steady – Battery charge indicator.
Flashing – Low battery indicator.
Changing Operating Mode
Method 1:
1. Press the or to cycle through the menu until
“App Mode” is displayed.
2. Press or to choose an available mode. Press
and or to confirm (Y/N).
3. Press button to confirm.
Method 2:
Quick button combination 1# will transition the radio from OTP
mode to ECP mode. If ECP software is not loaded in the radio,
“No App” appears in the radio display.
Changing the Active Profile
1. Press the or button until “ProfileMenu” is
displayed.
2. Use or to scroll through the list of available profiles.
3. Press to activate the selected profile.
Changing the Selected Voice Group
Turn the Group Selection knob on top of the radio to select the
desired voice group.
Transmitting a Voice Call
1. Select the desired voice group.
2. Depress and hold the PTT button; wait a couple of seconds.
If programmed by the administrator, a grant tone will be
sounded.
3. Begin speaking into the microphone in a normal voice.
For maximum clarity, hold the radio approximately two (2)
inches from your mouth. Take care not to cover the
microphone while speaking.
4. Release the PTT button when finished speaking.
Receiving a Voice Call
No action is required on the part of the user.
A radio receiving a System All Call displays “All Call” instead of
the alias. A radio not transmitting on a voice group in emergency
status will drop all other calls to scan into an All Call.
Transmitting a Selective Call
Selective Call Dialing Manually
1.
Enter *8, the User ID number of the user being called, and
the # key (no dashes or spaces). (This feature must be
enabled by the administrator.)
*8<destination user id>#
A shortened User ID number can be dialed using the
following guidelines:
If the radio being called is in the same region and agency,
enter only the last four digits.
If the radio being called is in the same region, but a
different agency, enter the last seven digits.
If the radio being called is in another region or if the area
is unknown, enter all ten digits.
2. Press PTT (and release) to ring the other user.
Selective Call Using Speed Dial
1.
Scroll through the Menu options using the or
button until “Speed Dia l” appears in the second line of t he
display.
2. Using the or keys, scroll through the pre-programmed
speed-dial numbers un til the desired number appea rs in the
display and press the PTT button.
Receiving a Selective Call
Press the , , or button to accept the incoming
Selective Call. Press the button, the key, or turn the
Voice Group Selector Control knob to reject the incoming call.
Terminating a Selective Call
Terminate a Selective Call by pressing the button or the
key, or turn the Voice Group Selector Control knob. “HANGUP”
will appear in the display followed by the active voice group.
For more detailed operating instructions and a list of options and
accessories, refer to the operator’s manual MM-008212-001
(available online at www.pspc.harris.com
).
Declaring an Emergency
1. Press the red emergency button on the radio to enter
emergency mode. Emergency is raised after the Emergency
Raise Delay (default is 1 second).
2. The microphone is hot (open mi c) for a progra mmed amo unt
of time in order to send your voice out on the emergency
voice group.
3. All of the radios in the emergency voice group hear your call
and see the emergency voice group displayed on their radio.
Clearing an Emergency
If enabled via programming, clear an emergency by pressing and
holding the button then pressing and holding the red
emergency button on the top of the radio simultaneously. When
finished, release both buttons.
Enabling Stealth Menu
P5370 & P5350
Press the or button to scroll through menus until
“StealthMenu” appears in the display, then press or button
once to activate Stealth Mode, exit the Stealth Menu, and returns
to the Dwell Display.
P5370
Use Quick Button combination 2# to enter Stealth Mode.
Disabling Stealth Mode
P5370
Use Quick Button combination 2# to exit Stealth Mode.
P5350
Press any key other than the PTT or the Emergency Button to
exit Stealth Mode.
NOTICE!
The material contained herein is subject to U.S. export approval. No
export or re-export is permitted without written approval from the U.S.
Government. Rated: EAR99; in accordance with U.S. Dept. of
Commerce regulations 15CFR774, Export Administration
Regulations.
 Loading...